SERIES: BPSBi, BPCMi, BPSP - OPERATION MANUAL RESTAURANT SERIES EQUIPMENT: SALAMANDER, CHEESEMELTER, & STOCKPOT - Bakers Pride
←
→
Page content transcription
If your browser does not render page correctly, please read the page content below

OPERATION MANUAL
RESTAURANT SERIES EQUIPMENT: SALAMANDER, CHEESEMELTER, & STOCKPOT

          SERIES: BPSBi, BPCMi, BPSP

            B U I LT BY C R A F T S M E N . T E S T E D BY T I M E ®.
C-SERIES OPERATION MANUAL

C-SERIES RESTAURANT EQUIPMENT

Models:
BPSP – Stockpot                                                                      CAUTION
BPCMi – Cheese Melter
BPSBi – Salamander                                                Improper installation, adjustment, alteration,
                                                                  service or maintenance can cause property
                                                                  damage, injury or death. Read the installation,
                                                                  operating and maintenance instructions
                                                                  thoroughly before installing or servicing this
                                                                  equipment.
All gas operated Bakers Pride® cheese melters and
salamanders are intended for use with the type of gas
specified on the rating plate and for installation will be in                       NOTICE
accordance with National Fuel Gas Code ANSI Z223.1
(latest edition).                                                 Instructions to be followed in the event the user
                                                                  smells gas must be posted in a prominent location
Please retain this manual for future references.                  in the kitchen area. This information shall be
                                                                  obtained from the local gas supplier.

                       WARNING
  FOR YOUR SAFETY: Do not store or use gasoline                                     WARNING
  or other flammable vapors or liquids in the vicinity
                                                                  California Residents Only
  of this or any other appliance.
                                                                  WARNING: This product can expose you to
                                                                  chemicals including chromium which is known to
                                                                  the State of California to cause cancer and birth
                       WARNING                                    defects or other reproductive harm. For more
                                                                  information go to www.P65Warnings.ca.gov.
  IMPORTANT INSTRUCTIONS: After the gas
  supply has been connected to your unit, it is                 This equipment is design engineered for commercial
  extremely important to check piping for possible              use only.
  leaks. To do this, use soap and water solution or
  solutions that are expressly made for this purpose.
  DO NOT USE matches, candles, flames, or other
  sources of ignition since these methods are
  extremely dangerous. Post in a prominent location
  instructions to be followed in the event you smell
  gas. Obtain these instructions from your local gas
  supplier.

                                             BAKERS PRIDE OVEN COMPANY, LLC.
                                              1307 N. Watters Rd., Suite 180
                                                     Allen, TX 75013

                          Phone: 800.527.2100 | Fax: 914.576.0605 | www.bakerspride.com
                                                                                                P/N 373712 REV A 4/19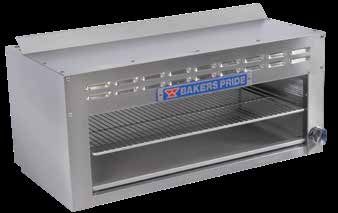
RESTAURANT SERIES OPERATION MANUAL

TABLE OF CONTENTS
INSTALLATION INSTRUCTIONS                                1       MAINTENANCE INSTRUCTIONS                                 4
OPERATING INSTRUCTIONS                                   2       WARRANTY                                                 6

INSTALLATION INSTRUCTIONS
• Installation of the equipment should be performed              • Installation must conform with local codes, or in the
  by qualified, certified, and authorized personnel who            absence of local codes, the National Fuel Gas Code,
  are familiar and experienced with local installation             ANS1 Z223.1 (latest edition). In Canada, installation
  codes.                                                           should conform to installation codes for gas
                                                                   burning appliances and equipment standard CAN/
• Before Installation please read instructions                     CGA-B149.1 or the Propane installation code, CAN/
  completely and carefully.                                        CGA-B149.2, as applicable.
• Do not remove permanently affixed labels, warnings             • Electrical wiring to the appliance must be electrically
  or plates from the product.                                      grounded in accordance with local codes or in the
                                                                   absence of local codes with the National Electrical
                                                                   Code ANSI/NFPA 70, or the Canadian Electrical
   Shipping Damage Claim Procedure                                 Code, CSA C22.2, as applicable.
   The equipment is inspected and crated carefully
   by skilled personnel before leaving our factory.              • A manual gas shut-off valve must be installed in
   The transportation company assumes full                         the gas supply line ahead of the appliance and gas
   responsibility for safe delivery upon acceptance of             pressure regulator for safety and ease in servicing.
   this equipment. If shipment arrives damaged:
                                                                 • The gas pressure regulator supplied must be installed
   1. Visible loss or damage: Note on freight bill or              on the appliance prior to connecting the equipment
      express delivery and signed by person making                 to the gas line. Failure to install a regulator could
      delivery.                                                    be potentially hazardous and will void the appliance
                                                                   warranty.
   2. File claim for damages immediately:
      Regardless of extent of damages.                           • The appliance and its individual shut off valve must
                                                                   be disconnected from the gas supply piping system
   3. Concealed loss or damage: If damage is                       during any pressure testing of that system at test
      noticed after unpacking, notify Transportation               pressures in excess of 1/2 psi (3.45kpa).
      Company immediately and file “Concealed
      Damage” claim with the transportation carrier.             • The appliance must be Isolated from gas supply
      This should be done within fifteen (15) days                 piping system, by closing its individual manual shut
      from the date delivery and receipt of goods.                 off valve during any pressure testing of the gas supply
      Retain container for inspection.                             piping system at test pressures equal to or less than
                                                                   1/2 psi (3.45kpa)

• Please observe all local and national codes and
  ordinances

                                                             1
RESTAURANT SERIES OPERATION MANUAL

OPERATING INSTRUCTIONS
Operating Instructions                                               Rating Plate
Operation of this equipment must be performed by                     Information on this plate includes the model, serial
qualified or authorized personnel who have read and are              number, BTU / hour input of the burners, operating
familiar with the functions of the equipment.                        gas pressure in inches WC, and whether the
                                                                     appliance is orificed for natural or propane gas. When
Maintenance                                                          communicating with factory about a unit or requesting
To perform maintenance and repairs of the appliance,                 for special parts or information, rating plate data is
please contact the factory, the factory representative, or           essential for proper identification.
the nearest authorized local service company.
                                                                                           CAUTION
                                                                       Appliances must be connected only to the type of
                                                                       gas identified on the rating plate.

Clearances
The appliance area must be kept free and clear of all combustibles.

           Equipment           Bakers Pride Model                Combustible                         Non-Combustible

                                                          Rear                 Sides             Rear              Sides
 Manual Griddle                     BPMG-C                 8”                   10”               0”                0”
 Thermostatic Griddle               BPTG-C                 8”                   10”               0”                0”
 Radiant Char Broiler               BPRB-C                N/A                   N/A               0”                0”
 Hot Plate                          BPHP-C                 8”                   10”               0”                0”
 Stock Pot Range                    BPSP-C                17”                   15”               0”                0”
 Lava Rock Char Broiler             BPEB-C                 8”                   10”               0”                0”
 Cheese Melter                       BPCM                  4”                   4”                0”                0”
 Salamander                          BPSB                  4”                   4”                0”                0”

Air Supply And Ventilation                                           be checked during installation. Air openings or baffles
The area in front of, around and above the appliance                 may have to be provided in the room, if pilot or burner
must be kept clear to avoid any obstruction of the flow of           outage problem persists.
combustion and ventilation air.
                                                                     Gas Connection
Adequate clearance must be maintained around the                     The gas supply (service) line must be the same size or
appliance for easy servicing.                                        greater than the inlet line of the appliance. Appliances
                                                                     use a 3/4” NPT inlet. Sealant on all pipe joints must be
Provision should be made for any commercial, heavy                   resistive to LP gas.
duty cooking appliance exhaust combustion waste
products to the outside of the building. Usual practice              Manual Shut Off Valve
is to place the appliance under an exhaust hood, which               This installer supplied valve must be in the gas service
should be constructed in accordance to the local codes.              line ahead of the appliance regulator in the gas
Strong exhaust fans in this hood or in the overall air               stream and in a position accessible in the event of an
conditioning system can produce a slight vacuum in                   emergency.
the room and / or cause air drafts, either of which can
interfere with the pilot or burner performance and
could be difficult to diagnose. Air movement should

                                                                 2
RESTAURANT SERIES OPERATION MANUAL
OPERATING INSTRUCTIONS
Pressure Regulator the factory, effectively matching them to sea level
Commercial cooking equipment must have a pressure conditions. Adjustments and calibrations to assure
regulator on the incoming service line for safe and proper operation may be necessary on installation to
efficient operation, since service pressures may fluctuate meet local conditions, low gas characteristics; correct
on local demand. A pressure regulator is packed inside possible problems caused by rough handling or vibration
every gas appliance. during shipment and are to be performed only by
qualified service personnel. These adjustments are the
responsibility of the customer and / or dealer and are
NOTICE not covered by our warranty.
Failure to install the pressure regulator will void Check all gas connections for leaks with a soapy water
the appliance warranty. solution before lighting any pilots.
Lighting & Shutdown
The regulators supplied will have 3/4” inlet/outlet
openings and are adjusted at the factory for 5” WC • Turn all valves to OFF position.
(natural gas) or 10” WC (propane gas) depending on • Wait for 5 minutes.
customer’s ordering instructions. Prior to connecting the
regulator, check the incoming line pressure, as these • Turn pilot valve(s) adjusting screw counter
regulators can only withstand a maximum pressure of clockwise, then light standing pilot and adjust flame
1/2’’ psi (14” WC). If the line pressure is beyond this 1/4 inch high.
limit, a step-down regulator will be required. • Turn ON gas valve(s) to light main burner.
The arrow shown on the bottom of the regulator body • For complete shutdown, shut OFF gas valve(s) and
shows the gas flow direction, it should point downstream turn pilot valve(s) adjusting screw clockwise to shut
to the appliance. The red air vent cap on the top is part off gas to the pilot(s).
of the regulator and should not be removed.
Before First Use
Any adjustments to the regulator should be made • Clean the griddle surface thoroughly with hot,
by qualified service personnel only with the proper soapy water to remove factory applied protective oil
equipment. coating.
Connections • Rinse with a mixture of 1/4 cup vinegar to one quart
Please check installer supplied intake pipes visually water.
and / or blow them with compressed air to clear any • Spread unsalted solid shortening or liquid frying
dirt particles, threading chips or any other foreign compound evenly over the entire griddle surface.
matter before installing a service line. When gas
pressure is applied, these particles could clog orifices. • Turn all griddle burners to medium and wait until
All connections must be sealed with a joint compound the shortening begins to smoke, then turn the
suitable for LP gas, and all connections must be tested burners OFF.
with a soapy water solution before lighting any pilots. • Rub the now melted shortening into the griddle
surface with burlap, moving in the direction of
Initial Pilot Lighting the surface’s polish marks and covering the entire
All appliances are adjusted and tested before leaving surface.
CAUTION • Allow the griddle to cool.
• When the griddle is cool after the second seasoning,
When lighting pilots and checking for leaks, do
wipe it with a thin film of shortening or cooking oil.
not stand with your face close to the combustion
chamber.
3RESTAURANT SERIES OPERATION MANUAL
MAINTENANCE INSTRUCTIONS
Cleaning & Maintenance Stainless Steel
Any equipment works better and lasts longer when All Stainless Steel body parts should be wiped regularly
maintained properly. Cooking equipment is no with hot soapy water during the day and with a liquid
exception. Your appliance must be kept clean too on a cleaner designed for this material at the end of each
daily basis. day. DO NOT USE steel wool, abrasive cloth, or powders
to clean Stainless surfaces. If it is necessary to scrape
Daily Maintenance Stainless steel to remove encrusted materials, soak in
Open Burners hot water to loosen the material, then use a wood or
1. Remove all top grates. nylon scraper. DO NOT USE a metal knife, spatula, or
any other metal tool to scrape Stainless Steel. Scratches
2. Lift off the burner heads and venturies by raising are almost impossible to remove.
the head slightly, sliding to the rear of the range
and lifting upwards. • Wash with hot, soapy water, then rinse with vinegar
and water.
3. Wash off the above in hot soapy water.
4. Re-install burner parts in the reverse order. • Rinse again with clear water.
• Re-oil with shortening or liquid frying compound.
Griddles
1. Scrape with a nylon griddle scraper to remove the • DO NOT FLOOD A HOT GRIDDLE WITH COLD
cooked spills. When absolutely necessary use a WATER. This could cause warping and griddle plate
fine-grained stone to scrape. to crack.
2. Wipe away any griddle stone dust and food particles Ovens
with burlap.
• Remove the baking racks. Wash in hot soapy water,
3. Wash with hot, soapy water, then rinse with vinegar and replace after the oven is fully cleaned.
and water.
• Remove the oven bottom by lifting it out from the
4. Rinse again with clear water. front, then sliding forward, out of the oven.
5. Re-oil with shortening or liquid frying compound.
• Scrape off any food particles with a nylon griddle
6. DO NOT FLOOD A HOT GRIDDLE WITH COLD scrapper. Be very careful about scratching the
WATER. This could cause warping and griddle plate porcelain finish on the oven liner panels.
to crack.
• Wash all the above with hot soapy water, then
reassemble.
• Baked on spills may be loosened and stubborn
stains removed with ordinary household ammonia
and scrubbing with a nylon pad in a cold oven only.
• Do not allow spray type oven cleaners to come into
contact with the temperature probe in the oven.
• After cleaning the oven, rinse well with 1/4 cup
of vinegar to one quart of clean water solution
to neutralize any caustic residue of the cleaning
compound. Wipe dry.
4RESTAURANT SERIES OPERATION MANUAL
MAINTENANCE INSTRUCTIONS
Periodic Cleaning
Check the ventilation system periodically to see that
nothing has fallen down into the stub back, high riser or
high shelf exhaust vents. Lubricate the pivot pins of the
WARNING
Contact the factory, factory representative or a
local service company to perform all Maintenance
and Service Repairs.
oven door hinge where the right and left arms connect
to the door. Use lubricating oil. Ensure your appliance
is checked by a qualified technician once a year for
efficient operation of the appliance.
Stainless Steel
All stainless steel body parts should be wiped regularly
with hot soapy water during the day and with a liquid
cleaner designed for this material at the end of each
day. DO NOT USE steel wool, abrasive cloth, or powders
to clean stainless surfaces. If it is necessary to scrape
stainless steel to remove encrusted materials, soak in
hot water to loosen the material, then use a wood or
nylon scraper. DO NOT USE a metal knife, spatula, or
any other metal tool to scrape stainless steel. Scratches
are almost impossible to remove.
5RESTAURANT SERIES OPERATION MANUAL
BAKERS PRIDE LIMITED WARRANTY
WHAT IS COVERED This warranty covers defects in material and workmanship under normal use, and applies only to the original purchaser
providing that:
• The equipment has not been accidentally or intentionally damaged, altered or misused;
• The equipment is properly installed, adjusted, operated and maintained in accordance with National
and local codes and in accordance with the installation instruction provided with the product;
• The serial number rating plate affixed to the equipment has not been defaced or removed.
WHO IS COVERED This warranty is extended to the original purchaser and applies only to equipment purchased for use in the U.S.A.
COVERAGE PERIOD Cyclone Convection Ovens: BCO Models: One (1) Year limited parts and labor; (1) Year limited door warranty.
GDCO Models: Two (2) Year limited parts and labor; (2) Year limited door warranty.
CO11 Models: Two (2) Year limited parts and labor; (5) Year limited door warranty.
All Other Products: One (1) Year limited parts and labor. Warranty period begins the date of dealer invoice to customer
or ninety (90) days after shipment date from Bakers Pride - whichever comes first.
WARRANTY This warranty covers on-site labor, parts and reasonable travel time and travel expenses of the authorized service
COVERAGE Representative up to (100) miles, round trip, and (2) hours travel time. The purchaser, however, shall be responsible for
all expenses related to travel, including time, mileage and shipping expenses on smaller counter models that may be
carried into a Factory Authorized Service Center, including the following models: PX-14, PX-16, P18, P22S, P24S, PD-4,
PDC, WS Series and BK-18.
EXCEPTIONS All removable parts in Bakers Pride® commercial cooking equipment, including but not limited to: Burners, Grates,
Radiants, Stones and Valves, are covered for a period of SIX MONTHS. All Ceramic Baking Decks are covered for a
period of THREE MONTHS. The installation of these replacement decks is the responsibility of the purchaser. The
extended Cyclone door warranty years 3 through 5 is a parts only warranty and does not include labor, travel, mileage or
any other charges.
• Negligence or acts of God, • Thermostats and safety valves with broken capillary
EXCLUSIONS tubes,
• Failures caused by erratic voltages or gas supplies,
• Fuses,
• Thermostat calibrations after (30) days from
equipment installation date, • Char-broiler work decks and cutting boards,
• Unauthorized repair by anyone other than a Bakers • Tightening of conveyor chains,
Pride Factory Authorized Service Center,
• Adjustments to burner flames and cleaning of pilot
• Air and Gas adjustments, burners,
• Damage in shipment, • Tightening of screws or fasteners,
• Light bulbs, • Accessories — spatulas, forks, steak turners, grate
lifters, oven brushes, scrapers, peels. etc.,
• Alteration, misuse or improper installation,
• Freight — other than normal UPS charges,
• Glass doors and door adjustments,
• Ordinary wear and tear.
INSTALLATION Leveling and installation of decks as well as proper installation and check out of all new equipment —per appropriate
installation and use materials — is the responsibility of the dealer or installer, not the manufacturer.
REPLACEMENT PARTS Bakers Pride genuine Factory OEM parts receive a (90) day materials warranty effective from the date of installation by a
Bakers Pride Factory Authorized Service Center.
This Warranty is in lieu of all other warranties, expressed or implied, and all other obligations or liabilities on the manufacturer’s part. Bakers Pride
shall in no event be liable for any special, indirect or consequential damages, or in any event for damages in excess of the purchase price of the unit.
The repair or replacement of proven defective parts shall constitute a fulfillment of all obligations under the terms of this warranty.
Form #U4177A 1/07
6IMPORTANT FOR FUTURE REFERENCE
Please complete this information and retain this manual for the life of the equipment. For Warranty Service and/or
Parts, this information is required.
Model Number Serial Number Date Purchased
NOTES
71307 N. Watters Rd, Ste. 180 Allen,Texas 75013
Phone 800.527.2100 | Fax 914.576.0605 | bakerspride.com
Be sure to keep up with new product
announcements and events on social media!
Social icon
Square
Only use blue and/or white.
For more details check out our
Brand Guidelines.
4.15.2019You can also read