User Guide IPSEN A WORDPRESS CMS
←
→
Page content transcription
If your browser does not render page correctly, please read the page content below
IPSEN

User Guide
A WORDPRESS CMS

                  Last update: 15 january 2020
TABLE OF CONTENTS

Part 1 ...................................................................................................................................... 3

   WordPress CMS ............................................................................................................................. 3
      How does a CMS work? ................................................................................................................................. 3
         Front-Office ............................................................................................................................................... 3
         Back-Office ................................................................................................................................................ 4
      Static and dynamic contents ......................................................................................................................... 4

   How to login into your dashboard? ......................................................................................... 4
      First authentication ....................................................................................................................................... 4
      Second authentication: Google authenticator ............................................................................................... 6

   Front-Office .................................................................................................................................... 7

   Back-Office ..................................................................................................................................... 8
      Sidebar .......................................................................................................................................................... 8
      Change the language of the Back-Office ........................................................................................................ 9

Part 2 ................................................................................................................................... 10

   Media Library ..............................................................................................................................10

   Posts ...............................................................................................................................................11
      Title and URL ............................................................................................................................................... 12
      Content ....................................................................................................................................................... 12
         Internal pictures ...................................................................................................................................... 13
         Video....................................................................................................................................................... 15
         Internal and external links ....................................................................................................................... 16
         Link to a PDF file ...................................................................................................................................... 16
      Publishing options ....................................................................................................................................... 17
      SEO.............................................................................................................................................................. 18

   News Articles & Press Releases ..............................................................................................19

   Pages ..............................................................................................................................................21
      Header ........................................................................................................................................................ 21
      Templates ................................................................................................................................................... 24
      Content ....................................................................................................................................................... 25
        Accordion ................................................................................................................................................ 27
        Achievements .......................................................................................................................................... 28
        Anchor Redirect ....................................................................................................................................... 29
        Awards .................................................................................................................................................... 29
        Carrers Block ........................................................................................................................................... 30
        Clickable Cards ........................................................................................................................................ 30

                                                                                                                                                                             1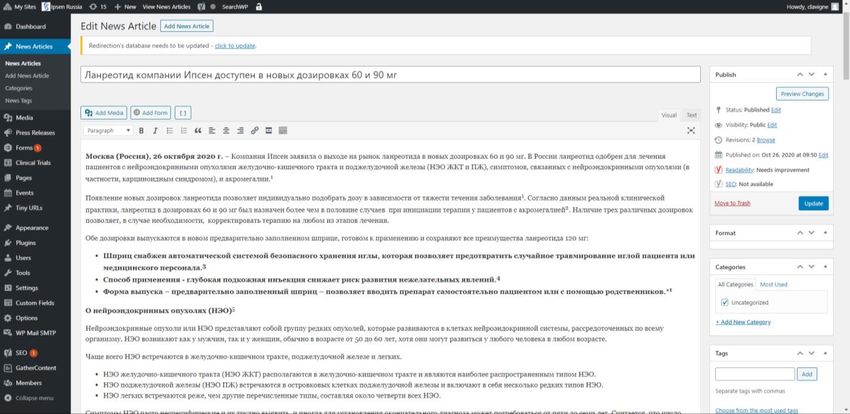
Content Cards.......................................................................................................................................... 35
       Content iFrame........................................................................................................................................ 36
       CTA Block ................................................................................................................................................ 36
       Editorial Content ..................................................................................................................................... 37
       Expanded Carousel .................................................................................................................................. 38
       50/50 Content ......................................................................................................................................... 43
       Link Redirect on Load............................................................................................................................... 43
       Message .................................................................................................................................................. 44
       Mini Carousel .......................................................................................................................................... 44
       News Center ............................................................................................................................................ 45
       Products List ............................................................................................................................................ 45
       Resources ................................................................................................................................................ 47
       Sticky CTA................................................................................................................................................ 48
       Tabbed Carousel ...................................................................................................................................... 48
       Timeline .................................................................................................................................................. 49
       Timeline (with modal popups) ................................................................................................................. 50
       Video....................................................................................................................................................... 51
       Widescreen Content ................................................................................................................................ 52

Appearance → Menus................................................................................................................54

Options ..........................................................................................................................................58

                                                                                                                                                                         2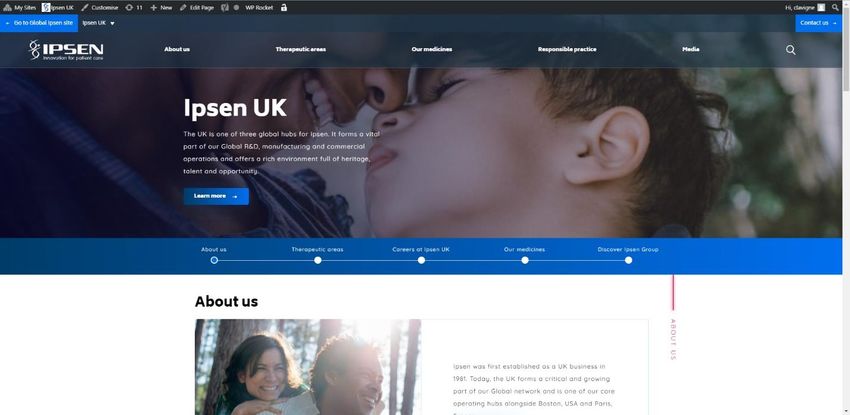
PART 1
WordPress CMS
        How does a CMS work?
A CMS (Content Management System) consists of two components:
    •   Front-Office : the visible public part of the site
    •   Back-Office : the interface which helps you to manage the contents and the features of the site
This distinction is essential and will be resumed throughout this user guide.

                Front-Office

                                                                                                          3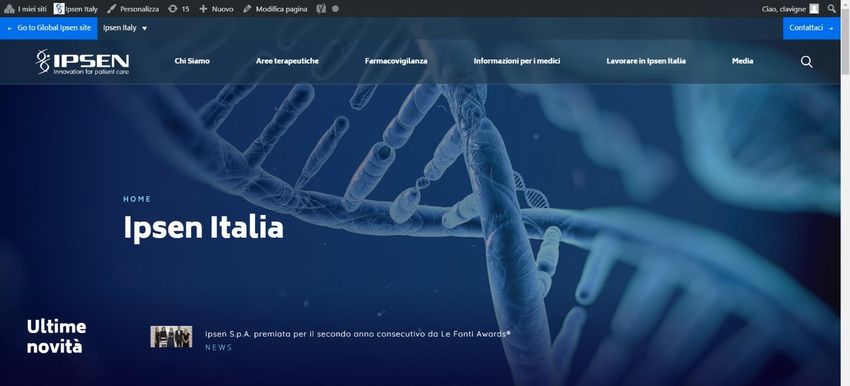
Back-Office
Static and dynamic contents
What is the difference between “dynamic contents” and “static contents”’ ?
• “Dynamic” contents are regularly published or modified.
For example: news and press releases.
• “Static contents” are pages with content which rarely evolves.
For example: Ipsen Group, Terms and conditions.
How to login into your dashboard?
To access the Back-Office of your website, you need to use the dedicated URL, the username and the
password which have been communicated to you.
Changes done in the Back-Office are immediately reflected on the website and visible to everybody.
A double authentication has been established to optimize the security of IPSEN websites.
First authentication
To access the Front-Office you simply need to enter this URL:
• https://www.ipsen.com/
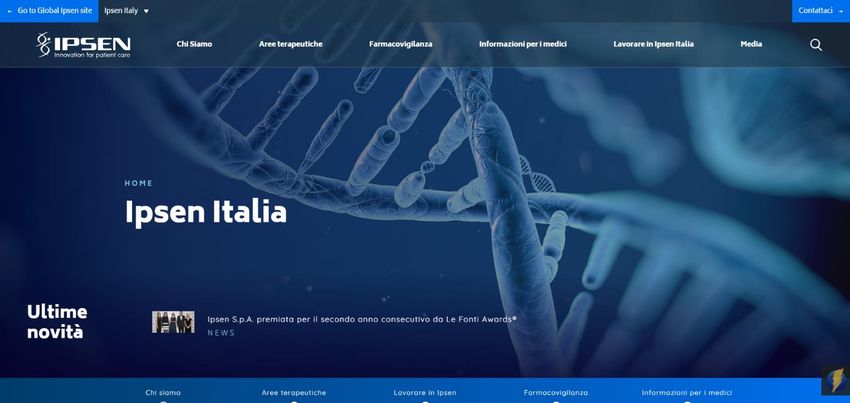
This is the website visible to everybody.
About other Ipsen websites, the existing URLs on January 1st 2021 are:
• Brazil: https://www.ipsen.com/brazil/
• Italy: https://www.ipsen.com/italy/
4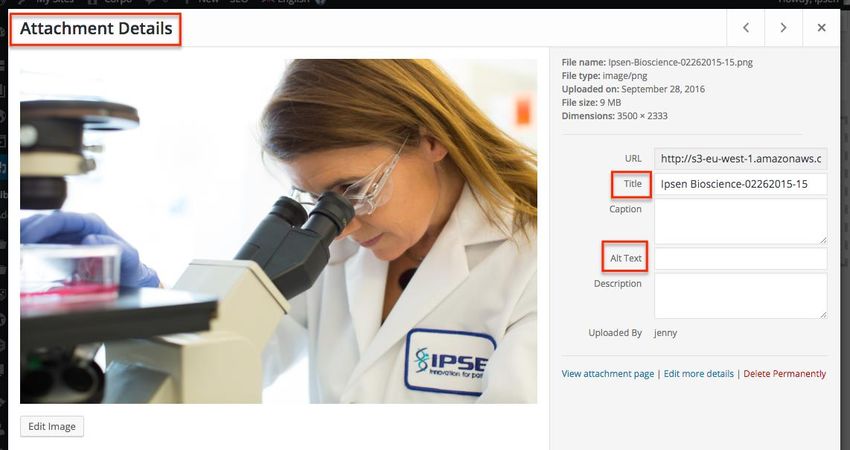
•   Korean: https://www.ipsen.com/korea/
   •   Russia: https://www.ipsen.com/russia/
   •   Spain: https://www.ipsen.com/spain/
To access to the management interface (Back-Office) enter this URL and add “login”:
   •   https://www.ipsen.com/wp-admin/
Then type your username and password into the login form:

                                                                                      5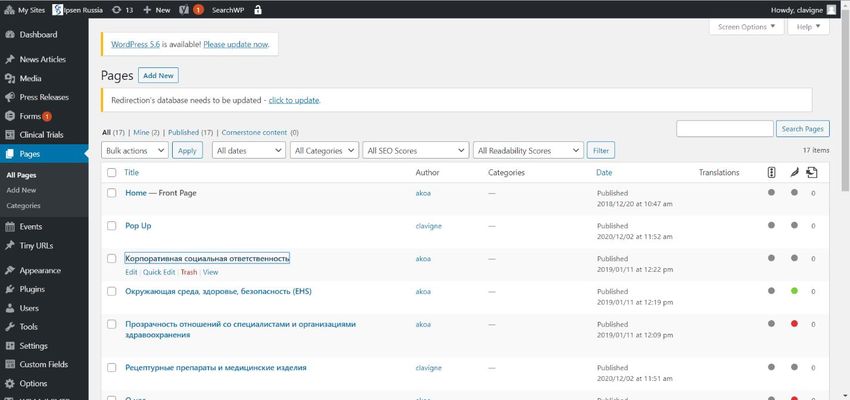
Second authentication: Google authenticator
As soon as the first authentication is successful, this window appears:

To get this code, you have to use the Google authenticator application available on Google Play , iTunes
and https://chrome.google.com/webstore/

Here are the steps to follow:
    •   Install the “Google Authenticator” application on your mobile device
    •   Open the app
    •   Click on “Begin setup”
    •   Select “Enter provided key”
    •   Then enter the email address of your Google Account in the "Enter account name" field
    •   Enter the supplied secret key
    •   Click on “Add”
    •   This code is limited in duration. The counter on the right shows the remaining time.
    •   Enter the secret key on your computer screen in the "Enter your key" field.
You are now able to see your WordPress Dashboard.

                                                                                                           6
Front-Office
You are now connected. On the front-office, an ‘‘admin bar’’ appears on the website. It provides access
to Back-Office options:

You can see the name of the current site and reach the Dashboard or Menus editor:

You can also modify the current page by clicking on “Edit Page”.

And reach your user profile or logout:

                                                                                                          7
Back-Office
        Sidebar
The sidebar offers various features. We will detail the ones listed below :

    •   Users → Profile
    •   Media
    •   News Articles
    •   Press Releases
    •   Pages
    •   Appearance → Menus
    •   Options

                                                                              8
Change the language of the Back-Office
To change the Back-Office language, without affecting the site language, reach your account
details (“Users” → “Profile”) :

On your profil page, scroll down to Language in Personal Options and switch from “Site Default” to your
preferred language, by selecting the option from the dropdown list.

Scroll to the bottom of the page and click on ‘‘Update User’’ to save your changes.

                                                                                                          9
PART 2
Media Library
This library contains every media (image, PDF, audio) present on the site. If you insert a media in a
content (page, news, etc.), this file will automatically be added to this library.
To add an element click on “Add new”, then choose your file.
Your last uploaded media will show at the top left of the library.
Click on it to access the media details and modify its options. You can for example enter a “Title” and an
“Alternative Text” to describe a picture:
10Posts
In the sidebar, click on the chosen Post Type (News Articles, Press Releases, Pages) to access all its posts.
A post can have from zero to many categories.
Click on an article to edit it or click on ‘‘Add New’’ to create a new one.
11On the page editor, you will see blocks present in different types of pages:
Title and URL
You can enter the title in the field above “Permalink”:
This title is used to construct the URL of the page.
If you want to change this title, you have to update the related URL. To update it, click on “Edit” near
“Permalink”.
Change the bold part of the URL. Delete text and click on “Ok”:
When you change the URL, you have to redirect the page. To manage URL redirects, consult IPSEN
headquarters who have ability to support it.
Content
You have to insert the main content in the field under “Add Media”:
12You can use the editor tools to :
- Hightlight elements by making the text bold / italic
- Create a list of elements
- Align the text to the left / center / right
- Create a link
- Priorize the content :
• Paragraph: for the body of the text
• Heading 1: for the main title of page: do not use
• Heading 2 to 6: to prioritize the different titles in content
Internal pictures
Click on “Add Media”:
You can select the picture from the Media Library or upload a new file from your computer.
Click on “Insert into item” to insert the picture inside the content
13If you click on the picture, you can manage its position in the page:
If you click on the pencil, you can access the parameters of the picture.
You can adjust the “Size” and fill the “Caption” field. Click on “Update” to save your changes:
14Video
If you want to insert a video, simply paste the Youtube URL in your content:
Video automatically appears inside your page:
15Internal and external links
To add a link, select the text and click on “Insert/edit link”:
Add the URL and text for the link.
Check “Open link in a new tab” for external links.
You can search the name of one of your pages in the search field and select it.
Click on “Add Link” to finish:
To modify an existing link, the process is same.
Link to a PDF file
To add a link to a PDF file, the process is same than to add an internal link.
Select the file from the dropdown list, then click on “Add Link”:
16Publishing options
Publishing options are reachable in the right sidebar, in the "Publish" block.
If you want to preview the changes before publishing, click on “Preview Changes” or “Preview”. The
content will open in a new tab.
To save your changes, click on “Update” or “Publish”.
If your content is not finished or approved, you can save it as “Draft”, it will not be visible on Front-
Office:
If you don’t want to display your content anymore, we recommend you to save your page as a “Draft”
instead of deleting the page (“Move to Trash”).
You can schedule the publication date of a content.
Simply specify in the “published on” field when your content should be online (date and time):
17SEO
“Yoast SEO” block allows you to enter SEO informations of your content and preview it.
SEO title for your pages has already been set up, we recommend you not to modify this field. You can
enter a “Meta description.” The recommended size is between 135 and 160 characters.
If you don’t write any metadescription, the tool will automatically fill this field with first sentences of the
main content.
18News Articles & Press Releases
In the sidebar, select the corresponding Post (News Articles or Press Releases)
Edit the title and content. You can also add sources and documents in the block ‘‘Page’’.
Select the corresponding category-ies.
Publish/Update your article. Click on ‘‘View …’’ to visualize the published page in front-office.
1920
Pages
        Header
The header is compulsory. However various options are available to personalize it:
    -   A main title (H1 essential)
    -   A navigation
    -   A background image (for mobile/desktop)
    -   A video background (instead of an image)
    -   A background color (if you don’t add a background image)
    -   A gradient color over the image
    -   A small introductory text
    -   Calls to action (buttons)
    -   Make the header take the size of the fullscreen
    -   Show the last articles

                                                                                     21
22
23
Templates
Thank to the box on the right, you can give the page a specific template.
Most of the pages are made using the ‘‘Default template’’.
If the page is a submenu, you have to indicate its parent name and its order in the menu.

To create a page that will have dynamic content, you have to choose a specific template:

A new component will appear in the middle of the page editor with two dropdown menus.
They serve to indicate which posts will be added:

In this example, each time a Press Release article will be created using the Press Release Category, it will
be automatically added to the top of the page:

                                                                                                               24
Content
The content of the pages is made through pre-configured blocks with specific design and purpose.
To add the block of your choice, click on the button ‘‘Add Block’’ and select one from the list:
Blocks have a name and number. They can be opened and closed.
To modify one’s order, drag the block up or down.
Many blocks have options to add a title (H2) and an anchor to the section of the component (in-page
navigation):
Somes of them also have mandatory fields (*):
25Some blocks like slides, editorial and accordions can be added inside blocks, clicking on a button:
It is possible to fastly remove one by clicking on the minus symbol and ‘‘Remove’’.
Be carefull to remove the correct content:
26Accordion
An Accordion block is composed of various accordions, that can be closed and opened.
Complete your block options and click on ‘‘add accordion’’ for each accordion that will be added.
27Complete the heading and content of each accordion.
Each block created inside another block, like in this example, will have a number at the left, to help
recognize it.
Achievements
Choose this component to list key achievements:
28Anchor Redirect
If you want to use an anchor Redirect, please asks our teams, as it require code knowledge.
Awards
This component is great to display small logos with link:
29Carrers Block
This component is a highlight section leading to another important internal or external page.
It is recommended to complete all fields:
Clickable Cards
This component works as a single, stacking or carousel cards:
Stacked
Solo card only (with or without picture)
30Carousel
31Complete the introductive fields and options:
Choose how to display the cards and add one or more cards:
32Complete the fields for each card. The cards can work as link or modal:
1st card
2nd card
3334
Content Cards
This component is displayed as a single card or two-columns:
Each card has optional image/icon, title and text:

In the editor, it is composed of two parts: Intro and Cards.

The Intro part is optional. You can add a section title (h2), label (anchor) and choose more options:

Choose the way to display cards and add one or more cards:

                                                                                                        35
Complete the fields:
Content iFrame
The content iFrame is used to insert a Youtube Video inside your page, using the embed url:
CTA Block
These blocks are useful to create an important interruption in the page and make a call for action:
36Editorial Content
This component serves to display your content the way you edit it:
It will be displayed within light blue borders:
37This component can be found inside many other components, to edit your content.
Expanded Carousel
The expanded carousel is a component that enables additional hidden/expandable content.
In the editor, click on the button to add more slides.
38The first slide is an introductive card with index links to other cards.
Those cards has the option to expand to show more.
Complete the fields and choose the layout of the expandable content:
An example for the first slide:
39The first indexed slide (second slide):
Result of the first slide:
Result of the first indexed slide with hidden content (editorial):
After clicking on ‘‘Read more’’:
40Another example of a slide with accordions expable content:
4142
50/50 Content
This component is similar to a single content card.
It is possible to switch the image and text:

                Link Redirect on Load
With this component, the page created is automatically redirected to the URL indicated (i.e.:
https://www.ipsen.com/uk/).

The redirection is executed immediately after the page has been loaded.
There is no need to add any other component to the page if you add this one.

                                                                                                43
Message
This component is usefull to add a quote:
Mini Carousel
This component can be used as a slide show for key facts:
44News Center
This component will display the last News Center articles:
Products List
This component can be used to list all products including their varieties of dosage, important
informations and images of packaging.
45A single block can be used to list all products.
Multiple blocks can be used to group products according to therapeutic areas.
46Resources
The resources block is recommended if you have a number of PDFs to present.
It’s ideal for press releases, legacy documents, meeting minutes and agendas.
Complete the fields and add a ressource:
The most recent ressource should always be added at the top:
47Sticky CTA
On desktop, this call to action stays sticky to the right and follows as you scroll.
On mobile, it is located under the main nav and stays sticky to the top as you scroll.
Tabbed Carousel
The tabbed carousel is very much like the expanded carousel but offers an alternative navigation:
48Timeline
The timeline component works like a carousel. You can travel through it using the arrows or swipe.
When the highlighted card comes into focus, it changes state to white background.
49Timeline (with modal popups)
This timeline is very similar. However, when clicking on Read more, the content shows in a modal:
50Video
Include a video from Vimeo in your page:
51Select the Vimeo Option and insert the video ID from Vimeo :
The video ID can be found from the URL:
Widescreen Content
The widescreen component is divided in 2 (image/content):
5253
Appearance → Menus
In ‘‘Appearance’’, go to ‘‘Menus’’. Here you can edit or create a menu.
To edit a menu, select the corresponding menu from the dropdown and click on ‘‘Select’’.

                                                                                           54
To create a menu, click on ‘‘Create a new menu’’. Choose a name for your menu and click on ‘‘Create
Menu’’
Check the menu name before editing.
To add items to your menu, select existing posts/pages or create a custom link, using the box on the left,
and click on ‘‘Add to menu’’.
The new items are added at the bottom of the menu.
You can modify the order of the items in your menu. And set the display location if you already know it.
When your menu is ready, click on ‘‘Save Menu’’.
You can also delete a created menu if needed.
55Switch to ‘‘Manage Locations’’ tab, to edit the location of your menus.
The predefined locations will appear in the header of your website:
Masthead Dropdown Menu (Choose your location) Header Menu (Italy Menu)
56If you create a menu that will have a different location than the ones listed (ex : footer menu), please
contact our team to add it to your website on the desired location:
57Options
Go to ‘‘Options’’. Scroll down the page to the ‘‘Footer options’’ block to set the URLs for the different
social media and add the legal text. The legal text appears in the footer of every page of your website.
58Scroll down again to the ‘‘Leaving Modal’’ block to set a personalized message to your visitors. It will be
shown when leaving the site through links.
Scroll back to the top of the page Options, to update your modifications.
59You can also read