Using Mobile Atlas Creator with Boyd's Maps - boydsmaps.com
←
→
Page content transcription
If your browser does not render page correctly, please read the page content below
Using Mobile Atlas Creator with Boyd’s Maps
by Boyd Ostroff, revised 3/14/2019

Section 1:
The free, open source Mobile Atlas Creator (MOBAC) is a powerful tool for viewing maps on your
computer and exporting them to more than three dozen apps on all platforms, plus Garmin and Magellan
GPS devices. MOBAC works exactly the same on Windows, Macintosh and Linux computers, but this
tutorial will specifically cover the Windows and Macintosh versions.

MOBAC can access maps stored locally on your computer or maps stored on internet servers. This tutorial
will focus primarily on using MOBAC with the free maps from https://boydsmaps.com/

After downloading, these maps are stored locally on your computer. However, the techniques presented are
also applicable to maps accessed on internet servers. Mobile Atlas Creator functions the same in either
case, and the only difference is that local maps are much faster to work with. It usually only takes a few
seconds to create an atlas from a locally stored map, while an internet map can take considerably longer
and is also subject to communications and server availability issues.

Section 2: Install Software (if needed)
The author assumes no responsibility for any computer or mobile device problems resulting from
following the instructions below. It should be simple and safe, but do not proceed if you aren't
comfortable with assuming all responsibility. Before installing any software, it's always wise to have
a full backup of your computer and mobile devices.
Mobile Atlas Creator is a Java application, so first we’ll check if Java is already installed and perform an
installation if needed. Next, we’ll install the Mobile Atlas Creator program.

Note: the examples shown throughout this tutorial are based on MacOS Sierra and Windows 7 Professional.
This tutorial is not updated very often, so older versions of Java may appear in some of the screenshots, but
the installation procedures are still the same.

2.1    See if Java is already installed

Macintosh
Check if Java is installed in the System Preferences control panel. Click the Java icon; the control panel will
open in a new window.

Click the update button in the Java control panel to see what version is installed
Windows
Look in the Programs and Features Control Panel to see if Java is already installed and note the version
number.

2.2   Install or update Java (if necessary)

Important Note: Unfortunately, I don’t have time to update this tutorial whenever a new version of Java is
released, so the screenshots and version numbers below are no longer current. But the installation
procedure will be the same for newer versions. When you go to the download link below, you’ll automatically
be offered the correct version of Java for your computer.

Go to this link, and click Agree and Start Free Download.

https://www.java.com/en/download/

The website should automatically choose the correct version for your computer. You may see a warning that
Java is not compatible with your browser. Disregard this, you don't need Java in a browser, it is only used for
the Mobile Atlas Creator program. I suggest that you disable the Java plug-in in your browser. The browser
plug-in is not needed for MOBAC and could pose a security risk on the web.

Macintosh
Click the Agree and Start Free Download button. The correct version should automatically be selected for
you. As of this writing (August 12, 2018) Java 8 was the correct version for my Mac running Sierra.
Windows
Click the Agree and Start Free Download button.

Macintosh
Double-click the installer

You will have to enter your Administrative password to install (this is the same password you use to install
other software and updates on your Mac). You will also have to click the “Open” button when you are asked
if you want to open the installer.
Windows
Double-click the installer and click the Run button.
When the installation is complete, you should see a message similar to this:

2.3   Install the Java SE Development Kit

Important Note: Unfortunately, I don’t have time to update this tutorial whenever a new version of Java is
released, so the screenshots and version numbers below are no longer current, but the procedure is still the
same.

Download the Java SE Development Kit from this link:

http://www.oracle.com/technetwork/java/javase/downloads/index.html
Choosing the correct version of the Java SE Development Kit (JDK): the version shown at the top of the
download page may not be correct for your computer. Note the version of Java that you installed in Section
2.2 above. In this tutorial, we installed Java 8 update 181, so, the correct JDK version would be Java SE
8u181, where “8” denotes Java 8 and “u181” denotes update 181. In this example, you would need to scroll
down the page to find the correct version.

This screenshot is old and Java SE 8u181 is probably the wrong version for your
computer. Make sure that you download the correct version, as explained above.

Accept the license agreement and download the correct version for your computer.

                            This screenshot is old and Java SE 8u181 is probably the wrong version for your
                            computer. Make sure that you download the correct version, as explained above.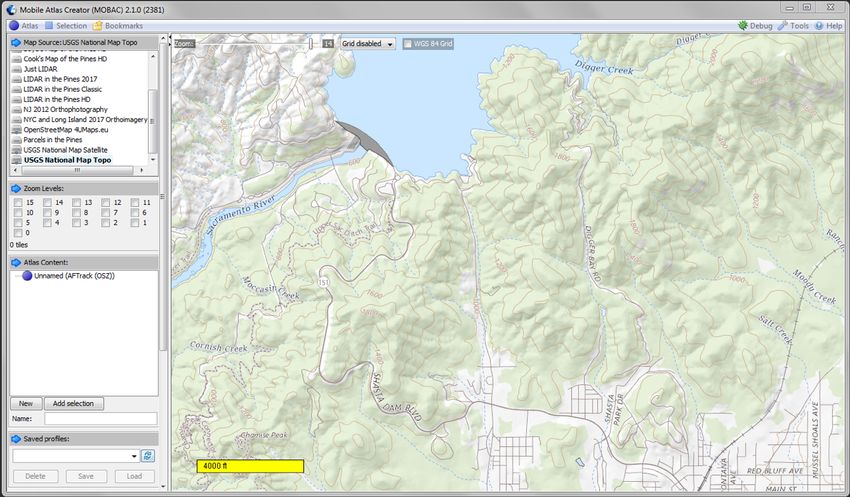
After downloading the development kit, double-click the installer

You should see a message like this at the end of the process.
2.4.0 Install Mobile Atlas Creator

Go to the link below, scroll down the page and download the latest stable version of Mobile Atlas Creator. As
of this writing (March 2019) the correct version is 2.1.0.

http://mobac.sourceforge.net

Just wait for the download to finish and don't click any of the spammy links on the download page!

2.4.1 Opening MOBAC on a Windows computer

Right-click the downloaded file and choose Extract All. Do not put the MOBAC folder inside the programs
folder. You can put it anywhere else that you like. Start the program by double-clicking the Mobile Atlas
Creator.exe file.:
2.4.2 Opening MOBAC on a Macintosh computer

Double-click the downloaded file to extract. You can put the MOBAC folder anywhere you like. Start the
program by double-clicking the Mobile Atlas Creator.jar file

The first time you open Mobile Atlas Creator on a Mac, you’ll see an alert like this.

Go to System Preferences and click on Security & Privacy
Click the Open Anyway button.

Congratulations: you are now ready to start using Mobile Atlas Creator!

2.5    Installation troubleshooting

If MOBAC crashes, you may have the wrong version of Java installed. See section 2.1 above for how to
check what version of Java is installed. If you need to downgrade, you must first remove the existing
version. Unfortunately, this can be complicated. See the links below for more information.

Macintosh

See this link for removing Java on the Mac:

https://www.java.com/en/download/help/mac_uninstall_java.xml

Additional help is available here:

https://java.com/en/download/help/mac_install.xml

Windows

This link describes the procedure for removing Java on Windows:

https://www.java.com/en/download/help/uninstall_java.xml

If you need more help on Windows, see this link:

https://java.com/en/download/help/windows_manual_download.xml
Section 3: Getting ready
Mobile Atlas Creator has a number of built-in mapsources for accessing free maps. The following should be
of general interest to users in North America.

OpenStreetMap 4UMaps.eu: Maps of the whole world. Since they are made from user-contributed data,
their quality and style can vary by location.

USGS National Map Topo: These are the new-style digital maps from the USGS that some people dislike.
They appear to be a “work in progress” with details varying by location. See Appendix A at the end of this
document if you would like to access the old-style paper 24k USGS topo maps.
USGS National Map Satellite & Topo: Topo map features overlaid on aerial imagery. They actually use
USDA NAIP imagery that was shot from airplanes instead of satellites in most cases.

USGS National Map Satellite: This is the same aerial imagery, but without the topo map overlay.
Canada Toporama: Topographic maps from The Atlas of Canada, provided by Natural Resources
Canada.

3.1    Installing new maps and mapsources

There are two components to a map in Mobile Atlas Creator. The mapsource is a small file that provides
the name to display in the menu and tells MOBAC where to find the map data. The map data can be
contained in a local file on your computer, or it can be located on an internet server. Mapsources for local
data are very simple, they just point to the location of the map file. Mapsources for internet data are more
complicated and tell MOBAC exactly how to communicate with the remote server. Note: locally stored map
data is a unique feature of the maps from https://boydsmaps.com and almost all maps from other sources
are accessed over the internet.

All of Boyd’s Maps include their own illustrated tutorial to guide you through installation. But the principle is
always the same. The actual map data is included in a large file with a .mbtiles extension and the
mapsource is a small file with an .xml extension. The .mbtiles file should be placed in the same folder as the
Mobile Atlas Creator program (this is the folder you chose when you installed MOBAC, there is no standard
location). You will also find a mapsources folder inside the Mobile Atlas Creator folder. Put the .xml file in the
mapsources folder.

3.2    Viewing a downloaded map for the first time in Mobile Atlas Creator

All of Boyd’s Maps include their own tutorials, but the procedure is pretty much the same. Start Mobile Atlas
Creator. A window will open asking you to choose an atlas format. This can be ignored – just click the OK
button. The first time you open MOBAC, you’ll see a map of the whole world. If you don’t see it, choose the
OpenStreetMap4UMaps.eu mapsource from the list at the top left (normally this will already be selected the
first time you open MOBAC). If you still don’t see a map, make sure your internet connection is working.
The following example assumes that you have downloaded and installed Cook’s Map of the Pines HD,
however the same principles apply to using Mobile Atlas Creator with any of Boyd’s Maps for the first time.
Cook’s Map of the Pines HD is available for download here:

https://boydsmaps.com/cooks-map-of-the-pines-hd/

Press and hold the right mouse button to drag the map around and use the mouse scroll wheel or the
slider at the top left to zoom in and out. I find it very awkward to use the trackpad on a laptop with Mobile
Atlas Creator; you may need to use a mouse if you have a hard time with the trackpad.

Drag/zoom the map until it is roughly centered on the area of downloaded map. Unlike other software,
MOBAC does not automatically center your view on the current map, you need to manually drag the map to
the correct location.

After installing the mapsource and map data in the correct folders, choose your map from list of
mapsources. Zoom and drag the map around to confirm that it works properly. If you don’t see your map on
the list, make sure the downloaded files were placed in their correct locations.
General usage tip: notice the small icons to the left of each mapsource. Maps that that are accessed on the
internet have a different icon from maps that are stored locally on your computer.

3.5   Customize the mapsource list

You can disable unwanted mapsources to make the list shorter. Click the Tools menu at the top right corner
of the MOBAC window and choose Settings.

Click the Map sources tab and choose the ones you don’t want from the list on the left. You can choose
multiple items by holding down the Control key (Windows) or Command key (Macintosh). Click the right-
arrow to move these items to the disabled list. They can easily be restored later by reversing the process.
Section 4: Working with Mobile Atlas Creator
The techniques discussed in the following sections can be used with any map in Mobile Atlas Creator,
regardless of whether the map is installed locally on your computer or accessed via the internet. Boyd’s
Maps are shown in these tutorials, but you can use the same procedures with any map. The main difference
is that it only takes a few seconds to create an atlas from a map that is stored locally on your computer,
while a map accessed via the internet may take considerably longer and can be affected by network issues.
4.1.0 Getting Started with Mobile Atlas Creator

We learned the basics of choosing a mapsource and viewing it in Section 3.4 above. Now we need to
change the map size setting before exporting any maps. Click the Settings button in the Tools Menu.

Click the Map Size tab and select 1048575 from the drop down Maximum size menu. This is necessary in
order to process large maps.

Creating maps for Garmin Handheld GPS units requires a different setting here. This will be covered in
detail in Section 6 below.

4.1.1 Macintosh bugs
Sometimes MOBAC fails to open on the Mac. The StartMOBAC menu appears at the top of the screen but
the main window doesn't open. If this happens, just quit and try again, that always seems to work.

Unfortunately, the Mac version does not remember the last location and map you were viewing when you
quit (this bug does not exist in the Windows version). The next time you open MOBAC, it will show the
default map of the whole world, which can be very annoying. But you can create bookmarks to help with this:
Zoom in to a desired location. Go to Bookmarks > Save current view and enter a name.
Unfortunately, bookmarks aren't saved automatically (another bug). After creating a new bookmark, go to
Tools > Settings and just click the OK button. You don't need to change any settings, just click OK: this
forces MOBAC to save your bookmark. The next time you open MOBAC, you can then use your bookmark
to restore your saved view.

4.2   Understanding map zoom levels

Maps have multiple layers known as “zoom levels”. Each level is a separate map at a different scale. As you
zoom closer, the level number increases. The current zoom level of the map you’re viewing is displayed next
to the slider at the top of the MOBAC map. Don’t confuse this number with the checkboxes in the Zoom
Levels box. The zoom level displayed in the top left corner only affects what you see in MOBAC on your
computer, it has no effect on the Zoom Levels in maps that you export.

For a simple map, such as one that only contains aerial photography, each zoom level will be identical
except for the scale. But each level can actually contain a completely different map. This capability can be
used to optimize map features (such as the size of labels) for maximum clarity at different zoom levels.
Section 1 of the documentation for each map will describe special zoom level features (if applicable).

Apps for smartphones and tablets make use of multiple zoom levels to speed up map rendering. On a
mobile device, it would be slow to load a big image of the whole map, then scale it down as you zoom out.
However, it’s very fast to simply load images that have previously been scaled for each zoom level.
So, most apps can only display the levels that you have included in your map. For example, if you only
choose levels 16 and 17, you will not be able to zoom out any farther than that.

Most computer software cannot utilize multiple zoom levels however, so if you are exporting maps for
Google Earth (for example) you must only choose one zoom level. You will usually want to choose the
highest zoom level in, but there might be reasons to use a lower zoom level depending on your needs.

                                                    The checkboxes in the zoom level section of the left
                                                    MOBAC panel show all levels that are available in the
                                                    current mapsource. Check the boxes next to each level
                                                    that you want to export. In this example, when you
                                                    create an atlas it will contain zoom levels 11 through
                                                    17. This will be covered in more detail in the following
                                                    sections.

                                     The map scale of each zoom level is twice that of the previous level,
                                     resulting in four times (2 x 2) more data. This exponential sequence
                                     gets big very quickly, as shown in the simplified example on the left.
                                     Assume that a level 12 map requires one megabyte of storage. Going
                                     up just 5 zoom levels results in one gigabyte map, or 1000 times more
                                     data!

                                     Also note in this example that the size of the level 17 map is three
                                     times larger than levels 12 through 16 combined. So, feel free to add
                                     all the lower zoom levels to your maps, they take up very little space
                                     compared to the high zoom levels.

4.3   Creating an atlas

Choose New Atlas from the Atlas menu
Type a name for your new atlas - it can be anything you want. Now choose the correct atlas format based on
the app you're using on your phone or other device. In the example above, we’re creating an atlas named
"ApplePie" in the Backcountry Navigator format.
You’ll find a full list of all the formats that MOBAC supports here: http://mobac.sourceforge.net
If you have a favorite smartphone app not covered in these tutorials, check to see if it supports offline maps
in one of the formats on the Mobile Atlas Creator website.
In Sections 5 through 8 we'll provide detailed examples in several popular formats for iOS, Android,
Windows and MacOS as well as Garmin handheld GPS devices.
4.3.1 Selecting a rectangular area for export
The default selection mode is a rectangular area. Hold
down the left mouse button and drag to make a box. To
change the selected area, click once on another section of
the map, then draw a new box. If you want to export
everything and aren't concerned about file size, you can
simply zoom way out and draw a box around the whole
map.4.3.2 Using the grid zoom feature Choose a level from the dropdown menu. Maps consist of "tiles", and the grid zoom feature shows tile boundaries for each level. It can be a useful tool to show exactly what data will be exported because MOBAC only exports whole tiles. As zoom level increases, there are more tiles in the same area of the map. When the grid feature is enabled, a rectangular area will "snap" to the boundary of the selected tiles. In the example below, the red line shows the area I selected with the mouse, but it was automatically enlarged to the shaded area to match the level17 grid. Enabling the grid has no effect on the file you export; it will be the same when grid zoom is turned off. But enabling the grid shows exactly what will actually be exported.
4.3.3 Selecting an export area with a polygon

Another selection method involves drawing a polygon around your desired area. This allows you to choose
exactly the region you want without exporting additional data you don't need. Choose polygon from the
selection menu to activate this option.

Polygon mode uses a "rubber band" line where you click repeatedly to add all the points you want. You can
use the mouse wheel to zoom in and out and hold the right mouse button to drag the map while you create
the polygon. If you make a mistake and want to start over, choose polygon from the selection menu again.
Polygon mode does not work properly and should not be used when exporting custom maps for a Garmin
GPS.
4.3.4 Selecting an area around a .gpx track file

This option allows you to select the area around where you're planning to hike. Only use this method if
you're worried about file size for a long hike. It will not give you much flexibility if you decide to change your
route since it only creates a "corridor" around your track. To use this method, show the GPX panel using the
tools menu. Note that you can also use the GPX panel if you just want to view your waypoints or tracks in
MOBAC.

Click the Load GPX button at the bottom and choose the track file that you want.
Choose Add selection around GPX track from the Selection menu.

Now choose the desired distance around the track. The preview button should show the results, although it
seems this doesn't work for some reason.

4.4.0 Adding your selected area and creating an atlas

                                                                                      After choosing an
                                                                                      Atlas format and
                                                                                      selecting an area
                                                                                      with one of the
                                                                                      techniques above,
                                                                                      check the boxes for
                                                                                      all the zoom levels
                                                                                      you wish to export.
                                                                                      The selection in this
                                                                                      example contains a
                                                                                      total of 92 map tiles,
                                                                                      as shown under the
                                                                                      zoom level
                                                                                      checkboxes
Now click the Add selection button. It will then appear in the Atlas Content section. MOBAC allows you to add additional selections to the same atlas if desired. You can even add portions of different maps. If you wish to do this, simply repeat the steps above and select the areas and maps you want, clicking the Add selection button as often as needed. See Section 4.5.0 below for a detailed example. Right-clicking on the atlas offers some options that may be useful, such as showing its contents, deleting a selection or clearing the whole atlas. Note that if you clear an atlas it will be reset to the default format. You will then need to use the Convert atlas format menu to choose your desired format again. Click the Create Atlas button when everything is setup the way you want. A window showing the atlas creation progress will now open. In this example, it only took a couple seconds since the map in the example is permanently stored on the computer. It could take much longer using a map from the internet. Note that errors (if any) will be shown in this box. It is very unlikely that you will see any errors with a map that’s stored on your computer (such as LIDAR in the Pines HD). But maps accessed on the internet frequently experience problems due to load on the servers or communications issues, often making for a frustrating experience.
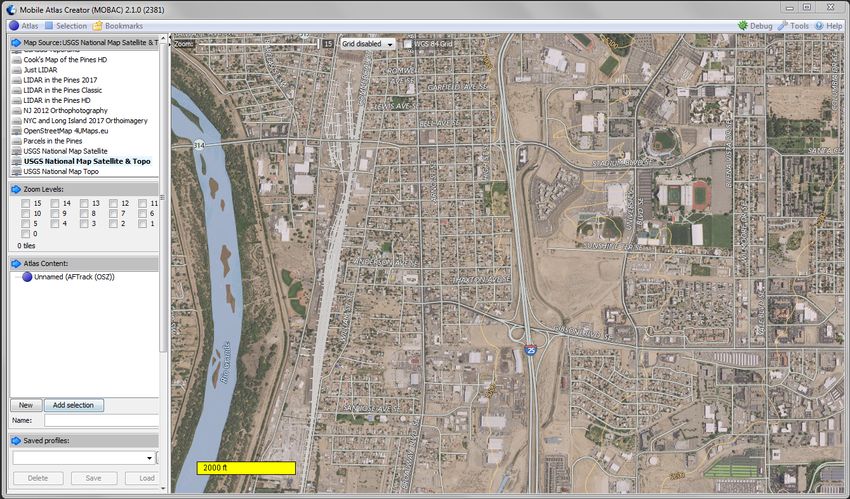
The exported file will be found in the Atlas folder inside the same folder as the MOBAC program. As a
shortcut, click the Open Atlas Folder button in the progress window after completion.

In the sections that follow, we'll provide detailed examples of installing and enabling maps on variety of
devices and apps.

4.4.1 Working with very large map files
4 gigabytes is the largest individual file that can be stored on a device that uses the FAT32 filesystem. This
should not be a problem with current generation smartphones and tablets. But if you add a 32gb (or smaller)
microSD card to your Android device, the default formatting will probably be FAT32. If you want to use map
files larger than 4gb, you will need to format a memory card as exFAT. Check your device's documentation
to see if this is compatible. Some older devices may require FAT32 and therefore limit file size to 4gb (such
as a Windows Mobile device or a Magellan handheld GPS).

4.5.0 Using different maps at different zoom levels

If you’re using a smartphone app that supports multiple zoom levels, you can create an atlas using more
than one map. In this example, We’ll make a map of the Crater Lake area in the Delaware Water Gap for
BackCountry Navigator.

This example uses the NJGIN Map Access package from https://boydsmaps.com/njgin-map-access/
But the same technique can be used with any maps, regardless of whether they are stored on your
computer or the internet.
We’ll start by selecting an area in the NJGIN 24k topo map and checking Zoom Levels 14 and 15. Click the
Add selection button to include it in the atlas.

Next we’ll choose the 100k topo mapsource and select a larger area (zoom levels can have different
coverage areas if desired). Check the boxes for Zoom Levels 13 through 8, then click Add selection. Notice
how this appears in the Atlas Content box.
Finally, we’ll zoom closer and choose the NJGIN 2015 Natural mapsource, check boxes 16 through 19 and
click Add selection again.

Click the Create Atlas button and all of these maps will be combined into one file for use in the
BackCountry Navigator app. The result will be a map that shows the 100k topo when you zoom way out.
When you zoom in farther, it will show a 24k topo of a smaller area. And zooming in farther still will show
2015 aerial imagery for the area immediately around the lake.

We can add more maps if desired, or use different selection techniques such as polygon selection (see
Section 4.3.3) to keep the file size smaller.

4.6.0 A real world atlas example

This example uses Boyd’s Map of the Pines HD available here:

https://boydsmaps.com/boyds-map-of-the-pines-hd/

The same techniques can also be used with any other map.

Let's say you plan to drive around the Pine Barrens a bit and then go for a hike in the Parker Preserve, but
you have limited space on your phone. We'll start by creating a new atlas named "My Pines Map" in the
Guru (formerly Galileo) Offline Maps format.
4.6.1 Make a rectangular selection

Draw a rectangle around the core of the Pines and check the boxes for zoom levels 11 through 15. This will
provide a medium level of detail while keeping the file size small. Click the button to add your selection and it
will appear in the Atlas Content section on the left.

4.6.2 Add another selection using a polygon

                                                Switch to polygon selection mode and draw a shape around
                                                the portion of the Parker Preserve where you plan to hike.
                                                Zoom in to level 17 with the mouse wheel so you can create
                                                a precise polygon. Use the right mouse button to drag the
                                                map around as you work

                                                Polygon mode allows you to include only the area that you
                                                need, resulting in a smaller map file.
Zoom back out with the
mouse wheel to show the
entire polygon and check
the boxes for zoom levels
16 and 17. Now add this
selection to the atlas. Notice
that both of your selections
are now listed in the Atlas
Content section.
4.6.3 Create the atlas
Click the Create Atlas button. Creation only took about 15 seconds on my computer and resulted in a file of
about 400 megabytes
Here's an example of the amount of detail you would see at level 15 in the Guru (formerly Galileo) app as
you drive.And this is the amount of detail shown at level 17 during your hike. Section 5: Making maps for desktop computer software 5.1 Exporting maps for Google Earth This example uses the NJGIN Map Access package from https://boydsmaps.com/njgin-map-access/ , but the same technique can be used with any map Start a new atlas using the Google Earth Overlay (KMZ) format.
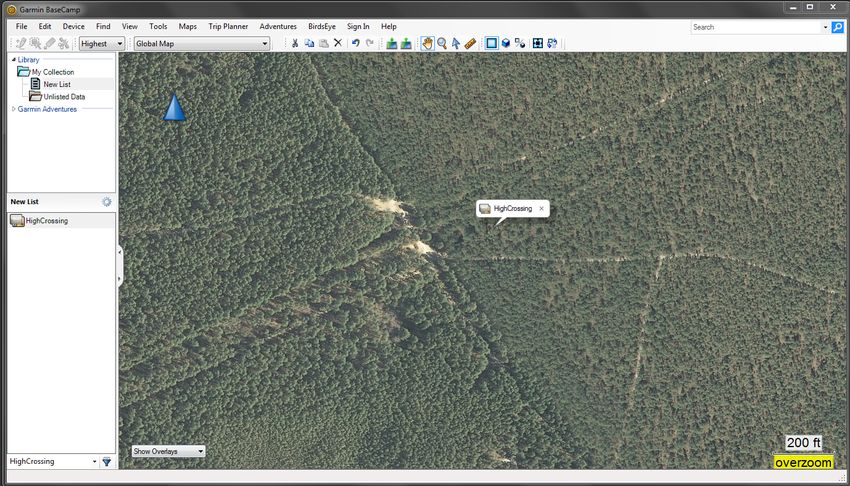
In this example we’ll make a map of the High Crossing area in Southern New Jersey using the NJGIN 2012
Natural Color mapsource. Choose only one zoom level – in most cases this should be the highest level.

Select the desired area, check the Zoom Level 19 box then click Add selection. Now click Create Atlas
and wait for the tiles to download.

When completed, you will find the .kmz file inside a time-stamped folder.
Double-click the file and Google Earth automatically zooms to the location of your map. This map will
contain the full amount of detail available in the original imagery, and you can over-zoom if you want to get
even closer.

5.2   Exporting maps for Garmin Basecamp

The procedure is the same as Google Earth: start a new atlas using the Google Earth Overlay (KMZ) format

                                                                              Select all or part of the map
                                                                              using one of the techniques
                                                                              discussed earlier. Choose only
                                                                              one zoom level – in most cases
                                                                              this should be the highest
                                                                              available level.
Add your selection and create the atlas. Note: Garmin handheld GPS units require special map size settings and only accept a limited number of map tiles. Garmin Basecamp does not have these limitations. The map we have created in this example is not compatible with Garmin GPS units but it is compatible with Basecamp. Open Garmin Basecamp. You will probably want to create a new list, but you could also import it into an existing list if you prefer. In this example, we'll create a new list. Now select the list in the sidebar and import the map into it.
You should now see your map in Basecamp.

Section 6: Using MOBAC with a Garmin handheld GPS
6.1   Is your GPS compatible?

These devices are not compatible: Nuvi Series, Drive Series (except DriveTrack), Dezl Series, RV Series,
Zumo 390/395/660, GPSMap 60, GPSMap 76, eTrex Vista, eTrex Legend and other old devices.

These devices accept a maximum of 100 map tiles: Colorado, Dakota, Oregon 200, 300, 400, 500 and 700
series, GPSMap62, GPSMap 78, Edge 510, 800, 810, Rino 600, eTrex 20/20x, eTrex 30/30x, eTrex Touch,
Zumo 590/595, Astro 320, BMW Motorad Nav V

These devices accept a maximum of 400 map tiles: DriveTrack 70, DriveTrack 71

These devices accept a maximum of 500 map tiles: GPSMap 64, Montana, Alpha 100, Monterra, Oregon
600, GPSMap 276cx?, GPSMap 66?

6.2   Change the map size setting
Before creating your atlas, go to the Mobile Atlas Creator settings and click on the Map size tab. Select
1024 from the dropdown menu. This step is essential. It forces creation of the 1024x1024 map tiles that
are required for Garmin handheld devices. If you are only going to use MOBAC to create maps for a Garmin
handheld, you can leave the map size set to 1024 all the time.
If you also use MOBAC to create maps for other purposes, I suggest that you change the Map size back to
1048575 when you aren't making Garmin Custom maps. The 1024 size setting will not work properly
with most other apps.

6.3   Create the atlas

Create a new atlas: you can use either the Garmin Custom Maps or Google Earth Overlay format. The
only difference (as far as I can tell) is that the Garmin format gives an error message if you try to export
more than 100 map tiles. This is helpful if your device only accepts 100 tiles (see list above). But if your
device accepts 500 tiles and you want to make the largest possible map, you must use the Google format.

You must use rectangular selection mode, polygon selection mode does not work properly for Garmin.
Select only one zoom level. Typically you will want the highest numbered zoom to show the most detail.
However using a lower zoom level will allow the creation of larger maps with less detail, which might be
better for some purposes.

You’ll need to be careful not to create a map with more tiles than your device can handle - see the list in
Section 6.1 above - most Garmin handhelds can only accept a total of 100 map tiles. If you create too many
map tiles, anything beyond the limit will be ignored.

Unfortunately, the only way to find how many tiles you have selected is to add your selection to the atlas.
The number of tiles displayed below the zoom levels is not the same as Garmin's definition of a map tile.
After adding your selection to the atlas you can right-click on it and choose item properties to display the
number of tiles (MOBAC calls this "Map count"). Alternately, just hover your mouse above the selection and
a pop-up will show the Map count.

If the map count is too large or too small, delete it from the atlas by right-clicking it in the Atlas Content
window, then make a new selection. It may take several tries to get it right.

6.4    Install the map on your GPS

                                                                After creating the atlas, connect your handheld
                                                                GPS to your computer and browse to the
                                                                CustomMaps folder. It will be inside the Garmin
                                                                folder. Copy the .kmz file from the atlas folder
                                                                on your computer to the CustomMaps folder on
                                                                the GPS. Note that MOBAC creates a new
                                                                time-stamped folder each time you export a
                                                                .kmz file. You must open this folder and only
                                                                copy the .kmz file itself to the GPS.
Remember, you cannot install more maps tiles on the device than its tile limit (either 100 or 500, depending on model). Older Garmin handhelds only permit the use of one custom map. You can have multiple .kmz files (up to the tile limit) but they will all be grouped together under a single Custom Maps menu item on the GPS. Newer handhelds allow you to enable/disable individual .kmz files. However, all of the files together cannot contain more map tiles than the device's limit. 6.5 Enable the map on the GPS On your GPS, go to the Map Setup menu and choose Map Information > Choose Map (the name of this menu may vary by device, these screenshots are from a Montana 600). Enable your custom map. You may need to zoom to .2 miles or closer in order to see the map This can vary depending on the resolution of the map you have created. If you enable a traditional Garmin map on the device at the same time (such as City Navigator), its roads and other features will be drawn on top of the custom map.
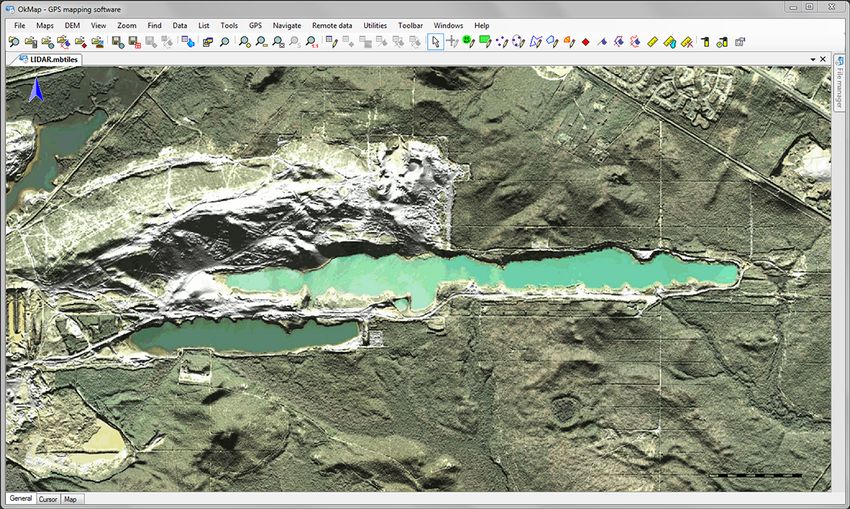
6.6    For advanced users only: getting around Garmin’s map size limit

While “custom maps” (.kmz files) are limited to a maximum of 100 tiles and 32MB on many handhelds,
Garmin’s proprietary Birdseye imagery format (.jnx files) supports 50,000 tiles and files as large as 4gb.
Thanks to reverse-engineering, you can now create your own .jnx files, but there’s a caveat and the process
isn’t very intuitive. The caveat is that you must have an active Birdseye subscription for the GPS device.
Several of Garmin’s premium models include a free subscription to Birdseye. You may purchase Birdseye
separately for $30/year

https://buy.garmin.com/en-SG/digital/p/70144

Birdseye can be used on any computer, but you’ll need an active subscription to transfer the imagery to your
GPS, and the subscription is tied to a single device. But once you’ve associated the .jnx files with your
device, they will continue to work even if you don’t renew the subscription. We will use OkMap software for
Windows to create the .jnx files. You’ll need the paid version, which currently costs about $22.

https://www.okmap.org/default.aspxhttps://www.okmap.org/default.aspx

Use Mobile Atlas Creator to create an atlas in MBTiles SQLite format. Use only one zoom level. Choose
File > Load > Map in OkMap and select MBTiles from the dropdown menu to open your atlas file.

After loading your file, choose Save > Map and select JNX Birdseye 3 from the dropdown Save as type
menu. There are limits to the size file that OkMap can process, so I suggest trying a small map for starters.
If you want to cover a large area, break it down into smaller sections and create separate files. They will all
be grouped together automatically on the GPS.

Now you need to convince Garmin’s servers that this is a valid Birdseye file. Basecamp will not allow you
import a .jnx file directly. So, we will copy the .jnx file to the ~\Garmin\Birdseye folder on the GPS and start
Basecamp. When you click on the GPS in the sidebar, Basecamp should show your .jnx file, and you can
view the map on your computer to confirm that it works. Drag the .jnx file from the GPS to a list in your
Basecamp collection to store it on the computer, then close Basecamp.

Now you must delete the original .jnx file from the Birdseye folder on your GPS. After deleting, open
Basecamp again, locate the .jnx file you previously copied to your collection and drag it back to the GPS.
This forces Basecamp to contact Garmin’s servers, validate your Birdseye subscription and authorize the file
for your GPS. If this succeeds, delete the copy of the .jnx file from your collection because it is hasn’t been
authorized. The version you want to save is the one from the GPS itself, because it has already been
associated with your GPS device. This will allow you to copy the .jnx file back to the GPS in the future
without contacting Garmin’s servers, which is essential if you want to continue using the file after your
Birdseye subscription has ended.

You are now ready to use your “home-made” .jnx file(s). One issue is that Garmin treats all Birdseye
imagery the same. So, if you also have “real” Birdseye files on your GPS, they will be mixed in with your own
.jnx files and the maps will interfere with each other. The only way to deal with this is to use separate
memory cards for different Birdseye maps, and physically remove the card when you don’t want to use
those files.

See this site for more information about .jnx files, including additional software and techniques that can be
used: http://whiter.brinkster.net/en/JNX.shtml
Section 7: Using your maps on a smartphone or tablet
Note: Galileo Maps is now called Guru Maps

7.1.0 Exporting maps for the Guru (Galileo) app on Android or iOS

                                                                           First you will need to install the
                                                                           app on your phone or tablet.
                                                                           Guru (formerly Guru (formerly
                                                                           Galileo) works exactly the
                                                                           same on either Android or iOS,
                                                                           but the method for installing
                                                                           maps from your computer is
                                                                           different.

                                                                           Search for Guru in Google
                                                                           Play on Android or the App
                                                                           Store on iOS.

                                                                           Get the free version, it has a 5
                                                                           day demo of all the Pro
                                                                           Features. After 5 days you can
                                                                           either watch ads to extend the
                                                                           free trial or upgrade to the Pro
                                                                           version for three dollars

                                                                           You will find the Guru (formerly
                                                                           Galileo) user manual here:

https://galileo-app.com/manual.html

Note: the screenshots in this section were taken on an iPhone 6s Plus and a Samsung Galaxy Tab 4

In Mobile Atlas Creator, create a new atlas in either the Galileo Offline Maps or MBTiles SQLite format
(both are compatible).
Use the techniques discussed earlier to select the desired area of the map. Rectangular selection is the easiest, but polygon mode will allow you to choose only the areas you really need and keep the file size down. You can add as many zoom levels as desired - for the best results, include all zoom levels up to and including the highest one. You will find the file in the atlases folder after you create it. 7.1.2 Installing the map on an Android device using a Windows computer Connect your device to your computer and browse to Android > data > com.bodunov.galileo > files > Imported Now drag the map file from the atlases folder on your computer to the Imported folder on your phone or tablet. Create a folder named Imported if it doesn’t already exist, your map won’t be recognized unless it’s in the Imported folder.
7.1.3 Installing the map on an Android device with a Macintosh computer

Download the free Android File Transfer program from

https://www.android.com/filetransfer/

Open the Android File Transfer program on your Mac, connect your device and browse to

Android > data > com.bodunov.galileo > files > Imported

Now drag the map file from the atlases folder on your computer to the Imported folder on your phone or
tablet. Create a folder named Imported if it doesn’t already exist, your map won’t be recognized unless it’s
in the Imported folder.
7.1.4 Installing the map on an iOS device with a Windows or Macintosh computer

You must have iTunes installed on your computer. Connect your device, start iTunes and click the small
phone icon

                         Now click the file sharing button in the list that
                         appears below your phone on the left side of the iTunes window

Click on Guru (formerly Galileo) in the Apps list in iTunes, then drag the map file from the atlases folder
on your computer to the Guru (formerly Galileo) Documents box in iTunes
7.1.5 Enabling the map on your Android or iOS device
The first time you open it, Guru (formerly Galileo) will ask if
you want to download a vector map. This is recommended
but it isn't required.
Tap the gear icon on the right side of the map to access the
settings menu.
Tap the Map Source button
Select your map file on the Map Source screen to
enable it.
Return to the main screen and your map is now ready to use.7.2.0 Exporting maps for the Map Plus App (iOS only)
Download Map Plus from the App Store.
The free version includes a trial of all the advanced features, but after
the trial period you will need to make an in-app purchase to continue
using your own maps. At minimum you will probably want to remove the
advertisements and get the enhanced map, which cost about $5.00 as of
this writing.
You will find the Map Plus user manual here:
http://duweis.com/en/mapplus_guide.html
In Mobile Atlas Creator, create a new atlas in the MBTiles SQlite format.
Use the techniques discussed earlier to select the desired area of the map. Rectangular selection is the
easiest, but polygon mode will allow you to choose only the areas you need to keep the file size down. You
can add as many zoom levels as desired - for the best results, include all zoom levels up to and including
the highest one. You will find the file in the atlases folder after creation.7.2.1 Installing the map with either a Macintosh or Windows computer
Connect your device to your computer, start iTunes and click the small phone icon
Now click the file sharing button in the list that
appears below your phone on the left side of the iTunes window
Click on Map Plus in the Apps list in iTunes, then drag the map file from the atlases folder on your
computer to the Map Plus Documents box in iTunes7.2.2 Using the map in the Map Plus app Open Map Plus and tap the wrench icon at the bottom right of the screen, then tap User Data. Press the Add button at the bottom of the User Data screen, then press Import from file. Select your map file on the Documents page and make sure that Delete Original File and Show after import are both checked. Tap the Continue button at the bottom of the screen.
The map is now ready to use when you return to the main screen.
                       You may need to drag/zoom to the map coverage area.

7.3.0 Exporting maps for the BackCountry Navigator app (Android only)

                                 Download the Backcountry Navigator app from Google Play.

                                 The free version is fully functional, but ads are displayed at the
                                 bottom of the screen.

                                 Visit the Backcountry Navigator website here:

                                 http://backcountrynavigator.com
Create a new atlas in the BackCountry
Navigator (SQLite) format. The BackCountry
format is identical to the Guru (formerly Galileo)
atlas format; they both create .sqlitedb files that
can be used interchangeably.
Use the techniques discussed in earlier to select
the desired map and area. Rectangular selection
is the easiest, but polygon mode will allow you to
choose only the areas you need and keep the file
size down. You can add as many zoom levels as desired - for the best results, include all zoom levels up to
and including the highest one. You will find the file in the atlases folder after you create it.
7.3.1 Installing the map with a Windows computer
Connect your phone or tablet to your
Windows computer and browse to find
the Download folder (this example
shows a Samsung Galaxy Tab 4 with
Windows 7).
Drag your map file from the atlases
folder to the Download folder.
7.3.2 Installing the map with a Macintosh
Download and install the free Android File Transfer program:
https://www.android.com/filetransfer/Connect your phone or tablet to your Mac and open Android File Transfer. Browse to find the Download
folder.
Drag your map file from the atlases folder on your Mac to the Download folder on your Android device.
7.3.3 Using your map in the Backcountry Navigator app
Open Backcountry Navigator and
tap the Map Layers button.
Tap PreBuilt Map. If your map is
not already listed, tap the Browse
button and locate it in the
Downloads folder.Your map is now ready to use in Backcountry Navigator. Section 8: Using Mobile Atlas Creator with other apps and devices Here are some mini-tutorials for additional apps that have been confirmed to work with Mobile Atlas Creator. For a current list with screenshots of compatible apps on all platforms, see the following link: https://boydsmaps.com/mobile-atlas-creator/ If you’ve read through Sections 3 through 7, you already know how to select a portion of the map, choose zoom levels and create an atlas. So, for another app, you just need to know the correct atlas format and how to install the map. There are only a few ways to install a map: On an iPhone or iPad, use iTunes file sharing on the Mac or PC. See Section 7.2.1 for an example. On an Android phone or tablet, use Windows Explorer to copy the map file to the correct folder (this will be app-specific). See Section 7.3.1 for an example. On an Android phone or tablet with a Mac, use the free Android File Transfer program to copy the map to the correct folder (which will be app-specific). See Section 7.3.2 for an example. For desktop software running on a Macintosh or Windows computer, there should be an Open or Import command in the File menu where you can select the atlas you have created. Unless otherwise noted, all mobile apps work on tablets as well as phones in either landscape or portrait orientation
8.0.1 TwoNav (Windows, iOS and Android)

http://manual.twonav.com/manual/twonav_31_en/wiki_twonav_smartphone/

TwoNav is integrated with CompeGPS Land software for Windows and the Mac, and if you purchase from
their website (about $6), you get an installation key that allows you use all three versions.

Use the TwoNav (RMAP) Atlas format. RMAP has some limitations and you may get a warning depending
on your selection method. RMAP supports multiple zoom levels, but requires the size of all layers to be the
same. This doesn’t usually happen when you create an atlas unless you take special steps.

First, determine how many levels you want. Let’s say you want to create an atlas with zoom levels 10
through 16. In the MOBAC dropdown menu next to the zoom slider, choose Grid Zoom 10. Now use
rectangular selection mode to choose the area you want. In other words, you should set Grid Zoom for the
lowest zoom level you want to include in the atlas. This should force the creation of layers of the same size.
8.0.2 OruxMaps (Android)

http://www.oruxmaps.com/cs/en

This is app offers a wealth of features and customization of the user interface. It’s no longer available from
Google Play, so you will have to install the APK version.

Users who want something simple may find it too complex however. Multiple zoom levels are supported.
Use the OruxMaps SqLite atlas format (do not use the plain OruxMaps format)

You choose the storage location for your maps in the OruxMaps Settings > Maps > Maps Directory menu.
MOBAC will create a time-stamped atlas folder that contains another folder with the map files inside.

Let’s say your atlas is named Topo. Copy the folder named Topo to the proper directory on your phone. It
should contain two files named Topo.otrk2.xml and OruxMapsImages.db.

                              8.0.3 Locus Map (Android)

                              http://www.locusmap.eu

                              Locus is another app offering a huge number of features and complete
                              customization of the user interface. It’s very popular with advanced users.
                              Choose the Rmaps SQLite atlas format, you may use multiple zoom levels.

                              Tap the map icon at the top right corner of the screen, then tap the OFFLINE
                              tab. The default map file location is shown here.

                              You can also tap the (+) button at the bottom right of that screen, then Add
                              external maps and ADD NEW FILE/DIRECTORY. Now choose any location
                              you prefer for map storage.
8.0.4 OsmAnd (iOS and Android)
https://osmand.net
Use the OSMAND SQLite atlas format with this app. You can use multiple
zoom levels.
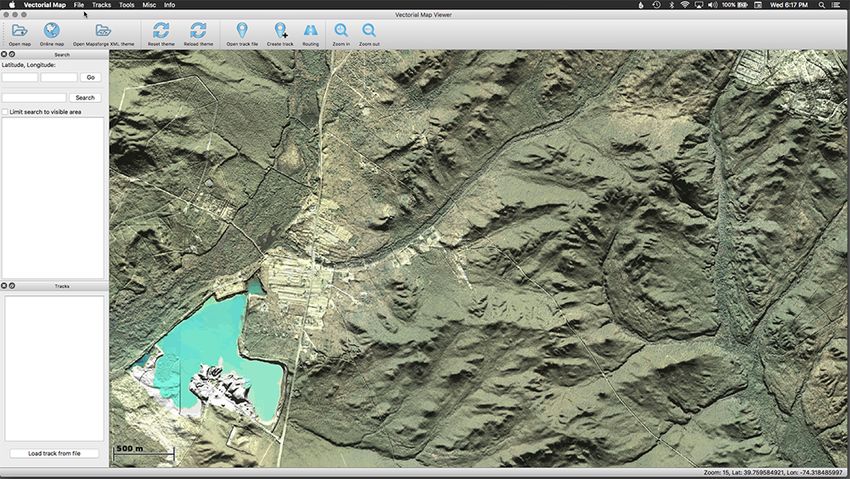
8.0.5.1 Vectorial Map (Windows, Macintosh and Linux)
This software is no longer available, but a functional trial version may still be downloaded here:
https://web.archive.org/web/20160416005605/http://www.vectorialmap.com/
Use the OSMAND SQLite atlas format, you can use multiple zoom levels. See this video for an example:
https://youtu.be/6dkzYMcN3n48.0.5.2 Vectorial Map (iOS, Android)
https://web.archive.org/web/20160416005605/http://www.vectorialmap.com/
Use the OSMAND SQLite atlas format, you can use multiple zoom levels. See
this video for an example:
https://youtu.be/6dkzYMcN3n4
Last time I checked, this app was still available at the iOS app store but not at
Google Play
8.0.6 Cartograph (Android, iOS, Windows, Macintosh, Linux)
https://www.cartograph.eu
This app is available for all
platforms, but I have only tested
the iOS version.
Use RMaps SQLite or MBTiles
SQLite Atlas format. Multiple
zoom levels are supported.8.0.7 DIY Maps (iOS only)
http://www.builtsoft.com/diy-map-gps/
One limitation of this app is that it only works in portrait mode Use the MBTiles
SQLite atlas format, you can use multiple zoom levels.
Builtsoft provides a MOBAC tutorial, including two videos here:
http://www.builtsoft.com/how-to-create-offline-map/
8.1.1 CompeGPS Land (Macintosh and Windows)
https://www.twonav.com/en/software/land
This program runs on Macs and PCs and provides live navigation if you connect a gps receiver. There are
many advanced features for opening GIS files and creating your own maps, and it can exchange all kinds of
data with the TwoNav app. Although it is rather expensive, there’s fully functional 30-day free trial. After the
trial ends, you’ll still be able to open your maps, but won’t be able to use the advanced features. Use the
TwoNav (RMAP) atlas format, as described in Section 8.1 above.8.1.2.1 OziExplorer (Windows)
https://www.oziexplorer4.com/w/
OziExplorer is one of the oldest Windows mapping and navigation programs. Use the OziExplorer (PNG &
MAP) atlas format. Choose only one zoom level, you will usually want to use the highest level.
8.1.2.2 OziExplorer CE (Windows CE)
https://www.oziexplorer4.com/ozice/oziexplorerce1.html
Many older automotive GPS units from
Magellan, Navigon, Mio and other
companies were based on the Windows
CE platform.
The MioPocket package can help you
“unlock” these devices to run alternative
software, such as OziExplorer CE. More
information on MioPocket can be found
here:
http://www.gpspassion.com/forumsen/topi
c.asp?TOPIC_ID=136798Use the OziExplorer (PNG & MAP) atlas format with only one zoom level to create an OziExplorer map. You will then need to convert this file for the GPS device with the free img2ozf program available here: https://www.oziexplorer4.com/img2ozf/img2ozf.html 8.1.2.3 OziExplorer Android https://www.oziexplorer4.com/android/oziexplorer_android.html This software is very similar to OziExplorer CE, and map preparation is the same. It is not available from the Google Play store, so you will need to install the APK version. Use the OziExplorer (PNG & MAP) atlas format with only one zoom level to create an OziExplorer map. You will then need to convert this file for the GPS device with the free img2ozf program available here: https://www.oziexplorer4.com/img2ozf/img2ozf.html
8.2.1.1 OkMap (Windows)
https://www.okmap.org/en/en_okmapDesktopFeatures.aspx
OkMap is a powerful (albeit a bit quirky) program with many advanced features for making and converting
maps. It can also be used for live navigation. It can use several file formats, including MBTiles SQLite. One
unique feature is the ability to create .jnx files that are compatible with Garmin Birdseye. This provides a way
to get around Garmin’s strict map size limitations, as discussed in Section 6.6 above.
8.2.1.2 OkMap Mobile (iOS)
https://www.okmap.org/en/en_okmapMobileFeatures.aspx
This app seems somewhat limited, although it has
some unique augmented reality (AR) features. Use
the Google Earth Overlay (.kmz) atlas format. I had
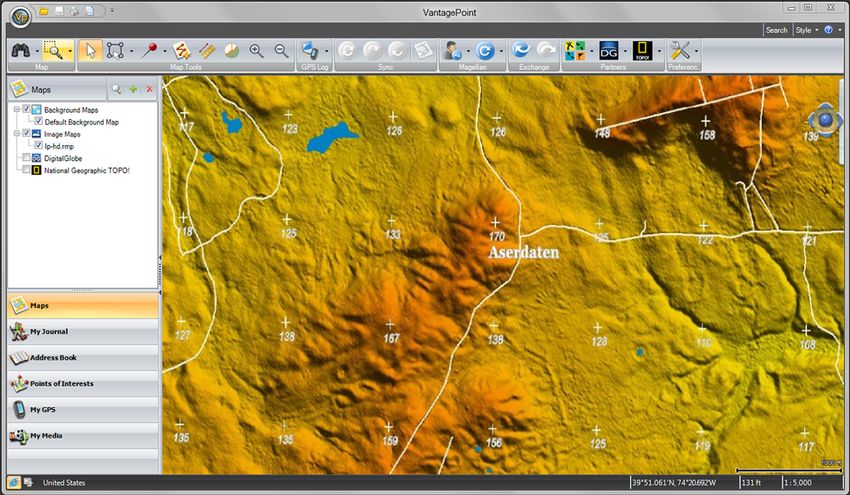
problems with the app crashing if I zoomed in too far.8.3.1 Magellan Vantage Point (Windows)
https://service.magellangps.com/M0100/FileReader_113780_America%20MAGELLAN_English%20Magella
n.html
This is the software for managing Magellan handheld GPS devices. It’s been discontinued and Magellan no
longer makes handhelds, but the software is still available at the link above. Use the Magellan RMP atlas
format. Multiple zoom levels are supported.
8.3.2 Magellan handheld GPS units
The Magellan Triton and Explorist devices have all been discontinued, but
they’re compatible with Mobile Atlas Creator. Use the Magellan (RMP) atlas
format. Multiple zoom levels are supported, but it’s not clear how many, and
this may vary depending on your device. But you should use multiple levels,
or you’ll have to zoom way in to view the map. Try three levels.
When the atlas is ready, copy it to a SD card, insert it in the GPS and enable
it from the Maps menu.Appendix A: Accessing classic USGS 24k topo maps in Mobile Atlas Creator
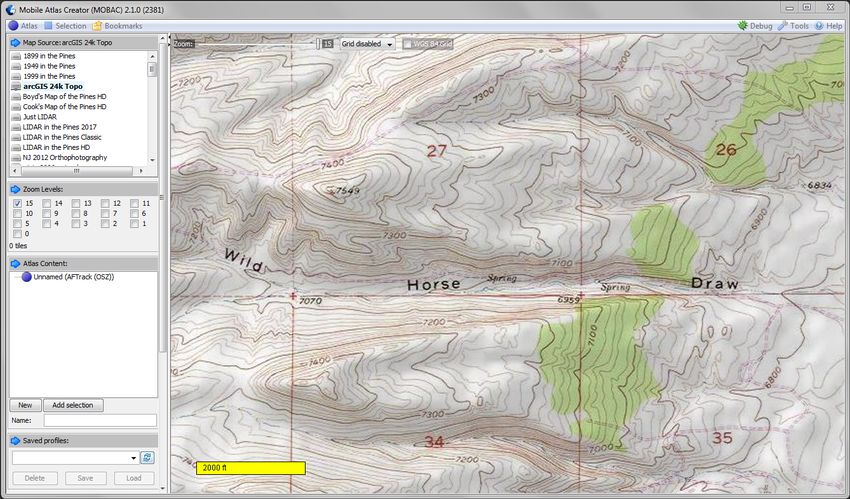
Scans of the original paper 7.5 minute (24k) topographic maps are available online from ArcGIS. You may
recognize these maps (with shaded terrain) as the old National Geographic TOPO!
You’ll need to create a custom mapsource to access these maps. First, close Mobile Atlas Creator if it is
open. Now, select the code below and copy it to the clipboard on your computer.
arcgis 24k topo
0
15
png
https://server.arcgisonline.com/ArcGIS/rest/services/USA_Topo_Maps/MapServer/tile/{$z}/{$y}/{$x}
None
#000000
Paste the code into a text editor such as Notepad on Windows or TextEdit on the Mac. In TextEdit on the
Mac, use Format > Make Plain Text after you paste the code.
Save the file as topo.txt, change the name to topo.xml and place it in your mapsources folder. You may
now choose the arcgis 24k topo mapsource to access USGS 24k topographic maps of the entire US.You can also read