EGGS 101 Natural goodness made easy - Learn how to prepare, cook and enjoy your favourite classic egg dishes.
←
→
Page content transcription
If your browser does not render page correctly, please read the page content below
EGGS 101
                                                       Natural
                                                       goodness
                                                       made easy.

Learn how to prepare, cook and enjoy your favourite classic egg dishes.
We all know eggs are good for you. They’re an
excellent source of protein and key nutrients
and extremely versatile in the many ways they
can be prepared. The best thing about eggs
though? They’re delicious. In these pages you’ll
find step-by-step techniques, tips and recipe
ideas to make sure you get perfect, delicious
eggs every time. By learning just a few basics
you can make a wide range of simple-to-
prepare meals for as few or as many people as
you’d like. So go on and Get Cracking!

Subscribe to eggs.ca today to create your own
online recipe box and receive free recipes
delivered to your email every month!

For more egg recipes and cooking tips visit eggs.ca.
4    HARD-COOKED EGGS

6    FRIED EGGS

8    POACHED EGGS

10   SCRAMBLED EGGS

12   OMELETTES

16   MICROWAVED EGGS

18   QUICHE

22   FRITTATAS

26   SOUFFLÉS

30   CRÊPES

34   MERINGUE

36   PICKLED EGGS

38   BASIC COOKIE DOUGH

41   NUTRITION

45   EGG HANDLING

50   REFERENCE SHEET

                          3
HARD-COOKED EGGS
making eggs on the stovetop is easy. all you need is a pot, some water and of course, eggs!
hard-cooked eggs are often referred to as “hard-boiled” eggs, but eggs cooked in their shells
should never really be boiled as it can cause the shell to crack and make the whites rubbery.
There’s no shortage of methods for making hard-cooked eggs. we’ve tested dozens and this
one is our favourite because it’s easy to follow and results in perfect eggs every time.

    YoU wiLL Need:
    pot with lid                          eggs
    Timer (try our egg Timer app on       water
       your mobile phone)                 bowl of ice water (optional)
    slotted spoon

                                               4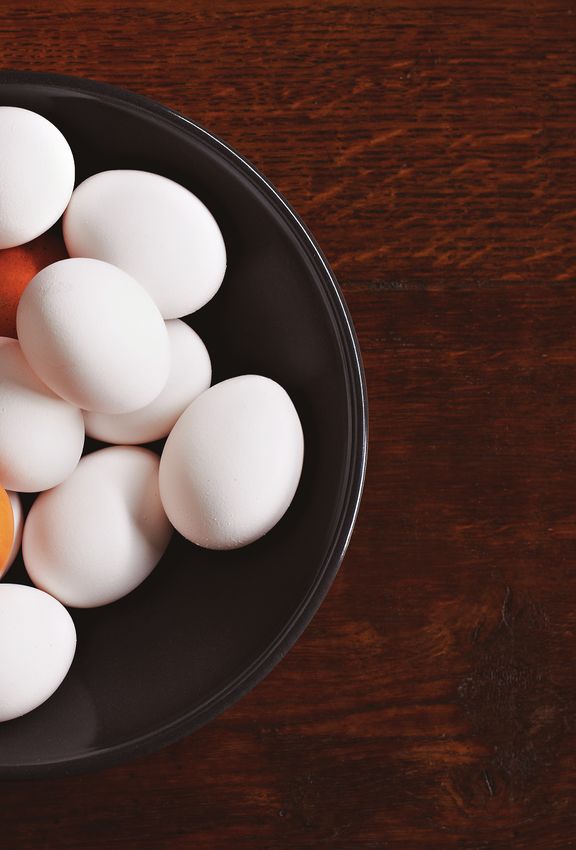
sTeps

1      Place the eggs in a single layer on the bottom of the pot and cover with cold
       water. The water should be about an inch or so higher than the eggs. Cover
       the pot and bring to a boil over medium-high heat.

2      When the water begins to boil, remove the pot from heat and let stand for
       18 to 23 minutes. For a softer yolk, reduce the time to 3 to 4 minutes, and
       11 to 12 minutes for a medium yolk.

3      Drain and immediately run cold water over the eggs until cooled or remove
       the eggs with a slotted spoon and place in an ice bath to halt cooking.

serviNg sUggesTioNs
Use hard-cooked eggs to make devilled eggs, egg salad or serve with a little salt and pepper for
a tasty snack.

Tips
To peel a hard-cooked egg, crack the shell all over by tapping the egg on a hard surface, then roll
the egg between your hands to loosen the shell. begin peeling at the large end under running
water to help remove the shell.

For easiest peeling, use eggs that have been in the refrigerator the longest. The less fresh the egg,
the easier it is to peel.

hard-cooked eggs in their shell will keep for 1 week in the fridge in a sealed container. Try
cooking a dozen eggs on sunday to have a supply of hard-cooked eggs for the week ahead.

       watch how to make hard-cooked eggs at eggs.ca/hard-cooked.

                                                  5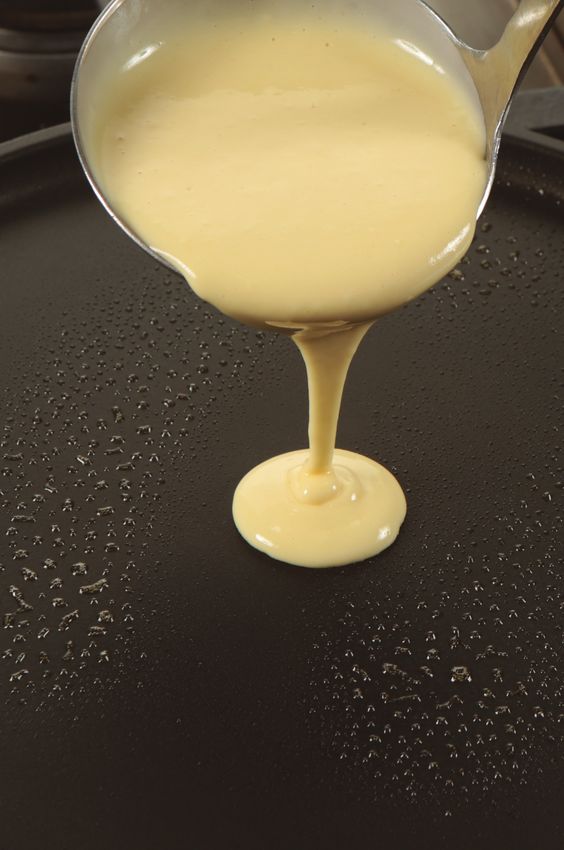
FRIED EGGS
Fried eggs aren’t just for breakfast anymore! They can add gourmet flair as well as protein
to all kinds of meals, such as salads, sandwiches and burgers. There are 4 basic styles of
fried eggs, depending on the texture of yolk you prefer: sunny-side-up, over-easy, over-
medium and over-well. This technique isn’t hard, and once you learn the proper way, you’ll
master it in no time.

    YoU wiLL Need:
    Non-stick or regular pan      eggs
    small bowl                    cooking spray, butter or oil
    spatula                       salt and pepper (optional)

                                              6
sTeps

1      Heat a pan over medium heat. Coat your pan with cooking spray (if using
       a regular pan only), butter or oil, based on your preference. If using butter,
       allow enough time for it to melt and if using oil give it 30 seconds to heat up.

2      Crack an egg into a bowl (if frying multiple eggs, you can either crack them
       each into their own bowl or you can reuse the same bowl) and drop the egg
       gently into the pan. Season lightly with salt and pepper (optional).

3      Let the egg cook until the white is set and the edges begin to curl, about
       3 to 4 minutes. Resist the urge to fuss—your eggs will turn out better if
       they’re left alone. For sunny-side-up, simply slide the egg onto a plate. For
       over-easy, over-medium or over-well eggs, carry on to the next step.

4      Use a spatula to gently flip the egg over. You don’t need to get it all the way
       under the egg, but make sure it’s under the yolk before you flip. Cook for about
       30 seconds more for over-easy, 1 minute for over-medium and a minute and a
       half for over-well. Flip once more and slide onto a plate.

TYpes oF Fried eggs
sUNNY-side-Up: The egg is fried with the yolk up and is not flipped.
over-easY: The egg is flipped and the yolk is still runny.
over-mediUm: The egg is flipped and the yolk is only slightly runny.
over-weLL: The egg is flipped and the yolk is cooked hard.

                                                 7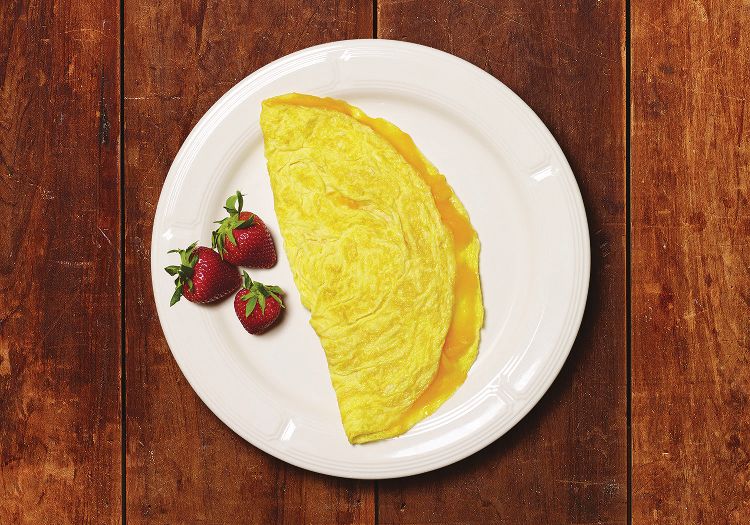
POACHED EGGS
Poached eggs have a rather unfair reputation for being difficult to cook. The truth is, with
the proper technique and a little practice, poaching an egg is an easy way to turn a salad
into a meal or a breakfast into a memorable occasion. The main problem most people
run into with poached eggs is creating wispy, thin whites instead of the perfect round
masterpiece that you get at a restaurant. Follow our step-by-step instructions and you’ll
get a perfect poached egg every time.

    YoU wiLL Need:
    saucepan                                       eggs
    small bowls (1 per egg being poached)          water
    Timer (try our egg Timer app on your           salt and pepper (optional)
       mobile phone)
    slotted spoon
    paper towel

                                               8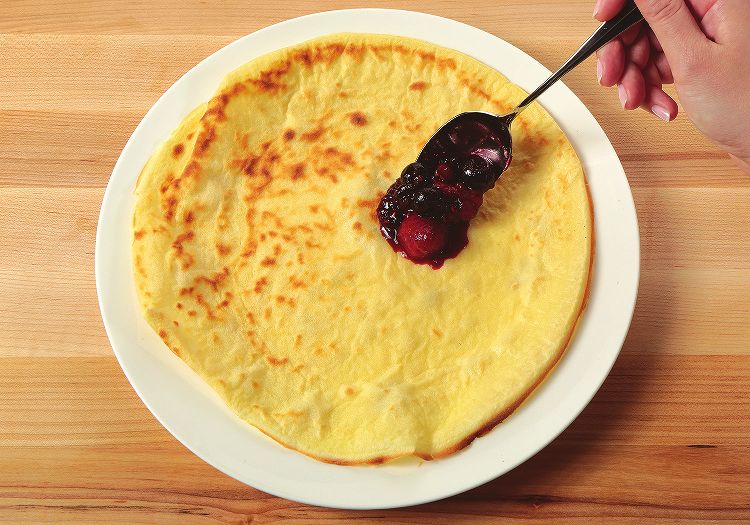
sTeps

1      Fill a saucepan with 3 inches (8 cm) of water and bring it to a boil. Meanwhile,
       crack each egg into its own small bowl so they’re ready to go when the water
       reaches the right temperature.

2      When the water reaches a boil, reduce it to a gentle simmer. Holding the bowl
       just above the simmering water, gently slip the egg into the water. Drop in
       the second egg in the same way and try to keep track of the order they went
       in. The first egg in should be the first egg out. Remember to use more water if
       you’re cooking more eggs so the water temperature doesn’t drop too much.

3      Take the eggs out after 3 minutes for soft-poached or let them cook for
       5 minutes for a more solid yolk. Remove with a slotted spoon and drain as
       much of the water as possible. The egg should wobble (but just a little) when
       you move the spoon around. Place the cooked eggs on a paper towel and
       season with salt and pepper (optional).

serviNg sUggesTioNs
serve poached eggs on toast, as a salad topper or with your favourite pasta for some extra protein.

Tips
if you’re cooking eggs for a crowd, don’t stress. poached eggs can be held in an ice bath for up to
an hour. when it’s time to serve, put them back in the hot water until they warm up (about
45 seconds) and serve.

       watch how to make poached eggs at eggs.ca/poached-eggs.

                                                 9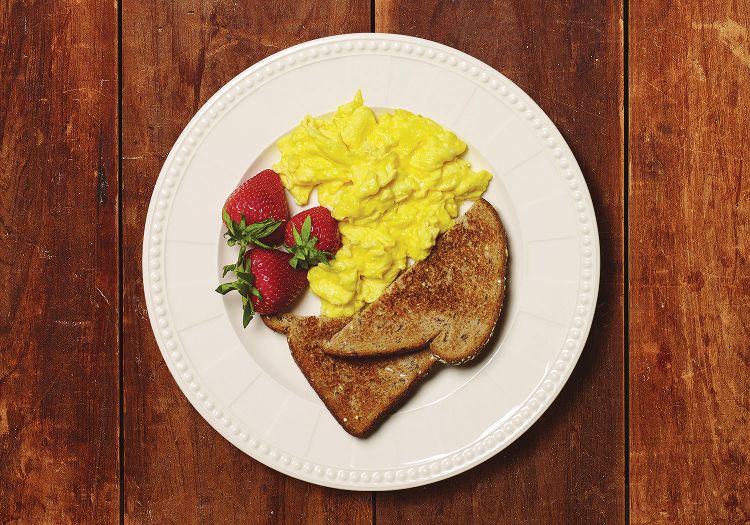
SCRAMBLED EGGS
scrambled eggs are one of the most versatile dishes to prepare. They’re delicious plain,
garnished with finely chopped herbs, or dressed up with caramelized onion, sautéed
mushrooms and grated cheese.

    YoU wiLL Need:
    bowl                           eggs
    whisk or fork                  milk
    Non-stick or regular pan       cooking spray or butter
    spatula                        salt and pepper (optional)

                                              10
sTeps
1 To prepare a single serving of scrambled eggs, crack 2 eggs into a bowl and
whisk in 2 tbsp (30 mL) of milk. Season with salt and pepper, if desired.
2 Heat pan over medium heat. Coat your pan with cooking spray (if using a
regular pan only) or butter based on your preference. If using butter, allow
enough time for it to melt. Pour the eggs into the pan and reduce the heat
to medium-low.
3 Gently move the eggs with a spatula, forming soft curds. Continue stirring
until there is no more liquid egg in the pan, but before the eggs appear dry.
Immediately remove eggs and plate.
serviNg sUggesTioNs
Try adding a bit of your favourite shredded cheese or some chopped fresh herbs, such as chives,
to your eggs just before serving.
watch how to make scrambled eggs at eggs.ca/scrambled-eggs.
11OMELETTES
an omelette is one of the easiest and most inexpensive meals to make and it works
beautifully for breakfast, lunch or dinner. The omelette is a close cousin to the Frittata
(p.22), and there are dozens of variations around the world. The version that most of us
are familiar with is the French omelette: slightly browned on the outside, creamy on the
inside and filled with anything from simple herbs to meat or vegetables.
YoU wiLL Need:
bowl 2 eggs
whisk or fork 2 tbsp (30 mL) water
Non-stick pan cooking spray, butter or oil
spatula Desired fillings (e.g.: cheese, mushrooms, green peppers)
salt and pepper (optional)
12sTeps
1 Using a whisk or a fork, beat the eggs with 2 tbsp (30 mL) of water. Season
with salt and pepper (optional). Be sure to incorporate the yolk and the white
together well.
2 Heat a pan over medium-high heat. Coat your pan with cooking spray (if using
a regular pan only), butter or oil, based on your preference. If using butter,
allow enough time for it to melt and if using oil give it 30 seconds to heat up.
3 Once the pan is hot, pour in the mixture. As the egg mixture sets around the
edge of pan, use a spatula to gently push cooked portions toward the centre of
pan. Tilt and rotate pan to allow uncooked egg to flow into empty spaces. When
the surface of the egg looks moist but does not move when the pan is jiggled,
it’s ready for filling. Add your filling sparingly—a little goes a long way.
4 Fold the omelette in half with a spatula and let the bottom brown slightly
before sliding onto a plate. If you have any leftover filling, pour the rest on
top of the omelette.
continued on next page >
13OMELETTES
FiLLiNg sUggesTioNs
broccoLi aNd cheese: Fill omelette with 1/2 cup (125 mL) cooked broccoli and 1/2 cup
(125 mL) grated cheese.
pizza: spread half of omelette with 3 tbsp (45 mL) pizza sauce. Top with 5 slices pepperoni,
1/4 cup (60 mL) shredded mozzarella cheese and 1 tbsp (15 mL) grated parmesan.
wesTerN: Coat pan with cooking spray, butter or oil. Sauté 1/4 cup (60 mL) finely chopped ham,
2 tbsp (30 mL) chopped green pepper and 1 tbsp (15 mL) finely chopped onion. Pour in omelette
mixture and cook as directed in the above instructions.
Tips
Using the proper skillet or pan is important for successful omelette making. The ideal skillet for
a 1, 2 or 3-egg omelette is about 8 inches (20 cm) in diameter at the base. it should be shallow
with sloping sides to make it easier to slide the omelette out of the skillet and onto a plate.
It’s important that whatever you’re filling your omelette with is already cooked, as it will not
have time to cook in the pan. it’s also important to make sure that your ingredients are not
going to produce a lot of water when warmed—wet ingredients, such as tomatoes, can create
a watery filling.
watch how to make an omelette at eggs.ca/omelette.
1415
MICROWAVED
EGGS
The microwave is a simple and quick way to make breakfast on a busy morning or a quick
high-protein snack. You can microwave eggs to be soft-cooked, hard-cooked, scrambled or
even poached. Just be sure to use a microwave-safe container, such as a ramekin or our
microwave egg cooker (you can get yours at eggs.ca).

    YoU wiLL Need:

    microwave-safe container, ramekin      1 egg
       or microwave egg cooker             cooking spray, butter or oil
    Fork                                   pinch of salt

                                            16
sTeps
1 Coat a microwave-safe container or ramekin with cooking spray, butter or
oil, based on your preference (if using the microwave egg cooker, no coating
is necessary). Sprinkle a few grains of salt into bottom of container. Salt
attracts microwave energy and helps to cook the egg evenly.
2 Break an egg into the container. Pierce the yolk and white with a fork
4 or 5 times (piercing is necessary to prevent exploding during cooking).
Cover with plastic wrap, pulling back a small area for venting (if using the
microwave egg cooker, place the lid on the base and twist to secure).
For soFT-cooked egg: microwave on high (100% power) for 30 seconds, or on medium
(50% power) for 50 seconds. Let stand for 30 seconds before removing the plastic wrap or lid. if it’s
still undercooked, turn the egg over in the container, cover and microwave for another 10 seconds,
or until cooked as desired.
For hard-cooked egg: microwave on high (100% power) for 40 seconds. Let stand for
30 seconds before removing the plastic wrap or lid. if it’s still undercooked, turn the egg over in
the container, cover and microwave for another 10 seconds, or until cooked as desired.
For scrambLed eggs: add 1 tbsp (15 mL) of milk to the container and salt and pepper if desired.
stir well. microwave on medium-high (70% power) for 90 seconds to 1 minute 45 seconds, stirring
several times during cooking.
Tips
cooking times will vary depending on microwave oven cavity-size, wattage and desired
consistency of yolk. Times provided are for a 1000-watt microwave oven. increase time slightly
for lower wattage; decrease for higher wattage. start with shortest time and increase in 10-second
intervals. Note the time that works best for your microwave oven.
watch how to make microwaved eggs at eggs.ca/microwaved-eggs.
17QUICHE
A basic quiche is one of life’s simple pleasures. The creamy filling and endless choice of
extras (cheese, mushrooms and ham, to name but a few) make it a satisfying and tasty
meal. it can be enjoyed warm as a savoury dinner, or served cold for lunch with a simple
side salad. keep pre-baked pie shells on hand to easily whip up delicious meals the whole
family will enjoy.
YoU wiLL Need:
whisk 4 eggs
bowl pre-baked pie shell
Desired fillings (see variations on the following page
for filling suggestions)
1 1/2 cups (375 mL) cream or milk
salt and pepper (optional)
18sTeps
1 Preheat oven to 350°F (180°C). Sprinkle cheese and any other fillings you’d
like into the bottom of your pie shell.
2 Whisk together the eggs and cream in a bowl until well blended. Season with
salt and pepper (optional).
3 Carefully pour the mixture into the pie shell.
4 Bake for 35 to 40 minutes or until the filling turns a golden brown. To check
doneness, insert a knife into the centre of the quiche. If it comes out clean it’s
done! Let stand for 10 minutes before serving.
variaTioNs
QUiche LorraiNe: combine 6 slices crumbled crisp bacon, 1 cup (250 mL) shredded swiss cheese,
1/4 cup (60 mL) minced green onion, 1/4 cup (60 mL) each green and red pepper strips, 1/4 tsp
(1.25 mL) ground nutmeg and 1/4 tsp (1.25 mL) dry mustard.
mUshroom QUiche: Combine 1 cup (250 mL) sautéed sliced mushrooms, 1/2 cup (125 mL)
shredded cheddar cheese and 1 tsp (5 mL) dried thyme.
ham aNd cheese QUiche: combine 3/4 cup (175 mL) shredded swiss cheese, 3/4 cup (175 mL)
diced cooked ham, 1/4 cup (60 mL) chopped red or green sweet pepper and 2 tsp (10 mL) finely
chopped fresh chives.
continued on next page >
19QUICHE
Tips
To pre-bake the pie shell, line the unbaked shell with a 12-inch (30 cm) square of aluminum foil.
Fill with uncooked rice or dried beans or peas. This will help to minimize shrinkage. cover the rim
of the shell with edges of foil. bake in preheated 450°F (230°c) oven until lightly browned at the
edges, about 10 minutes. Lift out the foil and the rice. cool on a wire rack.
cooked quiche may be refrigerated for up to 3 days or frozen for 1 month.
any leftover egg mixture can be poured into custard cups and baked to make mini quiches.
watch how to make a quiche at eggs.ca/quiche.
2021
FRITTATAS
A frittata is an extremely versatile dish. It’s fancy enough for fine dining, hearty enough
for breakfast and is the perfect way to use up leftovers from last night’s dinner. The
frittata is very similar to an omelette (p.12), the basic difference is the filling is mixed in
with the egg instead of folded. Mostly cooked in the skillet, frittatas are finished in the
oven, resulting in a puffy, slightly browned top.

    YoU wiLL Need:

    whisk                       8 eggs
    medium bowl                 1/2 cup (125 mL) water
    Non-stick or regular        1/8 tsp (0.5 mL) salt
       ovenproof skillet        1/8 tsp (0.5 mL) pepper
    spatula                     cooking spray, butter or oil
                                2 cups (500 mL) filling ingredients (chopped vegetables,
                                   meat, poultry, seafood, or a combination)
                                1/2 cup (125 mL) shredded cheese
                                Fresh or dried herbs, to taste (optional)

                                                22
sTeps
1 Preheat oven to broil. Whisk the eggs, water, herbs, salt and pepper together
in a medium bowl. Set aside.
2 Heat a 10-inch (25 cm) non-stick ovenproof skillet over medium heat. Coat
the skillet with cooking spray (if using a regular skillet only), butter or oil,
based on your preference. If using butter, allow enough time for it to melt
and if using oil give it 30 seconds to heat up. Add filling ingredients, sauté
them until fully cooked, stirring frequently.
3 Pour in the egg mixture. As the mixture sets around the edge of the skillet,
gently lift cooked portions with a spatula to allow uncooked egg to flow
underneath. Cook until the bottom is set and top is almost set, about
8 to 10 minutes.
4 Sprinkle cheese over top. Place skillet under preheated broiler for
2 or 3 minutes to melt cheese and puff up frittata or cover with lid and cook
for a couple minutes on the stovetop.
5 Loosen around the edge of the frittata with a knife. Cut into wedges and serve.
23SOUFFLÉS
The soufflé is an adaptable egg recipe that you can fill with any of your favourite
ingredients. The word soufflé is French for “to blow up,” which is exactly what happens
when air is whipped into the egg white, giving it the fluffy texture it’s known for. While
they have a reputation for being difficult to make, soufflés are remarkably easy and
sure to impress.
YoU wiLL Need:
medium saucepan 4 eggs
Large bowl 2 egg whites
electric mixer 2 tbsp (30 mL) butter
2 tbsp (30 mL) all-purpose flour
1/2 tsp (2.5 mL) salt
pinch pepper
3/4 cup (175 mL) milk (1%)
1/4 tsp (1.25 mL) cream of tartar
Finely chopped filling ingredients, see variations
on p.28 (optional)
26sTeps
1 Preheat oven to 375°F (190°C). Melt butter in a medium saucepan over low
heat. Stir in the flour, salt and pepper. Cook, stirring constantly, until the
mixture is smooth and bubbly. Stir in the milk gradually. Continue stirring
until the mixture is smooth and has thickened.
2 Separate the 4 egg yolks, reserving 2 of the egg whites. Beat the yolks well
and add 1/4 cup (60 mL) of warm sauce mixture to the egg yolks.
Combine this yolk mixture with the remaining sauce, blending thoroughly. If
desired, add any filling ingredients, stirring them into the white sauce until
blended (see variations). Set the sauce aside to cool slightly.
3 Beat the egg whites with cream of tartar in a large bowl, until stiff but not dry.
Fold some of the egg whites into the sauce to make it lighter, then gently, but
thoroughly, fold the sauce into the remaining egg whites.
Carefully pour into a 4-cup (1 L) lightly greased soufflé or casserole dish.
4 Bake until puffed and lightly browned, about 20 to 25 minutes, or until a
knife inserted comes out clean. Serve immediately.
continued on next page >
27SOUFFLÉS
variaTioNs
cheese soUFFLÉ: add 1 cup (250 mL) grated swiss cheese and 2 tbsp (30 mL) chopped green onion.
crab soUFFLÉ: add 1 can (6 oz/170 g) crab meat, 1/2 tsp (2.5 mL) dried thyme, 1/2 tsp (2.5 mL) curry
powder and 1/4 tsp (1.25 mL) garlic salt.
Leek aNd parmesaN soUFFLÉ: add 1 1/2 cups (375 mL) chopped leeks and 1/2 cup (125 mL) grated
parmesan cheese.
Tips
Never add egg yolks to the hot sauce all at once as they may coagulate too rapidly and
form lumps.
coating your greased dish with a sprinkling of breadcrumbs before adding the mixture, helps the
soufflé to “climb” and puff up in the oven.
Contrary to popular belief, it is normal for a soufflé to collapse a little after it’s removed from
the oven.
2829
CRÊPES
crêpes, originally from the brittany region of France, are a thin style of pancake. Unlike
traditional pancakes, crêpes are often served rolled with a sweet or savoury filling and can
be enjoyed for breakfast, lunch, dinner and dessert. Popular fillings include fruit, chocolate,
cheese and meat. For a simple treat, serve with a little sugar and a squeeze of lemon.

    YoU wiLL Need:
    medium bowl                                     4 eggs
    whisk                                           1/2 tsp (2.5 mL) salt
    crêpe pan or 8-inch (20 cm) non-stick           2 cups (500 mL) all-purpose flour
       or regular skillet                           2 cups (500 mL) milk
    spatula                                         1/4 cup (60 mL) vegetable oil
                                                    cooking spray or butter

                                               30
sTeps
1 Combine eggs and salt in a medium bowl. Gradually add the flour,
alternating with milk and whisking until smooth. Slowly whisk in the oil.
You can also use a blender for this step. Process all ingredients until smooth,
about 1 minute. Refrigerate the batter for at least 30 minutes to allow the
flour to expand and any air bubbles to collapse. The batter may thicken
during this time, so you might need to thin it out by adding a little more milk
or water. Crêpe batter should be the consistency of heavy cream.
2 Coat your crêpe pan with a little cooking spray (if using a regular pan only)
or butter. Heat over medium-high heat until water droplets sizzle when
sprinkled into the skillet.
3 Stir the batter and pour about 3 tbsp (45 mL) batter into the skillet all at once.
Quickly tilt and rotate the skillet while shaking it gently in a circular motion
to coat the bottom of the pan with the batter.
4 Cook until the bottom of the crêpe is slightly browned, about 45 seconds. Turn
the crêpe over with spatula and cook for another 15 to 30 seconds. Transfer
to a plate and repeat with the remaining batter. Add more cooking spray or
butter to the skillet if the crêpes start to stick.
5 Fill the crêpe with your favourite ingredients and enjoy!
continued on next page >
31CRÊPES
FiLLiNg sUggesTioNs
simpLe aNd sweeT: Cook any fruit that’s in season with a little bit of sugar and fill the crêpe.
savoUrY: Fill crêpe with sautéed chopped ham, red pepper and onion. Sprinkle with shredded
swiss or gruyère cheese. roll up and heat in the oven or microwave.
For kids: spread crêpe with peanut butter and top with sliced banana or jam; roll up.
Tips
To refrigerate cooked crêpes, wrap stacked crêpes well in foil or plastic wrap. refrigerate for up
to 3 days. Let stand at room temperature for an hour before serving.
To freeze cooked crêpes, stack them separated with pieces of waxed paper. place them in an
airtight container. Freeze for up to 4 months. To avoid tearing, thaw the crêpes completely
before unwrapping and separating.
3233
MERINGUE
a basic meringue is nothing more than a mixture of beaten egg whites and sugar. it’s a
must-have topping for many desserts, including everything from classic lemon meringue
pie to heavenly baked alaska. Follow these few simple steps and you’ll be a master
meringue maker in no time.

    YoU wiLL Need:
    glass or metal mixing bowl      3 egg whites at room temperature
    electric mixer                  1/4 tsp (1.25 mL) cream of tartar or lemon juice
                                    1/4 cup (60 mL) granulated sugar

                                            34
sTeps
1 Preheat oven to 425°F (220°C). To prepare a basic meringue, separate the
egg whites and place them in a glass or metal bowl (plastic bowls can have a
greasy film that prevents foaming). Separate the eggs without leaving any
trace of yolk in the whites as the fat in the yolk will prevent the whites from
developing the volume you want.
2 Add the cream of tartar and, using an electric mixer, beat the egg whites
until frothy. They should form what’s called soft peaks. Peaks are the “hills”
that pull up when removing the beaters from the foam. You’ll know your
peaks are soft when the tips gently fall over.
3 Gradually add the sugar, 1 to 2 tbsp (15-30 mL) at a time until it is all
incorporated and the peaks become glossy. Continue beating until the foam
forms stiff peaks and all of the sugar has been dissolved. To test if the sugar
has dissolved, rub the beaten meringue between your thumb and forefinger.
If it feels gritty, beat the eggs a few seconds longer until smooth.
4 Pile your meringue onto your warm filling and bake for about
4 or 5 minutes—just enough to gently brown the peaks.
Tips
Let egg whites stand at room temperature for about 20 minutes after separating. They will whip
to a greater volume than if beaten when cold.
watch how to make a meringue at eggs.ca/meringue.
35PICKLED EGGS
pickled eggs, once a favourite at pubs and taverns, are experiencing a bit of a renaissance,
showing up on the menus of high-end restaurants and modern gastropubs. Luckily,
pickled eggs are easy to make at home. They make tasty hors d’œuvres and are the perfect
picnic treat.
YoU wiLL Need:
small saucepan 12 hard-cooked eggs
Large jar with a tight sealing lid 1 cup (250 mL) water
1 cup (250 mL) white vinegar
1 tbsp (15 mL) granulated sugar
1 tsp (5 mL) salt
2 tsp (10 mL) pickling spices (can usually
be found at most grocery stores in the
spice section, or make your own! see
how under Tips.)
36sTeps
1 In a small saucepan over high heat, combine the water, vinegar, sugar,
salt and pickling spices. Bring to a boil, stirring frequently until the sugar
dissolves. Reduce the heat to low and simmer for 10 minutes.
2 Making sure they’re completely cooled, peel the hard-cooked eggs and place
them in the jar. Find out how to make perfect hard-cooked eggs on p.4.
3 Pour the hot pickling liquid into the jar, directly over the eggs. You can strain
out the pickling spices at this step, but the unstrained ingredients make for a
nice presentation.
4 Refrigerate for at least 2 days before using.
Tips
pickled eggs will keep for 1 month in the refrigerator.
make your own pepper pickling spice: Use 1 tsp (5 mL) peppercorns, 10 whole cloves, 1 bay leaf
and 2 dried whole chili peppers.
37BASIC COOKIE DOUGH
This is a great recipe as the basis for all kinds of cookies. Let the kids help mix ingredients
in an extra large bowl to reduce spills. before starting this recipe, choose the variation you
prefer. makes about 4 dozen delicious cookies!
YoU wiLL Need:
medium and large bowls 2 1/4 cups (550 mL) all-purpose flour
electric mixer 1 tsp (5 mL) baking soda
parchment paper or silicone mat 1/4 tsp (1.25 mL) salt
baking sheets 3/4 cup (175 mL) butter, at room temperature
3/4 cup (175 mL) granulated sugar
3/4 cup (175 mL) packed brown sugar
2 eggs
1 tsp (5 mL) vanilla
38sTeps
1 Preheat oven to 350°F (180°C) and line your baking sheets with parchment
paper or silicone mat. Combine the flour, baking soda and salt in a
medium bowl.
2 Beat the butter and granulated and brown sugars with an electric mixer in a
large bowl until smooth and fluffy. Add the eggs and vanilla and beat until
well blended. Add flour mixture and beat until combined.
3 Drop tablespoonfuls of dough about 2 inches (5 cm) apart onto the prepared
baking sheets. Bake just until cookies lose their shiny appearance, about
9 minutes. Let cookies cool on the baking sheets for 1 minute before
transferring to a wire rack to cool completely.
continued on next page >
39BASIC COOKIE DOUGH
variaTioNs
chocoLaTe chip: stir 1 cup (250 mL) semisweet, milk or dark chocolate chips and, if desired,
2/3 cup (150 mL) chopped walnuts into dough.
ciNNamoN sUgar: Add 1 tsp (5 mL) ground cinnamon to flour mixture. Using about 1 tbsp
(15 mL) per cookie, gently roll the dough into balls. combine 3 tbsp (45 mL) granulated sugar
and 2 tsp (10 mL) of ground cinnamon in a small bowl. roll the dough balls in the sugar and
cinnamon mixture, coating completely.
doUbLe chocoLaTe: Add 3 tbsp (45 mL) cocoa powder to the flour mixture, stirring well to
combine. stir 1 cup (250 mL) of semisweet, milk or dark chocolate chips into the dough. To make
Triple chocolate cookies use 1/2 cup (125 mL) semisweet, milk or dark chocolate chips and
1/2 cup (125 mL) white chocolate chips.
oaTmeaL raisiN: Decrease the amount of flour to 1 3/4 cups (425 mL). Add 2 1/4 cups (550 mL)
rolled oats and 1/2 tsp (2.5 mL) ground cinnamon to flour mixture. Stir 1 cup (250 mL) of raisins
into the dough (dried cranberries, blueberries or cherries can be used instead of raisins).
Tips
If desired, replace half of all-purpose flour with whole wheat flour.
if unsalted butter is used, increase the amount of salt to 1/2 tsp (2.5 mL).
allow at least 20 minutes for chilled butter to come to room temperature. it should give slightly
when pressed but still hold its shape.
40NUTRITION
41NUTRITION
Did you know eggs can play a role in a well-balanced, healthy diet? It’s true! Canadian eggs
are an excellent source of protein and many important nutrients. canada’s Food guide
considers 2 eggs to be 1 serving from the Meat and Alternatives food group.
NUTriTioN iNFormaTioN per oNe Large grade a egg (53 g)
calories 70 cal / 292.88.kJ
Fat 5g
cholesterol 195 mg
sodium 65 mg
carbohydrates 1g
protein 6g
42Here’s how the natural goodness of eggs benefits you:
nutrient Benefit
Essential for building and repairing muscles, organs, skin, hair
Protein and other body tissues; needed to produce hormones, enzymes and
antibodies; the protein in eggs is easily absorbed by the body
Carries oxygen to the cells, helps prevent anemia—the iron in eggs is
Iron
easily absorbed by the body
Vitamin A Helps maintain healthy skin and eye tissue; assists in night vision
Strengthens bones and teeth; may help protect against certain cancers
Vitamin D
and auto-immune diseases
An antioxidant that plays a role in maintaining good health and
Vitamin E
preventing disease
Vitamin B12 Helps protect against heart disease
Helps produce and maintain new cells; helps prevent a type of anemia,
Folate helps protect against serious birth defects if taken prior to pregnancy
and during the first 3 months of pregnancy
Works with vitamin E to act as an antioxidant to help prevent the
Selenium
breakdown of body tissues
Lutein and Maintains good vision; may help reduce the risk of age-related eye
zeaxanthin diseases, such as cataracts and macular degeneration
Choline Plays a strong role in brain development and function
Get Cracking on healthy eating!
4344
EGG HANDLING

     45
EGG HANDLING
shoppiNg Tips
Pick up eggs near the end of your grocery-shopping trip and ask the cashier to pack them
with frozen items to keep them cold. Be sure to put them in the fridge as soon as you
get home.
In Canada, all Grade A eggs are categorized by weight, not size or shape. This is why eggs
in the same carton may appear to be different sizes but their weights will always be within
the same range.
Pay attention to the “best before date” on an egg carton. This date indicates how long eggs
will maintain their Grade A quality. Keep in mind older eggs are best used in thoroughly
cooked dishes.
Did you know? Eggs at the store have arrived there within a week of being laid. Now
that’s fresh!
46STORING TIPS
Eggs are perishable and shells are porous. Keep them in their carton, in the main body of
the refrigerator. The carton helps to protect them and it keeps the “best before date” visible.
The carton also prevents eggs from absorbing odours and flavours of other foods.
Store leftover raw egg whites and yolks in airtight containers in the refrigerator. To prevent
yolks from drying up, cover them with a little cold water and drain the water before using.
FREEZING TIPS
Certain kinds of raw and prepared eggs (not in their shells) can easily be frozen following
these simple instructions:
Whole Eggs: Beat until just blended, pour into a freezer container and cover with a tight-
fitting lid. Label with the number of eggs and the date. Place in the freezer.
Egg Whites: Break and separate the eggs one at a time, making sure no yolk gets into the
whites. Pour the egg whites into a freezer container and cover with a tight-fitting lid. Label
with the number of eggs and the date. Place in the freezer.
Egg Yolks: Beat in 1/8 tsp (0.5 mL) salt (for use in main dishes) or 1 1/2 tsp (7 mL) sugar or
corn syrup (for use in baking or desserts) per 1/4 cup (60 mL) egg yolks (about 4 yolks). Pour
into a freezer container and cover with a tight-fitting lid. Label with the number of yolks,
the date and whether you added salt or sweetener.
Hard-Cooked Egg Yolks: Hard-cooked egg yolks can be frozen for later use as toppings
or garnishes. An easy way to freeze them is to put them in an ice cube tray. Once frozen,
transfer to a freezer container and label with the date.
47EGG HANDLING
Fresh sUbsTiTUTe For Thawed From FrozeN
1 large whole egg 3 tbsp (45 mL) thawed whole egg
1 large egg white 2 tbsp (30 mL) thawed egg white
1 large egg yolk 1 tbsp (15 mL) thawed egg yolk
Tips
it’s best to freeze eggs in small quantities (an ice-cube tray works perfectly) so you can thaw
only what you need.
Thaw eggs in the refrigerator and use them as soon as they are thawed.
only use thawed eggs in dishes that will be thoroughly cooked.
how To kNow YoUr eggs are Fresh?
The “best before date” is the best way to determine the freshness of eggs. But there are
other ways to tell if an egg is fresh:
Fresh oLder
Yolk sits up high and the white is thick and
Yolk is flat and breaks easily
closely surrounds the yolk
sinks in water Floats in water
cloudy egg white watery, thin egg white
48saFe Food haNdLiNg
Like all perishable foods, eggs are enjoyed best when properly handled. Follow these tips for
safe food handling at home:
• Wash hands, utensils, equipment and work areas with hot soapy water before and after
food preparation.
• Wash containers and utensils that have been used for raw egg mixture before re-using,
even for another raw egg mixture.
• When entertaining, serve all egg dishes within 2 hours. Cold egg dishes and beverages
should be kept on ice.
• Serve eggs and egg-rich foods immediately after cooking or refrigerate and serve
within 3 to 4 days.
When preparing any perishable foods, follow these 4 simple steps: clean, separate, cook and
chill to make sure food is prepared safely.
49REFERENCE SHEET
CONSUME EGGS BY THESE RECOMMENDED TIMES
EGG TYPE CONSUME BY
Fresh shell eggs By “best before date” on the carton
Leftover yolks or whites Within 2-4 days
Hard-cooked eggs Within 1 week
Prepared egg dishes Within 3-4 days
Pickled eggs Within 1 month
Frozen whole eggs (blended) Within 4 months
SUBSTITUTIONS
IF A RECIPE
YOU CAN USE...
CALLS FOR...
LARGE EGGS EXTRA LARGE MEDIUM SMALL
1 1 1 2
2 2 2 3
3 3 4 4
4 3 5 6
5 4 6 7
6 5 7 8
50british columbia egg marketing board
bcegg.com
egg Farmers of alberta
eggs.ab.ca
saskatchewan egg producers
saskegg.ca
manitoba egg Farmers
eggs.mb.ca
egg Farmers of ontario
eggfarmersofontario.ca
La Fédération des producteurs d’œufs du Québec
oeuf.ca
New brunswick egg producers
nbegg.ca
egg Farmers of Nova scotia
nsegg.ca
egg Farmers of prince edward island
eggspei.ca
egg Farmers of Newfoundland and Labrador
nleggs.ca
egg Farmers of canada
eggs.caMaking perfect eggs is easy with the official
Egg Timer App from Egg Farmers of Canada.
Easy to use and fully customizable, it transforms
your phone into a multi-functional egg timer.
Download it for free at Google Play or
the Apple App Store.
Find recipes, tips and more at eggs.ca!You can also read