IPod and iTunes: Applications for Music Education
←
→
Page content transcription
If your browser does not render page correctly, please read the page content below
iPod and iTunes: Applications for Music Education
                    SCSBOA Winter In-Service, January 2008
                     Dr. Daniel R. Zanutto, CSU Long Beach

I. Getting Your Music into iTunes
      A. First step, download iTunes – it’s free! www.apple.com/itunes/download
          Works on MAC and PC’s
          Another helpful site is www.apple.com/itunes/tutorials

      B. Import CD Collections - Digital
            1. iTunes makes CD importing very easy. Open iTunes, then insert the
            CD into the drive.

                                                                                   1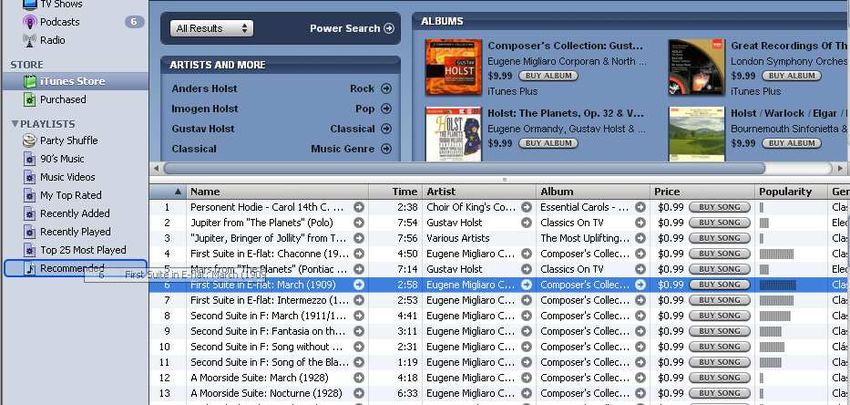
You will be asked if you want to import the CD into your iTunes library – click YES.
Also, you can “uncheck” individual tracks that you do not want to import.

       C. iMixes
       From the bottom of the iTunes window, select CREATE A PLAYLIST

       This will create a playlist that you can
       name descriptively. You can add
       tunes from your own library, and/or

       add from the iTunes store. Browse,
       search and find the music you need.
       Then, drag the music over into your playlist.

       You do not need
       to own all the
       music.
       However, only
       titles that are
       available from
       the iTunes store will be displayed in your playlist. The iTunes store provides short
       (30 second) samples for listening; of course students can choose to purchase the
       entire song from the iTunes store.

                                                                                         2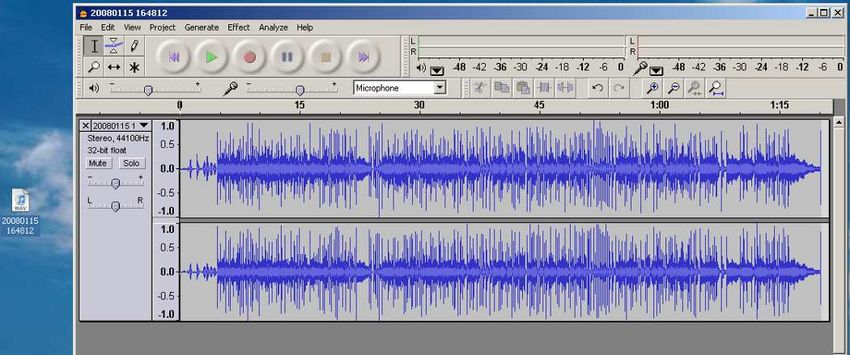
To publish your playlist, click the arrow to
the right side of its name, and select Create
iMix.

                                                Sign-in with your Apple ID and
                                                Password.

                                                                      Final edits
                                                                      are made to
                                                                      the title,
                                                                      category, and
                                                                      description
                                                                      prior to
                                                                      publishing.
                                                                      Students can
                                                                      then search by
                                                                      the iMix title
                                                                      find your
                                                                      music.

D. Network Sharing
Network sharing is a very useful tool if you are connected to your school’s
network. Up to 5 computers at a time may be logged into the shared iTunes
library. This differs from an iMix for the reason that your entire music file is
played

To setup Network Sharing, open iTunes and
Select EDIT>Preferences.

                                                                                   3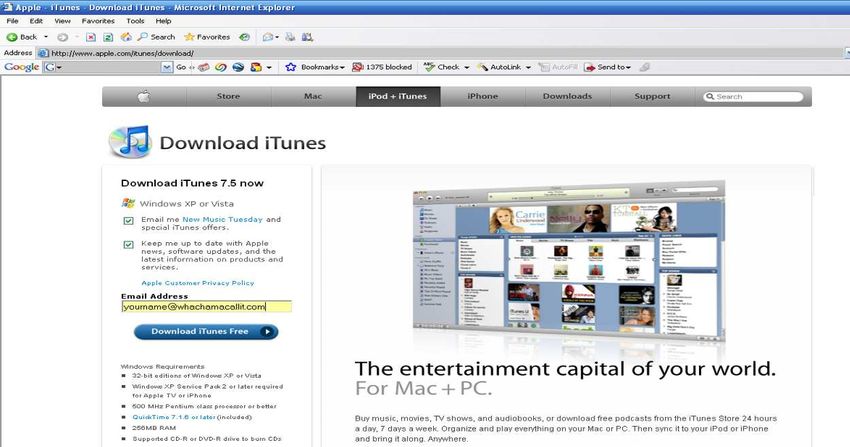
From the next screen select
the SHARING tab.
Select Share my Library
on my local network.
Share selected playlists.
Check the playlist.
Enter optional password.

Click OK.

Your playlist is now shared
with up to 5 computers on
your network.

E. Vinyl and Tape Conversion – Analog to Digital Conversion, part 1:
CONNECTIONS.

This is more advanced and requires two steps; 1) connecting equipment, and 2)
recording, because you need to transfer analog material to digital format. There
are a couple of ways to capture analog music (old school and new technology).
Either way, the data will need to be “captured” digitally on you computer and we
will cover that later.

Step one - connecting your analog equipment to your digital computer…

       1. Old School – Output from turntable/tape deck through powered
       amplifier is usually accomplished with RCA cables. Connect these RCA’s
       to a stereo mini 3.5mm adapter, and plug into your sound card. Recording
       preferences need to be set on your sound card.
                                           Attach this end to amplifier’s output.

                                                    Attach this end to the
                                                    computer’s sound card
                                                    input.

                                                                                   4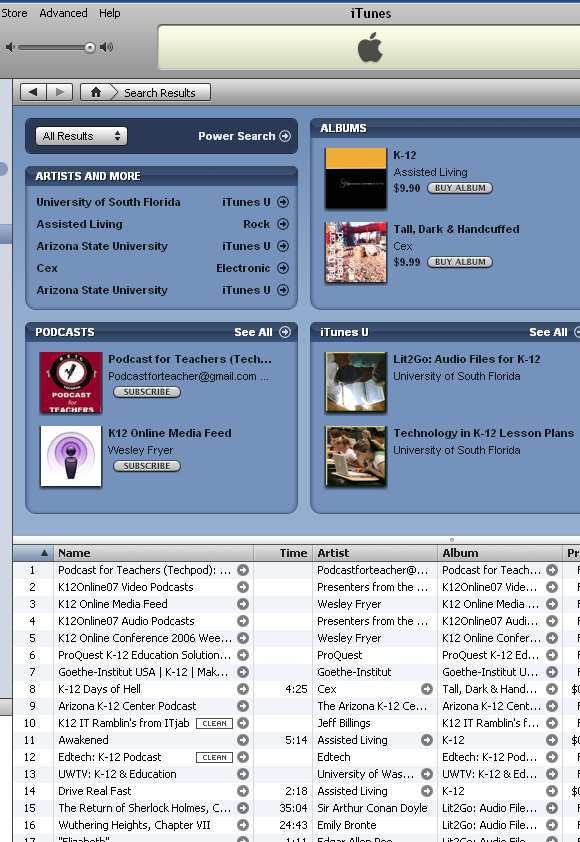
2. Newer technology – much easier chore if you have a lot of material to
       convert. ION turntable has USB connection and software (approx. $110),
       and includes 3.5mm stereo lack for tape deck piggyback input.

F. Step Two - Recording Music; Analog to Digital Conversion.
Assuming you have connected your analog equipment to the computer, you now
need to capture (record) the music to convert it to a digital format.

PC users - Audacity is FREE and POWERFUL sound editing software that will
allow you to RECORD your audio files, then EDIT (EQ) and save to .WAV or
MP3. http://audacity.sourceforge.net/download
MAC users see below...

To record from your source, Open Audacity (be sure you have your sound card
recording properties set to the correct input device),
then Click Record. Audacity will display the audio file as it records.

                                                                              5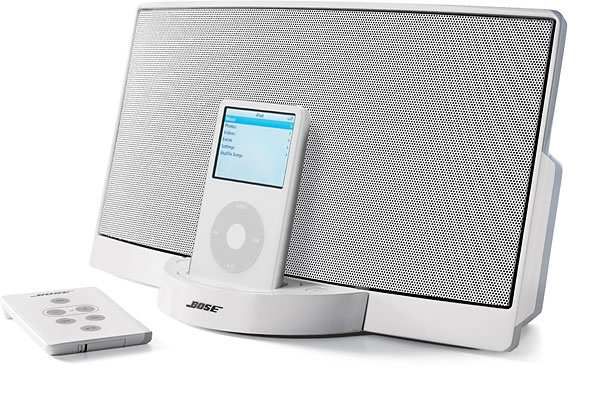
After recording, Effect options
       such as equalization may be
       applied.

Your file is now ready to export in
WAVE, MP3*, or Ogg Vorbes format.

*To use the MP3 export feature, you must first download a LAME MP3 encoder to
Audacity [see link for instructions].
http://audacity.sourceforge.net/help/faq?s=install&item=lame-mp3

Select your destination, file name, and verify the format and save.

                                                                                6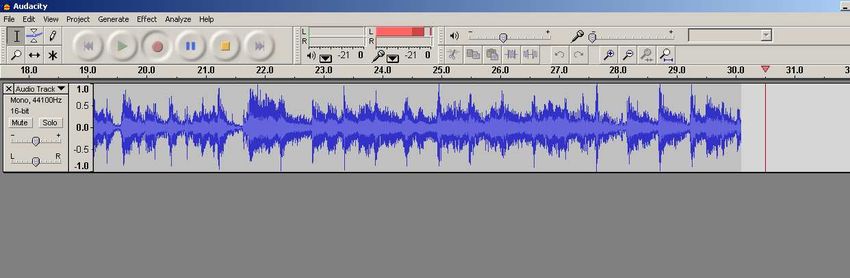
The next step is helpful for creating ID tags (locator information) for placement
       in iTunes.

                                   The file then begins exporting to your destination.

       G. Many file types can be “dragged” directly into the iTunes library. This
       process applies to recordings, as well as audio files from notation and sequencing
       projects.

       The file will import as WAVE or MP3, in this case, a .wav file.

       You may also convert (compress) to AAC

WAVE files are larger in size because it contains all the recorded
information. If you are creating a CD to play universally, then
this is the way to go.
AAC files – much smaller (1/10th the size), less storage room,
easy to attach to email files, if you are certain that end user is
opening in iTunes, then this is a good way to go.

                                                                                           7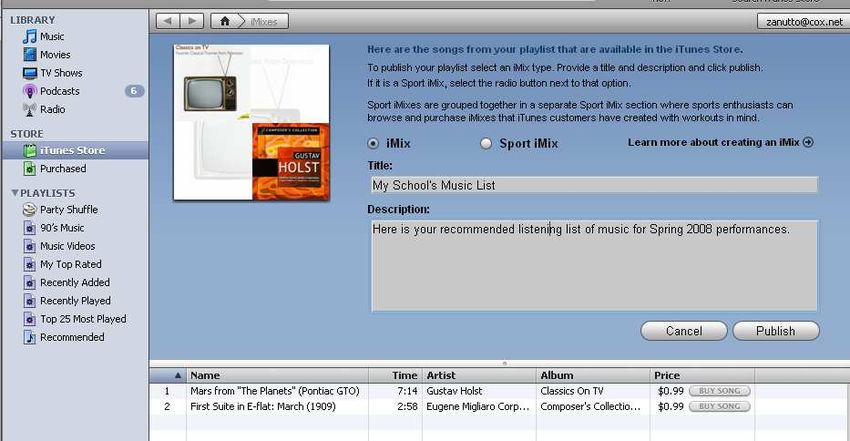
MAC users can achieve similar results using Garage Band. Open GB and select the
Audio/MIDI tab, then select your input device – in this case I am using the USB turn
table.

In GB, input a Real Instrument track
to capture the USB signal.

Hit the RECORD button, and start your turn table or tape deck.

Your recorded track will look something like this.

GB will let you send to iTunes…            or export to the desktop for more options.

                                                                                        8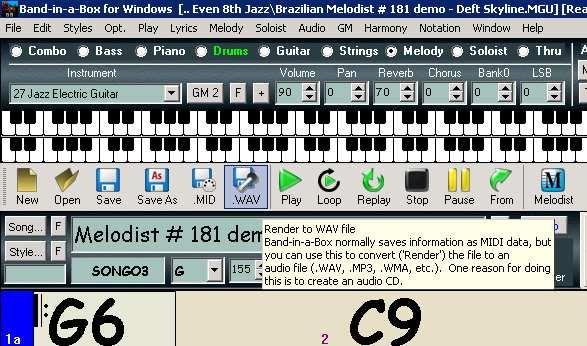
If you EXPORT, you can compress using MP3, or as in this example the AAC Encoder,
which is the iTunes compression.

Then, SAVE
to your chosen destination.

The file is then mixed and converted, and will appear at the destination.

                                                                                9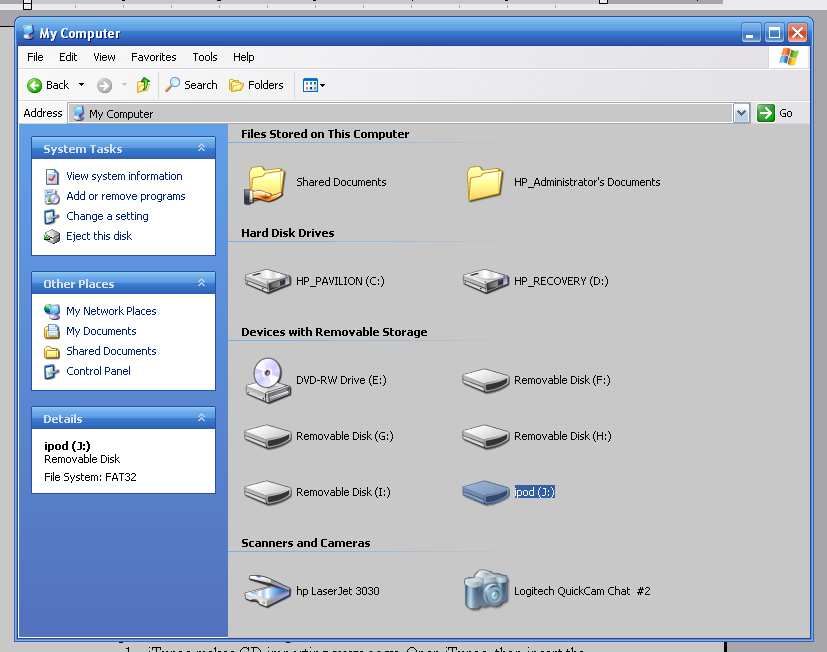
II. iPod Output Options
       A. Powered Speakers
       There is a very large secondary iPod market for iPod products. Configurations
       include docking or 3.5mm audio connections. Just a couple of samples…

                                           Bose system charges iPod, and has remote
                                           control.

       Yamaha has 10 watts of power plus EQ and microphone input.

       B. TV/Audio-Video Cables
       If you plan to display any video material (podcasts, video lessons, YouTube,
       PowerPoint or Keynote, etc.), then an A/V connection is necessary.

                                   Apple sells a handy component cable for about $50.
                                   This will connect video and audio outs to your TV or
                                   projector, and the iPod receives a charge in the
                                   process.

III. Loading and Sharing Other Digital Audio
       A. Notation
              1. Notation programs are extremely useful in creating exercises and
              musical arrangements. Music playback has improved dramatically due to
              software synthesis programs that are now common with Finale and
              Sibelius. Notion software plays back with digital audio files sampled by
              members of the London Symphony Orchestra. It is quite possible that you
              would like to upload these playback files to your iPod for rehearsal
              purposes.

                                                                                       10
Finale files are
converted to
audio files by
selecting
File>Save
Special>Save
as Audio File.
Choosing Standard
Audio creates a
.wav file;
Compressed creates
an MP3
Save to desktop,
then drag into
iTunes.
Sibelius files are
converted to audio files
by selecting
File>Export>Audio
Choose the destination, and
Sibelius creates a .wav file.
11Notion files are converted to
audio files by selecting
File>Save as .wav
2. Band in a Box
Band in a Box files are
converted to audio files
by selecting the .WAV
button. This begins a
rendering process that
creates either .wav,
MP3, or .WMA files.
IV. Live Digital Recording Set-Up
As mentioned earlier; there is a very large secondary iPod market for iPod products. You
may be surprised to know that iPods can record dictation (voice notes) and live music. I
have found that the portable nature of the iPod is perfect for recording in the classroom.
A. Record setting is automatic
when you plug your microphone
adapter into the iPod’s docking
mechanism. The screen readout
shows elapsed recording time, and
the PAUSE and STOP and SAVE
menu is controlled by the scroll
wheel.
Not all iPods will record. Generally
later models do, with the exception
of the iPod Touch (sorry). Check
your models specifications.
12B. Microphone Choices
The Belkin TuneTalk is about $70
Charge while recording, includes jack for
external microphone, auto-gain switch
Sony ECMMS907 Stereo Condenser microphone
about $75
Griffin iTalk Pro
Stereo microphone
is about $50
C. iPod Recorded Output is in Wave file format.
These files would be handled as previously described:
1. PC use Audacity (or other sound editing software) to edit/save
2. MAC use Garage Band
Audacity and Garage Band both allow editing and effects to be applied to the
recorded files. Completed projects can be saved in a variety of formats, including
CD, web broadcasting, and iTunes library storage.
13Recording on your iPod actually treats the device like the external hard drive
that it really is. I point this out because to enable this feature, you need to
Enable Disk Use for your iPod in the iTunes summary screen.
Select
Device
Choose
Enable
Disk
Use
__________________________________________________________________
Recordings will be found (viewed, listened to) on your iPod at Menu > Extras >
Notes. Retrieving recordings is not done through the iTunes interface, but rather
by accessing the iPod as an External Disk Drive.
MAC view boots iPod and shows an iPod image.
Double click to access.
PC users will go to My Computer, locate
the external drive, and double click.
__________________________________________________________________
14MAC view opens the iPod to
reveal the Recordings folder.
Open this folder.
PC view opens iPod
contents.
Locate Recordings folder
and open it.
__________________________________________________________________
MAC view recordings
folder contains the
recorded .wav file.
PC view of .wav file.
15MAC - save the .wav file to desk top, or just drag into Garage Band for editing.
PC – save the .wav file to desk top, or just drag into Audacity for editing.
Podcasts and Podcasting with iTunes
D. Subscribing to Podcasts
1. The easiest place to find Podcasts might be the iTunes Store.
Go to the iTunes Store
select Podcasts
16From this site, you can enter
search terms for specific
Podcast content. In this case, a
K12 search yielded 4 areas, of
which I chose Podcast for
Teachers.
At this point, you can:
Subscribe to the
Podcast
Subscriptions are
FREE, and new
episodes will download
to your iTunes library
each time you login, or
until you delete the
subscription.
Podcasts will sync to
your iPod.
Podcasts = Voice
Vodcast = Video
Search through
related topics
17Podcast Sites Podcast Series
www.podcastalley.com Music Tech for Me
www.podcasting-tools.com Music History Project
www.podcastingnews.com Music Education at Etude
www.podcasting-station.com Podcasts from Mustech.net
www.podcaster.net The Sax Tips Podcast
www.digitalpodcast.com Explore the Symphony
History 131
Vocal Chords – Lincoln Center
Philharmonic Orchestra Video Podcasts
Cue the Music
NPR: Jazz Profiles
APM: Composer’s Datebook
Teaching Music Theory with Theory Time
Makin Music with OS X
Songwriter’s Toolbox
Pro Tools Tutorials from Future Rhythm
The Home Recording Podcast
Check out this link: http://www.apple.com/education/products/ipod/
Another helpful .pdf can be found here:
http://images.apple.com/education/products/ipod/iPod_Getting_Started_Guide.pdf
18You can also read