Log Cabin Construction - The Folk School Fairbanks
←
→
Page content transcription
If your browser does not render page correctly, please read the page content below
Log Cabin Construction
April 22, 2020
Report by Jessica Austin, Kerri Hamos, and Brooks Ludwig

Background
The Folk School partnered with the Department of Natural Resources (DNR) to build a new
public use cabin on a hill overlooking the South Fork of the Chena River near Nugget Creek.
This cabin will be at the end of the new all-season Mastodon Trail and will replace the existing
Nugget Creek Cabin. Students worked two weeks from late February to early March, 2020, at
Pioneer Park, building the walls and roof supports. We then labeled each log, disassembled the
structure, and placed the logs on trailers so that DNR can move them to the building site.
Reconstruction was originally scheduled for mid-March, but due to unsafe trail conditions and
the COVID-19 pandemic, it has been postponed until the summer.

Local log-building instructors Sandy Jamieson and Tom Sorenson led students through the
entire process, from peeling the logs to building the roof. Kerri Hamos from the Folk School and
Brooks Ludwig from DNR handled logistics. Special thanks to everyone at DNR who helped with
this project, including Dane Happ, Ian Thomas, Gooseberry Peter, Sam Braband, Marty Schatz
and Lee Lemay. Special thanks also to Justin Cox who helped on site and was an amazing
skid-steer operator, John Manthei who built the door and window frames, and Jon Sanford from
the Woodway who hosted a chainsaw safety session, generously gave equipment discounts to
students during the class, and expedited repairs when our saws broke down. Finally, thank you
to all the students for their hard work in cold weather: Jessica Austin, Aaron Buchholz, David
Carel, Garret Dubois, Elizabeth Irving, John Pearson, Bruce Rasmussen, Todd Redinius, Lori
Winton, and Levi Rosson.

                 Jessica and Sandy pose in front of the bottom half of the cabin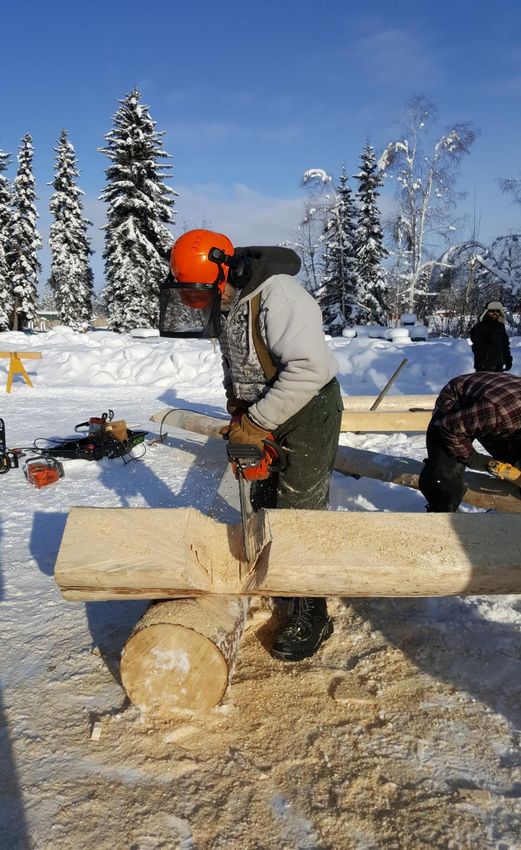
The Building Process

Logging and Peeling
The trees used for this cabin were white spruce, logged near Nenana this past fall and winter.
The logs averaged 11 inches at the tip and 14 inches at the butt and were each 20 feet long or
more.

                        Logs on a truck ready for transport to Fairbanks

Before they can be used for building, the logs must be peeled. Typically, this is done in the
summer or fall beforehand, and covered until building time to prevent mildew. Since we were
peeling in the winter and you can’t peel a frozen log, we had to bring the logs inside the DNR
shop to warm up. DNR staff and volunteers peeled most of the logs before the class started,
and students got to practice on the last few logs. To peel the logs, you use a drawknife to
remove the outer bark as well as the inner bark (cambium).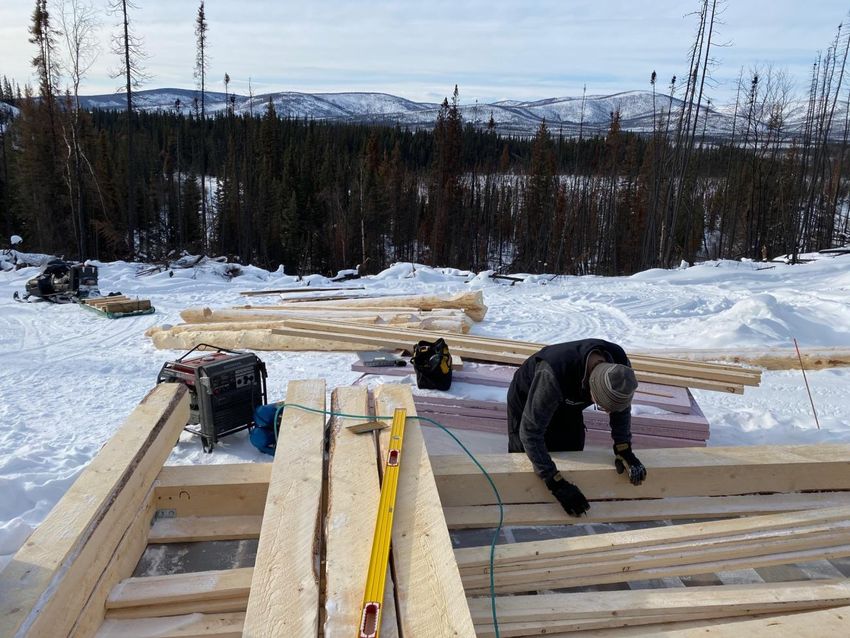
Logs in the shop, ready for peeling.

 Removing bark with a drawknife.
Here the middle log has almost all the cambium removed, and the other logs are still being
                                          worked on.

Inventory, Foundation and Sill Logs
Once the logs are peeled, the next step is building an inventory. We measured each log and
recorded its total length, tip diameter and butt diameter, and wrote it on the end of each log. We
also noted if the log had any unusual characteristics, such as a twist or bow. The straightest log
is reserved for our ridgepole.

                                    Inventorying the log pile.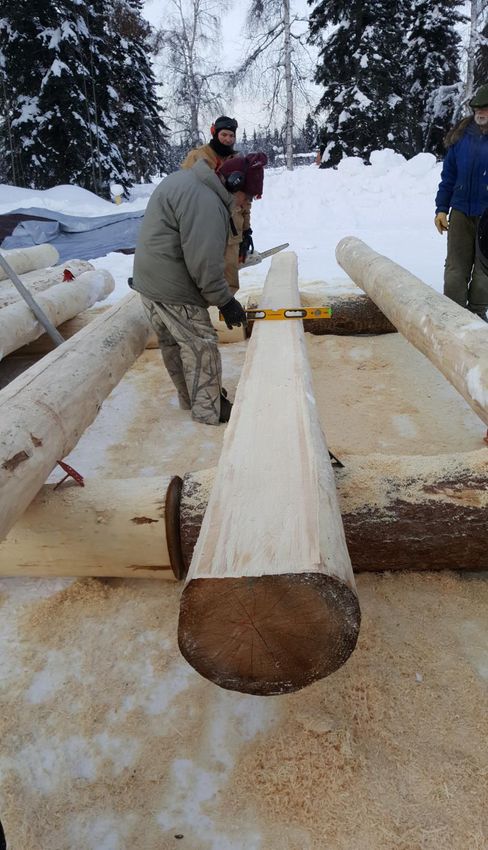
For this class, we built the structure in town at Pioneer Park before disassembling it for transport
to the actual building site. We built on top of a timber frame that mimicked one built by DNR at
the final site.

                The foundation at Pioneer Park. The walls are each 14 feet long.

The first logs that go on the foundation are the sill logs. For these, we cut one flat side on each
log to lay against the timbers.

                                   Setting up the log for the cut.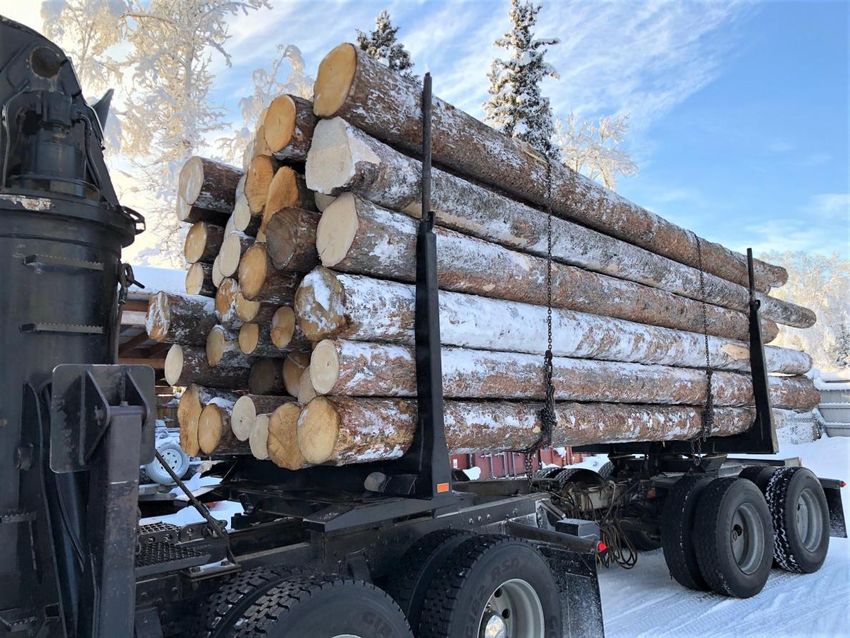
Sandy demonstrating the technique.

         A successful cut!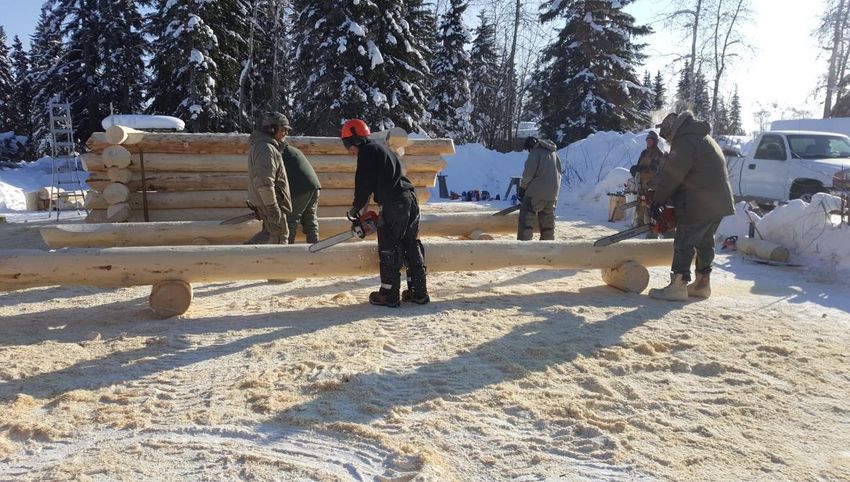
Checking that the flat is level all the way through.
Cutting the other sill logs.

                 The first sill logs in place. The top log still needs to be notched.

Scribing and Building the Walls
For this cabin, we used the full scribe method. This meant we built level by level, cutting notches
and grooves in each log to fit the one below. All cutting was done with chainsaws, with cleanup
where needed with an angle grinder. Our unofficial book for the class was Log Construction
Manual by Robert Chambers, which does an excellent job of describing this method.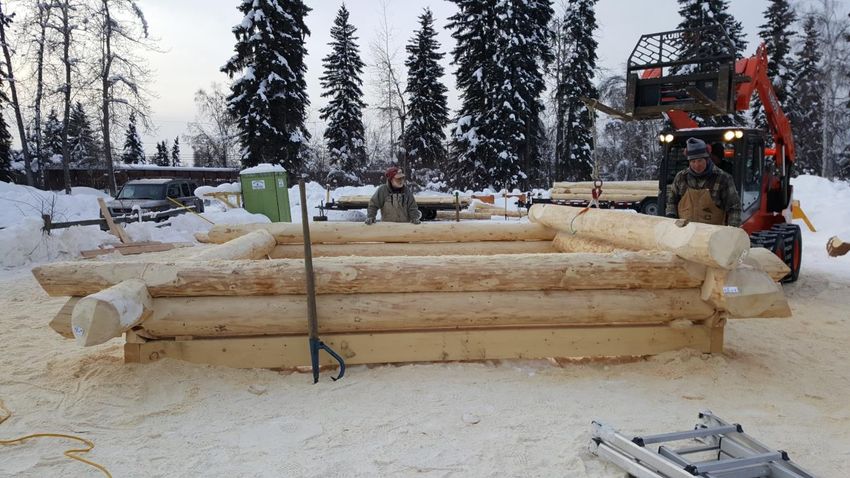
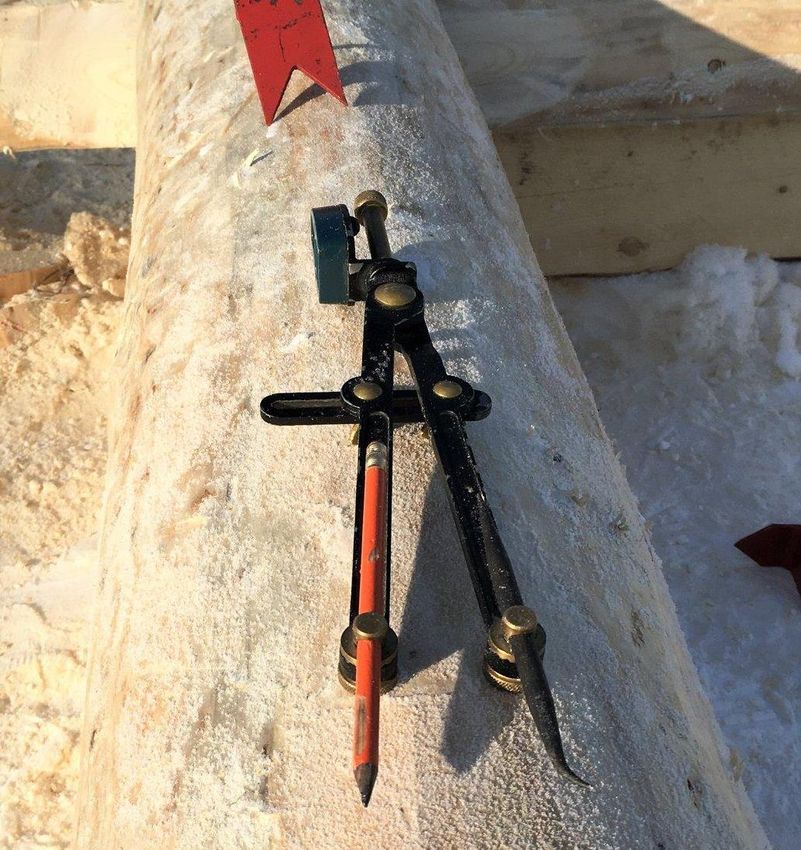
A log scribe. The tip of the metal arm touches on the log below, and the pencil end marks the
                          log above, tracing the shape of the log below.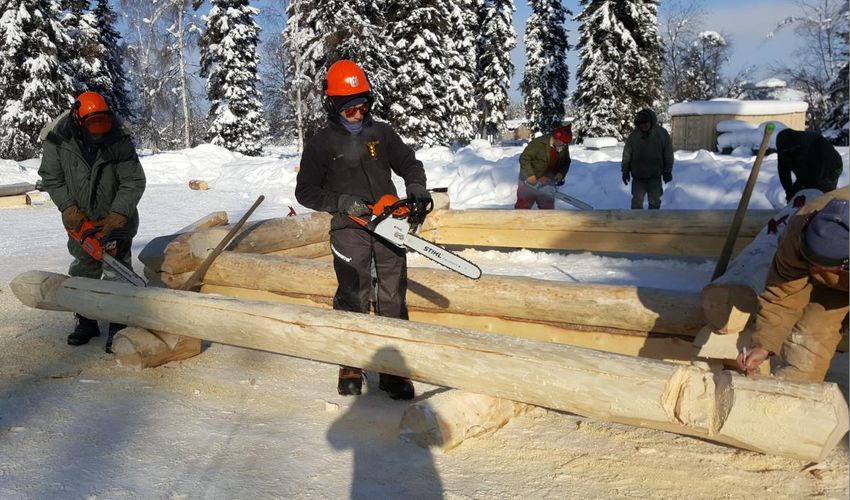
Using the scribe to mark the shape of the log below onto the log above.

Tom explains how we will use the scribe to mark the notch for the top sill logs.
Cutting a notch on a sill log.
The top sill logs notched and in place.

The basic process for setting up a new log is:
   ● Choose the next log, place it on the wall, and center it
   ● Scribe and cut rough notches, to bring the log roughly level with the one below
   ● Buck the log ends and cut saddles
   ● Put the log back up on the wall and scribe the runs and final notches
   ● Take the log back down, cut grooves and notches
   ● Place the log back up and make adjustments if needed for a perfect fit

Since we are building with green logs, we always need to think about how the logs will shrink in
diameter as they dry. Over the first 5 to 7 years of its life, the building will settle as much as one
inch per foot on each wall. The saddles and notches must be cut properly to allow the logs to
slide down and settle in place and eventually sit completely snug without any gaps.
First, pick the log, center it on the wall, and scribe rough notches.

Then cut log ends, rough notches and saddles, and sand the saddles smooth.
Put the log back on the wall and scribe the runs and final notches.

                   Cut the groove and notches.
Finally, place the log back on the wall and check the fit.
View of a different log with notch and groove. In the final reassembly, the groove will be filled
with insulation.Checking that the log is centered and has no hang-up spots.
One of our first decent saddles. It’s important that the saddles are smooth and shaped properly,
so that the notch of the log above can slide down as the building settles.
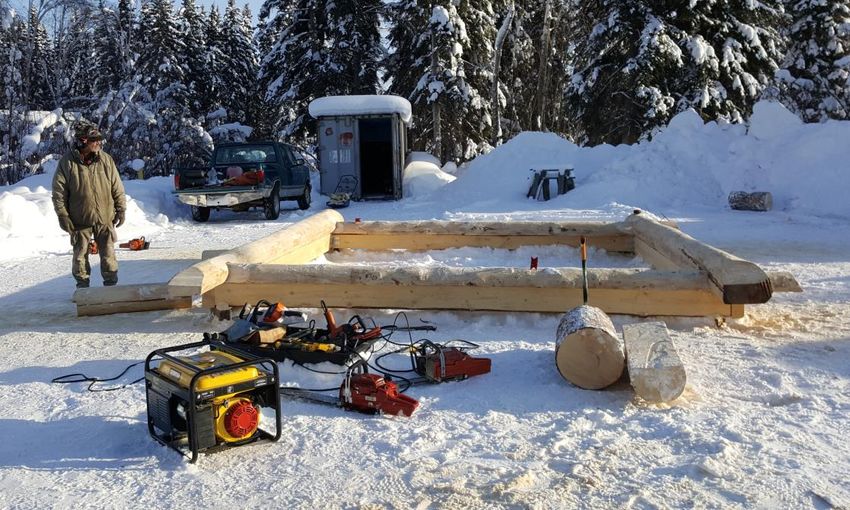
Building the Roof
After building the first half of the building—five levels of logs—we took down all but the top logs
and re-leveled. While this felt a bit like starting over, it allowed us to work at a comfortable
height for the whole project without needing scaffolding.A fresh start.
Building up the second half of the cabin. This is the front side, where the door will go. Since the
roof will have a significant overhang on the front side of the building, we made those logs
progressively longer to support the roof structure there.
We built a gable-end roof, continuing the walls upwards to fill the gable. The roof components—
ridgepole, purlins, and cap logs— all have flat sides where the actual roof will rest. We cut all of
these logs, and the rest of the roof will be built on site when the structure is reassembled.Roof components
Front side of the cabin, with cap logs in place. We still need to mark the angle of the roof, pull
them down, and cut the flats.Cutting the flat sides on the cap logs.
Building up the roof. This shows two cap logs (the one on the left is mostly hidden), two purlins,
and the gable-end logs. One more log will fill the gable, and a notch will be cut in that log for the
ridgepole to rest in.Constructing the Foundation
While the students worked on the cabin walls and roof structure at Pioneer Park, the DNR crew
worked on building the cabin foundation.
Foundation plans
The crew started by building the first and second levels in the DNR shop. The first level (closest
to the ground) was made from treated, all-weather wood.The DNR shop, with the first level constructed.
First level joint detail.Working on the second level of the foundation.
Second level joint detail.The crew then moved the first and second levels of the foundation out to the building site,
reconstructed and leveled them, and built the floor on top. Directly above the floor joists, they
placed ¼” hardware cloth and aluminum bug screening to keep out critters. On top of that they
laid 1”x6” rough cut planks, and then two layers of 2” rigid foam insulation. Finally, the crew
installed 2”x6” tongue and groove spruce decking for the floor.
Hardware cloth and bug screening, above the floor joists.Rough-cut spruce on top of the screen Rigid foam insulation sits directly beneath the floor.
Foam insulation beneath the floor (alternate view).

The floor with tongue-and-groove decking installed.
Disassembly and Next Steps
After two weeks of hard work in cold weather, it was time to wrap up at Pioneer Park. On the
final day, we labeled each log, disassembled each level, and loaded the logs up on trailers.
Over the following week, DNR transported the logs and other materials to the site for
reconstruction. In addition to re-assembling the logs, they will finish building the roof, install a
wood stove, and build all the furniture inside the cabin.

As of May 8, 2020, we are still waiting for the rebuild to take place. With spring break up in full
swing, and restrictions and concerns related to COVID-19, it is not possible to complete the
cabin yet. Currently, the DNR staff hopes to get out to the site in June to finish the logwork. The
interior completion will likely be put off until fall or winter of this year. There are still plans to build
another cabin along the Mastodon Trail, but dates are currently on hold until the pandemic
eases, and the first cabin is completely finished. Look for an announcement sometime in 2021.

           Logs with ends labeled. Also included is the jig used to line up the roof logs.
Taking the structure apart. Logs loaded up and ready to go!
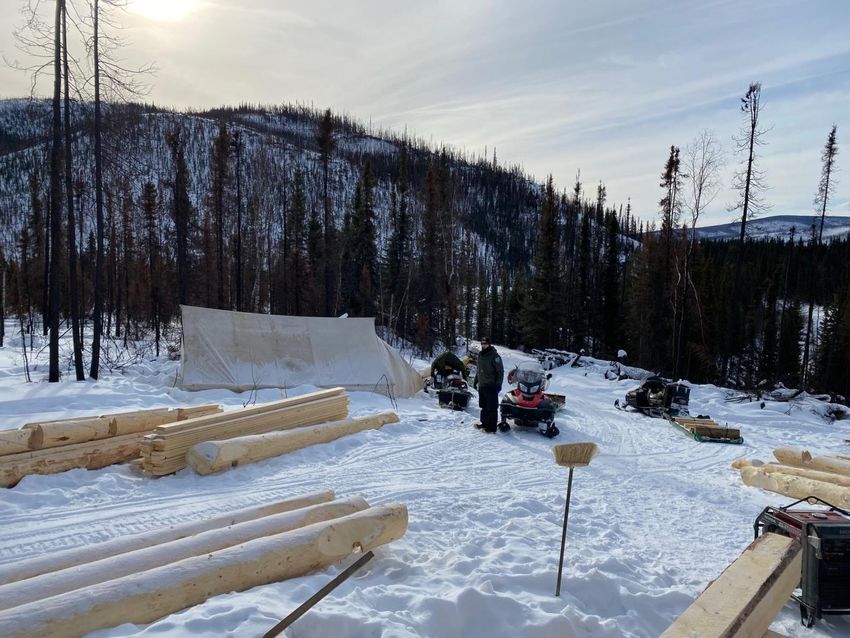
The building site off Nugget Creek, with some of the logs delivered.
Setting up the sill logs on the foundation.
Plans for the cabin interior.
You can also read