MIDWEST INSURANCE BROKERAGE SERVICE INC. DOCUSIGN GUIDE - MIDWEST INSURANCE BROKERAGE SERVICES INC
←
→
Page content transcription
If your browser does not render page correctly, please read the page content below

Midwest Insurance
Brokerage Service Inc.
   DocuSign Guide

         3/21/2018

                         1
DocuSign Guide
                   Table of Contents

Page   3     Intro and benefits

Pages 4-6    Steps to find Docusign package on BCBS website

Page 7 -8    How to complete the PowerForm document for employer
paperwork

Pages 9-14   How a group completes the documents and signs

Page 15 -    Agent completes agent information and signs

Pages 16-18 How to download and save completed documents

Pages 19-21 How to do DocuSign for employee applications

Pages 22-27 How to complete Census Import Template Enrollment (CITE)

                                                                       2
Streamline your BCBS IL group enrollment
With DocuSign
DocuSign emails the group enrollment package to your client, where they will
electronically fill out and sign the appropriate documents. DocuSign then automatically
emails the agent the completed and signed forms for the agent’s electronic
signature. No more handwritten forms being scanned, emailed or faxed. No more
missing information or forgotten forms. Agents using DocuSign will save time and see a
faster turnaround time on their group submissions.
Agents interested in additional hands on training, please contact Patty Kretschmar at
patty@midwestga.com.
Benefits:
Streamline & securely complete group level paperwork & employee applications
DocuSign can be completed anytime, anywhere on any device
Improved accuracy & legibility of documents
Faster turnaround time for group submissions
How it works:
1. Log into Blue Access for Producers at bcbsil.com.
3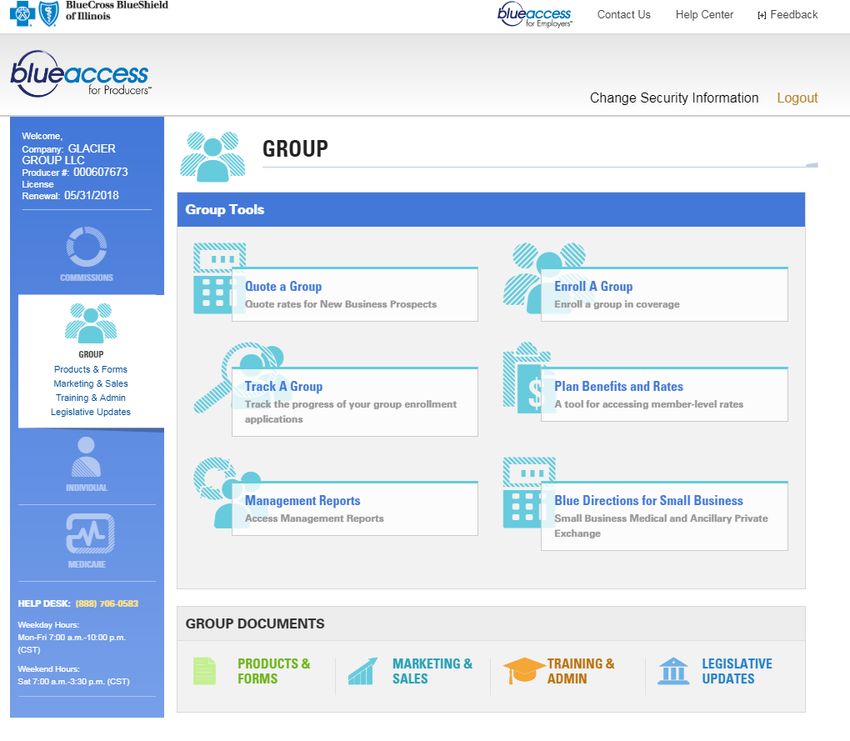
2. Click on the Group icon

3. Click on Products & Forms

                               4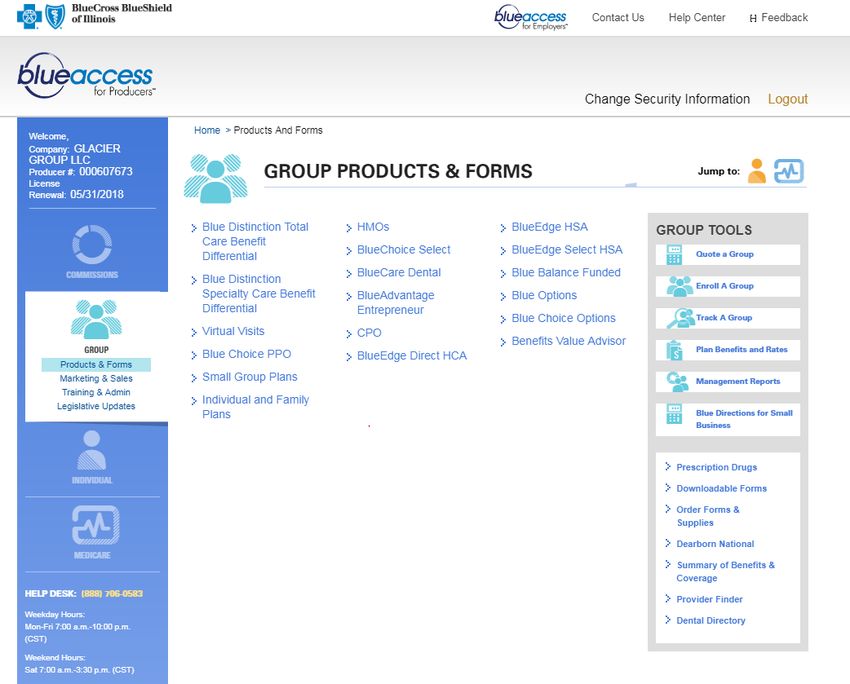
4. Under Group Tools, click on Downloadable Forms

5. Click on the link for the small group 2-50 market size

                                                            5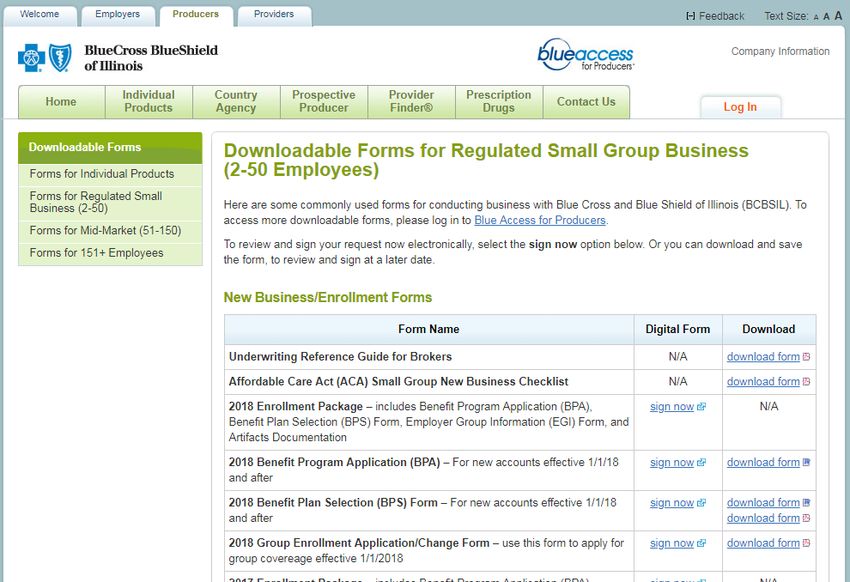
6. Click Sign Now for the 2018 Enrollment Package for Employer

                                                                 6
7. Complete the PowerForm Information page

                                             7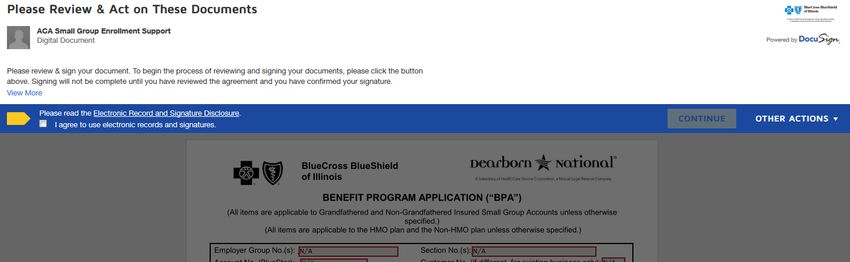
8. The producer or submitter will check off that they agree to use electronic records
   and signatures which will allow them to click the CONTINUE button.

9. The actual enrollment or application documents will appear and the agent has
   the option to enter in any information he has for the group and then click FINISH.

                                                                                    8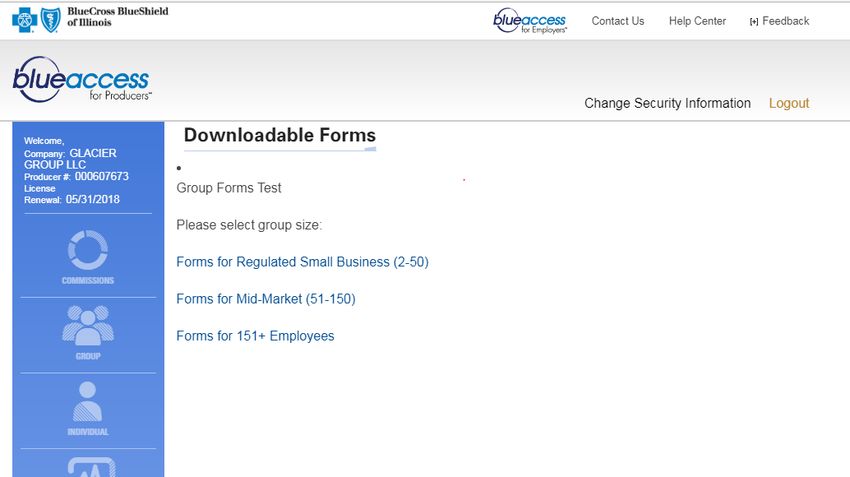
The enrollment envelope has been created and emailed to the group for the next step.

The group will now receive an email from: DocuSign System –
[mailto:dse@docusign.net].

subject line: Please review & sign your 2018 document. IL Group Contact: name

                                                                                       9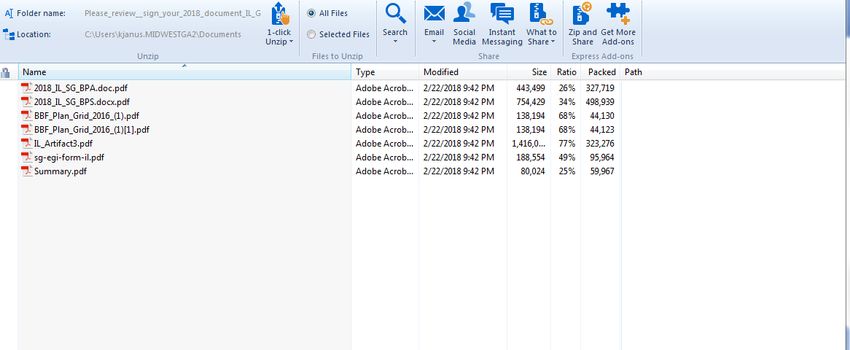
1. The group will click on the REVIEW DOCUMENTS button.

 2. The group will check off that they agree to use electronic records and signatures
 which will allow them to click the CONTINUE button.

                                                                                    10
3. The group will enter the required information into all data fields outlined in red for
all documents.
4. At the end of each document, the employer will be able to electronically sign by
clicking on the gold Sign icon:
115. A pop up will appear allowing where you can adopt your signature. Confirm name
is spelled correctly and then click the Adopt and Sign button.
As the employer continues to move through the remaining documents, they will be able
to electronically sign each document by clicking on the gold Sign button.
The last two pages of the group enrollments packet will be the list of artifacts that can
be uploaded.
1. Wage & Tax form
2. Payroll journal
3. List of employees on company letter head
4. Articles of incorporation/EIN form
5. Full time status certification for owners, partners, proprietors
6. Owners/certification FT form/Partners K1
7. IL 1065 Partnership K1 for husband wife group
8. PEO letter
9. Prior carrier bill
10. Collective bargaining agreement
11. Binder check
12. Routing sheet
126. For those attachments that are required for you group, click on the box before the
attachment title and an orange paperclip will appear.
In the example above, the box checked, is the Wage and Tax. (red arrow) This is
where you would upload the Quarterly Wage and Tax. Check the next box that
matches the next document and upload until all documents have been uploaded.
Click on the orange paperclip (blue arrow) and a pop up will appear allowing the group
to upload the selected document.
6. The group will click on UPLOAD A FILE and they will select the saved document
from their computer and click OPEN. For each additional required document that
needs to be attached, the group will check the box for the specific document and upload
until all documents have been uploaded. Then click DONE.
137. If anything is missing, the system will automatically take you to the field with the
missing information for completion. The FINISH button will not become available until
all required data fields have been completed.
All empty red boxes need to have something entered. You can enter NA if not
applicable. When all field are entered, the finish button will process. Click on the
FINISH button.
14An email, similar to the one the group received, will be sent to the agent for agent’s
information and signature.
1. Agent will click on REVIEW DOCUMENTS.
2. The documents will open and the agent will need to check the box to agree to
use electronic records and signature and then click CONTINUE.
3. The documents the group completed will open and the producer can review but
not edit.
4. The producer will go to the last page of the BPA and enter their agent information
and electronically sign by clicking on the two gold tabs. Make sure the
producer’s BCBS ID number is 9 digits. If needed, use leading zeroes to make 9
digits.
13. The agent will complete the Adopt your Signature and click ADOPT AND
SIGN. This will be done twice, one for each gold tab.
14. The agent will scroll through all of the documents until they reach the
bottom and click FINISH.
15. You are done.
Once MIBS signs as well, Docusign will automatically send the completed documents
to:
The Group
The Agent
The GA
15Click on VIEW COMPLETED DOCUMENTS to open.
16You can download the documents for your records by clicking on the download icon. A
larger view is seen in the second screen shot. Remember, you do not need to send
these forms to your CSR at MIBS as we will automatically receive it after the agent
finishes.
17A pop up will appear offering two download options:
Combined PDF
Separate PDF
Click on the option you want.
Follow the directions of the pop screen to download.
If electing separate PDFs, a zip file will open showing separate PDFs to open and save
or print.
If electing combined PDF, the system will create one PDF document to save or print.
If you have any questions or need to make any changes to the documents, please
contact your MIBS customer service rep. for assistance.
18Docusign and Employee Applications
Employee applications can be collected in the following ways:
Employee applications (for initial enrollment and new hires) are necessary to document
the employee selections of members enrolling and plan selection or waiver with reason.
All applications should be signed and dated.
1. The agent can use DocuSign to send the employee application to each individual
employee using a separate PowerForm for each employee. You will need the
name of the employee as well as the email address for each employee.
19Agent will complete a separate PowerForm Signer document for each employee with
employee’s contact information.
20The screen below will appear and the agent will need to check the box agreeing to use
electronic records and signatures. The CONTINUE button will turn gold and you can
click on it then.
The agent will enter the group information and then click FINISH.
The employee will now receive the email with the application. The will also need to
check the box that they agree to use electronic records and signatures. They will
21complete the application and electronically sign. The completed application will
automatically go to all emails listed on the PowerForm submission.
The agent will need to confirm that all applications are returned.
2. The other option is to collect hand written and signed applications from each
employee.
Using the employee applications, the agent can enter the information into the BCBS
enrollment spreadsheet instead of using the individual applications for enrolling
employees.
Benefits of using enrollment spreadsheet:
1. Very easy to enter data into spreadsheet.
2. Creates a one page document of all eligible employees and dependents, with
contact information and plan selection. So less paperwork to send to your
customer service rep.
3. If employer approves, this will be another list of prospects to sell other products.
4. Spreadsheet can be used as an easy resource for the future when you get
questions regarding who is enrolled and in which plan.
Using the new and updated Census Import Template Enrollment (CITE)
Determine what your Excel Version is.
Excel 1997-2009 is not compatible with the new spreadsheet.
Excel 2010 is mostly compatible (Have only one window open when
working on a document)
Excel 2013-2016 is compatible
Consider turning on Enable Macros feature
Save the CITE document to your local/network drive first before using.
Click on the link below to open the CITE document.
{Link to document}
22Steps for Entering a Group’s Census
1. Open the CITE document and save on your desktop or network using the Group’s name to lable file.
Do not use any spaces or special characters.
2. Enter the Division for the Group - IL and enter the information into the red blocks. As
you click on the red block, a drop down may appear and you can select the correct
option or just type in the information if a drop down does not appear. Click on the
green Go To Census Template button.
233. Enter the employee information into the red blocks which are required. The
spreadsheet will respond based on the data entered and may open additional data
fields.
Example: Column B enter Y or N for enrolling or waiving. If you enter Y for waiving,
then the box in column C turns red requiring the reason waiving. If you enter N to enroll
employee, then different data fields will turn red for required information.
The spreadsheet is designed to make sure all information needed to enroll or waive an
employee is entered.
4. If you have entered data into the spreadsheet but are unable to complete at the
present time, you can click File Save and a pop up box will display. Is data entry
completed for this census? Click No to just save the data. Then you can come back
later to finish.
245. Once data entry is complete, click File Save and a pop up will appear. Click Yes to
save the file and validate the data for errors.
If there are any errors detected during the save, they will be displayed in the Error List
tab at the bottom of the Excel sheet.
25To correct, click on the Import Census Template tab at the bottom of the Excel sheet
and correct as needed.
When all data is entered and validated with no errors, save and email to your MIBS
customer service rep.
Helpful hints:
1. Zip codes with leading zeroes can create a problem when validating. Enter
something into the data field but note row and column and when you email, include the
correct zip code and MIBS will fix at our end.
262. When a group offers life insurance and you check Y, the data fields in columns AW,
AX, AY and AZ turn red. AW is job class so do not enter anything in this field and
when you validate or save, it will automatically populate with “All Active Full Time”.
If you want training on this new procedure, please contact Patty Kretschmar at
patty@midwestga.com.
If you have any questions or issues, please feel free to contact your customer service
representative.
27You can also read