MosaicONE USER GUIDE Digital Signage Management Platform by MAD Elevator Inc - MAD Elevator Inc.
←
→
Page content transcription
If your browser does not render page correctly, please read the page content below
MosaicONE USER GUIDE
        Digital Signage Management Platform by MAD Elevator Inc.

© MAD Elevator Inc.
                                                    Last modified: January 20, 2021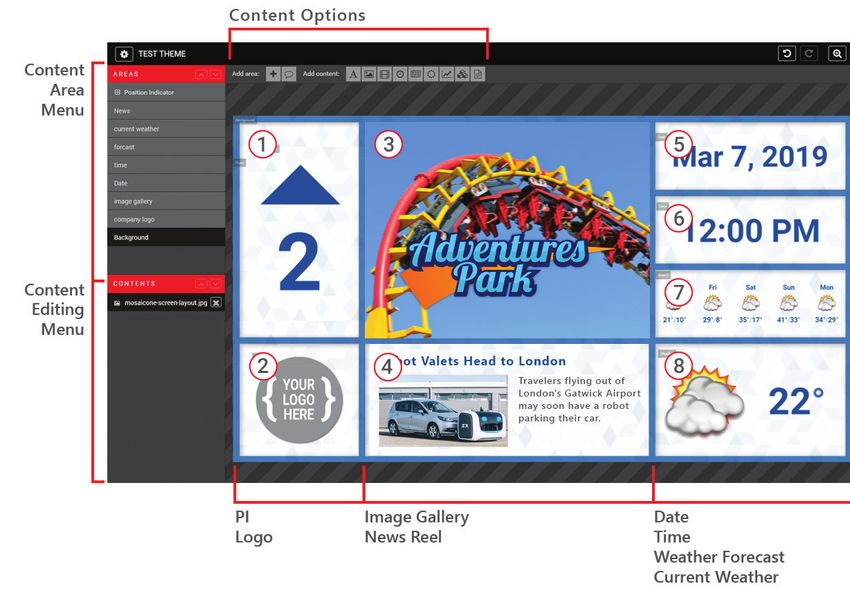
TABLE OF CONTENTS
GETTING STARTED
WHAT IS MosaicONE?                   3
USERNAME & LOGIN                     4

NAVIGATING THE INTERFACE
DEVICES: STATUS                      5
DEVICES: SCHEDULE                    5
DEVICES: EVENTS                      6
THEMES                               6
USERS                                7
EVENT LOG                            8
CREDENTIALS                          8

THEMES
CREATE A THEME                       9
THEME EDITOR                        10
THEME CONTENT & AREAS MENU          10
CREATING A THEME: GETTING STARTED   10
DESIGNATED AREAS & ADDING CONTENT   12
IMAGES & GALLERY                    13
CHANGING COLORS                     14
TRANSITION & DURATION               14
NEWS                                15
DATE & TIME                         16
WEATHER                             17
STOCKS                              18
THEME WITHIN A THEME                18
POSITION INDICATOR                  19
SAVE, PUBLISH & PREVIEW             20
DUPLICATE A THEME                   20
SCHEDULE A THEME                    21

TECHNICAL DETAILS                   22

                                         2
GETTING STARTED
WHAT IS MosaicONE?
MosaicONE is a cloud-native application that allows the user to update and manage any of their networked
devices from MAD through a web browser. The theme designer allows you to create or edit the displays
whenever and wherever you want! You can do it all yourself, or delegate responsibility to other users.

       Text (Notice Boards)
       News, Stocks & RSS feeds
       Time & Weather
       Pictures & Video
       HTML Content
       Position Indicator
       Per-Floor Messaging
       Scheduling
       Fully Customizable

                                                                                                 3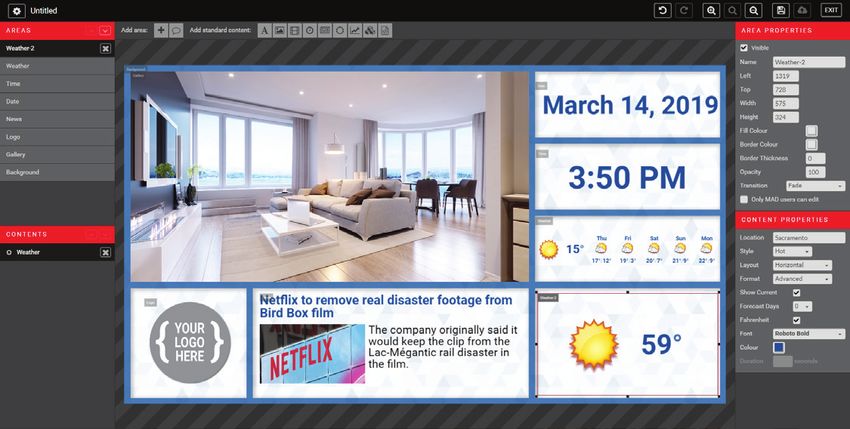
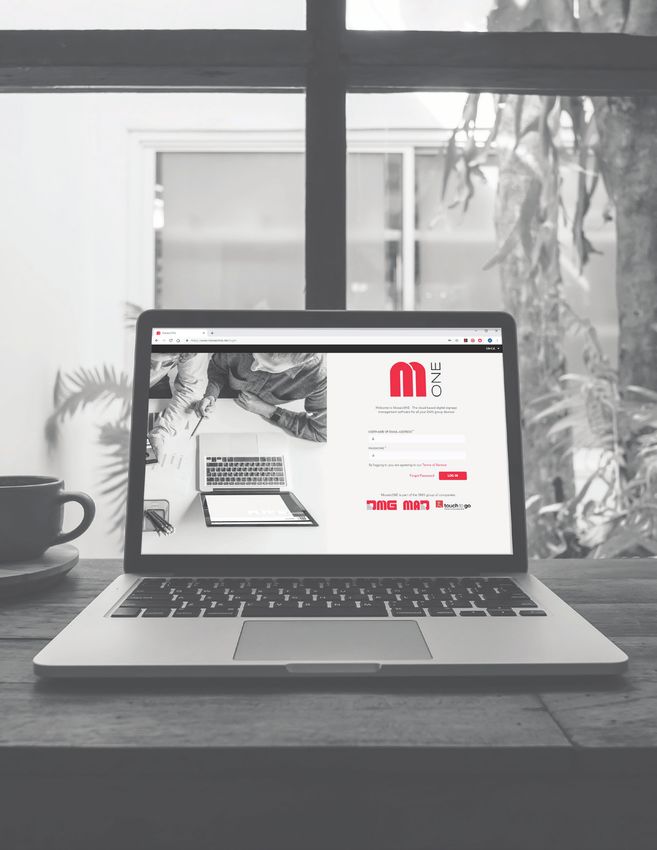
LOGIN
Go to www.mosaicone.net and sign in using your pre-assigned login credentials to access the units in
each of your buildings.

Once you log in you will see the following screen:

Click on the building name to access each screen and update/modify content remotely.

DEVICES
When you enter the building, the following interface is available:

At first glance you can determine the status of the units and if they are functioning.

                                                                                                4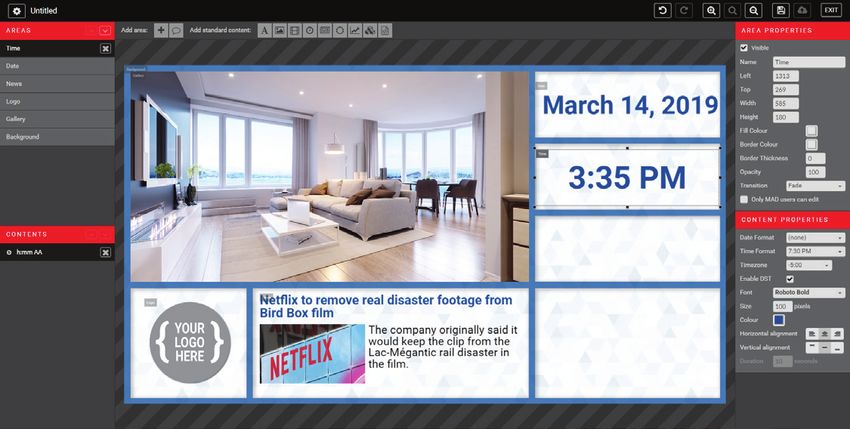
NAVIGATING THE INTERFACE
DEVICES: STATUS
Clicking on each device in “red” will provide access to detailed information on the status of the device.

Clicking on a device from the “Device” menu opens the sub-menu. The sub-menu shows the “Status”,
“Schedule” and “Events” relating to each device.

DEVICES: SCHEDULE
The Schedule page allows you to view the theme that has been scheduled to run on that device.

If you want your theme to run on a specific day or time, click “Add Rule”. You can set up as many rules
as you would like per theme.

                                                                                                    5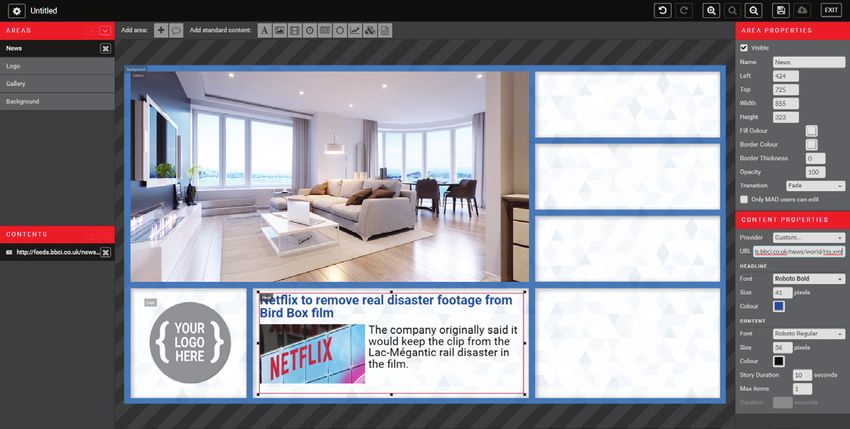
DEVICES: EVENTS
The events page will show information on the most recent events per device. You can also export this
to a CSV file for your records.

THEMES
At first glance from the “Themes” screen, you can view each theme scheduled, the size of the screen in
pixels, whether it has been published to its corresponding device, and the status i.e. whether the theme
is “idle” or “active”.

                                                                                                  6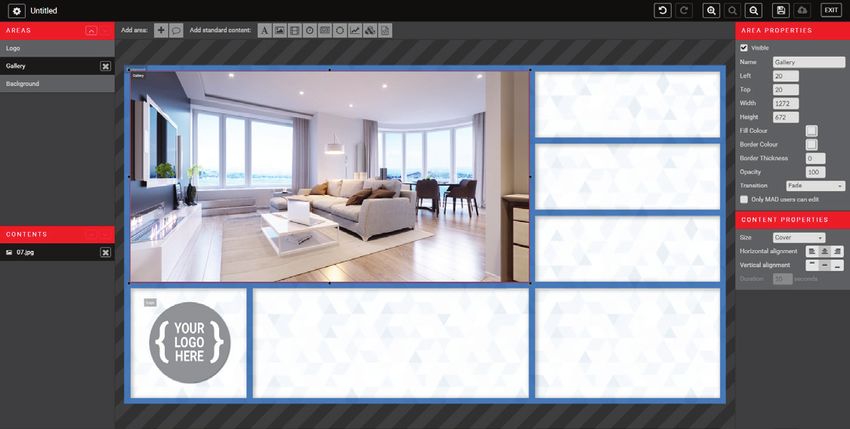
USERS
Returning to the main menu, by clicking on “Users” you can view the name, email address and the
phone number of people who have been allocated access to the system. An example is shown below

By clicking on the cog to the right of each person, you can edit the details and create a password for
each person you have granted access to the system. An example is shown below:

                                                                                                   7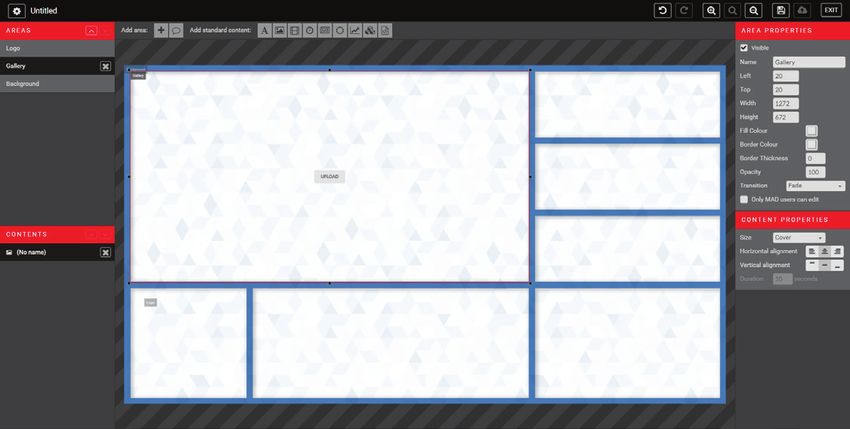
EVENT LOG
The event log shows the device, the status, the date, and the time of each event on the system.

By clicking “Export to CSV” you can download the events log to your computer.

CREDENTIALS
In Credentials, you can add and view the Providers, their App ID, Username, and password. For example,
Stocks from Thomson Reuters seen below:

Once added, it will display in the “Stock” widget in the Theme editor (explained further on page 21).

                                                                                                    8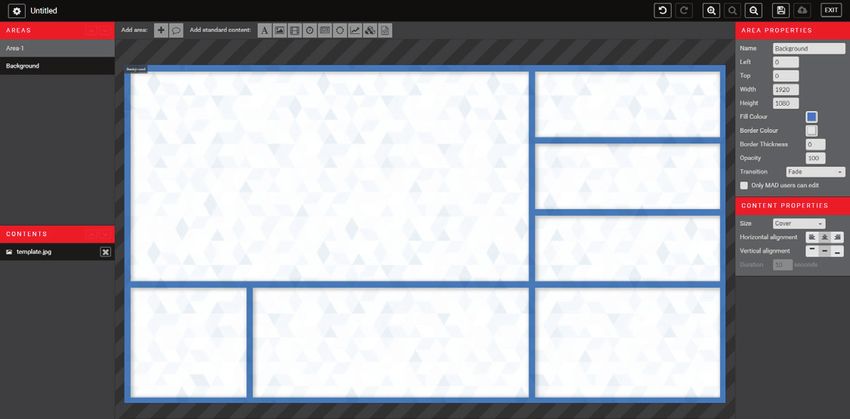
THEMES
CREATING A THEME
Create and manage templates for each device in the Themes section.

Click the “Create Theme” button to get started. To edit a pre-exhisting theme, click on its name, or use
the cog to the right.

In the “Device Type” drop-down menu, choose the
device credentials specific to the device. Leave the
“Position Indicator” unchecked if you do not want the
floor position displayed on the device.

The width and height are automatically calculated
based on the “Device Type” selected. The theme must
match the resolution of the device.

The “Rotate” tab allows to change between landscape
or portrait mode.

Once complete, click “Create Theme”. A new screen will
open showing the interface where your new theme can
be created and edited.

         Tip: Give your theme a name which will assist in identifying which lift or occasion it
         applies to for easy reference.

         Copy a theme instead of starting from scratch each time. Any theme can be shared to
         any building in your account. (explained further on page 22).

                                                                                                    9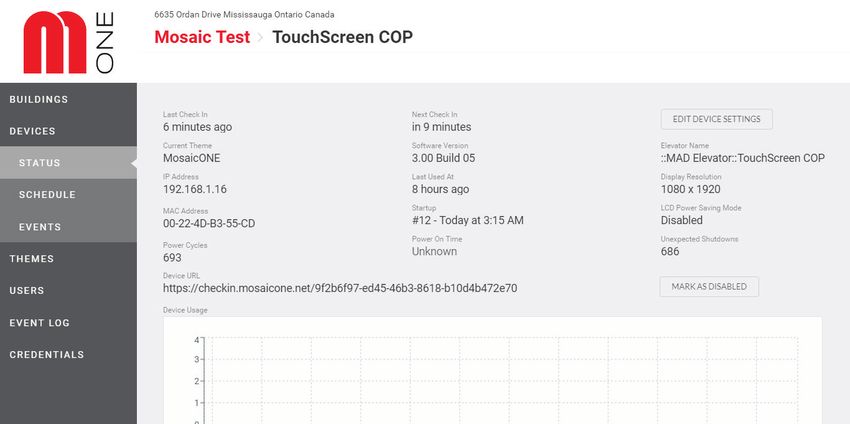
THEME EDITOR
                                                         1.   PI Display     5.   Date Display
The basic functions are in the top black menu            2.   Logo           6.   Time Display
(undo, redo, zoom in, zoom out, savel, publish). The     3.   Video Feed     7.   Weather Forcast
cog in the left allows you to edit the theme settings.   4.   News Reel      8.   Current Weather Display

THEME CONTENT & AREAS MENU
Content Area Menu & Content Editing Menu: The left menus show the “Areas” contained within the
Mosaic screen, and below shows the “Contents” of each Area. You first need to create Areas before you
can place Content in your theme. Areas act as frames containing content within the size you make it.

Area Properties Menu & Content Properties Menu: The right menus show the “Area Properties” and the
“Content Properties”. These two property menus dynamically change depending on which Area and
Content is selected. Here you can edit the contents in more detail (such as name, size, colour, etc.)

Content Options: In the top menu there are tabs to “Add an Area”, and to “Add Standard Content”.

CREATING A THEME: GETTING STARTED
When a new theme is first created, the editing space will be blank except for the “Background” Area.
You can change the name or color of the background in the Area Properties menu.

      To add Content, you need to first add an Area. When you click on this button, an Area box appears
      at the top left of the window by default. It will be added to your Areas menu as “Area-1”. The next
      area by default will be named Area-2, and so on.

An example is shown on the next page. Note: This example is for signage only and does not have a
Position Indicator visible. For an example with floor position, go to page 20.
                                                                                                   10
To add content, have the Area desired selected in the
Areas menu (in black), and click on desired Content.
To add Content, first have the Area selected in the Areas menu (in black), and use the top menu. From
left to right: Text, Image, Video, Date & Time, News, Weather, Stocks, Theme, HTML.
Tip: If you forget what a button does, hover over it; a tool tip will appear with its name.
Ex. For a background image, while Background is selected in the Areas menu, click on the Image icon
on the menu, and upload an image file saved locally on your computer. The upload button will appear in
the center of the Area. In this example, we uploaded a template.
11DESIGNATED AREAS & ADDING CONTENT
To add content to an Area-1, first resize the Area frame and position it where desired. You can do this
by either clicking and dragging it to size, or (while selected) use the Area Properties menu to update to
your specific proportions in pixels (this is where you can rename the Area as well).
While an Area is selected, click on an item in the Content
Options toolbar to add Content to that Area.
For example, adding an Image will give you an upload screen option like below.
To delete an item in an Area, click on the X beside its name in the Contents menu (needs to be
selected first)
To change the order of an Area or Content, use the arrows to move their position (needs to
be selected first)
Update the transitions in the Area Properties menu. By default it is selected to “Fade”.
Update duration in the Content Properties menu. By default it is 10 seconds.
All content will be added in a similar fashion:
1. Add Area
2. Resize Area’s size and position
3. Add Content to Area
4. Customize Content in Properties menus
12IMAGES & GALLERY
To add an image to the Gallery, while the Area is selected, click the Image icon in the Content
Options menu as many times as images you want to rotate in your Gallery. Formats accepted for
images are JPEG, PNG, TIFF, GIF and EPS.
To scale your image, select from the Size dropdown menu:
• Normal: Displays image at exact dimensions
• Stretch: Fit entire image within the Area size; may distort your image
• Fit: Shows entire image within the Area, by default scales by height
• Cover: Scales to width of Area, by default centers vertically
VIDEO
To add Video to an Area, while the Area is selected, click the Film icon in the Content Options
menu. Plesae note the video needs to be in MP4 format.
Similar to the image function, you will see an
“upload” button to upload your video to your
theme.
13CHANGING COLORS
To change the border/fill color of an Area, or the color of a font, click on the Color button in either
the Area Properties or Content Properties menu. Select a color from the provided color palette to
apply the color change.
If you want a cusom color, you
will need to manually find the
RGB value and type it in this
exact format with no spaces:
rgb(#,#,#)
For example, the blue used in
this theme has the format of
rgb(14,77,151).
Click OK when ready.
TRANSITION & DURATION
If you have multiple Contents in your Areas, the default transition between them is “Fade” and the
default duration is 10 seconds per.
The duration can be updated in the Content Properties
menu, and can be seen quickly at the bottom right of
each Content in an Area.
Transition is applied to the entire Area. The following transitions are available to choose from:
• Fade
• Slide Down
• Slide Left
• Slide Right
• Slide Up
14NEWS
To add News to an Area, while the Area is selected, click the News icon in the Content Options
menu.
News Provider can be selected in the first Content Properties drop-down menu. You can also customize
the duration of the news feed, and how many items of news you would like displayed at once. A
separtate property area is provided for headline font and content font.
Available Providers:
• CNBC
• CNN
• Global
• Thomson Reuters
• Yahoo
• Custom
If the News feed you desire is not one of the options, select “Custom” and enter the url of the RSS feed
for the news channel. Ex. BBC World News is http://feeds.bbci.co.uk/news/world/rss.xml and was
entered into the URL box in the example above.
15DATE & TIME
To add the Date and/or Time to an Area, while the Area is selected, click the Clock icon in the
Content Options menu.
Date and Time can be added together in one Area, or separately depending on the format selected in
the drop down menus.
The following formats are available to choose from:
Date: Time:
• 29/3/2019 • 19:30
• 3/29/2019 • 7:30 PM
• Mar 29, 2019 • 7:30:59 PM
• March 29, 2019 • 19h30
If you don’t want either date or time displayed, select “none”.
16WEATHER
To add the Weather to an Area, while the Area is selected, click the Sun icon in the Content
Options menu.
The location will automatically be determined by the location of your building. If you would like to
display weather from elsewhere, type in the location in the text box. you would like the weather to
display for.
There are two styles of icons to choose from: Vector or Hot. Examples below:
Basic format will display today’s date, while Advanced format can display up to 5 days.
By default the temperature will display in celsius; select the fahrenheit checkbox to display in fahrenheit.
17STOCKS
To add Stocks to an Area, while the Area is selected, click the Graph icon in the Content Options
menu.
Here you can specify which Stocks you want displayed by listing them in the Symbols textbox.
Create separate Content Containers and select
Transition “Slide Down” for a traditional stock
transition. Duration between sets of stock symbols
can also be customized.
You can also customize the font, size, gain colour and
loss colour to suit your theme design.
A list of compatible stock symbols can be found at:
https://iextrading.com/trading/eligible-symbols
THEMES
To add Existing Themes to an Area, while the Area is selected, click the Building Blocks icon in the
Content Options menu.
This tool allows for existing themes to display within another theme.
This can come in handy to schedule different content at different times
within an Area to keep the display consistent.
The themes must be saved and published in the same building to be
able to display in a Content Area.
18POSITION INDICATOR
When creating a new theme, be sure to have the
Position Indicator checkbox selected. It will then
automatically be added as the top-most layer to the
theme Areas. It can be minimized at any time.
The following sub-areas are included with the PI. Any
element can be hidden. Uncheck the “Visible” box in
Area Properties to hide.
• Floor (font customization)
• Direction (arrow style customization)
• Elevator ID
• Maximum Persons
• Maximum Weight
• Logo 2 (no smoking icon)
• Logo 1 (CE icon)
Position indicator is required to be a minimum of 2" in height. The minimum pixel size is given in the
Content Properties menu.
# of floors is updated locally by MAD.
To preview the look of the floor numbers, change the floor number in the Content Properties
area when Floor is selected. At this time, the floors do not change in the preview window.
19SAVE, PUBLISH & PREVIEW
In order to Preview your theme, you first need to Save (floppy disk icon) and Publish
(upload icon) your theme in the top-right menu. Then Exit to return to the Themes menu.
From here you will see a green checkmark under the Published column. Click on the green checkmark
to launch a new tab in your browser to preview your theme.
If you have Saved but not Published your theme, a yellow checkmark will appear instead of a green one.
Your theme Preview will be from the last time you Published your theme.
It takes approximately 15 minutes for the system to to update the devices after Publishing.
DUPLICATE A THEME
Once your theme has been created, you can edit it at any time by clicking on the
name of a theme, or from the gear icon selecting Edit.
You can also Publish, Schedule, Copy or Delete a theme from here.
If your theme was created with a PI, it will only be able to duplicate as a PI
theme. The same goes for a Digital Signage theme.
Once your theme has been created, you can
edit it at any time by clicking on the name
of a theme, or from the gear icon selecting
Edit.
You can also Publish, Schedule, Copy or
Delete a theme from here.
20SCHEDULE A THEME
To schedule a default theme to your device,
In the Themes page, click “Schedule” in the
drop-down menu from the gear icon.
Select the Device you want your theme to
be selected to in the pop-up.
For advanced options in theme scheduling,
go to Schedule in the Devices submenu.
If you don’t want your default Theme to be running 24/7, you can add “rules” to schedule it differently.
You can add as many rules as you’d like with whichever themes you’ve created.
Only themes that are compatible with the device will appear in the drop-down menu.
21TECHNICAL DETAILS
FLOOR DESIGNATIONS
The Position Indicator number is controlled by MAD locally (not MosaicONE) as the system is set up as
a hybrid solution. Size, font, colour, and style of the PI can be managed by the user.
SYSTEM UPDATES
The system requires updates to the firmware on a regular basis. Once the system is handed over and
you are in control of MosaicONE and its content, it is your responsibility to ensure that the system is
updated. You will be notified when updates are required to the system.
WHAT HAPPENS IF MY DEVICE GOES OFFLINE?
The device will automatically update every 15 minutes. If for some reason the device cannot connect
to the building’s Internet connection, it will continue to display the last updated information until the
connection is back. You will be able to see the status change in your MosaicONE panel “Devices” under
the “Status” column.
SERVICE
In the event of system failure, contact your Project Manager to arrange for repair by MAD. The cost of
any failures, faults or defects not covered by the warranty are the responsibility of the client.
DEVICE SETUP?
Our MAD team is happy to help with the initial setup and training to use your device. Please contact our
Tech Support team.
HOW TO REBOOT MY MAD SCREEN
You will need to open the COP panel and power cycle the Matisse device/player.
CONTACT
Our in-house technical support team is happy to help with any questions, concerns, or suggestions for
improvement!
Email: support@madelevator.com
Phone: 647-925-4520
Toll Free: 1 (866) 967-8500
22You can also read