NL100 Nitrogen Laser Operation and Service Manual - Stanford Research Systems
←
→
Page content transcription
If your browser does not render page correctly, please read the page content below
Operation and Service Manual

NL100
Nitrogen Laser

               Stanford Research Systems

                           Revision 1.12 • January 24, 2014
Certification
Stanford Research Systems certifies that this product is in compliance with IEC 60825 and U.S.
Code of Federal Regulations Title 21, Part 1040.10, and that it met its published specifications
when shipped.
Warranty
This product is warranted against defects and materials for a period of one (1) year after
shipment. The laser cartridge is warranted for a period of one (1) year or 20,000,000 laser shots,
whichever comes first.
Service
For warranty service or repair, this product must be returned to a Stanford Research Systems
authorized service facility. Contact Stanford Research Systems or an authorized representative
before returning this product for repair.
Information in this document is subject to change without notice.
Copyright © Stanford Research Systems, Inc., 2008, 2010, 2014. All rights reserved.
Stanford Research Systems, Inc.
1290-C Reamwood Avenue
Sunnyvale, California 94089
www.thinksrs.com
Printed in U.S.A.
NL100 Nitrogen LaserSafety and Preparation For Use iii
Safety and Preparation for Use
CAREFULLY READ THE SAFETY INFORMATION IN THIS SECTION
! BEFORE USING THE NL100 NITROGEN LASER. LASER SAFETY PAYS!
The NL100 Nitrogen Laser is a Class 3B that emits invisible ultraviolet (UV) radiation at
337.1 nm with sufficient intensity to be considered an acute hazard to human eyes and
skin. Therefore, all persons operating the NL100 laser and all persons in the vicinity of
the NL100 laser when it is in operation must be aware of the hazards of UV laser beams.
Basic Safe Laser Practices
• NEVER look directly into the laser beam.
• Only qualified personnel should operate the laser system.
• Always wear laser safety glasses or eyewear that protects against UV laser light
whenever the POWER LED emission indicator is lit. See below for a partial vendor
list of Do not expose skin to the laser beam because burns may result. Chronic
exposure of skin to UV light may increase the risk of skin cancer.
• Do not expose eyes or skin to specular reflections generated by the laser beam and an
optical surface.
• Securely mount the NL100 laser system and all optical elements in the beam path.
Trace all specular reflections of the laser beam and block eye or skin access to these
specular reflections.
• NEVER operate the laser with the protective housing off. The laser power supply
generates high voltages and currents that have the potential to produce a lethal
electrical shock.
• If the NL100 is used in a manner not specified by the Stanford Research Systems, the
protection provided by the NL100 may be impaired.
Stanford Research Systems recommends that users obtain the American National
Standards (ANSI) Z136.1 (2000) Safe Use of Lasers, (available from the Laser Institute
of America on the Internet at www.laserinstitute.org) or the IEC 60825-1 Safety of Laser
Products – Part 1: Equipment Classification, Requirements, and Users Guide prior to
operating the NL100 nitrogen laser system.
CAUTION – USE OF CONTROLS OR ADJUSTMENTS OR PERFORMANCE
OF PROCEDURES OTHER THAN THOSE SPECIFIED HEREIN MAY RESULT
! IN HAZARDOUS RADIATION EXPOSURE.
NL100 Nitrogen Laseriv Safety and Preparation For Use
Safety Features
The NL100 laser system has been designed with the required safety features for compliance
with IEC 60825 and 21 CFR 1040.10.
1. Protective housing 4. Emission indicator
2. Beam shutter 5. Key switch
3. Remote interlock connector 6. Three-second delay (not shown)
Figure 1. Front and back views of the NL100.
Warning Labels
The NL100 laser system has been designed with the required warning labels for compliance
with IEC 60825 and 21 CFR 1040.10.
A. Warning logotype C. Protective housing warning
B. Aperture warning D. Certification/Identification label
(On bottom plate)
Figure 2. Location of warning labels on the NL100.
NL100 Nitrogen LaserSafety and Preparation For Use v
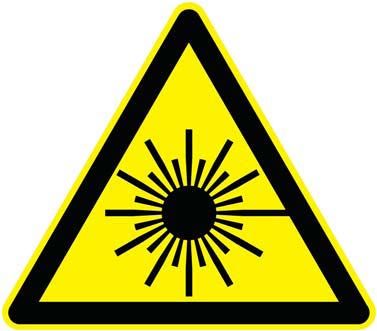
The warning labels that are attached to the NL100 or are painted onto the case are
reproduced below. These warning labels are a requirement for compliance with 21 CFR
1040.10 and IEC 60825.
Figure 3. Laser hazard label, located on the front panel near output aperture.
Figure 4. Invisible laser radiation label, located on the side of the protective cover
Figure 5. Aperture label, located on the front panel near output aperture.
Figure 6. Caution label, located on both sides of the protective cover.
Figure 7. Identification and certification label, located on bottom plate.
NL100 Nitrogen Laservi Safety and Preparation For Use
Vendors of Laser Safety Eyewear
Below is a partial list of vendors of laser safety eyewear. SRS does not endorse these
vendors or their products over other available safety eyewear vendors and products, and
provides this vendor list only for reference.
Kentek Corporation
1 Elm Street
Pittsfield, NH 03263
800-432-2323
www.kentek-laser.com
Rockwell Laser Industries
P.O. Box 43010
Cincinnati, OH 45243
800-945-2737
www.rli.com
Lase-R Shield
900 Douglas Pike
Smithfield, RI, 02917
1-800-288-1164
www.lase-rshield.com
GPT Glendale, Inc.
Glendale
10 Thurber Boulevard
Smithfield, RI 02917-1896
800-500-4739
www.glendale-laser.com
Laser Vision USA
595 Phalen Boulevard
St. Paul, MN 55101
800-393-5565
www.lasersafety.com
NL100 Nitrogen LaserSpecifications vii NL100 Nitrogen Laser Specifications Optical Laser wavelength 337.1 nm Optical bandwidth 0.1 nm Pulse repetition rate 1-20 Hz, internal trigger; 0-20 Hz external trigger Pulse width
viii     Specifications

       NL100 Nitrogen Laser
Contents ix
Contents
Certification ii
Warranty ii
Service ii
Safety and Preparation for Use iii
Basic Safe Laser Practices iii
Safety Features iv
Warning Labels iv
Vendors of Laser Safety Eyewear vi
NL100 Nitrogen Laser Specifications vii
Contents ix
Unpacking 1
Checklist 1
Standard Equipment and Supplies 1
Optional Equipment 1
Additional Necessary Equipment 1
Quick Start 2
Operating Instructions 3
Operating Controls 3
Key Switch 3
Power Input 4
Sync Out (Optional) 4
Trigger In 5
Rate 6
DB-9 Connector 7
LED Indicators 8
Beam Shutter 9
High Voltage Adjust 10
Maintenance and Service 11
Maintenance 11
Service 11
Laser Cartridge Replacement 11
Tools Required 11
Procedure 11
Mechanical Drawings 16
NL100 Nitrogen Laserx Contents
NL100 Nitrogen LaserUnpacking 1
Unpacking
WARNING!
Read the safety information and these operating instructions carefully before operating
this laser system.
Checklist
Open the box and inspect all components of the NL100 laser system.
Report any damage to Stanford Research Systems immediately.
Compare the contents of the shipping box against your original order and the
checklist below. Report any discrepancies immediately.
Standard Equipment and Supplies
NL100 laser system unit
One Hypertronics #D01PB 306 MST plug
Two keys for the key switch
One DB-9 interlock defeat connector
Optional Equipment
Optical synchronous detection circuitry, installed in factory
Sync out BNC connector, back panel
Additional Necessary Equipment
24 VDC, 50 W, 3 A peak power supply
NL100 Nitrogen Laser2 Quick Start
Quick Start
WARNING!
UV light can be dangerous! Be familiar with the safety information in this manual before
! proceeding.
1. Supply 24V power
See specifications on Page vii for power requirements.
2. Defeat Interlock
Insert the DB-9 plug supplied with your laser into the DB-9 connector on the back panel of the laser or
hook up your own laser interlock connector to the DB-9 on the laser. See Page 7 for more details. The
laser will not operate if the interlock is not defeated.
Figure 8. Supplied interlock defeat connector.
3. Turn on Internal Trigger
Turn RATE switch from OFF to somewhere between 1 Hz and 20 Hz. Alternatively, you can supply an
external trigger. See Page 5-6 for more information on the requirements for external triggering.
4. Turn Key Switch to On Position
Turning the key switch to the on position allows power to flow to the laser system.
5. Open Shutter
After a 3 second delay after turning the key switch, you will hear the laser firing and can observe the laser
beam by placing a fluorescing material (e.g., a business card) in the path of the beam.
NL100 Nitrogen LaserOperation 3
Operating Instructions
WARNING!
Read the safety information and these operating instructions carefully before operating
! this laser system.
Operating Controls
The operating controls for the laser system, with the exception of the beam shutter, are
located on the back panel, as shown in Figure 9.
Figure 9. Back panel and operating controls of the NL100.
Key Switch
Turning the key switch to the ON position connects the 24V DC input power to the laser
system, the POWER LED illuminates, and the laser system begins a 3-second delay
timer. Following the 3-second delay, the laser is armed and ready to fire, either from an
NL100 Nitrogen Laser4 Operation
internal trigger (see RATE below) or from an external trigger. The key cannot be
removed from the key switch when the switch is in the ON position.
Power Input
The NL100 requires 24V DC, 3A peak, 1.5 A average input power. Power may be
applied through a Hypertronics #D01PB 306 MST plug connected to the Hypertronics
receptacle located on the bottom right of the back panel. A Hypertronics connector is
supplied with your laser. Alternatively, power can be supplied through the DB-9
connector (see DB-9 CONNECTOR below).
Figure 10. Hypertronics power receptacle, as viewed from the back panel of the NL100. Supply
+24V DC on Pin 1. Pin 2 is the supply return and pin 3 is the case ground.
Sync Out (Optional)
This BNC connector outputs a +5V pulse into 50 Ohms synchronously with the laser
emission from the front aperture. Figure 11 shows a single shot from the sync out BNC
captured with an oscilloscope.
Figure 11. Single shot oscilloscope trace of the sync out of the NL100.
NL100 Nitrogen LaserOperation 5
Trigger In
When the RATE switch is in the OFF position (see RATE below), the NL100 is triggered
by a TTL pulse at this BNC connector. The laser will fire the laser on the rising edge of
the TTL pulse. The width required of the TTL pulse depends on whether the laser is
being operated in COMMAND CHARGE or AUTO CHARGE mode. (See DB-9
CONNECTOR below for information on how to configure the laser in either
COMMAND CHARGE or AUTO CHARGE modes).
In AUTO CHARGE mode, the falling edge of the trigger pulse has no effect on the
operation of the NL100 laser system, as shown in Figure 12. The trigger pulse width
should be > 1 µs. The high voltage charging circuitry becomes active immediately after
the laser has fired.
trigger pulse
high voltage
laser output
time
Figure 12. Timing diagram of AUTO CHARGE mode. Note that time is not shown to scale and the
diagram does not reflect triggering delays, etc.
In COMMAND CHARGE mode, high voltage charging circuitry becomes active only
when a TTL low appears on the trigger input, as depicted in Figure 13. To allow for
complete high voltage charging In this case, the dwell time of the trigger pulse must be
>30 ms. In other words, the trigger must be TTL low for >30 ms in COMMAND
CHARGE mode.
NL100 Nitrogen Laser6 Operation
Tdwell > Tdwell >
30 ms 30 ms
trigger pulse
high voltage
laser output
time
Figure 13. Timing diagram of COMMAND CHARGE mode. Note that time is not shown to scale
and the diagram does not reflect triggering delays, etc.
Where possible, we recommend using the NL100 in the COMMAND CHARGE mode.
This mode limits the amount of time high voltage resides on the laser components and
therefore improves laser performance and lifetime.
As shown in Figure 14, the trigger pulse is optoisolated from the rest of the laser
electronics. This allows triggering of the laser without permitting electrical noise from
the laser discharge from impacting the user’s electronics.
+5V
6N137
TRIG IN
200 3.9K .1U
TRIGGER CIRCUIT
1N5231B
Figure 14. Schematic diagram of optoisolated trigger input.
Rate
When the RATE knob is in the EXT TRIG position (indicator pointing down), the laser
system is in EXTERNAL TRIGGER mode, and will fire only when an appropriate pulse
is applied either to the TRIG IN BNC or through the DB-9 connector.
When the RATE knob indicator is between 1 and 20, the laser system is in INTERNAL
RATE mode and will generate laser pulses between 1-20 Hz, depending on the
positioning of the RATE knob indicator.
NL100 Nitrogen LaserOperation 7
NOTE: When the laser system is in INTERNAL RATE mode, it is also in AUTO
CHARGE mode, regardless of the configuration of the DB-9 connector. When the laser is
in INTERNAL RATE mode, trigger pulses applied at either the TRIG IN BNC or the
EXT TRIG pin of the DB-9 connector have no effect on the operation of the laser.
DB-9 Connector
The female DB-9 connector provides a convenient way to interface to the NL100 laser’s
inputs and outputs. Below is a description of the function of each pin.
Pin 1 and Pin 2: +24V DC In
An alternate connection for providing electrical power to the NL100. Pins 1 and 2 are tied
together.
Pin 3: + CHARGE CONTROL
The NL100 laser system provides a +5V (0.1 mA, max) level at Pin 3. If left high, the
laser system will be in AUTO CHARGE mode. In AUTO CHARGE, the high voltage
charging system will begin to recharge the storage capacitor and spark gap immediately
after the laser fires. Use of the DB-9 connector provided with the NL100 will put the
laser system in the AUTO CHARGE mode.
If Pin 3 is pulled low, the NL100 laser system will be in COMMAND CHARGE mode.
With COMMAND CHARGE, the high voltage charging begins only when a TTL low
level is received at one of the TRIGGER inputs (either the TRIG IN BNC or Pin 4 of the
DB-9). Since high voltage charging requires 30 ms, the Trigger pulse width must be
greater than 30 ms when COMMAND CHARGE is used.
Because COMMAND CHARGE reduces the amount of time key laser components are at
high voltage, especially at lower repetition rates, we recommend use of this mode where
possible.
Pin 4: -Trigger
Current return for opto-isolated external trigger pulse. Note that because the
EXTERNAL TRIGGER is optoisolated, the reference for the trigger, Pin 8: -Trigger is
isolated from GND. See Pin 8, +Trigger below and TRIGGER IN above for more
information.
Pin 5: +Interlock
The laser system provides +24V (10 mA, max.) level that must be terminated into Pin 9: -
Interlock or GND for the laser system to operate. The NL100 laser system is shipped with
one male DB-9 connector, where this connection is provided.
NOTE: The laser will not operate if the provided male DB-9 connector is not in place and
the Pin 5: +Interlock is not otherwise terminated!
This interlock is provided so that the user can control the laser system externally with a
door switch, for example.
Pin 6 and Pin 7: GND
Ground and electrical power return.
NL100 Nitrogen Laser8 Operation
Pin 8: +Trigger
Pin 8 provides an alternate connection for externally triggering the laser. Note that
because the EXTERNAL TRIGGER is optoisolated, the reference/return for the trigger
current, Pin 4: -Trigger is isolated from GND. See TRIGGER IN above for additional
information.
Pin 9: -Interlock
Return for Pin 1: +Interlock.
LED Indicators
Power LED
This LED is illuminated whenever the NL100 laser system is powered. A three-second
delay circuit prevents the laser from firing when electrical power is first applied to the
laser system to allow time for the laser beam path to be cleared.
Charge LED
This LED is lit when the high voltage charging circuit is active. In AUTO CHARGE
mode, the Charge LED is on whenever the laser is powered. In COMMAND CHARGE
mode, the Charge LED flashes on while the trigger pulse is high.
Trig LED
The Trig LED flashes when the NL100 laser system either receives a valid external
trigger or generates a trigger internally.
NL100 Nitrogen LaserOperation 9
Beam Shutter
The beam shutter is located at the front of the NL100 laser system, as shown in Figure 15
and Figure 16. Placing the beam shutter in the closed position mechanically blocks the
beam aperture, preventing laser emission from exiting the laser housing.
Figure 15. Front of the NL100 laser system, showing the beam shutter in the
closed position.
Figure 16. Front of the NL100 laser system, showing the beam shutter in the open
position.
NL100 Nitrogen Laser10 Operation
High Voltage Adjust
The energy output of the NL100 laser system is roughly proportional to the high voltage
charge. The high voltage can be changed by adjusting the ten-turn potentiometer that can
be accessed through the hole labeled HV ADJUST located in the left side of the
protective housing. The high voltage of each unit is set during testing such that the unit
meets specifications. As the pulse energy drops as the laser tube ages through use,
increasing the high voltage will help offset the drop in pulse energy.
We do not recommend running the NL100 laser system with the high voltage adjusted to
the maximum for long periods because this will shorten the life of laser cartridge. If your
application does not require full pulse energy of the NL100, reducing the high voltage
may significantly increase cartridge life.
Figure 17. Changing the high voltage adjustment potentiometer.
NL100 Nitrogen LaserMaintenance and Service 11
Maintenance and Service
Maintenance
The NL100 laser system, with a sealed laser tube within a modular laser cartridge, is
designed to be completely maintenance-free.
Service
The laser cartridge, which contains the laser tube and other high voltage components that
are expected to degrade with use, can be replaced, thereby restoring the NLl00 laser
system performance to that achieved when new.
We recommend that when the NL100 performance has degraded below the specifications
listed in this manual, or 2 years have elapsed since the unit was purchased or last
serviced, that the unit be returned to SRS for cartridge replacement, test and calibration.
Please contact SRS at 408-744-9040 to obtain a return merchandise authorization (RMA)
number.
For the technically sophisticated NL100 user who wishes to replace the laser cartridge
themselves, first obtain a replacement laser cartridge from SRS and then carefully follow
the instructions and illustrations given below. We strongly recommend that only
technically sophisticated users who are familiar with lasers and high voltage circuits
perform this service operation. All other customers should return the unit to SRS for
service. If you are in doubt, call SRS.
Laser Cartridge Replacement
Tools Required
Replacement laser cartridge
PH1 Phillips screwdriver
Nut Driver, ¼”
Procedure
1. Turn the NL100 laser key switch off and disconnect all cables.
2. Remove the Phillips screws that secure the protective housing to the laser frame and
remove the protective housing.
NL100 Nitrogen Laser12 Maintenance and Service
Figure 18. Remove the screws on the protective housing.
WARNING!
! Never provide power to the NL100 laser or attempt to operate the NL100 laser with the
protective cover removed! Doing so may expose the user to lethal voltages!
3. Disconnect the trigger and high voltage connectors on the laser cartridge, as shown in
Figure 19.
Figure 19. Disconnect high voltage connectors to the laser cartridge.
NL100 Nitrogen LaserMaintenance and Service 13
4. Disconnect the ground and monitor line connector, as shown in Figure 20.
Figure 20. Disconnect the ground and monitor connector.
5. Remove the four 4-40 nuts that secure the laser cartridge to the bottom plate.
Figure 21. Remove laser cartridge mounting nuts.
6. Remove the laser cartridge.
Figure 22. Remove laser cartridge.
NL100 Nitrogen Laser14 Maintenance and Service
7. Connect ground and monitor line connector plug to the power supply board, as
shown in Figure 23. Notice that both the cartridge connector and the circuit board
header are polarized. Take care to ensure proper orientation of the cartridge
connector.
WARNING!
! Be certain this connection is made is correctly before proceeding! If the unit is powered
on after this connection is improperly made, the cartridge will be irreversibly damaged!
Figure 23. Reconnect ground and monitor line connector.
8. Identify the trigger and HV leads coming from the board transformers. As shown in
Figure 24, the trigger lead is the shorter of the two, and connects to the upper female
high voltage connector on the laser cartridge.
Figure 24. Identify the trigger and HV leads.
NL100 Nitrogen LaserMaintenance and Service 15
9. Connect the trigger and HV lead connectors to the appropriate receptacle, as shown
in Figure 25. Be sure to tighten the knurled nuts for each connector to the receptacle.
Figure 25. Connect the trigger and HV connector plugs to their respective receptacles.
10. Make sure the HV lead is clear of all components attached to either printed circuit
board as shown in Figure 26. It may touch the trigger wire lead.
Figure 26. Make sure HV lead is not near board components.
WARNING!
Improper trigger and HV connections will result in the unit not operating, permanent
! damage to the unit, and expose the user to unsafe conditions. Contact SRS if you are
unsure if you performed this step correctly.
11. Secure new cartridge to bottom plate with four 4-40 nuts.
12. Carefully reposition the protective cover and replace the 4-40 Phillips screws that
secure the cover.
NL100 Nitrogen Laser16 Mechanical Drawings
Mechanical Drawings
NL100 Nitrogen LaserYou can also read