EARTH DEFENCE TABLE GUIDE BY SHORYUKENTOTHECHIN
←
→
Page content transcription
If your browser does not render page correctly, please read the page content below
Page 1 of 23

    Earth Defence Table Guide
     By ShoryukenToTheChin

     4
             6

         3

                  7   8

                          9
                              10
    2         5

1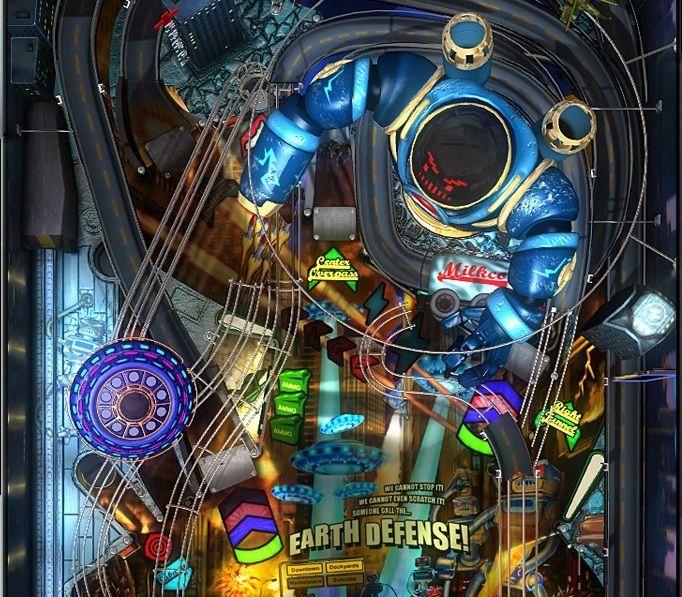
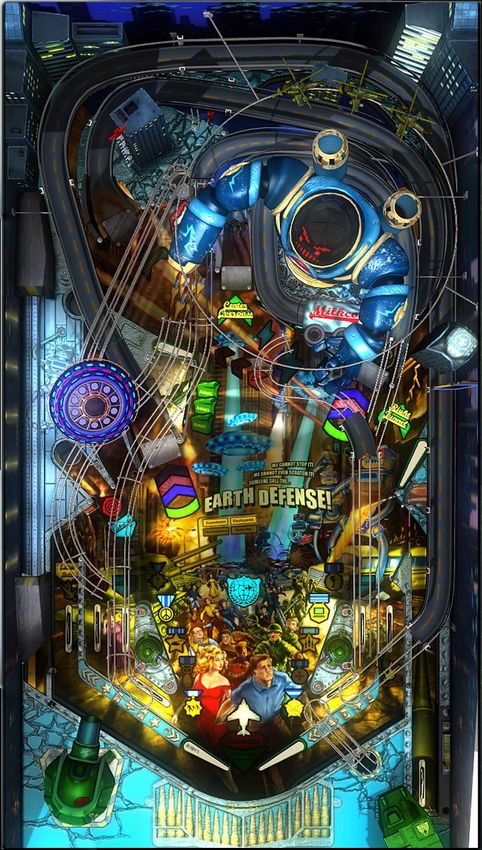
Page 2 of 23
Key to Table Image Above *Thanks to Community Member - Cloda for the Overhead Image*
1. Subway Sink Hole
2. Captive Ball
3. Left Orbit
4. Spiral Ramp
5. Left Highway Ramp
6. Rescue Sink Hole
7. Hidden Left Mini - Orbit
8. Centre Highway Ramp
9. Right Highway Ramp
10. Right Orbit
In this Guide when I mention a Ramp etc. I will put a number in brackets which will correspond to the Key
above, so that you know where on the Table that particular feature is located.
TABLE SPECIFICS
Introduction
This Table was one of the first Downloadable Content Tables which were made available for Pinball FX1. It
was one of the most complicated Tables that Zen Produced which to me was one of its many charms. The
Table featured breath-taking Artwork and its Background Music as well as Audio Cues was just the icing on
the preverbal Cake. You really lived the whole Theme that your Earths last defence against the Evil Robots.
Now when Zen Studios launched their new Platforms such as Pinball FX2 & Zen Pinball 2 etc. they decided
to upgrade this Table among others to the new Platforms Physics & Graphics Engine. The Table does play
differently on the new Physics engine but it’s still a lot of fun and as challenging as ever. Hopefully this
Guide will make it less of a challenge
Make sure to try out the other classic Tables, as well as the newer Tables on the Platforms etc.
Notice: This Guide is based off of the Pinball FX 2 version of the Table on default controls. Some of the
controls will be different on the other versions (Zen Pinball 2, Zen Pinball 3D, etc...), but everything else
in the Guide remains the same.
Skill Shot
Skill Shot is attained by pressing the ‘Launch’ Button when the crosshair is directly over the Robots head on
the Dot - Matrix. Once you do this you will be awarded one of the many random awards which can range
from Right Kickback being activated to upgrades to your systems like Military AI (Artificial Intelligence)
etc.
Crosshair – Press the
‘Launch’ Button
when it is in this
position to attain a
Skill Shot award!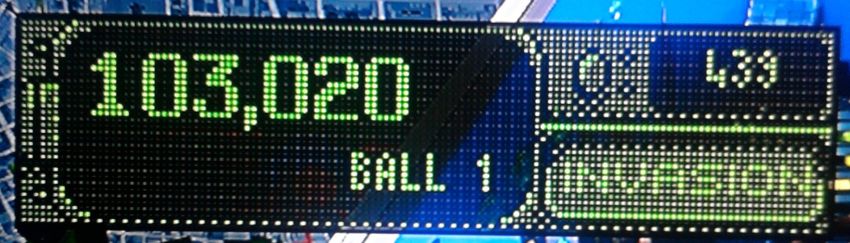
Page 3 of 23

Kick Back & Ball Save
Kickbacks – Each of the Kickbacks are activated in a different method, which I will detailed below –

Right Kickback – This is activated either by attaining the Skill Shot Award or if you complete one of the
Save Me Hurry Up Modes, this is activated by hitting either of the 3 Save Me Targets located on the Table
Playfield –

                                     Save Me
                                      Target

                                     Save Me
                                                                Save Me
                                      Target
                                                                 Target

Upon hitting one of the 3 above Targets shown in the Image, you will then begin the Hurry Up Mode, you
will then need to hit the lit Ramp/Orbit before the timer runs out to save the Girl. You are given about 20
Seconds, upon saving her you will be awarded with the Right Kickback.

If you hit all of 3 of the Targets and complete the Save Me Hurry Up Modes for each of the Targets on the
same Ball, you will be awarded with lighting Extra Ball on the Subway Sink Hole (1) you then hit that to
collect it.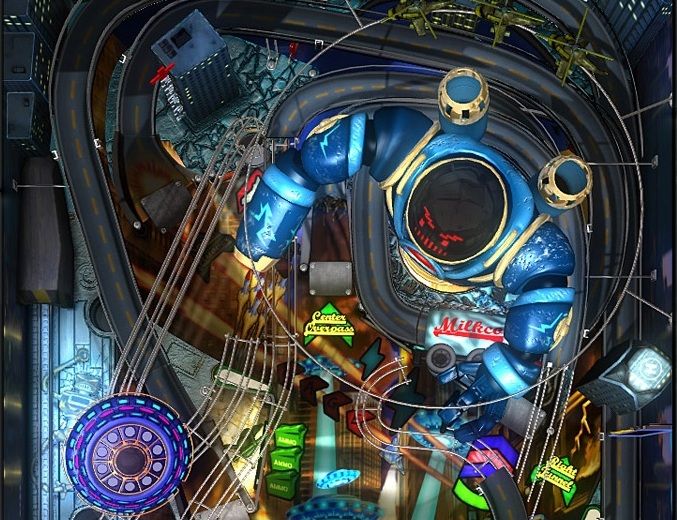
Page 4 of 23

Left Kicback – This is activated by having the Ball roll down the Left furtherest Inlane (has a Red Circle on
it) then immediately hitting the Right Orbit (10), upon doing so this Kickback will become activated –

            Red Circle –
             Located on
            furthest Left
               Inlane

  Left Kickback                                                                             Right
    - Activated                                                                          Kickback -
     Light will                                                                         Activated Light
   flicker when                                                                          will flicker
     activated.                                                                         when activated.

Then if the Ball goes down the Left Outlane - The Cannon (Left Kickback) will automatically fire the Ball
into the Mission Activation Sink Hole area, if the 3 Robot Drop Down Targets are still blocking it then the
Cannon will knock one of them down for you.

                 *Note - This Table doesn’t reset the Kickbacks earned if you lose a Ball*

Ball Save – this can be activated by hitting the Left Orbit (3) twice in quick succession with the Top Right
Flipper, then hit the Ball with the Top Right Flipper up the Spiral Ramp (4) to be awarded with a RAGE
Combo *Note – after you have hit the Left Orbit (3) twice you can take as long as you want to hit the
Spiral Ramp (4) because the last shot for RAGE Combo will remain available throughout that Balls life
cycle.* This will light one of the 10 Medals which are needed to be all lit to engage in the Tables Wizard
Mode (More Info later in the Guide).

   *Note – This Ball Save remains active until you lose the Ball or after 30 seconds. Which ever comes
                                                 first!*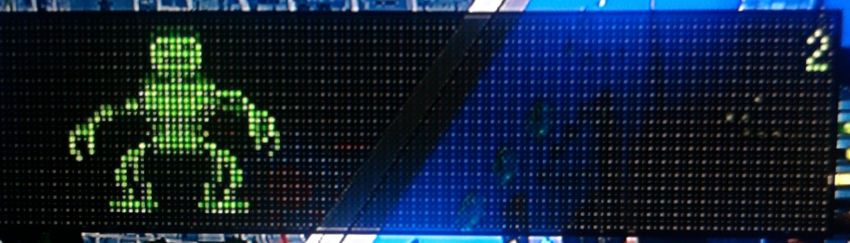
Page 5 of 23

Extra Balls
The 1 Way to achieve an Extra Ball –

   •   Method 1: Save Me Extra Ball; Complete all 3 of the Save Me Hurry Up Modes & collect the Extra
       Ball at the Subway Sink Hole (1). If you are unsure how to do this look earlier in the Guide in the
       Right Kickback section.

Raising the Multipliers
To raise the Multipliers on this Table you need to do hit all 3 ‘AMMO’ Multiplier Targets to raise the
Multiplier level to the next, for example first its 2x Multiplier then 4x Multiplier etc. –

                                                                      Hit all 3 ‘AMMO’
                                                                     Multiplier Targets to
                                                                    advance the Multiplier
                                                                       to the next level.

The Multiplier maxes out at 20x Multiplier, the Multiplier level can be seen on the Top Right of the Tables
Playfield on a Vertical Sign.

                      *Note – Upon losing the Ball your Multiplier Level will reset!*
Page 6 of 23

Invasion Multiball *1, 2 or 3 Balls* Hurry Up Mode
Upon starting each Ball, you will notice that the Dot - Matrix will display a 500 Second countdown timer.

Once this timer runs out, the Flippers will go dead (You won’t be able to use them) and the Ball will drain
and then the Invasion Mode will begin. You will then be given a Ball; to complete this Mode you must shoot
the Rescue Sink Hole (6) with the every Ball that is currently on the Playfield. You always will start off with
1 Ball and then after every 10 seconds or so another Ball will launch into the Playfield, up to 3 Balls. Every
Ball is represented by a Robot on the Dot – Matrix –

If you lose this Mode, a random Medal will be taken away and your Threat level will increase by 1 (More on
this later in the Guide).

    *Note - There is a way to tell if the Invasion Mode is going to start soon when you are in another
  Multiball Mode. The Danger light on the playfield (that big Red light that say "Danger") will begin to
  flash. An occasional flash (once every so often) indicates you have about 60 seconds or so left on the
timer. When it starts to flashing/blinking more consistently (flashes a lot), it means you have less than 20
                       seconds left. When this happens just hit the Captive Ball (2).*

Now to avoid the Invasion, hit the Captive Ball (2) which is located on the left side of the Table. The first hit
will start a 100 Second countdown for the 1st wave of the Invasion, the 2nd will start a 50 Second countdown
for the 3rd wave and the 3rd and final hit will reset the timer back to 500 Seconds. If the timer reaches 20
Seconds before the timer runs out you will hear "Hurry up!"

Sometimes when this is about to start and I can’t manage to hit the Captive Ball (2) enough times to stop it, I
will instead drain the Ball if I have another Ball. I only ever do that if I’m very close to 10 Medals (The
Importance will be explained later in the Guide).

While the timer is not visible during the Multiball Mode etc. it will continue to go countdown. If you are
about to start the Panic Multiball or the Airstrike Multiball, check your timer first and see if you have
enough time left to complete it! The invasion can and will start, and thus end your Multiball Mode.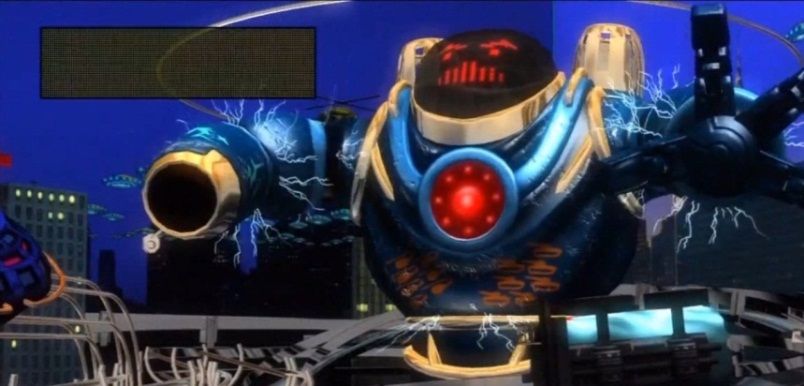
Page 7 of 23

Rescue Hurry Up Mode
If you hit the Recue Sink Hole (6) when it’s not lit you will rescue someone, this is an End of Ball reward so
try and save a few if you can as it will help boost your score when you eventually drain the Ball. It resets
upon starting again with a different Ball.

Subway Upgrades
The Subway Sink Hole (1) can be upgraded by making the Ball roll down the Subway Inlanes located on the
Left closest Inlane & Right Inlane. After the Ball rolls down one of them; a ‘SUBWAY’ Blue notification
light will be lit up, so upon doing that you must make the Ball roll down the other one and thus the Subway
Sink Hole (1) will upgrade.

                       Left Subway Inlane                             Right Subway
                         – Upon the Ball                            Inlane – Upon the
                       going down this the                         Ball going down this
                           ‘SUBWAY’                                  the ‘SUBWAY’
                        Notification Light                          Notification Light
                            will be lit.                                will be lit.

Repeat this further 4 times to fully upgrade the Subway Sink Hole (1), upon doing this if you hit the Subway
Sink Hole (1) you will then be presented with a few options on the Dot – Matrix. You can cycle through the
Options either with the Right Flipper Button (Moves Right) & Left Flipper Button (Moves Left) on your
controller, then selecting the one you want by pressing the ‘Launch’ Button. The Destination Options are as
follows –

   •   18th Street – Returns the Ball down the Right Inlane.
   •   Lexington Avenue – Ball just returns out of the Subway Sink Hole (1).
   •   Prince Street – Returns the Ball to the Top Left Flipper just below the Rescue Sink Hole (6).
   •   Lenox Hill Hospital – Hits the Ball into the Rescue Sink Hole (6). *Tip – This is one of the most
       useful destinations if you have the Airstrike Multiball Locking Mechanic active on the Rescue
       Sink Hole (6). Since you can use this to lock the Ball in there as the Subway Sink Hole (1) is an
       easier Target then the Rescue Sink Hole (6).*
   •   Central Park – Returns the Ball to the Top Right Flipper, just inside the Right Orbit (10).

       *Note – Any Subway Upgrades will carry over to the next Ball, but only on the same game.*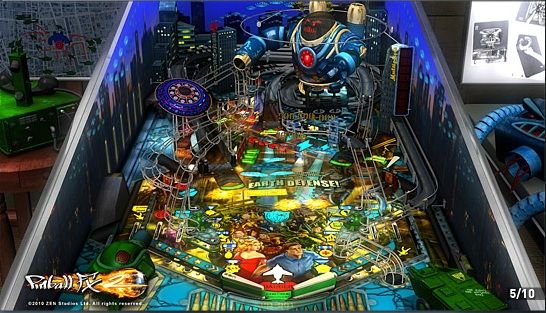
Page 8 of 23

Left Highway Ramp (5) & Right Highway Ramp (9) – Assignment Cycles

                                   Right Highway Ramp (9) –
                                    Rank Notification Lights

                                                    Left Highway Ramp (5) –
                                                     Rank Notification Lights

You will notice that the Left Highway Ramp (5) & Right Highway Ramp (9) will have flashing Arrows on
them (The Image above showcases this) representing the stripes of a Rank Medal, they will change colour
(Red, Blue & Green) according to your Rank as you advance through the Assignment Cycles by hitting
these Ramps in succession. For Example hit the Left Highway Ramp (5) then the Right Highway Ramp (9),
rinse and repeat that. By doing this you will gain upgrades such as decreasing the Threat Level or increasing
the Military AI (Artificial Intelligence).

Assignment Cycles are detailed below –

Assignment Cycle 1 –

After you hit each of the Highway Ramps the Robot will then begin to shoot at your Ball, be carefully as it
can cause you to drain the Ball very easily. This is a Hurry Up Mode which the objective will be for you to
hit a specific flashing Orbit/Ramp before the time runs out, you are given about 20 Seconds to hit the
flashing Orbit/Ramp. Upon doing so you will advance to the next Assignment Cycle Level. But if you fail
you will return to the first Assignment Cycle.

Assignment Cycle 2 –

Hit each of the Highway Ramps again to then enable the Airstrike Multiball Locking Mechanic which is
active on the Rescue Sink Hole (6). After which the Assignment Cycle will advance to the next Level.

Assignment Cycle 3 –

After hitting each of the Highway Ramps again you will receive an upgrade to your Military AI (Artificial
Intelligence). After which the Assignment Cycle will advance to the next Level.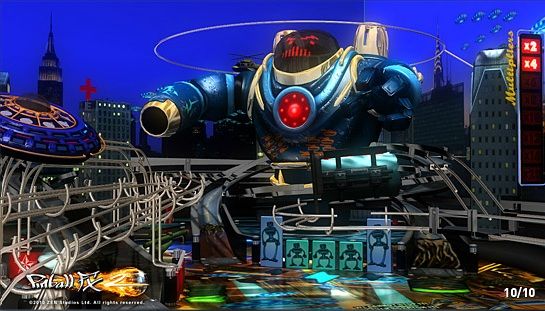
Page 9 of 23

Assignment Cycle 4 –

After hitting each of the Highway Ramps again you will receive a 3 Million Points reward. After which the
Assignment Cycle will advance to the next Level.

Assignment Cycle 5 –

After hitting each of the Highway Ramps again you will decrease the Threat level by 1. After which the
Assignment Cycle will advance to the next Level.

Assignment Cycle 6 –

After hitting each of the Highway Ramps again you will reset the countdown timer for Invasion (See that
Invasion section earlier in the Guide for more info). After which the Assignment Cycle will restart and start
from Assignment Cycle 1 but things like Points rewards will be higher etc.

    *Note - Upon draining the Ball you will remain on the Assignment Cycle you were on before you
                                               drained.*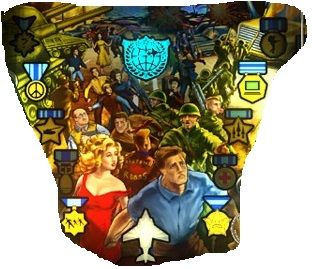
Page 10 of 23

    Earth Defence Medals (10 Medals) & How to Achieve Them

                                              No More Robots                              Completion of the
Completion of the City
                                               Wizard Mode,                              Survivor Objective
Destroyer Mission will
                                           available upon attaining                       will grant you this
 grant you this Medal.
                                              all the 10 Medals.                                Medal.

Decreasing the Threat
Level a total of 3 times                                                               Completion of the Data
  will grant you this                                                                  Bowl Mission will grant
        Medal.                                                                            you this Medal.

 Increasing the Military
      AI (Artificial                                                                     Completion of the
Intelligence) a total of 3                                                              Artillery Mission will
times will grant you this                                                               grant you this Medal.
         Medal.

   Activation of the                                                                      Completion of the
  Airstrike Multiball                                                                   Salvation Mission will
  Mode will grant you                                                                    grant you this Medal.
      this Medal.

  Completion of the                                                                      Performing a Rage
Panic Multiball Mode                                                                    Combo will grant you
  will grant you this                                                                        this Medal.
        Medal.

***Very Important!!!*** Remember failure of the Invasion (Look at the Invasion Section earlier in the
Guide for more Info) will cause you to lose a Random Medal & it will increase your Threat level (you will
have to decrease the level again if you had done so before).

Sometimes when this is about to start and I can’t manage to hit the Captive Ball (2) enough times to stop
it, I will instead drain the Ball if I have another Ball. In saying that I only ever do that if I’m very close to
10 Medals. ***

I will now explain in detail how to go about attaining all the 10 Medals available on this Table, turn to next
Page please -
Page 11 of 23
Mission Based Medals –
To gain access to the Missions of this Table you must first hit the 3 Robot Drop Down Targets which are
protecting the Mission Activation Sink Hole –
Hit all these 3 Robot
Drop Down Targets!
After you have knocked down those Targets the Mission Activation Sink Hole will become available –
Mission Activation Sink
Hole is now available; hit the
Ball into it to gain access to
the Mission selection process.Page 12 of 23
City Destroyer –
Completion of the City
Destroyer Mission will
grant you this Medal.
You need to keep the Ball around the Robot for the duration of 10 Seconds, you are given about 4 Seconds
or so to get the Ball back near the Robot and after you have accumulated 10 Seconds around the Robot the
Mission will be completed. You will gain the Medal & a Completion Points Bonus.
An easy way to get the Ball round the Robot is to hit the Mission Activation Sink Hole (The Hole will be
available throughout the Mission) this will make the Ball land just above the Top Right Flipper, then all you
need to do is hit either of the Left Orbit (3) or Spiral Ramp (4). Just rinse and repeat that until the Mission is
completed, trust me this is very easy.
*Tip - Completing the City Destroyer mission will also decrease the Threat Level by 1*Page 13 of 23
Data Bowl -
Completion of the Data
Bowl Mission will grant
you this Medal.
This Mission is not timed, so feel free to take your time to complete it. You will see that the Drop Down
Targets below the Robot will randomly be going up & down; the objective here is to hit the Drop Down
Target when it’s erect. You need repeat this process about 5 times to successfully complete the Mission; you
have a total of 5 lives which you lose upon missing the Target & hitting the Mission Activation Sink Holes.
Once you complete you will gain the Medal & a Completion Points Bonus
*Tip - Completing the Data Bowl mission will also increase your Military AI by 1*Page 14 of 23
Salvation *Hardest Mission – about 50 Seconds timer*–
Completion of the
Salvation Mission will
grant you this Medal.
*Tip – Depending on the version you are playing, it would be wise to have fully upgraded the Subway
Sink Hole (1) via the method described earlier in the Guide under the Subway Upgrade Section. This will
make this Mission much more easier as instead of going straight for the Rescue Sink Hole (6) you can
instead hit the Subway Sink Hole (1), then select the destination of Lenox Hill Hospital which sends the
Ball into the Rescue Sink Hole (6) automatically!*
This Mission requires you to hit the Rescue Sink Hole (6) a total of 10 Times, to save 10 Citizens. You can
only Rescue a max of 5 Citizens (Hitting the Rescue Hole (6) 5 times) you then must hit the Centre Highway
Ramp (8) to get them to safety, upon doing so you can continue to hit the Rescue Hole then hit the Centre
Highway Ramp (8). Repeat this until the Missions is completed; you will be awarded with the Medal &
Completion Bonus Points.Page 15 of 23
Artillery –
Completion of the
Artillery Mission will
grant you this Medal.
This Mission is the easiest of the lot to complete, upon starting it you will find yourself back at the launch
Lane. You must then select a Ramp from the Dot - Matrix with the Flipper Buttons on your Controller, and
then launch the Ball with the ‘Launch’ Button on your Controller once you have the one you want on
display on the Dot - Matrix. You have about 20 seconds to hit the Ramp which you chose to complete this
Mission.
*Tip – Select the "Left Highway", you will need to hit the Left Highway Ramp (5) which is the easiest
Ramp to hit on the entire Table Playfield.*
Upon completion, you will be awarded with the Medal & Completion Bonus Points.Page 16 of 23
Assignment Based Medals –
To complete an Assignment, simply hit both the Left Highway Ramp (5) & the Right Highway Ramp (9).
After hitting the first, you will hear "We have a direct order from the President!"
Look back at the Right Highway Ramp (9) & Left Highway Ramp (5) – Assignment Cycles Section of
Guide for more info on this.
Decreasing the Threat level 3 times *Must be done on the same Ball* -
Decreasing the Threat
Level a total of 3 times
will grant you this
Medal.
You can do this 1 of 3 ways –
1. Complete the City Destroyer Mission (Look back at the Mission Based Medals Section of the
Guide for more info) 3 times on the same Ball.
2. Completion of the Assignment Cycle 5 (Look back at the Right Highway Ramp (9) & Left
Highway Ramp (5) – Assignment Cycles Section of Guide for more info on this). Each time you do
this you will decrease the Threat level by 1, so do these 3 times to gain the Medal on the same Ball.
3. A random award attained from doing a Skill Shot (look back at the Skill Shot Section of the Guide
for more info) this will only decrease the Threat level by 1 and a Skill Shot can only be done once
per Ball.
You can mix & match the above methods to achieve your goal of lowering the Threat 3 times on the same
Ball. After you have decreased the Threat level 3 times on the same Ball, you will gain this Medal.Page 17 of 23
Increasing the Military AI (artificial intelligence) 3 times *Must be done on the same
Ball* -
Increasing the Military
AI (Artificial
Intelligence) a total of 3
times will grant you this
Medal.
You can do this 1 of 3 ways –
1. Complete the Data Bowl Mission (Look back at the Mission Based Medals Section of the Guide for
more info) 3 times on the same Ball.
2. Completion of the Assignment Cycle 3 (Look back at the Right Highway Ramp (9) & Left
Highway Ramp (5) – Assignment Cycles Section of Guide for more info on this). Each time you do
this you will decrease the Threat level by 1, so do these 3 times to gain the Medal on the same Ball.
3. A random award attained from doing a Skill Shot (look back at the Skill Shot Section of the Guide
for more info) this will only decrease the Threat level by 1 and a Skill Shot can only be done once
per Ball.
You can mix & match the above methods to achieve your goal of increasing the Military AI (artificial
intelligence) 3 times on the same Ball. After you have increased Military AI (artificial intelligence) 3 times
on the same Ball, you will gain this Medal.Page 18 of 23
Starting the Airstrike Multiball Mode -
Activation of the
Airstrike Multiball
Mode will grant you
this Medal.
After completing Assignment Cycle 2 (Look back at the Right Highway Ramp (9) & Left Highway
Ramp (5) – Assignment Cycles Section of Guide for more info on this). The Rescue Sink Hole (6) will now
be lit up. To start the Airstrike Multiball you must lock 3 Balls in there either by hitting it directly or by
using the fully upgraded Subway Sink Hole (1) and selecting "Lenox Hospital". Upon locking your 3rd Ball
you will go into the Multiball Mode and the Medal will be awarded.
As for when you are in the Airstrike Multiball Mode, you can gain a lot of Points *Tip - This Mode is how
Players gain their High Scores!* –
• Hitting the Sink Holes raises the Jackpot – Subway Sink Hole (1), Rescue Sink Hole (6) & the
Mission Activation Sink Holes (View the Section about the Mission Based Medals earlier in the
Guide if unsure where the Mission Activation Sink Holes are located).
• Hitting the Right Highway Ramp (9) & Left Highway Ramp (5) - will double the Jackpots value
to a max of 100 Million Points.
• The Centre Highway Ramp (8) - is used to collect the Jackpot, *Note – when the Jackpot is
maxed out at 100 Million Points you can collect the Jackpot via the Right Highway Ramp (9) &
Left Highway Ramp (5) also*
The Multiball will continue as long as you have a minimum of 2 Balls in play, you will have to repeat the
above process again if you wish to re-enter this Multiball Mode again.Page 19 of 23
Other Medal based Objectives -
Survivor –
Completion of the
Survivor Objective
will grant you this
Medal.
You need to first activate both the Left & Right Kickback (Look back earlier in the Guide for the section
about Kickback). After which you will have to send the Ball down both of the Outlanes so that both the
Kickbacks are used at least once during a single Ball. Upon doing so you will be awarded with the Medal.
You will usually get this Medal just by playing through your game on the Table.
*Note - Bang Backs (Death Saves) count towards this, it's not completely necessary to activate the
Kickbacks. A Bang Back is when you Nudge the Table upwards where you knock the Ball off the Outlane
drain wall as it heads towards the Centre drain and it goes through the Flippers (keep the flipper up on
the side which corresponds to the Outlane where the Ball is draining from) and over to the other
Flipper.*Page 20 of 23
Rage Combo –
Performing a Rage
Combo will grant you
this Medal.
This can be achieved by hitting the Left Orbit (3) twice in quick succession with the Top Right Flipper, then
hit the Ball with the Top Right Flipper up the Spiral Ramp (4) to be awarded with a RAGE Combo.
*Note – after you have hit the Left Orbit (3) twice you can take as long as you want to hit the Spiral Ramp
(4) because the last shot for RAGE Combo will remain available throughout that Balls life cycle*.
After which you will be awarded with the Medal.Page 21 of 23
Panic Multiball -
Completion of the
Panic Multiball Mode
will grant you this
Medal.
First you need to hit the Spiral Ramp (4) with the Top Right Flipper, after that wait till the Robot positions
his Hand on the Centre Highway Ramp (8) and then hit the Centre Highway Ramp (8) again for the Robot to
grab the Ball. This will lock 1 Ball. You then need to hit the Spiral Ramp (4) again, before you can lock the
2nd Ball into the Centre Highway Ramp (8) and thus start the Multiball Mode.
*Tip - You can lock 2 Balls with 1 Spiral Ramp (4) shot, but there's a timer. After hitting the Spiral Ramp
(4), you got about 10-15 seconds to hit the Center Highway Ramp (8). Hit the Center Highway Ramp (8)
to lock the 1st Ball and the game gives you another 10-15 seconds to lock the 2nd Ball. You'll know when
the timer has run out, because the Robot moves his arm back to normal position.*
The robot will then shoot out the 2 Balls which you just locked, just hold up the Right Flipper and the Ball’s
will come to rest on the Flipper. Now the objective here is to hit any of these Sink Holes with one of the
Ball’s –
• Subway Sink Hole (1)
• Rescue Sink Hole (6)
• The Mission Activation Sink Holes (View the Section about the Mission Based Medals earlier in
the Guide if unsure where the Mission Activation Sink Holes are located).
After you have hit one of those, a random Sink Hole will then be lit/flashing from the above selection and
you need to hit the other Ball into it before the Ball which you just locked is returned to the Playfield. Also
if you fail to hit the correct lit/flashing Sink Hole the locked Ball will also be returned.
Be careful as the Robot will constantly be shooting at the Balls, so it’s very dangerous as you can lose both
of the Ball’s or lose one Ball thus ending the Multiball. You would then need to repeat the Locking Process
to enable the Panic Multiball Mode again. After you have locked 1of the Ball’s into a Sink Hole, then the
other into the flashing Sink Hole you will then complete the Mode and be rewarded with the Medal.Page 22 of 23
WIZARD MODE (Final Mission)
The No More Robots Wizard Mode becomes available upon acquiring all the 10 Earth Defense Medals.
No More Robots
Wizard Mode,
available upon attaining
all the 10 Medals.
You then need to hit the 3 Robot Drop Down Targets & then hit the Mission Activation Sink Hole (View the
Section about the Mission Based Medals earlier in the Guide if unsure where the Mission Activation Sink
Holes are located) to activate this Wizard Mode.
Completion of the No More Robots Wizard Mode –
The Wizard Mode is a 2 Ball Multiball; hitting any of the Sink Holes/Ramps/Orbits increases the Jackpot.
To collect the Jackpot, you need to destroy the Robot with 2 Cannon shots. You activate the Canon by
hitting either one of these in the Wizard Mode –
• Spiral Ramp (4)
• Rescue Sink Hole (6)
• Center Ramp (8)
After hitting 1 of the above shoot the Subway Sink Hole (1) to load/fire the Cannon at the Robot. Rinse and
repeat the above process a 2nd time to complete the Wizard Mode.
After which you will have defeated the Invasion and defended the Earth!
After completion, the progress of the Medal acquisitions etc. will be reset thus Table Reset!Page 23 of 23 Special Thanks to all the Zen Studios Forum Community! Members such as Cloda, shogun00, Wims, IndyRC_Racer, Flynn74, rapierdwit, steviej, StOrMtRoOpErMx19 & E113 I couldn’t have completed the Guide without your help either directly or indirectly - you are all awesome!!! In closing I hope you enjoyed this Table, I certainly have and I hope by using this Guide it increases that Fun factor for you and everyone else who plays with you etc. Check out the other Tables available, they are all available to download on the Xbox Live Marketplace in Add-Ons section or download it straight from the PFX2 Platform itself. Zen Pinball on PlayStation Network, Zen Pinball on the Apple AppStore, Zen Pinball 3D on Nintendo 3DS and Zen Pinball THD on Android Marketplace. Thanks for viewing my Guide, “FANTASTIC!!!!” Yours ShoryukenToTheChin
You can also read