MASTERS OF THE FORCE TABLE GUIDE - BY SHORYUKENTOTHECHIN
←
→
Page content transcription
If your browser does not render page correctly, please read the page content below
Page 1 of 31

                           Masters of The Force Table Guide
                              By ShoryukenToTheChin

                                                     8
                                                                 10

                                                     7
                                                             9              12
                                                                      11

                                                         6

                                                 4                               13
                                                     5
                                                3                      14
                                            2

                                     1

Key to Table Overhead Image –

   1. Transfer Target
   2. Left Mini Loop
   3. Essence Target
   4. Left Orbit
   5. Captive Ball
   6. Dark Targets
   7. Cross Ramp
   8. Shaft Sink Hole
   9. Force Orbit
   10. Jedi Holocron Target
   11. Illusions Ramp
   12. Right Orbit
   13. Wall of Light Target/Sink Hole
   14. Light Targets

In this guide when I mention a Ramp etc. I will put a number in brackets which will correspond to the above
Key, so that you know where on the Table that particular feature is located.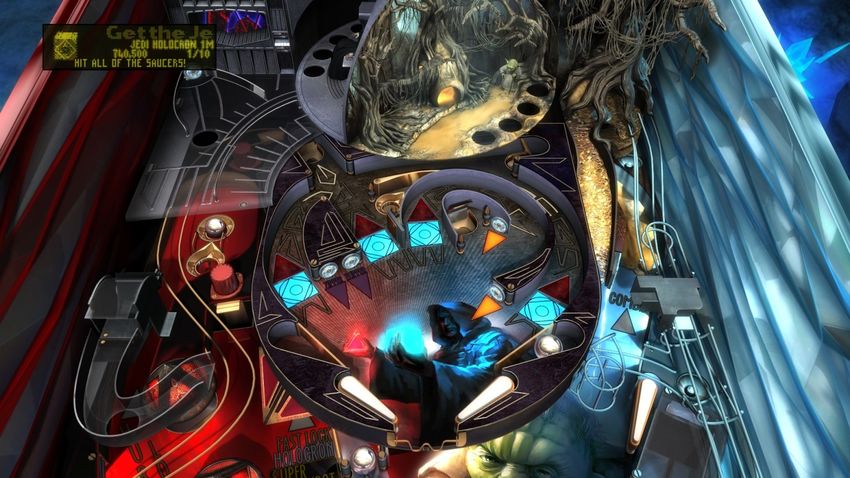
Page 2 of 31

                                       TABLE SPECIFICS
  Notice: This Guide is based off of the Zen Pinball 2 (PS4/PS3/Vita) version of the Table on default
 controls. Some of the controls will be different on the other versions (Pinball FX 2, Star Wars Pinball,
                        etc...), but everything else in the Guide remains the same.

INTRODUCTION
This Table came about as a result of the partnership between Zen Studios and LucasArts. This licensed Zen
to initially produce 10 Tables based on the Star Wars Universe.

The third batch of Tables was released in a 4 Pack; which included the Tables; Han Solo, Droids, Star Wars:
Episode IV – A New Hope & Masters of The Force.

This Table is of course the Masters of The Force; which is a Table that pays homage to the many iconic
moments in the movies involving Jedi Knight vs. Sith Lord battles. The Artwork and Audio cues are spot on
once again, adding that unique originality to the Table’s Playfield.

I hope my Guide will help you understand the Table better.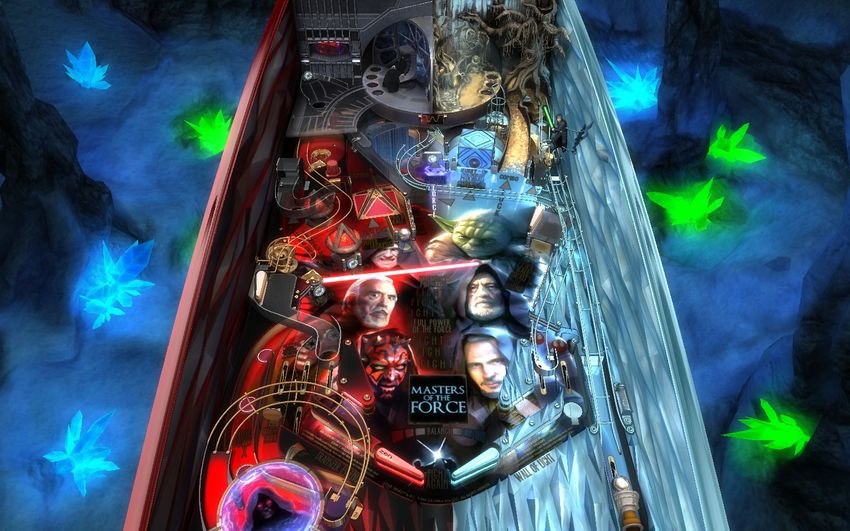
Page 3 of 31

Skill Shot -
To claim a Skill Shot award you must have the Ball launched with the precise amount of power to allow it to
stop just below the Luke Skywalker cut-out figure. Doing so will award you with a Skill Shot.

                                                                                     Power Gauge – As
                                                                                      you pull back the
                                                                                     Plunger (Analogue
                                                                                        Stick on your
                                                                                     Controller controls
                                                                                      this). The Gauge
                                                                                     will then increase.

                                                                                       Pull it back to
                                                                                      correspond to the
                                                                                           Image.

Double Skill Shot

Immediately after claiming a Skill Shot award you will have the opportunity to send the Ball up the Cross
Ramp (7) to score a Double Skill Shot. The Ball will be dropped just above the Top Right Flipper allowing
you a moment to prepare to hit the Ball up the Ramp with said Flipper.
Page 4 of 31

Kick Back & Ball Save
The Kickbacks are activated a tad differently from each other on this Table:

   •    The Left Kickback is activated by hitting the Ball at the Transfer Target (1) & Essence Target (3).
        After which the Kickback will be activated –

                                                  Essence
                                                 Target (3)
                            Transfer
                            Target (1)

   •    The Right Kickback is activated by hitting the Wall of Light Target/Sink Hole (13) repeatedly until
        it starts flashing; hit the Ball into the uncovered Sink Hole via the Wall of Light Target/Sink Hole
        (13) to activate the Kickback. You only have a short time to hit the Ball into the Sink Hole before the
        Target comes back up and you must repeat the process again.

                                                        Wall of Light
                                                       Target/Sink Hole
                                                             (13)

                 *Note - This Table doesn’t reset the Kickbacks earned if you lose a Ball*

Ball Save –

The Ball Save will activate in some Modes.

       *Note – Ball Save remains active until you lose the Ball or the Ball Save time limit runs out!*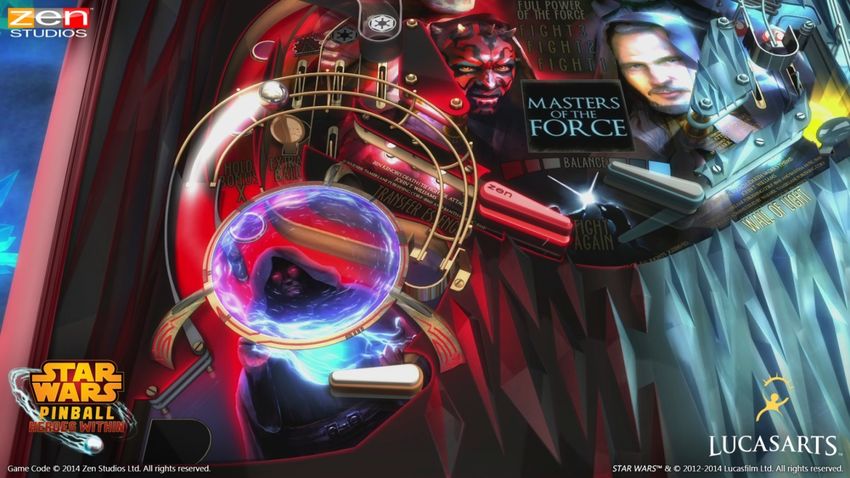
Page 5 of 31

Extra Balls
There are 5 Ways to achieve an Extra Ball – Extra Balls can be collected at either:

        The Dark Side via the Left Snap Trap                The Light Side at the Wall of Light Target/Sink
                                                                               Hole (13)

                                                                    Extra Ball

                       Extra Ball

   •   Method 1: 10x times Multiplier (awarded once per Ball); look later in the Guide at the Section
       titled ‘Raising the Multiplier’ for information on how to complete them for this Extra Ball.

   •   Method 2: 5 hit combo on the Alchemy Ramp (awarded once per Ball); look later in the Guide at
       the Section titled ‘Alchemy Ramp Mechanic’ for information on obtaining this Extra Ball.

   •   Method 3: Proton Torpedo/ Super Laser Shot (awarded once per Ball); Every 5 or so hits into the
       Shaft Sink Hole (8) will award you with a Shaft Bonus (Points). A Super Laser/Proton Torpedo Shot,
       which is a subsequent into the Shaft Sink Hole (8) right after hitting the Ball round the Cross Ramp
       (7). Repeat this process a few times to light Extra Ball.

   •   Method 4: Perform a Master Combo; the Master Combo needs to be done in a certain sequence
       (Right Orbit (12), Illusions Ramp (11), Left Orbit (4), and then the Cross Ramp (7)) in a short
       amount of time to acquire this Extra Ball. Otherwise the Combo will reset and you must begin
       again.

   •   Method 5: Completion of all of the Fights on one of the sides of the Force; look later in the Guide
       at the Section titled ‘Balance of The Force’ for information on obtaining this Extra Ball.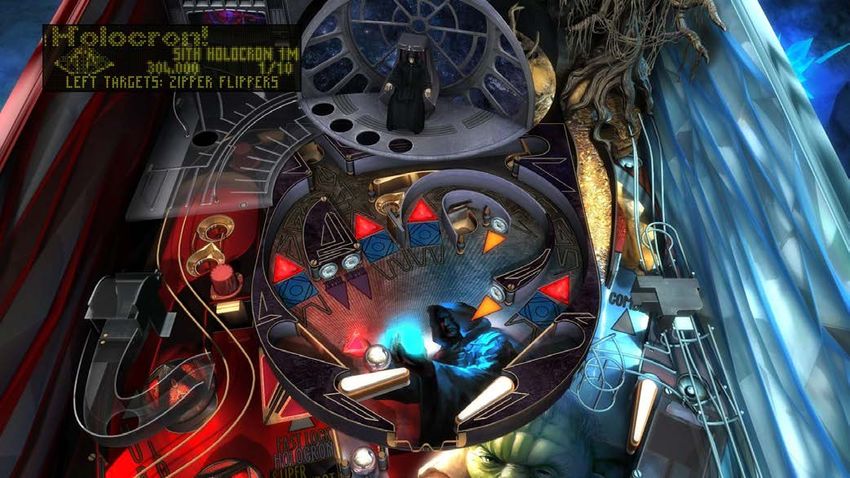
Page 6 of 31
Side (Light & Dark) Affected Features
Completion of a Hurry Up or Fight Mode will cause the state of the Force to shift between Light & Dark.
This of course is dependent on which Force side the Hurry Up or Fight Mode belongs to.
For example: if the Force is unbalanced then the dominant side will receive boosts to their Mode timers.
Certain features will also be linked to the Force such as; Super Laser/Proton Torpedo Shot, which is a
subsequent into the Shaft Sink Hole (8) right after hitting the Ball round the Cross Ramp (7). Many more
features like the end of Ball Multiplier Bonus are affected by this.
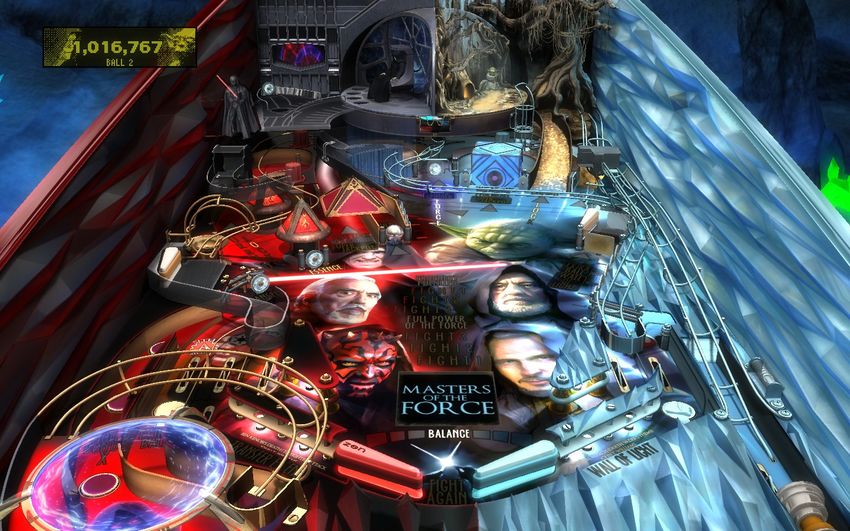
As you complete the various Modes on the Table the centre piece at the top of the Table Playfield will move
in correspondence to what side of the Force you are currently on. If it is Balanced than it will remain as
shown in the below Image, otherwise one side will take up more on the centre until it completely envelops
it.
Dark Side of the Force. Light Side of the Force.
Page 7 of 31

Raising the Multiplier
Increasing the Targets value -

Hitting the Ball through the Orbits: Left Orbit (4) & Right Orbit (12) will increase the Dark or Light Target
values. These values are stored when you hit the Dark or Light with the upper Flippers following the Ball
being sent round the Orbit:

   •   Left Orbit (4)

                                                                Use the Top Right Flipper
                                                                  to hit the Dark Side
                                                                         Targets.

   •   Right Orbit (12)

                  Use the Top Left Flipper to
                  hit the Light Side Targets.

Similar to how you perform combo shots. The values will be reset following the complete of either of the
Target Banks.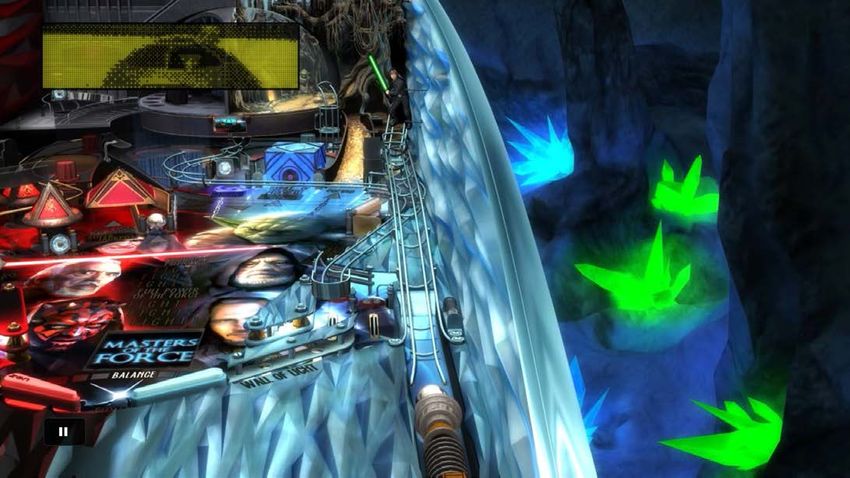
Page 8 of 31

How to Raise The Dark & Light Side Multiplier -

On each side of the Table Playfield you will find a Bank of Targets. You will need to hit all of the Targets to
raise the Multiplier of that Force side. These Targets can be hit barely with the lower Flippers, so you will
have to use the Upper Flippers to have a higher chance of hitting them.

   •   Dark Targets (6) Multiplier: Hitting all 4 of the ‘DARK’ Targets will result in raising the Dark side
       Multiplier level.

                                 Dark
                               Targets (6)

   •   Light Targets (14) Multiplier: Hitting all 5 of the ‘LIGHT’ Targets will result in raising the Light
       side Multiplier level.

                        Light
                     Targets (14)

If you manage to gain a 10x time Multiplier then Extra Ball will be available for collection.

Depending on your Force allegiance you will claim the end of Ball bonus Multiplier from that side, i.e. if
you are more inclined to the Light side because you have completed more Light side Fights. You will then
only be awarded the Light side end of Ball bonus Multiplier, likewise for if you are with the Dark Side.

But if you are balanced with the Force you will instead be rewarded with both sets of Multipliers for the end
of Ball bonus.

 *Note – Multiplier Level resets upon draining the Ball, unless you have the ‘Hold Bonus X’ as this will
          not reset the Multiplier (below Page has more information on how to acquire this).*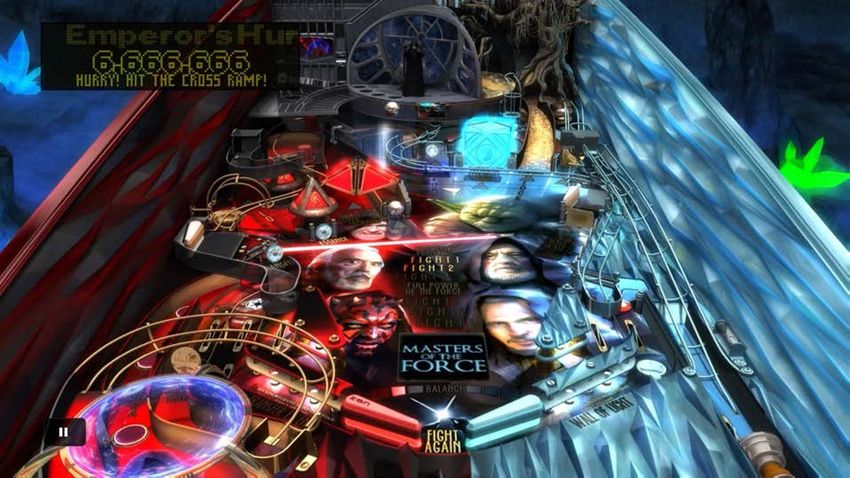
Page 9 of 31

Alchemy Ramp Mechanic
When hitting the Ball through the Right Orbit (12) the Ball will then pass by the Top Left Flipper. This is an
opportunity for you to lock a Ball into the Alchemy Sink Hole –

                           Alchemy Sink
                               Hole

All you need to do is hold up the Top Left Flipper and more often than not the Ball will divert into the Sink
Hole. Once done the Alchemy Ramp will be primed -

                         Alchemy Sink
                         Hole locked.

Just send the Ball back round the Right Orbit (12) and repeat the same process.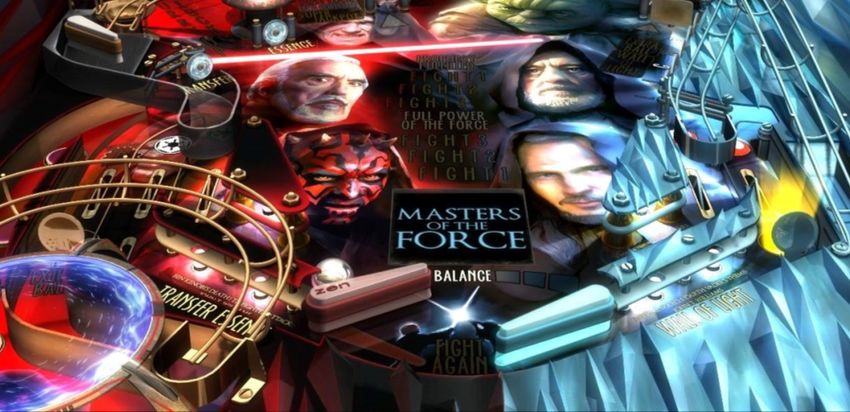
Page 10 of 31

You will then be taken to the Alchemy Ramp Playfield; the goal here is to send the Ball round the Alchemy
Ramp as many times as possible –

                                                                     The Ball being sent
                                                                      up the Alchemy
                                                                     Ramp successfully.

                                                                Exit Lane.

Use the Lower Flipper to do this, note that that Flipper is controlled using the Right Flipper Button.
Depending on the number of successful hits you do in a combo it can result in the award of lighting Extra
Ball for a 5 hit combo, and various other Point based bonuses.

Activate the ‘Hold X Bonus’ mechanic by reaching Sith Alchemist level 5, your level goes up every time
you make a shot around the Alchemy Ramp and successfully send the ball through the exit Lane. You earn
an Extra Ball in almost the same way, except all 5 of the Ramp shots have to be back-to-back during the
same instance of the Mode; for held multipliers, you can do it over the course of several attempts (but
always during the same Ball, since draining resets your Alchemist level).

Super Spinner Mechanic
                            Sith         Sith                                Jedi        Jedi
                             1            2                                   1           1

When you light all of the Rollovers on the In & Outlanes, the Super Spinner will be enabled at the Force
Orbit (9). It will only be active for a short amount of time, so hit it as many times as you can to score some
decent quick Points.
Page 11 of 31
Force Hurry Up Modes
Light Side Hurry Up *Yoda’s Hurry Up* –
If you manage to hit the Ball into the empty Sink Hole on the Jedi Holocron Target (10) then the Yoda
Hurry Up Mode will begin. The Jedi Holocron Target (10) will descend into the Table revealing a hidden
Sink Hole, simply hit the Ball into that Sink Hole before the Points displayed on the Dot – Matrix reaches
‘0’ and you will collect whatever is displayed on the Dot – Matrix as it will be added to your overall score.Page 12 of 31 Dark Side Hurry Up *Emperor’s Hurry Up* – The Emperor’s Hurry Up Mode will activate once you have hit the Bumpers several times, then the Left Mini Loop (2) will have a ‘HURRY UP’ Notification Light lit thus requiring you to send the Ball up the Loop to begin the Hurry Up Mode. Once the Mode begins the Ball will be magnetised onto the Sith Holocron and you will need to press the ‘Launch’ Button to release it to start the Mode. Now hit the Cross Ramp (7) before the score displayed on the Dot – Matrix ‘6,666,666’ reaches 0. Whatever is display on the Dot – Matrix when you successfully hit the Cross Ramp (7) will be then added to your overall score.
Page 13 of 31

                                        Multiball Modes
There are 3 Multiball Modes available on this Table;

Quick Multiball *Light Side of the Force - 2 Balls* -
To gain access to the Quick Multiball you will need to the captured Ball that is on one of the sides of the
Jedi Holocron Target (10). Every time you hit the Jedi Holocron Target (10) it will spin around and stop for
a short time before spinning back round again. When the side with the Ball is visible you will quickly need
to hit the Ball in play at this locked ball, and if done correctly the Quick Multiball Mode will engage –

Within the Mode you can gain Jackpot awards by locking a Ball into the Jedi Holocron Target (10), before
you can collect it you will need send the Ball round the Right Orbit (12) 3 times to activate the Jackpot at
the Jedi Holocron Target (10). Once done you will need to send one of the Balls into the Jedi Holocron
Target (10) to collect the Jackpot award. If you manage to collect the Jackpot the Jedi Holocron Target
(10) will descend into the Table revealing a Hidden Sink Hole behind it, hit the Ball into that Sink Hole to
score a Super Jackpot Award.

                                                                                Hidden Sink Hole (collect
                                                                                Jackpot award to reveal) –
                                                                                Hit this to gain the Super
                                                                                     Jackpot award.

The Multiball will continue as long as you have a minimum of 2 Balls in play and if you haven’t collected
a Jackpot &/or Super Jackpot award, you will have to repeat the above process again if you wish to re-
enter this Multiball Mode.
Page 14 of 31
Illusions Multiball *Light Side of the Force - 3 Balls* -
You must first look 3 Balls into the Gnarltree via the Illusions Ramp (11). Each time you successfully send
the Ball up the Illusions Ramp (11) you will light a Letter of ‘LOCK’, hit the Ball up the Ramp a further 3
times to light all the Letters.
Illusions Ramp (11)
Now the Ramp will divert into the Gnarltree, send the Ball up the Ramp to lock the Ball. Repeat this process
a further 2 times to have 3 Balls locked, the Multiball Mode will then begin.
During this 3 Ball Multi-Ball collect Jackpot award by hitting the Ball into the Centre Hole of the Jedi
Holocron Target (10) –Page 15 of 31 The Jackpot will start at 5 Million Points – You then have a few Seconds to hit the Ball back into the Centre of the Jedi Holocron Target (10) as it will be collected with an Electromagnet. The Super Jackpot starts at 20 Million Points – Afterward you will need to hit the Ball round the Right Orbit (12) several times to re-engage the Jackpot as well as raise the Jackpot value by 1 Million Points. This Multiball will continue as long as you have a minimum of 2 Balls in play. After losing the Multi-Ball, you will have to repeat the above process to re-enter this Multiball Mode.
Page 16 of 31

Force Rage Multiball *Dark Side of the Force - 3 Balls* -
You must first lock 2 Balls into the Sith Saucers which are located just after the Bumpers, and then hit the
Captive Ball (5) to start the Mode. You can do this 1 of 2 Ways –

   1. Hit the Ball round the Left Mini Loop (2) 4 times to enable Lock at this Loop, you will then see a
      cardboard cut-out of Darth Vader above it –

       Darth Vader –
    notification that Lock
       is lit/available.

       Then hit the Ball up it once more to lock the Ball.

   2. By hitting the Captive Ball (5) the Sith Holocron will be lowered at the entrance of the Left Orbit (4),
      hit the Ball hard enough up that to lock the Ball into one of the Saucers. Remember that the Sith
      Holocron will only be lowered for a very short time.

Once you have locked 2 Balls into the Sith Saucers simply hit the Captive Ball (5) to begin the 3 Ball Multi-
Ball Mode. Hitting the Cross Ramp (7) collects the Jackpot which starts at 5 Million Points. Hitting the Left
Mini Loop (2) increases the Jackpot by 1 Million Points with each successful hit.
Page 17 of 31 Collecting the Jackpot lights the Super jackpot, you need to jump the Ball off the now lowered Sith Holocron (which is a Jump Ramp) and land the Ball into one of the holes on the Emperor’s Throne (usually starts the Sith Holocron Mini – Playfield). This is worth 20 Million Points; remember this is only available for a very short amount of time. You must then relight the Jackpot by hitting the Left Orbit (4) 4 times, and then the Jackpot will re-light at the Cross Ramp (7). This Multiball will continue as long as you have a minimum of 2 Balls in play. After losing the Multi-Ball, you will have to repeat the above process to re-enter this Multiball Mode.
Page 18 of 31

                          Balance of The Force
To access the Force Fights you must first hit the Ball through the Force Orbit (9) 5 times to light all the
Letters of ‘FORCE’. Once accomplished, the next time you hit the Force Orbit (5) will decide on which side
of the Force Fight Mode will activate. Below I will explain -

You may have noticed a Diverter which is situated just behind the Force Orbit (9) Spinner. There are 2-ways
available –

   •   Left – Sith (Dark Side): this occurs when you hit the Ball through the Force Orbit (9) using the Left
       Flipper.

   •   Right – Jedi (Light Side): this occurs when you hit the Ball through the Force Orbit (9) using the
       Right Flipper.

 *TIP - Choosing the Side is easy using this simple Trick. The Trick is as follows. If the Ball is on the
Dark side Flipper (Left Flipper) and you want the Light side, hold the Light side Flipper (Right Flipper)
up and launch the Ball with the Dark side Flipper (Left Flipper). As soon as the Dark side Flipper (Left
Flipper) drops down, the Diverter behind the Spinner returns to the Light side. Reverse the Trick if you
                                         want the Dark side.*
Page 19 of 31
Jedi – Light Side of The Force Fight Modes
Fight 1 – Obi-Wan & Qui-Gon vs. Darth Maul
*Timed*
You will first need to hit the Enemy Target 3 times, but try to avoid hitting the Light side Hero Targets in
the Fight as it will make it harder to hit the Enemy Target –
After that, you will need to hit the Right Deadly Ray Target then follow that by hitting the Enemy Target.
Right Deadly Ray
TargetPage 20 of 31
Then you need to hit the Left Deadly Ray Target then follow that by hitting the Enemy Target.
Left Deadly Ray
Target
Finally, keep on hitting the Enemy Target until the Life Bar is depleted. Once done the Fight will be won.
It’s worth noting that each hit to the Enemy Target will add 10 or so Seconds to the timer.Page 21 of 31 Fight 2 – Yoda vs. Count Dooku *Timed* You will first need to hit the Enemy Target 4 times, but try to avoid hitting the Light side Hero Targets in the Fight as it will make it harder to hit the Enemy Target – After that you need to hit the Cross Ramp (7) within a small time frame.
Page 22 of 31

After that, the Table will become dark (a malfunction) and the Enemy Target will be moving fast. You need
to hit him 3 times and everything will return to normal.

Finally keep on hitting the Enemy Target until the Life Bar is depleted.

It’s worth noting that each hit to the Enemy Target will add 10 or so Seconds to the timer.
Page 23 of 31

Fight 3 – Luke Skywalker vs. The Emperor *Timed*
First you need to hit the Shaft Sink Hole (8) 3 times within the time limit, but be careful. Darth Vader is on
patrol and will occasionally block the Shaft Sink Hole (8).

Once that is finished, just keep on hitting the Enemy Target (The Emperor) until the Life Bar is depleted,
while avoiding the Hero Target as hitting it will make it harder to hit the Enemy Target.

It’s worth noting that each hit to the Enemy Target will add 10 or so Seconds to the timer.
Page 24 of 31

   Sith – Dark Side of The Force Fight Modes

Fight 1 – The Emperor vs. Yoda *Timed*
First you need to hit the Left Mini Loop (2). The ball will then begin to spin violently on the Sith Holocron.
You need to time the spin, launch the ball off of it and hit the Yoda target. Failure to hit Yoda will result in
needing to repeat the process, but the timer will reset each time.

After that, you just need to keep on hitting the Yoda target several times until you drain his Life Bar.

It’s worth noting that each hit to the Enemy Target will add 10 or so Seconds to the timer, and avoid hitting
the Sith Target as it will make it harder to hit the Enemy Target.
Page 25 of 31

Fight 2 – Darth Vader vs. Obi-Wan *Timed*
First you need to memorizes the light sequence of 4 Lanes and hit those Lanes in order. Each time you hit
the correct Lane in the sequence the timer will reset.

After that, just hit the Enemy Target the natural way until his Life Bar is depleted.

It’s worth noting that each hit to the Enemy Target will add 10 or so Seconds to the timer, and avoid hitting
the Sith Target as it will make it harder to hit the Enemy Target.
Page 26 of 31

Fight 3 – Darth Vader vs. Luke Skywalker *Timed*
You need to hit the Bumpers 10 times –

After that, then hit the Luke Target once -

Rinse and repeat the process 2 more times. After that, you just need to hit the Luke Target repeatedly until
the Life Bar depletes.

It’s worth noting that each hit to the Enemy Target will add 10 or so Seconds to the timer, and avoid hitting
the Sith Target as it will make it harder to hit the Enemy Target.
Page 27 of 31

                             Wizard Modes
There are 2 Wizard Modes available on this Table. You gain can access to either of these Wizard Modes by
doing the following –

   •   Full Power of The Force: If you complete all 3 fights on one side and then activate the Force for
       that side again (go through that Force sides diverter which has been explained earlier), then you will
       start this Wizard Mode. Otherwise, you will just activate the other side's Fights.

   •   Prophecy Fulfilled: Now if you complete all 3 Fight Modes for both sides of the Force, that’s 6
       Fight Modes altogether. You will instead gain access to the True Wizard Mode of the Table.

*Tip – Remember to build up your Holocrons before starting either Wizard Modes as it gives you a huge
                               score boost at the end of the Mode.*

Holocrons – How to Collect Them –
The collected Holocrons & Holocron Sets will gain you a huge score boost at the end of the Wizard Modes.
There are 2 types of Holocrons; each of them requires you to do the same thing on the Mini – Playfield to
gain Holocrons.

You’ll need to hit the 4 Saucers on the Mini – Playfield to earn a Holocron. You can hit the top 2 Saucers
straight away, although to access the other 2 you will need to move the 2 diverters. This is done by hitting
the Drop Targets on the right which have an Orange Triangle beneath them. If you hit them the Orange light
goes out and you can hit the remaining 2 Saucers, hit them again and they light up again and so forth. The
bottom Orange Target controls the bottom diverter and the top controls the top diverter.

Hitting both the 2 Orange Drop Targets on the left will light the Red Triangles and pull the Flippers closer
together for approx. 15 Seconds (they are called “Zipper Flippers”). This makes it almost impossible to drain
the Ball, and can be re-activated as many times as you require.

Once you have successfully hit a Saucer the corresponding flashing Blue light turns solid. Turn all 4 Blue
lights solid and the Holocron is earned.

 *TIP – make sure to activate the Zipper Flipper mechanic, and then just let the Ball land between your
   now close-together Flippers. Don't worry because as long as you don't flip the Ball, it will just rest
           between the Zipper Flippers. This will in turn, make it easier to hit you Targets.*
Page 28 of 31
The 2 types of Holocron Mini – Playfields are as follows -
• Jedi Holocron: Hitting the 2 sides of the Jedi Holocron Target (10) will cause it to rotate
corresponding to the side that was hit. There is a side which has an Electromagnet on it, when hit it
will drop the Ball into a Vertical Up-Kicker which in turn will launch the Ball onto the Jedi Holocron
Mini – Playfield –
Saucers
Top Orange Triangle
Bottom Orange Triangle
Target
Red Triangle Targets
• Sith Holocron: by hitting the Captive Ball (5) you will lower the Sith Holocron, making a Jump
Ramp out of it. The Ball can then be hit up it and with enough force land within the Emperor’s
Throne –Page 29 of 31
Once done the Sith Holocron Mini – Playfield will activate –
Saucers
Top Orange Triangle
Bottom Orange Triangle
Target
Red Triangle TargetsPage 30 of 31
Wizard Mode – Full Power of The Force
*Completed all 3 of one sides Fight Modes*
Once you have completed all of the Fight Modes of one Force Side (Light or Dark) you can access to the
False Wizard Mode. First hit the Ball through the Force Orbit (9) 5 times to light all the Letters of ‘FORCE’.
Once accomplished, hit the Force Orbit (5). If the diverter goes through the Force side where you have
completed all that sides Fights then this FALSE Wizard Mode will activate.
Depending on which side you completed all Fights for; you will only have the Holocrons of that Force’s side
added to the Wizard Mode for a huge score at the end.
The Image below shows the Light Side – Full Power of The Force Wizard Mode -
This is a Multiball Reward Mode; therefore you only play to score as many Points as possible. Of course any
of the Holocrons you collected will cause a huge score boost at the end. The Mode only ends once you go
down to 1 Ball, and then the Table will reset.Page 31 of 31
Wizard Mode – Prophecy Fulfilled *Completed
all 6 of the Force side Fight Modes*
Once you have completed all of the Fight Modes of each Force Side (Light & Dark) you will gain access to
the True Wizard Mode. First hit the Ball through the Force Orbit (9) 5 times to light all the Letters of
‘FORCE’. Once accomplished, hit the Force Orbit (5) once more to activate the TRUE Wizard Mode.
You will then see a 3rd Side to the Balance of the Force centre piece, which is located at the top of the Tables
Playfield. It will have Darth Vader & the Emperor. This is a Multiball Reward Mode; therefore you only
play to score as many Points as possible. Of course any of the Holocrons you collected will cause a huge
score boost at the end, and in this Mode both the Light & Dark Side Holocrons are added/available to you.
You have the advantage of having an unlimited Ball Saver, so all you have to worry about is scoring as
many Points as possible within the time limit. Once the timer reaches ‘0’ the Table will then reset.
Special Thanks to all the Zen Studios Forum Community! Members such as shogun00, Cloda,
skyway73, pinballwiz45b, Ramikadyc, tenorhero, DiscoKing, NTwoO & surf1der. I
couldn’t have completed the Guide without your help either directly or indirectly - you are all awesome!!!
In closing I hope you enjoyed this Table, I certainly have and I hope by using this Guide it increases that
Fun factor for you and everyone else who plays with you.
Check out the other Tables available, they are all available to download on the Xbox Live Marketplace in
Add-Ons section or download it straight from the PFX2 Platform itself. Zen Pinball 2 on PlayStation
Network, Zen Pinball on the Apple AppStore, Zen Pinball 3D on Nintendo 3DS and Zen Pinball THD on
Android Marketplace.
Thanks for viewing my Guide; any feedback would be greatly appreciated -
“In time you will call me, MASTER!”
Yours
ShoryukenToTheChinYou can also read