STUDENT EMPLOYMENT SUPERVISOR CAREER SITE USER'S GUIDE
←
→
Page content transcription
If your browser does not render page correctly, please read the page content below
STUDENT EMPLOYMENT
              SUPERVISOR
         CAREER SITE USER’S GUIDE

                               Providence College
                                 Hiring System

                                                   1
OFFICE OF FINANCIAL AID * STUDENT EMPLOYMENT * HARKINS HALL 215 * 549 RIVER AVENUE * PROVIDENCE, RI 02918
               (p) 401-865-2286 * (f) 401-865-1186 * (e) finaid@providence.edu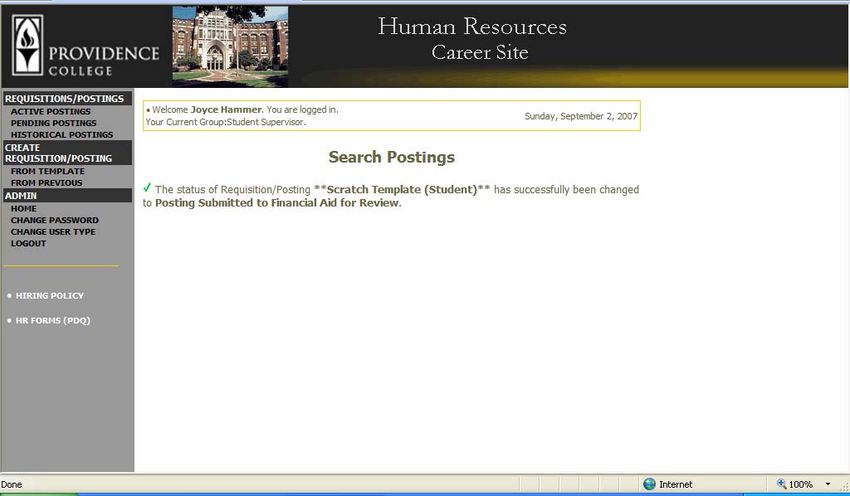
TABLE OF Contesn

INTRODUCTION .............................................................................................................................. 3

GETTING STARTED ....................................................................................................................... 4

CREATE USER ............................................................................................................................... 5

CREATING A REQUISITION/POSTING ......................................................................................... 6
     Entering Requisition/Posting Information .................................................................................. 7
     Adding Screening Questions ..................................................................................................... 8
     Adding Closed Ended Questions............................................................................................. 12
     Adding Open Ended Questions ............................................................................................... 13
     Assigning Points ...................................................................................................................... 14
     Submitting the Requisition/Posting .......................................................................................... 16

VIEWING APPLICANTS TO YOUR POSTINGS .......................................................................... 18
     Sorting & Filtering Applicants by Different Criteria .................................................................. 20
     Viewing and Printing Applications ........................................................................................... 21
     Viewing an Applicant’s History ................................................................................................ 22
     Changing the Status of Applicants .......................................................................................... 23

ADMINISTRATIVE FUNCTIONS .................................................................................................. 25
     Changing Your Password ........................................................................................................ 26
     Logging Out ............................................................................................................................. 26

                                                                                    2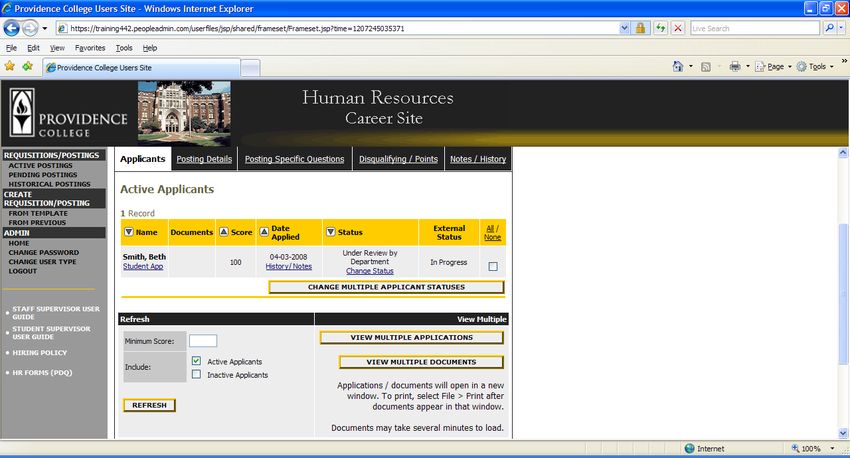
INTRODUCTION
Welcome to the Providence College Employment Application System. The Human Resources
department, in conjunction with Financial Aid and Academic Affairs, has implemented this system in order
to automate many of the paper-driven aspects of the employment application process.
You will use this system to:
Create and submit Requisitions/Postings to Financial Aid
View Applicants to your Postings
Notify Financial Aid of your decisions regarding the status of each applicant
The system is designed to benefit you by facilitating:
Faster processing of employment information
Up-to-date access to information regarding all of your Postings
More detailed screening of Applicants’ qualifications – before they reach the interview stage
The Office of Financial Aid and HR department have provided these training materials to assist with your
understanding and use of this system.
Web Browser
The Employment Application System is designed to run in a web browser over the Internet. The system
supports browser versions of Netscape 4.7 and above and Internet Explorer 4.0 and above. However
some of the older browser versions are less powerful than newer versions, so the appearance of certain
screens and printed documents may be slightly askew. Please notify the system administrator of any
significant issues that arise.
The site also requires you to have Adobe Acrobat Reader installed. This is a free download available at
www.Adobe.com.
It is recommended that you do not use your browser's "Back," "Forward," or "Refresh" buttons to
navigate the site, or open a new browser window from your existing window. This may cause unexpected
results, including loss of data or being logged out of the system. Please use the navigational buttons
within the site.
The site is best viewed in Internet Explorer 5.5 and above.
Security of Applicant Data
To ensure the security of the data provided by applicants, the system will automatically log you out
after 60 minutes if it detects no activity. However, anytime you leave your computer we strongly
recommend that you save any work in progress and logout of the system by clicking on the logout link
located on the bottom left side of your screen.
3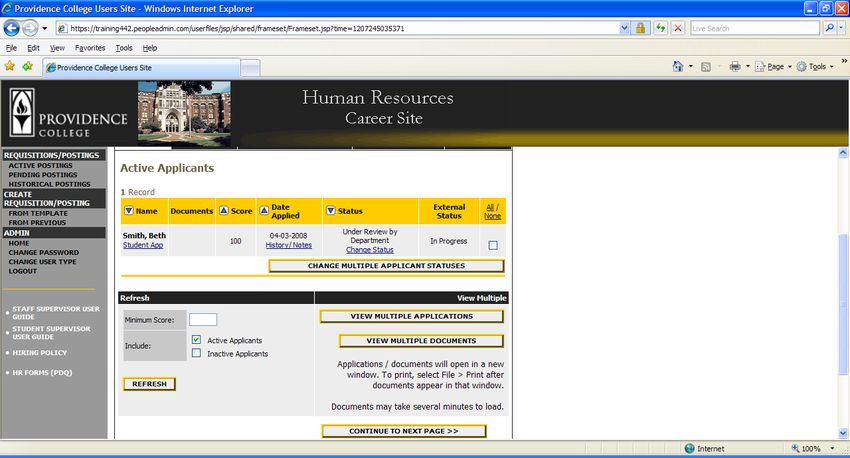
GETTING STARTED

After entering the URL (https://careers.providence.edu/hr), the “login screen” for the system will appear and should be
similar to the following screen:

Before you may enter the site, you must create your own account by clicking on the “CREATE USER ACCOUNT" link on
the left side of the screen. After you click this link, the following screen will appear:

                                                           4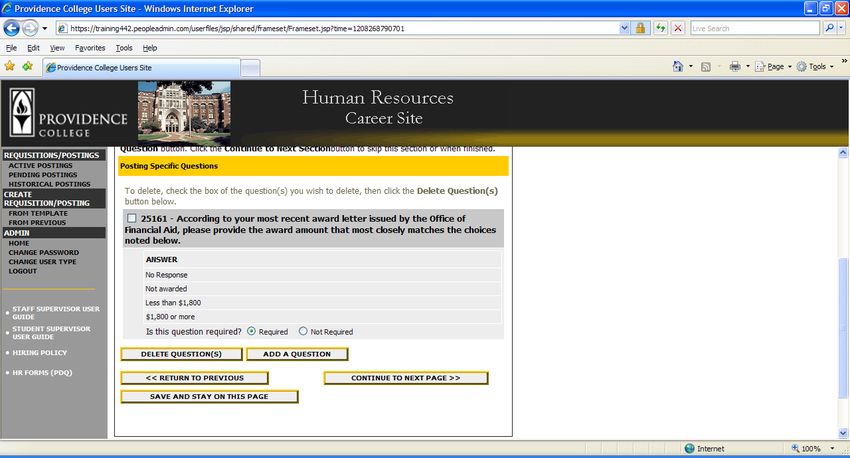
CREATE USER

Users can submit a user account to the Office of Financial Aid for approval and will be notified
be email when the account has been approved. Please fill in the following information to create
your account. Click the “CANCEL” button to return to the login page.

*Required information is denoted with an asterisk.

Enter a user name and password, along with the rest of the requested information.

Please write down your user name and password. You will need them each time you log in to the system.

In regards to the field; User Type Requested scroll down to Student Supervisor.

After completing this form, click “CONTINUE,” and you will be asked to review your information. After you have reviewed it,
click “CONFIRM” then click “OK.” Your request will then be sent to the Office of Financial Aid to approve or deny your
account.
Once the Financial Aid Office notifies you by email that your request has been accepted, you will then be able to log in to the
system with your user name and password.

                                                               5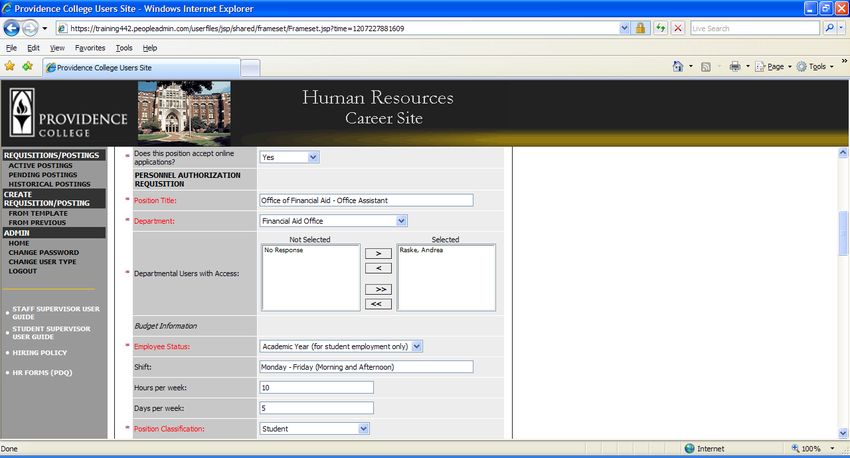
CREATING A REQUISITION/POSTING
To create a Requisition/Posting, begin by clicking a link under the header “CREATE REQUISITION/POSTING.” Your options
are:
“FROM TEMPLATE” (where several fields are predefined)
“FROM PREVIOUS”
Within the left hand side you will see “CREATE REQUISITION/POSTING” “FROM TEMPLATE.” Click on “FROM
TEMPLATE.” Within the Position Title: Scroll bar, scroll down to **Scratch Template (Student)** and click on “SEARCH.”
Click on Create located under **Scratch Template (Student)**
6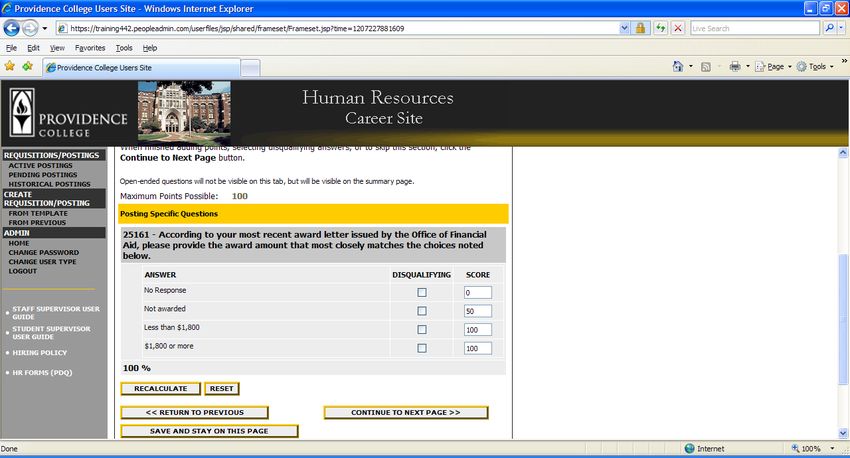
Entering Requisition/Job Posting/Description
In the following example, the Create from a Template option was selected. After scrolling down, you should see a screen
similar to the following:

A few notes about this screen:
    1. Fields with an Asterisk (*) are required, so if you do not include information in the field, an error message will appear

        and you will be required to complete it.

    2. For the question, does this position accept online applications; enter yes unless this is for the Student Caller – PC

        Phone Center Alumni Relations position.

    3. It is recommended to check mark “Closing Date: Open Until Filled”

    4. Required Applicant Documents: is not required.

    5. For the Job Code and pay rate refer to Wage Scale Form. This form is available online at:

        http://www.providence.edu/Admission/Undergraduate+Financial+Aid/Student+Employment/Wage+Scale.htm

      Copy and paste the link above to an internet address bar within a new internet window.

    6. VERY IMPORTANT: A Requisition/Posting is Not Saved until after you have completed the final step of the process

        by clicking “CONFIRM” on the final summary page. If you log out or click a link on the left side before completing

        these steps, none of the information you have edited will be saved.

                                                               7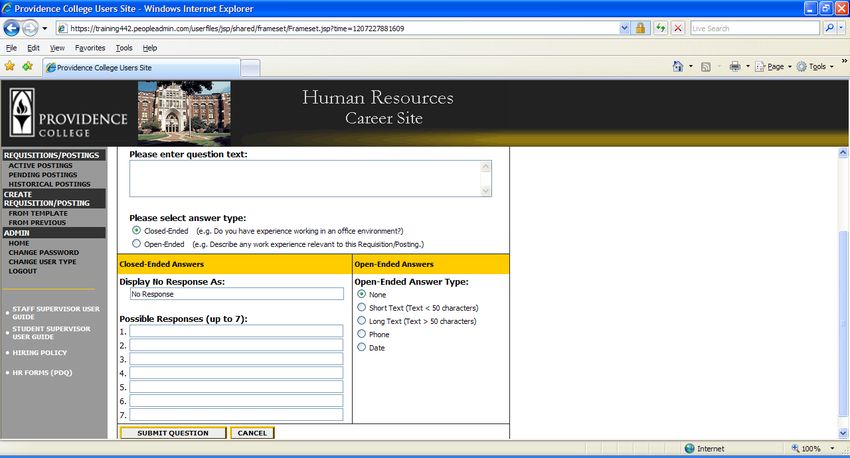
TIP: Fields in RED are viewable by applicants once the job is posted, so please proofread carefully.

When you have completed this page, click on “CONTINUE TO NEXT PAGE.”

Adding Screening Questions
Posting Specific (screening) Questions are individual questions that can be used to qualify/disqualify candidates, or rank
applicants based upon a score. You may create those questions in this section.

There is one required Screening Question for every Student Employment Requisition/Posting with exception to worked
performed within Chaplain’s Office and General Operations and for the following positions Resident Assistant (Residence
Life) and Orientation Leader (SAIL) due to federal work study regulations.

If the student employment requisition falls within the exceptions you may skip the process of adding any Screening
Questions, click the “CONTINUE TO NEXT PAGE” button. If you choose to add any optional screening questions to this
requisition click on the “ADD A QUESTION” button.

For every requisition that does not fall within the exception (departments and positions listed above) must add the required
Screening Question to every Requisition, click on the “ADD A QUESTION” button.

                                                               8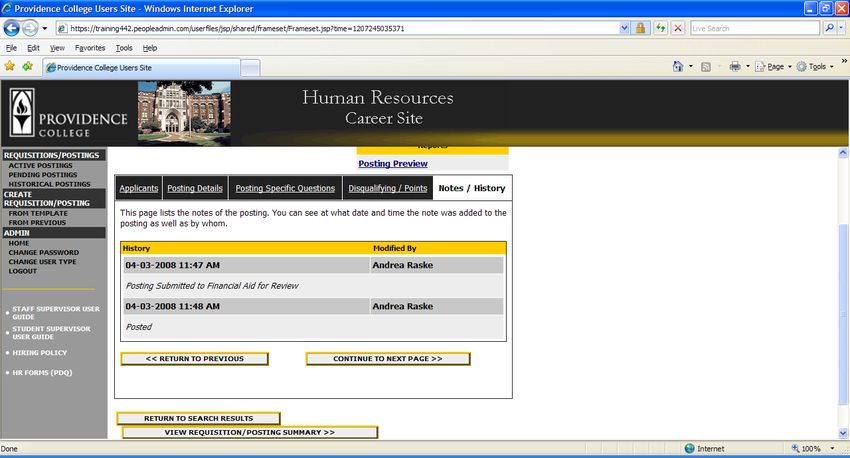
The first step is to search for the required question. To search for the required question, enter 25161 into the “Search by
Keyword” and click “SEARCH.” You will then see the required question, “According to your most recent award letter
issued by the Office…” and click on “View/Add.” You will see that the choices of responses have already been pre-selected
for you according to the requirements for this question. Click on “ADD THIS QUESTION” button.

                                                            9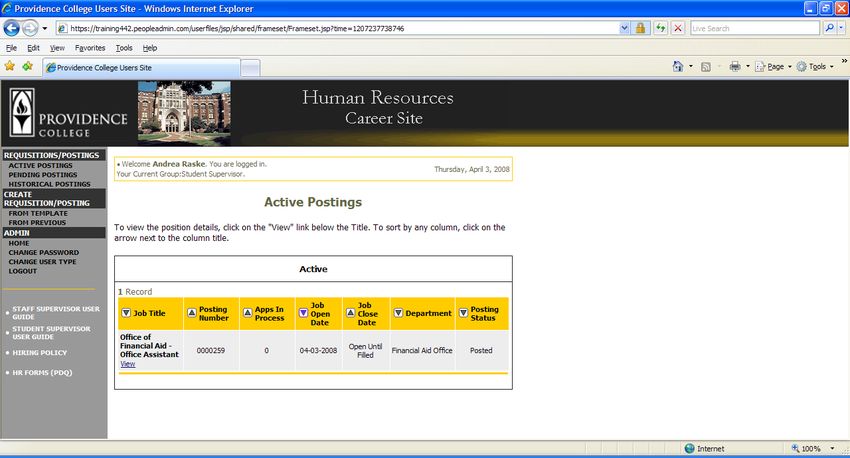
View to make sure that Required is checked with a green circle because this is a required question. If you would like to add
optional question(s) click on “ADD A QUESTION” button.

You can either add a pre-selected question or create a new question. To add a pre-selected question, click on “ADD A
QUESTION.” Within Search by Keyword: delete “25161” and click “SEARCH.” View all the question text. There are four
pages of question text, click “Next Page” to view other pages. Click “View/Add” for the one chosen. Then click “ADD THIS
QUESTION.” Choose whether or not to require this question. You also have the ability to Require an applicant to provide an
answer to the question you added. The applicant will not be allowed to proceed without answering the question with the
“Required” status. Then click “CONTINUE TO NEXT PAGE” if you do not want to add another question.

If you would like to add another question and you did not find an applicable sample question from the question text list
(optional questions) click on “ADD A QUESTION” You may create a question from scratch by clicking on the “Create a
Question” link at the bottom of the Search Results screen.
After clicking the “Create a Question” button, the following screen will appear, see next page:

                                                             10
Step 1: Please enter question text: Enter the text of the question you wish to ask all candidates who will apply to this Posting.
Step 2: Please select answer type: select either Closed-Ended or Open-Ended – described in the following sections.
Step 3: Enter answer choices or select answer format based on your selection in step 2.
11Adding Closed-Ended Questions
Closed-Ended questions require a multiple-choice answer.
For example:
Do you have experience working in an office environment?
Possible Responses: Yes or No
After selecting the “Closed-Ended” button, enter the answer choices that candidates can choose from in the boxes labeled
“Possible Responses.” In this case, you would enter:
1. Yes
2. No
Then click on “SUBMIT QUESTION”. Then click “CONTINUE TO NEXT PAGE,” if you don’t want to add another question.
However; if you would like to add an additional optional question click on “ADD A QUESTION.”
12Adding Open-Ended Questions
Click on “Create a Question”
Open-Ended questions DO NOT require a multiple-choice answer. For example:
Describe any work experience relevant to this position.
After selecting the “Open-Ended” button, select one of the answer-type choices from the right side of the screen. To limit the
length of a candidate’s response to less than 50 characters, select “Short Text.” Otherwise, select “Long Text” (Text > 50
characters). If a phone or a date is the required response, select the “Phone” or the “Date” options.
In the following example, “Phone” was selected as the answer-type for the open-ended question
The next step is to click on the “SUBMIT QUESTION” button at the bottom of the screen. This attaches the question to the
Requisition, and every applicant who applies to this Requisition will be asked this question.
13After you click “SUBMIT QUESTION,” you should see a screen similar to the following below. The following screen
summarizes the question(s) you have entered. As you enter additional questions, they will be added to this summary screen.
From this screen you may continue to add more questions by clicking the “ADD A QUESTION” button. You may also delete a
question you have entered by clicking the box next to the relevant question and clicking the “DELETE QUESTION(S)” button.
Choose whether or not to require the question.
If you spot a typo in your question, click on the “(Edit)” link at the end of the question to correct it.
When you have finished adding screening questions for this Requisition, click the “CONTINUE TO NEXT PAGE” button.
Assigning Points
In order to assist you in ranking the candidates to your Requisition by objective criteria, the system enables you to assign
points to the closed-ended questions you created on the Posting Specific Questions screen. Points must be assigned to
the Required question as seen on next page. Since open-ended questions are not allowed to have points assigned to
them, they will not appear on this screen.
If you did not enter any Screening Questions because you fall within the department and position exception as mentioned
previously enter nothing and click the “CONTINUE TO NEXT PAGE” button.
14The points assigned for the required question must be entered as follow:
No Response: 0
Not Awarded: 50
Less than $1,800: 100
$1,800 or more: 100
After entering the points accordingly click on “RECALCULATE” and you will see Maximum Points
Possible: 100 and 100% as seen above. Then click “CONTINUE TO NEXT PAGE.”
15Submitting the Requisition/Posting
After clicking the “CONTINUE TO NEXT PAGE” button from the previous screen and viewing any notes associated with the
Requisition/Posting, click on the “CONTINUE TO NEXT PAGE” or “View Posting Summary” buttons. You should see a
screen similar to the following below. Scroll down through this screen to review the information you entered.
Next select one of the choices and click the “CONTINUE” button either at the top or the bottom of this page. If you choose
“Save Without Submitting” your posting will be saved but will not be submitted to Financial Aid for review. If you are ready
to post the position, click on “Submit Posting to Financial Aid for Review.” After selecting your choice, click “CONTINUE”
to go to the confirmation page.
16Press “CONFIRM” to complete this step.
The details of your Posting are NOT SAVED until you complete the step above.
You should see a screen similar to the following below:
17VIEWING APPLICANTS TO YOUR POSTINGS
After logging into the system, if you have a posting that is currently accepting applications, you will see a screen that looks
similar to the following:
Below the Requisition/Posting heading on the left navigation bar, you are presented with the option to View Active, Pending
or Historical Postings.
ACTIVE: Postings that are Active are either:
currently posted on the applicant site, or
no longer posted but contain applicants still under review
PENDING: Postings that are Pending are either:
waiting for final review by Financial Aid, including addition of Career Site specific fields
approved by Financial Aid but not Active on the applicant site
HISTORICAL: Postings that are Historical are either:
Filled and are no longer listed on the applicant website
Cancelled and therefore not listed on the applicant website
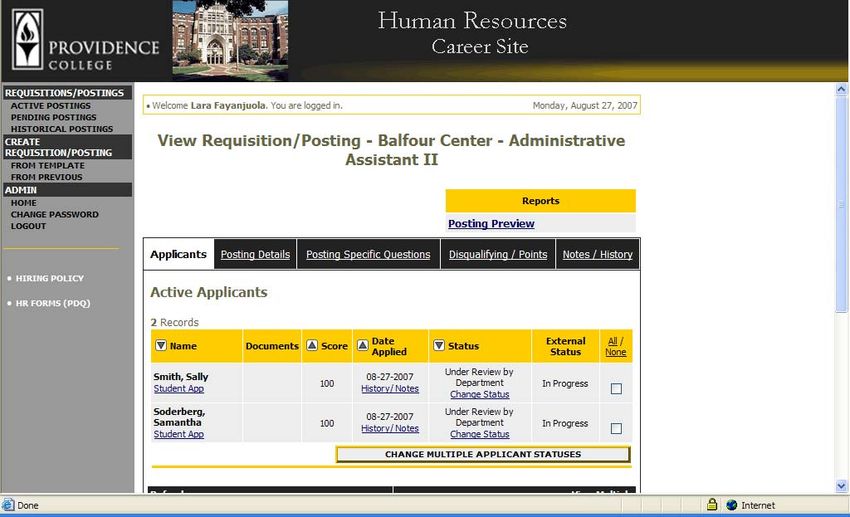
18To view the details of a specific Posting, including the description and the Applicants to that Posting, click on the word “View”
below the relevant title. This will bring you to a screen similar to the following below:
You will notice the posting data is divided into tabs, listed across the top, starting with “Applicants.” This first tab lists the
Applicants who have applied to this Posting. Additional information is also provided on this screen, including their Date
Applied, Status, etc. You may click through the other tabs at the top of the screen to view more details about the Posting,
including “Posting Specific Questions” and “Disqualifying/Points” (if applicable).
From the screen shown above you may perform a number of tasks, including:
Sort and view applicants by different criteria
Print applications and documents
Change an applicant’s status
19Sorting & Filtering Applicants by Different Criteria
To sort applicants by Name, Date Applied, etc., click the arrow at the top of the data column you wish to sort. The order in
which applicants are displayed will change accordingly.
To filter applicants by score, enter a numeric value in the Minimum Score box, and click “REFRESH.” Only applicants
meeting the score entered (and higher) will be included in your results.
You may also choose to show Active Applicants, Inactive Applicants, or both. This is performed by checking the boxes next
to “Active Applicants” (active Applicants are those still under review) and “Inactive Applicants” (inactive Applicants are no
longer under review). Click the “REFRESH” button to refresh the screen.
20Viewing and Printing Applications
To view and print a single application, click the link "Student App" under the applicant’s name from the "Active Applicants"
screen (the screen shown on the previous page). After clicking on this link, a screen similar to the following below will appear
in a new browser window. It may take a few moments for the information to load into the new window.
Select File>Print from your browser’s menu to print the applications. There is a signature line at the bottom of the page for
obtaining the applicant’s signature, if necessary (not required for student employment).
To close the window, click the "Close Window" link, or click the X in the upper right-hand corner of the window (this will NOT
log you out of the system – it will simply return you to the list of Applicants on the “View Applicants” screen).
To view and print multiple applications at the same time, perform the following steps:
211. Check the boxes next to the corresponding Applicants whose applications you wish to print (or click the “All/None”
link). These boxes are located on the right side of the page. (See top of next page.)
2. Click the “VIEW MULTIPLE APPLICATIONS” button.
3. A new window will appear (it may take several moments to load). This window contains all the applications you
selected to print.
4. Select File > Print from your browser’s menu to print the application(s).
5. Click X in the upper right hand corner of the window.
Viewing an Applicant’s History
While in the Active Applicants screen, you may view an applicant’s history. Every time an applicant changes status (i.e.
submits their application, withdraws their application, is no longer under consideration, etc.), a record is automatically created
in the Notes/History section, which is viewable within the screen below.
Common History entries you may see for each applicant include:
“Incomplete – Attached Application” (indicating the applicant clicked the “Apply to this Position” button but failed to
complete the application)
“Incomplete – Attached Questions” (indicating the applicant clicked the “Submit Questions” button but failed to answer one
or more of the required questions)
“Incomplete – Attached Documents” (indicating the applicant clicked the “Finished Attaching Documents” button)
“Completed Application Process-Received Confirmation Number” (indicating that the applicant completed all necessary
steps in applying for that position)
Others may appear, depending on your institution’s hiring process.
The “Modified By” column shows you who was responsible for moving the applicant through that step. An action taken by
“Template” or “System Generated” indicates that the system automatically moved the applicant to that step in the process.
Click “RETURN”
22Changing the Status of Applicants
Highly Important:
Supervisors must change all online student applicant statuses to either “Offer Made,” “Recommend for Hire,” or
“Not Hired.” Job postings cannot be switched to filled until all student applicants statuses are changed, as above.
Students will see the status of “Under Review By Department” up until the posting is switched to filled. Students will be able
to see that the posting is filled once it is switched. If you do not switch the student statuses the students will not be aware that
your posting is filled. Students need to be aware of their employment status within a reasonable time frame (no longer
than 3 weeks). The students need to know if they need to continue looking for employment elsewhere.
While in the Active Applicants display screen, you can change the status of Applicants as you review their applications.
To change the status of one applicant, click the “Change Status” link under the Status column in the row corresponding to
the applicant.
To change the status of multiple applicants at the same time, check the box “All/None” column for each applicant that you
wish to change (or click the “All/None” link), and then click the button labeled “CHANGE MULTIPLE APPLICANT
STATUSES.”
For students you plan to hire, change the status to “Recommend for Hire” or “Offer Made.” The Office of Financial Aid will
change the status of the student to “Hired” once the student has submitted all required paperwork. For students you do not
plan to hire, change status to “Not Hired.”
23After clicking the “CHANGE MULTIPLE APPLICANT STATUSES” button, a screen similar to the following will appear:
Under the “Status” column there is a drop down menu of the different statuses an applicant could be changed to. Select the
new status for each applicant, and then click the “CONTINUE TO CONFIRM PAGE” button. To reset the statuses to their
original values, click the “RESET TO ORIGINAL STATUS” button. To return to the previous screen, click “CANCEL.”
After clicking the “CONTINUE TO CONFIRM PAGE” button, you will come to a confirmation page. Select the “SAVE
STATUS CHANGES” button to complete the action. Select the “CANCEL” button to return to the previous screen to edit your
changes.
2425
ADMINISTRATIVE FUNCTIONS

Changing Your Password
To change your password, click the “CHANGE PASSWORD” link on the left navigation bar, and enter the required
information. The change will be updated automatically.

Logging Out
To ensure the security of the data provided by applicants, the system will automatically log you out after 60 minutes if it
detects no activity. However, anytime you leave your computer we strongly recommend that you save any work in progress
and Logout of the system by clicking on the logout link located on the bottom left side of your screen.

                                                            26
You can also read