SEE THE POTENTIAL: WOOD INNOVATIONS FOR THE CLASSROOM - K - 12 RESOURCE FOR ADST PROJECTS - Skills ...
←
→
Page content transcription
If your browser does not render page correctly, please read the page content below

SEE THE POTENTIAL:
WOOD INNOVATIONS FOR THE CLASSROOM
K – 12 RESOURCE FOR ADST PROJECTS

                                     SE E T H E POT E NT IA L   2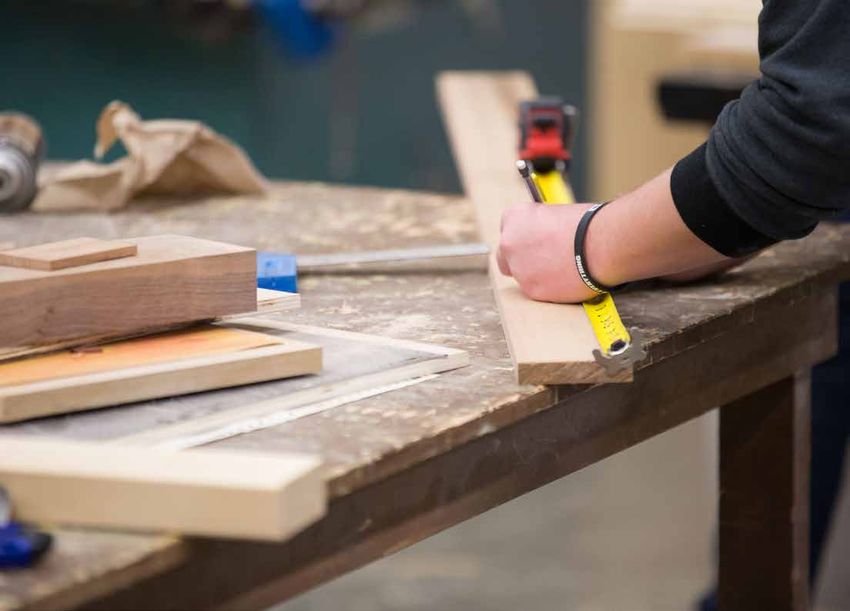
SEE THE POTENTIAL
From found wood, to pieces milled for sale in the local hardware store, any new creation starts with an idea.
The project guidelines contained within this book have been created to inspire students to learn new skills and
expand their minds to create new things. We believe that if you show someone what is possible, they will find
a way to make it a reality.

FOR ADDITIONAL INFORMATION VISIT: PROJECTS.SKILLSREADY.CA
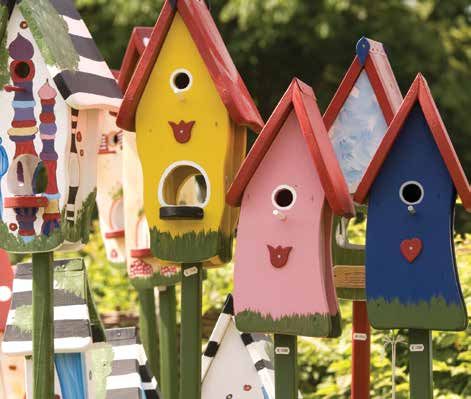
Table of Contents
TECHNOLOGY DEVICE HOLDERS                                                                                                   2     ANIMAL HOUSES/FEEDERS                                                                                                     22
   CAREER BITE – Paul Bates................................................................................................3         CAREER BITE – Leslie Myers........................................................................................23
   NOVICE – Tablet Stand......................................................................................................4      NOVICE – Mason Bee House......................................................................................24
   INTERMEDIATE – Animal Phone Stand....................................................................6                            INTERMEDIATE – Bat House........................................................................................26
   ADVANCED – Passive Phone Speaker......................................................................8                           ADVANCED – Double Custom Bird House........................................................28
JEWELRY                                                                                                                   10         Double Custom Bird House – Homework Guide..........................................30
   CAREER BITE – Adea Chung.......................................................................................11                 Double Custom Bird House – Design Guide....................................................31
   NOVICE – Wooden Rings..............................................................................................12          CROSS CURRICULAR TIES                                                                                                     32
   INTERMEDIATE – Striped Bangle..............................................................................13                     CAREER BITE – Arlene McPherson..........................................................................33
   ADVANCED – Wooden Sunglasses Frames.......................................................14                                      NOVICE – Planter Box......................................................................................................34
WOODEN TOYS                                                                                                               16         INTERMEDIATE – Laser Cut Lantern........................................................................36
   CAREER BITE– Ross Atkinson.....................................................................................17                 ADVANCED – Pinhole Camera...................................................................................37
   NOVICE – Skills Canada Gravity Car........................................................................18                      Pinhole Camera – Design Guide..............................................................................39
   INTERMEDIATE – Wooden Kazoo.............................................................................19                     BC CURRICULUM ADST TABLE                                                                                                  41
   ADVANCED – Cruiser Skateboard............................................................................20

                                                                                                                                                                                                                       SE E T H E POT E NT IA L                     1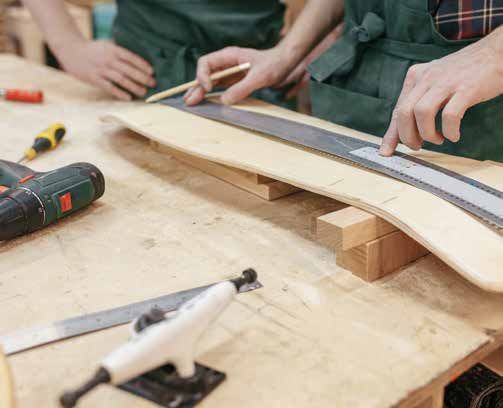
NOVICE

                                                          Tablet Stand
                                                          The tablet stand is a good project for the beginner
                                                          builder and pine is the wood of choice for its low
                                                          relative price as well as its workability. Students might
                                                          be interested to discuss the differences between
                                                          softwood and hardwood, and why pine would be a
                                                          good choice to use.

                                                          INTERMEDIATE
    Technology Device Holders                             Animal Phone Stand
                                                          Douglas fir is chosen for the intermediate project, the
    From workability to acoustic qualities, the myriad    animal phone stand, because of its tight/straight grain
                                                          (resistance to warpage) and its ability to resist splitting
    characteristics of B.C. wood allow makers, teachers
                                                          when fasteners are applied. Students may also be
    and students to choose the perfect material for       interested to research the grain designs of this wood and
    their job. Learning how to identify and select the    choose a clear finish to show off their piece.
    appropriate material or wood product to work
    with is an integral part of the B.C. Curriculum.

                                                          ADVANCED

                                                          Passive Phone Speaker
                                                          For the advanced project, the passive phone speaker,
                                                          students could research the acoustic characteristics of
                                                          locally available Sitka spruce, Western red cedar, and
                                                          maple, and make selections for their project based on
                                                          the results of their research. The option to customize
                                                          this speaker for a specific phone adds an element of
                                                          design planning to the project.

2
CAREER BITE

Paul Bates
Paul Bates is a shipwright and marine repair technician with over ten years of experience designing,
building, repairing and restoring boats of all makes and models. Most recently he has been working
on a marine project which seeks to lower environmental impacts. The project includes the creation
of electric boats, that maintain the beautiful, old look of an original craft and integrate it with newer
technology that will keep CO2 emissions and fuel costs down.

         batesmarine.com

What did you do in high school that connects to your career as a Shipwright?
In high school I did not take formal woodworking courses, my mom taught the women in trades and
technology program at the local college and showed me how to use all types of woodworking machines
and tools. This combined with taking machine shop class and automotive/welding in high school piqued
my interest in aircraft mechanics. I took a co-op class (cooperative education) at an airport, which allowed
me to assist in the restoration on a World War 2 training biplane called a Stearman, it had wings made of
oak (wooden) with fabric wrapped around them and an aluminum fuselage which was also wrapped
with fabric. It was a full restoration which took a little over 8000 hours.

What training or jobs did you complete previously that led to this career?
After high school I got into the film industry and built props and sets for different movies and
commercials along with many short films. I did a lot of woodworking and painting, making big
facades and props using a variety of wood products. I really enjoyed making things out of wood
mainly because you can make almost anything out of it!
I really loved being by the water, so when I was offered a job working with boats I was in there! I
started as a mechanics assistant and then accepted an opportunity to work with wooden boats. I
then attended courses at Quadrant Marine Institute which helped me gain a ton of useful knowledge
about all aspects of boats, from fibreglassing and painting to mechanical and woodwork. This is a Red
Seal program with amazing teachers.

What part of working with wood inspires you?
I love working on old boats and building new wooden boats — it is a privilege to see decades of
old work come back to life. I endeavour to retain traditional practices and integrate new concepts to
inspire others to keep up the old beauty with a new touch. We use many different species of wood
to create a boat — from oak frames to fir and cedar planking that is found here in BC. We also use
mahogany and numerous other woods found in different places around the world. Wooden boats
have a story to tell — hidden in the intricate woodwork, grain and hours of thought and planning
behind each placement and component.
                                                                       SE E T H E POT E NT IA L                3
Tablet Stand                                                                                       NOVICE

                         APPROXIMATE TIME: 2 1-HOUR CLASSES

                         TOOLS & MATERIALS

                    MATERIAL LIST                                            TOOL LIST
                    • SPF (Spruce, Pine, Fir) 1”x 6” x 20” long              •	Sandpaper (increasing grits) – start with 80
                    •	Water based stain or vegetable oil – other               and work up to 220
                       finishes such as felt pen/pencil crayon               • Sanding blocks
                       would also allow for student design and               • Tape Measure
                       personalization.                                      • Speed square
                    • Wood glue                                              • Clamps
                                                                             • Coping saw or small hand saw

                    PROCEDURE
                    1 Gather materials and tools.                              5	Spread wood glue along the faces of the two
                    2	Using the tape measure and speed square                    smaller pieces, and glue onto the large piece as
                       carefully measure out all pieces using the                 diagrammed. Match the long ends and leave a
                       CUT LIST:                                                  1” gap (this is where the tablet rests). Clamp and
                              • One ¾” x 5 ½” x 9”                                allow to dry. Wipe away any excess glue using a
                              • One ¾” x 5 ½” x 2”                                damp paper towel.
                              • One ¾” x 5 ½” x 6”                             6	Once your glue has dried (at least 1 hour),
                    3	Clamp your material to a table and begin cutting           remove the clamps. Sand your project using
                       out each of your laid-out pieces. Ensure your saw          sandpaper and blocks. Sand in the direction of
                       will not cut into your table and is clearly free of        the grain. Start with the 80 grit and move up to
                       any other obstacles.                                       the 220 grit until smooth.

                    4	Sand each of your pieces using sandpaper                7	Apply your water-based stain,
                       and a sanding block. Be sure to remove any                 or alternate finish.
                       rough edges.

4   SKILLS RE ADY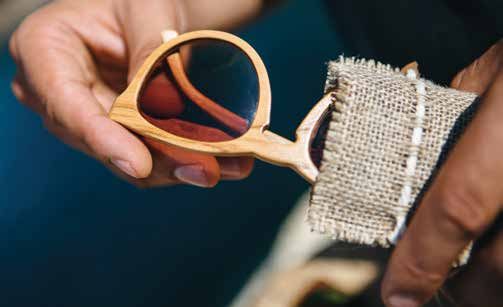
EXTENSION CHALLENGES

1
  Play with angling the sides of the cut using a mitre box         for either portrait or landscape arrangements.           4	Create a design on the large face using a wood burner
  and hand saw.                                                 3	Use a paint finish and customize a design on the large      or small rotary tool (Dremel).
2	Customize the width of the stand for a specific tablet, or      face in a contrasting colour.

                                                                                                                                                    SE E T H E POT E NT IA L           5
Animal Phone Stand                                                                       INTERMEDIATE

                                                       APPROXIMATE TIME: 3 TO 4 1-HOUR CLASSES

                                                      TOOLS & MATERIALS

                                                 MATERIAL LIST                                            TOOL LIST
                                                 • 2 – 1” x 6” x 5 ½” - Douglas fir                       • Safety glasses
                                                 •	Water based stain or vegetable oil – other            • Straight edge/ruler
                                                    finishes such as felt pen/pencil crayon would         • Compass
                                                    also allow for student design and personalization     •	Coping saw, bandsaw or scroll saw
                                                 • Wood glue                                              • Router table with ½” half round router bit
                                                 • 2 – #8 x 1 ¼” wood screws                              •	Cordless drill - with #8 Robertson driver bit, 1/8”
                                                                                                             drill bit and 3/8” countersink
                                                                                                          • Clamps
                                                                                                          • Sandpaper 80 – 220 grit
                                                                                                          • Sanding blocks

                    PROCEDURE
                    1
                      Using a blank piece of paper, draw a 5 ½” square.                        Sand your piece everywhere except the bottom of the feet.
                    2	Within your square, draw your chosen animal – This should           8	Place the animal on the base so that the animal is
                       be a simple outline as noted in the image to the left.                 perpendicular to the phone rest trough. Locate the forward
                    3	To make the base, use a table-mounted router with fence and            edge of the front feet within ½” of the far edge of the base
                       a ½” core box (half-round) router bit. Be sure to wear your            circle. Make some light pencil marks on all four sides so you
                       safety glasses. Set the fence ½” from the edge of the bit and          can see where to drill your holes and place the animal when
                       cut a 3/8” deep groove on the edge of one of the 5 ½” square           you are ready to glue.
                       pieces. **This should be done with teacher supervision**            9	Drill a 1/8” hole through the base where the animal feet will
                    4	Find the center of the base. To do this use a straight edge and         be located. (center of foot)
                       draw diagonal lines between corners, forming an “X”. Where          10 F rom the underside of the base, use a 3/8” countersink drill bit
                       the two lines intersect is your center location. Using a compass,       and drill a countersink hole so it leaves a dimple in the wood,
                       draw a circle with a 2 ½” radius.                                       to ensure your screw is flush with the bottom.
                    5	Cut out the round shape base using a bandsaw or coping
                                                                                           11	Spread glue on the base of the animal and set onto the base.
                       saw. Sand your piece to remove any rough edges.
                                                                                           12	Using the #8 Robertson driver bit, screw in 1 ¼” screws to
                    6	To make the vertical animal stand — Cut out a photocopy
                                                                                               secure your animal firmly to the base.
                       of your design and use a glue-stick to attach the paper to
                       the second 5 ½” square piece of wood. Make sure the “feet”          13 Wipe away any excess glue with a damp cloth.
                       or pieces that will rest on the base are flush at the edge of
                                                                                           14 Apply wood stain or paint to your finished piece.
                       the square. This will ensure they remain straight.
6   SKILLS RE ADY
                    7	Using a bandsaw or coping saw, cut out your animal shape.
EXTENSION CHALLENGES

1
  Experiment with a no-fastener design, where the      2	Design a more complex 3-D support (for example —          3 Woodburn details onto your animal.
  support fits into the base using different joinery      two 2-D figures interacting, or by turning a shape on a
  techniques and is removable for flat storage.           lathe etc.

                                                                                                                                        SE E T H E POT E NT IA L   7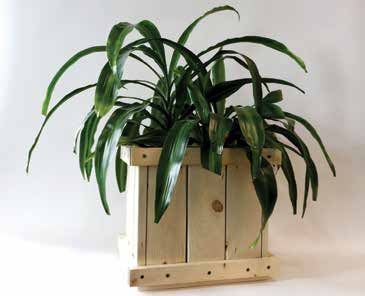
Passive Phone Speaker                                                                      ADVANCED

                                                         APPROXIMATE TIME: 4 TO 6 1-HOUR CLASSES

                                                        TOOLS & MATERIALS

                                                   MATERIAL LIST                                        TOOL LIST
                                                   •	Assorted wood types available in a variety        •   Safety glasses
                                                      of sizes. Top and bottom pieces should be 1/2"    •   Straight edge ruler
                                                      thick. Middle piece should be 1 1/2" thick        •   Bandsaw
                                                   • Wood glue                                          •   Chop saw
                                                                                                        •   Scroll saw
                                                                                                        •   Drill press with ½” Forstner bit
                                                                                                        •   Scrap wood for drill press and fence
                                                                                                        •   Assorted wood files
                                                                                                        •   Clamps
                                                                                                        •   Sandpaper (# grits)
                                                                                                        •   Sanding blocks

                    PROCEDURE
                    1
                      Cut your top and bottom pieces to 6” x 4” x 1/2” using the           5	Sketch the shape shown to the left onto your inner 1 1/2” thick
                      bandsaw or chop saw.                                                    piece. Cut out with a bandsaw or scroll saw.
                    2	On your top piece, you will drill a series of ½” holes as seen      6	Sand the curved sides before assembly. Do not sand the top
                       in the image on the left. They should be ½” away from the              and bottom faces that will be glued.
                       back of the long edge and 1 ½” from the sides. Be sure to drill     7	Spread glue on the top and bottom of your inner piece and
                       enough holes to custom fit your device.                                place the top and bottom of your speaker together like a
                    3	You will need to locate the center of the two outside holes            sandwich. Clamp tightly. Wipe away any excess glue with a
                       first. Measure ¾” in from the back edge of the board and 1 ¾”          damp cloth and allow to dry at least one hour.
                       from each side. Along with a drill press and a scrap piece of       8
                                                                                             Optional: Round the corners of your speaker using a disc
                       wood (to clamp on as a straight edge), a ½” Forstner drill bit        sander.
                       will be used to drill your holes. Continue drilling holes next to
                                                                                           9	Sand your finished piece and apply a stain or finish of your
                       each other to hollow out the phone slot.
                                                                                              choosing.
                    4	Clamp the top piece down (or use a vice) and use a wood file
                       to clean up the edges to create straight uniform edges, leaving
                       the ends of the slot round. Once the filing is complete, lightly
                       sand to remove any further rough areas.
8   SKILLS RE ADY
EXTENSION CHALLENGES
1
Customize your speaker for a particular phone, taking into account where the 3 Use of a variety of router bits to add detail to the top edges of your speaker.
phone’s speaker is and whether you will be using it in portrait or landscape mode. 4 Use a wood burning tool to customize your speaker with details.
2
Research different amplifying shapes found in nature and redesign yours to have
a different inner structure, or outer structure (ie: horn or shell shaped).
SE E T H E POT E NT IA L 9NOVICE
Wood Rings
Wooden rings can be made of just about any 1” square of
wood picked out of the waste bin. Harder wood will make
for a more long-lasting ring and is a beautiful way to utilize
offcuts from more valuable woods used in the shop. For
best results, show students how to look for bits of wood
that will produce a ring with end grain on the top side.
INTERMEDIATE
Jewelry Striped Bangle
No Lathe Needed - For the intermediate level project,
Starting in kindergarten, students are required to explain this striped bangle can be customized by students
depending on what types and thicknesses of scrap
how their Applied Design, Skills and Technologies
wood they can scrounge. Initial shaping is done with a
project affects the environment. The focus on evaluating bandsaw or coping saw, with further shaping done with
environment impacts continues throughout the elementary a benchtop sander.
curriculum. By grade 9, students are expected to be able to
critically analyze and prioritize sustainability considerations
and evaluate a variety of materials for reuse, recycling and
ADVANCED
biodegradability. Helping students identify ways to utilize
found wood and waste wood from other projects is a great Wooden Sunglasses
Wooden sunglasses frames are an ideal project to
way to introduce sustainability and innovation in material address the secondary woodwork curriculum. This
sourcing when they take on projects at home. project involves many tools, including bandsaw or
coping saw, planer, stationary sander, and Dremel.
Care should be taken when choosing the finish for these
Students can bring in an old or broken pair of plastic
projects, as projects worn next to the skin need to be sunglasses for design inspiration, potentially using the
non-toxic. Tung oil, linseed oil, beeswax, or carnauba wax are lenses in their new pair.
food-safe options that would work well in this application.
10CAREER BITE
Adea Chung
Adea Chung is the North Vancouver artist of “Billy Would Designs”. Her jewelry collections are made
exclusively from locally available reclaimed wood (including B.C. hardwoods, exotic hardwoods, and
even skate decks). Adea’s designs reflect both her commitment to sustainability and her passion for
West Coast style. Her collections are available online and in galleries country-wide.
instagram.com/billywould billywould.com
What did you do in high school that connects to your career as a
jewelry designer?
I went to high school in Clinton and 100 Mile House, British Columbia. In Clinton we had a fantastic
shop teacher who had a passion for woodworking and metal work. He was generous with his time,
Photo credit: Melissa Newberry skill and budget so it really allowed for ambitious projects and extra class time.
What training or jobs did you complete previously that led to this career?
My dad was a wood carver and also had a gallery for part of my teen years. I didn’t realize it at the
time but growing up with access to a workshop is such a luxury. My style of woodworking came
about by experimenting and learning from others, which never ends.
What part of working with wood inspires you?
Wood is such a wonderful medium to work in. The colours and grain make everything you do one of a
kind. I only work with reclaimed and recycled hardwoods so the wood regularly determines the design
it will become. Often, we associate wood with a limited list of uses. When it’s used for something
unconventional (jewelry) it allows us to look at the details and beauty in even the smallest slice.
SE E T H E POT E NT IA L 11Wooden Rings NOVICE
APPROXIMATE TIME: 3 1-HOUR CLASSES
TOOLS & MATERIALS
MATERIAL LIST TOOL LIST
• ½” x 1” square hardwood scrap (big leaf • Sandpaper (increasing grits) — start with
maple, arbutus, red alder, trembling aspen, 80 and work up to 220
white birch) (if prepping for a whole class, a • Sanding blocks
½” x 1” strip of wood to drill 5/8” holes 1” apart • Drill press
along, then cut into 1” square blocks for • 5/8” or 9/16” Drill Bits — depending on
individual rings) finger size
• Water based stain or vegetable oil, linseed oil • Clamps
– other finishes that are non-toxic • Assorted round files
PROCEDURE
1
Starting with a ½” x 1” x 1” block, identify end grain and the ring on often for this stage. Also, keep in mind that sanding
assign that as the “TOP” of the ring, or the part that you will your ring will enlarge the fit slightly, as will thinning the ring (in
look at when the ring is on your finger. the knuckle-to-fingertip dimension) and rounding the inner
2 Decide what you want your ring’s final shape to be, and edges of your ring.
sketch in pencil onto the wood. 6 Sand your ring starting with 150 grain sandpaper and
3 Using the drill press or a hand drill, remove the middle of the working your way up to emery paper.
ring. Pick the right size bit by measuring your finger first. 7 Choose a non-toxic finish, ensuring it is compatible with
4 Using the vice to secure your ring, file down the extra material daily wear next to skin. If you apply the finish with 400 grit
on the top and sides until you reach your desired shape. sandpaper it will smooth any rough areas.
5 Try the ring on and slowly file out more material from the 8 Dispose of your rag safely as per your teacher’s instructions.
center until your ring JUST fits. *Remember, you can always *Remember, oily rags can spontaneously combust and are a
remove more, but you can’t put wood back, so make sure to try safety hazard in shop environments.
EXTENSION CHALLENGES
1
Glue together several layers of scrap wood to give your 2 Research how to inlay a jewel or piece of metal into the 3 Carve an initial in the top of the ring using a Dremel tool.
ring stripes. top as a focal point for your ring.
12 SKILLS RE ADYStriped Bangle INTERMEDIATE
APPROXIMATE TIME: 6 1-HOUR CLASSES
TOOLS & MATERIALS
MATERIAL LIST TOOL LIST
• Chosen wood scraps, 4” square and flat, • Bandsaw or coping saw
enough to stack to 2–3” • Stationary belt sander
• Wood glue • Spindle sander (optional)
• Large hose clamp (to approximate the inner • Clamps
diameter for bangle sizing) • Assorted round files
• Linseed oil, vegetable oil or other • Sandpaper – Variety of grits
non-toxic finish • Sanding blocks
PROCEDURE
1 Using the bandsaw, cut your scraps into 4” squares by sliding it over your hand to make sure it’s the right 6 Glue the piece from step #5 back onto your bangle, and
diameter. Adjust to your desired size, make sure you can clamp until dry.
2 Design the order you want your pieces to be glued in.
slide your hand through it, and measure across at the
Play with variations in thickness to create patterns and 7 Cut along the outer circle until your bangle is round.
widest point. Divide this measurement by 2 — this will be
visual texture.
how far apart your compass points need to be to draw the 8 Shape and sand the inner part of your bangle with the
3 Once you have decided on the layout, cover the faces of inner circle of your bangle. Keep in mind that you will lose spindle sander. You can use the round files for finer
each wood slice with wood glue and clamp together. Be some extra material through sanding and shaping, so it’s details on the inside as well. Shape and sand the outer
sure to wipe away any excess wood glue with a damp cloth. better to draw a smaller circle at this point than one that’s part of your bangle with the belt sander.
4 When dry, mark the centre with an “x” by drawing diagonal already too large. 9 Once you have rough shaped both the inner and
lines corner to corner. Use a compass to draw two circles, 5 Using a straight edge, draw a line across the face of your outer diameter, use the assorted grits of sandpaper to
one with a 2” inch radius (diameter 4”), and one with a bangle that just meets the inner circle on both sides. Cut complete the final sand and polish.
radius for the inner part of the bangle. *Standard “medium- this off with a bandsaw or coping saw. Next, carefully cut 10 Choose a non-toxic finish, ensuring it is compatible with
size” bangles have an inner radius of 2 - 3/8”, but you may out in the inner circle. daily wear next to skin.
want to use a large hose clamp to check proper sizing
EXTENSION CHALLENGES
1
After step 1, cut the block in half at an angle and glue 2 Using a Dremel tool carve a design or a name onto the 3 Carve or wood burn a hidden message into the inside
in another layer of wood to make angled stripes in your outside of the bangle, of the bangle.
bangle.
SE E T H E POT E NT IA L 13Wooden Sunglasses Frames ADVANCED
APPROXIMATE TIME: 4 TO 6 1-HOUR CLASSES
TOOLS & MATERIALS
MATERIAL LIST TOOL LIST
• Hardwood veneer, offcut rectangles • Bandsaw
minimum 3” x 7” • Scroll saw
• 2”x 4” x 7” long • Drill (1/8” bit, and another tiny bit that fits the
• Maple for the arms (approx. ½” x 4” by 6”) diameter of the glasses screws)
• Two long glasses screws • Dremel with sanding bit
• Wood glue • Stationary belt sander
• Non-toxic finish • Sandpaper — assorted grits
PROCEDURE
1 Mark the centre of the 2x4 on both of the long, thin sides 5 Place your veneer pieces gently into the mold and draw 9 Sand the surface. Be sure not to take too much material
this will represent the midpoint of your glasses frame a pencil line along the veneer where it meets the edge off. Use the lenses to check the progress of your sanding
on the top and bottom, along the midpoint where your of the mold piece, then cut off excess veneer. You should – these pieces should be very slightly smaller than the
nose goes. be left with three pieces of veneer a bit longer but the diameter of the lenses, so that they can hold the lenses
same width as the 2x4. If you alternate the grains of the in place. Use this top piece as a stencil to trace the lens
2 Take the arms off your plastic glasses and place the frames
veneers, it will make your sunglasses stronger. holes onto the middle and bottom veneer pieces.
on the long, thin side of the 2x4 so that the top of the
frames are resting on the wood. Trace around the glasses 6 Sandwich the three pieces together and mark them with 10 Cut and sand the middle veneer holes slightly larger (by
to get an outline of the sunglasses as if you were looking pencil on the centre line on top and bottom where you 1/16”). When you sandwich the three veneers together, this
directly down on them from above (Bird’s-eye view). drew on the 2x4. larger hole will be the groove that the lenses pop into.
3 Draw a curve that roughly runs through the middle of 7 Take the lenses out of your glasses and place the frames 11 Cut the lens holes from the bottom veneer exactly the
this outline you drew and extend the line straight out to down on a piece of veneer. Centre them, and then use a same size as the top veneer. Clean up this cut line with
the sides of the 2x4. pencil to trace around the outer rim of your glasses and the Dremel or spindle sander, double checking with
the inner edge where the lenses go. the actual lenses to make sure you don’t take off too
4 Cut along this line using the bandsaw. This will be your
much material.
mold for gluing the veneers in. 8 To hollow out the frames, drill “eye holes” in the top veneer
layer, and use a scroll saw to cut out the lens holes.
14 SKILLS RE ADY12 Line up the centre line pencil marks, then glue the three 15 On the big surface (4”x6”), lay down your plastic arms centre. Be careful here not to cut off too much material.
veneers together and place in the 2x4 mold, making and trace around them. Cut along these lines with Cut small amounts off and keep checking to make sure
sure that all the centre lines on the veneers and the 2x4 the scroll saw. These pieces will be skinny — be sure the pieces fit snugly, and not too loose.
pieces line up. Clamp and wait to set, but do not let dry to keep your fingers away from the blade at all times.
18 Sand away any material on the frames or the arms that
completely. Remove the veneers before completely Smooth and shape the edges and faces of your arms
prevent the hinging movement.
dry and scrape out any glue that remains in the centre with sandpaper.
groove where the lenses will pop into. 19 Fit the arm “tabs” into the frame’s “U”-shaped notch, then
16 To make the hinges, line the arms up with the top
drill down from the top through the three pieces of wood.
13 Cut out the outer line using a bandsaw or scroll saw, then corners of your frames, and divide them into three
Counter-sink this hole with a larger drill bit so the glasses
sand and shape with the Dremel tool until smooth. horizontal sections. Draw the lines with a pencil, make
screw will fit flush. Screw the arms onto the frames.
sure not to make them longer than ¼”.
14 To make the arms, line up the top of the plastic arm
20 Sand all of your pieces smooth with 400 grit paper.
on the long, thin edge of the maple (½” x 6”), and trace 17 Cut the frames so that the top and bottom pieces
around it with a pencil. Cut this line carefully on the remain, making a “U”-shaped notch, and cut the arms so 21 Apply your chosen non-toxic finish.
bandsaw, then clean up with the stationary belt sander. that the centre piece remains, leaving a small tab in the 22 Pop the lenses in and they are ready to wear!
EXTENSION CHALLENGES
1
Make the frames out of one solid piece of maple. Trace 3 Keeping the inside lines consistent to fit with the lenses 6 Using an old set of clear prescription lenses, try making
the curves from your plastic glasses in all 3 dimensions you have, experiment with changing the outside shape wooden frames for reading or distance lenses.
and cut out on a bandsaw. Use a Dremel with a cutting of the glasses to try different “looks”. 7 Explore other materials, such as old skateboard decks,
disc to carefully carve out the groove for your lenses. 4 Use different wood veneers to achieve a striped look on to create different design features.
Shape your glasses to include nose rests. the top and sides of your glasses.
2 Find a way to use the metal hinges from an old pair of 5 Make a custom wooden case for your new glasses.
glasses instead of making wooden hinges.
SE E T H E POT E NT IA L 15NOVICE
Skills Canada Gravity Car
The Gravity Car and Race provides students an opportunity to
model their designs off of known shapes, test their prototypes
and amend their designs. It also offers cross-curricular learning
of science-based concepts like gravity and friction. This
project can be used as preparation for regional Skills Canada
competitions. Visit skillscanada.bc.ca to get involved.
INTERMEDIATE
Wooden Toys Wooden Kazoo
Kids and adults alike know the entertainment value of this
easily mastered musical instrument. The building process
Making toys as take-home projects is a classic way to involves the use of a table saw or bandsaw, stationary
sander, and drill press, which makes this project an ideal
motivate students to learn new techniques in woodwork.
introduction to using stationary tools. The kazoo’s appeal,
The many options for customization allow students to not as well as the simplicity and reproducibility of this design
only create a unique toy for their own amusement, but also and its hardware, make it an easy choice for students to
enable them to play with the applied design aspect of the explore entrepreneurship through simple profit calculations,
making several kazoos at once, and even recording video
re-designed B.C. curriculum through “gathering information demonstrations for advertising purposes.
from potential users”, building a prototype, and testing it.
Simple toys are also an ideal product for students to explore
the entrepreneurial objectives in the curriculum, as they are ADVANCED
objects that can be fun to design, demonstrate, advertise, Plywood Skateboard
and sell. For the advanced project, the skateboard is a uniquely
customizable project. It is also an item that many students
may actually use on a daily basis or can design and make
for someone who will. This project connects to other
curricula including art, science, social studies and physical
education. Students might be interested in researching
the history of art & design on skate decks, or the physics
of skate deck flexing and truck placement, wheel options,
deck grip options, and much more.
16CAREER BITE
Ross Atkinson
Ross Atkinson is the man behind Salt Spring Wooden Toys, and he has been making children’s toys
in his island wood shop for over a decade. His sons were his inspiration to design safe, healthy,
non-toxic toys for all ages. Ross’ products are not only designed for and tested by kids, but are
environmentally sustainable, too. He reclaims and reuses wood left over from construction and
other wood working projects that would have otherwise been burned or taken to landfill sites. Ross
is always on the look-out for others’ “scraps”, in particular from flooring installers, cabinet makers,
instrument makers and boat builders.
saltspringtoys.ca
What did you do in high school that connects to your career as a toymaker?
In high school I took woodworking and metal shop classes that provided me with a solid foundation
in hands-on making. I also took art classes which helped with the creative process. Math class was
also very helpful for figuring out how to make things (calculating angles, geometry, calculating stock
needs and totaling sales and taxes).
What training or jobs did you complete previously that led to this career?
I have always made things for my home and for the people I love including handmade gifts and
functional pieces like shelving units/book cases, furniture, jewelry boxes, toys/games, cutting boards,
artwork etc. I also enrolled in some continuing education courses/classes (life drawing, pottery). Salt
Spring has a world-famous Saturday market that I was keen to participate in, so I developed a small
line of toys to sell at the market. Over time this grew, and the product family developed, and we
were able to shift more time to toy making.
What part of working with wood inspires you?
Our inspiration for toy designs comes from many places - from family and friends, the natural world,
other toys, customers suggestions, books on toy making, requests from schools, and things we have
seen on the Internet.
Whatever the source we make it our own idea by producing a prototype and refining it for
production and aesthetics. We then make a small batch to see how they do at the market and make
adjustments accordingly.
SE E T H E POT E NT IA L 17Skills Canada Gravity Car NOVICE
APPROXIMATE TIME: 2 1-HOUR CLASSES
TOOLS & MATERIALS
MATERIAL LIST TOOL LIST
• Wood glue • Sandpaper (increasing grits) - start with 80
• Assorted chunks of 4” x 6” x 12” – maximum and work up to 220
dimension • Sanding blocks
• Welding rod or dowelling for axels • Clamps
• Water based stain, paint • Assorted files for shaping
• 4 old CDs or DVDs
Note: If the gravity car is being used for competition at
Skills Canada Competition, the following are the specifications: PROCEDURE
The only source of energy is the Potential Energy from gravity as the 1
Research the Skills Canada Competition 5 Assemble the wheel axles carefully — be
vehicle sits at the top of the track. To fit in the track, the maximum size specifications and requirements. sure to allow for adjustments with weight, as
of the vehicle is 101mm (4 inches) wide, 152 mm (6 inches) high and 2 Design, plan and draw your custom design. well as travel on the track. It is important that
304mm (12 inches) long. There is a 600-gram weight restriction on the Simple is often better. the car stays straight on the track.
vehicle. The vehicle can be made from any common materials found 6 Test your vehicle on a track that meets the
3 Create a materials list – Review with your
in school such as wood, metal, plastic and recycled materials from criteria designed for Gravity Car competitions.
teacher to confirm available materials.
electronic devices. The vehicles must be made from scratch by the
students and not be constructed in any form from any type of kits. 4 Build main body — be sure to weigh your
body after each adjustment is made to ensure
you meet the 600 gram or less requirement.
EXTENSION CHALLENGES
Since 1994 Skills Canada British Columbia has worked with industry,
educators, government and labour to promote rewarding and
1 Design the car after a specific commercial vehicle or favorite toy. in-demand skilled trade & technology careers to BC’s youth.
2 Research and explore the concept of wind resistance and how that Widely recognized for its annual 18 Olympic–style competitions
determined their choice for the final finish of the car. hosted in communities throughout BC, Skills BC engages over
35,000 students annually in its regional, provincial, national and
international competitions each year. www.skillscanada.bc.ca
18 SKILLS RE ADYWooden Kazoo INTERMEDIATE
APPROXIMATE TIME: 4 TO 5 1-HOUR CLASSES
TOOLS & MATERIALS
MATERIAL LIST TOOL LIST
• Hardwood (maple, alder, oak, arbutus) – • Clamps
finished dimension of 1/8” x 6”x 6” • Drill press
• Food grade finish • Sandpaper (increasing grits 80 to 220) or
• Wood glue bench sander
• 1 x wing bolt and matching wingnut • Bandsaw or scroll saw
• Waxed paper
PROCEDURE
1 Plane down an approximately 6”x6” piece of hardwood 5 Fit the wing bolt into the hole you drilled in the top piece 8 Apply your oil or other food grade finish to your kazoo.
to 1/8”. and arrange so that the wing bolt head is INSIDE the
9 Using the waxed paper holder piece as a stencil, use a
kazoo, then lay the top onto the side pieces. Make some
2 On your piece, pencil in the outlines of the top and pencil to draw out the shape on a piece of waxed
light pencil marks along the inside of the top and bottom
bottom pieces (1-½” by 6”), the side strips (1/4” by 6”), paper and cut it out. Put the waxed paper piece on the
pieces so you can see where to place your side pieces
and the waxed paper holder piece (1½” x 1”). top of your kazoo to cover the hole, place the paper
when you are ready to glue.
holder over top, line up the large holes, and secure with
3 Draw the ½” and wingnut hole placements for the top
6 Spread glue on surfaces, arrange your pieces, and clamp your wingnut.
and waxed paper holder. Use a ½” Forstner for the big
until dry.
holes, and make sure you customize your small holes for 10 Your kazoo is ready to play!
the diameter of your wing bolt. 7 Sand off the overhanging edges of the top and bottom
pieces and round the corners. Be careful to keep the
4 Cut out all 5 pieces on a bandsaw or using a scroll saw.
top of your kazoo very flat so that when you attach the
Line the side pieces up, making sure the 1/8” edges are
waxed paper and the wingnut, the paper is held evenly
touching the top and bottom (the top and bottom
and securely between the wood pieces.
pieces should be ¼” apart).
EXTENSION CHALLENGES
1
Consider how your procedure would change if you 2 Experiment by making kazoos with different dimensions 3 Laminate different colour hardwoods into a block and
were to plan on making 20 kazoos at once. and shapes (longer, shorter, wider, thicker, etc), different cut your top and bottom pieces at an angle to create
hole sizes and placements, angling the side pieces to stripes on your kazoo.
make a trapezoid kazoo, different thicknesses, etc, to see
if it changes the sound of the kazoo.
SE E T H E POT E NT IA L 19Cruiser Skateboard ADVANCED
APPROXIMATE TIME: 5 1-HOUR CLASSES
TOOLS & MATERIALS
MATERIAL LIST TOOL LIST
• Plywood (½” to ¾” thickness) • Bandsaw
• New or used skate trucks (axels) and wheels • Spindle sander
• Nuts and bolts to attach trucks • Disc sander
• Chosen wood finish or cloth finish for • Palm sander
bottom of deck – student specific • Drill press
• Grip tape for top of deck (or research and • Snap-blade knife
choose another method –i.e. adding non-slip
particles to marine paint)
PROCEDURE
1 Research skate decks (cruising decks) online to see what 5 Place your trucks on the base of your board and mark the tape gently on the top of your deck, starting in the
shapes work best for the type of skating you’d like to do hole placement with a sharp pencil or awl through the middle and laying down the ends. Be cautious at this
with your project. truck holes. Be sure the trucks are parallel to each other! – point, as the adhesive is strong and difficult to peel off
This will be specific to the trucks you choose to use. if you lay it down in the wrong spot. Smooth it down
2 Design the shape of your skateboard on a large piece of
from the centre outward to prevent bubbles.
paper, this will be your design template. Make sure you 6 Set up the drill press to drill the holes. Be sure to check the
consider the following: the width of your trucks, your size of the drill bit against the bolts needed for your trucks. 10 Use a file to rub along the edge of the skate deck at a
foot size and chosen placement, the style of board you 45-degree angle, making a white line where the grip
7 Sand any rough edges or splinters using sandpaper,
like, the dimensions of grip tape you have available. tape has been filed off. Carefully run a snap-blade knife
by hand.
up through the grip tape at the same 45-degree angle
3 Trace your board shape onto plywood using a pencil and
8 Add your chosen finish, design, applique, art to the to cut off the overhanging grip tape. Run the file along
cut to shape with the bandsaw. If you have designed a
bottom of the skate deck. the edge one more time to scrape away any excess grit
very curvy shape, be sure to make relief cuts in the wood.
9 If you’re using grip tape, peel the backing off and place around the edges.
4 Shape the edges and surfaces of your deck, keeping in
it on the gritty surface to protect your hands as you 11 Attach trucks, put your helmet on, and enjoy your
mind that if you’re using grip tape on the surface that it
smooth it to the board. Lay the sticky side of the grip new toy!
needs a flat surface to adhere to.
20 SKILLS RE ADYEXTENSION CHALLENGES
1
Research how to make laminated skate decks and try making a curved mold for 4 Instead of grip tape, research different non-slip deck finishes boat builders use
producing shaped decks by laminating thin pieces of wood together. (paint finishes with grit, lifted gel coats using a dry paint roller). Tape off sections
2 Add a short second layer of plywood on the top of the tail (last quarter of length) of your deck and apply the chosen finish in a pattern or shape of your choice.
of your board and feather it in to shape a “kick” at the back for trying tricks.
3 Cut designs into your grip tape before applying, making a pattern on your board
or incorporating stickers or painted designs.
SE E T H E POT E NT IA L 21NOVICE
Mason Bee House
Mason bees are important fruit and vegetable flower pollinators. They lay
eggs and make their cocoons in small holes such as old woodpecker holes.
Students can be encouraged to research how to take care of Mason bees
and draw up a maintenance and cleaning schedule for their house. Some
design factors they may choose to take into account are: mesh additions to
the front to protect sleepy bees from bird predators, large roof overhangs
to protect them from the weather, varying hole sizes to offer a range
of nesting options, ease of access at the back of the house for seasonal
cleaning, and a food-grade finish to ensure a healthy home for their bees.
INTERMEDIATE
Bat House
For a twist on the classic “bird house” project, our bat house encourages
students to discover more about the diversity of the ecosystems around
Animal Houses / Feeders them – the variety of species, niches, and daily (or nightly) animal activities.
Students may be interested to research which bat species in B.C. are at
risk of extinction due to habitat loss. Bats tend to use small, tight spaces
The B.C. Applied Design, Skills, and Technologies curriculum beneath loose pieces of tree bark to raise their young, and a successful bat
house design needs to mimic this environment. A narrow, well-sealed,
requires that students learn how to consider potential users and darkly painted house is an attractive habitat for bat roosting, and will
of their products, as well as recognize the environmental provide a protective, warm space for baby bats. Encourage students to
impacts of the project’s purpose, production, and life cycle. research the best place to install their bat houses; similar to the Mason bee
house, correct placement will increase the chances of the house being
Students are expected to be able to “critically evaluate the
utilized by the animal species intended. House plans adapted from Bat
success of their product and explain how their design ideas Conservation International’s single chamber bat box.
contribute to the...community and/or environment”. Building
an animal shelter or feeder that is customized to their local ADVANCED
animal populations helps students directly observe the Double Custom Bird House
environmental impact of their finished product. Students - Design Challenge
could do a follow up project where they make observations Designing projects that fit within a set of constraints is a big part of the
curricular competencies required of students throughout the ADST and
of their product in action, and then research and redesign the Woodwork curriculum. This project is set up as two lessons in which
original prototype to further its functionality. teachers and students identify inspiration and construction parameters
of their bird houses before getting started with building. The project
is student-led and student-designed, with the teacher taking more of
facilitating and mentoring role. Students will be drawing inspiration
from the architecture and style of a specific human home structure to
model their birdhouse after, and also designing their bird house with
2222 SKILLS RE ADY specific dimensional constraints based on the nesting box needs of a
local bird species.CAREER BITE
Leslie Myers
Leslie Myers is a Professional Interior Designer and Associate at Number 10 Architecture Group
in Victoria, BC. With a focus on commercial work and a flair for leading renovations, Leslie leads
Number 10’s Interior Design Department on projects ranging in scope and size.
numberten.com
What did you do in high school that connects to your career as a professional
interior designer?
When I was 12 years old, I discovered what it meant to be an architect and at that point, I knew that
my future included a career in architecture. Once I got into high school, I researched what I would
need to do to become an architect and moved in that direction. After high school I was accepted
into the University of Manitoba and achieved my Bachelor of Environmental Design with a major
in Architecture. As no career path is completely linear, the positions I took on as an architect after
graduation helped me discover that my true passion is in interior design.
What training or jobs did you complete previously that led to this career?
After graduating, I found that there were no jobs for young architects in my region, so I started out
with an interior design firm working on residential design and renovation projects, from there, I
went to work for a small architecture firm to gain experience as a project manager. During that time
I learned a multitude of things, including how to write specs. In 2008, I was laid-off and it was the
best thing that could have happened to me — it spurred me to search out new opportunities and
eventually brought me to work with Number 10 in Victoria.
What part of working with wood inspires you?
Wood offers flexibility in design and is warmer than most man-made materials. It brings the outdoors
into the workplace and provides a calming effect which increases the quality of the work environment.
Do you have any advice to share?
Life is not linear. Work hard and be open to opportunity.
SE E T H E POT E NT IA L 23Mason Bee House NOVICE
APPROXIMATE TIME: 3 1-HOUR CLASSES
TOOLS & MATERIALS
MATERIAL LIST TOOL LIST
• Five pieces 1”x 6” x 5” SPF per house • Drill press with varying extra-long bits (for 6”
• Roof: one piece of 1”x 6”x 8”, so it hangs 2” over deep holes) from 5/32” to ¼” for the house holes,
the front, and 1/2” over the sides and a small bit for the pilot hole to screw the
• Back: one 5”x5” piece of plywood, any thickness back cover on
• Wood glue • Clamps
• Food grade finish (optional) • Bandsaw (to angle the top of house for a shed
• Parchment paper or waxed paper roof, if you have the option in your shop)
• 2 keyhole hangers, • Pencil
• 4 screws to install back panel (make sure screws
aren’t longer than the thickness of the plywood
backing)
• 4 wood screws (to attach the back)
PROCEDURE
1 Arrange the five 1x6 pieces together to form a 4 Cut a piece of plywood to make a back cover
large rectangular prism block, 6” deep. Spread for your house – You can lay your house on
glue on the sides you want to stick together, then the plywood and trace around it, then cut the
clamp until dry. plywood rectangle out on the bandsaw or
handsaw. Place the cover on the back of the
2 OPTIONAL: At this point, if you choose to make a
house and drill 4 pilot holes the same diameter
slanted roof, draw a cut line along the side of your
as the inner diameter of your screws.
structure, ½” from the top of the house front and
angling up to the top back corner (see diagram). 5 Adding the roof: Centre the 8” piece of 1x6 on top
Ask your teacher to cut this line for you. of your house and draw the outline of the house
on the underside of the roof so you know where
3 Lightly draw a pencil line down the centre of
to spread the glue. Spread wood glue on the top
each 1x6 on the front of your house. Along these
of your bee house and the underside of your roof,
lines, mark pencil dots to plan the centres for
place the house onto the roof along your pencil
your bee holes, ensuring that they are all at least
lines, and clamp until dry.
3/4” apart from each other. Vary the sizes of your
holes to give the bees options. Drill your holes 6 If you choose to use a food grade finish, apply it
right through the 6” SPF using a variety of extra- to your house and the exterior of your back cover.
24 SKILLS RE ADY long bits between 5/32” and ¼”. Letting the wood weather is also an option.7 Next, line the holes with parchment paper or waxed paper. Count how many bee 8 Screw the two keyhole hangers onto the top corners of the back cover.
holes you have and cut a rectangle of paper 8”x2” for each one. For each hole, roll
9 Find the perfect place to put your Mason bee house. Ideally, it should be placed
the paper carefully around a thin pencil to make a long 8” tube, then push it into
between 4’ to 10’ (1-3 metres) off the ground, facing the southeast so it gets lots
the hole from the back until the paper is flush with the front of your house. Pull the
of morning sunshine, and tucked somewhere that will protect the bees from
pencil out and fold the extra 2” of parchment paper tube down at the back to pinch
wind and rain.
it closed. Repeat for every bee hole. When all your holes are lined, screw the back-
cover flush onto your house. 10 Research how to care for Mason bees and write up cleaning instructions and
schedule manual for your house.
EXTENSION CHALLENGES
1
Mitre the roof to give it an angle down to shed rain water. Experiment with 3 Research food-grade dyes to colour or camouflage your bee house.
different angled roofs in different planes to make your house original.
2 Add some wire mesh (½” holes) to the front to protect sleepy bees from being
picked off by birds on their way out of the holes.
SE E T H E POT E NT IA L 25Bat House INTERMEDIATE
APPROXIMATE TIME: 4 1-HOUR CLASSES
TOOLS & MATERIALS
MATERIAL LIST TOOL LIST CUT LIST
• 1 piece of ½” x 24” x 60” exterior • Table saw or portable circular saw • Spacing strips (pine):
plywood • Handheld drill or drill press 1 - ¾” x 1½” x 24” (top)
• 1 – 1” x 2” x 72” pine strip • Drill bits to drill pilot holes for #8 2 - ¾” x 1½” x 20½” (sides)
• 30 – #8 x 1” exterior screws (resists screws. • Back wall (½” plywood):
corrosion) • #2 Robertson driver bit 24” wide x 26” high
• 4 – #8 x 1½” exterior screws (to fasten • Caulking gun • Front panels (½” plywood):
the roof ) • Paint brushes Upper panel 16 ½” x 24”
• Exterior grade water-based stain, Lower panel 5” x 24”
primer, and paint in a DARK colour • Roof (½” plywood):
• Paintable latex caulk 3” x 24” (optional)
PROCEDURE
1
Measure, layout and cut the three panels. From your 24”x 5 Place the three spacing strips under the back and screw 9 Fasten the top pieces using 1” exterior screws, leaving
60” piece of plywood, cut a piece 26” x 24” (back), 16 ½” x them to the plywood. These pieces should be flush a ½” space for ventilation between the bottom and top
24” (front top) and 5“x 24” (front bottom). with the outside edge of the plywood. Fasten the top panel. Make sure plywood is flush with the sides and
2 Using a scratch awl or nail, scratch horizontal groves, strip first then butt the side pieces up to it. Use #8 - 1” wipe off any excess caulking with a damp cloth.
roughly ½” apart, on the back panel (this will create a exterior grade screws. 10 Measure, layout and cut the piece for the roof - 3” x 24”
rough surface for the bats to cling onto). 6 Caulk the inside seam where the strips and the plywood (optional)
3 Apply the dark water-based stain to all inside faces of meet. This will help provide for a weather tight / warm 11 Caulk the top of the house and screw the roof on using
your wood pieces. interior for the baby bats. 1½” screws. (seal screws with caulking)
4 Lay the back panel down, grooved side down. Predrill 7 Drill pilot holes in the front pieces according to diagram. 12 Caulk all outside joints and wipe off excess caulk.
pilot holes spaces similar to what is shown on the 8 (flip back piece with spacers attached, facing up) Before 13 Research the best way to mount your bat house.
diagram. (½” from the corners and outside edges, installing the front pieces, put a bead of caulking on the
14 Apply your exterior grade primer according to the
approx. 6” apart) faces of the front and side strips. (this will also help seal the
instructions on the label, and then apply 2 or more
unit to provide a dry / warm interior).
coats of your chosen dark exterior paint finish.
26 SKILLS RE ADYEXTENSION CHALLENGES
1 Add roofing shingles or metal roofing to your plywood roof. 4 Install an infrared camera so you can watch your bats roosting.
2 Research how to and make a larger bat house with multiple “rooms”, or a bat 5 Make a bat-watching pamphlet that includes how to identify the species in your
house with specific dimensions for a local bat species. area that might use your bat house.
3 Type up installation instructions for where to place your bat house and explain
why it needs to be facing a specific direction or mounted at a certain height, etc.
SE E T H E POT E NT IA L 27Double Custom Bird House ADVANCED
APPROXIMATE TIME: 10 1-HOUR CLASSES
TEACHER’S GUIDE
LESSON ONE: UNDERSTANDING CONTEXT
EMPATHIC OBSERVATION AND SOURCES OF INSPIRATION MATERIALS:
• Internet access
• Blank paper for lists and brainstorming
• Sticky notes (3 pads or so)
• “Homework Guide” photocopies (one per student)
• General current knowledge of local housing issues
1 INSPIRATION TYPES OF HUMAN HOMES
Intro: 10 minutes add sticky notes to the wall or board to make a master list living situations of people in your community?
Give students blank note paper or a pad of sticky notes and students can draw inspiration from. • What is one type of home on the list you’ve never lived
get them into groups of two to four. Have them brainstorm Discussion: 15 minutes in but would be curious to know what living there is
and note down all the types of human accommodation like? Why?
As a class, or in their groups, get them to discuss (and
or homes in their community or area they can think of. For • What types of materials are these structures made of?
answer in writing, if you think applicable) the following
example, apartment buildings, single-family homes, etc. Get
questions regarding the sticky notes on the board: • Which of these homes do you think make the most
them to think beyond what their own home situations are
• Have there been any local housing issues making the efficient use of resources and space? Which make the
and come up with as many different structures a human
news recently? How do you think this has changed the least efficient use of resources and space? How do
could use for a shelter as they can. Discuss as a class and
you know?
2 CONSTRAINTS LOCAL BIRD SPECIES THAT USE BIRD HOUSES
Brainstorming: 10 minutes down all the bird species on sticky notes and put on the Research: 15 minutes
Think-Pair-Share. Hand students blank note paper and board. Have the students assist you in grouping the birds In pairs, students use their computers to research
have them individually make a list of as many bird species into the following categories: “Birds that they think use bird which types of local birds use bird houses. Students
that they know live in their local area. Next, students houses”, “birds they don’t think that use bird houses”. collaboratively rearrange their sticky notes (and add sticky
discuss and share their list with a partner. As a class, note notes with species they didn’t come up with on their own)
to make a list of birds that would utilize birdhouses that
they make. Students copy this list out on their homework
guide sheet before the end of class.
28 SKILLS RE ADYYou can also read