Steps to doing a good Expo project - Eskom Expo for Young Scientists
←
→
Page content transcription
If your browser does not render page correctly, please read the page content below
Steps to doing a good Expo project
STEP 1: Choosing a topic
The topic for your project should be something that interests you and that you want to learn more about. You may
think of a good topic straight away just by looking at the list of Expo categories on our website, or you may need to
look for ideas for your topic. You can get ideas for projects from:
• Newspaper and magazine articles
• The Internet
• Television programmes
• Practical problems from your community
Your idea for a project should be an original one. This means that it should be your own idea and not somebody else’s.
Do not repeat an experiment from the school syllabus or choose a problem to which people already know the answer.
For example “Determining the specific heat capacity of iron” is not an original topic for you Expo project. The
procedure to follow is well-known from school textbooks and you can easily look up the answer.
The best Expo projects are not always complicated, but they are novel, imaginative and well carried out.
A good project is often:
• A clever solution to a problem
• A new idea for a device
• An investigation that no one has done
befoe Be original, but DO NOT choose a project that:
• could be dangerous to yourself or others;
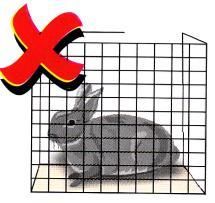
• needs any experiments on insects live animals or humans; or
• involves collecting plants or animals that are protected by Nature Conservation
laws.
Ask your teacher for advice if you are not sure whether your topic will make a suitable
scientific Expo project.
STEP 2: Write a research plan
Every student should type a research plan which should be submitted to the teacher/mentor/qualified scientist at the
beginning of the project for approval. This plan shows how you intend to do your project so it is written in the future
tense. The length of the research plan should be between 2-4 typed A4 pages. Research plans for ALL projects must
include the following:
A. Question or problem being addressed
B. Hypothesis or Engineering Goal (Engineering projects only- specify the requirements of the device to be
made)
C. Description in detail of the method to follow (scientific method projects) or the procedures to follow
(engineering projects) that will answer the questions you asked or solve the problem. The following are
important and key items that should be included when formulating ANY AND ALL research plans:
• Procedures (method)
• Variables: independent, dependent and controlled/fixed
• Data analysis: how long you will analyse the data
D. Bibliography: List at least three (3) most important references (e.g. science journal articles, books, Internet
sites) that you used to get information about your topic and that you will refer to in your introduction/ part A
above.
Check this website to ensure that you reference your sources correctly:
https://www.exposcience.co.za/index.php/referencing.htmlSTEP 3: Gather background information for your introduction
• Use books and Internet sites for your research. A summary of your background information must be included
in your introduction (this part is called a literature review). Remember to record your
references/bibliography. Find out how to record your references correctly from our website.
• Do surveys or send out questionnaires – a minimum of 100 people. Remember surveys are part of your
background research. File a blank copy of your questionnaire/survey in your journal.
STEP 4: Collect information and data
• Scientific Method:
Write out a method. Test your hypothesis/engineering goals and record your
results. Make sure you do sufficient testing to make your results reliable.
• Engineering projects:
Record design specifications, sketches and photos of each prototype. (Aim for three prototypes)
Make a working model of your final prototype to illustrate the solving of your problem.
• Interview people interested in your topic.
• Keep handwritten notes in your journal (e.g. file, diary or scrap book). Your journal is your most important
piece of work. Accurate and detailed notes make a logical and winning project. Good notes show consistency
and thoroughness to the judges. Record all data in your journal and then transfer to tables when writing your
project. Make sure you date every entry.
• Your journal can be hand written or typed and printed.
STEP 5: Results
• Add photos with captions – these are qualitative results.
• Scientific Method:
Record quantitative data in tables – firstly in your journal and then in Word or Excel.
Generate graphs from your tables. Check that your graphs are correctly completed.
• Engineering projects:
Record results of testing each prototype as well as suggestions for further modification.
STEP 6: Discuss results
• Scientific Method:
Interpret the data or make comparisons
Look at trends and patterns.
Note limitations and errors in your discussion.
• Engineering projects:
Discuss results of final prototype.
STEP 7: Conclusion(s)
• Scientific Method:
State whether your results support or do not support your hypothesis. Your conclusion(s) must be based on
your results and must be linked to your hypothesis.
• Engineering projects:
State how your final prototype meets the engineering goals you set out at the beginning of the project.
If you are selected to participate at the Eskom Expo International Science Fair, test your prototype and redesign,
rebuild and retest your new prototype or test your hypothesis again and make sure that you collect more data to
support your hypothesis.STEP 8: Evaluate the whole project
• Review, Revise and Redo
STEP 9: Write a report using the following headings
• Make sure your report clearly shows whether you did a scientific method or an engineering project.
• First page of the report should have the title of the project - Title must be simple descriptive and scientific.
• Number all pages and have a contents page
• Introduction, including information collected and description of the project literature review.
• State the problem/aim and hypothesis/engineering goals.
• Procedure/Method – numbered, logical, concise, write in the third person,
• For scientific method; include description of variables.
• Results - record of data in tables and graphs.
• Analysis/discussion and interpretation of results (include errors and modifications).
• Conclusion(s).
• Bibliography/References – list of books, journal articles and/or Internet sites where you acquired important
information.
• Remember to reference all images and photos.
• Acknowledgements – the list of people who helped you and the help each one gave. For example someone
might have lent you a piece of equipment, taken photographs for the poster or given some advice.
STEP 10: Showing your project
Your presentation must include the following:
• Display boards will be provided at regional Expos - check with the Regional Science Fair Director for the
size and dimensions
• At ISF – see website for dimensions
• Poster - must be printed on A4 pages (landscape or portrait). This is compulsory for regional expos and the
International Science Fair (ISF).
Presentation must be arranged logically and must be eye-
catching. See next page for order of poster
• Engineering projects: Model of final prototype max 50cm long
• Journal - see details below
• Report in a file - see details below
• If necessary a separate file: Surveys, questionnaires
• Regional Expo – check where the following must be filed:
Plagiarism form, Research Plan, Abstract, consent letter
• At ISF:
Official Forms file: Plagiarism form, consent letter research plan, abstract
Journal
• This is a record of ALL the work of the project – no matter how untidy it is!
• Everything should be dated.
• File all emails and rough data/results.
• File notes from interviews.
• File all designs, photos and plans.
• File copies of articles read, either alphabetically or in order of importance.
• File all survey questionnaires.Compulsory logical order for display board at Regional and International Science Fair
• Your poster summarises your project. Summarised information must be laid out in a logical order. Anyone
who wants more information can read your report file.
• Your poster is a very important part of your exhibit, it should be easy to read and understand. It should
explain what you did, how you did it and what you found out.
• Make your presentation eye-catching and interesting. You want visitors at the Eskom Expo to stop and read
about what you did.
• Title (Font size 150) – this should be in the centre of the poster and should NOT cover the Expo
logo Name of participant and grade underneath the title
• LHS: Introduction and background
information Aim
Hypothesis OR Engineering goals
Variables (Scientific Method), Designs and costs for (Engineering goals)
• Centre: Procedure/ Method
Results – graphs and analysis
• RHS: Discussion and interpretation of
results Conclusion(s)
Further research
Acknowledgements
• Photos can be added anywhere on the poster but where applicable.
Report File
• File must be neatly laid out – have a contents page with headings below, use dividers, logical order is
essential, pages must be numbered.
• Introduction including problem, literature review and background research – why you did the project,
including evidence of background research and the value of the project.
• Aim – the purpose of doing this project
• Hypothesis– statement that you are going to test which includes independent and dependent
variables. OR Engineering goals - specify the requirements of the device to be made.
See Report for details on Engineering projects
• Procedure (Method) – how the project was carried out. Written in the third person.
• Results (what happened – tables and graphs).
• Analysis of results (results/findings/graphs explained in words, more extensive in this report than on poster).
• Discussion, error and modifications (patterns and trends are noted and explained, anomalies/unusual results
are discussed, limitations noted and clarified).
• Conclusion(s) – refer directly to aim/hypothesis or engineering goals. Incorporates results and states whether
the findings support the engineering goals or hypothesis.
• References – which books and webpages you consulted and these must be referenced correctly, the first
reference must be one where you got your project idea from.
• Acknowledgments – people you talked to, who helped you and state what help they gave you.What is an abstract?
The purpose of an abstract is to summarise a project in a single page. It is usually the first document that a judge
reads.
Important information:
• Write your abstract in the past tense.
• It is a useful summary of the project that provides justification for the research.
• The abstract allows the reader to conclude whether the project write-up is worth reading.
How to write an abstract
The abstract should include the following headings:
Purpose of the Project/Experiment
• An introductory statement of the reason for investigating the topic of the project.
• A statement of the problem or hypothesis or engineering goals being studied.
Procedure (Method):
• A summarisation of the key points and an overview of how the investigation was conducted.
• An abstract gives no details about the materials used unless it greatly influenced the procedure or had to be
developed to do the investigation.
• An abstract should only include reference to procedures done by the student during the project. Work done
by a mentor (such as surgical procedures) or work done prior to the student involvement must not be
included.
• This section should provide key results that lead directly to the conclusion you have drawn.
• It should not give too many details about the results but must include the most important data generated in
the investigations.
• Conclusion(s) from the investigation should be described briefly.
• The summary paragraph reflecting on process and possibly state some applications and extensions of the
investigation.
• An abstract does not include sketches, photos, a bibliography or acknowledgements.You can also read