Vinyl Windows and Patio Doors - Owner's Manual - Pella 350 Series Pella 250 Series Encompass by Pella ThermaStar by Pella

Page created by Nathan Delgado
 
CONTINUE READING
Vinyl Windows and Patio Doors - Owner's Manual - Pella 350 Series Pella 250 Series Encompass by Pella ThermaStar by Pella
Vinyl Windows and Patio Doors
               Owner’s Manual

Pella® 350 Series   •   Pella 250 Series   •   Encompass by Pella®   •   ThermaStar by Pella®

                                                                                           OMV1213
Vinyl Windows and Patio Doors - Owner's Manual - Pella 350 Series Pella 250 Series Encompass by Pella ThermaStar by Pella
Congratulations on your purchase of Pella vinyl products! You have joined a
                                                                 ®

    select group of homeowners who have made their homes more beautiful and comfortable with

    Pella windows and doors. With proper installation, care and operation, your vinyl windows and

    patio doors will provide years of enjoyment and make every day a little easier. Read this manual

    thoroughly during your first few days of ownership so you feel comfortable operating, cleaning

    and maintaining your Pella vinyl products. Then refer to it in the future should a question arise.

        Rest assured that Pella’s commitment to service is as strong as its windows and doors. For

    more than 85 years, your complete satisfaction has been of utmost importance to us. If you

    have any questions or concerns or would like to learn more about your vinyl windows and patio

    doors, help is as close as your Pella retailer of vinyl products or at pella.com. We’re here for you

    today … and for years to come.

B
Vinyl Windows and Patio Doors - Owner's Manual - Pella 350 Series Pella 250 Series Encompass by Pella ThermaStar by Pella
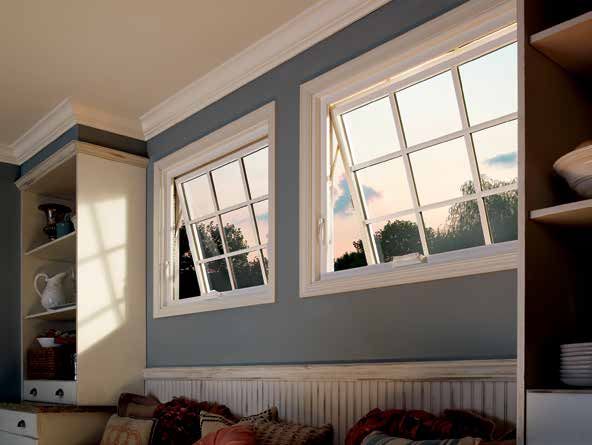
Owner’s Manual             How to Use/Table of Contents                                                                                                                                                                                                                        Table of Contents   Owner’s Manual

        H O W TO U S E YO U R O W N E R ’ S M A N U A L
           OV E RV I E W                                                                                                                                                          SL ID ING PAT IO D O O RS                                    T RO UB L E SH O OT ING
                                                                                                                                                                                5.1   Operation                                             7.1   Overview
        The Pella® Vinyl Windows and Patio Doors Owner’s Manual contains specific information for each style of product. Use the drawings and                                         5.1   Locking system                                        7.1   Glass breakage/damage
        descriptions next to each section of the Table of Contents to help locate the information you need. For the most up-to-date owner’s                                     5.1   Screens                                                     7.1   Sliding windows
        manuals and warranties for all Pella products, go to pella.com.                                                                                                         5.1   Grilles                                                     7.1   Double- and single-hung windows
                                                                                                                                                                                5.1   Blinds                                                      7.2   Casement windows
                                                                                                                                                                                5.2   Shades                                                      7.3   Sliding patio doors
                                                                                                                                                                                5.2   Cleaning                                                    7.3   Sliding screen doors
                                                                                                                                                                                      5.2   Cleaning the glass                                    7.3   Preventing condensation
                                                                                                                                                                                      5.2   Spot-cleaning stubborn materials on all glass         7.5   Unit ID Number: Service made simpler
                                                                                                                                                                                      5.2   Cleaning screen doors                                 7.6   EIFS/synthetic stucco
                                                                                                                                                                                      5.3   Cleaning Rolscreen® patio screen doors                7.6   NFRC label
                                                                                                                                                                                      5.3   Cleaning the weep system
                                                                                                                                                                                      5.3   Cleaning the interior and exterior frame           WA RRA NTY
          DOUBLE-HUNG                    SINGLE-HUNG                    SLIDING WINDOWS                   CASEMENT AND AWNING WINDOWS                  SLIDING PATIO DOORS
           WINDOWS                         WINDOWS                                                                                                                                    5.3   Cleaning the hardware finish                    Please visit pella.com/warranty.
                                                                     The operable sash(es) slides                Have one sash that hinges               The operable door(s)
     Have two sashes that slide    Have one sash that slides        open and closed — no hinges.                    open with a crank.                     open and close.
           up and down.                 up and down.
                                                                                                                                                                                  RE CO MME ND E D MA INT E NA NC E
                                                                                                                                                                                6.1   Overview

           D O UB L E - H U NG W I NDOW S                                                             S LIDIN G WIN DOWS                                                              6.1   Exterior

        1.1   Operation                                                                             3.1    Operation                                                                  6.1   Cleaning the weatherstrip

        1.1   Screens                                                                               3.1    Screens                                                                    6.1   Double- and single-hung windows

        1.1   Grilles                                                                               3.1    Grilles                                                                    6.1   Sliding windows

        1.2   Cleaning                                                                              3.1    Cleaning                                                                   6.1   Casement windows

              1.2   Cleaning the glass                                                                     3.1    Cleaning the glass                                                  6.2   Awning windows

              1.2   Spot-cleaning stubborn materials on all glass                                          3.2    Spot-cleaning stubborn materials on all glass                       6.2   Sliding patio doors

              1.2   Cleaning the exterior glass from the interior                                          3.2    Cleaning the exterior glass from the interior                       6.2   Sliding screen doors

              1.3   Cleaning flat screens                                                                  3.2    Cleaning flat screens                                               6.3   Salt spray environments

              1.3   Cleaning the interior and exterior frame and sash material                             3.2    Cleaning the weep system
              1.3   Cleaning the weep system                                                               3.2    Cleaning the interior and exterior frame and sash material
              1.3   Cleaning the hardware finish                                                           3.2    Cleaning the hardware finish

           S I N G L E - H UN G W I NDOW S                                                                CAS E ME N T AN D AWN IN G WIN DOWS
        2.1   Operation                                                                             4.1    Operation
        2.1   Screens                                                                               4.1    Screens
        2.1   Grilles                                                                               4.1    Grilles
        2.1   Cleaning                                                                              4.1    Cleaning
              2.1   Cleaning the glass                                                                     4.1    Cleaning the glass
              2.2   Spot-cleaning stubborn materials on all glass                                          4.2    Spot-cleaning stubborn materials on all glass
              2.2   Cleaning the exterior glass from the interior                                          4.2    Cleaning flat screens
              2.3   Cleaning flat screens                                                                  4.2    Cleaning the weep system
              2.3   Cleaning the weep system                                                               4.2    Cleaning the interior and exterior frame and sash material
              2.3   Cleaning the interior and exterior frame and sash material                             4.2    Cleaning the hardware finish
              2.3   Cleaning the hardware finish
Vinyl Windows and Patio Doors - Owner's Manual - Pella 350 Series Pella 250 Series Encompass by Pella ThermaStar by Pella
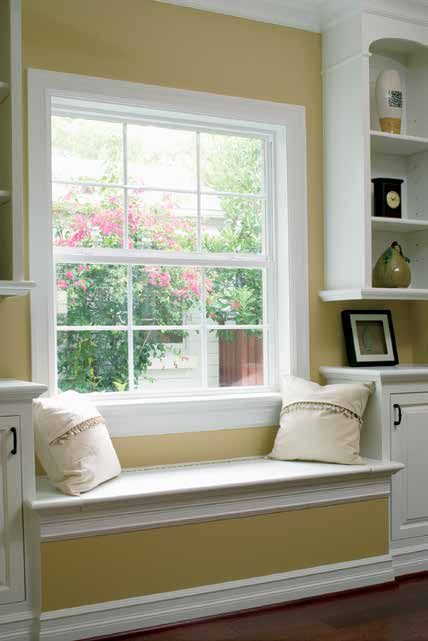
Double-Hung Windows               Operation/Screens/Grilles                                                                                                                                                                                                                Cleaning          Double-Hung Windows

       DOUBLE-HUNG WINDOWS                                                                                                                               C L E A NING

         O P E RAT I O N
                                                                                                                                                       Cleaning the glass
                                                                                                                                                       1. Use an ammonia-free glass cleaner such as Pella™ Glass and Window Cleaner. Or you may use a premixed vinegar-based cleaning
       To open the window, unlock the lock located on the top of the
                                                                                                                                                         solution (or make your own with one part white vinegar to 10 parts water), and apply to a soft, clean, lint-free microfiber cloth or paper
       venting (lower) sash. Larger windows may have two locks. You can
                                                                                                                                                         towel. Feel free to be generous with the amount of cleaner you apply to the cloth or paper towel, but avoid getting any cleaning
       open either the upper or lower sash, or both, depending on your
                                                                                                                                                         solutions on the wood, fiberglass or vinyl frames, as they may discolor the finish.
       preference. To promote good air circulation in a room, open both the
                                                                                                                       Sash Lock
                                                                                                                                                       2. Rub from several different directions.
       upper and lower sash a few inches.                                                                     (Styles vary by product type.)

                                                                                                                                                       3. Rinse with clear water if streaks remain after cleaning.
       To close the window, push the sash back to the closed position and lock
                                                                                                                                                               CAUTION: Do not use glass cleaners that are ammonia- or alcohol-based. They may leave streaks or produce a film that attracts moisture or dust.
       the window. Reengaging the lock will automatically align and center the
                                                                                                                                                               Do not use a razor blade to scrape off stubborn materials — doing so may leave permanent marks on the glass or scratches that could cause
       sashes together for a tight seal.                                                                                                                       glass breakage.
                                                                                                                       AutoLock
                                                                                                              (Styles vary by product type.)
       If your windows feature AutoLock, they are designed to lock automatically
                                                                                                                                                       Spot-cleaning stubborn materials on all glass
       when closed. Please double check that the lock is engaged.
                                                                                                                                                       To remove any markings from grease, oil, tape, adhesive, crayons or paint, or marks from plastics that may have come in contact with the glass:

                                                                                                                                                       1. Apply a solvent such as acetone, rubbing alcohol, or mineral spirits to a clean, dry, lint-free microfiber cloth or paper towel.
         S C RE E N S
                                                                                                                                                       2. Rub on the areas of glass that need spot-cleaning only. Avoid getting any solvents on the wood, fiberglass or vinyl frames, as they may
       Pella® 350 Series and Encompass by Pella®
                                                                                                                                                         discolor the finish.
       Removing a screen requires two hands. To remove the screen from the interior
       of the house/building, raise the lower sash by one-third and lower the upper                                                                    3. Wipe clean using a clean, dry, lint-free microfiber cloth or paper towel.
       sash by one-third. Then pull in on the four clips or plungers located in each                                                                   4. Then clean the glass as instructed above.
       corner (1 and 2) until they disconnect. Grasping the screen with two hands
       at the bottom, tilt the top of the screen away from the house/building and lift                                                                        CAUTION: Do not use a razor blade to scrape off stubborn materials — doing so may leave permanent marks on the
                                                                                                                                                              glass or scratches that could cause glass breakage. Contact the Pella Window and Door Showroom nearest you for
       the bottom. This should release the screen from the track. Carefully tilt and                                          1                2              special cleaning instructions.
       turn the screen so that it fits through the open window. Then pass the screen
       through the window to the inside of the house/building (3).
                                                                                                                                                       Cleaning the exterior glass from the interior
                                                                                                                                                       You can tilt both sashes of the double-hung window to the interior of the room for easier cleaning of
       Pella 250 Series
                                                                                                                                                       the exterior glass.
       Removing a screen requires two hands. To remove the screen from the interior of the house/building, raise the lower
       sash by one-third and lower the upper sash by one-third. Pull both tabs on either the right or left side of the screen,                         1. Unlock and slightly raise the lower sash. Release the tilt latches located on the top of the lower sash,
       pulling toward the opposite side (1 and 2). This will allow the screen to clear the opening. Once clear, gently push                              and pull the sash toward the interior of the room.
       the screen toward the exterior of the house/building. This should release the screen from the track. Carefully tilt and                     3
                                                                                                                                                       2. Carefully tilt the lower sash until it rests on the trim.
       turn the screen so that it fits through open window then pass the screen through the window to the inside of the
                                                                                                                                                       3. Pull down the upper sash until you can put your hands comfortably and safely on the top of the sash.
       house/building (3).
                                                                                                                                                       4. Release the tilt latches on the top of the upper sash, and pull the sash toward the interior. Carefully lower
       To replace the screen, reverse the process above and make sure the four pull tabs are engaged.                                                    the upper sash to rest against the lower sash.

               NOTE: Depending on the size of your unit, there may be only two pull tabs, but the process		                                            5. Clean the exterior glass of the upper sash, then lift and rotate it upright. Push it back into its normal position
               will be virtually the same.                                                                                                               while pulling the tilt latches in. Reengage the latches. Raise sash to a fully closed position.

                                                                                                                                                       6. Clean the exterior glass of the lower sash, then lift and rotate it upright. Push it back into its normal
                        CAUTION: Use caution when children or pets are around open windows and patio doors.
                        Screens are not designed to retain children or pets.                                                                             operating position while pulling the tilt latches in. Re-engage the latches. Lower sash to a fully closed position.

                                                                                                                                                              CAUTION: Sash may be heavy.
         G RI L L E S
                                                                                                                                                       For exterior glass-cleaning solution, follow the "Cleaning the glass" steps.
       Aluminum grilles-between-the-glass
       The aluminum grilles-between-the-glass are permanently installed between panes of glass, so they stay clean and never need to
       be removed.

       Permanent grilles
       Pella 350 Series and Pella 250 Series

1.1
       If your products have permanent Simulated-Divided-Light grilles, please refer to the cleaning section for general maintenance information.                                                                                                                                                                1.2
Vinyl Windows and Patio Doors - Owner's Manual - Pella 350 Series Pella 250 Series Encompass by Pella ThermaStar by Pella
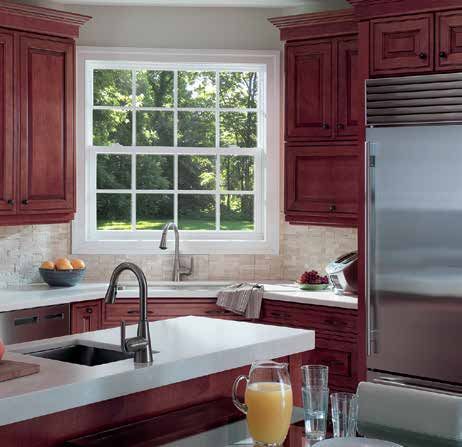
Double-Hung Windows              Cleaning                                                                                                                                                                              Operation/Screens/Grilles/Cleaning                      Single-Hung Windows

         Cleaning flat screens                                                                                                            SINGLE-HUNG WINDOWS
         To clean the fiberglass screen cloth, either remove the screen (see page 1.1) and gently wash it with soap
                                                                                                                                            O P E RAT IO N
         and water, rinse thoroughly with clean water and dry. Or use the drapery brush attachment on your vacuum
         cleaner.                                                                                                                         To open the window, unlock the lock located on the top of the venting
                                                                                                                                          (lower) sash. Larger windows may have two locks. Open the window
                      CAUTION: Use caution when children or pets are around open windows and patio doors.                                 by raising the lower sash.
                      Screens are not designed to retain children or pets.
                                                                                                                                                                                                                                                             Sash Lock
                                                                                                                                          To close the window, push the sash back to the closed position and                                        (Styles vary by product type.)

                                                                                                                                          lock the window. Reengaging the lock will automatically align and
                                                                                                                                          center the sashes together for a tight seal.
         Cleaning the interior and exterior frame and sash material
         Begin cleaning by vacuuming dirt from the sill and track areas. Then wash the window frame and sash with a                       If your windows feature AutoLock, they are designed to lock automatically
         mixture of mild dish soap and water, rinse thoroughly with clean water and dry.                                                                                                                                                                     AutoLock
                                                                                                                                          when closed. Please double check that the lock is engaged.
                                                                                                                                                                                                                                                    (Styles vary by product type.)

               WARNING: Do not use abrasive or caustic solvents as they may damage your windows. Do not scrape or use tools
               that might damage the surface. Do not power-wash.                                                                            SC RE E NS

                                                                                                                                          Removing a screen requires two hands. To remove the screen from the interior
         Cleaning the weep system                                                                                             Weep Hole
                                                                                                                                          of the house/building, fully open the lower sash. Grasping the screen handle,
         It is normal for water to accumulate in the sill and track. The water is intended to drain to the outside
                                                                                                                                          push the top of the screen frame upward or vertical and then push the bottom
         via the drainage or “weep” holes. Check to make sure that the weep holes are clear of obstruction
                                                                                                                                          of the frame screen toward the exterior of the house/building (1). This should
         (dirt, sand or building materials). To clean the weep holes, use a small, soft brush to clear the opening.
                                                                                                                                          release the screen from the track. Carefully tilt and turn the screen so that it fits
         Weep holes are located both inside and outside the window in the bottom of the frame. If the window is
                                                                                                                                          through the open window. Then pass the screen through the window to the
         “stacked,” there may be weep holes between the units.
                                                                                                                                          inside of the house/building (2).
                                                                                                                                                                                                                                                                      1                             2

         Cleaning the hardware finish                                                                                                     To replace the screen, reverse the process above and make sure the handle is engaged.
         A soft cloth and mild cleaner may be used on all hardware finishes for vinyl double-hung windows.
                                                                                                                                                          CAUTION: Use caution when children or pets are around open windows and patio doors.
                                                                                                                                                          Screens are not designed to retain children or pets.

                                                                                                                                            G RIL L E S

                                                                                                                                          Aluminum grilles-between-the-glass
                                                                                                                                          The aluminum grilles-between-the-glass are permanently installed between panes of glass, so they stay clean and never need to be
                                                                                                                                          removed.

                                                                                                                                          Permanent Simulated-Divided-Light grilles
                                                                                                                                          Pella 350® Series and Pella 250 Series

                                                                                                                                          If your products have permanent Simulated-Divided-Light grilles, please refer to the cleaning section for general maintenance information.

                                                                                                                                            C L E A NING

                                                                                                                                          Cleaning the glass
                                                                                                                                          1. Use an ammonia-free glass cleaner such as Pella™ Glass and Window Cleaner. Or you may use a premixed vinegar-based cleaning
                                                                                                                                            solution (or make your own with one part white vinegar to 10 parts water), and apply to a soft, clean, lint-free microfiber cloth or paper
                                                                                                                                            towel. Feel free to be generous with the amount of cleaner you apply to the cloth or paper towel, but avoid getting any cleaning
                                                                                                                                            solutions on the wood, fiberglass or vinyl frames, as they may discolor the finish.

                                                                                                                                          2. Rub from several different directions.

                                                                                                                                          3. Rinse with clear water if streaks remain after cleaning.

                                                                                                                                                  CAUTION: Do not use glass cleaners that are ammonia- or alcohol-based. They may leave streaks or produce a film that attracts moisture or dust.
                                                                                                                                                  Do not use a razor blade to scrape off stubborn materials — doing so may leave permanent marks on the glass or scratches that could cause
                                                                                                                                                  glass breakage.

1.3                                                                                                                                                                                                                                                                                                     2.1
Vinyl Windows and Patio Doors - Owner's Manual - Pella 350 Series Pella 250 Series Encompass by Pella ThermaStar by Pella
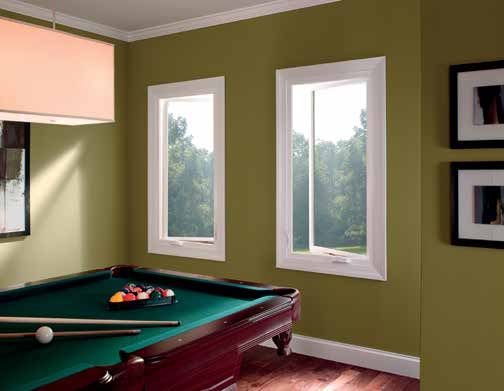
Single-Hung Windows             Cleaning                                                                                                                                                                                                                                          Cleaning         Single-Hung Windows

        Spot-cleaning stubborn materials on all glass                                                                                                            Cleaning flat screens
        To remove any markings from grease, oil, tape, adhesive, crayons or paint, or marks from plastics that may have come in contact with the glass:          To clean the fiberglass screen cloth, remove the screen and gently wash it with soap and water, rinse
                                                                                                                                                                 thoroughly with clean water and dry with a paper towel. Or use the drapery brush attachment on your
        1. Apply a solvent such as acetone, rubbing alcohol, or mineral spirits to a clean, dry, lint-free microfiber cloth or paper towel.
                                                                                                                                                                 vacuum cleaner.
        2. Rub on the areas of glass that need spot-cleaning only. Avoid getting any solvents on the wood, fiberglass or vinyl frames, as they may
          discolor the finish.                                                                                                                                                CAUTION: Use caution when children or pets are around open windows and patio doors.

        3. Wipe clean using a clean, dry, lint-free microfiber cloth or paper towel.                                                                                          Screens are not designed to retain children or pets.

        4. Then clean the glass as instructed above.

                                                                                                                                                                 Cleaning the weep system
              CAUTION: Do not use a razor blade to scrape off stubborn materials — doing so may leave permanent marks on the                                                                                                                                                            Weep Hole
              glass or scratches that could cause glass breakage. Contact the Pella Window and Door Showroom nearest you for                                     It is normal for water to accumulate in the sill and track. The water is intended to drain to the outside
              special cleaning instructions.
                                                                                                                                                                 via the drainage or “weep” holes. Check to make sure that the weep holes are clear of obstruction
                                                                                                                                                                 (dirt, sand or building materials). To clean the weep holes, use a small, soft brush to clear the
        Cleaning the exterior glass from the interior                                                                                                            opening. Weep holes are located both inside and outside the window in the bottom of the frame. If
        For windows featuring a TILTING lower sash. (Instructions for removable lower sash are below.)                                                           the window is “stacked,” there may be weep holes between the units.

              Lower sash only.

              1. Unlock and slightly raise the lower sash. Release the tilt latches located on the top of the lower
                 sash, and pull the sash toward the interior of the room. (The screen does not need to be
                 removed to clean the exterior glass.)                                                                                                           Cleaning the interior and exterior frame and sash material
                                                                                                                                                                 Begin cleaning by vacuuming dirt from the sill and track areas. Then wash the window frame and sash with a mixture of mild dish soap and
              2. Continue lowering the lower sash until it rests on the trim.
                                                                                                                                                                 water, rinse thoroughly with clean water and dry.
              3. Clean the exterior glass of the lower sash, then lift, rotate upright and push it back into its
                 normal operating position.                                                                                                                            WARNING: Do not use abrasive or caustic solvents as they may damage your windows. Do not scrape or use tools that might damage the surface.
                                                                                                                                                                       Do not power-wash.

                     WARNING: Do not use the sash to support your body weight because the sash can pivot under pressure.

                                                                                                                                                                 Cleaning the hardware finish
                                                                                                                                                                 A soft cloth and mild cleaner may be used on all hardware finishes for vinyl single-hung windows.

        For windows featuring a REMOVABLE lower sash. (Instructions for tilting
        lower sash are above.)

              You can remove the lower sash of the single-hung window
              for easier cleaning of the exterior glass.

              1. Locate the take-out clips at the top of the sides of the
                 window. Pop up the bottom of the take-out clips with a                                                 1                                    2
                 flathead screwdriver.

              2. Unlock the window and raise the lower sash until the sash balances engage the take-out clips (i.e., until the sash is raised above
                 the take-out clips). Slide the sash to one side, allowing the opposite side to clear the frame. Remove the sash and set it aside
                 for cleaning.

                     CAUTION: Sash may be heavy.

              Lay sash flat to wash the exterior glass on the vent panel. To wash the fixed panel from the interior of the building, remove the
              screen and reach out to wash the exterior glass.

                     CAUTION: Do not extend your body out of the window. If the entire glass of the fixed panel cannot be reached from the interior of the
                     house/building, wash the fixed panel from the exterior of the house/building.

        If cleaning the glass from the exterior, follow the "Cleaning the glass" steps.

2.2                                                                                                                                                                                                                                                                                                                   2.3
Vinyl Windows and Patio Doors - Owner's Manual - Pella 350 Series Pella 250 Series Encompass by Pella ThermaStar by Pella
Sliding Windows            Operation/Screens/Grilles/Cleaning                                                                                                                                                                                                                                     Cleaning         Sliding Windows

        SLIDING WINDOWS                                                                                                                                               Spot-cleaning stubborn materials on all glass
                                                                                                                                                                      To remove any markings from grease, oil, tape, adhesive, crayons or paint, or marks from plastics that may have come in contact with the glass:
          O P E RAT I O N
                                                                                                                                                                      1. Apply a solvent such as acetone, rubbing alcohol, or mineral spirits to a clean, dry, lint-free microfiber cloth or paper towel.
        To open the window, unlock the lock located in the middle of the
        venting (moving) sash. Larger windows may have two locks. Slide                                                                                               2. Rub on the areas of glass that need spot-cleaning only. Avoid getting any solvents on the wood, fiberglass or vinyl frames, as they may

        the window open. To close the window, slide the sash back to the                                                                                                discolor the finish.

        closed position and lock the window. Reengaging the lock will                                                                                                 3. Wipe clean using a clean, dry, lint-free microfiber cloth or paper towel.
                                                                                                                          Sash Lock
        automatically align and center the sashes together for a tight seal.                                     (Styles vary by product type.)
                                                                                                                                                                      4. Then clean the glass as instructed above.

        If your windows feature AutoLock, they are designed to lock automatically                                                                                           CAUTION: Do not use a razor blade to scrape off stubborn materials — doing so may leave permanent marks on the
        when closed. Please double check that the lock is engaged.                                                                                                          glass or scratches that could cause glass breakage. Contact the Pella Window and Door Showroom nearest you for
                                                                                                                                                                            special cleaning instructions.

                                                                                                                          AutoLock
                                                                                                                 (Styles vary by product type.)
                                                                                                                                                                      Cleaning the exterior glass from the interior
                                                                                                                                                                      You can remove the venting sash of the sliding window for easier cleaning of the exterior glass. Unlock the
          S C RE E N S
                                                                                                                                                                      window and slide to the fully open position. Ensure that the sash has cleared the anti-lift clip located at the
        Removing a screen requires two hands. To remove the screen from the interior                                                                                  top of the frame. Grasp the sash, and lift up and out of the bottom track.
        of the house/building, fully open the venting sash. Grasping the screen handles
        with two hands, push toward the opposite side of the screen frame and then                                                                                          CAUTION: Sash may be heavy.

        push the handle side of the screen frame toward the exterior of the house/
        building (1). This should release the screen from the track. Carefully tilt and                                                                               Lay sash flat to wash the exterior glass on the vent panel. To wash the fixed panel from the interior of the

        turn the screen so that it fits through the open window. Then pass the screen                                                                                 building, remove the screen and reach out to wash the exterior glass.

        through the window to the inside of the house/building (2).                                                                 1                             2
                                                                                                                                                                            CAUTION: Do not extend your body out of the window. If the entire glass of the fixed panel cannot be reached from the interior of the building,
                                                                                                                                                                            wash the fixed panel from the exterior of the building.
        To replace the screen, reverse the process above and make sure the handles are engaged.

                                                                                                                                                                      For exterior glass-cleaning solution, follow the “Cleaning the glass” steps on page 3.1.
                         CAUTION: Use caution when children or pets are around open windows and patio doors. Screens are not designed
                         to retain children or pets.
                                                                                                                                                                      Cleaning flat screens
                                                                                                                                                                      To clean the fiberglass screen cloth, remove the screen and gently wash it with soap and water, rinse
          G RI L L E S
                                                                                                                                                                      thoroughly with clean water and dry. Or use the drapery brush attachment on your vacuum cleaner.
        Aluminum grilles-between-the-glass
        The aluminum grilles-between-the-glass are permanently installed between panes of glass, so they stay clean and never need to be removed.                                  CAUTION: Use caution when children or pets are around open windows and patio doors.
                                                                                                                                                                                   Screens are not designed to retain children or pets.

        Permanent Simulated-Divided-Light grilles
        Pella® 350 Series and Pella 250 Series
                                                                                                                                                                      Cleaning the weep system                                                                                                 Weep Hole
                                                                                                                                                                      It is normal for water to accumulate in the sill and track. The water is intended to drain to the outside
        If your products have permanent Simulated-Divided-Light grilles, please refer to the cleaning section for general maintenance information.                    via the drainage or “weep” holes. Check to make sure that the weep holes are clear of obstruction
                                                                                                                                                                      (dirt, sand or building materials). To clean the weep holes, use a small, soft brush to clear the opening.
          CLEANING                                                                                                                                                    Weep holes are located both inside and outside the window in the bottom of the frame. If the window is
                                                                                                                                                                      “stacked,” there may be weep holes between the units.
        Cleaning the glass
        1. Use an ammonia-free glass cleaner such as Pella™ Glass and Window Cleaner. Or you may use a premixed vinegar-based cleaning
          solution (or make your own with one part white vinegar to 10 parts water), and apply to a soft, clean, lint-free microfiber cloth or paper                  Cleaning the interior and exterior frame and sash material
          towel. Feel free to be generous with the amount of cleaner you apply to the cloth or paper towel, but avoid getting any cleaning                            Begin cleaning by vacuuming dirt from the sill and track areas. Then wash the window frame and sash with a mixture of mild dish soap and
          solutions on the wood, fiberglass or vinyl frames, as they may discolor the finish.                                                                         water, rinse thoroughly with clean water and dry.

        2. Rub from several different directions.
                                                                                                                                                                            WARNING: Do not use abrasive or caustic solvents as they may damage your windows. Do not scrape or use tools that might damage the surface.
        3. Rinse with clear water if streaks remain after cleaning.                                                                                                         Do not power-wash.

                CAUTION: Do not use glass cleaners that are ammonia- or alcohol-based. They may leave streaks or produce a film that attracts moisture or dust.
                Do not use a razor blade to scrape off stubborn materials — doing so may leave permanent marks on the glass or scratches that could cause 		          Cleaning the hardware finish
                glass breakage.                                                                                                                                       A soft cloth and mild cleaner may be used on all hardware finishes for vinyl sliding windows.

3.1                                                                                                                                                                                                                                                                                                                               3.2
Vinyl Windows and Patio Doors - Owner's Manual - Pella 350 Series Pella 250 Series Encompass by Pella ThermaStar by Pella
Casement and Awning Windows                  Operation/Screens/Grilles/Cleaning                                                                                                                                                                                           Cleaning         Casement and Awning Windows

       CASEMENT AND AWNING WINDOWS                                                                                                                                   Spot-cleaning stubborn materials on all glass
                                                                                                                                                                     To remove any markings from grease, oil, tape, adhesive, crayons or paint, or marks from plastics that may have come in contact with the glass:
         O P E RAT I O N
                                                                                                                                                                     1. Apply a solvent such as acetone, rubbing alcohol or mineral spirits to a clean, dry, lint-free microfiber cloth or paper towel.
       Vinyl casement windows feature a convenient locking system — a single, easy-to-reach sash lock handle
       operates both locks on casement windows. To open the window, lift the sash lock handle to unlock the                                                          2. Rub on the areas of glass that need spot-cleaning only. Avoid getting any solvents on the wood, fiberglass or vinyl frames, as they may

       window, then rotate the handle and crank. Be sure to unlock the window before you try to open it —                                                              discolor the finish.

       otherwise, you’ll risk damaging the operating mechanism. To close the window, reverse the steps. 		                                                           3. Wipe clean using a clean, dry, lint-free microfiber cloth or paper towel.
                                                                                                                               Sash Lock
       Be sure to lock the sash whenever the window is closed.
                                                                                                                                                                     4. Then clean the glass as instructed in previous section.

       Awning windows are similar to casement windows that have been turned on their side. Awning                             Crank Handle
                                                                                                                                                                           CAUTION: Do not use a razor blade to scrape off stubborn materials — doing so may leave permanent marks on the
       windows are designed to be opened to a 45° angle or less. They feature dual sash locks — both                                                                       glass or scratches that could cause glass breakage. Contact the Pella Window and Door Showroom nearest you for
                                                                                                                                                                           special cleaning instructions.
       locks must be released before opening.

                                                                                                                                                                     Cleaning flat screens
         S C RE E N S
                                                                                                                                                                     Standard fiberglass screens
       Flat screens
                                                                                                                                                                     To clean the fiberglass screen cloth, either remove the screen and gently wash it with soap and water,
       Removing a flat screen requires two hands. To remove the screen, pull the clips or
                                                                                                                                                                     rinse thoroughly with clean water and dry. Or use the drapery brush attachment on your vacuum cleaner.
       plungers, located on the screen frame, inward and out of the slots in the window
       frame (1). Grab the screen frame securely, then carefully lower the screen from the
                                                                                                                                                                                  CAUTION: Use caution when children or pets are around open windows and patio doors.
       window into the home (2).                                                                         Encompass by
                                                                                                                                                                                  Screens are not designed to retain children or pets.
                                                                                                          Pella® Series         1

       To install the flat screen, place the screen in the window opening. Pull the clip
       or plunger inward while pushing the screen into the window. Then reengage the                                                                                 Cleaning the weep system
                                                                                                                                                                                                                                                                                              Weep Hole
       plunger in the slots on the sides of the window.                                                                                                              Encompass by Pella® and ThermaStar by Pella®

                                                                                                         Pella® 350 Series
                                                                                                                                                                     It is normal for water to accumulate in the sill and track. The water is intended to drain to the outside via
                        CAUTION: Use caution when children or pets are around open windows and                                  1             All Series         2
                        patio doors. Screens are not designed to retain children or pets.                                                                            the drainage or “weep” holes. Check to make sure that the weep holes are clear of obstruction (dirt, sand
                                                                                                                                                                     or building materials). To clean the weep holes, use a small, soft brush to clear the opening. Weep holes
                                                                                                                                                                     are located both inside and outside the window in the bottom of the frame. If the window is “stacked,”
         G RI L L E S
                                                                                                                                                                     there may be weep holes between the units.
       Aluminum grilles-between-the-glass
       The aluminum grilles-between-the-glass are permanently installed between panes of glass, so they stay clean and never need to be
       removed.
                                                                                                                                                                     Cleaning the interior and exterior frame and sash material
                                                                                                                                                                     Begin cleaning by vacuuming dirt from the sill and track areas. Then wash the window frame and sash with a mixture of mild dish soap and
                                                                                                                                                                     water, rinse thoroughly with clean water and dry.
       Permanent Simulated-Divided-Light grilles
       Pella 350 Series                                                                                                                                                    WARNING: Do not use abrasive or caustic solvents as they may damage your windows. Do not scrape or use tools that might damage the surface.
                                                                                                                                                                           Do not power-wash.
       If your products have permanent Simulated-Divided-Light grilles, please refer to the cleaning section for general maintenance information.

                                                                                                                                                                     Cleaning the hardware finish
         CLEANING
                                                                                                                                                                     A soft cloth and mild cleaner may be used on all hardware finishes for vinyl casement and awning windows.
       Cleaning the glass
       1. Use an ammonia-free glass cleaner such as Pella™ Glass and Window Cleaner. Or you may use a premixed vinegar-based cleaning
         solution (or make your own with one part white vinegar to 10 parts water), and apply to a soft, clean, lint-free microfiber cloth or paper
         towel. Feel free to be generous with the amount of cleaner you apply to the cloth or paper towel, but avoid getting any cleaning
         solutions on the wood, fiberglass or vinyl frames, as they may discolor the finish.

       2. Rub from several different directions.

       3. Rinse with clear water if streaks remain after cleaning.

               CAUTION: Do not use glass cleaners that are ammonia- or alcohol-based. They may leave streaks or produce a film that attracts moisture or dust.
               Do not use a razor blade to scrape off stubborn materials — doing so may leave permanent marks on the glass or scratches that could cause
               glass breakage.

4.1                                                                                                                                                                                                                                                                                                                      4.2
Vinyl Windows and Patio Doors - Owner's Manual - Pella 350 Series Pella 250 Series Encompass by Pella ThermaStar by Pella
Sliding Patio Doors            Operation/Screens/Grilles/Blinds                                                                                                                                                                                                                          Shades/Cleaning            Sliding Patio Doors

         S L I D I N G PAT I O D O O R S                                                                                                                                   SH A D E S

           O P E RAT I O N
                                                                                                                                                                         Shades-between-the-glass
                                                                                                                                                                         Pella® 350 Series
         Locking System
         Thumbturn lock                                                                                                                                                  The cellular shades are permanently installed between panes of insulating glass, so they stay clean and never need to be removed.
                                                                                                                                 Locked                       Unlocked

         The thumbturn lock is located on the flat panel behind the door handle. To lock
                                                                                                                                                                         Shades-between-the-glass operation
         the door, fully close the venting/sliding panel and turn the thumbturn to a vertical
                                                                                                                                                                         Move the operators up and down in a slow and steady motion. The operators are attached to the
         locked position. To unlock the door, turn the thumbturn in the opposite direction.
                                                                                                                                                                         operating mechanism with high-powered magnets. Moving the operators abruptly could cause the
                                                                                                                                                                         operator to become disengaged from the magnet.

           S C RE E N S                                                                                                                                                          NOTE: If a handle becomes disengaged from the operator and remains attached to the track, slide the
                                                                                                                                                                                 operator up and down until the magnet reengages. Slowly slide the handle all the way to the top of the track
         To remove the screen door for storage, lift the screen and tilt the bottom                                                                                              to fully engage the handle with the operator.
         portion of the screen away from the sliding door while lifting the screen out of
         the sill frame track (1).
                                                                                                                                                                           C L E A NING

         Pella® 350 Series patio doors with Rolscreen® retractable screen                                                                                                Cleaning the glass
         To remove the retractable Rolscreen, remove the retainer clips at both the                                                                                      1. Use an ammonia-free glass cleaner such as Pella™ Glass and Window Cleaner. Or you may use a premixed vinegar-based cleaning
         head and the sill (2), lift slightly, and tilt the bottom of the Rolscreen cassette                                        1                                2     solution (or make your own with one part white vinegar to 10 parts water), and apply to a soft, clean, lint-free microfiber cloth or paper
         away from the sliding patio door and remove from the notches in the frame.                                                                                        towel. Feel free to be generous with the amount of cleaner you apply to the cloth or paper towel, but avoid getting any cleaning
         Save the notch cover that is located at the top of the frame as well as the retainer clips for later installation.                                                solutions on the wood, fiberglass or vinyl frames, as they may discolor the finish.

                                                                                                                                                                         2. Rub from several different directions.
                 NOTE: Use a putty knife to lift the rollers out of the bottom channel.
                                                                                                                                                                         3. Rinse with clear water if streaks remain after cleaning.

                          CAUTION: Use caution when children or pets are around open windows and patio doors. Screens are not designed to retain children or pets.
                                                                                                                                                                                CAUTION: Do not use glass cleaners that are ammonia- or alcohol-based. They may leave streaks or produce a film that attracts moisture or dust.
                                                                                                                                                                                Do not use a razor blade to scrape off stubborn materials — doing so may leave permanent marks on the glass or scratches that could cause
                                                                                                                                                                                glass breakage.

           G RI L L E S

         Aluminum grilles-between-the-glass                                                                                                                              Spot-cleaning stubborn materials on all glass
         The aluminum grilles-between-the-glass are permanently installed between panes of glass, so they stay clean and never need to be removed.                       To remove any markings from grease, oil, tape, adhesive, crayons or paint, or marks from plastics that may have come in contact with the glass:

                                                                                                                                                                         1. Apply a solvent such as acetone, rubbing alcohol, or mineral spirits to a clean, dry, lint-free microfiber cloth or paper towel.
           BLINDS                                                                                                                                                        2. Rub on the areas of glass that need spot-cleaning only. Avoid getting any solvents on the wood, fiberglass or vinyl frames, as they may
         Blinds-between-the-glass                                                                                                                                          discolor the finish.
         Pella 350 Series, Encompass by Pella® and ThermaStar by Pella®                                                                                                  3. Wipe clean using a clean, dry, lint-free microfiber cloth or paper towel.

         The aluminum blinds-between-the-glass are permanently installed between                                                                                         4. Then clean the glass as instructed above.
         panes of glass, so they stay clean and never need to be removed.
                                                                                                                                                                               CAUTION: Do not use a razor blade to scrape off stubborn materials — doing so may leave permanent marks on the
                                                                                                                                                                               glass or scratches that could cause glass breakage. Contact the Pella Window and Door Showroom nearest you for
         Blinds-between-the-glass operation                                                                                                                                    special cleaning instructions.

         Move the operators up and down in a slow and steady motion. The                            Open-and-Close
         operators are attached to the operating mechanism with high-powered                         Tilt Operator                                                       Cleaning screen doors
         magnets. Moving the operators abruptly could cause the operator to                                                                                              To clean the fiberglass screen cloth, use a vacuum cleaner with the upholstery brush attachment, If necessary,

         become disengaged from the magnet.                                                                                                                              use the exhaust feature to blow debris off the exterior side of the screen. For greasy deposits, use hot water
                                                                                                                                                                         and mild detergent, rinse with clean water and dry.
                NOTE: If a handle becomes disengaged from the operator and remains
                attached to the track, slide the operator up and down until the magnet                 Raise-and-                                                                       CAUTION: Use caution when children or pets are around open windows and patio doors.
                reengages. Slowly slide the handle all the way to the top of the track to fully      Lower Operator
                engage the handle with the operator.

                If the blind does not completely lower on one side, using the tilt operator,
                ensure the slats are in the open position, then raise and lower the blind.

5.1                                                                                                                                                                                                                                                                                                                                    5.2
Sliding Patio Doors          Cleaning                                                                                                                                                                                                                                                       Recommended Maintenance

         Screens are not designed to retain children or pets.                                                                                                     A soft cloth and mild cleaner may be used on all hardware finishes for vinyl sliding patio doors.

         Cleaning Rolscreen® patio screen doors                                                                                                                   RECOMMENDED MAINTENANCE
         Pella 350 Series
                                                                                                                                                                     OVE RVIE W
         Rolscreen patio screen doors should be in the closed position for cleaning. For normal dust and dirt, use a vacuum cleaner with the
                                                                                                                                                                  Pella recommends you inspect your windows and doors at least annually as part of a home checkup. Recommended maintenance can
         upholstery brush attachment. If necessary, use the exhaust feature to blow debris off the exterior side of the screen. For greasy deposits,
                                                                                                                                                                  prolong the life of your windows and patio doors and will help ensure maximum warranty coverage. As needed, clean your windows and
         use hot water and mild detergent. If you wash your screen, rinse thoroughly with clean water and make certain it is dry before operating it.
                                                                                                                                                                  patio doors, and recaulk around them to help maintain optimal performance. Also be sure to regularly check for leaks, improper drainage
                 CAUTION: Do not power-wash.                                                                                                                      above or around vents, and sprinkler systems that may subject your windows and doors to prolonged water exposure. With recommended
                                                                                                                                                                  care, your Pella® windows and patio doors can reward you with many years of beauty and performance.

         Cleaning the weep system                                                                                                    Weep Hole
         It is normal for water to accumulate in the sill and track. The water is intended to drain to the outside                                                Exterior
         via the drainage or “weep” holes. Check to make sure that the weep holes are clear of obstruction                                                        An annual checkup can help preserve and maintain the beauty of your vinyl products for years to come.

         (dirt, sand or building materials). To clean the weep holes, use a small, soft brush to clear the opening.                                               Inspect the sealant/caulking on the exterior perimeter of your windows and patio doors at least once a year. The sealant/caulking helps
         Weep holes are located both inside and outside the door in the bottom of the frame.                                                                      create a watertight seal between the window and door frames and the exterior siding (whether it is vinyl, cedar, aluminum, brick, etc.). It
                                                                                                                                                                  is extremely important that the sealant/caulking remains intact and in good condition at all times. Pay particular attention to the caulking
                                                                                                                                                                  at the lower corners of windows and under joints between windows in combinations (a grouping of individual windows). The sealant
                                                                                                                                                                  material should not be cracked, broken or missing — or it may cause premature failure of your vinyl windows and patio doors or other
                                                                                                                                                                  parts of your home. Deterioration that occurs as a result of improper or insufficient maintenance is not covered by the vinyl window and
         Cleaning the interior and exterior frame
                                                                                                                                                                  patio door Limited Lifetime Warranty.*
         Begin cleaning by vacuuming dirt from the door track areas. Then wash the door frame with a mixture of mild dish soap and water, rinse
         thoroughly with clean water and dry.
                                                                                                                                                                  Cleaning the weatherstrip
                WARNING: Do not use abrasive or caustic solvents as they may damage your patio doors. Do not scrape or use tools that might damage the surface.
                                                                                                                                                                  To remove any deposits — such as grease, oil or stains — that may have come in contact with the weatherstrip, apply a small amount of
                Do not power-wash.
                                                                                                                                                                  concentrated fabric cleaner or carpet cleaner — such as Spray-n-Wash®, OxiClean® Fabric Cleaner or Resolve® Carpet Cleaner — to the
                                                                                                                                                                  weatherstrip. Scrub the cleaner into the weatherstrip with a toothbrush or similar applicator. Continue applying cleaner until the deposits are
         Cleaning the hardware finish
                                                                                                                                                                  no longer visible. Rinse weatherstrip with clean water, and dry with a paper towel.

                                                                                                                                                                                                    Double- and single-hung windows
                                                                                                                                                                                                    Keep weatherstrip clean and lubricated to ensure the sash operates smoothly. You may want to apply a thin
                                                                                                                                                                                                    layer of paraffin or other dry lubricant (Teflon® Dry Lubricant or Gulf Wax®, available at most home improvement
                                                                                                                                                                  stores, works well). Do not use oily lubricants; they attract dust and grime, which will eventually restrict the window’s movement.

                                                                                                                                                                                         Sliding windows
                                                                                                                                                                                         Keep the track free of debris that could affect operation of the window. Remove the sliding panel (see page 3.1 for
                                                                                                                                                                                         complete details). Inspect and clean the rollers on the bottom of the slide panel.

                                                                                                                                                                                 Casement windows
                                                                                                                                                                                 To keep the window operating smoothly, clean the window track occasionally with a brush. To help prevent the sash from
                                                                                                                                                                                 sticking, apply a thin layer of paraffin or other dry lubricant (Teflon® Dry Lubricant or Gulf Wax®, available at most home
                                                                                                                                                                  improvement stores, work well) to the weatherstripping. Do not use oily lubricants; they attract dust and grime, which will eventually restrict
                                                                                                                                                                  the window’s movement. You can remove the operating crank on your window by loosening the set screw located on the bottom of the crank.
                                                                                                                                                                  It’s important to keep the set screw tight; using a crank handle with a loose set screw causes the crank and operator stud to wear.

                                                                                                                                                                  * See written warranty for complete details at pella.com/warranty.

5.3                                                                                                                                                                                                                                                                                                                    6.1
Recommended Maintenance                                                                                                                                                                                                                                                          Recommended Maintenance

                           Awning windows                                                                                                                        Salt spray environments
                           Keep the window track free of dirt and debris. As with casement windows, to help prevent the sash from sticking,                      The seacoast environment is extremely hard on all sorts of products (automobiles, recreational vehicles, building products, etc.).
         you may want to apply a thin layer of paraffin or other dry lubricant (Teflon Dry Lubricant or Gulf Wax , available at most home
                                                                                             ®                          ®                                        Any product used in a seacoast location will require more frequent inspection and maintenance to help it last as long as possible in this
         improvement stores, work well). Do not use oily lubricants; they attract dust and grime, which will eventually restrict the                             harsh environment. Windows and doors are no different from other products in this respect.
         window’s movement.
                                                                                                                                                                 If your home is in a coastal environment and is subjected to wind-driven salt spray or salt fog, clean the exteriors, including operation
                                                                                                                                                                 hardware, using mild detergent soap, rinse thoroughly with clean water and dry at least quarterly — and more often if necessary — to
                                                                                                                                                                 prevent salt and other abrasive materials from building up on the exterior surfaces.
                          Sliding patio doors
                          For proper operation, keep the door track free of debris. You can adjust the rollers located in the bottom of the door if
                                                                                                                                                                       CAUTION: Do not power-wash.
                          necessary. The lock strike can also be adjusted if needed. (See page 7.3 for detailed instructions.) You may want to apply a
         thin layer of paraffin or other dry lubricant (Teflon® Dry Lubricant or Gulf Wax®, available at most home improvement stores, work well).
         Do not use oily lubricants; they attract dust and grime, which will eventually restrict the door’s movement.

         Cleaning under the track

         Open the sliding patio door panel. Make sure the top of the panel has cleared
         the anti-lift clips in the lower track. Grasp the panel with both hands, and lift
         up to remove it from the lower track. Then pull down to remove it from the
         upper channel (1). Pry up the track from the door frame with an Allen wrench
         or flathead screwdriver. Grasp the track and lift it all the way out (2).
                                                                                                                            1                                2

         Vacuum out any debris, and thoroughly clean the lower channel with warm soapy water, rinse thoroughly with clean water and dry with a
         paper towel.

         To replace, insert the lower track into the door frame and press it down all the way across. Reinstall the sliding patio door panel by lifting it
         up into the upper channel of the frame. Line up the panel with the bottom track, and gently lower the panel into the frame. Check for smooth
         operation by opening and closing the door.

                          Sliding screen doors
                          It is important to keep the upper and lower door tracks free of dirt and debris. The rollers on the top of the screen can be
         adjusted if necessary. (See page 7.3 for complete details.) If the screen becomes dirty, you can clean it by using a vacuum cleaner with the
         drapery brush attachment.

         Cleaning under the track

         Open the sliding screen door. You might have to adjust screen rollers so they
         can clear the lower track. (See page 7.3 for detailed instructions.) From the
         exterior, grasp the screen door with both hands and lift up to remove it from
         the lower track. Then pull down to remove it from the upper channel (1).
         Pry up the track from the door frame with an Allen wrench or flathead
                                                                                                                            1                                2
         screwdriver. Grasp the track and lift it all the way out (2).

         Vacuum out any debris, and thoroughly clean the lower track with warm soapy water, rinse thoroughly with clean water and dry with a
         paper towel.

         To replace, insert the lower track into the door frame and press it down all the way across. Reinstall the sliding screen door by lifting it up into
         the upper channel of the frame. Tilt in the bottom of the screen door, and set it on the lower track. Adjust the screen rollers if necessary. (See
         page 7.3 for detailed instructions.) Check for smooth operation by opening and closing the door.

6.2                                                                                                                                                                                                                                                                                                          6.3
Troubleshooting                                                                                                                                                                                                                                                                          Troubleshooting

         T R O U B L E S H O OT I N G                                                                                                                     A window that makes noise when it's opened or closed could be resolved with spray lubricant, by the adjusting the screws rubbing on
                                                                                                                                                          the balance spring (3a) or by smoothing the burrs from the installation holes rubbing on the balance system (3b).
           OV E RV I E W

         If you have a concern with your vinyl product or need additional assistance from an experienced professional, consult your Yellow Pages                1. Remove the lower sash by pulling it toward you until it’s perpendicular to the frame.
         (under “Windows”) for the Pella Window and Door Showroom nearest you or use the store finder at pella.com.                                                Lift straight up on one side until the locking pivot bar of the sash is released from
                                                                                                                                                                   the sash balance (1). Repeat on the other side. Lift the sash up and out of the
                                                                                                                                                                   window frame, then set it aside in a safe location.
         Glass breakage/damage
         In the event of glass breakage, consult the Pella Window and Door Showroom nearest you for assistance. Be sure to have your Pella Unit
                                                                                                                                              ®
                                                                                                                                                                2. Expose the installation holes by raising or lowering the balance.
         ID Number handy (see page 7.5). For safety reasons and to ensure optimum performance, we strongly advise you consult a professional for
                                                                                                                                                                3. (3a) If the screw is rubbing on the balance spring, drive it in three to four
         glass replacement.                                                                                                                                                                                                                                                       1
                                                                                                                                                                   clockwise turns so it does not rub. If it's still rubbing, file down the head of the
                                                                                                                                                                   screw with a metal file. (3b) If the burrs are rubbing on the balance assembly, use
         U.S. federal law and most local codes require the use of tempered glass in doors and other specific applications. Tempered glass can
                                                                                                                                                                   a deburring tool or the back of a utility knife to smooth the perimeter of the holes
         withstand greater impact than ordinary glass, but it is sensitive to scratches. Scratches can cause immediate or delayed breakage.
                                                                                                                                                                   to remove the burrs.
         If the glass is tempered, it will break into small, rounded pieces. If tempered glass is broken, likely by law it must be reglazed or replaced
         with tempered glass.
                                                                                                                                                          Debris in the balance track can cause the balance assembly to start making noise and
                                                                                                                                                          affect smooth operation. This can be remedied by completely lowering the sash (just
                                                                                                                                                          above the top of the sill), tilting the sash in (allowing access to the balance pocket) then                            3a                         3b
                           Sliding windows                                                                                                                removing debris from the balance pocket using a dusting cloth or vacuum. Wiping the full
                           The sash is hard to open and close. The sash rolls on a track inside the frame. Over time, dirt and debris can get in or       length of the spring coil clean is required.
                           on the track, making it harder to open and close the sash. Remove the sash and check for weld flash (tiny pieces of
         vinyl). Use a vacuum cleaner with the brush attachment to clean out the debris in the track to make the sash easier to operate.                  To replace the lower sash, make sure the exterior side is facing up, then insert one sash-locking pivot bar into the bottom of the window,
                                                                                                                                                          where the balance is the lowest. Repeat on the other side. Push the sash downward until it’s perpendicular to the frame. Then tilt it
                                                                                                                                                          upward and engage the tilt locks at the top. Raise and lower the sash a few times to make sure it operates correctly.

                                   Double- and single-hung windows
                                                                                                                                                          Also, over time, dirt and debris can make it harder to open and close the sash. Cleaning the frame and applying a thin layer of paraffin or
                                   The sash is hard to open and close. Vinyl double-hung and some single-hung windows tilt for easy cleaning.
                                                                                                                                                          other dry lubricant (Teflon® Dry Lubricant or Gulf Wax®, available at most home improvement stores, work well) will make the sash easier
                                   If these windows are not properly repositioned after washing, they may be difficult to open and close.
                                                                                                                                                          to operate. Do not use oily lubricants; they attract dust and grime, which will eventually restrict the window’s movement.

         One cause could be an insecure balance clip, which occurs when the sash balance is not hooked properly to the hole at the tip of the
         jamb track.
                                                                                                                                                                     Casement windows
              1. Remove the lower sash by pulling it toward you until it’s perpendicular to the frame. Lift straight
                                                                                                                                                                     The sash does not open. Make sure the sash lock handle is completely disengaged. Turn the crank slightly, and apply slight
                 up on one side until the locking pivot bar of the sash is released from the sash balance (1).
                                                                                                                                                                     pressure to the sash near the lock assembly. The sash should snap open. Then open the window and check the surface of
                 Repeat on the other side. Lift the sash up and out of the window frame, then set it aside in a
                                                                                                                                                          the weatherstripping. You may want to apply a thin layer of paraffin or other dry lubricant (Teflon® Dry Lubricant or Gulf Wax®, available
                 safe location.
                                                                                                                                                          at most home improvement stores, work well). Do not use oily lubricants; they attract dust and grime, which will eventually restrict the
              2. Using a flathead screwdriver, rotate the balance shoe a quarter-turn to lock the balance’s position (2).                                 window’s movement.
              3. Using straight or bent needle-nosed pliers, pull up on the hook until 				                                                          1
                 it aligns with the hole at the top of the jamb track, then insert the                                                                    The sash does not open smoothly. Check to see that the sash guide is clean. Dirt and debris in the track will         Encompass by Pella®
                                                                                                                                                                                                                                                                                 Fold-Away Crank
                 hook into the hole (3).                                                                                                                  affect operation. If needed, clean with soapy water or a dry brush. You may want to apply a thin layer of
                                                                                                                                                          paraffin or other dry lubricant (Teflon® Dry Lubricant or Gulf Wax®, available at most home improvement
                                                                                                                                                          stores, work well). Do not use oily lubricants; they attract dust and grime, which will eventually restrict
                                                                                                                                                          the window’s movement. If your sash drags (hits the frame), something is not square. Call your Pella retailer        Set Screw

                                                                                                                                                          for assistance.
                                                                                                                                                                                                                                                                                  Pella® 350 Series
                                                                                                                                                                                                                                                                                  Fold-Away Crank
                                                                                                                      2                              3
                                                                                                                                                          The operator crank comes off. There is a set screw located on the bottom of the crank handle. Tighten it.

                                                                                                                                                          The lock handle comes off. The lock handle is designed to be removable. Push it back into the opening
                                                                                                                                                                                                                                                                                           Set Screw
                                                                                                                                                          with the handle in the locked position. It should snap back in place.

7.1                                                                                                                                                                                                                                                                                                          7.2
Troubleshooting                                                                                                                                                                                                                                                                                        Troubleshooting

                         Sliding patio doors                                                                                                                       Newer homes, on the other hand, are more airtight and energy-efficient. Many have vapor barriers — plastic within the wall cavity that

                         The door does not slide smoothly. There are several possible causes. The track the door slides                                            blocks moisture passage in either direction. With tighter-fitting doors and windows, vapor barriers and increased insulation, heating and

                         on may have debris on it, causing it to drag. If so, simply clean the track below the sliding                                             cooling costs are lower — but humidity levels must be monitored more closely.

         panel. If this does not work, you may need to adjust the rollers to raise the door clear of the track. Adjust
                                                                                                                                                                   No matter when your home was built, the key is to strike the right balance when it comes to humidity levels. Air that’s too dry can cause
         the rollers up or down to make sure that the edge of the movable door is parallel to the side of the door
                                                                                                                                                                   furniture to dry out and crack, joints and studs to shrink and twist, and paint and plaster to crack. Excessive moisture in the home can cause
         frame. The adjustment screws are located on either side of the movable door, near the bottom. The lower of
                                                                                                                                                                   paint to peel and insulation to deteriorate, and condensation on windows and doors can damage sills and trim.
         the two screws is the adjustment screw. Turn the adjusting screw clockwise to raise the end of the door and
         counterclockwise to lower it.
                                                                                                                                                                   Measuring and controlling humidity.                                                                   Maximum Recommended Humidity Levels
                                                                                                                                                                                                                                                                       Outside Temperature          Inside Humidity
         The door lock doesn’t latch. To adjust the keeper, mark its current location with a pen or pencil. Remove all                                             To determine how much humidity is present in your home, you can purchase a
                                                                                                                                                                                                                                                                           20º F to 40º F            Not over 40%
         four screws and the keeper from the door frame. Slide the keeper up or down to align with the lock, then                                                  humidity gauge from a hardware store or home center. Invest in a quality unit for
                                                                                                                                                                                                                                                                           10º F to 20º F            Not over 35%
         replace the screws in their original holes. Shut the door and operate the lock to ensure correct placement of                                             greater potential accuracy in assessing humidity levels, or consult an expert. Another
                                                                                                                                                                                                                                                                            0º F to 10º F            Not over 30%
         the keeper.                                                                                                                                               way to monitor the interior humidity level is to watch your windows. When interior
                                                                                                                                                                                                                                                                           -10º F to 0º F            Not over 25%
                                                                                                                                                                   condensation begins to form, wipe it off to reduce the humidity, open windows, turn
                                                                                                                                                                                                                                                                          -20º F to -10º F           Not over 20%
                                                                                                                                                                   on exhaust fans or dehumidifiers, or minimize sources of moisture.                                     -20º F or below            Not over 15%

                                                                                                                                                                   The University of Minnesota Laboratories provides a chart showing recommended                     Based on engineering studies at 70º F conducted at
                         Sliding screen doors                                                                                                                                                                                                                            the University of Minnesota Laboratories.
                                                                                                                                                                   relative humidity levels for the home.
                         The screen door does not slide smoothly. The screen
                         should move smoothly on its track. Apply a thin layer                                                                                     Exterior condensation.
         of paraffin or other dry lubricant (Teflon® Dry Lubricant or Gulf Wax®,
                                                                                                                                                                   Exterior condensation on windows occurs primarily in the morning when days are warm and humid, but nights are cool. Typically, it clears as
         available at most home improvement stores, work well). Do not use oily
                                                                                                                                                                   the day warms. Exterior condensation can occur at any time, especially in warm, humid climates where interior temperatures are cooler than
         lubricants; they attract dust and grime, which will eventually restrict the
                                                                                                                                                                   outdoor conditions. Exterior condensation means that windows are doing their job properly. However, if you spot excessive condensation on
         door’s movement.
                                                                                                                            1                                 2    the inside of your windows, check your inside humidity — it may be a signal of potential problems if not addressed.

         The screen rollers can be adjusted by use of the roller adjustment screw located on the top and bottom rails of the screen door. If the screen
                                                                                                                                                                   Fogging between the panes of sealed glass.
         door is tight on the bottom, turn the adjusting screws clockwise to raise the door. If the screen door is too tight at the top, turn the adjusting
         screws counterclockwise to lower the door. Level the screen door so the edge aligns with the lock jamb of the frame.                                      Fogging between the panes of sealed insulating glass indicates a problem with a seal, not excess humidity. Contact your Pella retailer
                                                                                                                                                                   for information.

                NOTE: Depending on the model of your door, the adjusting screw will be located on either the lower inside (1) or lower outside of the frame (2).
                                                                                                                                                                   Tips for wintertime moisture management.

         Preventing condensation                                                                                                                                   • Open window coverings — such as blinds, shades, drapes and curtains — during daylight hours to increase airflow over the glass.

         Understanding condensation.                                                                                                                               • Closely monitor the furnace humidifier and any other humidifying devices.
         Moisture is present in all homes, but when it becomes excessive, homeowners need to take an active role in protecting their investment.
                                                                                                                                                                   • Be sure louvers and vents for the attic, basement and/or crawl space are open, adequately sized and cross-ventilated.

         Humidity and condensation.                                                                                                                                • Run exhaust fans for the kitchen, bathroom and laundry rooms for longer periods.
         Humidity is a measure of the amount of water vapor in the air.                                                                                            • Make sure exhaust fans vent directly outside, not into attics or crawl spaces.
         Condensation is water that forms when warm, moist air hits a cooler surface. In homes, it might occur on surfaces such as windows,                        • Be sure chimneys are free and clear, so moisture in combustion gases can escape.
         bathroom walls and cold-water pipes.
                                                                                                                                                                   • Follow the manufacturer’s instructions for venting gas appliances. In most cases, that will mean directing vents to the outside of the home.
         When interior humidity levels are too high, relative to cooler outdoor temperatures, condensation can form on the coldest surface in a room —
                                                                                                                                                                   • Make sure your furnace is in proper working order and is serviced regularly.
         often the glass in a window or door. While windows and doors do not cause condensation, they may be one of the first places it shows up.
                                                                                                                                                                   • Store firewood outside or in the garage — as wood dries, it gives off moisture.
         What causes condensation?
                                                                                                                                                                   • Install energy-efficient windows, such as those that have earned the ENERGY STAR®.
         Excess humidity is typically the cause of condensation. There are many sources for moisture in a home: showers, dishwashers, clothes washers
         and dryers, houseplants, humans and pets, among others. In newly built homes, additional moisture may escape from building materials such                 For more information on condensation in the home, consult the following:
         as lumber, plaster and masonry for up to three heating seasons — even with proper airflow and temperature management.                                     • Building Research Council at the School of Architecture, University of Illinois at Urbana-Champaign, http://brc.arch.uiuc.edu/f62.htm

                                                                                                                                                                   • Home Moisture Problems (Series 1437), published by the Oregon State University Extension Services, http://extension.oregonstate.edu/catalog/
         Older vs. newer homes.
                                                                                                                                                                   • The University of Minnesota Laboratories, http://www.dehs.umn.edu
         Condensation may be less of an issue in older homes if conditions allow for more air exchange between indoors and out, often from around
         aging, loose or poorly installed windows and doors. However, the tradeoff is higher energy bills.

7.3                                                                                                                                                                                                                                                                                                                        7.4
Troubleshooting                                                                                                                                                                                                                                                                                                                                                            Troubleshooting

         Unit ID Number: Service made simpler                                                                                                                    A D D IT IO NA L INF O RMAT IO N
         To help save you time if your product ever needs service or repair, Pella includes a special identification number. You will find this number in an
                                                                                                                                                               EIFS/synthetic stucco
         upper corner in the airspace between the glass panels or on the visible glass in a lower corner.
                                                                                                                                                               Vinyl products should not be used in barrier Exterior Insulation and Finish Systems (EIFS, also known as synthetic stucco) or similar systems —
                                                                                                                                                               except in the states of Arizona, California, Colorado, Nevada, New Mexico and Utah. Pella makes no warranty of any kind on and assumes no
                                                                                                                                                               responsibility for vinyl windows and doors manufactured by Pella installed in barrier EIFS. In the states listed above, the installation of Pella®
                                                                                                                                                               products in EIFS or similar barrier systems must be in accordance with Pella’s instructions for that type of construction.

                                                                                                                                                               NFRC label
                                                                                                                                                               Vinyl windows and doors manufactured by Pella labeled with the National Fenestration Rating Council® (NFRC) Energy Performance label are
                                                                                                                                                               tested in accordance with NFRC standards. NFRC ratings are based on a combination of computer simulations and physical testing of product
                                                                                                                                                               samples. For details on NFRC Energy Performance ratings, go to nfrc.org.

                                                                                                                                                               What’s so special about the NFRC label?

                                                                                                                                                               It represents one standard testing method from an independent source for all kinds and brands of windows
                                                                                                                                                               and doors. It replaces a system of individual manufacturers testing their own products with many different
                                                                                                                                                               testing standards. With this label, you can make direct comparisons. Keep in mind, energy efficiency is just one
                                                                                                                                                               of the many important qualities to look for in windows and patio doors. The NFRC has one single purpose: to
                                                                                                                                                               establish and improve upon uniform energy-rating procedures for all brands of windows and doors.

                                                                                                                                                               This nonpartisan coalition of professionals includes home and commercial builders, product designers and
                                                                                                                                                               specifiers, manufacturers, consumer advocates, utility company energy specialists, and government agencies.

                                                                                                                                                               Pella Corporation is a member of the NFRC and supports its work on behalf of homeowners and the building
                                                                                                                                                               industry. If you have questions about the NFRC, feel free to write to NFRC, 1300 Spring Street, Suite 500,
                                                                                                                                                               Silver Spring, MD 20910. Or call 301-589-1776, fax 301-588-0854 or visit nfrc.org.
                                                                                                                                                                                                                                                                                        Remove this label after final inspection; SAVE for future reference

                                                                                                                                                                                                                                                                                                                                   Pella Corporation
                                                                                                                                                               Warranty                                                                                                                                                            Designer Series
                                                                                                                                                                                                                                                                                                                                   Casement
                                                                                                                                                                                                                                                                                                                                   One Wide Left (LH)

               PELLA DOUBLE HUNG G0310047019 - NFRC APR 16 2003                                                                                                One of the best warranties in the business. Pella vinyl windows and patio doors are backed by the Pella                                                             Advanced Low-E
                                                                                                                                                                                                                                                                                                                                   5/8" IG – Argon
                                                                                                                                                                                                                                                                                                                                   Clear Panel
                                                                                                                                                               Limited Lifetime Warranty. See written warranty for complete details at pella.com/warranty.                                                                         CPD: PEL – N – 016
                                                                                                                                                                                                                                                                                                                 ENERGY PERFORMANCE RATINGS
                                                                                                                                                                                                                                                                                                        U-Factor                                           Solar Heat Gain Coefficient

                                                                                                                                                                                                                                                                                       0.29
                                                                                                                                                                                                                                                                                          (U.S./I-P)
                                                                                                                                                                                                                                                                                                                          1.65 (Metric/SI)
                                                                                                                                                                                                                                                                                                                                                                        0.22
                                                                                                                                                                                                                                                                                                           ADDITIONAL PERFORMANCE RATINGS
                                                                                                                                                                                                                                                                                        Visible Transmittance

                                                                                                                                                                                                                                                                                                       0.40                                                               ––
                                                                                                                                                                                                                                                                                  Manufacturer stipulates that these ratings conform to applicable NFRC procedures for determining
                                                                                                                                                                                                                                                                                  whole product performance. NFRC ratings are determined for a fixed set of environmental conditions
                                                                                                                                                                                                                                                                                  and a specific product size. NFRC does not recommend any products and does not warrant the
                                                                                                                                                                                                                                                                                  suitability of any product for any specific use. For more information, call (641) 621-3114 or visit
                                                                                                                                                                                                                                                                                  Pella’s web site at www.pella.com or visit NFRC’s web site at www.nfrc.org.
                                                                                                                                                                                                                                                                                        Wind Load                                                Qualified for highlighted area.
                                                                                                                                                                                                                                                                                      Design Pressure                                    Répond aux exigences pour les régions indiquées.
                                                                                                                                                                                                                                                                                        (DP) (psf)

                                                                                                                                                                                                                                                                                   + 50/ - 50                                  Canada
                                                                                                                                                                                                                                                                                       Per ASTM E330                    1-800-387-2000
                                                                                                                                                                                                                                                                                                                        energystar.gc.ca
                                                                                                                                                                                                                                                                                           Canada
                                                                                                                                                                                                                                                                                        Performance
                                                                                                                                                                                                                                                                                        Classification
                                                                                                                                                                                                                                                                                          CAN/CSA
                                                                                                                                                                                                                                                                                          A440-00
                                                                                                                                                                                                                                                                                   A3 Air Leakage                          U.S./E.U.
                                                                                                                                                                                                                                                                                                                         1-888-782-7937
                                                                                                                                                                                                                                                                                   B2 Water Leakage                      energystar.gov                                              = Qualified/Admissible
                                                                                                                                                                                                                                                                                   C3 Wind Resist.

                                                                                                                                                                                                                                                                                                           WDMA                                             R50 (Performance Grade 50)
                                                                                                                                                                                                                                                                                                             WINDOW AND DOOR                                    Tested to ANSI/AAMA/NWDA 101/I.S.2 – 97
                                                                                                                                                                                                                                                                                                              MANUFACTURERS
                                                                                                                                                                                                                                                                                   HALLMARK                     ASSOCIATION           CERTIFIED                         C-R50 35" x 73"
                                                                                                                                                                                                                                                                                                           www.wdma.com
                                                                                                                                                                                                                                                                                                                                                              Tested to AAMA/WDMA/CSA 101/I.S.2/A440 – 05
                                                                                                                                                                                                                                                                                            WDMA License Number: 411-H-990
                                                                                                                                                                                                                                                                                        Manufacturer Stipulates Conformance to the applicable standards.
                                                                                                                                                                                                                                                                                                                                                                      C-R50 889 x 1854
                                                                                                                                                                                                                                                                                  WDMA Hallmark Certification. Pella products labeled with the Window & Door
                                                                                                                                                                                                                                                                                  Manufacturers Association (WDMA) Hallmark Certification are tested in accordance with
                                                                                                                                                                                                                                                                                  applicable WDMA performance standards, which requires products be tested for air
                                                                                                                                                                                                                                                                                  infiltration, water infiltration and structural performance. Performance of Pella products
                                                                                                                                                                                                                                                                                  will change over time depending upon the conditions of use. For details on Hallmark
                                                                                                                                                                                                                                                                                  Certification, go to www.wdma.com.
                                                                                                                                                                                                                                                                                  Complies with HUD 111 (Pella,IA)

                                                                                                                                                                                                                                                                                  Florida Product Approval System (FPAS) Number: FL11885

                                                                                                                                                                                                                                                                                  Glazing type and thickness: Annealed, 2.5MM both panes, designed per ASTM E1300
                                                                                                                                                                                                                                                                                  Window or Door Actual Size: 29.750" wide by 65.500" tall

                                                                                                                                                                                                                                                                                  P0510358592

                                                                                                                                                                                                                                                                                  NOTE: For example purposes only.
                                                                                                                                                                                                                                                                                   NFRC ratings vary by product.

7.5                                                                                                                                                                                                                                                                                                                                         © 2014 Pella Corporation                                          7.6
You can also read