WHIRLPOOL & KITCHENAID IN-DOOR ICE SYSTEM - CONSUMER SERVICES TECHNICAL EDUCATION GROUP PRESENTS R-92
←
→
Page content transcription
If your browser does not render page correctly, please read the page content below
CONSUMER SERVICES TECHNICAL
    EDUCATION GROUP PRESENTS     R-92

WHIRLPOOL & KITCHENAID
  IN-DOOR ICE SYSTEM

                            JOB AID
                       Part No. 4322658A
FORWARD
This Job Aid, “Whirlpool & KitchenAid In-Door Ice System,” (Part No. 4322658A), provides the
technician with information on the operation and service of the Whirlpool & KitchenAid In-Door
Ice System. It is to be used as a training Job Aid and Service Manual. For specific information on
the model being serviced, refer to the “Use and Care Guide,” or “Tech Sheet” provided with the
Refrigerator/Freezer.
The Wiring Diagrams used in this Job Aid are typical and should be used for training purposes
only. Always use the Wiring Diagram supplied with the product when servicing the unit.
GOALS AND OBJECTIVES
The goal of this Job Aid is to provide detailed information that will enable the service technician to
properly diagnose malfunctions and repair the In-Door Ice System.
The objectives of this Job Aid are to:
• Understand and follow proper safety precautions.
• Successfully troubleshoot and diagnose malfunctions.
• Successfully perform necessary repairs.
• Successfully return the In-Door Ice System to proper operational status.
WHIRLPOOL CORPORATION assumes no responsibility for any repairs made
on our products by anyone other than Authorized Service Technicians.
Copyright © 2002, Whirlpool Corporation, Benton Harbor, MI 49022
- ii -TABLE OF CONENTS
Page
GENERAL ............................................................................................................................... 1-1
Safety First ......................................................................................................................... 1-1
PRODUCT INTRODUCTION .................................................................................................. 2-1
Overview ............................................................................................................................ 2-1
THEORY OF OPERATION ..................................................................................................... 3-1
COMPONENT ACCESS ......................................................................................................... 4-1
Component Locations ........................................................................................................ 4-1
Removing The Ice Maker & The Water Fill Tube ............................................................... 4-2
Removing The Emitter & Receiver Modules ...................................................................... 4-5
Removing & Reinstalling The Motor .................................................................................. 4-6
Accessing The Selector Switch Pack & Dispenser Switches ............................................ 4-9
DIAGNOSTICS & TROUBLESHOOTING .............................................................................. 5-1
Diagnostics ........................................................................................................................ 5-1
Optics Diagnostics Mode ............................................................................................... 5-1
Optics Diagnostics For Original Design Boards ............................................................. 5-2
Optics Diagnostics For 2002 Design Boards ................................................................. 5-4
Component Diagnostics Mode ....................................................................................... 5-5
Optics Diagnostics Mode Charts .................................................................................... 5-6
Component Diagnostics Mode Chart ............................................................................. 5-7
Troubleshooting Chart A—Original Optics Design ............................................................ 5-8
Troubleshooting Chart B—2002 Optics Design ................................................................. 5-9
Troubleshooting Chart C—Component Diagnostics Mode .............................................. 5-10
Troubleshooting The Motor .............................................................................................. 5-11
WIRING DIAGRAMS & STRIP CIRCUITS ............................................................................. 6-1
Whirlpool Wiring Diagram .................................................................................................. 6-1
KitchenAid Wiring Diagram ................................................................................................ 6-2
Strip Circuits ...................................................................................................................... 6-3
CONFIRMATION OF LEARNING EXERCISES ..................................................................... 7-1
- iii -— NOTES — - iv -
GENERAL
                                    SAFETY FIRST
             Your safety and the safety of others is very important.
We have provided many important safety messages in this Job Aid and on the appliance. Always
read and obey all safety messages.
                This is the safety alert symbol.
                This symbol alerts you to hazards that can kill or hurt you and others.
                All safety messages will follow the safety alert symbol and either the word
                “DANGER” or “WARNING.” These words mean:

                                      You can be killed or seriously injured if you don’t
         DANGER                       immediately follow instructions.

                                      You can be killed or seriously injured if you don’t
         WARNING                      follow instructions.

All safety messages will tell you what the potential hazard is, tell you how to reduce the chance
of injury, and tell you what can happen if the instructions are not followed.

ELECTRICAL POWER SUPPLY &
GROUNDING REQUIREMENTS                                            WARNING
             WARNING

                                                             Electrical Shock Hazard
                                                    Plug into a grounded 3-prong outlet.
         Electrical Shock Hazard                    Do not remove ground prong.
Disconnect power before servicing.                  Do not use an adapter.
Replace all panels before operating.                Do not use an extension cord.
Failure to do so can result in death or             Failure to follow these instructions can
electrical shock.                                   result in death, fire, or electrical shock.

                                              1-1
WARNING IMPORTANT
Electrostatic Discharge (ESD)
Sensitive Electronics
ESD problems are present everywhere.
ESD may damage or weaken the elec-
tronic control assembly. The new control
Electrical Shock Hazard assembly may appear to work well after
repair is finished, but failure may occur at
Connect green ground wire to ground
a later date due to ESD stress.
screw.
• Use an antistatic wrist strap. Connect the
Failure to do so can result in death or
wrist strap to the green ground connec-
electrical shock.
tion point, or to an unpainted metal sur-
face in the appliance.
- OR -
• Touch your finger repeatedly to a green
ground connection point, or to an un-
painted metal surface in the appliance.
• Before removing the part from its pack-
age, touch the antistatic bag to a green
ground connection point, or to an un-
painted metal surface in the appliance.
• Avoid touching electronic parts, or termi-
nal contacts. Handle the electronic con-
trol assembly by the edges only.
• When repackaging the failed electronic
control assembly in an antistatic bag,
observe the previous instructions.
1-2PRODUCT INTRODUCTION
OVERVIEW
The primary objective of the In-Door Ice Sys- Air Delivery
tem is to increase the usable space in the Air is delivered to the ice maker mold through
freezer compartment of the current freestand- a duct. This duct hooks onto the rear air duct
ing side-by-side refrigerator/freezer. The solu- at the back of the liner, and is secured to the
tion is to relocate the ice maker, the ice con- top of the liner with two screws. The duct di-
tainer, and drive mechanism, and replace this rects approximately 50% of the freezer air for-
eye-level volume with a cantilever shelving sys- ward to the ice maker mold. The mounting
tem. The following description is intended to bracket, mentioned in the previous section,
relate the changes that have been made from also serves as an air director, and directs the
the current side-by-side ice & water dispenser air that is delivered by the duct, under the mold,
configuration. The description is divided into and allows it to escape just under the ice strip-
three categories: Ice Making, Ice Storage, & per.
Ice Dispensing.
ICE MAKING
The ice maker module and mold have not been
changed from the current models. However,
the location, mounting method, air delivery,
water delivery, ice stripper, and ice level shutoff
have all been redesigned.
Location & Mounting
The ice maker has been relocated to the top
front of the freezer liner, and has been rotated
90˚. Due to code requirements, the ice maker
heater area is now protected by a plastic (PVC)
Air Duct
mounting bracket. The bracket is attached to
the ice maker with three mounting screws, and
is held in place by grooved tracks on either
side of the freezer liner.
Grooved Screw Mounting Grooved
Track (1 of 3) Bracket Track
2-1Water Delivery The water tube is made of polypropylene with
Water is delivered to the ice maker mold by an overmolded santoprene nozzle. Due to the
means of a “tube-within-a-tube” design. A con- rigid nature of the polypropylene, this tube is
duit system consisting of three separate pieces mated to a more flexible polyethylene tube with
(liner fitting, conduit, back panel fitting) is a John Guest fitting high on the back panel.
foamed into place in the cabinet. This change of material is necessary to pre-
vent kinking when the tubing is attached to the
This conduit provides a pathway from the water valve.
freezer liner to the back panel. The majority of
this system is routed above the refrigerator liner
to prevent the water tubing from freezing. The
tubing that delivers the water is routed through
the conduit, and is secured by snapping into
place at the freezer liner fitting.
Water Nozzle
Back Panel Fitting
Water
Tube
John
Guest
Fitting
2-2Ice Stripper Ice Level Shutoff
The ice stripper has been modified in order to The mechanical shutoff arm on the older ice
direct ice into the new ice container. The main makers has been replaced with an electronic
differences from the current stripper are: an ice level control system. This system is located
increased ramp, and a directing wall at the fill on either side of the freezer liner and utilizes
cup end. infrared light technology to sense the level of
Ejector Blades
ice in the door-mounted ice container. A manual
shutoff option is still available on the right side
of the freezer liner. This feature consists of a
plastic slide that covers the receiver sensor and
blocks the infrared beam.
Ice Stripper & Ramp
Infrared Emitter
Manual
Shutoff
Status LED
Infrared
Receiver
5-Cavity Ice Maker For
22 Cu. Ft. Models
2-3ICE STORAGE ICE DISPENSING
The ice container has been redesigned and Major changes have been made to the power
relocated to the freezer door. It is secured in train. The motor has been redesigned and re-
place on the door liner with a sliding spring- located to the freezer door. The cube/crush
loaded latch, mounted to a plate with two pins. selector solenoid and its related linkage have
The mounting plate is foamed-in-place on the been eliminated, and a drive shaft/spring-
door. The ice container is easily removed and loaded coupling have been added.
replaced on the door regardless of the auger Motor
orientation.
The motor is now located on the freezer door
The ice container is removed by pressing a in a foamed-in-place enclosure under the “dis-
release button on the right side and lifting. penser bubble” area of the inner door panel.
Removal instructions are printed on the con- The motor is mounted to a plastic mounting
tainer. bracket, which, in turn, is mounted to the en-
Other changes to the ice container consist of closure with four mounting screws.
a vertical rod ice auger, and a clear polycar- The motor operates on 115 volts DC (115 volts
bonate upper section. The vertical orientation AC is delivered to the motor, where it is con-
of the bin helps prevent “stale ice” areas, be- verted within the motor assembly to DC). This
cause the ice is a “first in—first out” system gives the motor a higher RPM than the earlier
which helps keep the ice fresher. Also, the ice dispenser motors, and results in a faster ice
container can be completely emptied. delivery rate in both the cubed and crushed
modes.
Crushed ice is delivered by turning the motor
Ice in a clockwise direction, and cubed ice is de-
Auger livered when the motor turns in a counterclock-
wise direction.
Ice
Container
Release
Button
Motor
Pins Plate
Auger Coupling
2-4Drive Shaft / Coupling gage when the container is placed on the door,
The drive shaft / coupling connects the motor the motor drive shaft coupling will be de-
to the ice container auger. The coupling at the pressed. The next time ice is dispensed, the
top of the motor drive shaft is spring-loaded to motor drive shaft coupling will spring up, and
allow replacing the ice container without hav- engage the ice container coupling.
ing to orient its coupling with the motor drive The original designed units use a pin that rests
shaft coupling. If the two couplings do not en- on a spring, located inside the drive shaft. The
Spring newly designed units have only the spring,
Spring-Loaded Pin
which rests in a shallower opening at the top
of the drive shaft, and eliminates the need for
the pin.
On newly designed models, the hex drive shaft
coupling has a skirt around it to prevent any
pieces of a damaged coupling from falling down
the chute.
Hex Drive Shaft
Top of Original Design Top of Newly Designed
Hex Drive Shaft Hex Drive Shaft
Newly Designed
Original Hex Drive Hex Drive Shaft
Shaft Coupling Coupling Skirt
Motor
2-5— NOTES — 2-6
THEORY OF OPERATION
The new ice making system consists of the fol-            The ice maker loads, the motor, heater, and
lowing: an ice maker with an integrated con-              water valve, are still controlled by the stamped
trol module, an electronic ice level sensor, an           circuit module, which is part of the ice maker.
external water valve, and a freezer door com-             The electronic control will check periodically
partment-mounted ice storage bin.                         to see if the ice maker is at the home position,
The ice maker control module is a stamped                 (when the ejector stops at the 2 o’clock posi-
circuit that provides power and control for the           tion). If the ejector is at the home position, the
ice making loads, which consist of the motor,             relay will deenergize, and remove power from
heater, and water valve.                                  the ice maker until the next harvest.
The ice harvesting process begins when the                To improve functionality and reliability, some
ice maker thermostat closes and signals that              important differences exist between the new
the harvest temperature has been reached.                 In-Door Ice system, and the earlier mechani-
The closed thermostat applies power to the ice            cal-type ice making systems.
maker motor and to the heater. As the heater              The first is that a harvest can only begin if the
melts the outer layer of the ice, the motor ro-           freezer door is closed, and previous harvest
tates a rake, which sweeps the ice cubes out              conditions are also met (ejector at home). If
of the mold, and into the storage bin.                    the bin is full, and ice is removed, which low-
Due to the placement of the storage bin on the            ers the ice level, it may take up to 5 minutes
freezer door instead of on the cabinet, the               before a harvest starts.
sensing of the ice level is quite different from          To prevent an early harvest from occurring af-
the earlier mechanical (bail arm) contact                 ter the last harvest is completed, a minimum
method. The mechanical arm has been re-                   of 50 minutes must pass before another har-
placed by an electronic control that performs             vest will be initiated. Closing the receiver’s
this function, and two additional functions. It           shutoff slide covers the sensor and prevents
controls power to the ice maker, and performs             the ice maker from harvesting ice.
system diagnostics, which includes optics di-             The In-Door Ice control contains two diagnos-
agnostics and component diagnostics.                      tic routines. One is an optics test, and the other
The electronic control consists of two sepa-              is a component test. There are two optics tests:
rate printed circuit boards mounted on oppo-              one for the original style optics, and the other
site sides of the freezer liner just inside the           for the 2002 design optics:
door. The board mounted on the freezer door                 1.a) Original Optics—An optics circuit test is
hinge-side of the cabinet is referred to as the                  run when the freezer door switch is ac-
“emitter board,” and the board mounted on the                    tuated three times, and the freezer door
mullion side is referred to as the “receiver                     is closed to allow a path for the optics
board.”                                                          beam to reach the receiver.
When the ice maker thermostat closes and sig-                 b) 2002 Design Optics—An optics circuit
nals that ice is ready to be harvested, the emit-                test is run any time the freezer door is
ter board sends out an infrared (IR) pulse. If                   opened.
the path of the pulse is unobstructed to the                2. Component Test—A component test is
receiver board, the phototransistor on the re-                   run on power-up when the freezer door
ceiver board will “sense” the pulse. The con-                    is closed.
trol will then energize a relay, which applies
                                                          Both routines provide visual feedback as to the
power to the ice maker, and a harvest begins.
                                                          result of the diagnostic. All other system en-
                                                          hancements are transparent during the ice
                                                          making system operation.
                                                    3-1
— NOTES — 3-2
COMPONENT ACCESS
                   COMPONENT LOCATIONS

                                        Ice Maker Door
                           Infrared Emitter

Freezer Door                                             Water Fill
                                                          Nozzle
                                                           Ice Maker

                                                          Infrared
                                                         Receiver
         Ice Bin

 Ice Container
Auger Coupling
    Motor Drive
      Coupling

 Hex Drive Shaft

          Motor

                           4-1
REMOVING THE ICE MAKER & THE WATER FILL TUBE
d) Remove the wire shield screw from the
WARNING bottom of the ice maker.
Wire
Shield
Electrical Shock Hazard
Disconnect power before servicing.
Replace all panels before operating.
Failure to do so can result in death or Wire Shield Screw
electrical shock.
e) From the rear of the ice maker, lift the
1. Disconnect the unit from the electrical top of the wire shield slightly and pull it
supply. back to release it from the ice maker.
2. To remove the ice maker: f) Press up on the two retaining clips (one
a) Open the freezer door. on each side) at the bottom of the ice
b) Close the spring-loaded emitter door maker tracks with a fingernail of each
and open the ice maker door. hand, pull the ice maker forward, and
Open Ice Maker Door remove it.
Track
Emitter Door Closed
Emitter Door Open
c) Push the ice maker door to the left so Retaining Clip
that the right pin disengages from the (1 on each track)
pivot arm, then lift the pin out of the
g) If you are completely removing the
pivot, and remove the left pin.
ice maker, unplug the wiring harness
Lift connector from the ice maker.
Push
Harness
Connector
Ice Maker Ice Maker
Door Pin Door Pin
4-2h) If you do not want to completely re- b) Slowly pull the end of the water fill
move the ice maker rotate the ice nozzle out of the fitting in the top of the
maker so the square end with the mo- freezer liner, then continue to pull the
tor faces the front, and hang the flange rest of the tube out of the liner. It will
of the ice maker on the track that is at- require some force to remove the first
tached to the freezer mullion. foot or so of tube from the liner. NOTE:
If the fill tube has water frozen inside, it
will be necessary to melt the ice before
removing the tubing, otherwise the tub-
Track
ing will tear when it is removed. Follow
Front of
step 4 to melt the ice. If the fill tube is
Ice Maker free of ice, skip step 4.
Flange
Pull Tube
Out Here
3. To remove the water fill tube:
a) From the rear of the unit, disconnect the
upper water line from the fitting. To re-
move the tube, press down on the lock-
ing ring at the top until the tube is re- Shoulder
leased.
Water Fill Nozzle
4. To melt ice inside the water fill tube:
a) Fill a plastic squeeze bottle with hot
Rear of Unit
water.
b) Place a container below the water fill
nozzle.
Continued on the next page.
Upper Water Line
Press Down
On Locking
Ring
Water Line
Fitting
4-3c) Install a length of flexible tubing on the b) Position the water fill nozzle so that the
spout of the squeeze bottle. bend is toward the mullion, and insert
d) Insert the end of the flexible tubing into the inner half of the grooved shoulder
the water fill nozzle as far as ice block- into the square cutout of the liner.
age. Grooved Shoulder In Liner Cutout
e) Squeeze the bottle and allow the hot
water to melt all of the ice.
Insert Flexible Tube
Into End Of Nozzle
Water Nozzle
c) Push the end of the tube into the water
line fitting as far as it will go, and then
Squeeze pull on the tube to make sure that it is
Bottle
secure.
Push Tube Into Fitting
5. To reinstall the new tube:
a) Insert the end of the tube into the hole
of the freezer liner fitting, and push it Locking Ring
through as far as the nozzle will allow.
To prevent a water flow restriction, do
not twist the tube and nozzle assembly. Water Line
Pull the end of the tube at the rear of Fitting
the unit to take up any slack. NOTE: The
end of the tube may get caught on the
fitting at the back of the unit. If this hap-
pens, position the tube in the center of
the hole with a small screwdriver, and Rear of Unit
push the tube the rest of the way
through from the front.
Pull Tube
Fitting Out Here
Rear of Unit
4-4REMOVING THE EMITTER & RECEIVER MODULES
c) Pull the module out and remove the
WARNING connector from the board.
Connector
Electrical Shock Hazard
Disconnect power before servicing.
Replace all panels before operating.
Failure to do so can result in death or
electrical shock.
3. To remove the receiver module:
1. Disconnect the unit from the electrical
supply. a) Open the freezer door.
NOTE: If either the emitter or receiver board b) Remove the three screws from the mod-
fails, both of the boards will have to be re- ule.
placed. The part numbers for the emitter and
receiver boards will be substituted with a single
kit number, which includes both boards.
2. To remove the emitter module:
a) Open the freezer door.
b) Remove the three screws from the mod-
ule. Receiver Module
Screw (1 of 3)
Screw (1 of 3)
c) Pull the module out and remove the
connector from the board.
Emitter
Module
Connector
4-5REMOVING & REINSTALLING THE MOTOR
d) Disconnect the harness connector from
WARNING the motor terminals.
Harness Screw
Connector (1 of 4)
Electrical Shock Hazard
Disconnect power before servicing.
Replace all panels before operating.
Failure to do so can result in death or
electrical shock.
1. Disconnect the unit from the electrical
supply.
e) Remove the four screws from the mo-
2. To remove the motor: tor bracket and allow the motor to drop
a) Open the freezer door. down.
b) Remove the ice container from the
freezer door.
Motor
Dropped
Ice
Container
Press To
Release
f) Pull the hex drive shaft out of the mo-
tor.
Pull Drive Shaft From Motor
c) Remove the two screws from the motor
housing cover and remove the cover.
Motor Housing
Cover Screw
(1 of 2)
4-63. To reinstall the motor: d) Plug the harness connector into the mo-
a) Remove the two screws from the hex tor. NOTE: The connector is designed
drive shaft coupling holder and remove to fit only one way on the motor termi-
the coupling assembly. nals.
e) Position the motor housing cover so that
Hex Drive Shaft Coupling
the raised center faces the motor, and
Screw
mount it in place with the two screws
you removed earlier.
Screw f) Make sure that the spring and pin are
in the center hole of the hex drive shaft,
and that the bearing and seal are prop-
erly positioned on the coupling, as
shown.
Coupling
Holder Coupling
Seal
Bushing
b) Install the hex drive shaft in the motor
as far as it will go.
c) Slide the new motor assembly back into
place in the freezer door and mount it Hex Drive
with the four screws you removed ear- Shaft
lier. Make sure that the top of the hex
drive shaft, spring, and pin are through
the hole in the ice container plate.
NOTE: On 2002, and later models, the g) Position the coupling assembly over the
pin is not used. spring-loaded pin, then push down on
the coupling and align it with the top of
the hex drive shaft. Secure the coupling
Pin assembly with the two screws you re-
moved earlier.
Spring
Push Down
Hex On Coupling
Drive
Shaft
Continued on the next page.
4-7h) Replace the ice container on the freezer penser is activated. At that time, the
door plate. NOTE: The coupling in the motor will turn, and the spring-loaded
ice container does not have to align with coupling on the end of the hex drive
the coupling on the end of the hex drive shaft will pop up and engage the ice
shaft when the ice container is installed. container coupling (you will hear a
They will engage as soon as the ice dis- “snap” when the coupling pops up and
engages).
Couplings
Couplings Engaged
Not Aligned
Motor Coupling
Motor Coupling Snaps Up
Depressed
4-8ACCESSING THE SELECTOR SWITCH PACK
& DISPENSER SWITCHES
3. Remove the screws from the ice and water
WARNING dispenser compartment front panel and
turn it over. The selector switch pack and
dispenser switches are now accessible for
testing.
Ice Dispenser Switch
Electrical Shock Hazard
Disconnect power before servicing.
Replace all panels before operating.
Failure to do so can result in death or
electrical shock.
1. Disconnect the unit from the electrical
supply.
2. Pull out and unclip the drip tray on the ice
and water dispenser compartment.
Selector Switch Pack
Drip Tray
4-9— NOTES — 4-10
DIAGNOSTICS & TROUBLESHOOTING
                                        DIAGNOSTICS
OPTICS DIAGNOSTICS MODE                                   The optics system can have one of two types
Diagnostics are used to determine whether the             of optics board designs installed: the original
optics circuits are operating properly. If the            design, or the 2002 design.
optics circuits are malfunctioning, the ice maker         Use the following flow chart to determine which
will not operate.                                         of the board designs are installed. Once this is
The optics system consists of an emitter board            determined, you will be directed to perform the
and a receiver board. The emitter board trans-            appropriate optics diagnostics procedure.
mits a beam of infrared light that is detected
by the receiver. If the beam of light is inter-
rupted, the ice maker will not operate.
                                                                   Close the freezer
                                                                  door for a minimum
                                                                      of 1 minute.
                   FLOW CHART TO
                   DETERMINE OPTICS
                   BOARD DESIGN
                                                                   Open the freezer
                                                                        door.

                         Proceed to 2002
                          Design Optics               Yes          LED is flashing 2
                        Mode on Page 5-4.                          pulses repeated.

                                                                           No

                                                                   Hold in the freezer
                                                                      light switch.

                 Wait 5 minutes and                            LED is flashing at 1 second
               use 2002 Design Optics         Yes            intervals indicating a 5 minute
                 Mode on Page 5-4.                                  “harvest” mode.

                                                                           No

                                                                   Proceed to Original
                                                                      Design Optics
                                                                   Mode on Page 5-2.

                                                    5-1
OPTICS DIAGNOSTICS FOR 5. Open the freezer door and activate the
ORIGINAL DESIGN BOARDS freezer door switch 3 times. NOTE: This
KIT #4388635 SUBS TO #4389102 step must be completed within 10 sec-
onds of opening the freezer door.
EMITTER—PART #2198585
RECEIVER—PART #2198586
To initiate an optics check, perform the follow- Freezer Door
ing steps: Light Switch
1. Open the freezer door.
2. Remove enough ice from the ice bin so
that the ice level is at least one inch below
the U-shaped cutouts in the bin.
Infrared Emitter Beam
6. Close the freezer door within 20 seconds
of completing step 5.
7. Wait for a minimum of 5 seconds, and a
maximum of 50 seconds, then open the
U-Shaped freezer door and view the status LED on
Cutout
the infrared receiver module for the error
Ice code. NOTE: You will have 60 seconds to
Level
open the freezer door, and 2 seconds from
then to view the LED output code.
Status LED
3. Make sure the ice maker manual shutoff
slide is in the “ON” (open) position on the
infrared receiver module.
Manual Shutoff Infrared Receiver
Slide Sensor
If you observe two LED pulses (flashes), per-
form the following steps.
1. Open the freezer door and remove the ice
bin from the door.
2. Make sure the ice maker manual shutoff
slide is in the “on” (open) position.
3. Tape the spring-loaded emitter door to the
emitter cover in the “down” position.
4. Close the freezer door for a minimum of 10
4. Close the freezer door for at least 10
seconds.
seconds.
5-25. Open the freezer door and actuate the If the LED still flashes twice, there could be
freezer door switch 3 times. NOTE: This dirt or frost on the optics, something could be
step must be completed within 10 sec- blocking the infrared beam path, or the optics
onds of opening the freezer door. may be defective. Clean the optic elements and
6. Close the freezer door within 20 seconds repeat the previous test.
of completing step 5. If the LED does not flash, the ice maker may
7. Wait for a minimum of 5 seconds, and a have been in a harvest, preventing the diag-
maximum of 50 seconds, then open the nostics from being performed. Look at the ice
freezer door, and view the status LED on maker to make sure the ejector is at the home
the infrared receiver module for the error position. If it is, wait 3 minutes, and try running
code. NOTE: You will have 60 seconds to test again. If the LED still does not flash, the
open the freezer door, and 2 seconds from optics boards may be defective.
then to view the LED output code.
5-3OPTICS DIAGNOSTICS FOR 4. Close the flapper door on the emitter mod-
2002 DESIGN BOARDS ule so that the infrared beam has a clear
KIT #4389102 path to the receiver board.
EMITTER—PART #2220398
RECEIVER—PART #2220402
To initiate an optics check, perform the follow-
ing steps:
1. Open the freezer door.
2. View the status LED. It should flash twice, Emitter
Module
pause for 1 second, and repeat the cycle
for as long as the door is open.
NOTES:
• If the LED is not flashing, the ice maker
may be in the 5 minute “harvest” mode.
If so, push in on the freezer door switch
with your finger, and observe the LED.
It should begin to flash at 1 second in-
Door Shown In The
tervals, and continue to flash for as long Open Position
as you hold the door switch.
• If the LED does not flash, as described 5. Make sure that the door switch is not
above, the original style optics boards pushed in, and view the status LED. With
may be installed. Perform the steps, the flapper door on the emitter module
shown in Chart A, on page 5-6. held closed, and the ice maker not in the 5
minute “harvest” mode, the status LED
3. Check the ice maker manual shutoff slide should be on steady. This indicates that
and make sure that it is in the “ON” (open) the optics circuits are operating properly.
position on the infrared receiver module. If the status LED continues to flash, refer
to the “Troubleshooting Chart” on page
Manual Shutoff Slide 5-9.
Status LED
Infrared Receiver
Sensor
5-4COMPONENT DIAGNOSTICS MODE 3. Slide the ice maker out of the mounting
rails and leave the wiring harness con-
WARNING nected.
4. Jumper the thermostat, as shown below.
5. Connect power to the unit.
6. Remount the ice maker, making sure that
the water fill tube is inside the fill cup.
7. Make sure there is a clear path across the
Electrical Shock Hazard bin for the infrared beam to travel to the
Voltage is present during these tests. receiver sensor.
8. Close the freezer door and wait 5 seconds
NOTE: The optics must be working properly to allow the optics relay to close.
to test the ice maker. If the optics test fails, 9. Open the freezer door and you will see the
you will not be able to force a harvest and check ejector bar moving. Remove the thermo-
the ice maker. Refer to the Troubleshooting stat jumper prior to the ejector blades
Chart on page 5-10 for additional servicing in- reaching the 10:00 position, or else you
formation. will not see the water fill. The mold should
IMPORTANT: If the freezer temperature is be warm due to the heater operation.
not cold enough to allow the ice maker bi- 10. Disconnect the power immediately after
metal to close, a jumper must be installed the water fill.
on the ice maker at test points T and H, and 11. With the freezer door closed, reconnect
the test rerun. the power.
1. Run an optics check as described in the 12. Wait for a minimum of 5 seconds, and a
previous section. maximum of 50 seconds, then open the
2. Disconnect power to the unit. freezer door, and view the status LED for
the output codes, as shown in Chart C, on
page 5-7.
Motor Jumper (Points T and H)
5-5OPTICS DIAGNOSTICS MODE CHARTS
NOTES:
1. Optics Diagnostics will not respond:
• For 5 minutes after the ice maker begins a “harvest” cycle. To reset the control, wait until
the ice maker “parks,” then unplug the refrigerator for 5 seconds, and repeat the test.
• While the control board is running self-checks. Reset the control, as above.
2. The ice maker control must be in the “ON” position.
3. The ice bin must be on the door and the ice level below the notched openings.
— Chart A —
Diagnostics Chart For Original Design Optics Boards
OPTICS DIAGNOSTICS PROCEDURE FOR ORIGINAL DESIGN BOARDS
STEP # STATUS LED POSSIBLE CAUSES ACTION
1. Open the freezer door (make sure
that the freezer door has been closed
for a minimum of 10 seconds prior to
opening the door).
2. Activate the door switch 3 times. 2 pulses, repeated once, indicates the A steady light that is ON for 5 If there is no light, unplug the
Push the button in completely for 1 optics are blocked, or defective. Clear seconds indicates that both of the refrigerator for 5 seconds,
second each time. the optics path, and repeat the optics boards are good. Continue and repeat the test. If there
“Optics Diagnostics Procedure.” with the “Component Diagnostics is still no light, replace both
3. Close the freezer door for a minimum
Replace both boards, if necessary. Mode.” optics boards.
of 5 seconds for a maximum of 50
seconds.
4. Open the freezer door and
immediately view the diagnostics
“status” LED.
— Chart B —
Diagnostics Chart For 2002 Design Optics Boards
OPTICS DIAGNOSTICS PROCEDURE FOR 2002 DESIGN BOARDS
STEP # STATUS LED POSSIBLE CAUSES ACTION
The flapper door on the emitter is
Two (2) pulses followed by a one Go to Step 2.
blocking the beam.
(1)second delay (repeated).
The optics are faulty. Go to Step 2.
Ice maker is in the “harvest” mode.
1. Open the freezer door. The harvest mode consists of a To confirm, press in and hold the freezer
five (5) minute period that starts door switch. If in the “harvest” mode, the
No lamp. when the bimetal closes, and the Status LED will flash once every second.
ice maker begins to run.
Faulty Status LED, or original Replace the receiver and emitter boards, or
style boards are installed. perform the steps in Chart A.
Two (2) pulses followed by a one (1)
2. Press in the emitter flapper door to second delay (repeated). The Optics are faulty. Replace the emitter and receiver boards.
unblock the optics beam.
LED is on steadily. The Optics are working properly. Close the freezer door.
5-6COMPONENT DIAGNOSTICS MODE CHART
— Chart C —
Component Diagnostics Mode
For Original & 2002 Design Boards
COMPONENT DIAGNOSTICS MODE (RUN OPTICS DIAGNOSTICS PROCEDURE FIRST)
1. Disconnect the power supply.
2. Slide the ice maker out and remove the cover.
3. Jumper holes “T” and “H” to bypass the bimetal and start a harvest.
4. Reconnect the power supply.
5. Close the freezer door to align the optics and a harvest cycle will begin in 5 seconds.
6. Open the freezer door and observe the ice maker. A “harvest” should be in progress.
NOTE: If holes “T” and “H” are properly jumpered and the ice maker will not run, stop the test, and check the ice maker.
7. Remove the jumper before the fingers reach 10:00. Reinstall the ice maker, or be prepared to catch the water fill during step 8.
8. Disconnect power immediately after the water fill.
9. With the freezer door closed, reconnect the power supply.
10. Wait 5 seconds, to a maximum of 50 seconds, then open the freezer door, and watch the Status LED for one of the following codes.
Status LED Output Codes
4 PULSES, repeated once, indicates the relay is defective. Replace both the emitter and receiver boards.
3 PULSES, repeated once, indicates the optics and relay are okay, but the ice maker is not being sensed, or will not operate. If this happens:
• Check the bail arm switch to make sure it is On.
• Check the ice maker circuit and the connections back to the receiver board and neutral.
• Check the ice maker components.
2 PULSES, repeated once, indicates the optics are blocked, or defective. Clear the optics path, and repeat the “Optics Diagnostics Procedure.”
Replace both boards, if necessary.
STEADY LIGHT for 5 seconds indicates the relay and optics are okay, and the receiver senses the ice maker.
NO LIGHT: Unplug the refrigerator for 5 seconds, and repeat the test.
5-7TROUBLESHOOTING CHART A
Original Optics Design
TEST RESULT POSSIBLE CAUSE CORRECTIVE ACTION
Ice maker slide control turned OFF (closed). Move ice maker slide control to ON (open).
Dirt on optics. Clean dirt from optics.
Misaligned ice bin. Realign ice bin cutouts with optics path.
Ice in bin blocking optics path. Remove enough ice from bin to clear path.
2 LED pulses, repeated. Frost on optics lenses. Clean frost from lenses.
Ice bin not closing optics emitter Tape emitter door closed and retest. If optics tests
door properly. okay, the ice bin and/or its mounting are at fault.
Freezer door not completely closed during
Optics Test. Close freezer door and retest.
Failed optics. Replace emitter and receiver boards and retest.
Optics Diagnostic Mode
(optics test only) Ice maker is in “harvest” cycle. Wait 5 minutes until “harvest” cycle is complete and retest.
5-8
LED was not viewed within 2 seconds of Retest and view LED within 2 seconds of opening freezer
opening freezer door. door.
Freezer door was not closed for a minimum of
Close freezer door, wait for at least 5 seconds, and retest.
No LED pulses. 5 seconds before starting test.
Incorrect wiring at emitter or receiver board. Correct wiring and retest.
Optics performing self-tests (will not Make sure ice maker is “parked.” Unplug refrigerator for
perform diagnostic tests during this time). 5 seconds to reset optics control and retest.
LED is defective. Replace emitter and receiver boards and retest.
5 second LED on steady. Ice maker control circuit is functioning normally. None required.TROUBLESHOOTING CHART B
2002 Optics Design
TEST RESULT POSSIBLE CAUSE CORRECTIVE ACTION
2 LED pulses, repeated. Ice maker slide control turned OFF (closed). Move ice maker slide control to ON (open).
Dirt on optics. Clean dirt from optics.
Frost on optics lenses. Clean frost from lenses.
Flapper door is open and is blocking the Hold the emitter door closed, and the status LED should be
emitter beam. on steady.
Failed optics. Replace emitter and receiver boards and retest.
Optics Diagnostic Mode To verify, press in on door switch. Status LED should flash
(optics test only) No LED pulses. Ice maker is in 5 minute “harvest” cycle.
at 1 second intervals.
Incorrect wiring at emitter or receiver board. Correct wiring and retest.
Optics performing self-tests (will not Make sure ice maker is “parked.” Unplug refrigerator for
perform diagnostic tests during this time). 5 seconds to reset optics control and retest.
LED is defective. Replace emitter and receiver boards and retest.
5-9
5 second LED on steady. Flapper door is held closed. Normal with flapper door closed.TROUBLESHOOTING CHART C
Component Diagnostics Mode
TEST RESULT POSSIBLE CAUSE CORRECTIVE ACTION
4 LED pulses, repeated once. Defective emitter relay. Replace emitter and receiver boards and retest.
Ice maker in “home” position and bimetal is open. Install jumper in ice maker holes “T” and “H” and retest.
Ice maker bail arm switch in OFF position. Bail arm not used in these models but switch must be ON.
Ice maker is unplugged. Plug in ice maker and retest.
3 LED pulses, repeated.
Thermal fuse in ice maker harness is open. Replace ice maker harness and retest.
Ice Maker Control Incorrect wiring at emitter or receiver board. Correct wiring and retest.
Circuit
Problem with ice maker. See "Ice Maker Checks.”
2 LED pulses. Optics boards defective. Replace emitter and receiver boards and retest.
5 second LED on steady. Ice maker control circuit is functioning normally. None required.
Optics performing self-tests (will not perform Make sure ice maker is “parked.” Unplug refrigerator for
No LED pulses.
diagnostic tests during this time). 5 seconds to reset optics control and retest.
Optics check not run before testing ice maker. Run optics test and recheck ice maker.
Freezer door not closed after Optics test. Close freezer door to start harvest.
5-10
Optics path not clear. Clear optics path.
No power applied to ice
maker module. Optics test failure. Replace emitter and receiver boards and retest.
Ice maker is unplugged. Plug ice maker in.
Thermal fuse in ice maker harness is open. Replace ice maker harness.
Wiring harness or door switch problem. Check continuity in wiring harness and door switch.
Ejector bar does not move. Motor has failed. Replace ice maker module.
Thermostat jumper not making contact. Reposition jumper.
Ice Maker Checks Heater is not on.
Heater has failed. Replace ice maker.
Thermostat jumper was left installed past 11:00
Remove jumper by 10:00 position of ejector bar.
position.
No water fill. Water valve is unplugged. Connect harness to valve.
Customer’s water supply is problem. Check for proper water supply.
Frozen water fill tube. Defrost the water fill tube and check for seeping valve.
Water valve has failed. Replace water valve.
Ejector bar does not stop at
“home” position. Thermostat jumper not removed. Remove thermostat jumper.TROUBLESHOOTING THE MOTOR
f) Disconnect/reconnect the 6-pin harness
WARNING to the motor 3 - 5 times to remove any
oxidation buildup on the connector pins.
g) Check power in the circuit (see “Check-
ing The Switch Pack on page 5-14 ).
2. Motor hums but does not rotate.
a) Clear ice jam in ice bin.
Electrical Shock Hazard b) Possible broken gear inside motor as-
Disconnect power before servicing. sembly.
Replace all panels before operating. 3. Motor starts but heats rapidly.
Failure to do so can result in death or a) 2, 3, 5.
electrical shock.
4. Motor runs too hot after extended opera-
tion.
NOTE: Refer to the “Motor Failure Modes a) 3, 4, 6, 9.
Chart” at the bottom of the page.
5. Reduction in power—motor overheats.
1. Motor does not hum or rotate.
a) 2, 5, 6.
a) 1, 2, 3, 5, 6.
b) Make sure refrigerator is plugged in. 6. High no-load speed (30 RPM is nominal).
c) Make sure freezer door is completely a) 2
closed. 7. Excessive noise (mechanical).
d) Make sure selection button is in UN- a) 2, 7, 8.
LOCK position.
8. Jerky operation—severe vibration.
e) Wait 1 minute after an ice jam occurs
for motor’s surge protector to automati- a) 2.
cally reset.
Motor Failure Modes Chart
1. Open circuit in connection to line (e. g. house fuse is blown
or motor is defective).
2. Defective motor.
3. Overloaded motor (mechanical failure in load).
4. Ventilation blocked.
5. Wrong connection to motor.
6. Improper or low line voltage.
7. Poor alignment between motor and load (e. g. loose motor
mounting).
8. Amplified motor noise due to mounting conditions.
9. High ambient temperature.
5-11NOTE: When you are instructed to make a
WARNING reading at the motor connector, press the tips
of the red and black test leads into the indi-
cated harness connector slots so they touch
the bare metal wire connectors. Reach around
the front of the door and press the ice dispenser
lever to activate the dispenser switch.
Electrical Shock Hazard
Voltage is present during these tests. Motor Harness
Pin 1 Connector
CHECKING THE MOTOR Press Tips Into
Connector Slots
To check voltages* at the motor for crushed Against Bare Wire
or cubed ice operation: Terminals To Check
1. Open the freezer door and remove the ice Voltages
bucket from the door.
2. Tape the door switch closed.
Test Leads
Door Switch
Taped Closed
Press The Ice
Dispenser Lever
* Voltage readings may vary, depending on the supply
voltage, and the type of test equipment being used.
5-123. Press the Unlocked button on the ice and 7. Touch the DC meter’s black test lead to
water dispenser front panel. wire harness pin 1, and the red test lead to
4. Touch the AC meter test leads to wire pin 2, then press the ice dispenser lever.
harness pins 3 and 5, then press the ice The meter should read +115 VDC ±10%.
dispenser lever. The meter should read 8. Press the Cube ice button on the ice and
115 VAC. water dispenser front panel.
5. Touch the DC meter’s black test lead to 9. Touch the DC meter’s red test lead to wire
wire harness pin 6, and the red test lead to harness pin 1, and the black test lead to
pin 7, then press the ice dispenser lever. pin 2, then press the ice dispenser lever.
The meter should read +115 VDC ±10%. The meter should read +115 VDC ±10%.
6. Press the Crushed ice button on the ice 10. Remove the tape from the door switch.
and water dispenser front panel.
+115 VDC 7 To Switch Pack (OR/BU)
–115 VDC 6 To Switch Pack (PK/BK)
Neutral 5 (WH)
Wire Harness Pinouts 4 No Connection
Pin 1 L1 (115 VAC) 3 (BU)
Motor (115 VDC) 2 From Switch Pack (RD/WH)
Motor (115 VDC) 1 From Switch Pack (BR/WH)
Motor Connector
5-132. The Locked/Unlocked switch allows AC
WARNING voltage to be sent to the motor through the
ice dispenser lever switch when it is in the
Unlocked position. If the Unlocked switch
is defective, the dispenser lever will not
operate the motor. To check the switch:
a) Check pins BU/BK and GY using an AC
Electrical Shock Hazard voltmeter. The meter should read 115
VAC if the switch is open, (Locked), or
Voltage is present during these tests. 0 VAC if the switch is closed (Un-
locked).
CHECKING THE SWITCH PACK b) Disconnect the BU/BK and GY wires
To check voltages at the switch pack: from the Lock/Unlocked switch termi-
NOTE: All of the wires must be connected to nals. Check the switch continuity with
the pins on the switch pack to obtain the fol- an ohmmeter. The continuity should
lowing readings, including the wire to the pin change when the switch is changed
being measured. Also, the freezer door light from Locked to Unlocked.
switch must be in the closed (taped down)
position before performing any voltage checks.
When measuring a voltage, lift the wire con-
nector partially off the switch terminal, and
touch the meter test lead probe to the terminal
(see below).
To Motor To Motor
L1 To (115 VDC) (115 VDC) L1
Light Pin 2 Pin 1 (115 VAC)
BR/WH BR/WH
YL/BK RD/WH RD/WH BU/BK
BU/BK PK/BK OR/BU GY
1. To check the Light On and Light Off
switches, press the Light button on the ice
L1 115 VDC 115 VDC L1 To Paddle/
and water dispenser front panel, and the (115 VAC) From Motor From Motor Dispenser Switch
& DC Motor
dispenser housing light should turn on. If
the light does not turn on: Switch Pack Pinouts
a) Check switch pack pins BU/BK and YL/
BK using an AC voltmeter. The meter
should read 115 VAC if the switch is
open, or 0 VAC if the switch is closed.
b) Disconnect the BU/BK and YL/BK wires
from the Light switch terminals. Check
the switch continuity with an ohmme-
ter. The continuity should change when
the Light switch is pressed on and off.
5-143. To check to make sure that DC voltage is d) Touch the DC voltmeter’s black test lead
being supplied to the switch pack: to RD/WH and the red test lead to BR/
a) Press the Unlocked button. WH, then press the ice dispenser lever.
b) Touch the DC voltmeter’s black test lead The meter should read +115 VDC
to PK/BK and the red test lead to OR/ ±10%.
BU, then press the ice dispenser lever.
The meter should read +115 VDC WARNING
±10%.
4. To check the Crushed and Cube ice
switches:
a) Press the Unlocked and the Crushed
buttons on the ice and water dispenser
front panel. Electrical Shock Hazard
b) Touch the DC voltmeter’s black test lead Disconnect power before servicing.
to BR/WH and the red test lead to RD/ Replace all panels before operating.
WH, then press the ice dispenser lever.
Failure to do so can result in death or
The meter should read +115 VDC
electrical shock.
±10%.
c) Press the Unlocked and the Cube but-
Continuity Tests
tons on the ice and water dispenser
front panel. Refer to the chart below to perform the ice dis-
penser switch pack continuity tests. All of the
tests are performed with power disconnected
from the unit, and the wires disconnected from
the terminals of the switch under test.
Switch Pack Setup Continuity Readings
Light Interlock Switch With Switch Closed Terminal BK to BU/BK
Ice Dispenser “Unlock” Selected Terminal BU/BK to GY
Ice Lever Switch With Dispenser Pushed In Terminal GY to BU
Dispenser Light Switch With Light On Selected Terminal BU/BK to YL/BK
Crushed Ice Selected Terminals OR/BU to RD/WH
& PK/BK to BR/WH
Cubed Ice Selected Terminals OR/BU to BR/WH
& PK/BK to RD/WH
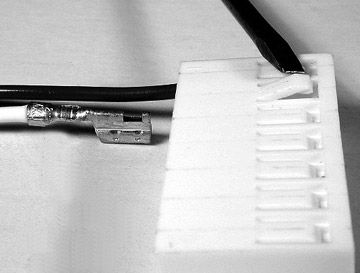
5-152. To install a wire terminal, position the
WARNING terminal with the slot facing the retainer
tab, and slide it into the connector. Press
down on the retainer tab to lock it in place.
Wire Terminal Screwdriver Wire
Slot Retainer
Tab
Electrical Shock Hazard
Disconnect power before servicing.
Replace all panels before operating.
Failure to do so can result in death or
electrical shock.
Motor
Connector
SERVICING THE HARNESS &
MOTOR CONNECTOR
Both the motor connector and the wire harness
are serviceable. To remove a wire from the
motor connector:
1. Use a small screwdriver or knife and lift
the wire retainer tab far enough to slide
the wire terminal out of the connector.
5-16WIRING DIAGRAMS & STRIP CIRCUITS
WHIRLPOOL WIRING DIAGRAM
ICE DISPENSER
MOTOR (SEE NOTE 2)
NOTES:
1. Freezer door is open, ice dispenser selection in Cubed mode, and dispenser lock switch in Locked position.
2. The dispenser has a built-in inverter board which converts the 115 VAC to 115 VDC. The OR/BU wire is the
positive (+) side of the DC signal, and the PK/BK wire is the negative (–) side. The BR/WH and RD/WH wires
switch polarity, depending on the crushed/cubed switch position, (see the following table).
BR/WH RD/WH
Crushed – +
Cubed + –
6-1KITCHENAID WIRING DIAGRAM
ICE DISPENSER
MOTOR (SEE NOTE 2)
NOTES:
1. Freezer door is open, ice dispenser selection in Cubed mode, and dispenser lock switch in Locked position.
2. The dispenser has a built-in inverter board which converts the 115 VAC to 115 VDC. The OR/BU wire is the
positive (+) side of the DC signal, and the PK/BK wire is the negative (–) side. The BR/WH and RD/WH wires
switch polarity, depending on the crushed/cubed switch position, (see the following table).
BR/WH RD/WH
Crushed – +
Cubed + –
6-2STRIP CIRCUITS
CRUSHED MODE
N
Crushed Ice
L1 Light Selection
OR/BU + RD/WH
Interlock Dispenser Lock Ice Lever Voltage Rectifier
Switch Switch Switch Motor
BK Bridge Converts CW
115 VAC to – Rotation
BU/BK GY BU PK/BK BR/WH
115 VDC
CUBED MODE
N
Cubed Ice
L1 Light Selection
OR/BU + BR/WH
Interlock Dispenser Lock Ice Lever Voltage Rectifier
Switch Switch Switch Motor
BK Bridge Converts CCW
115 VAC to – Rotation
BU/BK GY BU PK/BK RD/WH
115 VDC
6-3— NOTES — 6-4
CONFIRMATION OF LEARNING EXERCISES
1.   Trace the circuit for the crushed ice operation by closing the necessary switches. Refer to the
     Wiring Diagram NOTES at the bottom of the page.

                               To Light Switch
     L1                                                                                                       N

                                                                                           ICE DISPENSER
                                                                                         MOTOR (SEE NOTE 2)

NOTES:
1. Freezer door is open, ice dispenser selection in Cubed mode, and dispenser lock switch in Locked position.
2. The dispenser has a built-in inverter board which converts the 115 VAC to 115 VDC. The OR/BU wire is the
   positive (+) side of the DC signal, and the PK/BK wire is the negative (–) side. The BR/WH and RD/WH wires
   switch polarity, depending on the crushed/cubed switch position, (see the following table).

                                                   BR/WH     RD/WH
                                       Crushed       –         +
                                       Cubed         +         –

                                                     7-1
2. Trace the circuit for the cubed ice operation by closing the necessary switches. Refer to the
Wiring Diagram NOTES at the bottom of the page.
To Light Switch
L1 N
ICE DISPENSER
MOTOR (SEE NOTE 2)
NOTES:
1. Freezer door is open, ice dispenser selection in Cubed mode, and dispenser lock switch in Locked position.
2. The dispenser has a built-in inverter board which converts the 115 VAC to 115 VDC. The OR/BU wire is the
positive (+) side of the DC signal, and the PK/BK wire is the negative (–) side. The BR/WH and RD/WH wires
switch polarity, depending on the crushed/cubed switch position, (see the following table).
BR/WH RD/WH
Crushed – +
Cubed + –
7-2PRODUCT SPECIFICATIONS
AND
WARRANTY INFORMATION SOURCES
IN THE UNITED STATES:
FOR PRODUCT SPECIFICATIONS AND WARRANTY INFORMATION CALL:
FOR WHIRLPOOL PRODUCTS: 1-800-253-1301
FOR KITCHENAID PRODUCTS: 1-800-422-1230
FOR ROPER PRODUCTS: 1-800-447-6737
FOR TECHNICAL ASSISTANCE WHILE AT THE CUSTOMER’S HOME CALL:
THE TECHNICAL ASSISTANCE LINE: 1-800-253-2870
HAVE YOUR STORE NUMBER READY TO IDENTIFY YOU AS AN
AUTHORIZED SERVICER
FOR LITERATURE ORDERS:
PHONE: 1-800-851-4605
IN CANADA:
FOR PRODUCT SPECIFICATIONS AND WARRANTY INFORMATION CALL:
1-800-461-5681
FOR TECHNICAL ASSISTANCE WHILE AT THE CUSTOMER’S HOME CALL:
THE TECHNICAL ASSISTANCE LINE: 1-800-488-4791
HAVE YOUR STORE NUMBER READY TO IDENTIFY YOU AS AN
AUTHORIZED SERVICERCORPORATION
You can also read