2010 KITE USER'S GUIDE - Naish Kiteboarding
←
→
Page content transcription
If your browser does not render page correctly, please read the page content below
2010 KITE USER’S GUIDE
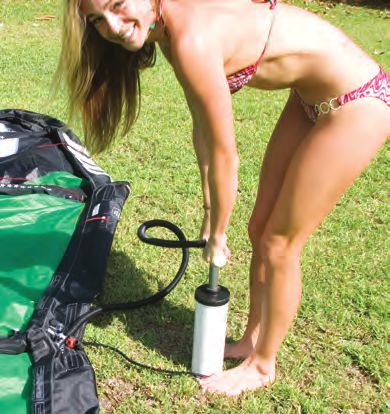
TABLE OF CONTENTS
  1. RELEASE AND AGREEMENT [4]
  2. WARNING & SAFETY PRECAUTIONS [5]
  3. ASSEMBLING THE BAR AND LINES [6-10]
  4. ASSEMBLING THE KITE [11]
  5. SAFETY [11-13]
  6. TUNING YOUR KITE [14-15]
  7. RELAUNCHING YOUR KITE [16-17]
  8. KITE MAINTENANCE & CARE [18]
  9. NAISH WARRANTY POLICY [19]

2 naishkites.com
KITE USER’S GUIDE • GEBRAUCHSANWEISUNG FÜR KITES
   • GUIA DEL USARIO COMETA • AILE GUIDE DE L’UTILISATEUR
                • GUIDA ALL’UTILIZZO DEL KITE

ENGLISH - pages 4-19
Thank you for purchasing a Naish kite. You have chosen a kite of the highest quality and performance. Please read this manual to familiarize
yourself with the technical features and benefits built into every Naish kite. Follow the guidelines and safety precautions found in this User’s Guide
to help maximize your enjoyment and to prolong the life of your kite. This is not a “How To” manual. We strongly encourage you to get professional
kiteboarding lessons from a reputable instructor before operating this kite.

Limited Warranty Registration- To receive full warranty and customer service benefits, you must register your product within 7 days of purchase
at the warranty section of our website. Register product at: www.naishkites.com

DEUTSCH - seite 20-35
Vielen Dank für die Wahl eines Naish Kites. Sie haben sich für ein Produkt höchster Qualität und Leistung entschieden. Bitte nehmen Sie sich die Zeit
die Gebrauchsanweisung zu lesen, um alle technischen Details und Feinheiten kennen zu lernen, die unsere 4-Leinen Kites besitzen. Folgen Sie den
Richtlinien und Sicherheitshinweisen, die Sie in dieser Anleitung finden, um maximale Freude mit diesem Produkt zu haben. Dies ist keine – „Wie
kitet man“-Anleitung. Wir empfehlen dringend vor der Nutzung dieses Kites entsprechenden Unterricht bei einem lizenzierten Kitelehrer zu neh-
men.

Garantie Registrierung- Um den vollen Umfang der Garantie- und Se viceleistungen nutzen zu können, müssen Sie sich innerhalb von 7 Tagen nach
Erwerb des Produktes im Garantiebereich auf unserer Website registrieren. Registrieren Sie Ihr Produkt unter: www.naishkites.com

ESPAÑOL - paginas 36-51
Gracias por haber adquirido el Shift System de Naish. Has escogido un producto de alta calidad y alto rendimiento. Por favor lee el manual para
familiarizarte con las características técnicas y beneficios que te aportará el uso del Shift System. Sigue las instrucciones y consejos de seguridad
que encontrarás en la Guía del Usuario para maximizar el re dimiento de tu cometa y prolongar la vida de tu equipo. Esto no es un manual de
manejo de la cometa. Te aconsejamos realmente de que tomes lecciones de un monitor profesional cualificado antes de utilizar este producto.

Límite de registro de garantía- Para poder obtener una garantía completa y beneficios de servicio, tienes que registrar tú producto en la sección de
garantías de nuestra Web con un tiempo máximo de 7 días después de la compra. Registra tu producto en: www.naishkites.com

FRANÇAIS - pages 52-67
Merci d’avoir acheté une aile Naish. Vous avez choisi une aile de haute qualité et aux performances exceptionnelles. Veuillez lire ce manuel pour
vous familiariser avec les caractéristiques techniques et les avantages de nos ailes à quatre lignes. Respectez les directives et les précautions de
sécurité répertoriées dans ce Guide de l’utilisateur pour tirer le meilleur parti de votre aile et prolonger sa durée de vie. Il ne s’agit pas d’un manuel
d’apprentissage. Nous vous recommandons vivement de prendre des leçons de kiteboarding dispensées par des professionnels avant d’utiliser
cette aile.

Enregistrement de Garantie Limitée- Pour obtenir une garantie complète et les avantages du service client, vous devez enregistrer votre produit
dans les sept jours qui suivent la date d’achat, dans la section Warranty de notre site Web. Enregistrez votre produit à l’adresse suivante : www.
naishkites.com

ITALIANO - paginas 68-83
Grazie per aver acquistato un prodotto Naish. Avete scelto il kite con la migliore qualita’ e con le migliori performance. Leggete prima questo manuale
per prendere confidenza nel montaggio e conoscere le particolarita’ tecniche del kite a 4 linee. Seguite I consigli e le precauzioni sulla sicurezza
riportati in questa utile guida per divertirvi ed aumentare il rendimento e la vita del vostro aquilone. Questo NON è un manuale per l’apprendimento
del kitesurf, raccomandiamo vivamente di prendere delle lezioni da un instruttore qualificato e professionale prima di praticare questo sport.

Limite della Garanzia di Registrazione- Al fine di ricevere la piena garanzia e i servizi benefit alla clientela, devi registrare il tuo prodotto entro 7 giorni
dall’acquisto alla sezione garanzia del nostro website. Registra il prodotto a: www.naishkites.com

                                                                                                                                          naishkites.com           3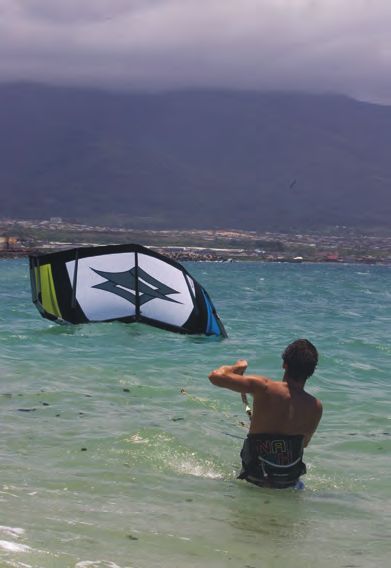
1. RELEASES & AGREEMENTS
 Release of Liability, Claim Waiver and Assumption of Risk Agreement
 Release and Waiver of Claims Agreement:
 In consideration of your use of this product, you hereby agree to the following, to the fullest extent permitted by law:

 To waive any and all claims that you have or may in the future have against Naish International, a division of Nalu Kai Incorporated, or any of its
 agents, resulting from use of this product and any of its components.

 To release Naish International, a division of Nalu Kai Incorporated, or any of its agents from any and all liability for any loss, damage, injury or ex-
 pense that you or any users of this product may suffer, or that your next of kin may suffer, as a result of the use of this product, due to any cause
 whatsoever, including negligence or breach of contract on the part of Naish International, a division of Nalu Kai Incorporated, or any of its agents, in
 the design or manufacture of this product.

 Arbitration:
 In further consideration of the sale to you of this product and any of its components, you hereby agree to submit to binding arbitration any and all
 claims, which you believe you may have against Naish International, a division of Nalu Kai Incorporated, or any of its agents, arising from the use of
 any of the Naish International/Nalu Kai Incorporated equipment. The arbitration shall be pursuant to the rules of the American Arbitration Associa-
 tion.

 Arbitration shall be commenced within one (1) year from the date on which any alleged claim first arose. Further, the arbitration shall be held in Maui,
 Hawaii unless otherwise mutually agreed to by all parties. The submission to the American Arbitration Association shall be limited and the arbitra-
 tion award may be enforced by any court of competent jurisdiction.

 Binding Effect of Agreement:
 In the event of your death or incapacity, this Agreement shall be effective and binding upon your heirs, next of kin, executors, administrators, as-
 signs and representatives.

 Entire Agreement:
 In entering into this Agreement, you are not relying upon any oral or written representations other than what is set forth in this agreement and
 User’s Guide.

 By inflating the leading edge and assembling this product, you are agreeing to:
 1) be bound to the terms set forth below; and 2) require anyone using this product to be bound by such terms. If you are unwilling to be bound by
 these terms, return this product (before use) for a full refund.

 Assumption of Risk:
 Use of this product and any of its components involves certain inherent risks, dangers and hazards, which can result in serious personal injury
 and death. In using this product you freely agree to assume and accept any and all known and unknown risks of injury while using this equipment.
 The risks inherent in the sport can be greatly reduced by abiding by the Warnings and Guidelines listed in this User’s Guide and by using common
 sense.

4 naishkites.com

2.WARNING & SAFETY PRECAUTIONS
Read the following points before assembling your kite:

                                                                                                                                                           English
Warning:
• Kite flying can be dangerous.
• Always use extreme caution when using this product.
• Misuse of this product can cause serious injury or death.
• Only use this product if you are in good physical health.
• Never act in a careless manner when using this product (such as jumping in the air, or tying yourself down).
• You are responsible for your own safety, and the safety of others around you when using this product.
• If you are under 18 you should have your parents or legal guardian read these warnings and instructions. You should not use this product
 unless you are under proper guidance and supervision.
• The use of this product exposes the user to many unavoidable and unexpected risks, dangers and hazards.
• Do not use this product if you are under the influence of alcohol, drugs or medications.

Important Safety Rules:
• Before using this product take lessons from a certified school. Do not attempt to fly a kite without being trained by a certified kite instructor.
• This product is not a personal flotation device. Always wear a Coast Guard approved personal flotation device when using this product near the
 water.
• Always have a partner when launching and landing your kite.
• Always learn to use a small two-line stunt kite before attempting to use this product.
• Never allow anyone who is not familiar with traction kiting to use this product without experienced assistance.
• Never use this product without a leash system. A loose kite is extremely dangerous to everyone down wind.
• The leash system is not a permanent attachment to this product. Never permanently attach yourself to the kite or any of its components.
• Always wear a helmet, gloves, shoes, and protective eyewear when using this product.
• Always use a high quality, kite specific harness.
• Get yourself used to the way your Quick release devices work by testing them often in a non emergency situation.
• Rinse your Quick Release device in fresh water after every session. Quick Release devices have a limited lifetime and must be checked and
 changed often.
• The Quick Release Trim Loop and your leash equipped with a quick release must be changed after 250 hours of kiting. Change them before if you
 see any sign of wear. The wearing of your Quick Release devices is not considered a warranty issue.

Choose Safe Weather Conditions:
• Never learn to use this product in more than 10 knots of wind.
• Never use this product in high winds.
• Never use this product in thunderstorm and lightning conditions.
• Only use this product when you can remain in a standing position.
• Never use this product in wind conditions that are above your ability level.
• Never use this product near or on the water in offshore wind conditions unless you are an expert swimmer.

Choose a Safe Location:
• Always observe local rules and regulations when using this product.
• Never use this product near power lines, telephone poles, trees, bushes, roads, automobiles, or airports.
• Only use this product when you have 100 meters of clear space downwind, and on both sides of your launching position. The power of the kite
 can pull you downwind unexpectedly and with great force.
• Do not fly your kite over other people or pets. Spectators should remain upwind of you when using this product.
• Never use this product on crowded beaches or fields.
• Never use this product near the water unless you know how to swim and are in good physical health.
• Practice launching and landing procedures, and self rescuetechniques before using this product near the water.

Use Caution with Flying Lines:
• Never touch the flying lines when the kite is in use. Flying lines are extremely dangerous while under tension and can cause serious injury
 or death.
• Never use this product with worn lines. A line that breaks while under tension can cause serious injury or death.
• Always check your flying lines for knots before each use. Knots greatly reduce the strength of the lines.
• Stay away from tangled flying lines unless the kite is secured to the ground. An unsecured kite can self launch unexpectedly, and can cause
 serious injury or death.
• Never allow yourself, or anyone else, to get between the control bar and the kite when using this product.

                                                                                                                                naishkites.com         5
3. ASSEMBLING THE BAR AND LINES
 The Shift System                                                      Drawing of Entire Shift System

                                                                                       M       J                    M

                                                                                                                L

             F                            O                G                               I

                                       H

                                                                                   F                                    G

                    A                                                                      K

                              E            P
                                               C

                                      D

                                                                                                            O
                                                      B                                        H

 Your new Shift System is a plug and play device. It come
 completely assembled and ready to use. These are diagrams of the                      A
 Shift System and descriptions of each line and its function.
                                                                                                                        B
                                                                                                   DEP
                                                                                                     OW
                                                                                                       ER

 A. 2010 Control Bar
 B. Shift Leash with Quick Release
 C. Shift Leash Attachment Loop
 D. Rotating Chicken Finger
 E. Quick Release Smart Loop (QRSL)
 F. Left Red Leader Line                                                M      M
 G. Right Blue LeaderLine
 H. Shift Line - Yellow Spectra Line
 I. Shift Line Yellow Bungee
 J. Shift Line (yellow)
 K. Center line up to the Y connection
 L. Y Connector with Pig Tails for Grey Control Lines to attach to             L
 M. Grey Control Lines - Attach to leading edge of kite
 N. Shift Extension Line - This line is different for each kite size
 O. Stopper
 P. Smart Loop Trim Line
                                                                                   G
                                                                                               N

6 naishkites.caom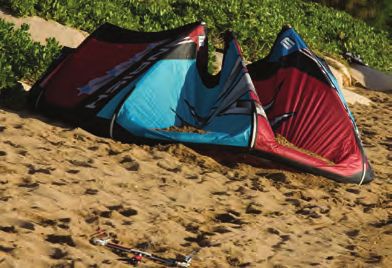
3. ASSEMBLING THE BAR AND LINES
The Universal System                                                    Drawing of Entire Universal System

                                                                                                                                             English
                                                                                                H
                            C
                                                                                    I                                   I

          A                                              B

                                                                            J       K                                       K       J

                            F

                                     D
                       G                  E
                                                                                L       M                           M           N

Your new Universal Control System is a plug and play device; it comes
completely assembled and ready to use. Below is a diagram of the
system and descriptions of each line and its function.

A. Left Red Leader Line                                                                                         P
B. Right Blue Leader Line
C. Pulley Assembly
D. Leash Attachment Loop                                                                    C
E. Smart Loop Trim Line
F. Stopper
G. Quick Release Smart Loop (QRSL) with Chicken Finger                              A                                   B
H. Kite
I. Bridle
J. Back Line Attachment Points
K. Front Line Attachment Points                                                             F
L. Left Red Steering Line
M. Front Grey Control Line
N. Right Blue Steering Line
O. Leash with Quick Release                                                                         DEP
                                                                                                      OWE

P. 4 Ring Piece
                                                                                                            R

                                                                                                                    O

                                                                                                                        naishkites.com   7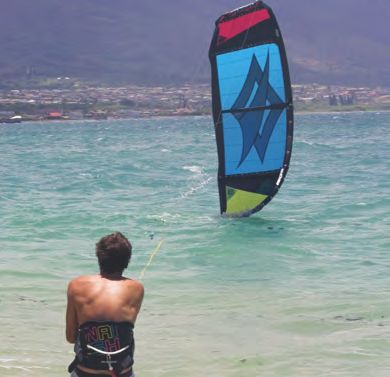
3. ASSEMBLING THE BAR AND LINES
 Assembling the Shift System
 Preparation:
  Pic 1- Position your kite on the beach facing directly into the wind. Place
 sand on the canopy. Layout the bar upwind of the kite. Place the Red
 side of bar on the left side when you are looking down wind toward
 the kite. Make sure the lines are straight and not wrapped, knotted or
 tangled in any way.

 Attaching the Shift System Bar and Lines:
 Lay the kite across the lines approximately 5 meters before the end of
 the lines.
 Pic 2- Attach the Grey control lines to the leading edge pigtails.
 Pic 3- Move the steering lines outside of the kite and attach the Red and
 Blue steering lines first using either the Figure 8 knot or the larks head        1
 dependent on your kite’s pig tails.
 Pics 4 & 5- Make sure all lines are hooked up correctly and take extra
 time to straighten your lines before each session as the lines will tend
 to be twisted. It is difficult to see twist in the Shift line at the Red Bungee
 and Y connection. Pay special attention to these points when checking
 your lines. Look for twists in the Shift line. Use the quick disconnect
 point to help untwist the lines. Also look for twists of the Shift line
 around the control lines just above the Y connection. You can use the
 larks head attachment points on the Y Connector to untwist the grey
 control lines.

 The Shift Extension Line:
 Pic 6- On the opposite end of the Shift Extension line you will find three
 knots. The middle knot is where you will attach the shift line to the Shift       2   3
 Extension line if your kite lines are brand new. Attach the Shift Extension
 Line to the Yellow Shift Line using the larks head. Note: (Over time your
 steering lines and control lines will stretch and you will need to use the
 knot below to compensate for the line stretch.)

 Important Considerations for Maintaining Your
 Shift System:
 You may find that your tensioned lines stretch at a different rate than
 the Shift Line. This means you will have to monitor the slack in the Shift
 line above the Y connector. It is always a good idea to monitor your
 kites performance in relation to how your kite lines are stretching. If at
 full power the line is slack, you can shorten your connection point on
 the Shift Extension line to eliminate the slack and give the kite optimal
 performance. You can test the slack by pulling on the ball at the fixed           4   5
 point on the QRTL and watch the results at the kite. Have someone look
 at the shape of the leading edge to make sure it is not flat in any way.
 Adjustments can be made at the Shift Extension line by changing the
 knot position. See page 14 for tuning your Shift Bar. Always check for
 wear on all lines and loops where friction occurs.

                                                                                   6

8 naishkites.com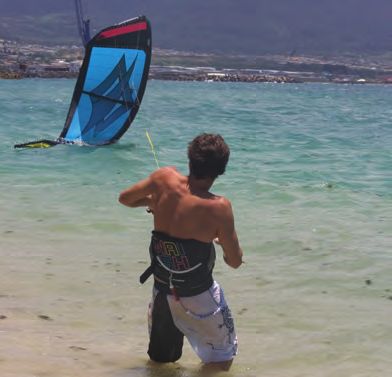
3. ASSEMBLING THE BAR AND LINES
Assembling the Universal Control System

                                                                                                                    English
Preparation:
Pic 1- Position your Sigma kite on the beach with the second strut,
(on one side) facing directly into the wind. Place sand on the canopy
between the second and third strut. Layout the bar upwind of the kite.
Place the red side of the bar on the left side when you are looking down
wind toward the kite. Make sure the lines are straight and not wrapped,
knotted or tangled in any way.

                                                                              1

Attaching your lines to the bridle:
Pic 2- Move the steering lines outside of the kite and attach the red and
blue steering lines to the back line bridle attachments using the larks
head. Attach the grey front lines to the front line bridle attachments us-
ing the larks head on the front lines. Make sure to keep the left and right
front line on the correct side, without twists. Make sure that all bridle
lines are clear and free of tangles. Make sure there are no knots in any
of the flying or bridle lines. Make sure the pulleys on the bar and in the
bridle system are turning freely.

                                                                              2

Fool Proof Flying Lines:
Naish kites are equipped with specialized flying line connectors which
prevent inadvertently attaching the front lines to the trailing edge and
the opposite. The pictures below show how to use this feature. The line
connectors have a handy easy-open feature as well. Pull on the black
tab to release your flying lines after your session.

                                                                                  DEPOWE

                                                                                           R

                                                                                               naishkites.com   9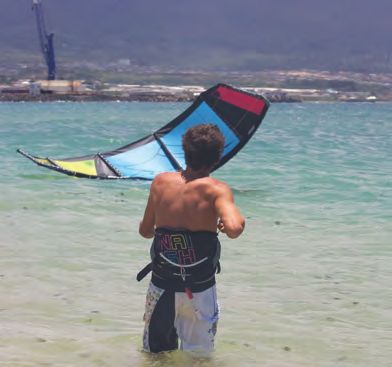
3. ASSEMBLING THE BAR AND LINES
 Chicken Finger & Stopper
 How to lock the Chicken Finger into your
 harness hook:
 The Control System is designed with a Chicken Finger to help you stay
 locked into your QRTL. Before you connect the finger to your harness
 hook make sure that your lines are set up properly without any
 tangles or twists.

 1- Push the finger into the center of the harness hook.
 2- Make sure that it is below the trim loop and that the Chicken Finger
 gets all the way in and is straight.

 If you want to disconnect from the trim loop, you can grab the finger
 and pull it out of the harness hook, and then unhook the loop. Or, you can
 release your QRTL as described on page 12.

                                                                               1   2

 Rotating Chicken Finger:
 Be aware that using this item can cause serious injury or death. When
 the chicken finger is installed, you will have to activate your Quick Re-
 lease Trim Loop in order to release yourself from the kite. Only use the
 chicken finger if you are an expert kiteboarder. Install the chicken finger
 only when you are in the water and away from all obstacles. NEVER
 return to the shore with your chicken finger installed. To use it simply
 slip it under you harness bar hook and out the end so that the QRTL will
 not fall from the hook if there is no pressure on the QRTL.

 Note: Pressure from the QRTL can cause the chicken finger to bend and
 let the QRTL come unhooked in some circumstances.

 Adjusting the power of your kite with the
 smart loop:
 • To depower your kite pull down on the trim line, below the QRTL, the
   desired amount, then lock the line in the jam cleat.
 • To give your kite more power, pull down on the trim line to release it
   from the jam cleat.Feed out the desired amount of line and then lock
   the line back into the jam cleat.

                                                                                       Trim Line

10 naishkites.com
4. ASSEMBLING THE KITE
Inflating Your Kite with a Standard System
English
Always use the pump leash to hold your kite while you inflate it. First
inflate struts then the leading edge.
On Your Octopus System Equipped Kite:
• Close all strut valves.
• Close the deflate valve on the LE.
• Inflate the kite at the LE inflation valve.
• Pump until the kite is very firm and rigid.
• Close the inflate valve with the velcro and valve lock bungee.
How to Deflate Your Octopus Equipped Kite:
• Open all strut valves.
• Open the deflate valves on the LE. That’s it.
Inflation Pressure:
Smaller kites require greater pressure in the bladder to hold their
shape. Below are recommended maximum pressures.
• 6m through 10m kites require a maximum of 8 psi or .55 mPa
• 12m through 14m kites require a maximum of 7 psi or .50 mPa
• 16m through 20m kites require a maximum of 6 psi or .40 mPa
• Always inflate kite very firmly.
Note: Do not over inflate the kite struts or you may damage the internal
bladder.
5. SAFETY
Release of Power:
If you need to release yourself from your kite, your first option is to unhook from your trim loop and let go of the bar. If you can not unhook im-
mediately then you need to release your QRTL. Your kite comes with a leash that connects from one of the front lines or fifth line to your harness.
If you need to release your kite, this will keep you attached to your kite and the kite will have no power. If your kite keeps pulling you for any reason,
you can release yourself from your leash with the quick release at the bottom of the leash.
*Remember: you should know how all of your releases work, keep them in good working order, and practice using them. You should be able to
reach them all in an instant without a second thought.
If your kite goes down in the surf, release yourself from it. Hanging on will cause the kite to rip or lines to break. Even a small wave or shore break
can exert enough force to damage your kite if you do not let it go.
In the event that your kite is down in the water and you want to self rescue or self land your kite, grab the line that your leash is attached to. “Walk”
yourself up that line to the kite to avoid an unwanted relaunch. Make sure that you stay clear of the other lines.
naishkites.com 115. SAFETY
Quick Release Features
Operating the Quick Release Trim Loop: To Release:
To activate the Quick Release Trim Loop: Grasp the handle of the quick
release trim loop and force it up the QRTL line, away from your body.
Important: It is your responsibility to maintain the proper working
order of the quick release mechanism. Always inspect this piece prior
to launching your kite. Make sure the trigger mechanism is properly
seated before you ride, and occasionally while on the water. There are
two ways to do this:
1. Grasp the handle and pull it towards your body.
2. Briefly unhook from the loop, and then hook back in. 1 2
Release Pics 1-4: To release, grasp the handle and force it away from
your body to open the loop.
Reload Pic 5: Released QRTL.
Reload Pic 6: Slide the arm through the stainless steel loop at the end
of the QRTL.
Reload Pic 7: Slide the handle down the line over the arm.
Note: You MUST test your Quick Releases before every session in
order to get used to the way they work. This is the only way for you
to be able to use them fast enough in case of emergency. Remember
that the Quick Release devices have a limited lifetime and you must 3 4
change them after 250 hours
of kiting. Our Quick Releases are
developed and designed to be To Reload:
used by a rider of 80kg or less.
5 6 7
Stopper Warning:
BE AWARE THAT USING THIS ITEM CAN CAUSE SERIOUS INJURY OR DEATH.
Only use this Stopper if you are an expert kiteboarder and fully under-
stand the consequences of using this item. The Stopper is NOT a safety
system and will greatly inhibit the kite from reaching its full depower
range. DO NOT install this item if you are not an expert kiteboarder. When
you launch your kite or when you are getting close to the beach or any
obstacle on the water, you must ALWAYS put your stopper at it’s highest
position (against the pulley).
12 naishkites.com5. SAFETY
Shift Leash Quick Release Features
English
1 2
Releasing the Shift Leash Quick Release:
Pics 1 & 2: If you need to get totally free of the kite, release the leash quick release by grabbing the red handle and pushing it away from you, and
let go.
1 2
3 4
Reconnecting the Shift Leash Quick Release:
Pic 1: Slip the pivot pin through the loop that is still attached to your harness or spreader bar.
Pic 2: Pull the red release tube toward yourself sliding it over the pivot pin.
Pic 3: Keep sliding it back making sure it slides smoothly over the pivot pin.
Pic 4: Pull it all the way back to the black stopper ball to ensure that it doesn’t release inadvertently.
Always make sure the handle is in the correct position.
CAUTION! If you are practicing spins, and you continually spin in one direction, the Shift System could be rendered ineffective by twisted lines. To avoid
the potential of twisted lines you should always try to do the same number of spins in both directions. In addition, you should always check the condi-
tion of your Shift line by pulling on your Shift leash to make sure the Shift line is not bound in any way. If you feel tension on the line you should go to the
beach and reset your lines to eliminate all twists.
naishkites.com 136. TUNING YOUR KITE
Advanced Tuning-Shift System
Tuning your kite to match your riding style is the key to maximizing
your fun. Small adjustments can greatly effect the kite’s perfor-
mance. We recommend using the standard setup until you become
familiar with the behavior of your kite. You can then adjust the
settings in a variety of ways (Please see diagram at right):
1. Dynamically change the power of the kite by moving the control
bar up/down the gray center line (trim line). Sheeting in and out will
change the Angle of Attack.
2. Statically change the Angle of Attack by adjusting the trim line at
the smart loop.
3. Tune where full power is on your trim line to suit your riding style
by adjusting the Power Tuning Knots. There are three knots on the AB
leader lines and 2 knots on your front lines (only available on some CD
models). See Advanced Tuning on page 13 for more information.
A) Forward Centerline Attachment C) Forward Turning Speed
4. Modify the turning speed of the kite by attaching the flying lines to Point Adjuster
one of the two attachment points. • Choice of pros • For high wind conditions
• Most wind range • For beginners
Helix, Cult & Charger Bar Pressure: • Increased sheetability • For smaller kites in your
If you want to increase the bar pressure there is an additional rear • Best for overpowered quiver
line attachment point on the Helix (Toward the middle of the kite). conditions • Decreased turning speed
• Kite is less sensitive to bar
B) Rear Centerline Attachment movements
Point
• More hang time D) Rear Turning Speed Adjuster
• More power goes to harness • Fastest turning speed
• Choice of heavier riders • Underpowered conditions
• Kite is less sensitive to bar • Can use a smaller bar
movements • Less hand pressure to turn
• Great for wave riding
Over sheeting diagram for Shift System kites
View of kite from riders perspective. Kite in the neutral position directly
above the rider. Over sheeted wingtip (too much back line tension). Front
lines too long.
Bar End Flip:
Your bar has a plastic piece that can be removed and flipped 180
degrees to change the effective pull point of the steering lines. Pull
down on the tab to pull the plastic piece out. Because the piece has the
flying knot going through it, you will only get it to come part way out.
When you have enough slack, turn the piece 180 degrees and reinsert
into the slot. Carefully align the piece back into the slot to get it to fully
reseat. Repeat on the other bar end so that the knots are either both to
the inside or outside. The bar ends will flex under load and give you an Correct trim
effectively new bar length.
Oversheeted
14 naishkites.com6. TUNING YOUR KITE
Advanced Tuning
English
The following is a general guide for what your kite will do at certain knot
positions. Do not hesitate to try several different combinations to find
what suits your style best.
Attach the outside flying lines to one of the three knots on the control
bar’s extension lines labeled A, B, or C.
Knot A: The kite will be somewhat depowered when your arms are
outstretched. Push the bar away from your body for even less power. B
The kite will fly at optimum trim while the control bar is close to the
quick release trim loop. You will be ready to unhook at any moment for
power moves. C
Knot B: The kite will be fully powered when the bar is a few inches A
from the quick release trim loop. This position will allow you to be fully
powered when your arms are in a more extended and comfortable
position. This setup retains a good amount of depower room above the
bar, and puts you in a more ergonomic body posture.
Knot C: This position allows you to ride with the kite fully powered when
your arms are outstretched. This setup is great for one-handed jumps.
Pulling the bar down to the center loop will oversheet the kite.
Caution: This setting does not allow the rider much room to depower
the kite, compromising the ability to sheet out completely. Only ad-
vanced kiteboarders should use this setup.
1 2
Front Line Attachment:
Your new Naish Kite (Cult/Helix/Charger) will come with the Standard
Leash attached to one of the grey front lines, and the other line will be
attached to the stainless 4 ring piece. In the case that you want to use
the trim line as your leash you will need to remove the Standard Leash
and re-attach the grey front line to the stainless 4 ring piece. Pull the
present Standard Leash back through the bar so that the grey front
line comes down all the way through the bar and retainer ring on the
chicken loop. Un-attach the leash and pull the grey line back up to the
stainless 4 ring piece and attach identically as the non leashed grey
front line (See Pic 3 & 4).
3
4
naishkites.com 157. RELAUNCHING YOUR KITE
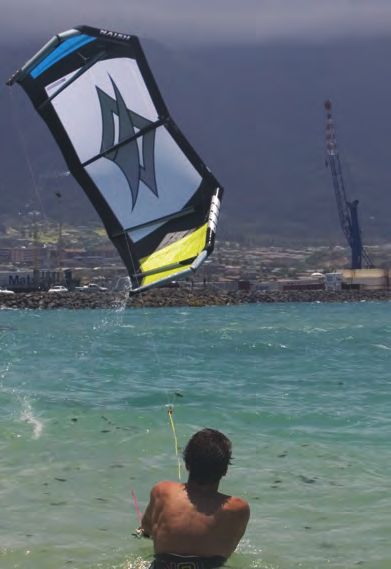
Shift System Use
How the Shift System helps to relaunch the kite:
When you crash the kite and you have NOT let go of the bar, it is very
simple to relaunch the kite with the Shift system.
Pics 1 & 2
Wait until the kite is downwind. Make sure all lines are tensioned. Reach
above the bar, grab the Shift line and pull it toward yourself. This should
force the leading edge of the kite to come toward you. As the kite rolls
over onto its canopy, keep your eyes on the kite. Never wrap the lines
around your hand. When you let go of the slack line, pay special atten-
tion to stay clear of all lines.
Pics 3 & 4
To get the kite to begin moving toward the edge of the window, you will
need to put some pressure on the steering lines. Use extreme caution
and keep clear of the Shift line. Apply tension on the appropriate steer-
ing line as the kite moves closer to the edge of the window for relaunch.
When the kite lifts out of the water, check all lines and make sure there 1
are no tangles. If the kite rolls over let it drift down wind and begin the
process over again.
Tip: When your kite has relaunched, if you have to body drag to get to
your board, adjust the trim strap to depower the kite. This will make it
easier to work your way upwind. It might make steering looser, but the
advantages of a shorter body drag are well worth it.
2
3 4
16 naishkites.com7. RELAUNCHING YOUR KITE
Relaunch
English
How the Universal Control System helps to
relaunch the kite:
If the kite is straight downwind of you, with the leading edge on the wa-
ter, you can simply pull on one of the back leader lines to relaunch the
kite. As you pull the leader line in, the kite will roll on its side and work
its way to the edge of the window. From there it will relaunch easily.
Make sure that you never wrap the line around your hand. Be careful
not to become entangled in any slack line.
1
2 3
naishkites.com 178. KITE MAINTENANCE & CARE Notes on Caring for Your Kite Folding the kite: After landing and securing your kite, detach your lines and wind them up. Leaving lines on the ground can be hazardous. Note: The Octopus valves are not designed to hold air overnight or for long periods of time. • Never store kite wet. • Let it dry and remove excess sand from the kite before rolling it up. Use a hand broom to help remove sand from your inflated kite. Carefully folding the kite is very important to prolong the life of the kite and to prevent twisting the leading edge bladder. Before folding your kite, dry it out completely. To fold the kite: 1. Deflate all of the struts. 2. Open both valves on the leading edge – deflate valve and inflate valve – to fully deflate air from the main bladder. 3. Lay the kite flat on the ground and flatten the leading edge. 4. Start folding the kite at the wingtip towards the center making sure that the leading edge stays flat. 5. Fold both sides together. 6. Fold the kite into three sections. Pulleys- Make sure that all the pulleys are in good working order before each session. Rinse them with fresh water after each session to keep them sand and debris free. Sun- Ultraviolet radiation is the enemy of all fabrics. Your kite will last a long time in even the most extreme sun, but care should be given not to sub- ject the kite to unnecessary exposure. For instance; If you have more than one kite rigged on the beach, put the one you are not using in the shade. Heat- Bladder pressure increases when the air inside gets hot. Be careful of kites left on dark surfaces (black sand, asphalt) as the pressure in the bladders may cause damage to the kite. Don’t leave struts fully inflated inside a hot car. Sand- Try to keep sand from sitting in the crease between the inflated frame and the canopy. Sand left here will act as a constant source of abra- sion. Rocks- Rocks, coral, sticks and other beach debris are potential puncture hazards for any kite. Bladders- Keep sand and water out of the internal bladders. If deflating the kite on the water, close valve afterwards. Storing- The combination of a kite stored while still wet, and or heat can cause colors to transfer. Only pack your kite away after it is completely dry. Never store your kite in hot temperatures (over 40C or 104F) for example in a hot car. Doing so will damage your bladders. Pump- Apply even pressure on both sides of the pump handle to decrease the possibility of handle failure. Self-launch- Use caution when self-launching in windy conditions as this puts a lot of strain on the leading edge. Leading edge- Do not allow the leading edge to bend backwards. Use care when handling on the beach during launching or landing to keep the leading edge in its proper “C” shape. The kite is not designed to be bent backwards. Straightening or bending the leading edge backwards puts tremendous strain on the fabric. Shore Break- Even a small shore break can be brutal on a kite. Not only does the shorebreak carry sand into every crevice on the kite, but moving water can rip the kite skin. Miscellaneous- Impact zones, shore breaks, power lines and trees are even the most durable kite’s worst nightmare. Use only properly designed and manufactured parts from a reputable supplier (helmets, harnesses, etc). Line checks- Check all of your lines, including bridle lines, before and after each use. Check lines for fraying, change in diameter and color loss. Compress line together and look closely at braid for evidence of wear. Replace any lines that have any signs of wear. Change out bridle lines every 3 to 6 months based upon use and condition. 18 naishkites.com
9. NAISH WARRANTY POLICY

                                                                                                                                                            English
Naish warrants this product to be free from major defects in material or workmanship to the origi-
nal purchaser for a period of ninety (90) days from the date of purchase. This warranty is subject
to the following limitations:
The warranty is valid only when the product is registered in the warranty section of www.naishkites.com within seven (7) days from the date of
purchase.

The warranty is valid only when this product is used for normal recreational activties, and does not cover products used in rental or teaching
operations.

Naish will make the final warranty determination, which may require inspection and/or photos of the equipment, which clearly show the defect(s).
If necessary, this information must be sent to the Naish distributor in your country, postage prepaid. Product can be returned only if a return
authorization number (RAN) is given in advance by the Naish distributor. The RAN number must be clearly labeled on the outside of the package, or it
will be refused.

If a product is deemed to be defective by Naish, the warranty covers the repair or replacement of the defective product only. Naish will not be
responsible for any costs, losses, or damages incurred as a result of loss of use of this product.

This warranty does not cover damage caused by misuse, abuse, neglect or normal wear and tear including, but not limited to, punctures, rigging
with other than Naish components, damage due to excessive sun exposure, or damage due to over inflation of the bladders, damage caused by
improper handling and storage, damage caused by use in waves or shore break, and damage caused by crashing the kite at high speed or dam-
age caused by anything other than defects in material and workmanship.

This warranty is void if any unauthorized repair, change or modification has been made to any part of the equipment.

The warranty for any repaired or replacement equipment is good from the date of the original purchase only.

The original purchase receipt must accompany all warranty claims. The name of the retailer and date of purchase must be clear and legible.

There are no warranties, which extend beyond the warranty specified herein.

                                                                                                                                 naishkites.com        19
1. HAFTUNGSAUSSCHLUSS & VEREINBARUNGEN Haftungsausschluss, Verzicht auf Schadenersatz und Anerkennung der Gefahr Verzicht auf Schadenersatz: Durch die Benutzung dieses Produkts stimmen Sie ohne Einschränkungen und rechtsgültig Folgendem zu: Sie verzichten auf jegliche bestehenden oder zukünftigen Ansprüche gegen Naish International, einem Unternehmen der Nalu Kai Incorporated, oder jeden seiner Vertreter, die aus der Nutzung dieses Produkts oder einer seiner Komponenten resultieren. Sie befreien Naish International, ein Unternehmen der Nalu Kai Incorporated, oder jeden seiner Vertreter von sämtlichen Ansprüchen aus Schäden, Verlust, Beschädigung, Verletzung oder Sonstigem, die Sie oder eine Dritte Person durch die Nutzung dieses Produkts erleiden. Dies beinhaltet auch Fehler des Produkts in Design oder Produktion, die durch Fahrlässigkeit oder Vertragsbruch seitens Naish International, einem Unternehmen der Nalu Kai Incorporated, oder einem seiner Vertreter zu Stande kommen. Schiedsgerichtsverfahren: Mit dem Kauf dieses Produkts stimmen Sie hiermit zu, alle Forderungen, die Sie Ihrer Meinung nach gegen Naish International, einem Unternehmen der Nalu Kai Incorporated oder einem seiner Vertreter haben, auf dem Wege eines Schiedsgerichtsverfahrens geltend zu machen. Das Schieds- gerichtsverfahren wird nach den Richtlinien der American Arbitration Association abgehalten. Die Ansprüche sind innerhalb eines Jahres nach derem ersten Auftreten geltend zu machen. Schiedsgerichtsstand ist Maui, Hawaii in den USA, es sei denn, es wurde unter beiderseitigem Einverständnis ein anderer Gerichtsstand festgelegt. Die Zuständigkeit der American Arbitration Associa- tion ist begrenzt und die Durchsetzung des Schiedsgerichtsspruchs kann anderen juristischen Organen übertragen werden. Rechtsverbindlichkeit der Vereinbarung: Im Falle Ihres Todes oder mangelnder Prozessfähigkeit ist diese Vereinbarung ebenfalls bindend für Ihre Erben, Ihre Verwandten und die mit der Durchsetzung Ihrer oder der Rechte Ihrer Angehörigen beauftragten Personen. Uneingeschränkte Vereinbarung: Neben der bestehenden Vereinbarung, die in dieser Gebrauchsanweisung definiert ist, gelten keinerlei mündliche oder schriftliche Zusatzverein- barungen. Durch erstmaliges Aufpumpen der Fronttube und durch den Aufbau dieses Produkts stimmen Sie folgendem zu: 1) Sie stimmen den weiter unten aufgeführten Punkten ohne Einschränkung zu, und 2) verpflichten sich, die Zustimmung zu diesen Punkten von je- dem zu fordern, der dieses Produkt benutzt. Möchten Sie diese Verpflichtung nicht eingehen, senden Sie das Produkt an uns oder an Ihren Händler zurück und Sie erhalten Ihr Geld zurück. Anerkennung der außerordentlichen Gefahr: Die Benutzung dieses Produkts und aller seiner Komponenten birgt besondere Risiken und Gefahren, die zu schweren Verletzungen und dem Tod führen können. Durch die Benutzung dieses Produkts stimmen Sie zu, dass Sie alle von dem Produkt ausgehenden bekannten und unbekannten Gefahren akzeptieren und Sie deren Folgen ohne Einschränkung persönlich tragen. Die hier genannten Risiken und Gefahren können durch die konsequente Beachtung dieser Gebrauchsanweisung erheblich gemindert werden. 20 naishkites.com
2.WARNUNGEN & SICHERHEITSHINWEISE
Lesen Sie die folgenden Punkte vor dem ersten Aufbau Ihres Kites:
Warnungen:
• Kitesurfen kann gefährlich sein.
• Verhalten Sie sich bei der Benutzung dieses Produkts stets extrem vorsichtig.
• Fehlbenutzung kann zu ernsthaften Verletzungen oder dem Tod führen.
• Benutzen Sie dieses Produkt nur mit guter physischer Fitness.
• Handeln Sie niemals verantwortungslos (unkontrollierbare Sprünge oder feste Verbindungen zum Kite)
• Sie sind für Ihre eigene und die Sicherheit aller umstehenden Personen verantwortlich.
• Wenn Sie unter 18 Jahre alt sind, sollten diese Warnungen und Anweisungen von Ihren Eltern oder einer Aufsichtsperson gelesen werden.
 Dieser Naish Kite sollte nur unter genauester Anleitung und Beaufsichtigung gebraucht werden.
• Der Gebrauch dieses Produktes setzt den Benutzer vielfältigen unvermeidbaren und unerwarteten Risiken und Gefahren aus.
• Der Kite ist nicht unter Einfluss von Alkohol, Drogen oder Medikamenten zu benutzen.

Wichtige Sicherheitsregeln:

                                                                                                                                                         Deutsch
• Dieses Produkt ist keine Auftriebshilfe. Tragen Sie stets eine CE geprüfte Rettungsweste, wenn Sie dieses Produkt in der Nähe des Wassers
 benutzen.
• Starten und Landen Sie den Kite grundsätzlich mit einem Helfer.
• Lernen Sie die Handhabung eines kleinen Zweileinen Kites bevor Sie diesen Kite einsetzen.
• Gestatten Sie niemals jemandem, der nicht über entsprechende Fähigkeitenverfügt, die Nutzung dieses Produkts.
• Benutzen Sie stets eine SicherungUniversaline. Ein herrenloser Kite ist eine extreme Gefahr für jede Person in der Umgebung.
• Die SicherungUniversaline ist keine dauerhafte Verbindung zum Kite. Verbinden Sie sich nie fest mit dem Kite oder einer seiner Komponenten.
• Tragen Sie stets einen Helm, Handschuhe und eine Schutzbrille bei der Nutzung dieses Produkts.
• Nutzen Sie stets ein hochwertiges, kitespezifisches Trapez.
• Lassen Sie sich durch eine lizenzierte Kiteschule einweisen. Versuchen Sie nicht den Kite ohne eine entsprechende Ausbildung einzusetzen.
• Machen Sie sich eingehend mit den Schnellabwurfsystemen des Kites vertraut indem Sie diese in gefahrlosen Situationen testen.
• Spülen Sie die Schnellabwurfsysteme nach jeder Nutzung mit Süsswasser. Diese Systeme haben eine begrenzte Lebensdauer und müssen
 regelmäßig überprüft und ausgetauscht werden.
• Der Schnellabwurf Chickenloop und die SicherungUniversaline müssen spätestens nach 250 h Einsatz getauscht werden. Tauschen Sie bei
 Abnützungserscheinungen diese unbedingt vorher. Diese Abnutzungserscheinungen sind nicht Teil der Garantie.

Wählen Sie sichere Wetterbedingungen:
• Lernen Sie den Einsatz dieses Kites niemals bei mehr als 3 Windstärken.
• Nutzen Sie das Produkt niemals bei Starkwind.
• Nutzen Sie dieses Produkt niemals während eines Gewitters.
• Nutzen Sie dieses Produkt nur, wenn Sie sich in einer sicheren Standposition halten können.
• Nutzen Sie dieses Produkt nur in Ihrem Können entsprechenden Bedingungen.
• Nutzen Sie dieses Produkt niemals bei ablandigen Windbedingungen.

Wählen Sie einen sicheren Ort:
• Beachten Sie stets örtliche Regeln und Vorschriften beim Einsatz dieses Produkts.
• Nutzen Sie dieses Produkt niemals im Bereich von Stromleitungen, Telefonmasten, Bäumen, Büschen, Straßen, Fahrzeugen oder Flughäfen.
• Nutzen Sie den Kite nur, wenn Sie 100 Meter freien Raum in Richtung in die der Wind weht und zu beiden Seiten von Ihrer Startposition haben.
 Die Kraft des Kites kann Sie unerwartet und mit großer Kraft davonziehen.
• Fliegen Sie den Kite nicht über andere Personen oder Tiere. Zuschauer sollten sich in Luv von Ihnen aufhalten.
• Setzen Sie den Kite niemals an überfüllten Stränden oder Feldern ein.
• Nutzen Sie den Kite nicht in Wassernähe, wenn Sie nicht schwimmen können und nicht über gute physische Gesundheit verfügen.
• Üben Sie Start- und Landetechniken und Selbstrettungsmethoden bevor Sie den Kite in Wassernähe einsetzen.

Gehen Sie vorsichtig mit Flugleinen um:
• Berühren Sie niemals die Flugleinen während der Kite benutzt wird. Unter Spannung stehende Flugleinen sind extrem gefährlich und können
 ernsthafte Verletzungen oder den Tod verursachen.
• Nutzen Sie niemals verschlissene Leinen. Eine reißende Leine kann ernsthafte Verletzungen oder den Tod verursachen.
• Überprüfen Sie die Leinen stets auf Knoten. Knoten reduzieren die Haltbarkeit der Leinen extrem.
• Halten Sie sich von verwickelten Leinen fern bis der Kite am Boden gesichert ist. Ein nicht gesicherter Kite kann selbstständig starten und zur
 ernsthaften Gefahr werden.
• Verhindern Sie unbedingt, dass Sie selbst oder irgendjemand anderes zwischen die Lenkstange und den Kite gerät während dieser im Einsatz
 ist.

                                                                                                                               naishkites.com       21
3. MONTAGE VON BAR & LEINEN
The Shift System Zeichnung des kompletten Systems
M J M
L
F O G I
H
F G
A K
E P
C
D
O
B H
Ihr neues Shift System bzw, Ihre Vier-Leiner-Bar werden komplett
montiert und startbereit geliefert. Unten finden Sie ein Diagram mit A
allen Einzelteilen und deren jeweiliger Funktion.
B
DEP
OW
ER
A. 2010 Control Bar
B. Shift Leash mit Schnellauslösung (Quick Release)
C. Shift Leash Befestigungsschlaufe
D. Drehen des Chicken Finger
E. Quick Release Smart Loop (QRSL)
F. Linke rote Steuerleine M M
G. Rechte blaue Steuerleine
H. Shift Leine - rote Spectra Leine
I. Shift Line Red Bungee
J. Shift Leine (gelb)
K. Am Adjuster beginnende Mittelleine, die in Y-Form an die
Anküpfpunkte weiterläuft L
L. Verbinder von dem die grauen Depowerleinen an die Anknüpfpunkte
am Schirm geführt werden
M. Graue Depowerleinen- Verbindung mit der Fronttube des Kites
N. Shift VerlängerungUniversaline- die Länge nur dieser Leine variert in
G
Abhängigkeit des Kites. N
O. Stopper
P. Smart Loop Trim Line
22 naishkites.com3. MONTAGE VON BAR & LEINEN
The Universal System Aufzeichnung eines vollständigen Uni-
versal Control System Diagramms
H
C
I I
A B
Deutsch
J K K J
F
D
G E
L M M N
Das neue Universal Control System wird fertig für den Gebrauch aus-
geliefert (Plug and Play). Die Bar kann direkt ausgerollt und an den Kite
angeknüpft werden.In dem folgendem Diagramm wird gezeigt, welche
Funktionen die Leinen haben.
P
A. Linke rote Steuerleine
B. Rechte blaue Steuerleine
C. Pulley Assembly C
D. Leash Attachment Loop
E. Smart Loop Trim Line
F. Druckstopper A B
G. Schnellauslöser mit Chickenloop und Arretierung (QRSL. Quick-
Release-Smart-Loop)
H. Kite
I. Waageleinen F
J. Anknüpfpunkte für die Steuerleinen (hinten)
K. Anknüpfpunkte für die Frontleinen (vorne)
L. Linke rote Steuerleine
M. Vordere graue Kontrollleine DEP
OWE
N. Rechte blaue Steuerleine
R
O. Leash mit Quick Release O
P. 4 Ring Piece
naishkites.com 233. MONTAGE VON BAR & LEINEN
Montage des Shift Systems
Vorbereitung:
Bild 1- Positionieren Sie den Sigma Kite am Strand, wobei die zweite
Quertube einer Seite direkt in den Wind zeigt. Beschweren Sie das
Tuch zwischen der zweiten und dritten Quertube mit Sand. Versichern
Sie sich, dass die Leinen weder verdreht, verknotet noch irgendwie
beschädigt sind.
Verbinden von Shift System Bar & Leinen und
dem Kite:
Legen Sie den Kite ca. 5m vor dem Ende der Leinen auf die Leinen.
Bild 2- Verbinden Sie die grauen Flugleinen mit den Anknüpfpunkten an
der Fronttube.
Bild 3- Führen Sie Steuerleinen von außen an den Kite und knüpfen
1
Sie zuerst die rote und blaue Leine an die entsprechenden roten und
blauen Anknüpfpunkte.
Bilder 4 & 5- Versichern Sie sich, dass alle Leinen korrekt verbun-
den sind und entfernen Sie jegliche Verdrehungen aus den Leinen.
Besonders an der Shift Leine und der Gummileine mit dem Y-Verbinder
sind Verdrehungen schwer zu sehen. Prüfen Sie diesen Bereich
besonders gründlich. Nutzen Sie Schnellverbinder, um eventuelle
Verwindungen aus einzelnen Leinen zu entfernen. Achten Sie auch
auf Verwindungen der Shift Leine um die Flugleinen oberhalb des
Y-Verbinders. Auch hier empfiehlt es sich die Schnellverbinder kurz zu
lösen, die Verdrehung zu beseitigen und wieder zu verbinden.
Befestigung der Shift Extension Leine:
Bild 6- Am anderen Ende der Shift VerlängerungUniversaline befinden 2 3
sich drei Knoten. Der mittlere Knoten wird bei der ersten Montage mit
völlig neuen Leinen verwendet. Verbinden Sie Schlaufe der gelben Shift
Leine wie gewohnt oberhalb einer der Knoten. Hinweis: (Mit der Zeit
können sich die Leinen am Kite dehnen, so dass ein anderer Knoten
als der anfänglich verwendete genutzt werden sollte, um dies zu
kompensieren.)
Wichtige Hinweise zur Pflege/Wartung des
/Shift Systems:
Unter Umständen dehnen sich die Steuerleinen und die Shift Leine ver-
schieden stark. Daher sollte besonders in der Anfangszeit die richtige
Länge der Shift Leine ständig beobachtet werden. Sollte der Durchhang
der Leine zunehmen, kann diese durch die Wahl eines anderen Knotens
verkürzt und dem Kite somit wieder die optimale Performance geben 4 5
werden. Der Effekt verschiedener Leinenlängen kann sichtbar gemacht
werden, indem Sie an der roten Kugel am QRTL ziehen. Die Form der
Fronttube sollte in keinem Fall flach gezogen werden. Korrekturen
können durch die Wahl verschiedener Knotenpositionen an der Shift
VerlaengerungUniversaline oder an der Bar direkt gemacht werden.
Siehe auch Seite 30 - Feintuning der Shift Bar. Überprüfen Sie alle Leinen
und Einzelteile kontinuierlich auf eventuelle Abnutzungen.
6
24 naishkites.com3. MONTAGE VON BAR & LEINEN
Vorbereitung des Universal Control Systems
Vorbereitung:
Bild 1- Positioniere deinen Sigma Kite am Strand, wobei die zweite Quer-
tube einer Seite direkt in den Wind zeigt. Beschwere das Tuch zwischen
der zweiten und dritten Quertube mit Sand. Versichern Sie sich, dass die
Leinen weder verdreht, verknotet noch irgendwie beschädigt sind.
1
Deutsch
Erst dann können die Leinen verknüpft werden:
Bild 2- Die Steuerleinen liegen außen vom Kite. Knüpfen Sie die rote und
die blaue Steuerleine an die hinteren Waageleinen- Anknüpfpunkte an.
Die graue Kontrollleine liegt mittig vom Kite. Sie wird an den vorderen
Waageleinen angeknüpft. Hierfür benutzen Sie den vorderen Anknüp-
fungspunkt. Es muss auch hier gewährleistet sein, dass die rechte und
linke Vorderleine parallel geradeliegend nebeneinander geordnet sind.
Knüpfen Sie auch die vorderen Steuerleinen an den vorderen Waage-
leinen an. Bevor die Leinen angeknüpft werden, muss darauf geachtet
werden, dass die Waageleinen frei von Drehern und Verknotungen
sind. Es muss sichergestellt werden, dass alle Umlenkrollen der Bar
sowie die der Waageleinen einwandfrei funktionieren. 2
Narrensichere Flugleinen:
Naish Kites sind speziell mit Flugleinenverbinder ausgestattet, die das
falsche Verbinden der Flugleinen unmöglich machen. Das Diagramm
zeigt Ihnen wie dies funktioniert. Die Leinen-Anknüpfverbinder sind
sehr leicht zu handhaben. Ziehen Sie an den schwarzen Laschen, um
die Leinen nach dem Kiten leicht zu lösen.
DEPOWE
R
naishkites.com 253. MONTAGE VON BAR & LEINEN
Chicken Finger & Stopper
Verbinden der Arretierung mit dem Trapezhaken:
Das Universal Control System ist mit einer Arretierung versehen, die
das versehentliche Aushaken verhindert. Bevor Sie sich fest mit der
Arretierung einhaken, überprüfen Sie den richtigen Aufbau der Bar und
der Verknüpfungen der Leinen mit dem Kite.
1- Arretierung durch den Haken einfädeln.
2- Der Chickenloop und die Arretierung müssen in die gleiche Richtung
zeigen.
Zum Aushaken des Chickenloop müssen Sie die Arretierung aus dem
Haken ziehen. Erst dann können Sie sich aushaken. Sie haben auch die
Möglichkeit den Schnellauslöser zu betätigen, um sich von dem Kite zu
lösen. Wie beschrieben auf Seite 28.
1 2
Drehen des Chicken Finger:
Seien Sie sich bewusst, dass die Nutzung dieses Gegenstandes Grund
für ernsthafte Verletzungen oder den Tod sein kann. Mit installiertem
Drehen des Chicken Finger muss der Quick Release Trim Loop aktiviert
werden, um sich vom Kite zu trennen. Nur fortgeschrittenen Kitern
ist der Gebrauch zu empfehlen. Benutzen Sie Drehen des Chicken
Finger nur, auf dem Wasser und in sicherer Entfernung von jeglichen
Hindernissen. Kehren Sie NIEMALS mit installiertem Drehen des Chicken
Finger zum Strand zurück. Um es zu nutzen, montieren Sie es, wie
auf dem Bild zu sehen, an Ihrem Trapezhaken, so dass es ohne Druck
nicht abfällt.
Hinweis: Druck durch den QRTL kann dazu führen, das sich Da Tickler
unter Umständen ungewollt aushakt.
Anpassung der Power des Kites:
• Um deinen Kite zu depowern zieh die Trimmleine, unterhalb des QRTL,
um die gewünschte Länge hinunter, und befestige die Leine wieder in
der Klemme.
• Um den Kite anzupowern, ziehe die Trimmleine hinunter, um sie aus
der Klemme zu lösen. Gib der Leine um die gewünschte Länge nach
und befestige sie dann wieder in der Klemme.
• Die Trimmleine nur am unteren schwarzen Ball angreifen.
Trim Line
26 naishkites.com4. AUFBAU DES KITES
Aufblasen von Kites mit Standard System:
Nutzen Sie stets die SicherungUniversaline der Pumpe, um den Kite zu
sichern. Pumpen Sie zuerst die Quertubes, dann die Fronttube auf.
Mit Octopus System ausgerüstete Kites:
• Schließen Sie alle Quertube Ventile
• Schließen Sie das Ablassventil an der Fronttube.
• Pumpen Sie den Kite am entsprechende Ventil an der Fronttube auf.
• Pumpen Sie den Kite stramm und fest auf.
• Schließen Sie das Ventil und sichern es mit Klett und Gummiband.
Ablassen der Luft bei einem Kite mit Octopus
System:
Deutsch
• Öffnen Sie alle Quertube Ventile.
• Öffnen Sie das Ablassventil an der Fronttube. Das war`s.
Aufpumpdruck:
Kleinere Kites benötigen einen größeren Druck, um Ihre Form zu halten.
Naish rät zur Verwendung unserer Elektopumpe “The Inflator”. Diese
Pumpen verfügen über einen integrierten Druckbegrenzer, der den
Pumpvorgang abbricht, wenn der eingestellte Druck erreicht wird.
Empfohlene Maximaldrücke finden Sie unten.
• 6 bis 10 qm Kites benötigen einen Maximaldruck von 8 psi oder 55mPa
• 12 bis 14 qm Kites benötigen einen Maximaldruck von 7 psi oder
50mPa
• 16 bis 20qm Kites benötigen einen Maximaldruck von 6 psi oder
40mPa
• Pumpen Sie den Kite stets mit entsprechender Vorsicht auf.
Hinweis: Zu starkes Aufpumpen kann zur Beschädigung des internen
Schlauchs führen.
5. SICHERHEIT
Release of Power:
Wenn man sich vom Kite aushaken möchte, ist die erste Möglichkeit, den Trimm Loop auszuhaken und die Bar loszulassen. Falls das nicht möglich
sein sollte, muss der QRTL gelöst werden. Der Kite wird inklusive einer Leash geliefert, die die Frontleinen (oberhalb des Adjuster Strap) mit dem
Trapez befestigt. Beim Aushaken bleibt der Kite damit mit dem Kiter verbunden, ohne jedoch noch Power im Kite zu haben. Falls der Kite den Kiter aus
irgendeinem Grund durch das Wasser schleift, kann man sich selbst von der Leash mit dem Quick Release am Ende der Leash trennen.
*Achtung: Man sollte sich unbedingt mit allen Auslösemechanismen vertraut machen – sie sollten immer gut gewartet werden und funktionieren.
Es ist ratsam, das Auslösen mehrmals „zu üben“. Jeder Kiter sollte in der Lage sein, sämtliche Auslösemöglichkeiten anzuwenden, ohne auch nur
eine Sekunde darüber nachdenken zu müssen.
In dem Fall, dass Sie den Kite alleine ohne Helfer landen möchten, reißen Sie den roten Griff über die Zugeinstellungsschlaufe. Hangeln Sie sich an
der Leine entlang, bis Sie den Kite erreichen. Gehen Sie sicher, dass Sie frei von anderen Leinen stehen, um einen ungewollten Restart des Kites zu
vermeiden.
Das Gleiche gilt für die Selbstrettung des Kites auf dem Wasser. Überprüfen Sie regelmäßig den QRTL auf Funktionsfähigkeit. Lösen Sie sich zur
Übung an Land von Ihrem Chickenloop, um sich für den Fall einer Notsituation mit der Funktion vertraut zu machen.
naishkites.com 27You can also read