O USER MANUAL - GPO Retro
←
→
Page content transcription
If your browser does not render page correctly, please read the page content below
e l l R a d io
                                  Ryd
                                      USER MANUAL

                                          V3 UPDATED SEPT 2021

                                                                   1

GPO_Rydell_DAB_EU_Manual_JSEPT_2021_V3.indd 1                    30/09/2021 14:17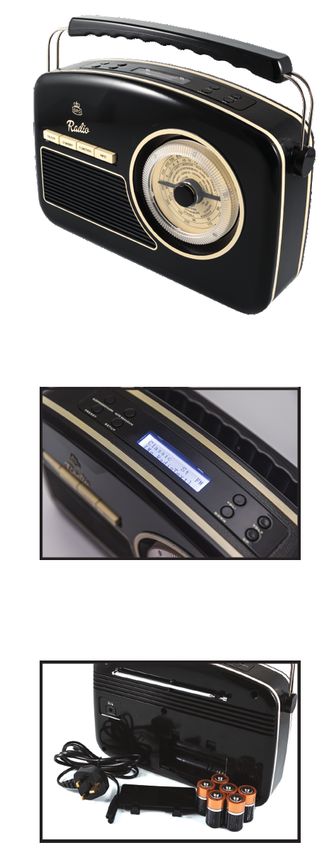
Content

                English...................................................................................... 13
                English                                                                                                           Th
                                                                                                                                  th
                                                                                                                                  fo
                German................................................................................... 10
                German                                                                                     13

                French .................................................................................... 20
                French                                                                                       25

                Spanish................................................................................... 30
                Dutch                                                                                       37
                                                                                                                                  1
                                                                                                                                  1
                Spanish                                                                                       49
                Dutch ...................................................................................... 40                   1

                                                                                                                                  Re
                                                                                                                                  su

            2

GPO_Rydell_DAB_EU_Manual_JSEPT_2021_V3.indd 2                                                                      30/09/2021 14:17
Introduction
Thanks for purchasing this product from ProtelX. Please read
the instructions carefully before use and store in a safe place
for future reference.
What’s in the box
1 x GPO Rydell DAB Radio
1 x Power Supply Unit
1 x User Manual
Unpacking
Remove packing material and set the unit on a flat, supportive
surface. Make sure to remove additional items from packaging.
3
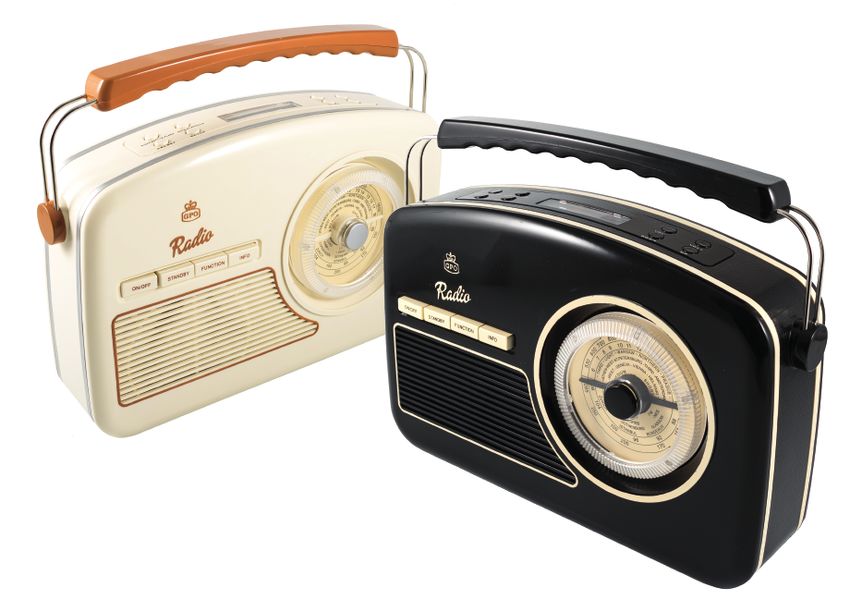
GPO_Rydell_DAB_EU_Manual_JSEPT_2021_V3.indd 3 30/09/2021 14:17Location of Controls
O
A On/off Button
A In
B Standby Button B lo
C
C Function Button O
D
1.
D Info Button
2.
E Sleep/snooze/alarm Button 3.
F Auto Scan/enter Button E F M
No
Ch
G Vol- Button L
re
H Vol+ Button K ex
co
G
I Tune Up Button
H BA
J Tune Down Button Ke
K Setup Button J I
In
pr
L Preset Button N
pr
M Display
O Re
ba
N Antenna tim
O Power Cord Socket Ne
he
P Battery Compartment
P
4
GPO_Rydell_DAB_EU_Manual_JSEPT_2021_V3.indd 4 30/09/2021 14:17Operation Instructions
OPERATING THE UNIT WITH POWER CORD
Insert one end at the supplied power cord to the DC 9V IN Jack
located at the rear of the unit and the other end into the wall socket.
OPERATING THE UNIT ON BATTERIES
1. To play your unit on batteries, the power cord must be disconnected
from the player.
2. Unplug the power cord from the unit and insert 6 size “C” batteries
(not provided) in the compartment.
3. Close the battery compartment door.
Note:
Check your batteries regularly. Old or discharged batteries should be
replaced. If the unit is not to be used for some time or is being run
exclusively on AC electrical current, remove batteries from the battery
compartment to avoid leakage.
G
H BATTERY SAFETY PRECAUTIONS:
Keep batteries away from children and pets.
Insert the batteries observing the proper polarity (+/-). Failure to
properly align the battery polarity can cause personal injury and/or
property damage.
Remove old or discharged batteries from the product. Remove the
batteries when the product will not be used for extended periods of
time to prevent damage due to rusted or corroded batteries
Never throw batteries into a fire, do not expose batteries to fire or other
heat sources
5
GPO_Rydell_DAB_EU_Manual_JSEPT_2021_V3.indd 5 30/09/2021 14:18Battery Disposal: Pr
Old or discharged batteries must be properly disposed of and recycled Re
in compliance with all applicable laws.
Th
OPERATION
Press the ON/OFF button to turn on the power supply. Press the M
STANDBY button to the turn ON/OFF the unit. Re
1)
IN DAB MODE
1. In power on mode, Press the STANDBY button to select DAB 2)
radio mode
Auto select : Press the AUTO-SCAN/ENTER button, “Scanning” IN
will show on the display, and the number of DAB stations will A.
shown on the upper right corner, and it will automatically play the
first station. Pressing UP/DOWN button to choose the next or Sh
previous station., short press AUTO-SCAN/ENTER button to th
confirm selection. 1.
Di
IN FM MODE
1. Press the FUNCTION button to select FM radio mode, Press the AUTO Di
SCAN/ENTER button, when a radio is found, the frequency on display 3.
will stop running and start playback automatically.
2. If reception is no good, Press the UP/DOWN button to fine tune. FM 4.
radio presetting is same as DAB radio presetting
5.
PRESET TUNING
1. Tune to your desired station according to the normal tuning procedure. 6.
2. Long press the PRESET button untill "Preset 1 empty" appears, then 7.
press DOWN/UP button to change the number where the station will
be stored.
(Preset 1 to Preset 10)
3. Store the current frequency by pressing and holding AUTO SCAN Th
/ENTER button again when you get the desired number. bo
4. Repeat the same procedure to set other desired frequencies into
Memory
6
GPO_Rydell_DAB_EU_Manual_JSEPT_2021_V3.indd 6 30/09/2021 14:18Preset 1 to Preset 10
ed Remarks: A stored frequency can only be erased by storing another
frequency in its place.
The unit can be preset up to 10 stations.
MEMORY RECALL
Recall the stored frequencies
1) Short press PRESET button, then press DOWN/UP button to change
the number where the station has been stored. (Preset 1 to Preset 10)
2) Short press AUTO SCAN /ENTER button again to confirm.
INFO Button
A. The UNIT has DAB information modes which are shown on the
e bottom line of the display.
Short Press
the INFO key to see the available types.
1. program type
Displays the type of station content being broadcast e.g. Classic, Pop,
News, etc. 2.Ensemble Freq.
AUTO Displays the DAB station frequency such as 13F 239.200MHz.
play 3. Audio Bit Rate Displays the data rate in kilo Bits per second and the
audio mode e.g. Stereo.
M 4. Ensemble name Displays the name of the multiplex to which the
Digital1 Network current station belongs
5. Signal strength Displays the signal strength for the station being
listened to.
dure. 6. Time/Date Displays current time and date, received off-air.
hen 7. DLS (Dynamic Link Segment) Scrolling text which includes
will messages such as Artist and track name, phone numbers, program
details, etc.
The UNIT has six FM information modes which are shown on the
bottom line of the display.
7
GPO_Rydell_DAB_EU_Manual_JSEPT_2021_V3.indd 7 30/09/2021 14:18Short AU
Press the INFO button to see the available types. 3.
1 .PTY (program type)
Displays the type of station content being broadcast e.g. Classic, Pop, 4.
News, etc.
2. Signal strength Displays the signal strength for the station being 5.
listened to.
3. Time and Date Displays current time and date, received off-air.
4. Station frequency Displays the frequency of the station being AL
listened to. 1.
5. Audio mode Displays the current audio mode setting i.e.
Auto(Stereo) or Mono. 2.
6. Radio Text Scrolling text which includes messages such as Artist
and track name, phone numbers, program details, etc. 3.
TIME SETTINGS Manual setting 4.
1. In FM mode, Press the SETUP button until the FM menu is shown.
2. Press the UP/DOWN button to select Main menu and short Press 5.
AUTO SCAN/ENTER to confirm
3. In Main menu. Use the UP/DOWN button to select time setup and 6.
short Press the AUTO SCAN/ENTER to confirm.
4. In Time setup menu , Use the UP/DOWN button to select set clock
and short press the AUTO SCAN/ENTER to confirm No
5. In Set clock menu, the hour begin to flash and you can press
UP/DOWN button to set. Press the AUTO SCAN/ENTER to confirm. AL
6. The minute flashes and can now be set, and then short Press AUTO 1.
SCAN/ENTER button to confirm.
Note: In time setup menu, you can set clock,date,auto update,12/24 2.
hour following the same operation.
3.
Automatical setting
1. In DAB mode, Press the SETUP button until the DAB menu is 4.
shown.
2. Press the UP/DOWN button to select Main menu and short Press 5.
8
GPO_Rydell_DAB_EU_Manual_JSEPT_2021_V3.indd 8 30/09/2021 14:18AUTO SCAN/ENTER to confirm
3. In Main menu. Use the UP/DOWN button to select time setup and
short Press the AUTO SCAN/ENTER to confirm.
p, 4. In Time setup menu , Use the UP/DOWN button to select Auto
update and short press the AUTO SCAN/ENTER to confirm
5. In Auto update menu, use the UP/DOWN button to select from radio.
ALARM 1 SETTINGS
1. In FM or DAB mode, Press the SLEEP/SNOOZE/ALARM button until
the Alarms menu is shown.
2. Press the UP/DOWN button to select alarm1 and short Press AUTO
SCAN/ENTER to confirm
3. In alarm detail menu. Use the UP/DOWN button to select time and
short Press the AUTO SCAN/ENTER button to confirm.
4. The hour begin to flash and you can press UP/DOWN button to set.
. Press the AUTO SCAN/ENTER to confirm.
5. The minute flashes and can now be set, and then short Press AUTO
SCAN/ENTER button to confirm.
6. Back to alarm detail menu. Use the UP/DOWN button to select save
and press the AUTO SCAN/ENTER to make the alarm setting is
k active.
Note: turn on the alarm1 function in the alarm detail menu.
m. ALARM 2 SETTINGS
TO 1. In FM or DAB mode, Press the SLEEP/SNOOZE/ALARM button until
the Alarms menu is shown.
2. Press the UP/DOWN button to select alarm2 and short Press AUTO
SCAN/ENTER to confirm
3. In alarm detail menu. Use the UP/DOWN button to select time and
short Press the AUTO SCAN/ENTER button to confirm.
4. The hour begin to flash and you can press UP/DOWN button to set.
Press the AUTO SCAN/ENTER to confirm.
5. The minute flashes and can now be set, and then short Press AUTO
9
GPO_Rydell_DAB_EU_Manual_JSEPT_2021_V3.indd 9 30/09/2021 14:18SCAN/ENTER button to confirm. CA
6. Back to alarm detail menu. Use the UP/DOWN button to select save 1.
and press the AUTO
SCAN/ENTER to make the alarm setting is active. 2.
Note: turn on the alarm1 function in the alarm detail menu.
Note: In alarm detail menu, you can set other alarm functions such as
alarm Off,alarm time,alarm Days,alarm Mode,alarm Last
listened,alarm,volume & alarm Save. SY
Sy
SHUT OFF CANCEL Al
To cancel the Alarm when it has activated. Press STANDBY button to di
stop the alarm sound, the alarm will reset for next day. m
1.
TO TURN OFF THE ALARM COMPLETELY
Short Press the SLEEP/SNOOZE/ALARM button the press AUTO
SCAN/ENTER button repeatedly until to enter Alarm detail settings 2.
mode, PRESS the UP/DOWN button to select alarm OFF then Press
AUTO SCAN/ENTER button to confirm.
3.
SNOOZE FUNCTION
When the Alarm activates, Press the SLEEP/SNOOZE/ALARM button.
Then the alarm will turn off and will ring again 5 minutes later.
SET THE SLEEP TIMER
1. With the UNIT switched ON and playing any of the inputs i.e. DAB or
FM , Press and hold the SLEEP/SNOOZE/ALARM button until the
Sleep menu is shown.
2. The minutes are now flashing. Short Press SLEEP button to change
the Sleep time (such as 15mins, 30mins ,45mins, 60mins, 90mins)
3. Available Sleep time is 15 to 90 minutes, in 15 minutes increments.
Set the required time and short Press AUTO SCAN/ENTER button to
confirm.
4. The display will show the settings sleep time on the right upper
corner. The UNIT plays for the selected time and then switches to
Standby.
10
GPO_Rydell_DAB_EU_Manual_JSEPT_2021_V3.indd 10 30/09/2021 14:18CANCEL SLEEP TIMER
ve 1. With the UNIT switched ON and playing any of the inputs i.e. DAB or
FM, Press and hold the SLEEP/SNOOZE/ALARM button until the
Sleep menu is shown.
2. The minutes are now flashing. Short Press SLEEP/SNOOZE/ALARM
button to change the Sleep time to OFF and press AUTO
s SCAN/ENTER button to confirm.
SYSTEM RESET
System Reset can be used to clear the station list, the presets and all
Alarm and Sleep settings. This is useful if you move the UNIT to a
o different location (when you move house for instance) as some stations
may not be available in the new area.
1. In DAB mode, Press the SETUP button then press UP/DOWN
button to select DAB MAIN MEMU. Press the AUTO SCAN/ENTER
button to confirm.
2. In MAIN MENU setting mode, press UP/DOWN button to select
Factory reset Short and Press the AUTO SCAN/ENTER button 2
times to confirm.
3. The UNIT will now clear the internal memory and automatically start
a quick scan.
n.
or
ge
s.
to
11
GPO_Rydell_DAB_EU_Manual_JSEPT_2021_V3.indd 11 30/09/2021 14:18Product Care
Ventilation - The appliance should be situated so that its location
or position does not interfere with its proper ventilation. For
example, the appliance should not be situated on a bed, sofa, rug
or similar surface that may block the ventilation openings, or placed
in a built-in installation, such as a bookcase or cabinet, that may
impede the flow of air through the ventilation openings.
Heat - The appliance should be situated away from heat sources
such as radiators, heat registers, stoves, or other appliances
(including amplifiers) that produce heat.
Power Sources - The product should be operated only with the
type of power supply indicated on the marking label. If you are not
sure of the type of power supply to your home, consult your
product dealer or local power company. For products intended to
operate from battery power, or other sources, refer to the operating
instructions.
Product Support
Looking for more help? Visit www.gporetro.com. For your personal
safety, do not attempt to open the device.
There are no serviceable parts inside and the warranty is void if the
device is opened.
12
GPO_Rydell_DAB_EU_Manual_JSEPT_2021_V3.indd 12 30/09/2021 14:18German
n
g
ced
ot
o
ng
nal
he
13
GPO_Rydell_DAB_EU_Manual_JSEPT_2021_V3.indd 13 30/09/2021 14:18Vi
Pr
Be
sp
1
1
1
En
au
de
14
GPO_Rydell_DAB_EU_Manual_JSEPT_2021_V3.indd 14 30/09/2021 14:18Einführung
Vielen Dank, dass Sie sich für den Kauf dieses Produktes von
ProtelX entschieden haben. Bitte lesen Sie sich die
Bedienungsanleitung sorgfältig durch und bewahren Sie sie zum
späteren Nachlesen an einem sicheren Ort auf.
Packungsinhalt
1 x GPO Rydell DAB Radio
1 x Netzgerät
1 x Bedienungsanleitung
Auspacken
Entfernen Sie alle Verpackungsmaterialien und stellen Sie das Gerät
auf eine ebene, feste Fläche. Entnehmen Sie alle Zubehörteile aus
der Verpackung.
15
GPO_Rydell_DAB_EU_Manual_JSEPT_2021_V3.indd 15 30/09/2021 14:18Anschlüsse und Bedienungselemente
BE
A Ein-/Ausschalter St
A DC
B Standby-Taste B St
C
C Funktionstaste BE
D
1.
D Info-Taste
2.
Taste fürE Schlaf-/Schlummer-/Weckfunktion
Taste für Schlaf-/Schlummer-/Weckfunktion
3.
Auto-Scan/Enter-Taste
F Auto-Scan/Enter-Taste E F M
Lautstärke-reduzieren-Taste
G Lautstärke-reduzieren-Taste Hi
L
Üb
Lautstärke-erhöhen-Taste
H Lautstärke-erhöhen-Taste K Ba
od
G
Senderwahl-vorwärts-Taste
I Senderwahl-vorwärts-Taste Ba
H ve
Senderwahl-rückwärts-Taste
J Senderwahl-rückwärts-Taste
Setup-Taste SI
K Setup-Taste J I
Ba
Preset-Taste
L Preset-Taste N
Be
DisplayM Display Ei
O fü
AntenneN Antenne Al
lä
Netzkabelanschluss
O Netzkabelanschluss en
ve
Batteriefach
P Batteriefach
P Ba
Hi
16
GPO_Rydell_DAB_EU_Manual_JSEPT_2021_V3.indd 16 30/09/2021 14:18Bedienungshinweise
BETRIEB DES GERÄTS ÜBER NETZSTROM
Stecken Sie ein Ende des mitgelieferten Netzkabels in die
DC-9V-Buchse an der Geräterückseite, das andere Ende in eine
Steckdose.
BETRIEB DES GERÄTS ÜBER BATTERIEN
1. Um das Gerät über Batterien betreiben zu können, muss das
Netzkabel aus dem Radio herausgezogen sein.
2. Ziehen Sie das Netzkabel aus dem Gerät heraus und setzen Sie 6
Stück 1,5-Volt-Batterien (Größe C) (nicht im Lieferumfang enthalten)
in das Batteriefach ein.
3. Schließen Sie das Batteriefach.
Hinweis:
Überprüfen Sie regelmäßig die Batterien. Alte oder verbrauchte
Batterien sind zu ersetzen. Wenn das Gerät längere Zeit nicht benutzt
oder ausschließlich über Netzstrom betrieben wird, nehmen Sie die
G
Batterien aus dem Batteriefach, um ein Auslaufen der Batterien zu
H vermeiden.
SICHERHEITSHINWEISE ZU BATTERIEN
Batterien für Kinder und Haustiere unzugänglich aufbewahren.
Beim Einlegen der Batterien auf die Polarität (+/-) achten. Falsches
Einlegen der Batterien kann zu Personen- und/oder Sachschäden
führen.
Alte und verbrauchte Batterien aus dem Gerät herausnehmen. Bei
längerem Nichtgebrauch des Geräts die Batterien aus dem Gerät
entfernen, um Schäden durch verrostete oder korrodierte Batterien zu
vermeiden.
Batterien nicht ins Feuer werfen und weder Feuer noch anderen
Hitzequeln aussetzen.
17
GPO_Rydell_DAB_EU_Manual_JSEPT_2021_V3.indd 17 30/09/2021 14:18Entsorgung von Batterien: 3.
Alte oder verbrauchte Batterien sind ordnungsgemäß zu entsorgen und
in Übereinstimmung mit den geltenden Vorschriften zu recyceln.
4.
BETRIEB
Drücken Sie die EIN-/AUS-Taste, um die Stromversorgung des Geräts Pr
einzuschalten. Drücken Sie die STANDBY-Taste, um das Gerät ein- Hi
bzw. auszuschalten.
Da
DAB-MODUS
1. Drücken Sie bei eingeschaltetem Gerät die STANDBY-Taste, um den SP
DAB-Modus für das Radio auszuwählen. Ab
1)
Automatische Sendersuchfunktion: Drücken Sie die
AUTO-SCAN/ENTER-Taste. Auf dem Display erscheint die Anzeige
„Scanning“. In der rechten oberen Ecke wird die Anzahl der verfüg- 2)
baren DAB-Sender angezeigt, und das Gerät stellt automatisch den
ersten Sender ein. Drücken Sie die UP/DOWN-Taste zur Auswahl des
nächsten oder vorherigen Senders. Drücken Sie einmal kurz auf die IN
Taste AUTO-SCAN/ENTER, um die Auswahl zu bestätigen. A.
FM-MODUS Dr
1. Drücken Sie die Taste FUNCTION und wählen Sie den FM-Modus
für das Radio aus. Drücken Sie die Taste AUTO SCAN/ENTER. 1.
Sobald eine Radiostation gefunden ist, stoppt der Frequenzlauf auf
dem Display und der Sender wird automatisch wiedergegeben. 2.
2. Wenn der Empfang schlecht ist, können Sie über die Taste
UP/DOWN die Frequenz genau abstimmen. Die Senderprogrammi- 3.
erung im FM-Bereich ist gleich wie die Senderprogrammierung im
DAB-Modus 4.
ABSTIMMUNG DER VOREINSTELLUNGEN 5.
1. Stellen Sie den gewünschten Sender mit dem normalen Abstim-
mungsverfahren ein. 6.
2. Halten Sie die PRESET-Taste gedrückt, bis "Preset 1 leer" erscheint,
und drücken Sie dann die AUF/AB-Taste, um die Nummer zu 7.
ändern, unter der der Sender gespeichert werden soll.
(Preset 1 bis Preset 10)
18
GPO_Rydell_DAB_EU_Manual_JSEPT_2021_V3.indd 18 30/09/2021 14:183. Speichern Sie die aktuelle Frequenz, indem Sie die AUTO-SCAN /
nd EINGABE-Taste erneut drücken und gedrückt halten, wenn Sie die
gewünschte Nummer erreicht haben.
4. Wiederholen Sie den Vorgang, um weitere gewünschte Frequenzen
zu speichern.
ts Preset 1 bis Preset 10
Hinweise: Eine gespeicherte Frequenz kann nur gelöscht werden,
indem eine andere Frequenz an ihrer Stelle gespeichert wird.
Das Gerät kann auf 10 Sender voreingestellt werden.
en SPEICHERABRUF
Abruf gespeicherter Frequenzen
1) Drücken Sie kurz auf die PRESET-Taste und dann auf die
AUF/AB-Taste, um die Nummer zu ändern, unter der der Sender
gespeichert wurde. (Preset 1 bis Preset 10)
2) Drücken Sie zur Bestätigung kurz die AUTO-SCAN /
EINGABE-Taste.
s
INFO-Taste
A. Das Gerät verfügt über DA-Informationsmodi, die in der unteren
Zeile des Displays angezeigt werden.
Drücken Sie einmal kurz auf die INFO-Taste. Es werden die verfüg-
s baren Informationsarten angezeigt.
1. Program Type: Zeigt die Art des Senderprogramms an, z. B. Klassik,
uf Pop, Nachrichten usw.
2. Ensemble Freq.: Zeigt die Frequenz der DAB-Senders an, z. B. 13F
239.200 MHz.
i- 3. Audio Bit Rate: Zeigt die Datenübertragsrate in Kilobit pro Sekunde
und den Audio-Modus, z. B. Stereo, an.
4. Ensemble name: Zeigt den Namen des Multiplex an, zu dem der
aktuelle Sender des Digital 1 Network gehört.
5. Signal strength: Zeigt die Signalstärke des wiedergegebenen
Senders an.
6. Time/Date: Anzeige der aktuellen Uhrzeit und des Datums, wie vom
nt, Sender übertragen.
7. DLS (Dynamic Link Segment): Laufender Text mit Informationen wie
Künstler und Musikstück, Telefonnummern, Angaben zum
Programm usw.
19
GPO_Rydell_DAB_EU_Manual_JSEPT_2021_V3.indd 19 30/09/2021 14:18de
Das Gerät verfügt über sechs FM-Informationsmodi, die in der unteren Ze
Zeile des Displays angezeigt werden.
Au
Drücken Sie kurz auf die INFO-Taste. 1.
Es werden die verfügbaren Informationsarten angezeigt.
1. PTY (Program Type): Zeigt die Art des Senderprogramms an, z. B. 2.
Klassik, Pop, Nachrichten usw.
2. Signal strength: Zeigt die Signalstärke des wiedergebebenen 3.
Senders an.
3. Time/Date: Anzeige der aktuellen Uhrzeit und des Datums, wie vom
Sender übertragen. 4.
4. Station Frequency: Zeigt die Frequenz des wiedergegebenen
Senders an.
5. Audio Mode: Zeigt den aktuell eingestellten Audiomodus an, d. h. 5.
Auto (Stereo) oder Mono.
6. Radio Text: Laufender Text mit Informationen wie Künstler und EI
Musikstück, Telefonnummern, Angaben zum Programm usw. 1.
EINSTELLUNG DER UHRZEIT Manuelle Einstellung 2.
1. Drücken Sie im FM-Modus so lange die Taste SETUP, bis das
FM-Menü angezeigt wird. 3.
2. Drücken Sie die UP/DOWN-Taste, wählen Sie „Main Menu“ und
drücken Sie zur Bestätigung kurz auf die Taste AUTO SCAN/ENTER.
3. Im Hauptmenü: Drücken Sie die UP/DOWN-Taste, wählen Sie „Time 4.
Setup“ und drücken Sie zur Bestätigung kurz auf die Taste AUTO
SCAN/ENTER.
4. Drücken Sie im Menü „Time“ die UP/DOWN-Taste, wählen Sie „Set 5.
Clock“ und drücken Sie zur Bestätigung kurz auf die Taste AUTO
SCAN/ENTER.
5. Im Menü „Set Clock“ beginnt die Anzeige für die Stunden zu 6.
blinken. Stellen Sie die Stunde über die Taste UP/DOWN ein.
Drücken Sie zur Bestätigung die Taste AUTO SCAN/ENTER.
6. Als Nächstes blinken die Minuten, die jetzt eingestellt werden Hi
können. Drücken Sie zur Bestätigung anschließend kurz auf die
Taste AUTO SCAN/ENTER.
Hinweis: Im Menü „Time Setup“ K, wählen Sie „Time“ önnen Sie nach EI
1.
20
GPO_Rydell_DAB_EU_Manual_JSEPT_2021_V3.indd 20 30/09/2021 14:18dem gleichen Prinzip Uhrzeit, Datum, automatische Aktualisierung,
en Zeitanzeige im 12/24-Stunden-Format einstellen.
Automatische Einstellung
1. Drücken Sie im DAB-Modus so lange die Taste SETUP, bis das
DAB-Menü angezeigt wird.
. 2. Drücken Sie die UP/DOWN-Taste, wählen Sie „Main Menu“ und
drücken Sie zur Bestätigung kurz auf die Taste AUTO SCAN/ENTER.
3. Im Hauptmenü: Drücken Sie die UP/DOWN-Taste, wählen Sie „Time
Setup“ und drücken Sie zur Bestätigung kurz auf die Taste AUTO
m SCAN/ENTER.
4. Drücken Sie im Menü Time Setup die UP/DOWN-Taste, wählen Sie
„Auto Update“ und drücken Sie zur Bestätigung kurz auf die Taste
AUTO SCAN/ENTER.
5. Drücken Sie im Menü „Auto Update“ die UP/DOWN-Tasten und
wählen Sie „From Radio“ aus.
EINSTELLUNG WECKFUNKTION 1
1. Drücken Sie im FM- oder DAB-Modus so lange die Taste
SLEEP/SNOOZE/ALARM, bis das Menü „Alarms“ angezeigt wird.
2. Drücken Sie die UP/DOWN-Taste, wählen Sie „Alarm 1“ und
drücken Sie zur Bestätigung kurz auf die Taste AUTO SCAN/ENTER.
3. Drücken Sie im Menü „Alarm Detail“ die UP/DOWN-Taste, wählen
Sie „Time“ und drücken Sie zur Bestätigung kurz auf die Taste
ER. AUTO SCAN/ENTER.
me 4. Die Anzeige für die Stunden beginnt zu blinken. Stellen Sie die
Stunde über die Taste UP/DOWN ein. Drücken Sie zur Bestätigung
die Taste AUTO SCAN/ENTER.
et 5. Als Nächstes blinken die Minuten, die jetzt eingestellt werden
können. Drücken Sie zur Bestätigung anschließend kurz auf die
Taste AUTO SCAN/ENTER.
6. Gehen Sie zurück zum Menü „Alarm Detail“. Drücken Sie die
UP/DOWN-Taste, wählen Sie „Save“ und drücken Sie die Taste
AUTO SCAN/ENTER, um die Weckfunktion zu aktivieren.
Hinweis: Schalten Sie die Weckfunktion 1 über das Menü „Alarm
Detail“ ein.
ch EINSTELLUNG WECKFUNKTION 2
1. Drücken Sie im FM- oder DAB-Modus so lange die Taste
21
GPO_Rydell_DAB_EU_Manual_JSEPT_2021_V3.indd 21 30/09/2021 14:18SLEEP/SNOOZE/ALARM, bis das Menü „Alarms“ angezeigt wird. DE
2. Drücken Sie die UP/DOWN-Taste, wählen Sie „Alarm 2“ und 1.
drücken Sie zur Bestätigung kurz auf die Taste AUTO SCAN/ENTER.
3. Drücken Sie im Menü „Alarm Detail“ die UP/DOWN-Taste, wählen
Sie „Time“ und drücken Sie zur Bestätigung kurz auf die Taste 2.
AUTO SCAN/ENTER.
4. Die Anzeige für die Stunden beginnt zu blinken. Stellen Sie die
Stunde über die Taste UP/DOWN ein. Drücken Sie zur Bestätigung 3.
die Taste AUTO SCAN/ENTER.
5. Als Nächstes blinken die Minuten und können jetzt eingestellt
werden. Drücken Sie zur Bestätigung anschließend kurz auf die 4.
Taste AUTO SCAN/ENTER.
6. Gehen Sie zurück zum Menü „Alarm Detail“. Drücken Sie die
UP/DOWN-Taste, wählen Sie „Save“ und drücken Sie die Taste
AUTOSCAN/ENTER, um die Weckfunktion zu aktivieren. EI
1.
Hinweis: Schalten Sie die Weckfunktion 1 über das Menü „Alarm
Detail“ ein.
Hinweis: Im Menü „Alarm Detail“ können Sie andere Weckfunktionen 2.
einstellen, z. B. Weckfunktion ausschalten, Weckzeit, Wecktage,
Weckmodus, Zuletzt verwendeter Wecksender, Lautstärke und Alarm
speichern.
SY
WECKER UND WECKFUNKTION AUSSCHALTEN M
Ausschalten des Weckers, nachdem dieser aktiviert wurde. Drücken ge
Sie zum Ausschalten des Wecktons die Taste STANDBY. Der Weckauf- w
trag wird für den nächsten Tag eingestellt. ve
de
WECKFUNKTION GANZ ABSCHALTEN 1.
Drücken Sie kurz auf die Taste SLEEP/SNOOZE/ALARM. Drücken Sie
anschließend wiederholt auf die Taste AUTO SCAN/ENTER, bis der
Modus Alarm Detail Settings erscheint. Drücken Sie die Taste 2.
UP/DOWN, wählen Sie Alarm OFF und bestätigen Sie Ihre Eingabe
anschließend mit AUTO SCAN/ENTER.
3.
SCHLUMMERFUNKTION
Sobald der Wecker ausgelöst wird, drücken Sie die Taste
SLEEP/SNOOZE/ALARM. Der Wecker 8 wird ausgeschaltet und klingelt
22 5 Minuten später noch einmal.
GPO_Rydell_DAB_EU_Manual_JSEPT_2021_V3.indd 22 30/09/2021 14:18DEN EINSCHLAF-TIMER EINSTELLEN
1. Drücken Sie bei eingeschaltetem Gerät (DAB oder FM) die Taste
ER. SLEEP/SNOOZE/ALARM und halten Sie sie so lange
n niedergedrückt, bis das Menü „Sleep“ angezeigt wird.
2. Die Anzeige für die Minuten beginnt zu blinken. Drücken Sie zum
Einstellen der Einschlafzeit (d. h. 15 Min., 30 Min., 45 Min., 60 Min.,
90 Min.) kurz auf die Taste SLEEP.
g 3. Die verfügbaren Einschlafzeiten reichen von 15 bis 90 Minuten in
Schritten von 15 Minuten. Stellen Sie die gewünschte Zeit ein und
drücken Sie zur Bestätigung kurz auf die Taste AUTO SCAN/ENTER.
4. Das Display zeigt die verbleibende Einschlafzeit in der rechten
oberen Ecke. Das Gerät läuft während der eingestellten Zeit und
schaltet sich dann in Standby-Modus.
EINSCHLAF-TIMER AUSSCHALTEN
1. Drücken Sie bei eingeschaltetem Gerät (DAB oder FM) die Taste
SLEEP/SNOOZE/ALARM und halten Sie sie so lange
niedergedrückt, bis das Menü „Sleep“ angezeigt wird.
n 2. Die Anzeige für die Minuten beginnt zu blinken. Drücken Sie kurz auf
die Taste SLEEP/SNOOZE/ALARM, stellen Sie „Sleep Time“ auf
m OFF und drücken Sie zur Bestätigung auf AUTO SCAN/ENTER.
SYSTEM-RESET
Mit der Funktion System Reset können die Senderliste, die
gespeicherten Sender und alle Weck- und Einschlaffunktionen gelöscht
uf- werden. Dies ist nützlich, wenn Sie das Gerät an einem anderen Ort
verwenden möchten (z. B. wenn Sie umziehen), da manche Sender an
dem neuen Standort möglicherweise nicht verfügbar sind.
1. Drücken Sie im DAB-Modus die Taste SETUP. Drücken Sie so lange
e die Taste UP/DOWN, bis Sie zu DAB MAIN MENU gelangen.
Drücken Sie zur Bestätigung AUTO SCAN/ENTER.
2. Drücken Sie im MAIN MENU die Taste UP/DOWN, wählen Sie
Factory Reset aus und drücken Sie zur Bestätigung zweimal kurz
auf AUTO SCAN/ENTER.
3. Der interne Speicher des Geräts wird gelöscht und das Gerät startet
automatisch mit einem Sendersuchlauf.
lt
23
GPO_Rydell_DAB_EU_Manual_JSEPT_2021_V3.indd 23 30/09/2021 14:18Wartung und Pflege
Luftzirkulation - Das Gerät muss so aufgestellt werden, dass
Standort oder Position die Luftzirkulation nicht beeinträchtigen.
Beispielweise sollte das Gerät nicht auf einem Bett, Sofa, Teppich
oder ähnlichen Oberflächen aufgestellt werden, die die Luftschlitze
blockieren. Ferner sollte das Gerät nicht eingebaut werden, z. B. in
einem Buchregal oder Schrank, da andernfalls die Luft
möglicherweise nicht durch die Luftschlitze zirkulieren kann.
Wärmequellen - Das Gerät darf nicht in der Nähe von
Wärmequellen wie Heizkörpern, Heizregistern, Öfen oder anderen
Wärme produzierenden Geräten (einschließlich Verstärkern)
aufgestellt werden.
Stromquellen - Das Gerät darf nur mit der Stromart versorgt
werden, die auf dem Typenschild angegeben ist. Wenn Sie nicht
sicher sind, welche Art Stromversorgung vor Ort verwendet wird,
fragen Sie Ihren Fachhändler oder das örtliche
Ernergieversorgungsunternehmen. Für Produkte, die mit Batterien
oder anderen Stromquellen betrieben werden, lesen Sie sich bitte
die Bedienungshinweise durch.
Technische Unterstützung
Weitere Informationen erhalten Sie unter www.gporetro.com. Zum
Schutz Ihrer eigenen Person versuchen Sie bitte nicht, das Gerät
zu öffnen.
Dieses Gerät enthält keine vom Benutzer zu wartenden Teile.
Durch Öffnen des Gerätes erlischt die Gewährleistung.
24
GPO_Rydell_DAB_EU_Manual_JSEPT_2021_V3.indd 24 30/09/2021 14:18French
25
GPO_Rydell_DAB_EU_Manual_JSEPT_2021_V3.indd 25 30/09/2021 14:18M
m
po
1
1
1
Re
st
26
GPO_Rydell_DAB_EU_Manual_JSEPT_2021_V3.indd 26 30/09/2021 14:18Introduction
Merci d'avoir acheté ce produit Rydell Radio. Veuillez lire attentive-
ment ces instructions avant l’utilisation, et les conserver en lieu sûr
pour référence ultérieure.
Dans la boîte
1 x Radio DAB GPO Rydell
1 x Alimentation
1 x Guide Utilisateur
Déballage
Retirez l'emballage et placez l'appareil sur une surface plate et
stable. Veillez à retirer tous les accessoires de l'emballage.
27
GPO_Rydell_DAB_EU_Manual_JSEPT_2021_V3.indd 27 30/09/2021 14:18Emplacement des commandes
UT
In
A Bouton On/Off
A
B Bouton Standby B
C
C Bouton Function UT
D
1.
D Bouton Info
2.
E Bouton Sleep/Snooze/Alarm 3.
F Bouton AutoScan/Enter E F M
Re
G Bouton Vol- Vé
L
H Bouton Vol+ K
G
I Bouton Tune Up
H
J Bouton Tune Down M
Te
K Bouton Setup J I
L Bouton Preset N
In
pi
M Display et
O
Re
N Antenne l'in
pi
O Prise du cordon fo
d'alimentation
P Compartiment à piles Ne
P ou
28
GPO_Rydell_DAB_EU_Manual_JSEPT_2021_V3.indd 28 30/09/2021 14:18Consignes d'utilisation
UTILISATION DE L'APPAREIL BRANCHÉ AU SECTEUR
Insérez une extrémité du cordon d'alimentation fourni dans la prise c.c.
9V IN située à l'arrière de l'appareil, et branchez l'autre extrémité à
la prise murale.
UTILISATION DE L'APPAREIL AVEC DES PILES
1. Pour faire fonctionner votre appareil avec des piles, le cordon
d'alimentation doit être débranché.
2. Débranchez le cordon d'alimentation de l'appareil et insérez 6 piles
de type « C » (non fournies) dans le compartiment prévu à cet effet.
3. Fermez la trappe du compartiment à piles.
Remarque :
Vérifiez régulièrement vos piles. Les piles usées ou déchargées doivent
être remplacées. Si l'appareil n'est pas utilisé pendant une période
prolongée ou si vous le faites fonctionner exclusivement avec le
cordon secteur, retirez les piles du compartiment pour éviter les
G
fuites.
H
MESURES DE SÉCURITÉ CONCERNANT LES PILES :
Tenez les piles hors de portée des enfants et des animaux.
Insérez les piles en respectant la polarité (+/-). La non-installation des
piles conformément à la polarité indiquée peut entraîner des blessures
et/ou endommager vos appareils.
Retirez les piles usées ou déchargées du produit. Si vous n'avez pas
l'intention d'utiliser le produit pendant une longue période, retirez les
piles pour éviter tout dommage que pourrait causer leur corrosion ou la
formation de rouille.
Ne jetez jamais les piles dans le feu, et n'exposez pas les piles au feu
ou à d'autres sources de chaleur.
29
GPO_Rydell_DAB_EU_Manual_JSEPT_2021_V3.indd 29 30/09/2021 14:18Élimination des piles : 3
Les piles usagées ou déchargées doivent être correctement jetées et
recyclées en conformité avec toutes les lois en vigueur.
4
FONCTIONNEMENT
Appuyez sur le bouton ON/OFF pour activer l'alimentation. Appuyez P
sur le bouton STANDBY pour allumer l'appareil. R
EN MODE DAB L
1 Une fois l'appareil allumé, appuyez sur le bouton STANDBY pour
sélectionner le mode radio DAB R
R
Sélection automatique : appuyez sur le bouton AUTO SCAN/ENTER ; 1
l'indication « Scanning » (recherche des stations) apparaît sur l'écran
et le nombre de stations DAB disponibles s'affiche dans le coin
supérieur droit. L'appareil commence automatiquement à diffuser la 2
première station. Appuyez sur le bouton UP/DOWN pour choisir la
station suivante ou précédente, puis appuyez rapidement sur AUTO
SCAN/ENTER pour confirmer la sélection. B
A
EN MODE FM
1. Appuyez sur le bouton FUNCTION pour sélectionner le mode radio A
FM, puis appuyez sur le bouton AUTO SCAN/ENTER ; lorsqu'une d
station est trouvée, l'écran affiche la fréquence fixe correspondante 1
et la diffusion commence automatiquement. A
2. Si la réception n'est pas satisfaisante, appuyez sur le bouton
UP/DOWN pour l'ajuster. Le préréglage de la radio FM est identique 2
à celui de la radio DAB.
3
SYNTONISATION DES PRÉ-RÉGLAGES
1. Syntonisez à la station désirée en suivant la procédure de syntonisa- 4
tion normale.
2. Appuyez longuement sur le bouton PRÉRÉGLAGE jusqu'à ce que 5
"Préréglage 1 vide" apparaisse, puis appuyez sur le bouton HAUT/
BAS pour changer le numéro où la station sera stockée. 6
(Préréglage 1 au Préréglage 10)
30
GPO_Rydell_DAB_EU_Manual_JSEPT_2021_V3.indd 30 30/09/2021 14:183. Sauvegardez la fréquence actuelle en appuyant à nouveau sur le
t bouton AUTO SCAN/ENTRER et en le maintenant enfoncé lorsque
vous obtenez le numéro souhaité.
4. Répétez la même procédure pour mettre d'autres fréquences
souhaitées en mémoire.
Préréglage 1 au Préréglage 10
Remarques : Une fréquence mémorisée ne peut être effacée qu'en
mémorisant une autre fréquence à sa place.
L'appareil peut être préréglé jusqu'à 10 stations.
RAPPEL DE MÉMOIRE
Rappeler les fréquences stockées
R; 1) Appuyez brièvement sur le bouton PRÉRÉGLAGE, puis appuyez sur
ran le bouton HAUT/ BAS pour changer le numéro où la station a été
mémorisée. (Préréglage 1 au Préréglage 10)
la 2) Appuyez brièvement sur la touche AUTO SCAN / ENTRER pour
a confirmer.
TO
Bouton INFO
A. L'appareil dispose de différents modes d'informations DAB, qui
s'affichent à la dernière ligne de l'écran.
o Appuyez rapidement sur la touche INFO pour accéder aux types
disponibles.
te 1. Type de programme
Affiche le type de contenu diffusé par la station, par ex. : musique
classique, pop, actualités, etc.
ue 2.Ensemble Freq. Affiche la fréquence de la station DAB, comme 13F
239.200MHz.
3. Débit Audio. Affiche le débit de données en kilo bits par seconde et
le mode audio, par ex. : Stéréo.
sa- 4. Ensemble Nom. Affiche le nom du multiplex auquel la station
actuelle du réseau numérique 1 appartient
5. Puissance du signal. Affiche la puissance du signal de la station
T/ écoutée.
6. Heure/Date. Affiche la date et l'heure actuelles, reçues hors signal
radio.
31
GPO_Rydell_DAB_EU_Manual_JSEPT_2021_V3.indd 31 30/09/2021 14:187. DLS (Dynamic Link Segment). Texte défilant qui inclut des messages 6.
tels que le nom de l'artiste et de la chanson, les numéros de
téléphone, les détails du programme, etc. Re
B. L'appareil dispose de six modes d'informations FM, qui s'affichent à
la dernière ligne de l'écran.
Appuyez rapidement sur la touche INFO pour accéder aux types
disponibles. Ré
1. PTY (type de programme) 1.
Affiche le type de contenu diffusé par la station, par ex. : musique
classique, pop, actualités, etc. 2.
2. Puissance du signal. Affiche la puissance du signal de la station
écoutée.
3. Heure/Date. Affiche la date et l'heure actuelles, reçues hors signal 3.
radio.
4. Fréquence de station. Affiche la fréquence de la station écoutée.
5. Mode Audio. Affiche les paramètres actuels du mode audio, par ex. : 4.
Auto (Stéréo) ou Mono.
6. Texte Radio. Texte défilant qui inclut des messages tels que le nom
de l'artiste et de la chanson, les numéros de téléphone, les détails 5.
du programme, etc.
RÉGLAGES DATE/HEURE RÉ
Réglage manuel 1.
1. En mode FM, appuyez sur le bouton SETUP jusqu'à ce que le menu
FM s'affiche. 2.
2. Appuyez sur le bouton UP/DOWN pour sélectionner Main menu
(menu principal), et appuyez rapidement sur AUTO SCAN/ENTER 3.
pour confirmer.
3. Dans le menu principal, utilisez le bouton UP/DOWN pour sélection-
ner Time setup (réglage de l'heure), et appuyez rapidement sur 4.
AUTO SCAN/ENTER pour confirmer.
4. Dans le menu Time setup, utilisez le bouton UP/DOWN pour 5.
sélectionner Set clock (régler l'horloge), et appuyez rapidement sur
AUTO SCAN/ENTER pour confirmer. 6.
5. Dans le menu Set clock, l'heure se met à clignoter : appuyez sur le
bouton UP/DOWN pour la régler. Appuyez sur AUTO SCAN/ENTER
pour confirmer. Re
l'a
32
GPO_Rydell_DAB_EU_Manual_JSEPT_2021_V3.indd 32 30/09/2021 14:18es 6. Les minutes clignotent : réglez-les de la même façon, puis appuyez
rapidement sur le bouton AUTO SCAN/ENTER pour confirmer.
Remarque : dans le menu Time setup, vous pouvez régler l'horloge, la
à date, la mise à jour automatique, le mode d'affichage (12/24 heures)
en suivant les mêmes consignes.
Réglage automatique
1. En mode DAB, appuyez sur le bouton SETUP jusqu'à ce que le
menu DAB s'affiche.
2. Appuyez sur le bouton UP/DOWN pour sélectionner Main menu
(menu principal), et appuyez rapidement sur AUTO SCAN/ENTER
pour confirmer.
3. Dans le menu principal, utilisez le bouton UP/DOWN pour sélection-
ner Time setup (réglage de l'heure), et appuyez rapidement sur
AUTO SCAN/ENTER pour confirmer.
.: 4. Dans le menu Time setup, utilisez le bouton UP/DOWN pour
sélectionner Auto update (mise à jour automatique), et appuyez
m rapidement sur AUTO SCAN/ENTER pour confirmer.
5. Dans le menu Auto update, utilisez le bouton UP/DOWN pour
sélectionner la radio source.
RÉGLAGE DE L'ALARME 1
1. En mode FM ou DAB, appuyez sur le bouton
u SLEEP/SNOOZE/ALARM jusqu'à ce que le menu Alarms s'affiche.
2. Appuyez sur le bouton UP/DOWN pour sélectionner alarm1, et
appuyez rapidement sur AUTO SCAN/ENTER pour confirmer.
3. Dans le menu des détails de l'alarme, utilisez le bouton UP/DOWN
pour sélectionner Time (heure), et appuyez rapidement sur AUTO
n- SCAN/ENTER pour confirmer.
4. L'heure se met à clignoter : appuyez sur le bouton UP/DOWN pour
la régler. Appuyez sur AUTO SCAN/ENTER pour confirmer.
5. Les minutes clignotent : réglez-les de la même façon, puis appuyez
rapidement sur le bouton AUTO SCAN/ENTER pour confirmer.
6. Retour au menu des détails de l'alarme. Utilisez le bouton
UP/DOWN pour sélectionner Save (enregistrer), puis appuyez sur
R AUTO SCAN/ENTER pour activer les réglages effectués.
Remarque : activez la fonction alarm1 dans le menu des détails de
l'alarme
33
GPO_Rydell_DAB_EU_Manual_JSEPT_2021_V3.indd 33 30/09/2021 14:18RÉGLAGE DE L'ALARME 2
1. En mode FM ou DAB, appuyez sur le bouton RÉ
SLEEP/SNOOZE/ALARM jusqu'à ce que le menu Alarms s'affiche. 1.
2. Appuyez sur le bouton UP/DOWN pour sélectionner alarm2, et
appuyez rapidement sur AUTO SCAN/ENTER pour confirmer.
3. Dans le menu des détails de l'alarme, utilisez le bouton UP/DOWN 2.
pour sélectionner Time (heure), et appuyez rapidement sur AUTO
SCAN/ENTER pour confirmer.
4. L'heure se met à clignoter : appuyez sur le bouton UP/DOWN pour 3.
la régler. Appuyez sur AUTO SCAN/ENTER pour confirmer.
5. Les minutes clignotent : réglez-les de la même façon, puis appuyez
rapidement sur le bouton AUTO SCAN/ENTER pour confirmer.
6. Retour au menu des détails de l'alarme. Utilisez le bouton 4.
UP/DOWN pour sélectionner Save (enregistrer), puis appuyez sur
AUTO SCAN/ENTER pour activer les réglages effectués.
AN
Remarque : activez la fonction alarm2 dans le menu des détails de 1.
l'alarme
Remarque : dans le menu des détails de l'alarme, vous pouvez
paramétrer d'autres fonctions, telles que la désactivation de l'alarme, 2.
l'heure de l'alarme, les jours de l'alarme, le mode de l'alarme, la
dernière alarme entendue, le volume et l'enregistrement de l'alarme.
ARRÊT DE L'ALARME RÉ
Pour annuler l'alarme une fois qu'elle s'est déclenchée. La
Appuyez sur le bouton STANDBY pour éteindre le son de l'alarme. st
L'alarme se reprogramme pour le jour suivant. fo
un
DÉSACTIVATION COMPLÈTE DE L'ALARME st
Appuyez rapidement sur le bouton SLEEP/SNOOZE/ALARM, puis gé
appuyez plusieurs fois sur AUTO SCAN/ENTER pour accéder au menu 1.
des paramètres détaillés de l'alarme. Appuyez sur le bouton UP/DOWN
pour sélectionner alarm OFF, puis appuyez sur AUTO SCAN/ENTER
pour confirmer. 2.
FONCTION SNOOZE
Quand l'alarme se déclenche, appuyez sur le bouton 3.
SLEEP/SNOOZE/ALARM. L'alarme s'éteint et sonne à nouveau 5
34 minutes plus tard.
GPO_Rydell_DAB_EU_Manual_JSEPT_2021_V3.indd 34 30/09/2021 14:18RÉGLAGE DU MINUTEUR DE LA FONCTION SLEEP
1. Une fois l'appareil allumé et réglé sur une station (DAB ou FM),
maintenez enfoncé le bouton SLEEP/SNOOZE/ALARM jusqu'à ce
que le menu Sleep s'affiche.
2. Les minutes se mettent à clignoter. Appuyez rapidement sur le
bouton SLEEP pour modifier la durée (par ex. : 15 min, 30 min, 45
min, 60 min, 90 min)
3. Les durées de lecture disponibles avant l’arrêt automatique vont de
15 à 90 minutes, par intervalles de 15 minutes. Sélectionnez la
z durée de votre choix, puis appuyez rapidement sur AUTO
SCAN/ENTER pour confirmer.
4. Les réglages de la fonction Sleep sont affichés dans le coin
supérieur droit de l'écran. L'appareil joue pendant la durée
sélectionnée puis se met en veille.
ANNULATION DU MINUTEUR DE LA FONCTION SLEEP
1. Une fois l'appareil allumé et réglé sur une station (DAB ou FM),
maintenez enfoncé le bouton SLEEP/SNOOZE/ALARM jusqu'à ce
que le menu Sleep s'affiche.
2. Les minutes se mettent à clignoter. Appuyez rapidement sur le
bouton SLEEP/SNOOZE/ALARM pour régler la durée de la fonction
Sleep sur OFF et appuyez sur AUTO SCAN/ENTER pour confirmer.
RÉINITIALISATION DU SYSTÈME
La fonction System Reset peut être utilisée pour effacer la liste des
stations, les stations préréglées, et tous les réglages d'alarme et de la
fonction Sleep. Cette fonction est utile si vous déplacez l'appareil dans
un nouvel endroit (si vous déménagez, par exemple), car certaines
stations ne seront peut-être pas disponibles dans la nouvelle zone
géographique.
u 1. En mode DAB, appuyez sur le bouton SETUP, puis appuyez sur le
WN bouton UP/DOWN pour sélectionner DAB MAIN MENU. Appuyez
sur le bouton AUTO SCAN/ENTER pour confirmer.
2. Une fois en mode MAIN MENU, appuyez sur le bouton UP/DOWN
pour sélectionner Factory reset et appuyez 2 fois de suite sur le
bouton AUTO SCAN/ENTER pour confirmer.
3. L'appareil efface alors la mémoire interne et procède automatique-
ment à une recherche rapide de fréquences.
35
GPO_Rydell_DAB_EU_Manual_JSEPT_2021_V3.indd 35 30/09/2021 14:18Entretien
Ventilation - L'appareil doit être installé à un endroit et dans une
position qui ne compromettent pas sa bonne ventilation. Par
exemple, l'appareil ne doit pas être placé sur un lit, un canapé, un
tapis ou toute surface similaire susceptible de bloquer les trous
d'aération, ou placé dans un meuble encastré, tel qu'une
bibliothèque ou une vitrine, qui pourrait compromettre la circulation
de l'air par les trous d'aération.
Chaleur - L'appareil doit être placé à l'écart des sources de
chaleur, telles que les radiateurs, les registres de chauffage, les
cuisinières ou autres appareils (y compris les amplificateurs) qui
produisent de la chaleur.
Alimentation - Le produit ne doit être utilisé qu'avec le type
d'alimentation indiqué sur l'étiquette. Si vous avez des doutes sur
le type de courant qui alimente votre domicile, consultez le
revendeur du produit ou votre fournisseur d'électricité local. Si votre
produit est conçu pour fonctionner avec des piles, ou d'autres
sources d'énergie, veuillez consulter les consignes d'utilisation.
Assistance
Vous avez encore besoin d'aide ? Rendez-vous sur le site
www.gporetro.com
Pour votre propre sécurité, n'essayez pas d'ouvrir l'appareil.
Ce produit ne contient aucune pièce réparable et la garantie sera nulle
si l'appareil est ouvert.
36
GPO_Rydell_DAB_EU_Manual_JSEPT_2021_V3.indd 36 30/09/2021 14:18Dutch
ulle
37
GPO_Rydell_DAB_EU_Manual_JSEPT_2021_V3.indd 37 30/09/2021 14:18H
de
Be
ge
1
1
1
Ve
st
ha
38
GPO_Rydell_DAB_EU_Manual_JSEPT_2021_V3.indd 38 30/09/2021 14:18Inleiding
Hartelijk dank voor uw aankoop van dit product van ProtelX! Lees
de gebruiksaanwijzing goed door voordat u het product gebruikt.
Bewaar de gebruiksaanwijzing op een veilige plek voor toekomstig
gebruik.
Wat zit er in de doos?
1 x GPO Rydell DAB-radio
1 x stroomsnoer
1 x gebruikershandleiding
Uitpakken
Verwijder het verpakkingsmateriaal en zet de radio op een vlakke en
stevige ondergrond. Zorg dat u alle losse items uit de verpakking
haalt.
39
GPO_Rydell_DAB_EU_Manual_JSEPT_2021_V3.indd 39 30/09/2021 14:18Wat zit waar?
DE
A Aan/uit
A Sl
B Stand-by B 9V
ui
C
C Functie
D
DE
D Info 1.
2.
E Slaap/sluimer/alarm
3.
F Auto E F M
G scan/Enter Volume NB
L
Co
H omlaag Volume omhoog K u
ne
I Frequentie omhoog G
vo
H
J Frequentie omlaag VO
Ho
K Instellen J I
L Voorkeuzes Le
N
u
M Display
O Ve
er
N Antenne sc
O Aansluiting netvoeding (AC) G
an
P Batterijvak
P
40
GPO_Rydell_DAB_EU_Manual_JSEPT_2021_V3.indd 40 30/09/2021 14:18Bedieningsinstructies
DE RADIO GEBRUIKEN OP NETVOEDING
Sluit het ene uiteinde van het meegeleverde stroomsnoer aan op de DC
9V IN-aansluiting aan de achterzijde van de radio en het andere
uiteinde (de stekker) in het stopcontact.
DE RADIO GEBRUIKEN OP BATTERIJEN
1. Om de radio op batterijen te laten werken, haalt u de stekker uit het
stopcontact.
2. Trek het stroomsnoer uit de aansluiting en plaats 6 “C”-batterijen
(niet meegeleverd) in het batterijvak.
3. Sluit het deksel van het batterijvak.
NB:
Controleer de batterijen regelmatig. Vervang oude of lege batterijen. Als
u de radio een tijd lang niet gaat gebruiken of alleen maar via de
netvoeding gebruikt, haal dan de batterijen uit het batterijvak om te
G
voorkomen dat ze gaan lekken..
H
VOORZORGSMAATREGELEN BATTERIJEN:
Houd batterijen uit de buurt van kinderen en huisdieren.
Let bij het plaatsen van de batterijen op de juiste polariteit (+ en -). Als
u dat niet doet, kan dat leiden tot schade en/of persoonlijk letsel.
Verwijder oude of lege batterijen uit het batterijvak. Haal de batterijen
eruit wanneer u de radio langere tijd niet gaat gebruiken; zo voorkomt u
schade ten gevolge van roestende of lekkende batterijen
Gooi batterijen nooit in vuur en stel batterijen niet bloot aan vuur of
andere warmtebronne
41
GPO_Rydell_DAB_EU_Manual_JSEPT_2021_V3.indd 41 30/09/2021 14:18Batterijen verwijderen: 3.
Oude of lege batterijen moeten op de daarvoor bestemde adressen
worden ingeleverd en volgens de toepasselijke wetgeving worden 4.
gerecycled en hergebruikt.
Pr
BEDIENING O
Druk op de knop AAN/UIT om de radio van stroom te voorzien. Druk
op de knop STANDBY om de radio aan/uit te zetten. He
IN DE DAB-MODUS G
1. Zorg dat de radio aanstaat en druk op de knop STANDBY om de O
modus DAB-radio te selecteren 1)
Automatisch selecteren: Druk op de knop AUTO-SCAN/ENTER. In
het scherm verschijnt “Scanning” (Bezig met scannen), het aantal 2)
DAB-zenders wordt rechts bovenin weergegeven en de eerste
zender wordt automatisch afgespeeld. Druk op de knop D
Omhoog/Omlaag om de volgende of vorige zender te selecteren. A.
Druk kort op de knop AUTO-SCAN/ENTER om de selectie te
bevestigen.. Dr
1.
IN DE FM-MODUS
1. Druk op de knop FUNCTIE om de modus FM-radio te selecteren. Druk 2.
op de knop AUTO SCAN/ENTER. Wanneer een zender is gevonden, 3.
wordt het zoeken naar een frequentie gestopt en wordt de
weergegeven zender automatisch afgespeeld. 4.
2. Als de ontvangst matig is, drukt u op de knop Omhoog/Omlaag voor
fijnafstelling. Het instellen van voorkeuzezenders bij FM-radio gaat net 5.
zoals bij DAB-radio 6.
7.
AFSTEMMEN VAN DE VOORINSTELLINGEN
1. Stem af op de gewenste zender met behulp van de normale
afstemprocedure.
2. Houd de toets PRESET ingedrukt tot "Preset 1 leeg" verschijnt en druk He
dan op de toets OMHOOG/OMLAAG om het nummer te wijzigen waar
de zender zal worden opgeslagen.
(Preset 1 tot Preset 10)
42
GPO_Rydell_DAB_EU_Manual_JSEPT_2021_V3.indd 42 30/09/2021 14:183. Sla de huidige frequentie op door de AUTOSCAN/ENTER toets
opnieuw ingedrukt te houden wanneer u het gewenste nummer hebt.
4. Herhaal dezelfde procedure om andere gewenste frequenties op te
slaan.
Preset 1 tot Preset 10
Opmerkingen: Een opgeslagen frequentie kan alleen worden gewist door
er een andere frequentie voor in de plaats op te slaan.
Het toestel kan worden voorgeprogrammeerd op 10 zenders.
GEHEUGEN HERINNERING
Oproepen opgeslagen frequenties
1) Druk kort op de toets PRESET en vervolgens op de toets
OMHOOG/OMLAAG om het nummer te wijzigen waar de zender was
In opgeslagen. (Preset 1 tot Preset 10)
al 2) Druk kort op de AUTO SCAN/ENTER toets om te bevestigen.
De knop INFO
n. A. Het toestel biedt zeven modi met DAB-informatie. Deze modi zijn
weergegeven op de onderste regel van het scherm.
Druk kort op de knop INFO om de beschikbare typen te bekijken.
1. Program type Het type programma dat door een zender wordt
uitgezonden, bijv. klassiek, pop, nieuws, enz.
Druk 2. Ensemble Freq. De DAB-zenderfrequentie, bijv. 13F 239.200 MHz.
n, 3. Audio Bit Rate De overdrachtssnelheid in kilobits per seconde en de
audiomodus, bijv. Stereo.
4. Ensemble name De naam van de multiplex waar de huidige Digital1
oor Netwerk-zender toe behoort
net 5. Signal strength De signaalsterkte van de beluisterde zender.
6. Time/Date De huidige tijd en datum, buiten de ether ontvangen.
7. DLS (Dynamic Link Segment) Toont informatie over bijvoorbeeld
uitvoerende en titel van liedje, telefoonnummers,
programmagegevens, enz.
druk Het toestel biedt zes modi met FM-informatie. Deze modi worden
waar weergegeven op de onderste regel van het scherm.
43
GPO_Rydell_DAB_EU_Manual_JSEPT_2021_V3.indd 43 30/09/2021 14:18Druk kort op de knop INFO om de beschikbare typen te bekijken.
1. PTY (Programmatype) Het type programma dat door een zender AU
wordt uitgezonden, bijv. klassiek, pop, nieuws, enz. 4.
2. Signal strength De signaalsterkte van de beluisterde zender.
3. Time/Date De huidige tijd en datum, buiten de ether ontvangen.
4. Station frequency De frequentie van de beluisterde zender. 5
5. Audio mode De actuele audiomodus-instelling: Auto (Stereo) of
Mono.
6. Radio Text Toont informatie over bijvoorbeeld uitvoerende en titel IN
van liedje, telefoonnummers, programmagegevens, enz. 1.
2.
TIJDINSTELLINGEN - Handmatig instellen
1. Ga naar de FM-modus en druk op de knop SETUP tot het FM-menu 3.
wordt weergegeven.
2. Druk op de knop Omhoog/Omlaag om Main Menu (Hoofdmenu) te
selecteren en druk ter bevestiging kort op AUTO SCAN/ENTER 4.
3. Druk in het hoofdmenu op de knop Omhoog/Omlaag om Time Setup
(Tijd instellen) te selecteren. Druk ter bevestiging kort op AUTO
SCAN/ENTER. 5.
4. Druk in het menu Time Setup op de knop Omhoog/Omlaag om Set
Clock (Klok instellen) te selecteren en druk ter bevestiging kort op 6.
AUTO SCAN/ENTER
5 .In het menu Set Clock gaat het uur knipperen en kunt u op de knop
Omhoog/Omlaag drukken om het uur in te stellen. Druk op de knop NB
AUTO SCAN/ENTER om te bevestigen.
6. De minuut knippert en kan nu worden ingesteld. Druk vervolgens IN
kort op de knop AUTO SCAN/ENTER om te bevestigen. 1.
NB: In het menu Time Setup kunt u op soortgelijke wijze de klok,
datum, automatisch bijwerken en 12/24-tijdnotatie instellen. 2.
TIJDINSTELLINGEN - Automatisch instellen 3.
1. Ga naar de DAB-modus en druk op de knop SETUP tot het
DAB-menu wordt weergegeven.
2. Druk op de knop Omhoog/Omlaag om Main Menu (Hoofdmenu) te 4.
selecteren en druk ter bevestiging kort op AUTO SCAN/ENTER
3. In het hoofdmenu: Druk op de knop Omhoog/Omlaag om Time
Setup (Tijd instellen) te selecteren. Druk ter bevestiging kort op
44
GPO_Rydell_DAB_EU_Manual_JSEPT_2021_V3.indd 44 30/09/2021 14:18You can also read