User Manual Zia Coffee Machine INB Small Cabinet 1.000 Instant - 5DUINP20M EN V2.1
←
→
Page content transcription
If your browser does not render page correctly, please read the page content below
User Manual
Zia Coffee Machine

INB Small Cabinet
    1.000 Instant

       5DUINP20M EN V2.1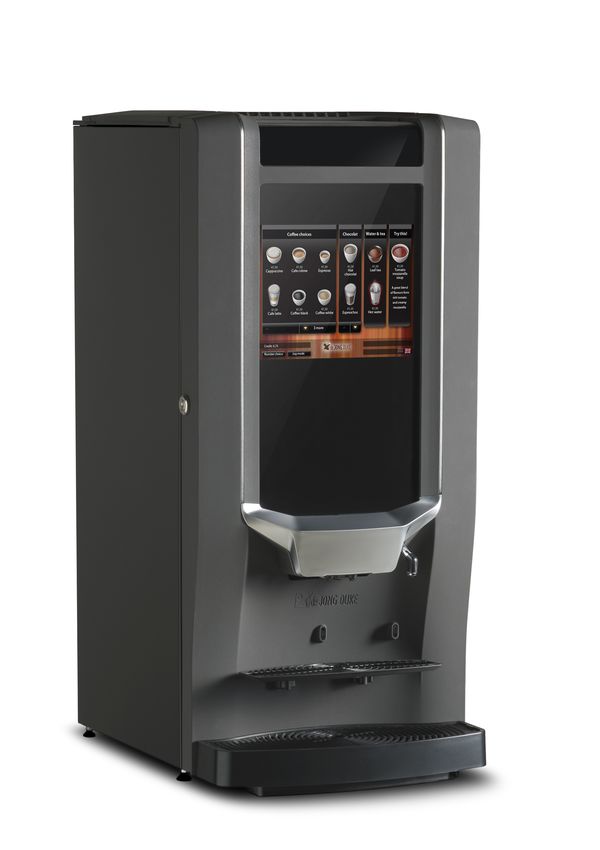
Preface

Copyright
                                           J.M. de Jong Automatenfabriek B.V. © 2021.

                                           The contents of this manual are copyrighted. Texts, images, and
                                           source files may only be used for professional purposes.
                                           No part of this guide may be reused, modified, or published
                                           without the prior written permission of the manufacturer.
                                           Printing pages is allowed only for professional use.

                                           The English language version is the original version. All other
                                           language versions are translations of the original version.

Disclaimer
                                           Although this manual has been put together with the utmost
                                           care, J.M. de Jong Automatenfabriek B.V. accepts no liability for
                                           inaccuracies or omissions. No liability is accepted for the
                                           consequences arising from operation of the equipment in
                                           accordance with the information contained in these instructions.
                                           J.M. de Jong Automatenfabriek B.V. reserves the right to alter
                                           specifications at any time and without prior notification to the
                                           purchaser.

                                           All rights reserved.

Introduction
                                           • Before using the coffee machine, please read the safety
                                             instructions and all of the information in this manual first.
                                           • Keep this manual in a safe and accessible place for later
                                             reference.
                                           • The machine serves hot drinks. Keep a distance from the
                                             outlet nozzles after selection, during dispense and when the
                                             drink is removed from the machine after dispense.
                                           • Only properly trained service personnel may carry out
                                             installation, adjustments, repair or move the machine.
                                           • This machine can be used by children aged 8 years and older
                                             and persons with reduced physical, sensory or mental
                                             capabilities or lack of experience and knowledge if they have
                                             been given supervision or instruction concerning use of the
                                             appliance in a safe way and they understand the hazards
                                             involved.
                                           • All information for normal daily use is found in the paragraph
                                             Using the coffee machine (on page 32).

Zia INB Small Cabinet 1.000 Instant User Manual 5DUINP20M EN V2.1                                            2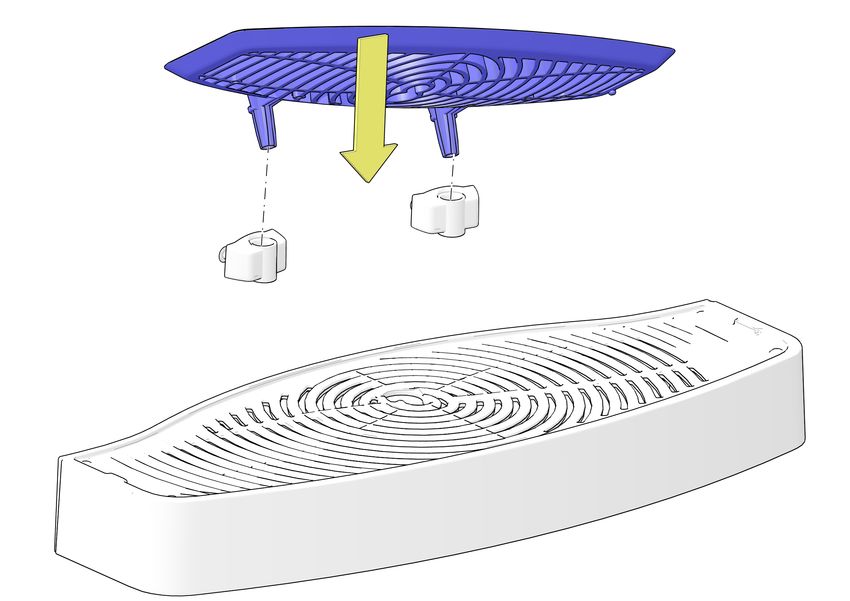
• The information in the other paragraphs is meant only for
                                                 persons trained in the operation and maintenance of the
                                                 machine.
                                               • Solutions to simple issues or malfunctions that may occur are
                                                 given in the back of the manual.
                                               • The manual cannot be regarded as a replacement for the
                                                 training and instruction, but must be seen as an addition to
                                                 the training, and as a reference work.
                                               • The user manual is valid for the machine supplied by the
                                                 manufacturer, including the options installed by the
                                                 manufacturer.
                                               • The manufacturer accepts no liability for any damage
                                                 resulting from incorrect or improper use of the machine, or
                                                 resulting from modifications that have not been authorized
                                                 by the manufacturer.
                                               • Only use original parts from the manufacturer when the
                                                 machine needs to be repaired.
                                               • Contact the dealer / supplier of the coffee machine (see
                                                 contact information in the next section) for maintenance or
                                                 repairs not explained in this manual.

Service and support
                                               For service and support contact the dealer / supplier of the
                                               machine.
Record dealer information in this box or use a dealer stamp.
Telephone Service Number:
Internet:
Company name:
Address:
Area code - City:
Country:
Telephone:
E-mail:

Record the serial number of the coffee machine in this box. Mention it when service is required.
Serial number:

Zia INB Small Cabinet 1.000 Instant User Manual 5DUINP20M EN V2.1                                             3
Contents

Preface. . . . . . . . . . . . . . . . . . . . . . . . . . . . . . . . . . . . . . . . . . . . . . . . . . . . . . . . . . . . 2
      Copyright. . . . . . . . . . . . . . . . . . . . . . . . . . . . . . . . . . . . . . . . . . . . . . . . . . . . . . . . . . . . . . . . . . . . . . . . . . . . . . . . . . 2
      Disclaimer. . . . . . . . . . . . . . . . . . . . . . . . . . . . . . . . . . . . . . . . . . . . . . . . . . . . . . . . . . . . . . . . . . . . . . . . . . . . . . . . . . 2
      Introduction. . . . . . . . . . . . . . . . . . . . . . . . . . . . . . . . . . . . . . . . . . . . . . . . . . . . . . . . . . . . . . . . . . . . . . . . . . . . . . . . 2
      Service and support. . . . . . . . . . . . . . . . . . . . . . . . . . . . . . . . . . . . . . . . . . . . . . . . . . . . . . . . . . . . . . . . . . . . . . . . . . 3

    About this manual. . . . . . . . . . . . . . . . . . . . . . . . . . . . . . . . . . . . . . . . . . . . . . . . . . . 7
      Audience. . . . . . . . . . . . . . . . . . . . . . . . . . . . . . . . . . . . . . . . . . . . . . . . . . . . . . . . . . . . . . . . . . . . . . . . . . . . . . . . . . . 7
      Scope. . . . . . . . . . . . . . . . . . . . . . . . . . . . . . . . . . . . . . . . . . . . . . . . . . . . . . . . . . . . . . . . . . . . . . . . . . . . . . . . . . . . . 7
      Conventions. . . . . . . . . . . . . . . . . . . . . . . . . . . . . . . . . . . . . . . . . . . . . . . . . . . . . . . . . . . . . . . . . . . . . . . . . . . . . . . . 7
      Related documents. . . . . . . . . . . . . . . . . . . . . . . . . . . . . . . . . . . . . . . . . . . . . . . . . . . . . . . . . . . . . . . . . . . . . . . . . . . 8
      Availability of this manual. . . . . . . . . . . . . . . . . . . . . . . . . . . . . . . . . . . . . . . . . . . . . . . . . . . . . . . . . . . . . . . . . . . . . . 9

1 Safety. . . . . . . . . . . . . . . . . . . . . . . . . . . . . . . . . . . . . . . . . . . . . . . . . . . . . . . . . . 10
      1.1 Safety and risk levels. . . . . . . . . . . . . . . . . . . . . . . . . . . . . . . . . . . . . . . . . . . . . . . . . . . . . . . . . . . . . . . . . . . . . . 10
      1.2 Safety and warnings. . . . . . . . . . . . . . . . . . . . . . . . . . . . . . . . . . . . . . . . . . . . . . . . . . . . . . . . . . . . . . . . . . . . . . 11
      1.3 Installation. . . . . . . . . . . . . . . . . . . . . . . . . . . . . . . . . . . . . . . . . . . . . . . . . . . . . . . . . . . . . . . . . . . . . . . . . . . . . 13
      1.4 Maintenance. . . . . . . . . . . . . . . . . . . . . . . . . . . . . . . . . . . . . . . . . . . . . . . . . . . . . . . . . . . . . . . . . . . . . . . . . . . . 13
      1.5 Extended down time. . . . . . . . . . . . . . . . . . . . . . . . . . . . . . . . . . . . . . . . . . . . . . . . . . . . . . . . . . . . . . . . . . . . . . 13

2 Description. . . . . . . . . . . . . . . . . . . . . . . . . . . . . . . . . . . . . . . . . . . . . . . . . . . . . . 14
      2.1 Overview. . . . . . . . . . . . . . . . . . . . . . . . . . . . . . . . . . . . . . . . . . . . . . . . . . . . . . . . . . . . . . . . . . . . . . . . . . . . . . . 14
          2.1.1 Front view. . . . . . . . . . . . . . . . . . . . . . . . . . . . . . . . . . . . . . . . . . . . . . . . . . . . . . . . . . . . . . . . . . . . . . . . . . 15
          2.1.2 Inside view. . . . . . . . . . . . . . . . . . . . . . . . . . . . . . . . . . . . . . . . . . . . . . . . . . . . . . . . . . . . . . . . . . . . . . . . . . 16
          2.1.3 Door interior. . . . . . . . . . . . . . . . . . . . . . . . . . . . . . . . . . . . . . . . . . . . . . . . . . . . . . . . . . . . . . . . . . . . . . . . 17
          2.1.4 Inside view base cabinet — optional. . . . . . . . . . . . . . . . . . . . . . . . . . . . . . . . . . . . . . . . . . . . . . . . . . . . . . 18

3 User interface. . . . . . . . . . . . . . . . . . . . . . . . . . . . . . . . . . . . . . . . . . . . . . . . . . . . 19
      3.1 Display layout. . . . . . . . . . . . . . . . . . . . . . . . . . . . . . . . . . . . . . . . . . . . . . . . . . . . . . . . . . . . . . . . . . . . . . . . . . . 19
      3.2 Main menu - Cup dispensing. . . . . . . . . . . . . . . . . . . . . . . . . . . . . . . . . . . . . . . . . . . . . . . . . . . . . . . . . . . . . . . . 20
          3.2.1 Additional options submenu. . . . . . . . . . . . . . . . . . . . . . . . . . . . . . . . . . . . . . . . . . . . . . . . . . . . . . . . . . . . 22
          3.2.2 Jug dispensing submenu. . . . . . . . . . . . . . . . . . . . . . . . . . . . . . . . . . . . . . . . . . . . . . . . . . . . . . . . . . . . . . . 24
          3.2.3 Number selection submenu. . . . . . . . . . . . . . . . . . . . . . . . . . . . . . . . . . . . . . . . . . . . . . . . . . . . . . . . . . . . . 25
          3.2.4 Dispense submenu. . . . . . . . . . . . . . . . . . . . . . . . . . . . . . . . . . . . . . . . . . . . . . . . . . . . . . . . . . . . . . . . . . . . 27
          3.2.5 Ready submenu. . . . . . . . . . . . . . . . . . . . . . . . . . . . . . . . . . . . . . . . . . . . . . . . . . . . . . . . . . . . . . . . . . . . . . 28
          3.2.6 Message submenu. . . . . . . . . . . . . . . . . . . . . . . . . . . . . . . . . . . . . . . . . . . . . . . . . . . . . . . . . . . . . . . . . . . . 29

4
                                                                               Zia INB Small Cabinet 1.000 Instant User Manual 5DUINP20M EN V2.1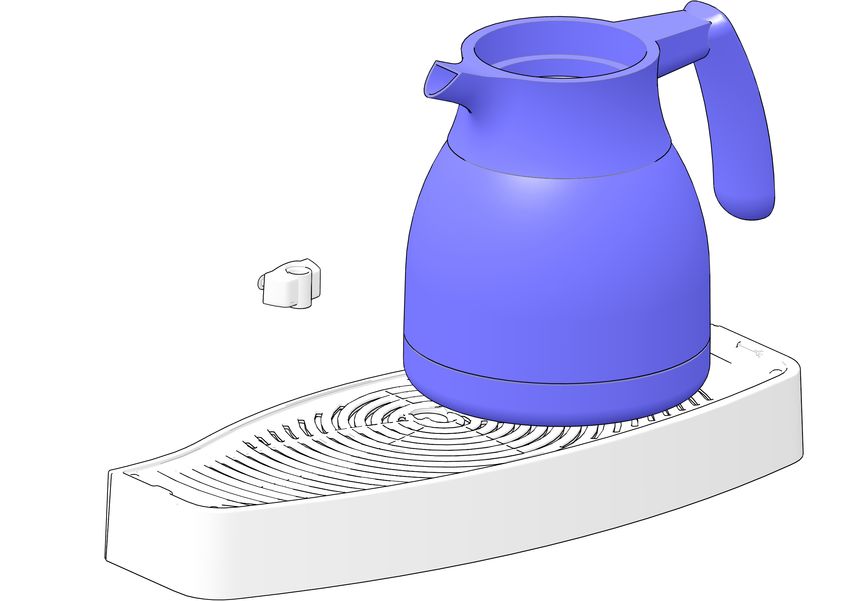
3.2.7 Information submenu. . . . . . . . . . . . . . . . . . . . . . . . . . . . . . . . . . . . . . . . . . . . . . . . . . . . . . . . . . . . . . . . . 31

4 Using the coffee machine. . . . . . . . . . . . . . . . . . . . . . . . . . . . . . . . . . . . . . . . . . . 32
   4.1 Before use. . . . . . . . . . . . . . . . . . . . . . . . . . . . . . . . . . . . . . . . . . . . . . . . . . . . . . . . . . . . . . . . . . . . . . . . . . . . . . 32
   4.2 Procedures. . . . . . . . . . . . . . . . . . . . . . . . . . . . . . . . . . . . . . . . . . . . . . . . . . . . . . . . . . . . . . . . . . . . . . . . . . . . . 33
       4.2.1 Select a beverage. . . . . . . . . . . . . . . . . . . . . . . . . . . . . . . . . . . . . . . . . . . . . . . . . . . . . . . . . . . . . . . . . . . . 33
           4.2.1.1 Cup dispensing. . . . . . . . . . . . . . . . . . . . . . . . . . . . . . . . . . . . . . . . . . . . . . . . . . . . . . . . . . . . . . . . . . . 34
           4.2.1.2 Cup dispensing by number — optional. . . . . . . . . . . . . . . . . . . . . . . . . . . . . . . . . . . . . . . . . . . . . . . . . 35
           4.2.1.3 Jug dispensing. . . . . . . . . . . . . . . . . . . . . . . . . . . . . . . . . . . . . . . . . . . . . . . . . . . . . . . . . . . . . . . . . . 36
       4.2.2 Payment. . . . . . . . . . . . . . . . . . . . . . . . . . . . . . . . . . . . . . . . . . . . . . . . . . . . . . . . . . . . . . . . . . . . . . . . . . . 38

5 Preventive maintenance. . . . . . . . . . . . . . . . . . . . . . . . . . . . . . . . . . . . . . . . . . . . 39
   5.1 Food safety engagement. . . . . . . . . . . . . . . . . . . . . . . . . . . . . . . . . . . . . . . . . . . . . . . . . . . . . . . . . . . . . . . . . . . 39
   5.2 Preventive maintenance schedule. . . . . . . . . . . . . . . . . . . . . . . . . . . . . . . . . . . . . . . . . . . . . . . . . . . . . . . . . . . . 40
   5.3 Daily maintenance. . . . . . . . . . . . . . . . . . . . . . . . . . . . . . . . . . . . . . . . . . . . . . . . . . . . . . . . . . . . . . . . . . . . . . . . 41
   5.4 Weekly maintenance. . . . . . . . . . . . . . . . . . . . . . . . . . . . . . . . . . . . . . . . . . . . . . . . . . . . . . . . . . . . . . . . . . . . . . 42
   5.5 Monthly maintenance. . . . . . . . . . . . . . . . . . . . . . . . . . . . . . . . . . . . . . . . . . . . . . . . . . . . . . . . . . . . . . . . . . . . . 43
   5.6 Preventive maintenance procedures . . . . . . . . . . . . . . . . . . . . . . . . . . . . . . . . . . . . . . . . . . . . . . . . . . . . . . . . . . 44
       5.6.1 Switch on. . . . . . . . . . . . . . . . . . . . . . . . . . . . . . . . . . . . . . . . . . . . . . . . . . . . . . . . . . . . . . . . . . . . . . . . . . . 44
       5.6.2 Open the door. . . . . . . . . . . . . . . . . . . . . . . . . . . . . . . . . . . . . . . . . . . . . . . . . . . . . . . . . . . . . . . . . . . . . . . 44
       5.6.3 Close the door. . . . . . . . . . . . . . . . . . . . . . . . . . . . . . . . . . . . . . . . . . . . . . . . . . . . . . . . . . . . . . . . . . . . . . . 44
       5.6.4 Open or close top lid . . . . . . . . . . . . . . . . . . . . . . . . . . . . . . . . . . . . . . . . . . . . . . . . . . . . . . . . . . . . . . . . . . 45
       5.6.5 Switch off / Putting out of order. . . . . . . . . . . . . . . . . . . . . . . . . . . . . . . . . . . . . . . . . . . . . . . . . . . . . . . . . 46
       5.6.6 Scheduled rinse. . . . . . . . . . . . . . . . . . . . . . . . . . . . . . . . . . . . . . . . . . . . . . . . . . . . . . . . . . . . . . . . . . . . . . 47
       5.6.7 Flush mixers. . . . . . . . . . . . . . . . . . . . . . . . . . . . . . . . . . . . . . . . . . . . . . . . . . . . . . . . . . . . . . . . . . . . . . . . 48
       5.6.8 Clean the cup stand. . . . . . . . . . . . . . . . . . . . . . . . . . . . . . . . . . . . . . . . . . . . . . . . . . . . . . . . . . . . . . . . . . . 49
       5.6.9 Clean the waste bin in the base cabinet. . . . . . . . . . . . . . . . . . . . . . . . . . . . . . . . . . . . . . . . . . . . . . . . . . . 50
       5.6.10 Clean the drip tray. . . . . . . . . . . . . . . . . . . . . . . . . . . . . . . . . . . . . . . . . . . . . . . . . . . . . . . . . . . . . . . . . . . 52
       5.6.11 Clean the mixing system. . . . . . . . . . . . . . . . . . . . . . . . . . . . . . . . . . . . . . . . . . . . . . . . . . . . . . . . . . . . . . 54
       5.6.12 Clean the canisters. . . . . . . . . . . . . . . . . . . . . . . . . . . . . . . . . . . . . . . . . . . . . . . . . . . . . . . . . . . . . . . . . . 63
       5.6.13 Clean the cold water outlet nozzle — optional. . . . . . . . . . . . . . . . . . . . . . . . . . . . . . . . . . . . . . . . . . . . . . 64
       5.6.14 Deep clean the cold water outlet nozzle — optional. . . . . . . . . . . . . . . . . . . . . . . . . . . . . . . . . . . . . . . . . 65
       5.6.15 Fill up the ingredient canisters. . . . . . . . . . . . . . . . . . . . . . . . . . . . . . . . . . . . . . . . . . . . . . . . . . . . . . . . . 67
       5.6.16 Enter canister ingredient levels — optional. . . . . . . . . . . . . . . . . . . . . . . . . . . . . . . . . . . . . . . . . . . . . . . . 70
       5.6.17 Clean the outside of the machine. . . . . . . . . . . . . . . . . . . . . . . . . . . . . . . . . . . . . . . . . . . . . . . . . . . . . . . . 71
       5.6.18 Clean the touchscreen. . . . . . . . . . . . . . . . . . . . . . . . . . . . . . . . . . . . . . . . . . . . . . . . . . . . . . . . . . . . . . . . 72
       5.6.19 The service key. . . . . . . . . . . . . . . . . . . . . . . . . . . . . . . . . . . . . . . . . . . . . . . . . . . . . . . . . . . . . . . . . . . . . . 73
           5.6.19.1 Insert the service key. . . . . . . . . . . . . . . . . . . . . . . . . . . . . . . . . . . . . . . . . . . . . . . . . . . . . . . . . . . . . 73

Zia INB Small Cabinet 1.000 Instant User Manual 5DUINP20M EN V2.1                                                                                                             5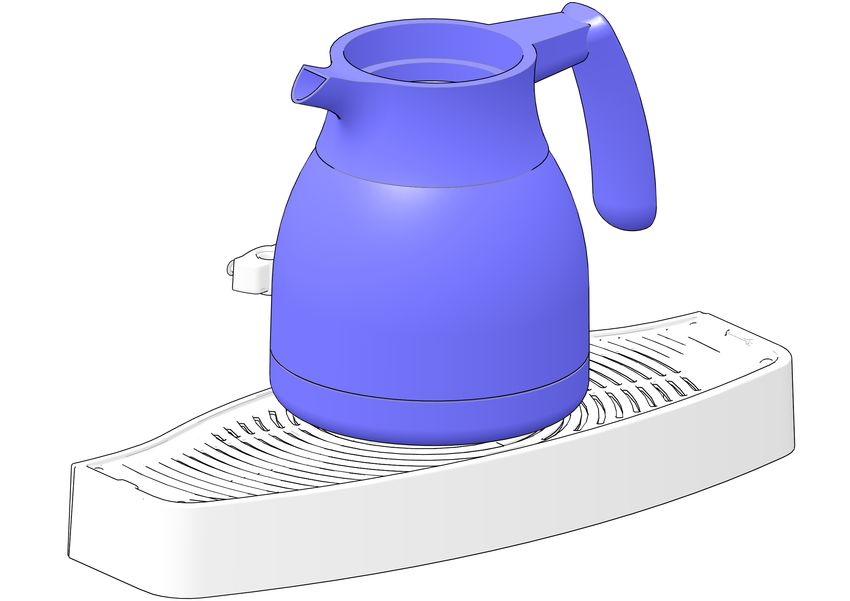
5.6.19.2 Remove the service key. . . . . . . . . . . . . . . . . . . . . . . . . . . . . . . . . . . . . . . . . . . . . . . . . . . . . . . . . . . 74
6 Troubleshooting. . . . . . . . . . . . . . . . . . . . . . . . . . . . . . . . . . . . . . . . . . . . . . . . . . 75
6.1 Messages. . . . . . . . . . . . . . . . . . . . . . . . . . . . . . . . . . . . . . . . . . . . . . . . . . . . . . . . . . . . . . . . . . . . . . . . . . . . . . . 75
6.1.1 Message: Clean screen. . . . . . . . . . . . . . . . . . . . . . . . . . . . . . . . . . . . . . . . . . . . . . . . . . . . . . . . . . . . . . . . . 75
6.1.2 Message: Communication error. . . . . . . . . . . . . . . . . . . . . . . . . . . . . . . . . . . . . . . . . . . . . . . . . . . . . . . . . . 75
6.1.3 Message: Door open. . . . . . . . . . . . . . . . . . . . . . . . . . . . . . . . . . . . . . . . . . . . . . . . . . . . . . . . . . . . . . . . . . . 75
6.1.4 Message: Drip tray full. . . . . . . . . . . . . . . . . . . . . . . . . . . . . . . . . . . . . . . . . . . . . . . . . . . . . . . . . . . . . . . . . 75
6.1.5 Message: Filling boiler. . . . . . . . . . . . . . . . . . . . . . . . . . . . . . . . . . . . . . . . . . . . . . . . . . . . . . . . . . . . . . . . . 76
6.1.6 Message: Heating boiler. . . . . . . . . . . . . . . . . . . . . . . . . . . . . . . . . . . . . . . . . . . . . . . . . . . . . . . . . . . . . . . 76
6.1.7 Message: Insert coins. . . . . . . . . . . . . . . . . . . . . . . . . . . . . . . . . . . . . . . . . . . . . . . . . . . . . . . . . . . . . . . . . 76
6.1.8 Message: Mixer blocked. . . . . . . . . . . . . . . . . . . . . . . . . . . . . . . . . . . . . . . . . . . . . . . . . . . . . . . . . . . . . . . . 76
6.1.9 Message: Machine Blocked. . . . . . . . . . . . . . . . . . . . . . . . . . . . . . . . . . . . . . . . . . . . . . . . . . . . . . . . . . . . . . 76
6.1.10 Message: Not all ingredients available. . . . . . . . . . . . . . . . . . . . . . . . . . . . . . . . . . . . . . . . . . . . . . . . . . . . 77
6.1.11 Message: No water connected / No water in boiler. . . . . . . . . . . . . . . . . . . . . . . . . . . . . . . . . . . . . . . . . . . 77
6.1.12 Message: Open boiler leaking, inlet closed. . . . . . . . . . . . . . . . . . . . . . . . . . . . . . . . . . . . . . . . . . . . . . . . 77
6.1.13 Message: Place cup in center. . . . . . . . . . . . . . . . . . . . . . . . . . . . . . . . . . . . . . . . . . . . . . . . . . . . . . . . . . . 77
6.1.14 Message: Place cup right. . . . . . . . . . . . . . . . . . . . . . . . . . . . . . . . . . . . . . . . . . . . . . . . . . . . . . . . . . . . . . 78
6.1.15 Message: Please load configuration. . . . . . . . . . . . . . . . . . . . . . . . . . . . . . . . . . . . . . . . . . . . . . . . . . . . . . 78
6.1.16 Message: Please load the User Interface. . . . . . . . . . . . . . . . . . . . . . . . . . . . . . . . . . . . . . . . . . . . . . . . . . 78
6.1.17 Message: Replace water filter. . . . . . . . . . . . . . . . . . . . . . . . . . . . . . . . . . . . . . . . . . . . . . . . . . . . . . . . . . . 78
6.1.18 Message: Startup problem. . . . . . . . . . . . . . . . . . . . . . . . . . . . . . . . . . . . . . . . . . . . . . . . . . . . . . . . . . . . . 78
6.1.19 Message: Temp. sensor disconnected. . . . . . . . . . . . . . . . . . . . . . . . . . . . . . . . . . . . . . . . . . . . . . . . . . . . . 79
6.1.20 Message: Temperature boiler (too) high. . . . . . . . . . . . . . . . . . . . . . . . . . . . . . . . . . . . . . . . . . . . . . . . . . 79
6.1.21 Message: Water level too low. . . . . . . . . . . . . . . . . . . . . . . . . . . . . . . . . . . . . . . . . . . . . . . . . . . . . . . . . . . 79
6.1.22 Message: Wait, Heating boiler. . . . . . . . . . . . . . . . . . . . . . . . . . . . . . . . . . . . . . . . . . . . . . . . . . . . . . . . . . 79
6.1.23 Message: Water filter installed?. . . . . . . . . . . . . . . . . . . . . . . . . . . . . . . . . . . . . . . . . . . . . . . . . . . . . . . . . 79
6.1.24 Message: Ready, take your cup. . . . . . . . . . . . . . . . . . . . . . . . . . . . . . . . . . . . . . . . . . . . . . . . . . . . . . . . . . 80
7 Technical specifications. . . . . . . . . . . . . . . . . . . . . . . . . . . . . . . . . . . . . . . . . . . . 81
7.1 Standards and regulations. . . . . . . . . . . . . . . . . . . . . . . . . . . . . . . . . . . . . . . . . . . . . . . . . . . . . . . . . . . . . . . . . . 81
7.2 Type plate. . . . . . . . . . . . . . . . . . . . . . . . . . . . . . . . . . . . . . . . . . . . . . . . . . . . . . . . . . . . . . . . . . . . . . . . . . . . . . 81
7.3 Disassembly and recycling. . . . . . . . . . . . . . . . . . . . . . . . . . . . . . . . . . . . . . . . . . . . . . . . . . . . . . . . . . . . . . . . . . 82
7.4 Technical specifications. . . . . . . . . . . . . . . . . . . . . . . . . . . . . . . . . . . . . . . . . . . . . . . . . . . . . . . . . . . . . . . . . . . . 83
7.5 Cup and jug sizes. . . . . . . . . . . . . . . . . . . . . . . . . . . . . . . . . . . . . . . . . . . . . . . . . . . . . . . . . . . . . . . . . . . . . . . . . 84
7.6 Manufacturer contact information. . . . . . . . . . . . . . . . . . . . . . . . . . . . . . . . . . . . . . . . . . . . . . . . . . . . . . . . . . . . 85
8 Appendix. . . . . . . . . . . . . . . . . . . . . . . . . . . . . . . . . . . . . . . . . . . . . . . . . . . . . . . . 86
8.1 Appendix list. . . . . . . . . . . . . . . . . . . . . . . . . . . . . . . . . . . . . . . . . . . . . . . . . . . . . . . . . . . . . . . . . . . . . . . . . . . . 86
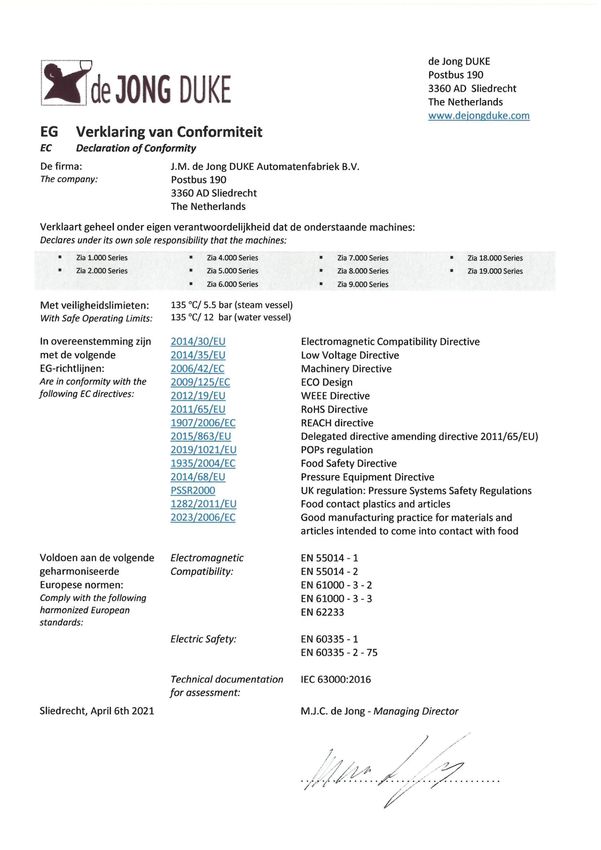
8.2 Declaration of conformity. . . . . . . . . . . . . . . . . . . . . . . . . . . . . . . . . . . . . . . . . . . . . . . . . . . . . . . . . . . . . . . . . . 87
6
Zia INB Small Cabinet 1.000 Instant User Manual 5DUINP20M EN V2.1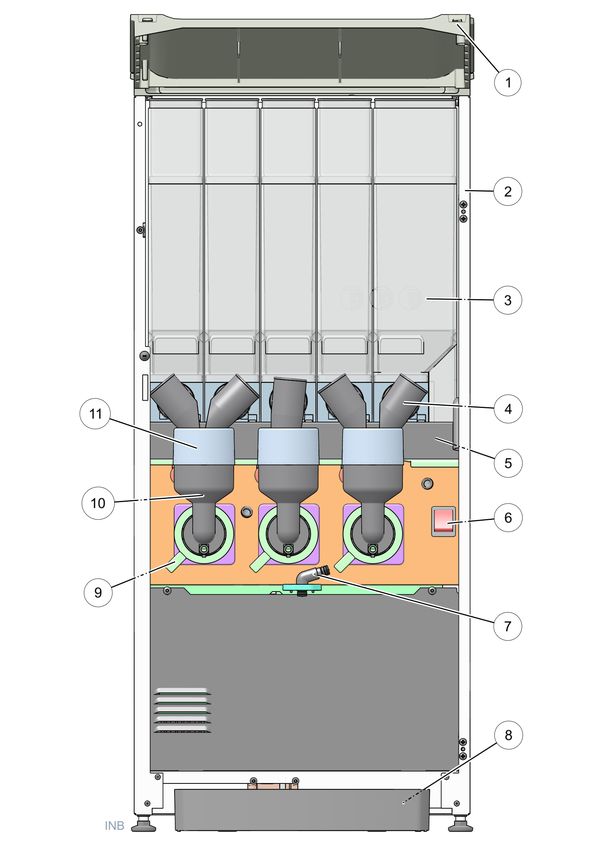
About this manual

Audience
                                           This manual describes how to use and maintain the Zia coffee
                                           machine. Intended users are the end user and staff responsible
                                           for regular maintenance of the machine.
                                           De Jong DUKE assumes that staff will:
                                           • have sufficient technical knowledge and experience to carry
                                             out the tasks assigned to them,
                                           • recognize and prevent possible hazards,
                                           • read and understand this manual,
                                           • follow the procedures described in this manual,
                                           • ensure that the machine will not harm personnel and/or
                                             damage its environment.

                                           If the responsible staff has permission to perform maintenance
                                           actions or to change parameters, De Jong DUKE expects that the
                                           operator is trained for these tasks.

Scope
                                           This manual contains essential information for proper operation
                                           and maintenance of the machine. Following the instructions
                                           contained in this manual should assure trouble-free, safe
                                           operation and maintenance of the machine.

                                           CAUTION
                                           Before using or maintaining the machine read this manual
                                           carefully to become familiar with the functionality. Make sure
                                           that any operator or service engineer understands the correct
                                           operating and maintenance procedures and all safety
                                           precautions. If any (part of the) information in this manual is
                                           unclear contact the supplier.

                                           Operators and service engineers must be adequately trained in
                                           the correct operation of the machine. Keep this manual in a pre-
                                           determined place near the machine.

Conventions
                                           This manual uses the following text conventions:
                                           • Actions that you should perform in a specific sequence are
                                             numbered, for instance, e.g.:
                                             1. Open the door of the coffee machine.

Zia INB Small Cabinet 1.000 Instant User Manual 5DUINP20M EN V2.1                                             7
• Black circled numbers (e.g. 1, 2, 3) and numbers between
                      parentheses e.g. (1) in text refer to elements in a figure.
                    • Bold text is used for (sub)titles and for information that
                      needs special attention: 'Read these instructions carefully'.
                    • Menu names in the user interface are shown in bold, for
                      example: return to the Main menu.
                    • Settings in the user interface are shown in italics; for
                      example: 0.45.
                    • Soft keys, keyboard buttons and hardware buttons are shown
                      between brackets, for example: [Start], [Enter], [2].
                    • Messages shown in the user interface are shown between
                      quotation marks and in italics, e.g.:
                      'Place cup right (see Message: Place cup right on page 78)'.
                    • Cross-references to sections, tables, figures etc. are indicated
                      as blue text or written as (see "....." on page ..). The main
                      purpose is easy recognition in the paper and on-line (PDF)
                      version of the manual. In the on-line version, the cross-
                      references function as hyperlinks that can be used to navigate
                      through the manual by clicking on them. Example: Scope (on
                      page 7).
                    • The safety symbols indicate situations or actions that may
                      endanger the operators and service engineers and are
                      explained in detail in the safety section.
                    • One additional symbol is available to give the reader
                      additional information:

                    TIP
                    Recommendations for the reader.

Related documents
                    In addition to this manual, the following documentation is
                    available:
                    • Technical manual
                      containing all information about the functionality of all parts
                      in the machine, procedures for servicing and configuring the
                      recipes.
                    • Electrical drawings
                      contains the electrical drawing/diagrams of the machine.
                    • Spare parts manual
                      containing relevant information for identification of the
                      spare parts.
                    • Third party documentation
                      contains the available documentation of third-party machine
                      parts.

8
                      Zia INB Small Cabinet 1.000 Instant User Manual 5DUINP20M EN V2.1
Availability of this manual
                                           De Jong DUKE expects this manual to be available to all
                                           operators and service engineers. The original hard copy (paper)
                                           version should always be available near the machine.

                                           If the operator has the permission to perform a number of
                                           maintenance actions or program activities, De Jong DUKE
                                           expects that the operator is trained according to the activities
                                           and that the appropriate documentation is available for the
                                           operator.

Zia INB Small Cabinet 1.000 Instant User Manual 5DUINP20M EN V2.1                                             9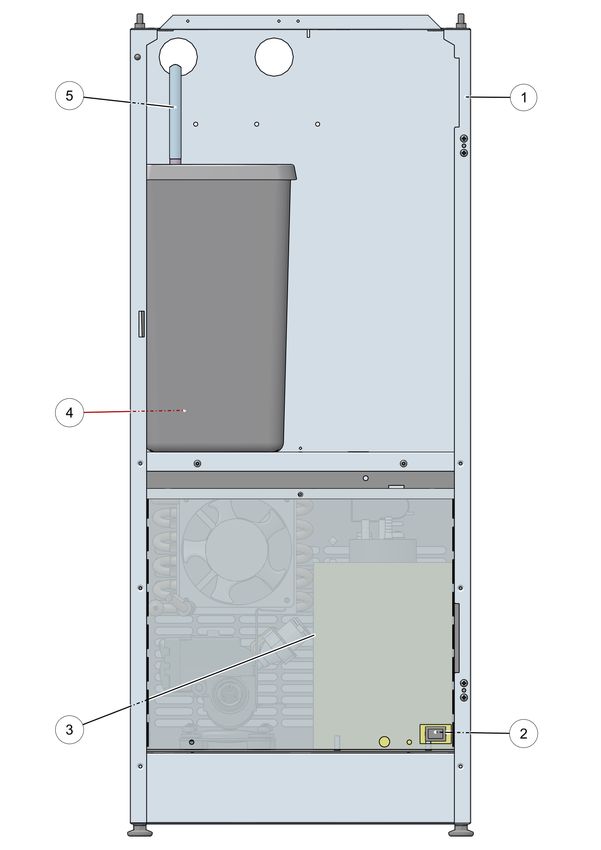
1
Safety

1.1 Safety and risk levels
                                           Four safety and risk levels are used in this manual.
                                           The risk levels and explanations are:

                                           NOTE
                                           To show extra information that may help the reader.

                                           CAUTION
                                           Indicates a potentially hazardous situation that, if not avoided,
                                           can result in minor or moderate injury or damage to the machine
                                           or property.

                                           WARNING
                                           Indicates a potentially hazardous situation that, if not avoided
                                           can result in death, serious injury or machine damage. It
                                           includes hazards that are exposed when guards or security
                                           features are removed.

                                           DANGER
                                           Indicates a hazardous situation that, if not avoided, can result in
                                           death or serious injury.

Zia INB Small Cabinet 1.000 Instant User Manual 5DUINP20M EN V2.1                                             10
1.2 Safety and warnings
The safety warnings in this section apply to the entire document.
The risk level associated with the explanation are:
DANGER
All danger level warnings applicable to the entire document:
• Do not use water in or near the machine unless the
instructions contain explicit directions to the contrary. Risk
of electrocution when water comes in contact with internal
electrical parts.
• Do not use a water jet to clean the coffee machine.
• HOT water! The water system (boiler, pipes, etc.) may contain
hot water. Risk of burning when HOT water comes in contact
with a person that can cause a scalding injury.
• Do not move, lift or tilt the machine. Risk of serious personal
(hand and finger) injuries.
• Only qualified service personnel is allowed access to the
internals of the machine.
WARNING
All warning level warnings applicable to the entire document:
• Do not shake the machine while in use. Risk that machine can
tip over and fall.
• Do not lean on the door when open. Risk that machine can tip
over and fall. Risk of serious injury.
CAUTION
All caution level warnings applicable to the entire document:
• Do not use aggressive cleaning products or abrasives to clean
(parts of) the machine.
• Do not use a dish washer to clean parts.
• Do not use a damaged machine. Please contact your supplier.
• If a fault occurs disconnect the machine from the electrical
and water supplies. Please contact your supplier immediately.
NOTE
All note level warnings applicable to the entire document:
• Use the machine only in areas where trained personnel can
monitor the operation.
• Water and electrical connections must conform to local
regulations.
• Make sure a waterlock is used in the water connection.
Zia INB Small Cabinet 1.000 Instant User Manual 5DUINP20M EN V2.1 11• If the power cord is damaged it must be replaced by the
manufacturer, the supplier or similar qualified persons.
• Do not use an extension cord.
• Do not use an external timing device to manage the
availability of the machine.
• Damaged water connection hoses may only be repaired by
trained personnel.
• Make sure to follow instructions on all safety labels on and in
the coffee machine.
• Do not remove safety labels.
12
Zia INB Small Cabinet 1.000 Instant User Manual 5DUINP20M EN V2.11.3 Installation
For instructions about transportation, unpacking, and
installation of the machine, consult the Technical manual.
• Installation, transportation, and adjustment of the machine
is specialized work, only properly trained service personnel is
allowed to do this.
• The coffee machine is for indoor use only.
• Make sure the machine is placed on a level, flat and stable
surface in a hygienic, dry room with a temperature between
5...40 °C .
• Make sure that the electricity and water supply connections
comply to local regulations and remain easily accessible after
installation.
1.4 Maintenance
Regular cleaning is needed to ensure hygienic operation of the
machine. This manual explains all cleaning procedures to ensure
a proper operation of the coffee machine.
1.5 Extended down time
• If the coffee machine will not be used for a longer period of
time (more than one week) it is recommended to turn off the
water supply and the electricity (if the power switch is not
accessible pulling the main power plug from the wall socket is
sufficient). This will also prevent unnecessary use of energy.
If the coffee machine was used also check the cleaning
procedures in section Switch off / Putting out of order (on
page 46).
• In areas where the temperature can drop below freezing
point, the boilers must be emptied. When freezing has
occurred allow sufficient time for the machine to reach room
temperature before switching on the machine. Contact your
supplier (see Service and support on page 3) for more
information.
Zia INB Small Cabinet 1.000 Instant User Manual 5DUINP20M EN V2.1 132
Description
2.1 Overview
The Zia coffee machine is a compact semi-automatic machine for
the preparation and vending of hot (and optionally cold) drinks.
The coffee machine is an instant coffee machine.
The coffee machine is operated using the touchscreen panel on
the door. By tapping one of the buttons on the screen a product
choice can be made. Before a beverage is dispensed a cup or jug
must be placed under one of the outlets. More details are found
in the sections:
• Using the coffee machine (on page 32) and
• User interface (on page 19) for information shown on the
touchscreen.
The next sections contain drawings of the front, the inside and
the optional base cabinet of the coffee machine. The drawings
show the location and the name of the most important parts of
the machine.
NOTE
All pictures show a generic configuration. The actual model can
be different. To improve clarity, colors in the pictures may be
different from the actual colors.
More details are also found in the chapter Technical
specifications (on page 81).
Zia INB Small Cabinet 1.000 Instant User Manual 5DUINP20M EN V2.1 142.1.1 Front view
Front view Zia (small model)
NOTE
All pictures show a generic configuration. The actual model can
be different. To improve clarity, colors in the pictures may be
different from the actual colors.
1. Touchscreen
2. Outlet hot water ( / cold water —
option)
3. Cup sensors
4. Cup stand
5. Drip tray / Jug stand
6. Outlet other dispenses
7. Door lock and key
Zia INB Small Cabinet 1.000 Instant User Manual 5DUINP20M EN V2.1 152.1.2 Inside view
The inside view shows the location and names of the most
important parts.
NOTE
All pictures show a generic configuration. The actual model can
be different. To improve clarity, colors in the pictures may be
different from the actual colors.
Inside view Instant (small model)
1. Top lid
2. Cabinet
3. Instant Canisters
4. Canister outlet nozzles
5. Exhaust filter drawer
6. Power switch
7. Dispensing nozzles
8. Drip tray
9. Mixer bayonet catch
10. Mixer house
11. Mixer suction trap
16
Zia INB Small Cabinet 1.000 Instant User Manual 5DUINP20M EN V2.12.1.3 Door interior
Door interior Zia Instant small model with optional payment device
(coin acceptor)
NOTE
All pictures show a generic configuration. The actual model can
be different. To improve clarity, colors in the pictures may be
different from the actual colors.
1. Service key
2. Door lock and key
3. USB port
Zia INB Small Cabinet 1.000 Instant User Manual 5DUINP20M EN V2.1 172.1.4 Inside view base cabinet — optional
Inside view base cabinet Instant (small model)
NOTE
All pictures show a generic configuration. The actual model can
be different. To improve clarity, colors in the pictures may be
different from the actual colors.
1. Base cabinet
2. Chiller flush button CO2 — optional
3. Chiller sub cabinet — optional
4. Waste water bin
5. Sensor waste water level — optional
18
Zia INB Small Cabinet 1.000 Instant User Manual 5DUINP20M EN V2.13
User interface
3.1 Display layout
The coffee machine is operated with a touchscreen on the door.
All selections are made by tapping (a short press) on one of the
buttons or menu tabs on the touchscreen.
Main screen layout (example)
NOTE
All drawings and screen images of the coffee machine are based
on generic configurations. The actual model will be different but
the functionality is similar.
All screens and menus are explained in detail in the next
sections. Using the touchscreen to dispense a beverage is
explained in the chapter Using the coffee machine (on page 32).
Zia INB Small Cabinet 1.000 Instant User Manual 5DUINP20M EN V2.1 193.2 Main menu - Cup dispensing
The Main menu (or screen) is displayed when the machine is
ready for use. It gives access to selections for cup dispensing and
all other functions.
Main selection screen
1. [Cup beverage selections] buttons 6. [Number selection] button —
2. [Scroll up/down] buttons — optional
optional 7. Logo — optional
3. Credit amount — optional 8. Message area
4. [Info] — optional 9. Language menu buttons — optional
5. [Jug] button — optional 10. Clock — optional
Beverage selection The main screen shows a selection of the most popular
beverages. The available beverages are logically grouped in
blocks. When more selections are available then can be displayed
in a block, a [Scroll up/down] button with an arrow is displayed.
Tap this button to show the other available beverage selections.
Each beverage button contains a small impression of the
beverage, the name and, when payment mode is activated, the
price of the beverage. Tap a button to select a beverage.
Lower part of the screen The lower part of the screen contains at least:
• Message area
Relevant status information about the coffee machine is
displayed in the message area. If more than one message
must be displayed they are shown in sequence. Tap the [!]
exclamation mark in front of the message to open the
Message submenu (on page 29) to see all messages
completely. Check the Message submenu (on page 29) for
more details.
• Clock
20
Zia INB Small Cabinet 1.000 Instant User Manual 5DUINP20M EN V2.1Displays the current time (as set in the coffee machine).
Optional Depending on the model and configurations of the coffee
machine the following options can be available:
• Credit amount — optional
When payment mode is activated, the credit value is
displayed. It is the total amount of money already entered for
payment of a beverage.
• [Info] — optional
Tap the [Info] button to open the Information submenu (on
page 31) with more details about ingredients.
• [Jug] — optional
Tap this button to open the Jug dispensing submenu (see
Jug dispensing on page 36) with selections to fill complete
jugs.
• [Number selection] — optional
Tap this button to open the Number selection submenu for
quick dispense of a beverage.
• Logo — optional
• Language — optional
If more languages are available the screen shows a selection
of language buttons. Tap on the desired language button to
change the text on the screen to the selected language.
Zia INB Small Cabinet 1.000 Instant User Manual 5DUINP20M EN V2.1 213.2.1 Additional options submenu
The Additional options submenu is displayed after a beverage
selection (cup or jug) is made on the Main menu (see Main menu
- Cup dispensing on page 20).
• This submenu is not available if the (selected beverage on
the) coffee machine is configured for direct dispense only.
• The options shown in the submenu depend on the selected
beverage, some beverages will have no options at all.
• If a jug dispense is selected, the [Start] and [Cancel] buttons
are available. If canister selection is possible this button bar
is displayed.
Additional options submenu
1. [Canister selection] button bar — 7. Currently selected beverage
optional 8. [Cancel] button
2. [Strength] button bar — optional 9. Message area
3. [Add-on] button bar — optional 10. Credit amount — optional
4. [2nd Add-on] button bar — optional 11. [Start] button
5. [Cup size] button bar — optional
6. Price for this beverage — optional
Depending on the configuration additional options are displayed
in the submenu. The following options are possible:
• Canister selection bar: to select an ingredient from a different
canister after initial selection. For example, when coffee is
selected, it is then possible to select the type of coffee from
different canisters. The current selection is highlighted.
Depending on configuration and availability of ingredients, a
two or three options bar is shown. Tap the desired canister.
• Strength selection bar: to adjust the amount of coffee
ingredient. The default strength is the middle button. The
selected strength will be highlighted.
22
Zia INB Small Cabinet 1.000 Instant User Manual 5DUINP20M EN V2.1▪ tap a [LINE] button for the desired strength. More lines is
more strength.
• Add-on selection bar: to add an extra ingredient, for example
milk, to the selected coffee. The selected amount is
highlighted. Tap the desired amount.
▪ [0] is no added ingredient (default).
▪ tap a [LINE] button for the desired amount of added
ingredient. More lines is more ingredient.
• 2nd Add-on selection bar: to add another extra ingredient, for
example sugar, to the selected coffee.
• Cup size bar: to select different cup sizes, a two or three
options bar can be displayed. The current cup size selection is
highlighted. Tap the desired cup size.
The remaining information on the screen:
• Price for the selected beverage. Only visible if payment is
activated for the machine.
• The currently selected beverage.
• The [Cancel] button. Tap to cancel the current selection and
return to the Main menu.
• The Message area. Displays relevant messages of the coffee
machine. Tap the [!] exclamation mark button to open the
Message submenu (on page 29). Details of all messages and
possible solutions to solve simple issues are listed in the
section Messages (on page 75).
• Credit. Displays the amount already entered to pay for the
selected beverage. Only visible if payment is activated for the
machine.
• The [Start] button. Tap this button to start the preparation of
the beverage. The button is disabled if no full payment is
made or if another problem is found that prevents the
dispense. Check the displayed message(s) in the message
area.
Zia INB Small Cabinet 1.000 Instant User Manual 5DUINP20M EN V2.1 233.2.2 Jug dispensing submenu
The Jug dispensing submenu is displayed after tapping the
[Jug] button on the Main menu (see Main menu - Cup dispensing
on page 20). On some models this menu is only available if the
jug function is activated with a jug key or pin code.
Jug dispensing menu
1. [Jug selection] buttons
2. Credit amount — optional
3. Message area
4. [Cup mode] button
The menu shows the following information:
• The Jug dispensing submenu displays a number of selection
buttons with beverages to fill (part of) a jug. Each button
contains a small image with an impression of the beverage,
the name and, when payment mode is activated, the price of
the jug dispense. Tap a button to select a beverage.
• The Message area displays relevant messages of the coffee
machine. Tap the [!] exclamation mark button to open the
Message submenu (on page 29). Details of all messages and
possible solutions to solve simple issues are listed in the
section Messages (on page 75).
• The [Cup mode] button. Tap it to cancel the jug selection and
return to the Main menu (see Main menu - Cup dispensing on
page 20).
24
Zia INB Small Cabinet 1.000 Instant User Manual 5DUINP20M EN V2.13.2.3 Number selection submenu
The Number selection submenu is displayed when the [Number
Selection] button is tapped on the Main menu (see Main menu -
Cup dispensing on page 20).
Number selection menu
1. Currently entered number selection
2. Actual beverage name
3. Beverage price in payment mode — optional
4. Credit in payment mode — optional
5. Numeric keypad with [0...9] buttons
6. [Cancel] button
7. Message area
8. [Start] button
The display shows the following information:
• The unique number entered for the selected beverage is
visible in the small window.
• The actual name connected to the entered number.
• Use the keypad to tap in the [number selection] of the
desired beverage.
NOTE
The unique number that must be entered here is shown
on the Dispense menu (see Dispense submenu on
page 27) screen when a beverage is prepared.
• Tap the [Start] button to start the preparation and dispense
of the beverage.
• Tap the [Cancel] button to exit the number selection and
return to the Main menu.
Zia INB Small Cabinet 1.000 Instant User Manual 5DUINP20M EN V2.1 25NOTE
If payment is activated for this beverage and the credit
amount is smaller than the price of the beverage the
[Start] button is disabled until full payment has been
made. The price for the selected beverage is shown
and the credit amount already entered.
• The Message area displays relevant messages of the coffee
machine. Details of all messages and possible solutions to
solve simple issues are listed in the section Messages (on
page 75).
26
Zia INB Small Cabinet 1.000 Instant User Manual 5DUINP20M EN V2.13.2.4 Dispense submenu
The Dispense submenu is shown during preparation and
dispense of the beverage.
Dispense submenu
1 Progress indicator
2. Beverage name
3. Unique beverage code
4. [Stop] button
When the beverage is prepared / dispensed the display shows:
• An impression and/or the name of the beverage currently
being prepared.
• An indicator showing the progress of the dispense of the
beverage.
• The number displayed is the unique number for the beverage
currently prepared. Use this number in the Number selection
submenu (on page 25) — optional for quick dispense of the
preferred beverage.
• The [Stop] button. Tap it to abort the current dispense and
return to the Main menu (see Main menu - Cup dispensing on
page 20).
Zia INB Small Cabinet 1.000 Instant User Manual 5DUINP20M EN V2.1 273.2.5 Ready submenu
The Ready submenu is shown when the coffee machine is
finished with the dispense.
Ready submenu
1. Progress indicator
2. Message when dispense is finished
3. Unique number of prepared beverage
4. [Cancel] button
When the dispense is completed the display shows:
• A dispense progress indicator at 100% completed.
• the message 'Ready, take your cup' to indicate it is safe to
remove the beverage (cup or jug).
• The unique number for the beverage that was prepared.
Instead of using the selection and options screens to prepare
the preferred beverage this unique number can be entered
using the Number selection submenu (on page 25) —
optional.
• The [Cancel] button. Tap it or remove the cup/jug to return to
the Main menu (see Main menu - Cup dispensing on page 20).
28
Zia INB Small Cabinet 1.000 Instant User Manual 5DUINP20M EN V2.13.2.6 Message submenu
The Message submenu shows all relevant messages for this
coffee machine in one screen. Tap the [!] exclamation mark
button on any screen to open this Message submenu (on page
29). Details of all messages and possible solutions to solve
simple issues are listed in the section Messages (on page 75).
Message submenu
1. [X] close button
2. List of all active messages
The message screen displays all active messages from the coffee
machine.
• Tap the [X] button or tap somewhere in the message area to
return to the previous menu.
There are three levels of messages • display only messages, e.g. 'Install drip tray'. When this
message is displayed the coffee machine continues to work,
even without the drip tray.
• disable dispense messages, e.g. 'Insert coins (see Message:
Insert coins on page 76)'. When this message is displayed the
coffee machine is fully functional except for the dispense. In
this case the [Start] button will be enabled after full payment
is made.
• disable selections messages, e.g. 'Water level 2 too low'.
When this message is displayed some or all beverage selection
buttons are disabled. When the boilers are filled and the
water level is correct the message is removed and the
selection buttons are enabled.
Zia INB Small Cabinet 1.000 Instant User Manual 5DUINP20M EN V2.1 29Details of all messages and possible solutions to solve simple
issues are listed in section Messages (on page 75).
30
Zia INB Small Cabinet 1.000 Instant User Manual 5DUINP20M EN V2.13.2.7 Information submenu
The Information submenu is displayed after tapping the [Info]
button on the main menu screen. It shows details about the
ingredients or the coffee machine.
Information submenu
1. Customized information
2. [Cancel] button
The customized information image shows details about the
beverage or coffee machine and is defined for every available
language (for example: Food allergy warnings).
Tap the [Cancel] button to return to the Main menu.
Zia INB Small Cabinet 1.000 Instant User Manual 5DUINP20M EN V2.1 314
Using the coffee machine
4.1 Before use
Transportation, installation and adjustment of the machine is
specialized work. Only properly trained service personnel should
carry this out. Instructions about transportation, unpacking,
and installation of the machine can be found in the Technical
manual.
Switch on the coffee machine Perform the steps described in the procedure Switch on the
machine (see Switch on on page 44).
Fill up the ingredient canisters Perform the steps described in the procedure Fill up the
ingredient canisters (on page 67).
Zia INB Small Cabinet 1.000 Instant User Manual 5DUINP20M EN V2.1 324.2 Procedures
4.2.1 Select a beverage
NOTE
If the Main menu (see Main menu - Cup dispensing on page 20) is
not shown, tap on the screen somewhere or place a cup on the
cup stand.
NOTE
If the button [Place cup and press here] is shown, first perform
a rinse procedure. (see Scheduled rinse on page 47)
Procedure Perform the following steps:
1. Tap the desired [language] button on the screen (optional).
The screen will change to the selected language.
TIP
The selected language will remain active until the
beverage is dispensed.
2. From the Main menu (see Main menu - Cup dispensing on
page 20) select one of the following:
▪ To fill a single cup using the selection menus continue
with the procedure Cup dispensing (on page 34).
▪ To (quickly) fill a single cup using pre-set ingredients
continue with the procedure Cup dispensing by number —
optional (on page 35).
▪ To fill (part of) a jug continue with the procedure Jug
dispensing (on page 36).
Zia INB Small Cabinet 1.000 Instant User Manual 5DUINP20M EN V2.1 334.2.1.1 Cup dispensing
Procedure Perform the following steps:
1. Tap the desired beverage button from the selections on the
Main menu (see on page 20).
▪ or first tap one of the [Scroll Up/down] buttons and then
select the desired beverage.
2. The Additional options submenu (on page 22) with the
selected beverage is shown.
3. When available and needed, tap one or more of the desired
options to make additional changes.
4. Place a cup under the correct outlet.
▪ check the drawing of the front view (on page 15) for the
correct outlet.
5. Tap the [Start] button to prepare the beverage.
▪ or tap [Cancel] to return to the Main menu (see on page
20).
▪ when payment mode is activated, full payment is needed
first to enable the [Start] button. Check the payment (on
page 38) section for more details.
6. The Dispense submenu (see on page 27) is now shown and
the beverage is prepared.
▪ or tap the [Stop] button to interrupt and stop the
dispense.
7. When the dispense is finished the Ready submenu (on page
28) is shown.
▪ do not remove your cup before the message 'Ready, take
your cup (see Message: Ready, take your cup on page 80)'
is visible. The message will remain visible on the screen
until the cup is removed.
▪ To add an additional beverage to the same cup, do not
remove the cup but tap the [Cancel] button and select the
next beverage.
8. The prepared drink is ready.
WARNING
Hot liquid can leak from the outlet nozzle after the
dispense is finished.
34
Zia INB Small Cabinet 1.000 Instant User Manual 5DUINP20M EN V2.14.2.1.2 Cup dispensing by number — optional
Each beverage with specific strength and/or added ingredients
has its own code. Instead of entering all selections, this code can
be used to dispense the beverage more quickly with required
strength and additional ingredients.
NOTE
This procedure is optional and only available if the [Number
Selection] button is available on the Main menu.
Procedure Perform the following steps:
1. Tap the unique [number] of the desired beverage on the
keypad displayed on the screen.
NOTE
The actual number that needs to be entered here is
shown on the Dispense menu (see Dispense submenu
on page 27) screen when the beverage is prepared /
during dispense.
2. Tap the [Start] button to prepare the beverage.
▪ or tap [Cancel] to return to the Main menu (see on page
20).
▪ when payment mode is activated, full payment is needed
first to enable the [Start] button. Check the payment (on
page 38) section for more details.
3. The Dispense submenu (see on page 27) is now shown and
the beverage is prepared.
▪ tap the [Stop] button to interrupt and stop the dispense.
4. When the dispense is finished the Ready submenu (on page
28) is shown.
▪ do not remove your cup before the message 'Ready, take
your cup (see Message: Ready, take your cup on page 80)'
is visible. The message will remain visible on the screen
until the cup is removed.
▪ To add an additional beverage to the same cup, do not
remove the cup but tap the [Cancel] button and select the
next beverage.
5. The prepared drink is ready.
WARNING
Hot liquid can leak from the outlet nozzle after the
dispense is finished.
Zia INB Small Cabinet 1.000 Instant User Manual 5DUINP20M EN V2.1 354.2.1.3 Jug dispensing
Purpose When configured it is possible to fill complete jugs at once. On
some models this option is available after activation with a jug
key or pin code.
Procedure Perform the following steps:
WARNING
The outlet of the machine may occasionally drip hot liquid even
when the machine is not in use.
When hot liquid comes in contact with a person, this can lead to
serious scalding injuries.
1. Lift and remove the cup stand from the suspension points in
the door.
2. For hot water place the jug on the right side below the hot
water outlet.
WARNING
If jugs are not correctly placed, the machine can spill
hot liquid down the front. This can cause serious
scalding injuries.
36
Zia INB Small Cabinet 1.000 Instant User Manual 5DUINP20M EN V2.13. For all other dispenses place the jug in the middle below the
main outlet.
4. If the jug submenu is not visible tap the [Jug] button from
the main menu (see Main menu - Cup dispensing on page 20).
5. Tap the desired beverage and jug filling from the shown
selection buttons.
▪ or tap the [Cup mode] button to return to the Main menu
6. Tap the [Start] button to start the dispense.
▪ tap the [Cancel] button to return to the Main menu (see
Main menu - Cup dispensing on page 20).
▪ when payment mode is activated, full payment is needed
first to enable the [Start] button. Check the payment (on
page 38) section for more details.
▪ if the [Start] button is disabled check the Message area
for more details.
7. The Dispense submenu (see Dispense submenu on page 27) is
now displayed.
▪ tap the [Stop] button to interrupt and stop the dispense.
8. When the dispense is finished the Ready submenu (on page
28) is shown.
▪ do not remove your cup/jug until the message "Ready,
take your cup (see Message: Ready, take your cup on page
80)" is shown.
▪ the message will remain visible on the screen until the
cup/jug is removed.
▪ to add an additional beverage to the same cup/jug tap the
[Cancel] button.
CAUTION - Hot liquid can leak from the outlet
nozzle after the dispense is finished.
9. The filled jug is ready.
10. Place the cup stand back in the suspension points in the door.
Zia INB Small Cabinet 1.000 Instant User Manual 5DUINP20M EN V2.1 374.2.2 Payment
Purpose If the coffee machine is activated for payment, the cup or jug
dispense will only start after full payment is made.
Procedure Perform the following steps:
1. The price for the dispense of the selected cup / jug is shown
on the screen.
2. Make the full payment.
▪ The entered credit amount is calculated and shown on
screen.
NOTE
The [Start] button will remain disabled until full
payment is made.
38
Zia INB Small Cabinet 1.000 Instant User Manual 5DUINP20M EN V2.15
Preventive maintenance
5.1 Food safety engagement
Food safety and quality are important for both customer and
those who work in the vending industry. Respecting a number of
basic principles, such as personal hygiene, is essential. We
therefore advise you to follow the advice given in "A hygiene
guide for vending". This guide is published by the European
Vending and Coffee Association and has been prepared to help
ensure that a hygienic product is delivered to the customer on
every occasion.
Zia INB Small Cabinet 1.000 Instant User Manual 5DUINP20M EN V2.1 395.2 Preventive maintenance schedule
NOTE
Skipping maintenance can affect the quality of the dispensed
drink and may lead to malfunctioning of the machine. Clean the
coffee machine at the end of the day and before the machine is
switched off for a longer period.
The schedule below gives an overview of all procedures needed to
maintain the coffee machine.
Preventive maintenance schedule Instant (small model)
Cleaning procedures for the coffee machine with intervals D WMH
Scheduled rinse (on page 47) X
Flush mixers (on page 48) X
Clean the mixing system (on page 54) X
Clean the drip tray (on page 52) X
Clean the cup stand (on page 49) X
Clean the waste bin in the base cabinet (on page 50) X
Clean the cold water outlet nozzle — optional (on page 64) X
Deep clean the cold water outlet nozzle — optional (on page 65) X
General Cleaning cold water system (1) X
Sanitization cold water system (1) X
Clean the canisters (on page 63) X
Fill up the ingredient canisters (on page 67) X
Enter canister ingredient levels — optional (on page 70) X
Clean the outside of the machine (on page 71) X
Clean the touchscreen (on page 72) X
(1) Cold water specific cleaning procedures must be performed by a certified dealer and are not
explained in this end user manual.
Interval column codes
Daily D
Weekly W
Monthly M
Every 6 months H
40
Zia INB Small Cabinet 1.000 Instant User Manual 5DUINP20M EN V2.15.3 Daily maintenance
Purpose Performing daily maintenance will ensure the quality of your
beverages and a proper operation of the machine.
Procedure For daily maintenance follow these steps:
1. Open the door (on page 44) of the machine.
2. Flush mixers (on page 48).
3. Clean the drip tray (on page 52).
4. Clean the cup stand (on page 49) in the door.
5. Fill up the ingredient canisters (on page 67).
6. Enter canister ingredient levels — optional (on page 70).
7. Close the door (on page 44).
8. Clean the outside of the machine (on page 71).
9. Clean the touchscreen (on page 72).
10. Check correct functioning by taking a test beverage.
Each step is described in detail in the next sections.
Zia INB Small Cabinet 1.000 Instant User Manual 5DUINP20M EN V2.1 415.4 Weekly maintenance
Purpose Performing weekly maintenance will ensure the quality of your
beverages and a proper operation of the machine.
Procedure For weekly maintenance follow these steps:
1. Open the door (on page 44) of the machine.
2. Clean the mixing system (on page 54).
3. Clean the drip tray (on page 52).
4. Clean the cup stand (on page 49) in the door.
5. Clean the waste bin in the base cabinet (on page 50).
6. Clean the cold water outlet nozzle — optional (on page 64).
7. Fill up the ingredient canisters (on page 67).
8. Enter canister ingredient levels — optional (on page 70).
9. Close the door (on page 44).
10. Clean the outside of the machine (on page 71).
11. Clean the touchscreen (on page 72).
12. Check correct functioning by taking a test beverage.
Each step is described in detail in the next sections.
42
Zia INB Small Cabinet 1.000 Instant User Manual 5DUINP20M EN V2.15.5 Monthly maintenance
Purpose Performing monthly maintenance will ensure the quality of your
beverages and a proper operation of the machine.
Procedure For monthly maintenance follow these steps:
1. Open the door (on page 44) of the machine.
2. Clean the mixing system (on page 54).
3. Clean the drip tray (on page 52).
4. Clean the cup stand (on page 49) in the door.
5. Clean the waste bin in the base cabinet (on page 50).
6. Deep clean the cold water outlet nozzle — optional (on page
65).
7. Clean the canisters (on page 63).
8. Fill up the ingredient canisters (on page 67).
9. Enter canister ingredient levels — optional (on page 70).
10. Close the door (on page 44).
11. Clean the outside of the machine (on page 71).
12. Clean the touchscreen (on page 72).
13. Check correct functioning by taking a test beverage.
Each step is described in detail in the next sections.
Zia INB Small Cabinet 1.000 Instant User Manual 5DUINP20M EN V2.1 435.6 Preventive maintenance procedures
5.6.1 Switch on
Procedure Perform the following steps:
1. Turn on the water supply.
2. Connect the power cord to the power mains socket.
3. Open the door (on page 44).
4. Switch the [ON/OFF] power switch to the ON position.
▪ check the inside view drawing (see on page 16) for the
precise location.
5. Close the door (on page 44).
6. The coffee machine will start up.
7. The main screen is displayed with the message 'filling boiler'
and then 'heating boilers' in the message area (see on page
20) on the screen.
NOTE
If the door was left open for too long the service menu
is shown.
Tap the [Exit] button and then the [Close door and
press here to quit service] button to leave the
Service menu.
8. After a few minutes the message 'heating boilers' disappears
and the machine is ready for use.
5.6.2 Open the door
Procedure Perform the following steps:
1. Insert the key in the lock of the door of the coffee machine.
2. Turn the key 90 degrees.
3. Open the door.
▪ The Service menu is displayed on the screen.
NOTE
Do not leave the door open unattended to prevent
unauthorized access to the inside of the machine.
5.6.3 Close the door
Procedure Perform the following steps:
1. Insert the key in the lock of the door of the coffee machine.
44
Zia INB Small Cabinet 1.000 Instant User Manual 5DUINP20M EN V2.12. Turn the key 90 degrees.
3. Close the door.
4. Turn the key 90 degrees to lock the door.
5. Remove the key and store it in a safe place.
NOTE
Always remove the key from the coffee machine to
prevent unauthorized opening of the door.
6. (Optional) Leave the Service menu: tap the [Exit] button and
then the [Close door and press here to quit service] button
to return to the main menu.
5.6.4 Open or close top lid
Purpose To fill up or clean the canisters they need to be removed from the
coffee machine. To allow easy access to the canisters, the top lid
of the coffee machine can be opened.
NOTE
The top lid locks inside the door and can only be opened if the
door is opened.
Depending on the model, the top lid can contain cut outs for one
or two (bean) canisters.
Procedure Perform one of the following steps:
1. To open, lift the top lid in the front and swing it open to the
back. The top lid stays open in the upright position.
2. To close, swing the opened top lid back down. Make sure it is
lowered completely and locks when the door is closed.
Zia INB Small Cabinet 1.000 Instant User Manual 5DUINP20M EN V2.1 455.6.5 Switch off / Putting out of order
Procedure Perform the following steps:
1. Open the door (on page 44).
2. Switch the [ON/OFF] power switch to the OFF position.
▪ check the inside view drawing (see on page 16) for the
precise location.
• If the coffee machine is not used for a longer period of time
(more than one week) it is recommended to:
▪ perform a daily (see Daily maintenance on page 41)
maintenance cleaning procedure or, if the machine is not
used for a longer time it is recommended to perform a
monthly (see Monthly maintenance on page 43)
maintenance procedure.
▪ turn off the water supply.
▪ switch off the power supply (pulling the plug from the wall
socket is sufficient). This will also prevent unnecessary
use of energy.
See also section: Extended down time (on page 13).
46
Zia INB Small Cabinet 1.000 Instant User Manual 5DUINP20M EN V2.15.6.6 Scheduled rinse
Purpose Cleaning the coffee machine can be skipped or forgotten. The
scheduled rinse is forced every day using a scheduler. When
activated follow the procedure below to perform the rinse.
Instead you can also run the daily maintenance (on page 41) or
weekly maintenance (on page 42).
Required Use the following parts to perform the procedure:
• A rinsing tub.
Interval Perform this procedure:
• Daily (see Daily maintenance on page 41), announced on
screen.
Procedure Perform the following steps:
1. Place a rinsing tub underneath the outlet nozzle to collect the
rinse water.
2. Tap the button [Place cup and press here] on the screen.
▪ Hot water from the boiler flows through the mixers.
3. A progress screen is shown.
▪ Wait until the rinse procedure is finished.
▪ Total time to rinse is 1 to 2 minutes.
4. Remove the rinsing tub.
5. The machine returns to the Main menu (see Main menu - Cup
dispensing on page 20) and is ready for use.
Zia INB Small Cabinet 1.000 Instant User Manual 5DUINP20M EN V2.1 475.6.7 Flush mixers
Performing daily maintenance will ensure the quality of your
beverages and a proper operation of the machine.
Purpose The Rinse process flushes hot water from the boiler through all
mixers to remove any residue.
Required Use the following parts to perform the procedure:
• Rinsing tub or 1 liter jug.
Interval Perform this procedure:
• At least Daily (see Daily maintenance on page 41), more if
needed.
Total time • Total time needed to rinse is 1 to 2 minutes.
Procedure Perform the following steps:
1. Tap the [Rinse] button from the Service Menu.
▪ Hot water from the boiler flows through the mixers.
2. Repeat step 1 until clean water comes out of the machine.
48
Zia INB Small Cabinet 1.000 Instant User Manual 5DUINP20M EN V2.1You can also read