2020 Fall Product Program M2 Quick Reference Guide for Caregiver/Girl
←
→
Page content transcription
If your browser does not render page correctly, please read the page content below
M2 Quick Reference Guide for Caregiver/Girl

                              2020 Fall Product Program
                      M2 Quick Reference Guide for Caregiver/Girl

M2 – Task Schedule (Fall Program – Sept. 21st through Oct. 23rd)

Before Program Begins
-   Girl should be registered for 2021 Membership Year

September
-   Launch emails (from noreply@mail.gsnutsandmags.com) sent to all active girls registered
    for the 2021 Membership Year (21st)
-   Register in M2 from launch email
-   Test login credentials (username/email and password) to ensure they work
-   Familiarize yourself with documentation and M2 database
-   Create your Avatar to share with the rest of your troop (earn the patch by sending 15+
    emails and selling $250+ ONLINE)
-   Build contact list to prepare communications for sending to customers and receive online
    orders
-   Send out shop emails (Nuts/Candy or Magazines) to start receiving online orders
-   Use “Share on Social Media” function (if applicable) to share shop links online

October
-   Receive online orders throughout length of program (track in M2 – “Sales Reports” page)
-   Receive in-person (paper order card) orders and enter into M2 by deadline (23rd, 11:59pm)
-   Confirm recognitions are correctly earned and choices (if applicable) selected by deadline
    (23rd, 11:59pm)
-   Ensure all funds received by girl are given to the troop, with time to clear, for Nov. 2 nd debit

                                                                                                    1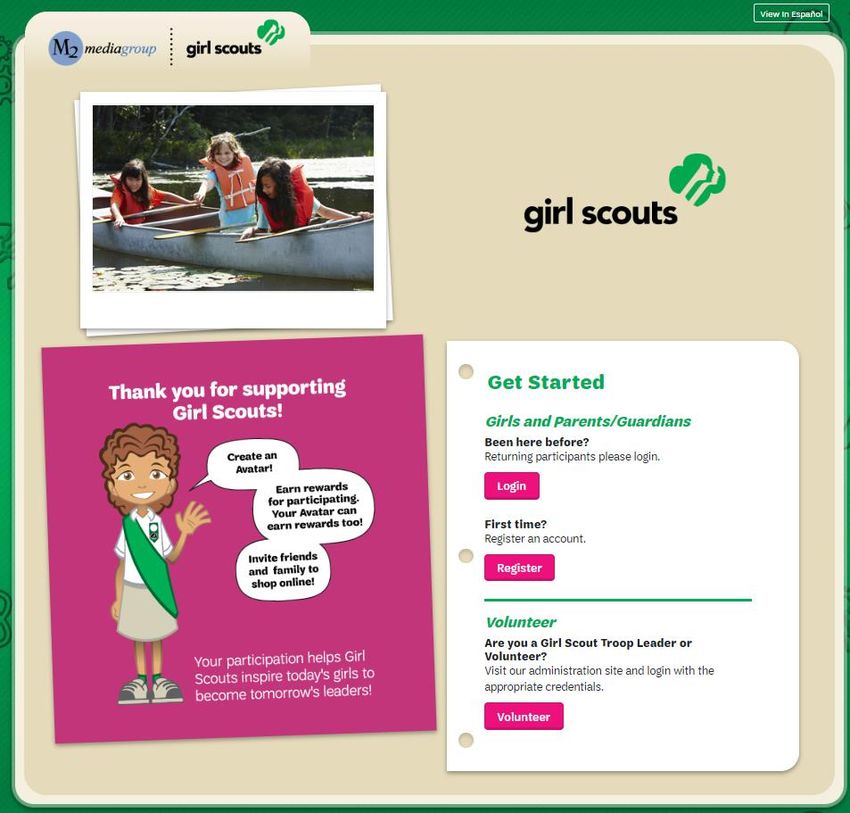
M2 Quick Reference Guide for Caregiver/Girl

Registration Email and Setting Up Account
The following requirements must be met in order to receive a Girl login to M2:

        •   Active 2021 Girl Membership
        •   Associated with a valid caregiver email (to receive registration/launch email)

Once the above have been met, Council will create the girl as a user and an email (similar to the one
below), from a no reply address (noreply@mail.gsnutsandmags.com), will be sent directly to the email
associated with the girl:

Click the link in the email to register an account on the M2 site. Put in your zip code and parent
information, as well as, create your password.

You will then be prompted to create your avatar customers will see when opening emails from you, and
other members of your troop will see when logged into M2:

                                                                                                        2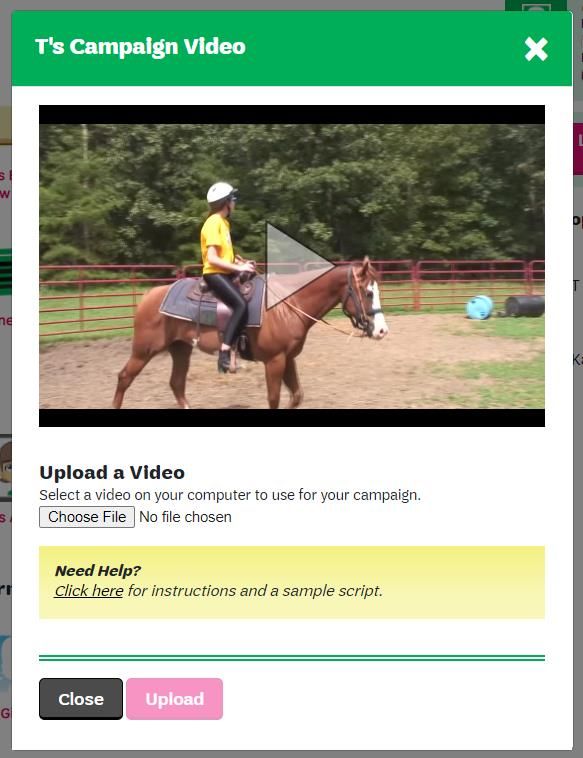
M2 Quick Reference Guide for Caregiver/Girl

You have many options available to you in order to create the Avatar that looks most like you. You can
change the skin tone, hair, eyes, body type and clothing, and as you progress through the Fall program,
you will have access to even more options.

Note: You can also add your voice, at this stage, so people can hear your voice when they are directed
to your online selling sites, but that is completely optional.

Once the Avatar has been created, you can then upload a photo or yourself, or a video you created in
order for friends and family to hear more about the program and your goals (also optional):

Next, you can promote your campaign by building your contact list at this time. You can either enter
them manually by putting in their First and Last Name, a more personalized greeting, and their email

                                                                                                          3
M2 Quick Reference Guide for Caregiver/Girl

address, or you can import contacts directly from a number of different email accounts, including Gmail
and Outlook:

Note: While this is optional at this time, it is highly recommended to get off to a good start with the
program. You can always add/delete contacts later by navigating to the “Emails” section of the system
(more information on pages 11-12).

Once you are satisfied with the contacts list, a window will prompt you to share your shop links to either
Facebook or Twitter, but this is optional and can be done later by navigating to the “Share on Social
Media” section of the system (more information on page 22). Press the “Close” button to close this
window and you will be shown a page to enter your address so the personalized patch (if earned) can be
sent directly to you when the requirement(s) have been met:

                                                                                                         4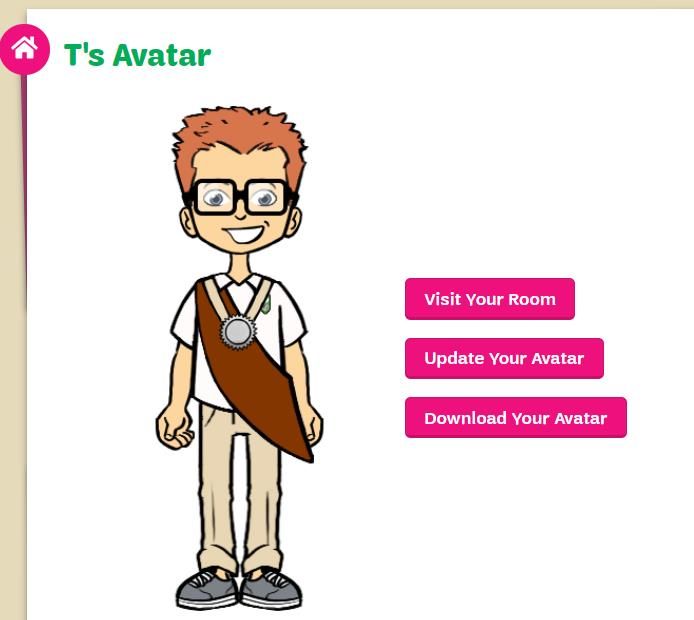
M2 Quick Reference Guide for Caregiver/Girl

Make note of the unique code that appears in the box below where you entered the address
information and then you can navigate to different parts of the database from here with the links
provided at the bottom:

Once everything is completed, you will receive an email (similar to the one below), which will give you
links to both of your shop sites, one for Nuts and Candy and the other for Magazines, as well as, a link to
check your current progress in the program:

                                                                                                          5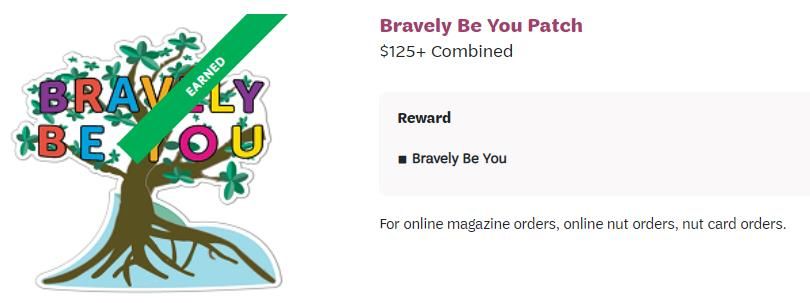
M2 Quick Reference Guide for Caregiver/Girl

Logging-In
To log into the M2 database, you will go to our custom Council URL:
https://www.gsnutsandmags.com/gsema.

In the “Get Started” box (below the Girl Scouts logo), you would click the “Login” button to access your
Girl account.

Note: Any roles you may have (e.g. Service Unit or Troop) are kept separate from girl accounts, if
applicable, but all girls associated with your email can be accessed through the same girl account.
Also, you can have the same email address for both volunteer and girl logins, but they are accessed in
different ways.

Enter the email and password associated with your account and click “Login”. If you have forgotten your
password, you can click the “Forgot Your Password?” link and a temporary one will be sent to you within
a few minutes.

                                                                                                           6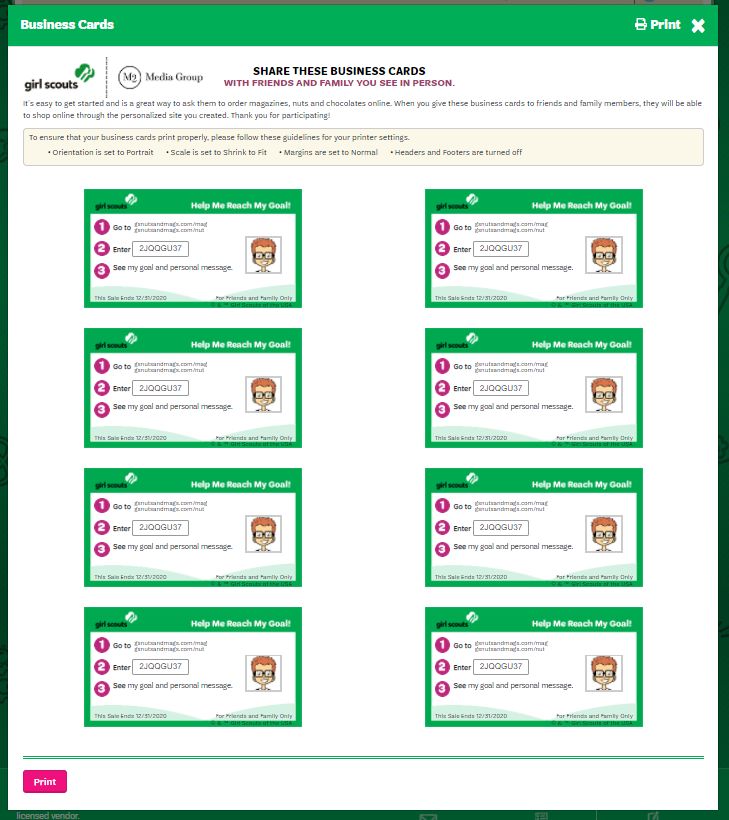
M2 Quick Reference Guide for Caregiver/Girl

Note: If multiple girls are associated with your account, you will need to select which one to view
before being redirected to the dashboard. Click the “View” button next to a girl and you will be sent
to their dashboard.

Navigating the Database
Once you are successfully logged into the M2 system as a Girl user, you will be taken to the girl
dashboard:

Note: This dashboard is from our test database. Some of these options may not be available when the
program begins and some of the information is for testing purposes only.

                                                                                                        7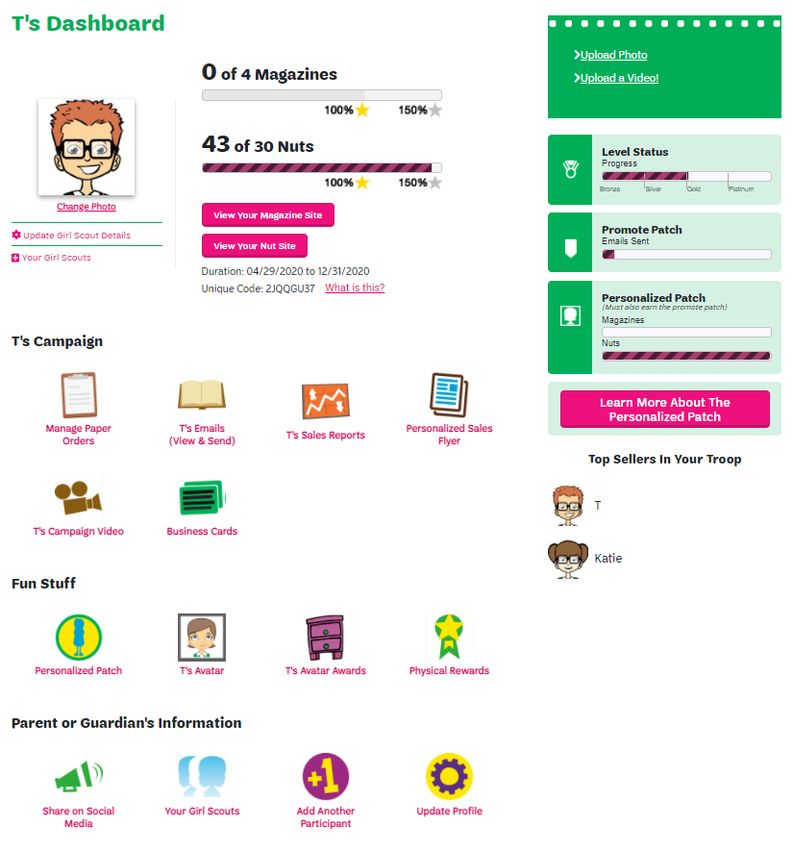
M2 Quick Reference Guide for Caregiver/Girl

From the girl dashboard, you can view very high-level information on your sales progress (overall nuts
and magazines), access your nut and magazine shop sites, check your progress on earning the
personalized patch, as well as, accessing every function available to girl users.

At the top-right of this page, by hovering over the symbol detailing the type of user you are logged in as
(e.g. “PG – Parent / Guardian”), you have a few options available to you:

    •   Your Girl Scouts – allows you to change between multiple girls tied to your email address (if
        applicable)
    •   Add Another Participant – disabled; contact Council at customercare@gsema.org to add any
        missing girls
    •   Update Profile – allows you to change the primary account’s name and password
    •   View in Español – allows you to view the entire system in Spanish
    •   Logout – ends current session

From the top section of the dashboard, you can change your photo (defaults to avatar, if created),
update your details (such as your goals and notifications), visit your shop sites, and upload a
photo/video (if not done already):

                                                                                                             8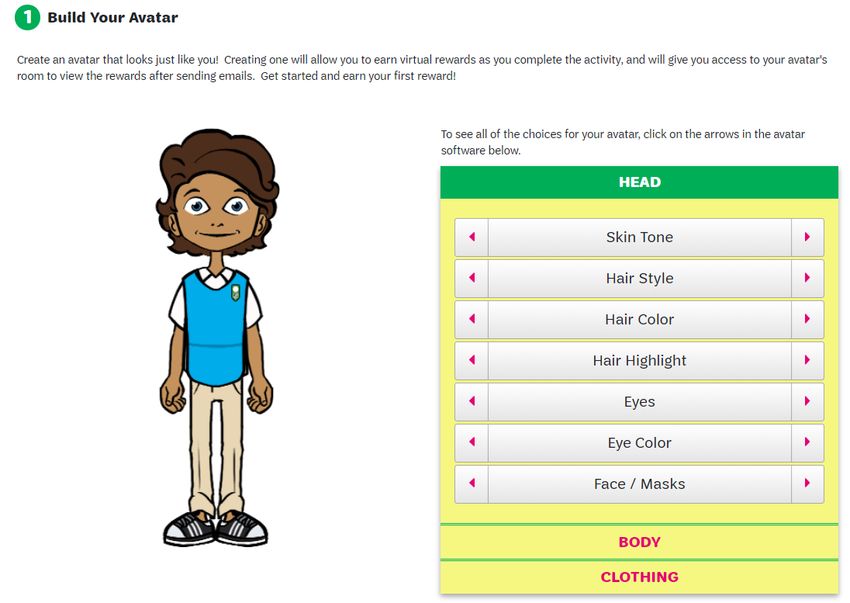
M2 Quick Reference Guide for Caregiver/Girl

The bottom section of the dashboard will have icons for all of the different sections of the database. We
will take a look at each of these sections in the coming pages:

Managing Paper Order Card Orders
From the dashboard, you can click the “Manage Paper Orders” icon (under [girl’s name] Campaign) to
enter any orders you have received on your paper order card.

Note: All online orders, whether direct ship or girl-delivered, will be automatically calculated in the
girl’s numbers. Only order card orders will need to be entered.

                                                                                                          9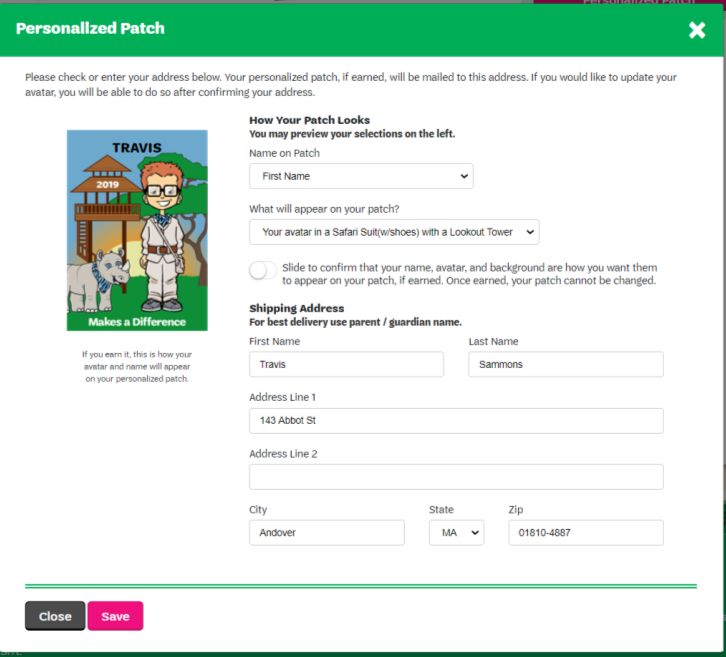
M2 Quick Reference Guide for Caregiver/Girl

This page will have a list of all products listed on the order card, in the same order, for you to tab
through more easily:

Enter the number sold for each product in the “Quantity” column and click “Update” to make sure the
changes are saved and you will be taken back to the Girl Dashboard.

Note: If you need to leave this page for any reason, without updating numbers, there is a Home icon
in the top-left, next to “Manage Paper Orders”, or a “Return to Dashboard” button on the bottom of
this page. All sections of the database have this icon and button for easier navigation.

                                                                                                         10
M2 Quick Reference Guide for Caregiver/Girl
Sending Shop Emails
You may have added/imported contacts upon initial setup, but if you did not or need to edit/delete any
contacts, you can do so by clicking the “[girl’s name] Emails (View & Send)” icon (under [girl’s name]
Campaign). You will be taken to the following page:
The top of this page will show you a table of all current contacts and the bottom has a legend to show
you the different statuses your emails could have.
Above the contact table, there is an “Add Contacts” button you can click to bring up a window which will
allow you to import contacts or add people manually (if not already done so):
Once you are satisfied with the list, you can click the “Send” button to send the emails to the entered
contacts, or click “Cancel” to exit this window.
11M2 Quick Reference Guide for Caregiver/Girl
If you have already sent emails, but want to resend for any reason, you can click the circular arrows icon
in the “Resend” column to do so:
When finished, you can click the Home icon or “Return to Dashboard” button to go back to the Girl
Dashboard.
Sales Reports
You can track your progress throughout the entire length of the program by accessing sales reports. To
do so, you will need to click the “[girl’s name] Sales Reports” icon (under [girl’s name] Campaign) and
you will be taken to the default report, “All Sales”:
12M2 Quick Reference Guide for Caregiver/Girl
There are many different reports available to Girl users. A short description of each is below:
• All Sales – shows your Supporters (Customers) who have ordered online nuts and magazines and
what they bought, as well as, a summary of your paper order card items
• Magazine Sales – shows just the magazine sales ordered by Supporters
• Direct Ship Nuts – shows just the nut sales made online by Supporters
• Nut Order Card – shows just the paper order card items summary
• Campaign Stats – shows a list of the different activities done by the girl for the program (incl.
uploading video/photo, creating an avatar, adding contacts, etc.)
• Online Nuts Girl Delivered – shows a summary of all products ordered online for girl-delivery,
with a breakdown of Supporters
Note: As noted previously, all online sales are automatically calculated into the system. However, all
paper order card items and online nuts that were selected for girl-delivery will be included in the
physical order to the Service Units and Troops at the end of the program.
Note: All reports can be printed, emailed or downloaded to PDF, by clicking the respective buttons at
the bottom of each Report page:
Personalized Patch
The “Personalized Patch” section (under Fun Stuff) on the dashboard is where you will go to customize
the look of the patch and will give you a preview of what it will look like, if earned. Once you click the
“Personalized Patch” icon, the following window will open:
13M2 Quick Reference Guide for Caregiver/Girl
The top portion of the window will allow you to choose the look of your patch, with your customized
avatar already included (if created):
The first option is to choose what name will appear on your patch: First name only, a nickname, or your
initials. Next, you will choose the background of your patch, which will include different configurations
with the theme/mascot. Finally, once you are satisfied with the look of the patch, you will need to use
the slider to confirm it is how you want it to look, because once it is earned, it cannot be changed.
The bottom portion of the window will be used to confirm the address, which the patch will be shipped
to:
Make sure the first name, last name, address, city, state and zip code are entered correctly for the
address you want the patch shipped to. Once completed, click the “Save” button to confirm.
14M2 Quick Reference Guide for Caregiver/Girl
Viewing/Editing Avatar
Whether you did, or did not, create your avatar during the setup process, you can access it at any time
during the program by clicking the “[girl’s name] Avatar” icon (under Fun Stuff) on the dashboard. You
will be taken to a page where you can update the default avatar (if not created) or your current avatar
(if created):
There are three buttons on this page: one for visiting your room, which includes all of the virtual
“awards” you have earned during the program (more information on page 16); one for updating your
avatar, which will allow you to change any aspect of your avatar (refer back to page 3); and, one for
downloading an image of your avatar to share with your friends/family.
15M2 Quick Reference Guide for Caregiver/Girl
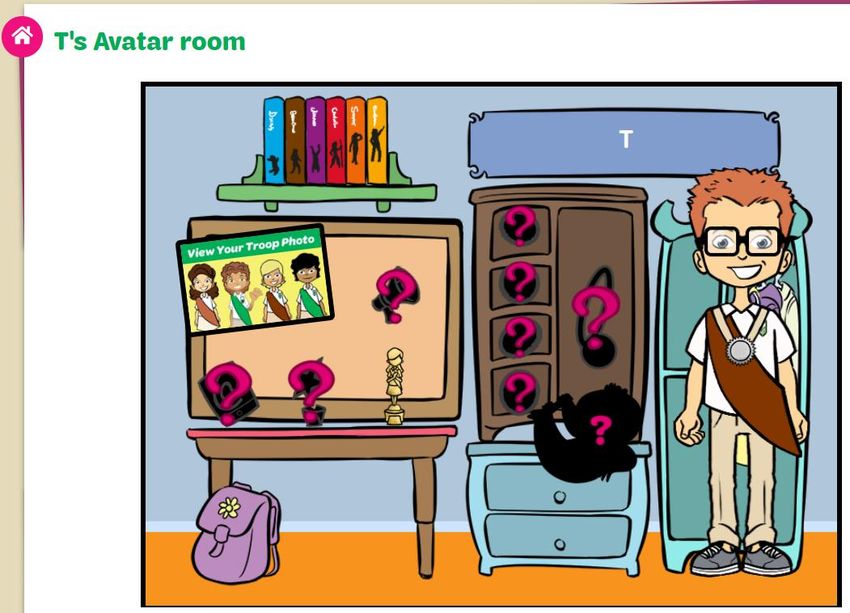
Avatar Awards/Room
As mentioned in the prior section, your avatar will have a room which stores all of your virtual “awards”
throughout the program. This can be accessed by clicking the button in the Avatar section, or by clicking
the “[girl’s name] Avatar Awards” icon (under Fun Stuff) on the dashboard. Once clicked, a page will
appear showing your avatar in a mockup of a room:
The room includes a banner at the top which will have your nickname printed on it, a troop photo on the
board which will populate with all of your troop members’ avatars once they create them, and a series
of question marks which can be clicked to show you the requirements for different “awards”. You can
also click on your avatar and it will take you to the page to view/edit your avatar.
Come back throughout the program to see what new awards you may have earned as your progress.
16M2 Quick Reference Guide for Caregiver/Girl
Recognitions
You can view the complete line-up of recognitions offered by Council, whether earned or not, at any
time by clicking the “Physical Rewards” icon (under Fun Stuff):
Across the top of the page, there is a scrolling banner which will show you some of the featured
recognitions and their requirements, and below that you can see the full list of recognitions and their
requirements.
Come back periodically to check the progress you are making and make sure you are getting all of the
recognitions you earned. If a recognition is earned, you will see a green “Earned” banner across the top-
right of the picture:
Note: Make sure to look through all of the recognitions and if a choice needs to be made (e.g. two
options, t-shirt size, etc.), make sure to choose it as soon as possible so you can guarantee you are
getting the recognition you want. Otherwise, if no option is made at the end of the program, the
choice will be made for you.
17M2 Quick Reference Guide for Caregiver/Girl
Your Girl Scouts (if applicable)
As mentioned prior, you are able to switch between girl scouts by navigating to the top-right of the page
and clicking “Your Girl Scouts” to switch between them (if applicable). The other way to do this is to click
the “Your Girl Scouts” icon (under Parent or Guardian’s Information), to switch between them. It will
bring you to a page that lists all of the girls associated with your profile (email address):
To switch to another girl, you simply click the “View” button next to the girl you want to view and you
will be taken to their respective dashboard.
Updating Profile
As mentioned prior, you are able to edit a little of your profile information by navigating to the top-right
of the page and clicking “Update Profile” to bring up a window where you can edit the information. The
other way to do this is to click the “Update Profile” icon (under Parent or Guardian’s Information). The
window will appear where you can change the name associated with the profile and your password:
18M2 Quick Reference Guide for Caregiver/Girl
Resources
There are many different resources for girls to use, throughout the program, to help promote their
selling:
• Personalized Sales Flyer
• Campaign Video
• Business Cards
• Share on Social Media
Below, the above resources will be explained in more detail.
Personalized Sales Flyer
To access the flyer, you would click the “Personalized Sales Flyer” icon (under [girl’s name] Campaign).
This will bring up a window, that shows a QR code and your unique shop code, which you can use to
print and send to anyone you like:
By using these codes, customers will have a direct link to your shops where they can purchase
nuts/candy and/or magazines.
19M2 Quick Reference Guide for Caregiver/Girl
Campaign Video
As mentioned prior, your girls can create a video showing what their goals are and their different Girl
Scout experiences, which customers will see when they access the shop site(s). To upload a created
video, you will click the “[girl’s name] Campaign Video” icon (under [girl’s name] Campaign) and the
following window will appear:
Click the “Choose File” button to bring up a window to select the video file you want to upload. If you
need help, there is a “Click Here” link which provides a sample script and suggested instructions on what
the video should have in it:
20M2 Quick Reference Guide for Caregiver/Girl
Once you are satisfied with the video, you will click the “Upload” button, at the bottom of the window,
to have it uploaded to the shop sites.
Business Cards
You also have access to Business Cards which can be printed, with your unique shop code, which can be
handed out to anyone you like. These will provide the URL and code needed to access your online shops.
To print them out, click the “Business Cards” icon (under [girl’s name] Campaign) and the below window
will appear:
Click “Print”, in either the top-right or bottom-left of the window, and a print preview will appear
showing you what it will look like. Once printed, you can then cut them out to hand out to potential
customers.
21M2 Quick Reference Guide for Caregiver/Girl
Share on Social Media
As mentioned prior, you are able to share links to your shop sites on social media sites (only Facebook
and Twitter, at this time). To do so, click the “Share on Social Media” icon (under Parent or Guardian’s
Information) and the following window will appear:
By clicking on the respective links, dialog boxes will appear for you to login to the appropriate social
media site and create a post that has the shop link included.
22You can also read