2018 Unify Troop Database Guide - Website
←
→
Page content transcription
If your browser does not render page correctly, please read the page content below
2018 Unify
Troop Database Guide

Website: http://girlscouts.qspgao.com/easternmass

              Last Updated: 9/11/2018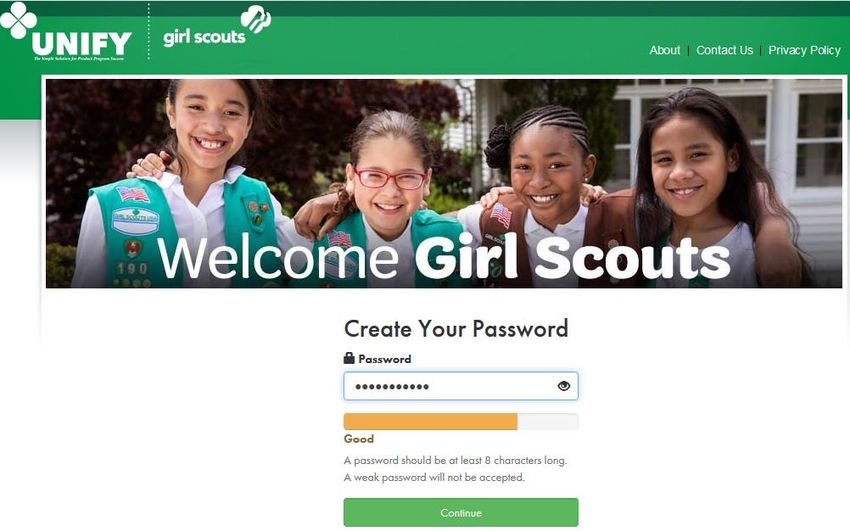
2018 Unify Troop Database Guide

Table of Contents

 Gaining Access to Unify                      2
 Registering to Unify                         3
 Logging into Unify                           4
 Troop Dashboard                             5-6
 Navigating through Unify                    6-7
 Switching Roles (if applicable)              8
 My Info                                      9
 Selecting Campaigns                         10
 Dashboard Tools                           10-19
    -   59 Minute Quick Start (Optional)      10
    -   Delivery                              11
    -   Financials                         11-12
    -   Manage Orders                      12-15
           o Adding Girl Payments             13
           o Viewing/Editing Girl Orders   14-15
    -   Messaging                          16-17
           o Sending Emails                   16
           o Posting Messages              16-17
           o Email Records                    17
    -   Take Action (Optional)             17-18
    -   MyCreation (Optional)                 18
    -   Rosters                               19
 Reports                                   20-21
 FAQ (Frequently Asked Questions)            21

                                                   1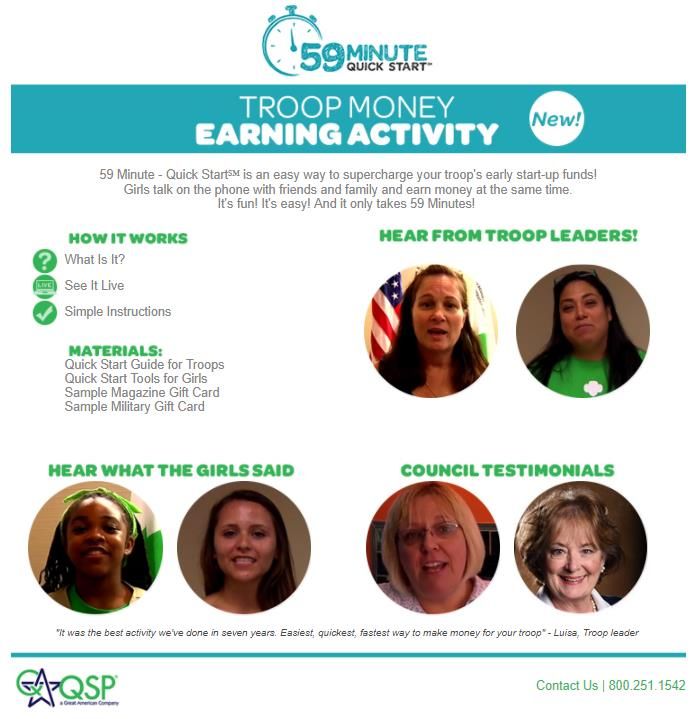
2018 Unify Troop Database Guide
Gaining Access to Unify
Two forms need to be received by Council in order to activate the Troop login email for Unify:
Troop Fall Product Program Coordinator Agreement
Troop Bank Account Form – if participating in the Cookie Program as well, this form will NOT
need to be resubmitted; it will carry over automatically
Once all forms have been received, Council will create you as a user in Unify and an automatically-
generated email, from a no reply address (GirlScout-sale@qspgao.com), will be sent directly to the email
written on the form:
2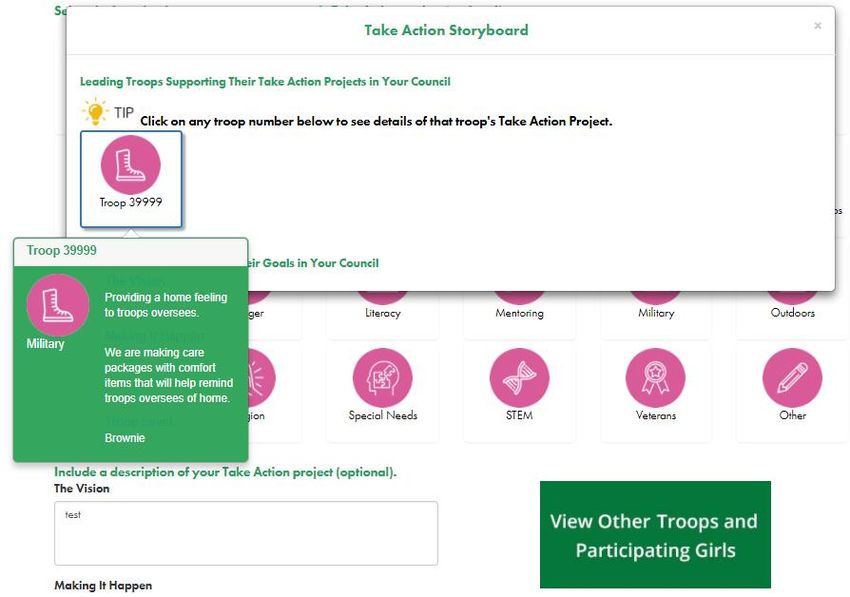
2018 Unify Troop Database Guide
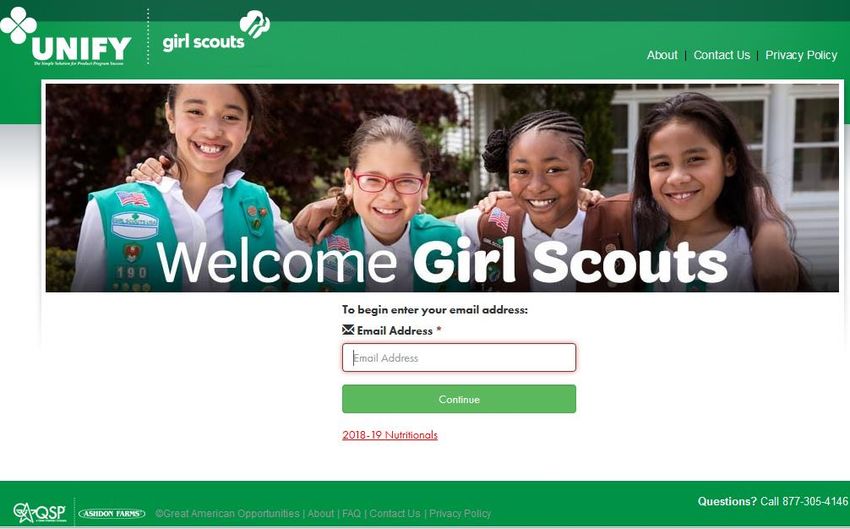
Registering to Unify
Once you click the “Go To Troop Dashboard” button in the email, you will be sent to the following page:
You will be prompted to add a password to the login tied to your email address. The password should be
at least 8 characters long, and if it is deemed weak by the system (no special characters or numbers),
you will need to re-enter another password.
Click the “Continue” button once the password has been selected.
Now you will be forwarded to the “My Info” page in your Troop login. More information about this
page can be found on pages 9-10.
3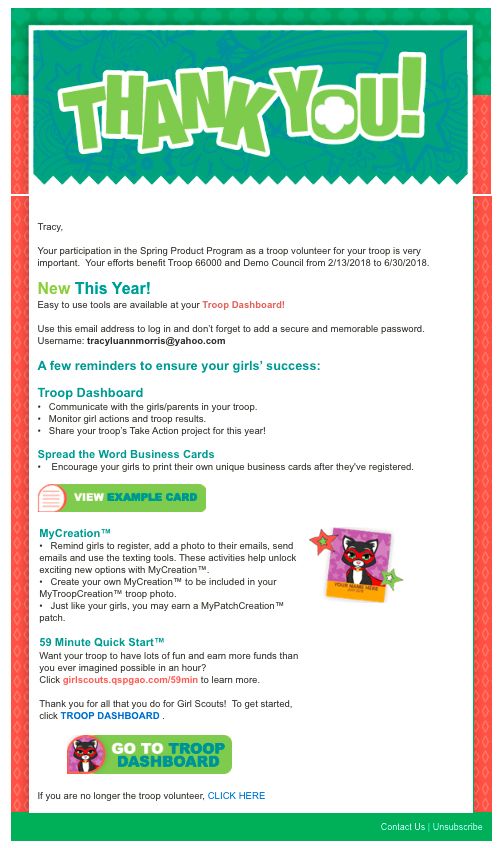
2018 Unify Troop Database Guide

Logging into Unify
To login, go to the Unify homepage, https://girlscouts.qspgao.com/easternmass:

Enter the email address and click the “Continue” button. Then enter the password and click the “Log In”
button.

Note: If entered correctly, a prompt will appear that says your login was successful. Otherwise, the
prompt will tell you the password is incorrect and needs to be re-entered.

                                                                                                       4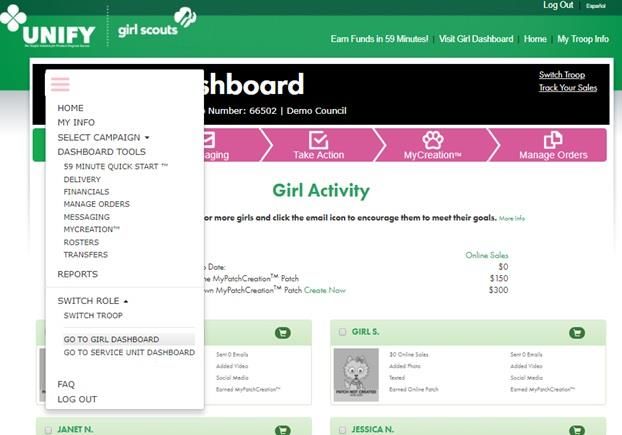
2018 Unify Troop Database Guide

Troop Dashboard
Once you have successfully logged in, you will be forwarded to the Troop Dashboard, which shows you
the “Girl Activity” page. This page lists all of the girls in your troop and what online tasks they have
completed:

From here, you can see how many emails they have sent, if they have completed their avatar, earned
the online-specific patches, and many other things. You can also click the checkbox next to the girls’
names, which will bring up an email icon for you to reach out to them directly. Finally, you can also click
on a girl’s shopping cart and that will bring up their shop page if you would like to order directly from
that girl:

                                                                                                           5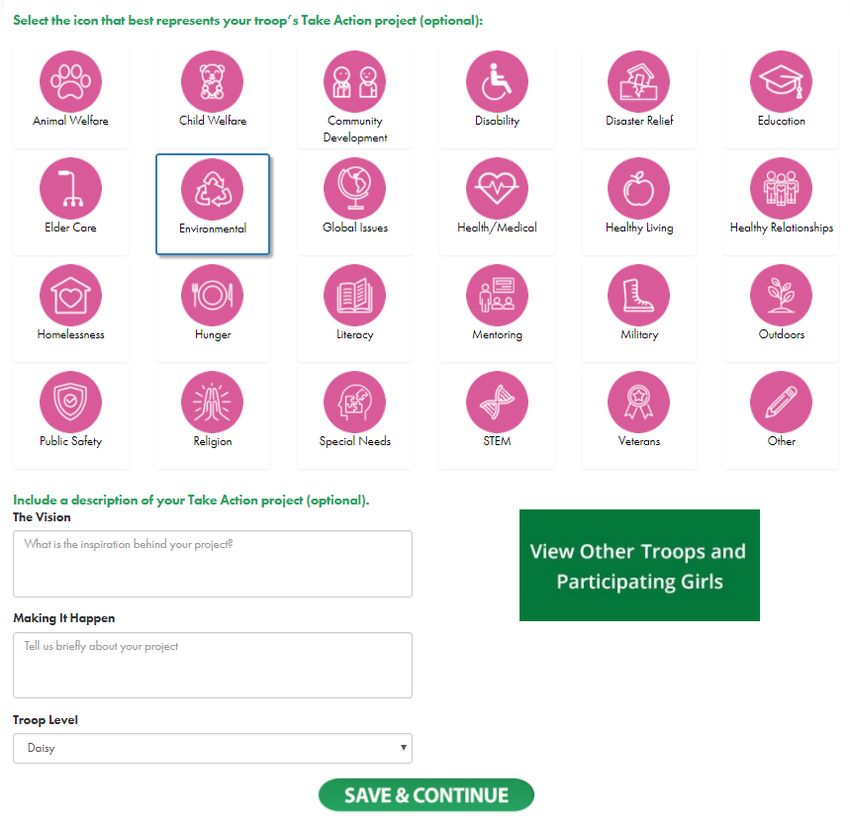
2018 Unify Troop Database Guide

If you click the email icon, a prompt will appear where you can enter the subject and body and click
“Send Emails Now”:

Once you are done on this page, click the “Continue” button at the bottom of the page and this moves
you to the next section, “Messaging” (more info on pages 16-17).

Navigating through Unify
There are two ways to navigate from the Troop login: the “hamburger” menu which gives you the most
options and every available section of Unify and the ribbon across the top of the dashboard page which
gives you the most used options for easier navigation:

“Hamburger” menu view:

                                                                                                         6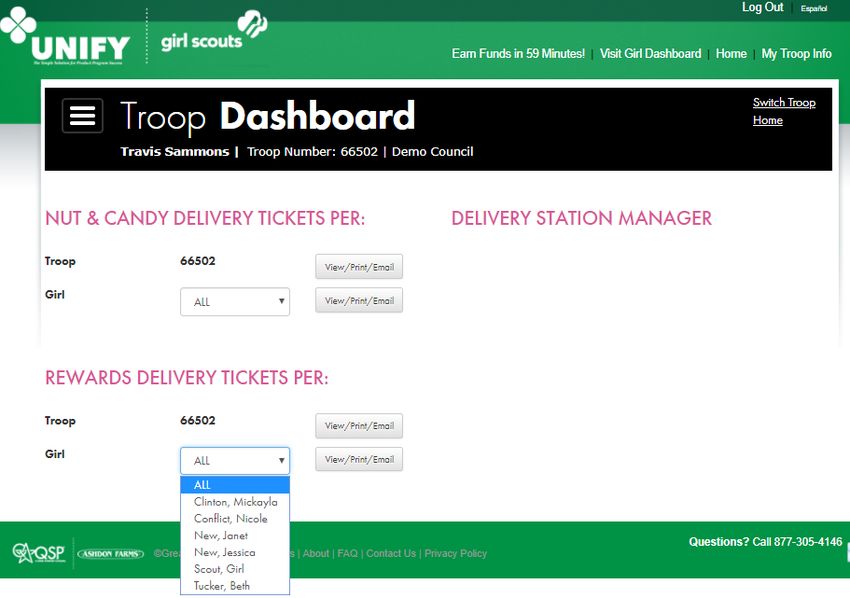
2018 Unify Troop Database Guide
Ribbon view:
For Troops, the sections are as follows:
Home (Troop Dashboard/Girl Activity page – see pages 5-6 for more information)
My Info
Select Campaign
Dashboard Tools
o 59 Minute Quick Start – OPTIONAL
o Delivery
o Financials
o Manage Orders – “Hamburger” and ribbon views
o Messaging – “Hamburger” and ribbon views
o Take Action – OPTIONAL (ribbon view ONLY)
o MyCreation – “Hamburger” and ribbon views
o Rosters
o Transfers – IGNORE
Reports
Switch Role
FAQ
Log Out
In the following pages, each section of Unify will be explained in more detail.
While navigating, you may notice two icons:
The trefoil with the “i” in it will make a window appear which shows Sales performance at any given
time, messages sent, and general program information.
The calendar, with small clock, will show any important dates you will want to be aware of throughout
the length of the program.
7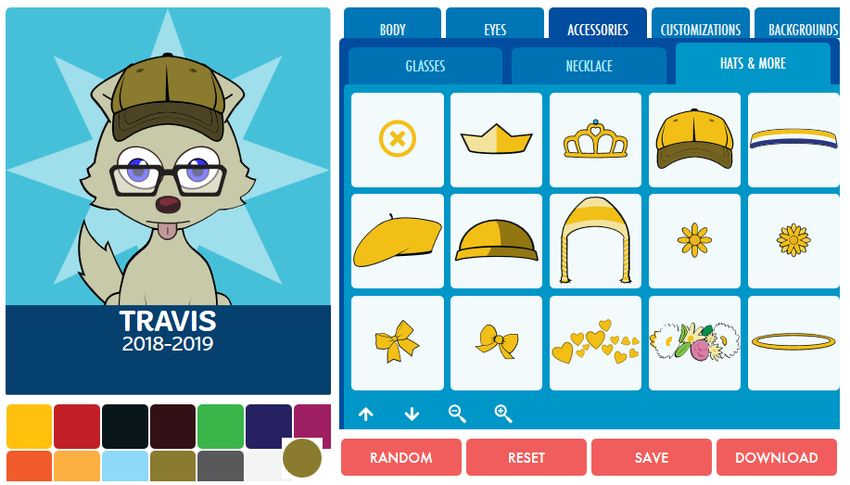
2018 Unify Troop Database Guide

Switching Roles (if applicable)
To switch roles, if you have multiple (e.g. Service Unit, Troop, Girl logins), you will click on the
hamburger” menu:

Once clicked, you will see navigational options and near the bottom is “Switch Role”. Clicking on this will
open more options, depending on how many roles you have. In this example, this user has a Service Unit
and Girl role, in addition to being a Troop user for multiple troops (“Switch Troop”). By clicking on the
role you would like to switch to, it will forward you to the appropriate dashboard for that user.

                                                                                                         8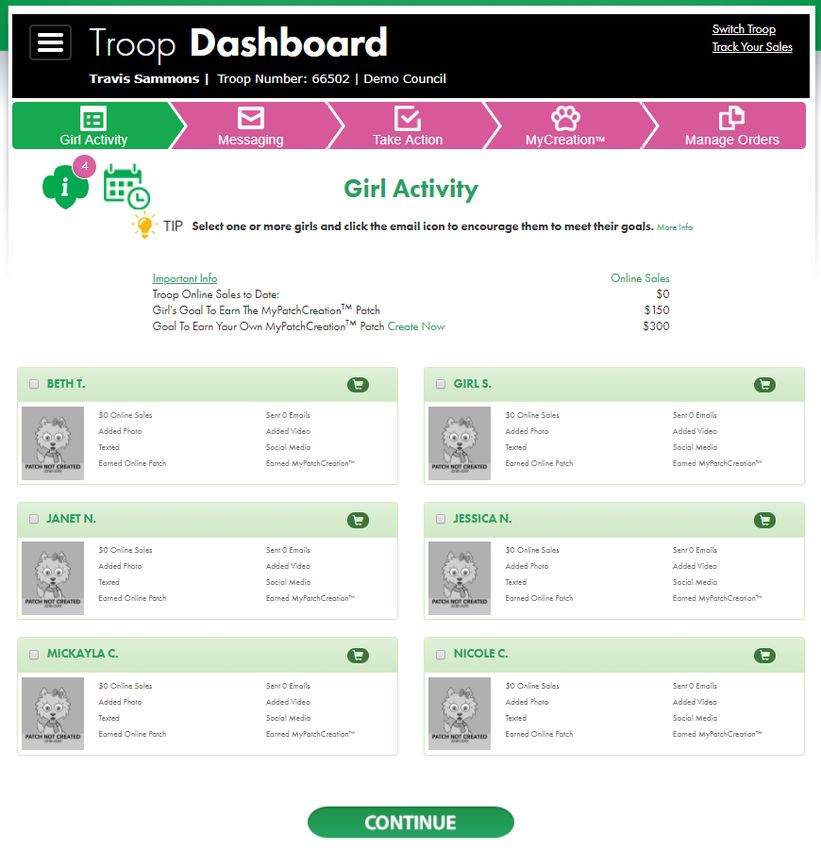
2018 Unify Troop Database Guide

My Info
The “My Info” section shows the contact details for your profile, including Email, Address, Phone
Number, etc.:

In the “Password” field, you can change your password at any time.

                                                                                                    9
2018 Unify Troop Database Guide
Selecting Campaigns
The “Select Campaign” section allows you to choose the current program year’s information, or prior
years’ information (if applicable). You will be able to go back, at most, three years for tracking your
Troop’s Fall Product Program progress.
Note: The current program year will be listed as “2018-2019-PRODUCT PROGRAM”. Please keep this in
mind if you navigate to another program year.
Dashboard Tools
The “Dashboard Tools” section of Unify is where you will be spending most of your time, as this includes
the financial section, as well as, order viewing and editing.
59 Minute Quick Start (Optional)
This page gives you a general overview about everything the Fall Product Program can offer your troop
(from our vendor, QSP/Ashdon Farms). It includes guides to help you get started, as well as, testimonials
from Councils, other Troop leaders, and girls from around the country:
102018 Unify Troop Database Guide
Delivery
This page allows you to print/view delivery tickets, those similar to what Council provides to the vendor,
to anticipate at the end of the sale what each girl should expect to receive for product and recognitions.
You can view by all girls, or individually:
Financials
The Financials section has two tabs: “Troop Bank” and “Troop Transactions”. The “Troop Bank” tab
shows the bank account associated with your troop. For privacy, the majority of the routing and account
numbers are masked:
112018 Unify Troop Database Guide
The “Troop Transactions” tab shows all of the payments made by your troop:
Below the list of payment(s) is a quick-view troop summary detailing the high-level sales information,
total payments made, and balance due.
Note: Payments will appear here once the ACH has been run, after the sale, on November 5th.
Manage Orders
The Manage Orders section allows you to view/edit your girls’ orders. The first page shows you a list of
all of the girls in your Troop, along with important deadlines, set by Council, for order submission:
122018 Unify Troop Database Guide
Note: This page has two buttons: “Order Details” and “Activity Log”. These provide quick access to
reports that export to excel and give you more information about your troops’ sales.
To the left of each girl, you may see three options: Edit (pencil icon), Email (envelope icon), and Call
(phone icon). The Edit function will be used when you want to view/edit orders for girls. The Email
function will allow quick access to emailing the primary caregiver associated with that particular girl. The
Call function (if available) will allow you to call the primary caregiver if your computer has the capability
to do so.
Adding Girl Payments (Optional)
To the right of each girl, there is a column labeled “Payment”, which has a ‘+’ icon within. Clicking this
will allow you to enter girl payments for the selected girl. This function is completely optional and does
not affect the troop’s balance:
Enter the transaction date and Amount (both required), as well as, any notes in the “Memo” field, then
click “Save” to add the payment and “Close” when you are completely done adding payments for that
particular girl.
132018 Unify Troop Database Guide
Viewing/Editing Girl Orders
The most important tasks for Troop users are the order functions. Click on the pencil icon to view a
particular girl’s order and the following screen will appear:
This section has two tabs: “Girl Order” and “Select Rewards”. The “Girl Order” page is always the default
page you will see, considering it is the first step for the “Select Rewards” screen to populate when
orders are entered into this tab.
This page has the girl’s name associated with the order, as well as deadlines specific to girl order entry.
This page also allows you to enter information for magazine orders (total quantity and total dollars only)
and quantities for each of the products (from the order card).
The bottom of this page summarizes the online orders received by the girl (automatically populated):
142018 Unify Troop Database Guide
Once you are finished entering and reviewing the product data, click “Save and Continue”; this will
activate the “Reward Summary” tab:
On the reward page, you can view all of the recognitions available to the girls, regardless of whether or
not they have earned it. A green “Earned” tag will appear at the top-right of each recognition box if it
has been earned, and in the event of a choice, a checkbox can be clicked ahead of time in case the girl
does reach the recognition level eventually, and you will not have to go back in and make the decision
again.
Note: In the event of a choice, the first item listed is the default. If no selection is made by the troop,
parent, or girl, the girl will receive the first item (if she reaches that particular level).
Click “Save and Continue” once done and a prompt will appear letting you know it was done
successfully.
152018 Unify Troop Database Guide
Messaging
The “Messaging” section allows you to send emails and post messages directly from Unify.
Sending Emails
For emails, you can select the desired recipients from a drop-down box, fill out a subject and body for
the email, then click the “Send” button to send the emails directly to the selected people:
Posting Messages
For messages, you have a graphic into which you can write the message that troop users will see upon
logging in:
162018 Unify Troop Database Guide
Edit out the text (if any) that may appear in this box and replace it with the desired text. You can also
select a date/time for this post where it will be removed automatically when the date and time has
passed by using the “Show Message Until” field.
Once done with the message, click the “Post” button to post it in Unify. In the window that appears, you
will receive a confirmation that it was saved successfully; click “Ok” to close.
Email Records
This section allows you to view the history of emails sent, and search for items if needed as well:
Take Action (Optional – ribbon view ONLY)
This section allows your troop to communicate any service projects the troop is involved in, directly to
customers. This allows customers to see where the proceeds from their orders are going and are more
likely support your girls.
You will start by selecting a service project category, and then you would include the inspiration (vision)
and the specific details of the project, and finally, include your troop’s level (Daisy, Brownie, etc.). Click
“Save & Continue” when done. This information will be communicated to customers when shopping and
submitting their orders.
172018 Unify Troop Database Guide
You can also view other participating troops’ and girls’ Take Action service projects by clicking the big
green button next to the right of where you enter the Vision, description, etc. This will open a “Take
Action Storyboard”, which shows the participating troops, and by clicking on them, the details of their
projects:
MyCreation (Optional)
The MyCreation section allows you, as the Troop Coordinator, to create your own custom avatar that
will appear to girls when they login. This is just a fun thing to show the girls your creative side; there are
many options to choose from in creating your avatar:
182018 Unify Troop Database Guide
Rosters
The “Rosters” section has two tabs: Troop and Girl. The “Troop” tab will show you all of the users
associated with your troop (those that have submitted a volunteer agreement for the troop). To the left,
you will see your troop; click on it and it will show you a list of the users:
Note: All users will default as a Product Manager, but you can switch/add the role of Troop Leader to
anyone in the troop as you deem necessary. This is completely optional and has no effect on any other
aspect of Unify.
The “Girl” tab will give you a list of the girls in your troop, with their membership ID and their unique
online ID for their individual shop. You can also go to the “Manage Orders” screen for a particular girl
directly from here if needed:
192018 Unify Troop Database Guide
Reports
The “Reports” section allows you to view reports at the Girl and Troop levels, as well as, Financial
reports. The first page that appears is the “Progress - Dashboard”. This shows you graphs which you can
look through to track your progress throughout the Fall Product Program, and you can set date
parameters if you only want to see reports for a particular time period:
In the top-left corner of this page, next to “Progress – Dashboard”, you will see a button that says “View
Reports”. Click this button and you will be forwarded to the page which shows all of the Troop, Girl, and
Financial reports:
202018 Unify Troop Database Guide
While all of the reports are useful, the reports designated with a letter and number (e.g. T1, G1, etc.) are
the ones you will, most likely, use most often. Reports are available in PDF and/or Excel for viewing.
Note: You can return to the “Progress Dashboard” view by clicking the “View Dashboard” button on
the top-left of this page, to the left of “Progress – Reports”.
FAQ (Frequently Asked Questions)
The FAQ page is a collection of the most commonly asked questions regarding the QSP/Unify program:
You can also email QSP directly at support@qspgao.com if you have any technical issues, such as the site
not working properly.
Important: For all issues related to orders, recognitions, calculations, reporting, or any other Council-
related items, please contact Council at customercare@gsema.org.
21You can also read