USER GUIDE - Weland Solutions
←
→
Page content transcription
If your browser does not render page correctly, please read the page content below
USER GUIDE
Document version 1.1
2020-10-05

Contents
1 Introduction ............................................................................ 3
2 References ............................................................................. 3
3 Installation and configuration ................................................. 3
  3.1 Install Compact Talk ...................................................................... 3
  3.2 Install MySQL Database Server .................................................... 7
     3.2.1 Configure the database......................................................... 11
     3.2.2 Setup database..................................................................... 18
     3.2.3 Database connection ............................................................ 18
     3.2.4 Install and configure MySQL .Net Connector ........................ 18
  3.3 Basic Configuration of Compact Talk .......................................... 22
     3.3.1 License ................................................................................. 22
     3.3.2 Partitions............................................................................... 23
     3.3.3 G1 Elevator ........................................................................... 25
     3.3.4 G2 Elevators ......................................................................... 31
     3.3.5 Save and exit ........................................................................ 34
     3.3.6 Use your new configuration .................................................. 34

4 Service Monitor .................................................................... 34
  4.1 Service ........................................................................................ 35
  4.2 Communication ........................................................................... 35
  4.3 Elevators ..................................................................................... 35
     4.3.1 Elevator – Status .................................................................. 35
     4.3.2 Elevator – Mode.................................................................... 36
     4.3.3 Elevator - State ..................................................................... 36
     4.3.4 Elevator – Button [Pause] ..................................................... 36
     4.3.5 Elevator – Button [Resume] .................................................. 36

                                                                                                               1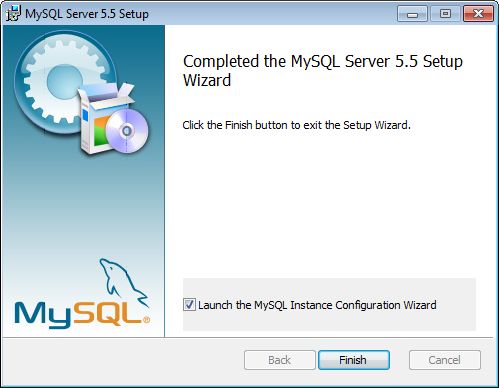
2020-10-05

     4.3.6 Elevator – Button [Return trays] ............................................ 36
     4.3.7 Elevator – Button [Clear order queue] ................................... 36
  4.4 Orders ......................................................................................... 37
     4.4.1 Orders – TransId................................................................... 37
     4.4.2 Orders – Id............................................................................ 37
     4.4.3 Orders - Elevator .................................................................. 37
     4.4.4 Orders - Tray ........................................................................ 37
     4.4.5 Orders - Opening .................................................................. 37
     4.4.6 Orders - Status ..................................................................... 37
     4.4.7 Orders – Button [Delete Order] ............................................. 38
  4.5 Log .............................................................................................. 38
  4.6 Diagnostics.................................................................................. 39

5 TroubleShooting ................................................................... 39
APPENDIX 1 ........................................................................... 41
  Download links .................................................................................. 41

                                                                                                                 2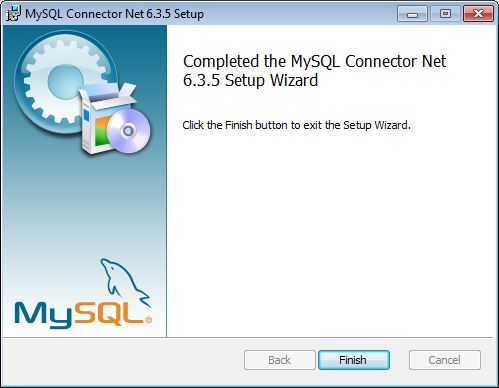
2020-10-05

1 Introduction
The Compact Talk service application is an integration component that simplifies integration
between a WMS/ERP system and Weland Solutions´s products. The Compact Talk service
application is delivered with a MySQL database, a Service Monitor and a Configuration Tool.

This document describes how to install and configure a basic installation of Compact Talk v3
by example.

The basic installation procedure consists of three parts:

   •   Prerequisite:
           o .Net 4.7.1 needs to be installed before the installation of
               Compact Talk v3 is started. Installation of these packages is not covered by
               this document.
   •   Installation:
           o Install Compact Talk v3
           o Optional: MySQL
   •   Configuration:
           o Configure Compact Talk v3 with the Configuration Tool.

When the installation and configuration is complete there will be a Windows service
registered that is called “Compact Talk Service”. The service is started by pressing [Start] in
the Compact Talk Service Monitor, which can be found in the Start menu or as a desktop
shortcut.

2 References
[1] Compact Talk V3 Configuration manual.

3 Installation and configuration
The installation process consists of installation of Compact Talk. If MySQL is to be used, this
needs to be installed as well.

3.1 Install Compact Talk
Start the installation of Compact Talk by double clicking the “CTSetup – v3.x.x.x.msi” file in
the Compact Talk folder. The pictures below show the installation steps in detail.

                                                                                                       3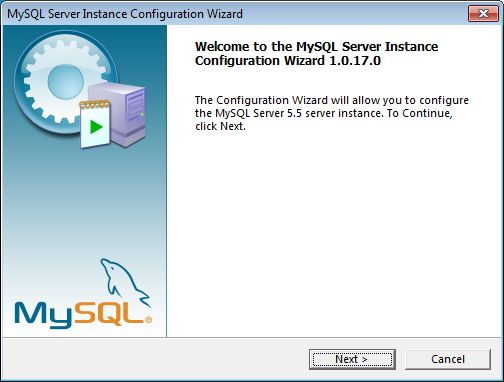
2020-10-05

Press [Next] to continue.

It is recommended to use the default installation folder.

                                                                         4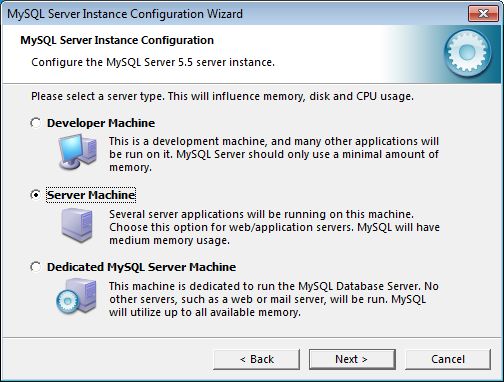
2020-10-05

Press [Next] to continue.

Please note that in a 64-bit system the default installation location is:

“C:\Program Files (x86)\Weland Solutions AB\Compact Talk\”

Press [Install] to continue.

                                                                                         5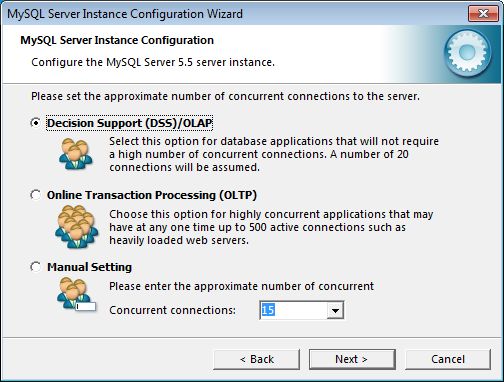
2020-10-05

Press [Finish] to finish the installation.

                                                          6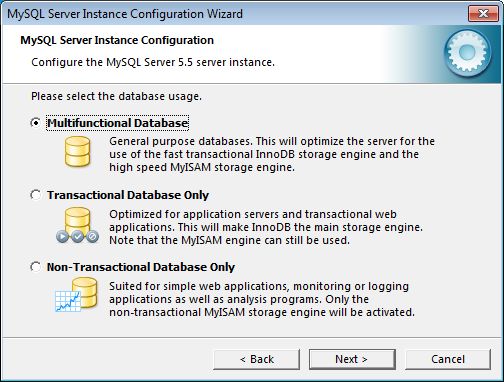
2020-10-05
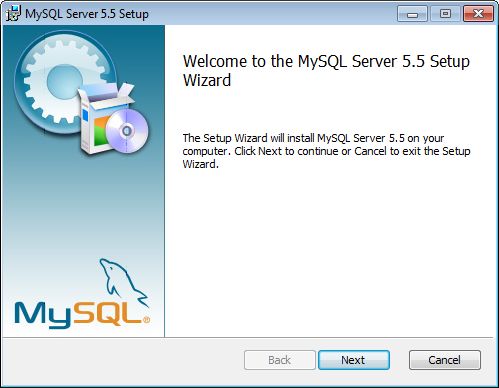
3.2 Install MySQL Database Server
NOTE: If you are installing Compact Talk 2.4.1 or higher, this section can be skipped,
because we are now using SQLite instead, which doesn’t require a separate installation.
This guide is written for MySQL version 5.5.8 (32-bit version).
Start the installation of the MySQL Server by double clicking the file “mysql-5.5.8-win32.msi”
found in the MySQL folder on the installation disc. The installation steps are described in
detail in the following pictures.
Some windows are left out in from the description of the process since these have no
relevance to the installation.
Click [Next] to continue.
7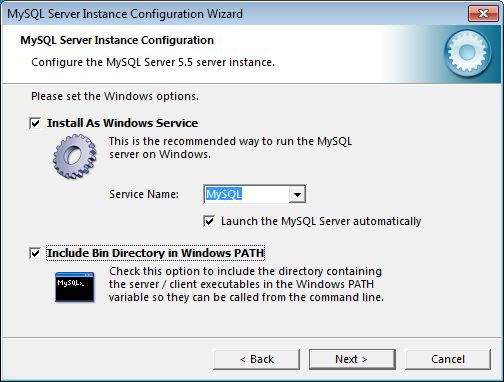
2020-10-05

Check “I accept the terms in the License Agreement” box.
Click [Next] to continue.

Click [Typical] to continue.

                                                                        8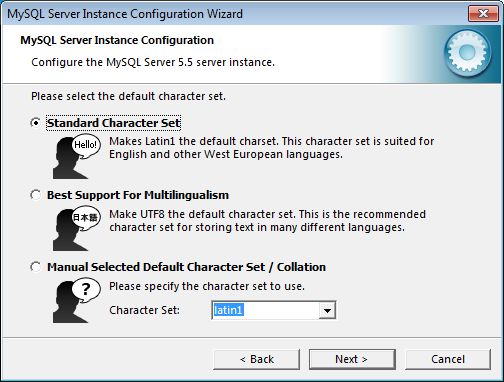
2020-10-05

Click [Install] to start the installation.

Click [Yes] to grant the extra privileges that are necessary to start the installation (Windows
Vista/7 only).

                                                                                                        9
2020-10-05
Wait while the installation completes.
Leave the “Launch the MySQL Instance Configuration Wizard” box checked.
102020-10-05
Click “Finish” to complete the installation.
3.2.1 Configure the database
The MySQL Server Instance Configuration Wizard is launched automatically when the
installation is complete. The pictures below show the configuration steps in detail.
Click [Yes] to grant the extra privileges that are necessary to start the installation (Windows
Vista/7 only).
Click [Next] to continue.
112020-10-05
Choose “Detailed Configuration”.
Click [Next] to continue.
122020-10-05
Choose “Server Machine”.
Click [Next] to continue.
Choose “Multifunctional Database”.
Click [Next] to continue.
132020-10-05
It is recommended to use the default settings.
Click [Next] to continue.
Select “Decision Support (DSS)/OLAP”.
Click [Next] to continue.
142020-10-05
Check the “Enable TCP/IP Networking” box.
Check the “Enable Strict mode” box.
Click [Next] to continue.
Select “Standard Character Set”.
152020-10-05
Click [Next] to continue.
Check the “Install As Windows Service” box.
Check the “Launch the MySQL Server automatically” box.
Check the “Include Bin Directory in Windows PATH”. Note: Important!
Click [Next] to continue.
162020-10-05
If the default database setup script is used, the password must be set to “admin”.
Click [Next] to continue.
Click [Execute] to start the configuration.
172020-10-05
Click [Finish] to close the Wizard.
3.2.2 Setup database
The Compact Talk v3 installation disc includes a database script that will set up the
database. The script can be run by double clicking the “Configure database.bat” file in the
CompactTalk folder on the installation disc.
3.2.3 Database connection
The standard database connection uses MySQL .Net Connector.
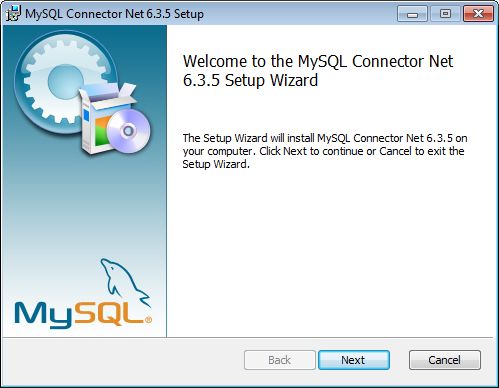
3.2.4 Install and configure MySQL .Net Connector
Start the installation of the MySQL .Net Connector by double clicking the file
“mysql.data.msi” found in the MySQL folder on the installation disc. The installation steps are
described in detail in the following pictures.
182020-10-05
Click [Next] to continue.
Click [Typical] to continue.
192020-10-05
Click [Install] to start the installation.
Click [Yes] to grant the extra privileges that are necessary to start the installation (Windows
Vista/7 only).
202020-10-05
Click [Next] when the installation is completed.
Click [Finish] to close the installation program.
212020-10-05
3.3 Basic Configuration of Compact Talk
In this section we will use an example to illustrate how to perform a basic configuration of a
Compact Talk system. The example system has two partitions, one partition with a G1
elevator and one partition with a G2 elevator. At a minimum, every elevator needs a panel
accessory. In this example, the G2 elevator also has a pick display attached to it.
Compact Talk is configured using a configuration tool. The Compact Talk Configuration Tool
can be found in the Start menu under Weland Solutions AB.
This example will only cover basic configuration of a standard installation. Please see [1] for
a full description of the configuration tool if you need to configure a non-default setup, such
as another database solution than described in this document.
3.3.1 License
From the tree structure, select “General->License” and enter your license key in the text box
called “License Key”. You should have received your license key together with your Compact
Talk installation disc.
222020-10-05
3.3.2 Partitions
All elevators need to be part of a partition. The number of partitions allowed depends on your
Compact Talk v3 license. In this example two partitions will be used, one with a G1 elevator
and one with a G2 elevator. It is recommended not to have G1 elevators and G2 elevators in
the same partition.
From the tree structure, select “Devices->Partitions”.
232020-10-05
Press [Add] to open the Partition dialog.
Enter the name of your partition in the “ID” field. This name must be unique and will be used
as the ID of the partition. In this example the partition is called “Partition1”.
The “Active Poll Interval” and “Idle Poll Interval” can be left with their default values.
Click [Ok] to create the new partition.
242020-10-05
3.3.3 G1 Elevator
All elevators of type G1 need to have a bus driver defined.
From the tree structure, select “Devices->Partitions->Partition1->BusDrivers” to add a bus
driver.
Click [Add] to open the BusDriver Dialog.
252020-10-05
Enter a name for your bus driver in the “ID” field. This name must be unique and will be used
as the ID of the bus driver. In this example the bus driver is called “Busdriver1”. Driver
Module and Type should be left at their default values.
Select the “Value” cell in the Driver Properties table and write the number of the COM port
used by the bus driver. In this case COM port “COM1” is used. Only the number of the port
should be entered, thus the “1”.
Click [Ok] to create the new bus driver.
From the tree structure, select “Devices->Partitions->Partition1->Elevators”.
Click [Add] to open the Elevator dialog.
262020-10-05
Enter a name for your elevator in the “ID” field. This name must be unique and will be used
as the ID of the elevator. In this example the elevator is called ElevatorG1.
Leave the “Master” checkbox unchecked, since the G2 elevator will be master in this
example.
Leave “Compatibility ID” to its default value.
To configure this elevator as a G1 elevator chose “G1Elevator.dll” in the “Device Module”
drop down box and “G1Elevator” in the “Type” drop down box.
In the “Device Properties” table, enter the length and width of the tray in the “Value” cells. In
this example, the length of the tray is 2440 mm and the width of the tray is 820 mm.
Driver Module and Type should be left at their default values.
In the “Driver Properties” table, enter the node number in the “Value” cell. Default Node is 1.
Select the connected bus driver created earlier.
Click [Ok] to create the elevator.
272020-10-05
3.3.3.1 ACCESSORIES
From the tree structure, select “Devices->Partitions->Partition1->Elevators->ElevatorG1-
>Accessories”. The “Panel” accessory has been automatically added.
Click [Add] to open the Accessory dialog.
282020-10-05
Enter a name for the panel in the “ID” field. This accessory name must be unique for the
elevator to which it is attached. In this example the panel is called LaserPointer_G1.
The “Opening” drop down box determines in which service opening the accessory is
installed.
To configure “LaserPointer_G1” as a laserpointer, select “LaserPointer.dll” in the “Device
Module” drop down box and “LaserPointer” in the “Type” drop down box.
This type of Laserpointer needs a bus driver to function correctly, in this case set to
“Busdriver1”.
The device “LaserPointer_G1” is connected with the Driver Module and it is necessary to set
a unique Driver Properties “Node” to make it work, in this case “2”.
Note than it is also possible to change the “TrayView” Device Property, it can be set to
“Front” or “Back”.
Click [Ok] to create the new accessory.
292020-10-05
3.3.3.2 ACCESSORY SEQUENCE
For each accessory a sequence of actions is preconfigured.
Select “Devices->Partitions->Partition1->Elevators->ElevatorG1->Accessories-
>LaserPointer_G1->Sequences” in the tree structure to change the sequence of the
laserpointer.
Click [Add] to open the Sequence Step dialog, to add a step or select a preconfigured and
click [Edit] to change a step.
The dialog has three drop down boxes with pre-configured values to choose from. A
sequence needs at least one sequence step, but typically two or more steps are used
depending on the accessory type.
Click [Ok] to create the sequence step or [Cancel] to abort.
Keep the preconfigured steps only unless you have a specific purpose.
302020-10-05
3.3.4 G2 Elevators
First create a second partition called “Partition2” in the same way “Partition1” was created in
Section 0.
From the tree structure, select “Devices->Partitions->Partition2->Elevators”.
Click [Add] to open the Elevator dialog.
Enter a name for your elevator in the “ID” field. This name must be unique and will be used
as the ID of the elevator. In this example the elevator is called ElevatorG2.
Check the “Master” checkbox, since this elevator will be master in this example. The Master
checkbox shall be checked if the elevator is connected to the license.
Leave “Compatibility ID” to its default value.
Select the number of openings available in the elevators.
To configure this elevator as a G2 elevator chose “G2Elevator.dll” in the “Device Module”
drop down box and “G2Elevator” in the “Type” drop down box.
312020-10-05
In the “Device Properties” table, enter the length and width of the tray in the “Value” cells. In
this example, the length of the tray is 2440 mm and the width of the tray is 820 mm.
Driver Module and Type should be left at their default values.
In the “Driver Properties” table, enter the IP address and the port number of the elevator. In
this example the IP address is 192.168.1.35 and the port number is 20001.
Click [Ok] to create the elevator.
3.3.4.1 ACCESSORIES
From the tree structure, select “Devices->Partitions->Partition2->Elevators->ElevatorG2-
>Accessories”. The “Panel” accessory is automatically added.
Next we will add the pick display accessory. Click [Add] to open the Accessory dialog.
322020-10-05
Enter a name for the accessory. In this example the accessory is called “MyPickDisplay”.
The “Opening” drop down box determines in which service opening the accessory is
installed.
To configure “MyPickDisplay” as a pick display, select “PickDisplay.dll” in the “Device
Module” drop down box and “PickDisplay” in the “Type” drop down box.
In the “Device Properties” table, enter “Front” or “Rear” in the “TrayView” value cell
depending on where the service opening is located on the elevator.
For a pick display a Driver Module must be defined. The “Driver Module” and “Type” fields
should be left at their default values.
In the “Driver Properties” table, enter the IP address and the port number of the pick display.
In this example the IP address is 192.168.1.76 and the port number is 20001.
Click [Ok] to create the new accessory.
332020-10-05
3.3.4.2 ACCESSORY SEQUENCE
The sequence of the pick display has three preconfigured steps, se below. These steps can
be altered as described in Section 0
3.3.4.5 PICTURES
Article pictures used for the PicturesPath in configuration settings, must follow the following
prerequisites: 1920x1080px or maximum 5MB/picture.
3.3.5 Save and exit
When all changes are made, click [Save] to save your configuration.
Click [Close] to exit the configuration tool.
3.3.6 Use your new configuration
Compact Talk must be restarted to use your new configuration. Compact Talk is restarted
either by using the Compact Talk Service Monitor tool, or by restarting your computer.
4 Service Monitor
Compact Talk v3 has a Service Monitor that is used to start and stop the service, and to
monitor the status of the system. The Service Monitor can be found in the Start menu and as
a desktop shortcut.
342020-10-05
View Startup Log Opens the startup log
View Application Log… Opens the selected application log
4.1 Service
The Service area contains status information of the Compact Talk v3 service, e g running or
stopped. It is also possible to start or stop the service by using the two buttons, [Start] and
[Stop].
4.2 Communication
The Communication area shows the status of the connection to the Compact Talk Service.
4.3 Elevators
The Elevators area contains a table with the names of the configured elevators and their
respective status, mode and state. If there is an error, the error text associated with that
error is displayed.
Only known states are reported, i.e. that if there is a connection error during normal
operations, the elevator might still look “Enabled”.
Below the table with elevator names are four buttons located. These buttons have the labels
“Pause”, “Resume”, “Return trays”, “Clear order queue”.
4.3.1 Elevator – Status
The elevator Status is either “Running”, “Paused” or “Error”. “Running” means that the
elevator is running normally. “Paused” means that the elevator is connected and ready to run
352020-10-05
but Compact Talk v3 will not dispatch any new orders to it. “Error” means that the elevator is
not working, and the associated error text is displayed in the “Error Text” column.
4.3.2 Elevator – Mode
The elevator has three different modes, “Remote”, “Local” and “Unknown”. “Remote” means
that it is controlled by Compact Talk v3. “Local” means that is can only be controlled by the
operator. “Unknown” means that Compact Talk has not been able to detect the running
mode.
4.3.3 Elevator - State
The elevator “State” has two different states, “Enabled” or “Disabled”. “Enabled” means that
the elevator is ready to execute new remote or local orders.
4.3.4 Elevator – Button [Pause]
Compact Talk will stop to send new orders to the elevator. Note however, that already sent
orders will continue to be serviced by the elevator.
4.3.5 Elevator – Button [Resume]
Compact Talk will resume to send new orders to the elevator.
4.3.6 Elevator – Button [Return trays]
The PLC has an internal order queue to enhance performance and enable some functions.
“Return trays” will clear that PLC internal queue, and reset all orders sent to the PLC.
4.3.7 Elevator – Button [Clear order queue]
“Clear order queue” will clear the Compact Talk v3 queue for the selected elevator.
362020-10-05
4.4 Orders
The orders area contains a table with the different fields that is relevant for an order.
4.4.1 Orders – TransId
“TransId” is the unique identifier which the WMS system uses to identify the order.
4.4.2 Orders – Id
“Id” is the number the Compact Talk v3 and the elevator uses to uniquely identify the order.
4.4.3 Orders - Elevator
“Elevator” shows which elevator is going to process the order.
4.4.4 Orders - Tray
“Tray” shows which tray to be collected.
4.4.5 Orders - Opening
“Opening” shows to which opening the order is going to be delivered to.
4.4.6 Orders - Status
“Status” shows one of the following values:
Accepted The order has been confirmed by operator and client.
The order has been confirmed by the operator and client but is
AcceptedStillAtPlace
waiting for external acknowledge from the client.
372020-10-05
AtPlace Indicates that the order is at an opening.
NextAtPlace Indicates that the order is next in turn to enter an opening.
The order is passive and needs to be activated for it to be
Posted
dispatched.
Refused The order was rejected by the elevator device.
Selected The order is active and are available for selection by the dispatcher.
Sent The order has successfully been dispatched to the elevator device.
TaskDone The order has been confirmed by the operator.
The order has been confirmed by the operator but is still not
TaskDoneStillAtPlace
confirmed by the client.
4.4.7 Orders – Button [Delete Order]
The button “Delete order” will be enabled when an order is deletable. An order is deletable
when it is not being processed by the elevator.
4.5 Log
Displays an active log.
382020-10-05
4.6 Diagnostics
Displays current status and error counters for individual services. Buttons is available for
updating and resetting counters.
5 TroubleShooting
The Compact Talk v3 service is a complex system with a lot of measures taken to repair
faulty states that can happen in a normal environment. Therefore, when troubleshooting it is
necessary to start with the symptoms and then look in the log files, not the other way around
since the repair mechanism very well might fix the logged error before they have any impact.
If full functionality still cannot be reached there are a number of different measures to be
taken:
Symptom Possible reason Solution
Configuration Wrong versions of .Net. Verify that you have .Net 3.5.1
tool does not and 4.0 installed. This is done by
start. looking into the control panel->
installed programs or in the
windows registry. For more
details, see:
http://msdn.microsoft.com/en-
us/kb/kbarticle.aspx?id=318785
Service monitor: Incorrect license key has been Verify that you have the correct
Service status supplied. license key.
shows
“StartPending”
and then
392020-10-05
“Stopped” when
trying to start
the service.
Some elevators Your license key does not support the • Verify that you have the
are not shown elevator type or the configured correct license key.
in the Service number of elevators
monitor. • Contact Weland to get a
new license key.
The “Startup • Wrong license key. • Verify that you have the
Log” shows the • The connected and correct license key.
following: responding PLC:s do not have
“Failed to start the correct serial number. • Contact Weland to get a
one of the new license key.
master
elevators”
The “Startup • The elevator called ‘NAME’ • Reboot the PLC, see
Log” shows the does not answer to separate guidelines.
following: communication attempts. • Make sure that the
“ERROR Elevator is connected.
Follow the communication
|Failed to
cables to make sure that
startup elevator they are not damaged.
‘NAME’”
The “Startup • The elevators accessory • Reboot the PLC, see
Log” shows the called ‘ACCESSORY’ does separate guidelines.
following: not answer to communication • Make sure that the
“|ERROR attempts. Accessory Elevator is connected.
Follow the communication
|Failed to
cables to make sure that
startup they are not damaged.
accessory
‘ACCESSORY’
on elevator
'NAME'!”
The “Startup The Compact Talk v3 can sometimes This error usually corrects itself.
Log” shows the start before the database. If it doesn’t try to restart your
following: database or contact Weland
“|WARNING|Fail Solutions for support.
ed to connect to
database. Might
be temporary
problem, but
check your
configuration.!”
402020-10-05
The “Application The Compact Talk v3 cannot Verify that the database is on and
Log” shows the reconnect to the database after responsive.
following: startup
“|ERROR
|Failed to
reconnect to
database
APPENDIX 1
Download links
• .Net 4.7.1: https://dotnet.microsoft.com/download/dotnet-framework/net471
• MySQL Database: http://dev.mysql.com/downloads/mysql/
• MySQL .Net Connector: http://dev.mysql.com/downloads/connector/net/
41You can also read