ACOUSTIC LIGHTING INSTALLATION GUIDE - 2020 INSTRUCTIONS - Luxxbox
←
→
Page content transcription
If your browser does not render page correctly, please read the page content below
ACOUSTIC LIGHTING
                          INSTALLATION GUIDE

                                                                                                                                                                                     2020

                                                               INSTRUCTIONS
                                                    For Assembling and Installing Fixtures
                                                      Pour l'assemblage et L'installation

Luxxbox reserves the right to change the specification, material and colours at any time without notice. Standard warranty terms and conditions apply.All rights reserved. © July 2020 Ver 3.4

                  LUX XBOX USA INC               (P)+1 (415) 871 0448          USA@LUXXBOX.COM
                  LUX XBOX PTY LTD               (P)+61 7 3257 2822           INFO@LUXXBOX.COM
                  W W W.LUXXBOX.COM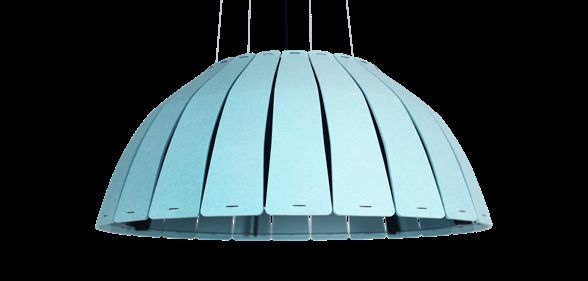
CONTENTS
NORTH AMERICA
ON-BOARD
REMOTE DRIVER CONCEALED DRIVER
DRIVER
SUSPENSION CANOPY CEILING ADDITIONAL DRIVER INSTALLATION DRIVER INSTALLATION INSTALLATION
POINTS INFORMATION MOUNT INFO SCHEMATICS INSTRUCTIONS SCHEMATICS INSTRUCTIONS INSTRUCTIONS
CODE
POINTS DE INFO SUR SUPPORT INFORMATION BLOC INSTRUCTIONS BLOC INSTRUCTIONS INSTRUCTIONS
SUSPENSION PAVILLONS PLAFOND ADDITIONELLE D'ALIMENTATION D'INSTALLATION D'ALIMENTATION D'INSTALLATION D'INSTALLATION
VE-S/M/L 1 11, 12, 13 14 30 15, 16, 17 18,19,20,21 15, 16, 17 23, 24, 25, 26 22
VER-S/M/L 2 11, 12, 13 14 - 15, 16, 17 18,19,20,21 15, 16, 17 23, 24, 25, 26 22
MA-3/5 3 11, 12, 13 14 - 15, 16, 17 18,19,20,21 15, 16, 17 23, 24, 25, 26 22
SH-S/M/L 4 11, 12, 13 14 - 15, 16, 17 18,19,20,21 15, 16, 17 23, 24, 25, 26 22
BC-S/M/L 5 11, 12, 13 14 - 15, 16, 17 18,19,20,21 15, 16, 17 23, 24, 25, 26 22
LN-S/M/L/XL 6 11, 12, 13 14 - 15, 16, 17 18,19,20,21 15, 16, 17 23, 24, 25, 26 22
BL-S/M/L/XL 7 11, 12, 13 14 - 15, 16, 17 18,19,20,21 15, 16, 17 23, 24, 25, 26 22
DA-S/M/L/XL 8 11, 12, 13 14 - 15, 16, 17 18,19,20,21 15, 16, 17 23, 24, 25, 26 22
AC 9 11, 12, 13 14 - 15, 16, 17 18,19,20,21 15, 16, 17 23, 24, 25, 26 22
HH-S/M 10 11, 12, 13 14 - 15, 16, 17 18,19,20,21 15, 16, 17 23, 24, 25, 26 22
GLOBAL
ON-BOARD
REMOTE DRIVER CONCEALED DRIVER
DRIVER
SUSPENSION CANOPY CEILING ADDITIONAL DRIVER INSTALLATION DRIVER INSTALLATION INSTALLATION
POINTS INFORMATION MOUNT INFO SCHEMATICS INSTRUCTIONS SCHEMATICS INSTRUCTIONS INSTRUCTIONS
CODE
POINTS DE BOITIER SUPPORT INFORMATION BLOC INSTRUCTIONS BLOC INSTRUCTIONS INSTRUCTIONS
SUSPENSION ELECTRIQUE PLAFOND ADDITIONELLE D'ALIMENTATION D'INSTALLATION D'ALIMENTATION D'INSTALLATION D'INSTALLATION
VE-S/M/L 1 11, 12, 13 14 30 15 27, 28 15 23, 24 29
VER-S/M/L 2 11, 12, 13 14 - 15 27, 28 15 23, 24 29
MA-3/5 3 11, 12, 13 14 - 15 27, 28 15 23, 24 29
SH-S/M/L 4 11, 12, 13 14 - 15 27, 28 15 23, 24 29
BC-S/M/L 5 11, 12, 13 14 - 15 27, 28 15 23, 24 29
LN-S/M/L/XL 6 11, 12, 13 14 - 15 27, 28 15 23, 24 29
BL-S/M/L/XL 7 11, 12, 13 14 - 15 27, 28 15 23, 24 29
DA-S/M/L/XL 8 11, 12, 13 14 - 15 27, 28 15 23, 24 29
AC 9 11, 12, 13 14 - 15 27, 28 15 23, 24 29
HH-S/M 10 11, 12, 13 14 - 15 27, 28 15 23, 24 29
Luxxbox reserves the right to change the specification, material and colours at any time without notice. Standard warranty terms and conditions apply.All rights reserved. © July 2020 Ver 3.4
LUX XBOX USA INC (P)+1 (415) 871 0448 USA@LUXXBOX.COM
LUX XBOX PTY LTD (P)+61 7 3257 2822 INFO@LUXXBOX.COM
W W W.LUXXBOX.COM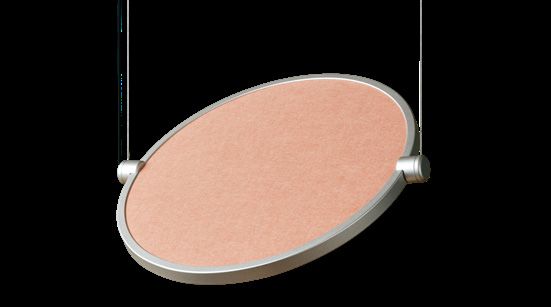
SUSPENSION POINTS
                                                                                                                                                     VAPOR ECHO

                                                                                           TOP VIEWS
                                                                                                                           Power Cable

                                             SMALL

                                                                                                                          PCD = 11" / 270mm
                                                                                                                          4 points equally
                                                                                                                          spaced at 90°

                                                                                               11" / 270mm

                                                                                                                         PCD = 21" / 523mm
                                                                                                                         4 points equally
                                                                                                                         spaced at 90°

                                             MEDIUM

                                                                                                                                  Power Cable

                                                                                               21" / 523mm

                                                                                                                         PCD = 31" / 800mm
                                                                                                                         4 points equally
                                                                                                                         spaced at 90°

                                             LARGE

                                                                                                                                            Power Cable

                                                                                              31" / 800mm

Luxxbox reserves the right to change the specification, material and colours at any time without notice. Standard warranty terms and conditions apply.All rights reserved. © July 2020 Ver 3.4

                  LUX XBOX USA INC               (P)+1 (415) 871 0448          USA@LUXXBOX.COM
                  LUX XBOX PTY LTD               (P)+61 7 3257 2822           INFO@LUXXBOX.COM
                  W W W.LUXXBOX.COM

                                                                                                     1
SUSPENSION POINTS
                                                                                                                                                     VAPOR ECHO RECTILINEAR

                                                                                           TOP VIEWS

                                 SMALL
                                                                                               10" / 250mm                                PCD = 10" /
                                                                                                                                          250mm
                                                                                                                                          4 points equally
                                                                                                                                          spaced at 90°

                                                                                                                         10" / 250mm
                                                         Power Cable

                                                                                              22" / 559mm

                              MEDIUM
                                                                                              18" / 450mm                    4 Suspension Cables

                                                                                                                                       10" / 250mm

                                               Power Cable

                                                                                             40" / 1009mm

                                 LARGE
                                                                                            35.5" / 900mm                                             4 Suspension Cables
                                                                                                                                                          10" / 250mm

                              Power Cable

                                                                                             58" / 1459mm

Luxxbox reserves the right to change the specification, material and colours at any time without notice. Standard warranty terms and conditions apply.All rights reserved. © July 2020 Ver 3.4

                  LUX XBOX USA INC               (P)+1 (415) 871 0448          USA@LUXXBOX.COM
                  LUX XBOX PTY LTD               (P)+61 7 3257 2822           INFO@LUXXBOX.COM
                  W W W.LUXXBOX.COM

                                                                                                    2
SUSPENSION POINTS
                                                                                                                                                                                                       MATRIX

                                                                                           TOP VIEWS

                                    MEDIUM

                                                                                                                               suspension points

                                                                                                                                                               20.5" - 520mm
                                                                                                                                               12.9" / 328mm
                                                                                                                                2.7" / 70mm
                                                               suspension points                                                power cable
                                                                                             15.6" / 396mm        3.5" / 90mm

                                                                                             32.4" - 825mm

                                       LARGE

                                                                                                                                                                               suspension points              20.5" - 520mm
                                                                                                                                                                                              12.9" / 328mm
                                                                                                                                                                                2.7" / 70mm

                                             suspension points                                                                                                                  power cable

                                                                                             38.5" / 978mm                                    4.3" / 109mm

                                                                                              56" - 1425mm

Luxxbox reserves the right to change the specification, material and colours at any time without notice. Standard warranty terms and conditions apply.All rights reserved. © July 2020 Ver 3.4

                  LUX XBOX USA INC               (P)+1 (415) 871 0448          USA@LUXXBOX.COM
                  LUX XBOX PTY LTD               (P)+61 7 3257 2822           INFO@LUXXBOX.COM
                  W W W.LUXXBOX.COM

                                                                                                    3
SUSPENSION POINTS
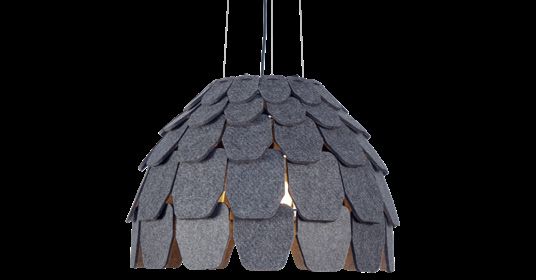
SHINGLE
TOP VIEWS
PCD = 3.5" / 85mm
SMALL 3 points equally
spaced at 120°
Power Cable
3.5" / 85mm
PCD = 7.5" / 185mm
3 points equally
MEDIUM spaced at 120°
Power Cable
7.5" / 185mm
PCD = 12.5" / 315mm
3 points equally spaced
at 120°
LARGE
Power Cable
12.5" / 315mm
Luxxbox reserves the right to change the specification, material and colours at any time without notice. Standard warranty terms and conditions apply.All rights reserved. © July 2020 Ver 3.4
LUX XBOX USA INC (P)+1 (415) 871 0448 USA@LUXXBOX.COM
LUX XBOX PTY LTD (P)+61 7 3257 2822 INFO@LUXXBOX.COM
W W W.LUXXBOX.COM
4SUSPENSION POINTS
BIRDCAGE
TOP VIEWS
PCD = 4.7" / 120mm
3 points equally
SMALL spaced at 120°
Power Cable
4.7" / 120mm
PCD = 6.3" / 160mm
3 points equally
spaced at 120°
MEDIUM
Power Cable
6.3" / 160mm
PCD = 14.1" / 360mm
3 points equally spaced
at 120°
LARGE
Power Cable
14.1" / 360mm
Luxxbox reserves the right to change the specification, material and colours at any time without notice. Standard warranty terms and conditions apply.All rights reserved. © July 2020 Ver 3.4
LUX XBOX USA INC (P)+1 (415) 871 0448 USA@LUXXBOX.COM
LUX XBOX PTY LTD (P)+61 7 3257 2822 INFO@LUXXBOX.COM
W W W.LUXXBOX.COM
5SUSPENSION POINTS
LINEA
TOP VIEWS
SMALL
Suspension Cable Suspension
Cable
Power Cord
1' / 305mm
Detail A
3.15" / 80mm
Suspension Cable
Power Cord
1.9' / 586mm
MEDIUM Detail A
2' / 610mm 0.8" / 20mm
3.15" / 80mm
4' / 1220mm
LARGE
4' / 1220
3.15" / 80mm
6' / 1828mm
EXTRA-LARGE
2' / 610mm 2' / 610mm
3.15" / 80mm
8' / 2439mm
Luxxbox reserves the right to change the specification, material and colours at any time without notice. Standard warranty terms and conditions apply.All rights reserved. © July 2020 Ver 3.4
LUX XBOX USA INC (P)+1 (415) 871 0448 USA@LUXXBOX.COM
LUX XBOX PTY LTD (P)+61 7 3257 2822 INFO@LUXXBOX.COM
W W W.LUXXBOX.COM
6SUSPENSION POINTS
BLADE
TOP VIEWS
SMALL
Suspension Cable Suspension Cable
Power Cord
1' / 305mm
Suspension Cable Power Cord
18mm - 0.7"
2' / 610mm
0.8" / 20mm
MEDIUM Detail A
2' / 610mm Detail A
0.7" / 18mm
4' / 1220mm
LARGE
4' / 1220mm
0.7" / 18mm
6' / 1828mm
EXTRA-LARGE
2' / 610mm 2' / 610mm
0.7" / 18mm
8' / 2439mm
Luxxbox reserves the right to change the specification, material and colours at any time without notice. Standard warranty terms and conditions apply.All rights reserved. © July 2020 Ver 3.4
LUX XBOX USA INC (P)+1 (415) 871 0448 USA@LUXXBOX.COM
LUX XBOX PTY LTD (P)+61 7 3257 2822 INFO@LUXXBOX.COM
W W W.LUXXBOX.COM
7SUSPENSION POINTS
DASCH
SIDE VIEWS
SMALL
17" - 436mm
Suspension Cables
6" / 145mm
18.5" - 470mm
MEDIUM
Power Cord
28" - 714mm
6" / 145mm
29.5" / 750mm
LARGE
50" - 1274mm
6" / 145mm
52" / 1310mm
EXTRA-LARGE
72" / 1834mm
6" / 145mm
74" / 1870mm
Luxxbox reserves the right to change the specification, material and colours at any time without notice. Standard warranty terms and conditions apply.All rights reserved. © July 2020 Ver 3.4
LUX XBOX USA INC (P)+1 (415) 871 0448 USA@LUXXBOX.COM
LUX XBOX PTY LTD (P)+61 7 3257 2822 INFO@LUXXBOX.COM
W W W.LUXXBOX.COM
8SUSPENSION POINTS
AC-LIPSE
TOP VIEWS
PCD = 25" / 637mm
Power Cable 2 points equally
spaced at 180°
25.5" - 650mm
23.5" / 600mm
Luxxbox reserves the right to change the specification, material and colours at any time without notice. Standard warranty terms and conditions apply.All rights reserved. © July 2020 Ver 3.4
LUX XBOX USA INC (P)+1 (415) 871 0448 USA@LUXXBOX.COM
LUX XBOX PTY LTD (P)+61 7 3257 2822 INFO@LUXXBOX.COM
W W W.LUXXBOX.COM
9SUSPENSION POINTS
HELM AC
Power Cable exits
Only one suspension
pendant through side
point in the center of
the pendant
15" / 390mm
Power Cable exits
pendant through side Only one suspension
point in the center of
the pendant
11" / 275mm
ceiling canopy - AUS ceiling canopy - US
2" / 50 4.7" / 120
1.77" / 45
2.36" / 60
0.5" / 12.5 1.18" / 30
Luxxbox reserves the right to change the specification, material and colours at any time without notice. Standard warranty terms and conditions apply.All rights reserved. © July 2020 Ver 3.4
LUX XBOX USA INC (P)+1 (415) 871 0448 USA@LUXXBOX.COM
LUX XBOX PTY LTD (P)+61 7 3257 2822 INFO@LUXXBOX.COM
W W W.LUXXBOX.COM
10CANOPY OPTIONS
NORTH AMERICA GLOBAL
PRODUCT Remote Concealed On-Board Remote Concealed On-Board
Driver Driver Driver Driver Driver Driver
LX-VE-L SA CD13 SA SB CD13 SB
LX-VE-L-DI SA CD11 SA SB CD11 SB
LX-VE-M SA CD13 SA SB CD13 SB
LX-VE-M-DI SA CD11 SA SB CD11 SB
LX-VE-S SA CD11 SA SB CD11 SB
LX-VE-S-DI SA CD11 SA SB CD11 SB
LX-BC-L/M/S SA CD11 SA SB CD11 SB
LX-SI-L/M/S SA CD11 SA SB CD11 SB
LX-VER-L SA CD11 SA SB CD11 SB
LX-VER-L-DI SA CD13 SA SB CD13 SB
LX-VER-M SA CD11 SA SB CD11 SB
LX-VER-M-DI SA CD13 SA SB CD13 SB
LX-VER-S SA CD11 SA SB CD11 SB
LX-VER-S-DI SA CD11 SA SB CD11 SB
LX-MA-5 SA CD11 SA SB CD11 SB
LX-MA-5-DI SA CD13 SA SB CD13 SB
LX-MA-3 SA CD11 SA SB CD11 SB
LX-MA-3-DI SA CD11 SA SB CD11 SB
LX-DA-XL/L/M/S SA CD11 SA SB CD11 SB
LX-AC SA - - SB - SB
LX-BL-XL/L/M/S SA CD11 - SB CD11 -
LX-LN - - SA - - SB
LX-WP-U-XL/L/M/S SA CD11 - SB CD11 -
LX-WP-D-XL/L/M SA CD11 - SB CD11 -
LX-HH-M/S SA - - SB - -
LX-PL-L/M/S SA - - SB - -
LX-NP SA - - SB - -
INDEX FOR CANOPY INFORMATION
CANOPY SA SB CD11 CD13 CDG
PAGE 13 13 14 14 TBC
Luxxbox reserves the right to change the specification, material and colours at any time without notice. Standard warranty terms and conditions apply.All rights reserved. © July 2020 Ver 3.4
LUX XBOX USA INC (P)+1 (415) 871 0448 USA@LUXXBOX.COM
LUX XBOX PTY LTD (P)+61 7 3257 2822 INFO@LUXXBOX.COM
W W W.LUXXBOX.COM
11CANOPY DIMENSIONS
REMOTE AND ON-BOARD OPTIONS
SB CANOPY (GLOBAL)
0.13" / Ø3.5mm
2.36" / 60mm
1.96" / 50mm 6" / 25mm
BOTTOM VIEW SIDE VIEW TOP VIEW RENDERED VIEW
SA CANOPY (NORTH AMERICA)
US Standard
Mounting Plate
1.77" / 45mm
4.7" / 120mm
more detailed
dimensions below
BOTTOM VIEW SIDE VIEW TOP VIEW RENDERED VIEW
MOUNTING PLATE PATTERN (NORTH AMERICA)
PCD: 3.5" / 89mm
PCD: 2.75" / 70mm
PCD: 2.16" / 55mm
Luxxbox reserves the right to change the specification, material and colours at any time without notice. Standard warranty terms and conditions apply.All rights reserved. © July 2020 Ver 3.4
LUX XBOX USA INC (P)+1 (415) 871 0448 USA@LUXXBOX.COM
LUX XBOX PTY LTD (P)+61 7 3257 2822 INFO@LUXXBOX.COM
W W W.LUXXBOX.COM
12CANOPY DIMENSIONS
CANOPY CONCEALED OPTION
CD11 CANOPY (GLOBAL / NORTH AMERICA)
US Standard
Mounting Plate
3.42" / 87mm
11" / 280mm
more detailed dimensions on
previous page
BOTTOM VIEW SIDE VIEW TOP VIEW
CD 13 (GLOBAL / NORTH AMERICA) US Standard
Mounting Plate
3.42" / 87mm
13" / 330mm more detailed dimensions on
previous page
BOTTOM VIEW SIDE VIEW TOP VIEW
Luxxbox reserves the right to change the specification, material and colours at any time without notice. Standard warranty terms and conditions apply.All rights reserved. © July 2020 Ver 3.4
LUX XBOX USA INC (P)+1 (415) 871 0448 USA@LUXXBOX.COM
LUX XBOX PTY LTD (P)+61 7 3257 2822 INFO@LUXXBOX.COM
W W W.LUXXBOX.COM
13STANDARD CEILING MOUNT / SUPPORT PLAFOND
ALL ACOUSTIC LIGHTS
Ceiling mount
(supplied)
Support plafond
(inclus)
Fix in to ceiling substrate, screw type to be
determined by installer.
(not supplied)
1/3'' / 8.5mm max Fixez au plafond. Le type de vis sera
determiné par l'installateur
(pas inclus)
Cable clamp with grip lock nipple.
(supplied)
Serre-câble avec système de fermeture
(inclus)
Ø 1/20" / 1.2mm Stainless suspension cable.
(supplied)
Ø 1/20" / 1.2mm Câble de suspension en
acier inoxydable
(inclus)
Luxxbox reserves the right to change the specification, material and colours at any time without notice. Standard warranty terms and conditions apply.All rights reserved. © July 2020 Ver 3.4
LUX XBOX USA INC (P)+1 (415) 871 0448 USA@LUXXBOX.COM
LUX XBOX PTY LTD (P)+61 7 3257 2822 INFO@LUXXBOX.COM
W W W.LUXXBOX.COM
14DRIVER SCHEMATICS / SCHÈMAS ÉLECTRIQUES
MEANWELL DRIVER
Caution, risk of electric shock
INFORMATION
All electrical work, including the installation and wiring of drivers to be completed by a licensed electrician. (Tous le travaux
electrique et d'installation doivent être effectués par un èlectricien autorisé.)
• Please refer to driver and accompanying documentation for further information regarding installation / wiring. (Veuillez consulter
l'information sur l'alimentation et la documentation additionelle pour plus information sur l'assemblage et l'installaiton de ce
produit.)
• Indoor use only (Pour l'interieur seulment)
• The light source contained in this luminarie shall only be replaced by the manufacturer or his service agent or a similar qualified
person. (Le source de lumière dans ce luminaire doit être remplacé uniquement par le fabricant ou par un agent autorisé.
TERMINALS / BORNES ÉLECTRIQUES
1. Line Voltage / Mains Power (Tension de ligne)
2. DC Output (Sortie C.C.)
3. Dimming Control (Gradateur)
+ Positive Voltage/Tension positive
2 -
AC Hot/Live/Active/Phase Negative Voltage/Tension negative
AC Neutral/Neutre 1 + Positive Dimming/Gradateur positif
GND/Earth/Mise à Terre
3 - Negative Dimming/Gradateur negatif
WIRE COLOURS / COULEURS DES CÂBLES
• Hot/Live/Active/Phase: Brown or as per wire label / Marron ou selon l'etiquette du câble
• Neutral/Neutre: Blue or as per wire label / Bleu ou selon l'etiquette du câble
• Ground/Mise à Terre: Green-Yellow or as per wire label / Vert-jaune ou selon l'etiquette du câble
• Dimming Positive (+)/Gradateur (+): Purple or as per wire label / Mauve ou selon l'etiquette du câble
• Dimming Negative (-)/Gradateur (-): Grey or as per wire label / Gris ou selon l'etiquette du câble
• Output (+)/Sortie (+): Red or as per wire label / Rouge ou selon l'etiquette du câble
• Output (-)/Sortie (-): Black or as per wire label / Noir ou selon l'etiquette du câble
Luxxbox reserves the right to change the specification, material and colours at any time without notice. Standard warranty terms and conditions apply.All rights reserved. © July 2020 Ver 3.4
LUX XBOX USA INC (P)+1 (415) 871 0448 USA@LUXXBOX.COM
LUX XBOX PTY LTD (P)+61 7 3257 2822 INFO@LUXXBOX.COM
W W W.LUXXBOX.COM
15DRIVER SCHEMATICS / SCHÈMAS ÉLECTRIQUES
ELDOLED SL75B-M1A0A1
Caution, risk of electric shock
INFORMATION
All electrical work, including the installation and wiring of drivers to be completed by a licensed electrician. (Tous les travaux
eléctriques et d'installation doivent être effectués par un èlectricien autorisé.)
• Please refer to driver and accompanying documentation for further information regarding installation / wiring. (Veuillez consulter
l'information sur l'alimentation et la documentation additionelle pour plus information sur lássemblage et l'installaiton de ce
produit.)
• Indoor use only (Pour l'interieur seulment)
• The light source contained in this luminarie shall only be replaced by the manufacturer or his service agent or a similar qualified
person. (Le source de lumière dans ce luminaire doit être remplacé uniquement par le fabricant ou par un agent autorisé.
TERMINALS / BORNES ÉLECTRIQUES
1. Line Voltage / Mains Power (Tension de ligne)
2. DC Output (Sortie C.C.)
3. Dimming Control (Gradateur)
120-277VAC
50-60Hz
Neutral/Neutre
Live/Hot/Phase
GND/Mise à Terre + Led Output
2 - Sortie C.C.
1
Dimming 0-10V +
Gradateur 0-10V - 3
WIRE COLOURS / COULEURS DES CÂBLES
• Hot/Live/Phase: Black/Noir
• Neutral/Neutre: White/Blanc
• Ground/Mise à Terre: Green/Vert
• Dimming Positive (+)/Gradateur (+): Purple or as per wire label / Mauve ou selon l'etiquette du câble
• Dimming Negative/Gradeteur (-): Grey or as per wire label / Gris ou selon l'etiquette du câble
• Output (+): Red or as per wire label / Rouge ou selon l'etiquette du câble
• Output (-): Black or as per wire label / Noir ou selon l'etiquette du câble
Luxxbox reserves the right to change the specification, material and colours at any time without notice. Standard warranty terms and conditions apply.All rights reserved. © July 2020 Ver 3.4
LUX XBOX USA INC (P)+1 (415) 871 0448 USA@LUXXBOX.COM
LUX XBOX PTY LTD (P)+61 7 3257 2822 INFO@LUXXBOX.COM
W W W.LUXXBOX.COM
16DRIVER SCHEMATICS / SCHÈMAS ÉLECTRIQUES
ELDOLED SL30B-M1Z0A
Caution, risk of electric shock
INFORMATION
All electrical work, including the installation and wiring of drivers to be completed by a licensed electrician. (Tous les travaux
eléctriques et d'installation doivent être effectués par un èlectricien autorisé.)
• Please refer to driver and accompanying documentation for further information regarding installation / wiring. (Veuillez consulter
l'information sur l'alimentation et la documentation additionelle pour plus information sur lássemblage et l'installaiton de ce
produit.)
• Indoor use only (Pour l'interieur seulment)
• The light source contained in this luminarie shall only be replaced by the manufacturer or his service agent or a similar qualified
person. (Le source de lumière dans ce luminaire doit être remplacé uniquement par le fabricant ou par un agent autorisé.
TERMINALS / BORNES ÉLECTRIQUES
1. Line Voltage / Mains Power (Tension de ligne)
2. DC Output (Sortie C.C.)
3. Dimming Control (Gradateur)
Dimming 0-10V +
Gradateur 0-10V -
3
+ Led Output
GND/Mise à Terre 2 - Sortie C.C.
Live/Hot/Phase 1
Neutral/Neutre
120-277VAC
50-60Hz
WIRE COLOURS / COULEURS DES CÂBLES
• Hot/Live/Phase: Black/Noir
• Neutral/Neutre: White/Blanc
• Ground/Mise à Terre: Green/Vert
• Dimming Positive (+)/Gradateur (+): Purple or as per wire label / Mauve ou selon l'etiquette du câble
• Dimming Negative (-): Grey or as per wire label / Gris ou selon l'etiquette du câble
• Output (+): Red or as per wire label / Rouge ou selon l'etiquette du câble
• Output (-): Black or as per wire label / Noir ou selon l'etiquette du câble
Luxxbox reserves the right to change the specification, material and colours at any time without notice. Standard warranty terms and conditions apply.All rights reserved. © July 2020 Ver 3.4
LUX XBOX USA INC (P)+1 (415) 871 0448 USA@LUXXBOX.COM
LUX XBOX PTY LTD (P)+61 7 3257 2822 INFO@LUXXBOX.COM
W W W.LUXXBOX.COM
17REMOTE DRIVER INSTALLATION - MEANWELL
NORTH AMERICA
Caution, risk of electric shock
Main input / Entrée principale
Dimming / Gradateur
DC Output / Sortie CC
Positive: Brown or Negative: Blue or
as per wire label as per wire label
Wire Colors / Couleurs des câbles
• Hot/Live/Phase: As per wire label / Selon l'etiquette du câble
• Neutral/Neutre: As per wire label / Selon l'etiquette du câble
• Ground/Mise à Terre: As per wire label / Selon l'etiquette du câble
• Dimming Positive(+)/Gradateur Positif(+): Purple or as per wire label/Mauve ou selon l'etiquette du câble
• Dimming Negative(-)/Gradateur Negatif(-): Grey or as per wire label/Gris ou selon l'etiquette du câble
• Output (+)/Sortie(+): Red or as per wire label/Rouge ou selon l'etiquette du câble
• Output (-)/Sortie(-): Black or as per wire label/Noir ou selon l'etiquette du câble
This product is to be installed by a qualified electrician only.
Ce produit doit être installé par un èlectricien autorisé
Luxxbox reserves the right to change the specification, material and colours at any time without notice. Standard warranty terms and conditions apply.All rights reserved. © July 2020 Ver 3.4
LUX XBOX USA INC (P)+1 (415) 871 0448 USA@LUXXBOX.COM
LUX XBOX PTY LTD (P)+61 7 3257 2822 INFO@LUXXBOX.COM
W W W.LUXXBOX.COM
18REMOTE DRIVER INSTALLATION - MEANWELL
NORTH AMERICA
Before starting, determine which fasteners will be best suited to secure the fitting, based on the material of the ceiling substrate.
Il est recommandé de choisir le type de fixations avant de commencer l'installation)
This product is to be installed by a qualified electrician only.
Tous le travaux électriques et d'installation doivent être effectués par un électricien autorisé).
1 2 3
A
B
Licensed electrician to terminate Mains
Input (A) and Dimming Control (B) to Mains Hang shade from ceiling using mounting
Power. Driver Schematics on p.16 (Connectez hardware provided. See page 15 for
l'entrée C.A. et les câbles du gradateur à lde additional details. (Suspendre l'abat-jour
l'alimentation principale. Schémas électriques avec la quincaillerie de montage. Voyez la Mount canopy base to ceiling. (FIxez le pavillon
à la page 16) page 15 pour plus d'information ) en position)
4 5 6
A B
B
C
A
Insert DC output (A) from Driver into canopy
base, then insert the DC input (B) from pendant
or light source through canopy cover. (Insérez
la sortie CC (A) de l'alimentation à travers de Place canopy cover over canopy base (A), then
la base du pavillon. Après, insérez l'entrée CC Terminate DC input to DC output inside fasten grub screws (B) and cable strain relief
du luminaire à travers le plaque de montage canopy. (Connectez l'entrée CC et la sortie (C). (Levez le pavillon en position (A), ressérez
du pavillon) CC a l'interieur du pavillon) les vis (B) et ajustez la bride de décharge(C).)
Luxxbox reserves the right to change the specification, material and colours at any time without notice. Standard warranty terms and conditions apply.All rights reserved. © July 2020 Ver 3.4
LUX XBOX USA INC (P)+1 (415) 871 0448 USA@LUXXBOX.COM
LUX XBOX PTY LTD (P)+61 7 3257 2822 INFO@LUXXBOX.COM
W W W.LUXXBOX.COM
19REMOTE DRIVER INSTALLATION - ELDOLED
NORTH AMERICA
Caution, risk of electric shock
DC Output / Sortie CC Main input / Entrée principale
Positive: Brown or Negative: Blue or
as per wire label as per wire label
Wire Colors / Couleurs des câbles
• Hot/Live/Active/Phase: Black or as per wire label/Noir ou selon l'etiquette du câble
• Neutral/Neutre: White or as per wire label/blanc ou selon l'etiquette du câble
• Ground/Earth/Mise à Terre: Green or as per wire label/Vert ou selon l'etiquette du câble
• Dimming Positive(+)/Gradateur Positif(+): Purple or as per wire label/Mauve ou selon l'etiquette du câble
• Dimming Negative(-)/Gradateur Negatif(-): Grey or as per wire label/Gris ou selon l'etiquette du câble
• Output (+)/Sortie(+): Red or as per wire label/Rouge ou selon l'etiquette du câble
• Output (-)/Sortie(-): Black or as per wire label/Noir ou selon l'etiquette du câble
This product is to be installed by a qualified electrician only.
Ce produit doit être installé par un èlectricien autorisé
Luxxbox reserves the right to change the specification, material and colours at any time without notice. Standard warranty terms and conditions apply.All rights reserved. © July 2020 Ver 3.4
LUX XBOX USA INC (P)+1 (415) 871 0448 USA@LUXXBOX.COM
LUX XBOX PTY LTD (P)+61 7 3257 2822 INFO@LUXXBOX.COM
W W W.LUXXBOX.COM
20REMOTE DRIVER INSTALLATION - ELDOLED
NORTH AMERICA
Before starting, determine which fasteners will be best suited to secure the fitting, based on the material of the ceiling substrate.
Il est recommandé de choisir le type de fixations avant de commencer l'installation)
This product is to be installed by a qualified electrician only.
Tous le travaux électriques et d'installation doivent être effectués par un électricien autorisé).
1 2 3
A
Licensed electrician to terminate Mains Input
and Dimming Control (A) to Mains Power. Hang shade from ceiling using mounting
Driver Schemtatics on p.17, 18. (Connectez hardware provided. See page 15 for
l'entrée C.A. et les câbles du gradateur à lde additional details. (Suspendre l'abat-jour
l'alimentation principale. Schémas électriques avec la quincaillerie de montage. Voyez la Mount canopy base to ceiling. (FIxez le pavillon
à la page 17, 18.) page 15 pour plus d'information ) en position)
4 5 6
A B
B
C
A
Insert DC output (A) from Driver into canopy Terminate DC input to DC output inside
base, then insert the DC input (B) from pendant canopy. Fix driver to junction box as per
or light source through canopy cover. (Insérez US standards. (Connectez l'entrée CC et la
la sortie CC (A) de l'alimentation à travers de sortie CC a l'interieur du pavillon. Fixez le Place canopy cover over canopy base (A), then
la base du pavillon. Après, insérez l'entrée CC bloc d'alimentation á la boite de junction fasten grub screws (B) and cable strain relief
du luminaire à travers le plaque de montage selon les standards americains). (C). (Levez le pavillon en position (A), ressérez
du pavillon) les vis (B) et ajustez la bride de décharge(C).)
Luxxbox reserves the right to change the specification, material and colours at any time without notice. Standard warranty terms and conditions apply.All rights reserved. © July 2020 Ver 3.4
LUX XBOX USA INC (P)+1 (415) 871 0448 USA@LUXXBOX.COM
LUX XBOX PTY LTD (P)+61 7 3257 2822 INFO@LUXXBOX.COM
W W W.LUXXBOX.COM
21ON-BOARD DRIVER
ELDOLED / MEANWELL (NORTH AMERICA)
Before starting, determine which fasteners will be best suited to secure the fitting, based on the material of the ceiling substrate.
Il est recommandé de choisir le type de fixations avant de commencer l'installation)
This product is to be installed by a qualified electrician only.
Tous les travaux électriques et d'installation doivent être effectués par un èlectricien autorisé).
1 2 3
A
B
Licensed electrician to terminate Mains
Power to Driver Input. EldoLED and
Hang shade from ceiling using mounting Meanwell Driver schematics on p. 16, 17,
hardware provided. See page 15 for 18. Connectez l'alimentation principale
additional detail. (Suspendez l'abat-jour á l'entrée de l'alimentation. Schémas
avec la quincaillerie de montage. Plus info Mount canopy base to ceiling. (FIxez le pavillon élctriques du EldoLED et Meanwell á la page
á la page 15) en position) 16, 17, 18.
4 5
B
B
C
A
Place canopy cover over canopy base (A), then
Licensed electrician to terminate ground connections from canopy to ground main input (B). fasten grub screws (B) and cable strain relief
Driver schematics on pg. 16, 17, 18. (Connectez la mise à terre du pavillon à la mise à terre de (C). (Levez le pavillon en position (A), ressérez
l'alimentation. Schémas eléctriques a la page 16, 17. 18.) les vis (B) et ajustez la bride de décharge(C).)
Luxxbox reserves the right to change the specification, material and colours at any time without notice. Standard warranty terms and conditions apply.All rights reserved. © July 2020 Ver 3.4
LUX XBOX USA INC (P)+1 (415) 871 0448 USA@LUXXBOX.COM
LUX XBOX PTY LTD (P)+61 7 3257 2822 INFO@LUXXBOX.COM
W W W.LUXXBOX.COM
22CANOPY CONCEALED INSTALLATION
MEANWELL
To dimming (vers gradateur)
To mains (vers alimentation principale)
To pendant
Vers luminaire *Standard 4" junction box (not included)
*Standard 4" boîte de junction (pas inclus)
CANOPY DIMENSIONS
Isometric Views
CD11 CD13
11'' / 279.4
13'' / 330
3'' / 75
3'' / 75
Luxxbox reserves the right to change the specification, material and colours at any time without notice. Standard warranty terms and conditions apply.All rights reserved. © July 2020 Ver 3.4
LUX XBOX USA INC (P)+1 (415) 871 0448 USA@LUXXBOX.COM
LUX XBOX PTY LTD (P)+61 7 3257 2822 INFO@LUXXBOX.COM
W W W.LUXXBOX.COM
23CANOPY CONCEALED INSTALLATION
MEANWELL
Before starting, determine which fasteners will be best suited to secure the fitting, based on the material of the ceiling substrate.
Il est recommandé de choisir le type de fixations avant de commencer l'installation)
This product is to be installed by a qualified electrician only.
Tous les travaux électriques et d'installation doivent être effectués par un èlectricien autorisé).
1 2
A B
Insert main power and dimming cables through Canopy Base. Licensed electrician to
Hang shade from ceiling using mounting terminate Mains power to Driver Input (A) and ground connections from canopy to ground
hardware provided. See page 16 for main input (B). Driver schematics on pg. 16 (Insérez le cable d'alimentation principale et le
additional detail. (Suspendez l'abat-jour avec cable du gradateur à travers la base du pavillon. Connectez l'alimentation principale á l'entrée
la quincaillerie de montage, pur detailles C.A. (A) et la mise à terre du pavillon à la mise à terre principale. Voyez schémas électriques
additionels voyez la page 15) à la page 16)
3 4 5
Place canopy cover over canopy base (A), then
Fix driver to canopy base using the screws fasten grub screws (B) and cable strain relief
Mount canopy base to ceiling. (FIxez le provided. (Fixez l'alimentation aux pavillon (C). (Levez le pavillon en position (A), ressérez
pavillon en position) avec les vis inclus) les vis (B) et ajustez la bride de décharge(C).)
Luxxbox reserves the right to change the specification, material and colours at any time without notice. Standard warranty terms and conditions apply.All rights reserved. © July 2020 Ver 3.4
LUX XBOX USA INC (P)+1 (415) 871 0448 USA@LUXXBOX.COM
LUX XBOX PTY LTD (P)+61 7 3257 2822 INFO@LUXXBOX.COM
W W W.LUXXBOX.COM
24CANOPY CONCEALED INSTALLATION
ELDOLED
*Standard 4" Junction Box (not included)
*Standard 4" Boîte de Junction (pas inclus)
CANOPY DIMENSIONS / DIMENSIONS DU PAVILLON
Isometric Views
CD11 CD13
11'' / 279.4
13'' / 330
3'' / 75
3'' / 75
Luxxbox reserves the right to change the specification, material and colours at any time without notice. Standard warranty terms and conditions apply.All rights reserved. © July 2020 Ver 3.4
LUX XBOX USA INC (P)+1 (415) 871 0448 USA@LUXXBOX.COM
LUX XBOX PTY LTD (P)+61 7 3257 2822 INFO@LUXXBOX.COM
W W W.LUXXBOX.COM
25CANOPY CONCEALED INSTALLATION
ELDOLED
Before starting, determine which fasteners will be best suited to secure the fitting, based on the material of the ceiling substrate.
Il est recommandé de choisir le type de fixations avant de commencer l'installation)
This product is to be installed by a qualified electrician only.
Tous les travaux électriques et d'installation doivent être effectués par un èlectricien autorisé).
1 2 3
Insert main power cable through Canopy Hang shade from ceiling using mounting
Base and screw this to Standard Junction Box. hardware provided. See page 15 for
(Insérez le cable d'alimentation principal a additional detail. (Suspendre l'abat-jour avec Fix driver mounting plate to driver using the
travers la base du pavillon et fixez la plaque de la quincaillerie de montage. Voyez la page nuts provided. (FIxez la plaque de l'alimentation
montage du pavillon à la boîte de connexion) 15 pour plus d'information) à l'alimentation avec les écrous inclus)
Recommended strip length
(longueur recommandé)
4 A 9mm 5 6
B
C
B C
Licensed electrician to terminate Mains Power
to Driver Input (A), DC output from Driver A
to pendant (B), and ground connections
from canopy to ground main input (C).
Driver schematics on p. 17, 18. (Connectez
l'alimentation principale a l'entrée C.A. (A), la
sortie C.C. de l'alimentation à la luminaire (B), Place canopy cover over canopy base (A), then
et les connections du mise à terre du pavillon Fix Driver to Canopy Base using the screws fasten grub screws (B) and cable strain relief
à la mise à terre de l'alimentation (C). Schémas provided. (Fixez la base du pavillon avec la (C). (Levez le pavillon en position (A), ressérez
électriques à la p. 17, 18.) quincaillerie de montage) les vis (B) et ajustez la bride de décharge(C).)
Luxxbox reserves the right to change the specification, material and colours at any time without notice. Standard warranty terms and conditions apply.All rights reserved. © July 2020 Ver 3.4
LUX XBOX USA INC (P)+1 (415) 871 0448 USA@LUXXBOX.COM
LUX XBOX PTY LTD (P)+61 7 3257 2822 INFO@LUXXBOX.COM
W W W.LUXXBOX.COM
26REMOTE DRIVER INSTALLATION - MEANWELL
GLOBAL
Caution, risk of electric shock
Main input / Entrée Principale
Dimming / Gradateur
DC Output / Sortie CC
Positive: Brown or Negative: Blue or
as per wire label as per wire label
Wire Colors / Couleurs des câbles
• Active/Phase: Brown/Marron
• Neutral/Neutre: Blue/Bleu
• Earth/Mise à Terre: Green-Yellow/Vert-Jaune
• Dimming Positive (+)/Gradateur Positif(+): As per wire label/selon l'etiquette du câble
• Dimming Negative (-)/Gradateur Negatif(-): As per wire label/selon l'etiquette du câble
• Output(+)/Sortie(+): Red or as per wire label/Rouge ou selon l'etiquette du câble
• Output(-)/Sortie(-): Black or as per wire label/Noir ou selon l'etiquette du câble
This product is to be installed by a qualified electrician only.
Ce produit doit être installé par un èlectricien autorisé
Luxxbox reserves the right to change the specification, material and colours at any time without notice. Standard warranty terms and conditions apply.All rights reserved. © July 2020 Ver 3.4
LUX XBOX USA INC (P)+1 (415) 871 0448 USA@LUXXBOX.COM
LUX XBOX PTY LTD (P)+61 7 3257 2822 INFO@LUXXBOX.COM
W W W.LUXXBOX.COM
27REMOTE DRIVER INSTALLATION - MEANWELL
GLOBAL
Before starting, determine which fasteners will be best suited to secure the fitting, based on the material of the ceiling substrate.
Il est recommandé de choisir le type de fixations avant de commencer l'installation)
This product is to be installed by a qualified electrician only.
Tous les travaux électriques et d'installation doivent être effectués par un èlectricien autorisé).
1 2 3
A
B
Terminate Mains Power (A) / Dimming
Control (B) to remotely mounted LED driver.
Driver schematics on page 16. (Connectez
l'alimentation principale (A) / le control du Hang shade from ceiling using mounting
gradateur (B) avec le bloc d'alimentation. hardware provided. See page 15 for
Schémas électriques à la page 16) additional detail. (Suspendez l'abat-jour
avec la quincaillerie de montage. Plus info Mount canopy base to ceiling. (FIxez le pavillon
á la page 15) en position)
4 5 6
B
A
B
C
A
Insert DC output (A) from Driver into canopy
base, then insert the DC input (B) from pendant
or light source through canopy cover. (Insérez
la sortie CC (A) de l'alimentation à travers de Place canopy cover over canopy base (A), then
la base du pavillon. Après, insérez l'entrée CC Terminate DC input to DC output inside fasten grub screws (B) and cable strain relief
du luminaire à travers la plaque de montage canopy. (Connectez l'entrée CC et la sortie (C). (Levez le pavillon en position (A), ressérerz
du pavillon) CC a l'interieur du pavillon) les vis (B) et ajuster la bride de décharge(C).)
Luxxbox reserves the right to change the specification, material and colours at any time without notice. Standard warranty terms and conditions apply.All rights reserved. © July 2020 Ver 3.4
LUX XBOX USA INC (P)+1 (415) 871 0448 USA@LUXXBOX.COM
LUX XBOX PTY LTD (P)+61 7 3257 2822 INFO@LUXXBOX.COM
W W W.LUXXBOX.COM
28ON-BOARD DRIVER
MEANWELL (GLOBAL)
Before starting, determine which fasteners will be best suited to secure the fitting, based on the material of the ceiling substrate.
Il est recommandé de choisir le type de fixations avant de commencer l'installation)
This product is to be installed by a qualified electrician only.
Tous les travaux électriques et d'installation doivent être effectués par un èlectricien autorisé).
1 2
Hang shade from ceiling using mounting
hardware provided. See page 15 for
additional detail. (Suspendez l'abat-jour
avec la quincaillerie de montage. Plus info Mount canopy base to ceiling. (FIxez le pavillon
á la page 15) en position)
4 5 6
B
A
B
C
A
Insert Mains (A) into canopy base, then insert
the DC input (B) from pendant through canopy Licensed electrician to terminate Mains
cover. Driver schematics on pg. 16 (Insertez Power to DC input, and ground connection
l'alimentation principale à travers de la base from Mains to canopy base. (Connectez Place canopy cover over canopy base (A), then
du pavillon, en suivant, insertez l'entrée C.C. l'alimentation principale á l'entrée C.C, et la fasten grub screws (B) and cable strain relief
(B) de la luminaire à travers la plaque du mise à terre de l'alimentation principale à la (C). (Levez le pavillon en position (A), ressérez
pavillon. Schémas électriques à la page 16.) mise à terre du pavillon les vis (B) et ajustez la bride de décharge(C).)
Luxxbox reserves the right to change the specification, material and colours at any time without notice. Standard warranty terms and conditions apply.All rights reserved. © July 2020 Ver 3.4
LUX XBOX USA INC (P)+1 (415) 871 0448 USA@LUXXBOX.COM
LUX XBOX PTY LTD (P)+61 7 3257 2822 INFO@LUXXBOX.COM
W W W.LUXXBOX.COM
29BRACE INSTALLATION
VAPOR ECHO (LARGE ONLY)
BRACE INSTALLATION INSTRUCTIONS (LARGE ONLY)
1. Place supplied braces over sheet metal tabs
2. Ensure braces overlap one another at frame
arms
3. Use pliers to twist tabs 90° to secure braces.
3
1
2
Luxxbox reserves the right to change the specification, material and colours at any time without notice. Standard warranty terms and conditions apply.All rights reserved. © July 2020 Ver 3.4
LUX XBOX USA INC (P)+1 (415) 871 0448 USA@LUXXBOX.COM
LUX XBOX PTY LTD (P)+61 7 3257 2822 INFO@LUXXBOX.COM
W W W.LUXXBOX.COM
30You can also read