POWERLOGIC SMS 4.0 System Manager Software Setup Guide - Instruction Bulletin
←
→
Page content transcription
If your browser does not render page correctly, please read the page content below

POWERLOGIC® SMS 4.0
                         System Manager Software
                         Setup Guide

Instruction Bulletin
Retain for future use.
HAZARD CATEGORIES AND   Read these instructions carefully and look at the equipment to become
SPECIAL SYMBOLS         familiar with the device before trying to install, operate, service or maintain it.
                        The following special messages may appear throughout this bulletin or on the
                        equipment to warn of potential hazards or to call attention to information that
                        clarifies or simplifies a procedure.
                        The addition of either symbol to a “Danger” or “Warning” safety label
                        indicates that an electrical hazard exists which will result in personal injury if
                        the instructions are not followed.
                        This is the safety alert symbol. It is used to alert you to potential personal
                        injury hazards. Obey all safety messages that follow this symbol to avoid
                        possible injury or death.

                                                        DANGER
                         DANGER indicates an imminently hazardous situation which, if not
                         avoided, will result in death or serious injury.

                                                       WARNING
                         WARNING indicates a potentially hazardous situation which, if not
                         avoided, can result in death or serious injury.

                                                        CAUTION
                         CAUTION indicates a potentially hazardous situation which, if not
                         avoided, can result in minor or moderate injury.

                                                     CAUTION
                         CAUTION, used without the safety alert symbol, indicates a potentially
                         hazardous situation which, if not avoided, can result in property damage.

PLEASE NOTE             Electrical equipment should be installed, operated, serviced, and maintained
                        only by qualified personnel. No responsibility is assumed by Schneider
                        Electric for any consequences arising out of the use of this material.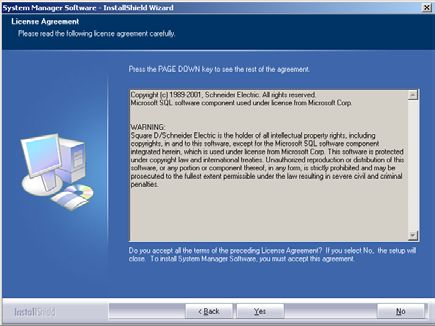
6320-060-228B1                                                                                                                    SMS 4.0 Setup Guide
08/2004                                                                                                                                      Contents

CONTENTS

                                                INTRODUCTION
                                                What is SMS 4.0? ........................................................................................ 1
                                                   SMS 4.0 Browser Access ....................................................................... 1
                                                   SMS Setup Utility ................................................................................... 1
                                                Contents of this Package ............................................................................. 2
                                                   User Documentation and Help Files ...................................................... 2
                                                Prerequisites ................................................................................................ 3
                                                   Calculating Space Requirements for Logging ........................................ 5
                                                Administrative Concerns .............................................................................. 5
                                                   Security Setup ........................................................................................ 5
                                                   Avoid Blank Passwords in Windows Accounts ...................................... 5
                                                   Communications Protocol Setup ............................................................ 6
                                                   SQL Considerations ............................................................................... 6
                                                   Popup Blockers ...................................................................................... 6
                                                   Font Setting/Viewing from the Browser .................................................. 6
                                                   Alarm Log Size ....................................................................................... 6
                                                   Customizing SMS 4.0 ............................................................................. 6
                                                   Server Restarts ...................................................................................... 7

                                                INSTALLATION
                                                SMS Licensing Requirements ..................................................................... 9
                                                Installing IIS; Installing and Enabling ASP.Net ............................................ 9
                                                    Windows 2000 Professional ................................................................... 9
                                                    Windows XP ......................................................................................... 10
                                                    Windows 2000 Server .......................................................................... 10
                                                    Installing IIS and ASP on Windows Server 2003 ................................. 10
                                                    Enabling ASP.Net on Windows Server 2003 ....................................... 11
                                                    Run Windows Update .......................................................................... 11
                                                New Installation, System Manager DL
                                                    and System Manager Standard ........................................................... 12
                                                    .NET Framework Installation ................................................................ 13
                                                    SOAP Toolkit Installation ..................................................................... 13
                                                    MSDE 2000 (SQL) Installation ............................................................. 14
                                                    System Manager 4.0 Installation .......................................................... 15
                                                    Information Manager Installation .......................................................... 20
                                                    SQL Service Pack 3 Installation ........................................................... 21
                                                    Optional Installs .................................................................................... 22
                                                    Reinstalling Terminal Services ............................................................. 22
                                                Upgrade Installation, System Manager DL
                                                    and System Manager Standard ........................................................... 22
                                                    Ethernet Gateway ................................................................................ 23
                                                    SMS 4.0 Launchpad Installation .......................................................... 23
                                                    .NET Framework Installation ................................................................ 24
                                                    SOAP Toolkit Installation ..................................................................... 24
                                                    System Manager 4.0 Installation .......................................................... 25
                                                    Information Manager Installation .......................................................... 29
                                                    SQL Service Pack 3 Installation ........................................................... 30
                                                    Optional Installs .................................................................................... 32
                                                    Reinstalling Terminal Services ............................................................. 32
                                                Uninstalling and Reinstalling SMS 4.0 ....................................................... 32
                                                    Uninstalling SMS 4.0 ............................................................................ 32
                                                    Reinstalling SMS 4.0 ............................................................................ 33
                                                Additional SMS 4.0 Client Licenses ........................................................... 33

© 2004 Schneider Electric All Rights Reserved                                                                                                                 i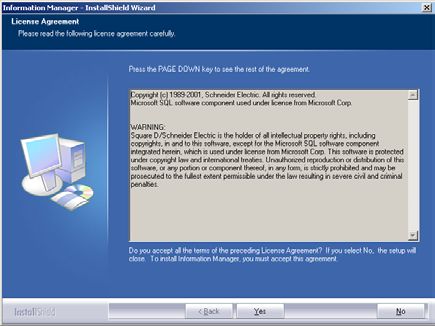
SMS 4.0 Setup Guide                                                                                              6320-060-228B1
Contents                                                                                                                08/2004

                      Installing Add-on Products after SMS 4.0 is Installed ................................ 33

                      USING SMS 4.0
                      Accessing SMS 4.0 .................................................................................... 35
                          Using a PowerUser Account when Running SMS ................................ 35
                          Accessing the Server Computer ........................................................... 35
                          Delivering SMS 4.0 to System Users ................................................... 37
                          Opening an SMS 4.0 Browser Session as a Remote User .................. 37
                          When Maximum Number of Connections is Met .................................. 39
                          Accessing the SMS Setup Utility .......................................................... 40
                      Customizing the SMS Interface .................................................................. 40
                          Customizing the About Box Icon and Banner ....................................... 40
                      Storing Document Files and Web Links ..................................................... 42
                      Information Manager Considerations ......................................................... 42
                          Printing Information Manager Reports ................................................. 43

                      INDEX ......................................................................................................... 45

ii                                                                       © 2004 Schneider Electric All Rights Reserved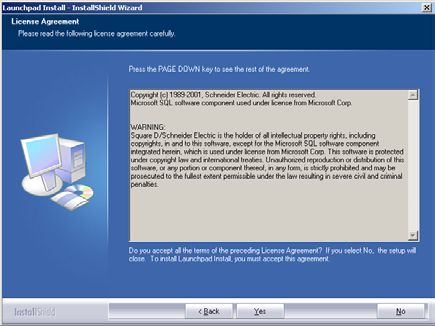
63220-060-228B1                                                                                        Chapter 1 — Introduction
08/2004                                                                                                      What is SMS 4.0?

CHAPTER 1 —INTRODUCTION

WHAT IS SMS 4.0?                                PowerLogic® System Manager Software 4.0 (SMS 4.0) provides access to
                                                real-time and historical system data using a standard web browser format.
                                                With SMS 4.0, you can:
                                                • view real-time data in meters, bar charts, and tables
                                                • view real-time trends
                                                • view documents (in PDF and HTML format) and web links to certain
                                                   Schneider sites, as well as to your own favorite sites
                                                • view certain “web-enabled” devices from the SMS Setup Utility (when
                                                   adding the device to the Setup Utility, you can set it to be web enabled)
                                                • set user preferences for the SMS 4.0 browser display
                                                • store and view historical waveforms and reports
                                                • configure and retrieve alarm information
                                                • create and view data diagrams (if you also have installed the GFX
                                                   interactive graphics software)

                                                There are three SMS 4.0 products: System Manager DL, System Manager
                                                Standard, and System Manager Professional. Throughout these
                                                instructions, all three products will be called “SMS 4.0” or “SMS.” Not all of
                                                the SMS 4.0 features are available in all three products. When a feature is
                                                limited to one or two of the SMS 4.0 products, the instructions will explain the
                                                limitation.

SMS 4.0 Browser Access                          You can view SMS information from any computer that has Microsoft
                                                Internet Explorer, version 5.5 (service pack 2) or greater. As long as the
                                                browser can connect to the SMS server computer, users have full access to
                                                the browser features.
                                                For a description of all of the browser features, see the SMS 4.0 online
                                                user’s guide, accessed from within the browser. See Table 1–1 on page 4
                                                for hardware requirements. See “SMS Licensing Requirements” on page 9
                                                for an explanation of licensing requirements.

SMS Setup Utility                               In addition to viewing information through a browser connection, you can
                                                access information through the SMS Setup Utility, which runs on the server
                                                computer. Use the Setup Utility to add and configure devices and their
                                                network addresses. With the Setup Utility, you also set up historical logging
                                                and system alarms. You can view real-time data in the Setup Utility also
                                                (from the server computer).
                                                For information about launching the Setup Utility, see the SMS 4.0 User’s
                                                Guide (from the SMS browser, click the System tab; then click “SMS 4.0
                                                User’s Guide” from the list in the left pane of the window. For help using the
                                                Setup Utility, refer to the Setup Utility online help file.
                                                Part of the Setup Utility is the PowerLogic Network server (PLNS), which
                                                resides on the SMS 4.0 server. To ensure that browser connections reflect
                                                correct device information, you must run the PLNS as a Windows service.
                                                You will set the “server as a service” status during SMS 4.0 installation.

© 2004 Schneider Electric All Rights Reserved                                                                                  1
Chapter 1 — Introduction                                                                                                           63220-060-228B1
Contents of this Package                                                                                                                   08/2004

                                                          In System Manager DL or System Manager Standard, you must access the
                                                          Setup Utility from the server computer; thus, only one connection to the
                                                          Setup Utility can be made at a time. If you have System Manager
                                                          Professional, you can connect to the Setup Utility from the server and from
                                                          remote browsers. For remote access, you must own sufficient Microsoft®
                                                          Windows® client access licenses (CAL) and Terminal Services client access
                                                          licenses (TSCAL) for the number of users that will connect to the SMS 4.0
                                                          server simultaneously. Contact Microsoft to purchase the necessary
                                                          licenses.
                                                          NOTE: The browser must be Internet Explorer, version 5.5, service pack 2,
                                                          or greater. You cannot use Netscape to view SMS 4.0 screens. If you do not
                                                          have service pack 2 installed, you can download a copy from Microsoft.com.
                                                          (If you prefer, you can download and install Internet Explorer 6.0.)

CONTENTS OF THIS PACKAGE                                  In this package you will find:
                                                          • SMS 4.0 installation CDs (includes five CDs)
                                                          • SMS 4.0 Installation Notes, containing last-minute instructions for
                                                             installing and using SMS 4.0
                                                          • Product serial number to register your System Manager products; the
                                                             serial number is found on a card inside the software box, as well as on the
                                                             box itself.

User Documentation and Help Files                         SMS 4.0 includes a number of documents and online help files. The table
                                                          below lists some typical topics, the product you will use, and where to find
                                                          the related information.

               What do you want to do?                    Where do you go?                  Where can you find help?
               Installation: SMS 4.0 (including GFX and   SMS 4.0 Launchpad installation    SMS 4.0 Setup Guide; see “New Installation, System
               Information Manager)                                                         Manager DL and System Manager Standard” on page 12.
               Launching (accessing) SMS Setup Utility    Start Menu                        SMS 4.0 User’s Guide (HTML help file, accessed from the
                                                                                            browser); or see “Accessing the SMS Setup Utility” on
                                                                                            page 40.
               Viewing Information via your browser       Start Menu                        SMS 4.0 User’s Guide (HTML help file, accessed from the
                                                                                            browser); or see “Accessing the Server Computer” on
                                                                                            page 35.
               Setting up system devices                  SMS Setup Utility                 Setup Utility online help file
               Setting up reports                         System Manager DL and Standard:   Information Manager online help file
                                                          Information Manager
               Setting up historical logging and device   SMS Setup Utility                 Setup Utility online help file
               alarms

2                                                                                                © 2004 Schneider Electric All Rights Reserved
63220-060-228B1                                                                                      Chapter 1 — Introduction
08/2004                                                                                                         Prerequisites

PREREQUISITES                                   Before you install SMS 4.0, ensure that you have all of the prerequisites
                                                listed below:
                                                1. The person who installs SMS 4.0 must be logged on to the server
                                                   computer as a Windows Administrator on the local computer. Create this
                                                   Administrator account before you begin the SMS install.
                                                   — This account cannot be logged on to the domain during installation.
                                                   — This account should be dedicated. It cannot have the same name as
                                                     any account on the domain.
                                                   — The account’s password cannot be blank, and it must be set to never
                                                     expire. When creating this account, do not check the box “User must
                                                     change password at next logon.”
                                                   — If you install SMS on a computer that has Windows Server 2003 as
                                                     its operating system, you must use an Administrator account that also
                                                     belongs to the IIS Worker Process Group (IIS_WPG group).

                                                2. There must be at least 150 MB of free space on the computer hard drive
                                                   (typically, the C: drive).
                                                3. For System Manager DL and Standard: ensure that one of the following
                                                   operating systems is installed on the SMS 4.0 server computer:
                                                   — Windows XP Professional (Service Pack 1)
                                                   — Windows 2000 Professional (Service Pack 3)
                                                   — Windows 2000 Server (Service Pack 3)
                                                   — Windows Server 2003

                                                   For System Manager Professional: ensure that one of the following
                                                   operating systems is installed on the SMS 4.0 server computer:

                                                   — Windows 2000 Server (Service Pack 3)
                                                   — Windows Server 2003

                                                   Service packs can be obtained from Microsoft (www.microsoft.com).

                                                4. Ensure that Internet Explorer version 5.5, service pack 2, is installed on
                                                   the server computer. You may install more recent versions or service
                                                   packs, but you cannot use Netscape.
                                                5. If the SQL service pack 3 is already installed on the server computer,
                                                   verify that the SQL agent is set to automatic:
                                                   a. Display the SQL Server Service Manager box: click Start > Programs
                                                      > Startup > Service Manager.
                                                   b. In the Server box, enter computer name\sms3000 (where “computer
                                                      name” is the name of the server computer).
                                                   c. From the Services pull-down box, select SQL Server Agent.
                                                   d. Check the box named “Auto-start service when OS starts.”
                                                   e. Close the SQL Server Service Manager box.
                                                6. If you are installing SMS on a computer that has Microsoft Server 2003
                                                   as its operating system, and if Terminal Services is already installed, you
                                                   must uninstall Terminal Services before you begin the Launchpad

© 2004 Schneider Electric All Rights Reserved                                                                                   3
Chapter 1 — Introduction                                                                                                                       63220-060-228B1
Prerequisites                                                                                                                                          08/2004

                                                                         installation (you will be able to re-install it after you follow the launchpad
                                                                         steps). To uninstall Terminal Services:
                                                                         a. Click Start > Control Panel > Add or Remove Programs.
                                                                         b. At the Add or Remove Components screen, click Add/Remove
                                                                            Windows Components.
                                                                         c. At the Windows Components window, uncheck Terminal Server.
                                                                    7. If you are upgrading from a previous version of SMS, you must have
                                                                       installed SMS version 3.3.2.3 on the SMS server computer.
                                                                    8. If you are upgrading from a previous version of SMS, be sure that you
                                                                       back up your SMS databases before you begin.

                                                                    Table 1–1 lists the minimum hardware/software requirements to run SMS
                                                                    4.0 on the server computer. “SMS Licensing Requirements” on page 9 lists
                                                                    the minimum licensing requirements to provide SMS 4.0 browser
                                                                    connections.

Table 1–1:       SMS 4.0 Minimum Hardware/Software Requirements

                                                                                             SMS 4.0 Product
Requirement                           System Manager DL               System Manager Standard        System Manager Professional Remote Browser Computer
                                                                                                     Server
Processor Speed                                                 733 MHz 1                            1 GHz                           N/A
RAM                                                             256 MB 1                             512 MB                          64 MB
Disk Space                               3 GB free space (includes space for historical logging) 1   1 GB free space PLUS space      N/A
                                                                                                     for logging (see “Calculating
                                                                                                     Space Requirements for
                                                                                                     Logging” below.)
PC Monitor Resolution                                                                        800x600 minimum
Operating System                      Windows 2000 Professional (Service Pack 3) or                  Windows 2000 Server             Any operating system that
                                                                                                     (Service Pack 3)                supports Internet Explorer
                                      Advanced Server (Service Pack 3)
                                                                                                                                     version 5.5, service pack 2, or
                                      Windows XP Professional (Service Pack 1)                       Windows Advanced Server
                                                                                                                                     higher
                                                                                                     (Service Pack 3)
                                      Windows 2000 Server (Service Pack 3)
                                                                                                     Windows Server 2003
                                      Windows 2000 Server Advanced Service Edition (Service
                                      Pack 3) or Windows Server 2003
Browser                               Internet Explorer 5.5, service pack 2 or greater. Service Pack 2 must be obtained from Microsoft (www.microsoft.com).
                                      Netscape and earlier versions of Internet Explorer cannot be used.
Internet Information Services (IIS)   Version 5.0 (or greater) required; enables SMS 4.0 to serve web pages to browser clients       N/A
Terminal Services                                                  N/A                               Required for accessing the SMS N/A
                                                                                                     Setup Utility from a remote
                                                                                                     browser
.NET Framework, SP 2                                              Included in the Launchpad installation.                            N/A
SOAP Toolkit, version 3                                           Included in the Launchpad installation.                            N/A
GFX                                             Required to use the Diagrams feature in SMS, and to view GFX drawings.               N/A
Maximum Number of Simultaneous          1 (can be increased to 6 with optional WebXTR product)       10 (upgradable in increments of N/A
Browser Connections                                                                                  5 to a maximum of 30)
Maximum Number of Simultaneous 16 (can be increased to 32                                        Unlimited                           N/A
Device Connections             with optional SMSDL32U
                               product)

1 If you want to add the “Advanced Reports Add-On for System Manager Standard, use the processor speed, RAM, and disk space requirements for System
  Manager Professional.

4                                                                                                               © 2004 Schneider Electric All Rights Reserved
63220-060-228B1                                                                                       Chapter 1 — Introduction
08/2004                                                                                               Administrative Concerns

Calculating Space Requirements for              Before you log history data, you should ensure that you have sufficient hard
Logging                                         disk space for the logging you want to do. Use the following formulas to
                                                estimate your disk space requirements for historical logging.

                                                1. Estimate the disk space needed to log one template.
                                                To determine the space used by any template:

                                                (# of quantities logged + 1) * 31 bytes/sample * # of samples logged/day *
                                                # of devices assigned to the template

                                                For example, if you log 59 quantities for 25 devices at 15-minute intervals
                                                (96 samples/day/device), the formula is:

                                                (59 + 1) * 31 * 96 * 25 = 4,464,000 bytes = 4.46 MB/day

                                                2. Estimate the total disk space needed for historical logging.
                                                Multiply the figure from Step 1 by the number of days of data retained in your
                                                history database (default is 400 days; see the SMS Setup Utility online help
                                                file for instructions on changing the default).

                                                In this example, the total disk space needed for historical logging would be:

                                                4.46 MB/day * 400 days = 1.78 GB

                                                NOTE: You need to perform these calculations for every template that you
                                                are using.

ADMINISTRATIVE CONCERNS                         As you prepare to install SMS 4.0, please keep in mind the following points.

Security Setup                                  To access SMS 4.0, every user needs an SMS user name and password.
                                                You must understand SMS user account information before you create and
                                                assign these user names and IDs. Instructions for adding user accounts are
                                                found in the SMS Setup Utility online help file.

                                                Each SMS 4.0 user who accesses the SMS Setup Utility through Terminal
                                                Services (System Manager Professional only) must have a unique SMS user
                                                name and password. (In SMS, a user name/password can be used by only
                                                one user at a time.) The level—1 through 10—that you give the user
                                                provides specific access rights to SMS. The access level table (in the Setup
                                                Utility online help file) shows the level required for each SMS feature.

                                                Although the Setup Utility requires specific security levels in order to access
                                                its features, the SMS 4.0 browser allows full access to any user ID level. You
                                                do not need unique user IDs for browser access; multiple users can use the
                                                same user name and password.

Avoid Blank Passwords in Windows                When setting up the PowerLogic Network Server to run as a Windows
Accounts                                        service (which you do during the SMS launchpad installation), you use an
                                                administrator or power user account. This account cannot have a blank
                                                password. Using a blank password will cause the PowerLogic Network
                                                Server service to be unable to start.

© 2004 Schneider Electric All Rights Reserved                                                                                 5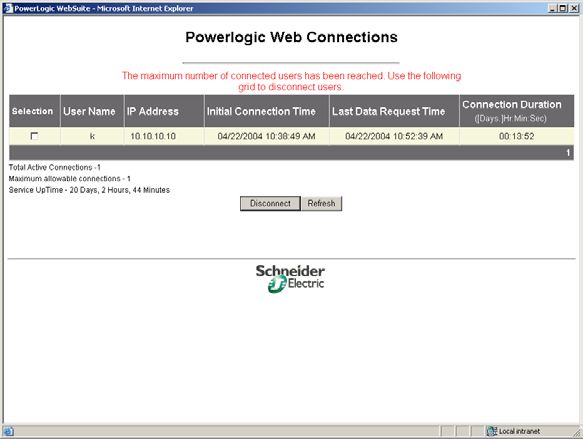
Chapter 1 — Introduction                                                                               63220-060-228B1
Administrative Concerns                                                                                        08/2004

Communications Protocol Setup           For the best performance of your SMS product, we highly recommend that
                                        you use TCP/IP for your communications protocol. The communications
                                        protocol is set in the SMS Configuration Utility (Start > Programs >
                                        POWERLOGIC > TOOLS > SMS Config Utility; or, from within the Setup
                                        Utility, click Tools > Configuration Utility). If you need help when making
                                        changes in this utility, see the Setup Utility online help file.
                                        NOTE: The default protocol is Named Pipes. Before you can change the
                                        protocol to TCP/IP, you must completely install SMS, including the final
                                        restart.

SQL Considerations                      Please verify the SQL configuration on the SMS 4.0 server computer before
                                        you continue with the SMS 4.0 installation. There are two possibilities:
                                        • The SMS 4.0 Launchpad installs will add a SQL instance named
                                          “SMS3000,” with mixed-mode authentication. If you change or delete this
                                          instance, you will not be able to log on to SMS.
                                        • If you do not want to install the SMS3000 instance via the Launchpad,
                                          you can use your own copy of SQL Server software to create your own
                                          instance. But the instance must be named SMS3000, and it must have
                                          mixed-mode authentication.

                                        By default, the SMS installation installs SQL with the “sa” account and a
                                        blank password. If you want greater database security, you can change the
                                        password to a non-blank.

Popup Blockers                          If you are using certain popup blockers (such as from Google or Yahoo),
                                        certain SMS popup screens may not be able to display. Examples are the
                                        real-time trend screen and the screen notifying you that the maximum
                                        number of browser connections has been met. To ensure that these SMS
                                        popup windows display correctly, set the blocker to allow the SMS server
                                        address to display.

Font Setting/Viewing from the Browser   Certain computers have a wide screen, or wide aspect ratio display, option.
                                        If these computers are set for “large fonts” (in the Display screen of the
                                        Control Panel), screens will not display correctly in the SMS browser. If SMS
                                        screens are cut off in the browser view, please check the font setting for that
                                        computer.

Alarm Log Size                          Although you set a maximum number of alarms to be viewed in the SMS 4.0
                                        browser window, you also set a maximum in the Setup Utility. If you set a
                                        limit in the browser (System tab > User Preferences) that is greater than the
                                        one in the Setup Utility, the alarm log viewed in the browser will be smaller
                                        than expected. (There is a limit of 1,000 alarms in the browser.)

Customizing SMS 4.0                     You can replace the SMS 4.0 banner and About box with your own graphics.
                                        See “Customizing the About Box Icon and Banner” on page 40.

                                        You can also add your own documents and web links to those that are
                                        already part of the SMS 4.0 browser. For instructions, see “Storing
                                        Document Files and Web Links” on page 42.

6                                                                           © 2004 Schneider Electric All Rights Reserved
63220-060-228B1 Chapter 1 — Introduction
08/2004 Administrative Concerns
Server Restarts Whenever you restart your SMS 4.0 server computer (for example, for SMS
updates or Windows OS updates), you must follow these steps:
1. Notify all SMS 4.0 remote users to shut down their SMS 4.0 browser
connections.
2. After all browser connections are shut down, restart the SMS 4.0 server
computer.
3. The remote users can reconnect to the server.
If the server computer restarts unexpectedly before clients can shut down
their SMS 4.0 sessions (for example, unexpected power outages), all clients
must still shut down their browsers. You must manually restart the server
computer after all clients have shut down.
© 2004 Schneider Electric All Rights Reserved 7Chapter 1 — Introduction 63220-060-228B1 Administrative Concerns 08/2004 8 © 2004 Schneider Electric All Rights Reserved
63220-060-228B1                                                                                        Chapter 2 — Installation
08/2004                                                                                           SMS Licensing Requirements

CHAPTER 2 —INSTALLATION

                                                This chapter explains how to install the following Microsoft tools:
                                                • Internet Information Services (IIS)
                                                • Active Server Pages (ASP) and ASP.Net

                                                There are also instructions for using the Launchpad to install SMS 4.0 and
                                                add-on products.

SMS LICENSING REQUIREMENTS                      Each SMS 4.0 product provides an SMS client access license (SMS CAL).
                                                These licenses permit a specified number of simultaneous browser
                                                connections. You can purchase additional licenses, providing more
                                                simultaneous connections. The SMS CAL requirements are as follows:

                                                System Manager DL and System Manager Standard:
                                                The SMS CAL permits only one browser connection. You can purchase an
                                                optional product, WebXTR, that offers five additional simultaneous browser
                                                connections.

                                                System Manager Professional:
                                                The SMS CAL permits ten simultaneous remote browser connections. You
                                                can purchase additional licenses (each purchase provides an additional five
                                                remote browser connections).

INSTALLING IIS; INSTALLING AND                  Internet Information Services (IIS) enables SMS 4.0 to serve web pages to
ENABLING ASP.NET                                its browser clients. You must install IIS on the SMS 4.0 server computer
                                                BEFORE you run the SMS 4.0 installation. This section tells how to install
                                                IIS. To install SMS, see the instructions beginning on page 12.

                                                Active Server Pages (ASP) and ASP.Net (Active Server Pages for .Net
                                                Framework) are two Microsoft products. They provide rich web-client data to
                                                system users when the SMS server is installed.

                                                In Windows 2000 Professional, Windows 2000 Server, and Windows XP:
                                                ASP is automatically installed and enabled when IIS is installed. ASP.Net is
                                                installed and enabled during the SMS Launchpad installation.

                                                In Windows Server 2003:
                                                You install ASP, ASP.Net, and IIS simultaneously; however, you must
                                                enable ASP.Net separately.

Windows 2000 Professional                       Before you begin, locate the Windows 2000 Professional installation CD;
                                                you will use it during the install.

                                                Click Start > Settings > Control Panel > Add/Remove Programs. On the left
                                                side of the Add/Remove Programs window, click Add/Remove Windows
                                                Components.

                                                When the Windows Components window displays, check Internet
                                                Information Services (IIS). Click Next.

© 2004 Schneider Electric All Rights Reserved                                                                                9
Chapter 2 — Installation 63220-060-228B1
Installing IIS; Installing and Enabling ASP.Net 08/2004
A wizard guides you through the rest of the process.
Windows XP Before you begin, locate the Windows XP installation CD; you will use it
during the install.
Click Start > Settings > Control Panel. Double-click Add or Remove
Programs. On the left side of the Add or Remove Programs window, click
Add/Remove Windows Components.
When the Windows Components window displays, check Internet
Information Services (IIS). Click Next.
A wizard guides you through the rest of the process.
Windows 2000 Server Before you begin, locate the Windows 2000 Server installation CD; you will
use it during the install. Follow these steps:
1. Click Start > Settings > Control Panel. Double-click Add/Remove
Programs.
2. On the left side of the Add/Remove Programs window, click Add/Remove
Windows Components. Click the Components button.
3. When the Windows Components Wizard window displays, check Internet
Information Services (IIS). Click Next.
A wizard guides you through the rest of the process.
Installing IIS and ASP on Windows Before you begin, locate the Server 2003 installation CD; you will use it
Server 2003 during the install. Follow these steps to install IIS, ASP, and ASP.Net on a
computer that is running Server 2003 software:
1. Click Start > Control Panel > Add or Remove Programs.
2. When the Add or Remove Components screen displays, click the
Add/Remove Windows Components button.
3. When the wizard screen displays, check Application Server, then click
Details.
4. When the Application Server screen displays, check the following items:
— Application Server Console
— ASP.NET
— Enable Network COM+ Access
— Internet Information Services (IIS)
5. Click OK.
6. At the Windows Components screen, click Next.
Progress bars display while the components are installed and
configured.
7. When the Windows Components Wizard screen displays, click Finish.
Close the Add or Remove Programs screen.
ASP, ASP.Net, and IIS are all installed. Follow the steps in the next section
to enable ASP.Net.
10 © 2004 Schneider Electric All Rights Reserved63220-060-228B1 Chapter 2 — Installation
08/2004 Installing IIS; Installing and Enabling ASP.Net
Enabling ASP.Net on Windows Server After you have installed ASP, ASP.Net, and IIS on the Windows 2003
2003 Server, you must enable ASP.Net. Follow these steps:
1. Click Start > All Programs > Administrative Tools > Internet Information
Services (IIS) Manager.
The Internet Information Services (IIS) Manager screen displays:
2. From the tree view (left-hand pane of the screen), click the “+” next to the
name of the local computer. Highlight Web Service Extensions. The
screen displays Web Service Extensions details:.
3. In the right-hand pane, check the status of Active Server Pages. If it is
prohibited, highlight the item name, and click Allow.
The status changes to Allowed.
4. Close the Internet Information Services (IIS) Manager screen.
NOTE: Verify that the ASP.NET status is also Allowed. If not, follow
steps 3 and 4 for ASP.NET.
ASP.Net is now enabled.
Run Windows Update After IIS and ASP are installed and ASP is enabled, you need to run the
Microsoft Windows Update option on the Microsoft website. This ensures
that the most recent updates are applied for your operating system.
© 2004 Schneider Electric All Rights Reserved 11Chapter 2 — Installation 63220-060-228B1
New Installation, System Manager DL and System Manager Standard 08/2004
NEW INSTALLATION, SYSTEM Before you begin, ensure that you have all of the prerequisites listed in
MANAGER DL AND SYSTEM “Prerequisites” on page 3, and that you have installed and activated IIS and
MANAGER STANDARD ASP.Net; then follow the steps below to install SMS 4.0 for the first time.
NOTE: Except for names at the top of screens, the System Manager DL and
System Manager Standard installs are exactly the same. These instructions
use screen captures for System Manager Standard.
NOTE: After you begin the launchpad installation that follows, you should
complete all of the launchpad steps before you click Finish. If you click Finish
before you are instructed, you will see a message telling you that you have
not completed the installation. This message will display each time that you
restart the computer (until you complete all steps in the launchpad process).
1. Insert Disk 1 in the CD-ROM drive of the SMS 4.0 server computer.
If you have disabled your computer’s autorun feature, you will need to
launch the installation manually. To do this, click Start > Run, then
browse to locate the CD named LP_SMSSE (LP_SMSDL for System
Manager DL).
Double-click setup.exe. At the Run screen, click OK.
2. When the Welcome screen displays, click Next.
The Launchpad License Agreement dialog displays:
3. Before you continue, read the license agreement to be sure you accept
its terms. To continue the installation, click Yes. To terminate the
installation, click No.
4. When the Machine Reboot Required message displays, click OK. At the
Windows login screen, you must log in with a Windows Administrator
password.
12 © 2004 Schneider Electric All Rights Reserved63220-060-228B1 Chapter 2 — Installation
08/2004 New Installation, System Manager DL and System Manager Standard
After the computer restarts, the Launchpad screen displays:
If a component is already installed, a red check appears in the Installed
column; you do not need to re-install this component. These instructions
assume that none of the components are installed, and that you will
install them in the order given.
.NET Framework Installation 5. Click the .NET Framework v 1.1 button.
6. When prompted to insert the .NET Framework CD, remove Disk 1 and
insert Disk 2 in the CD-ROM drive.
7. Click OK.
8. When prompted whether you would like to install .NET Framework, click
Yes.
A progress bar displays, followed by the .NET Framework License
Agreement screen.
9. Click the “I agree” radio button, then click Install.
A progress bar displays, followed by a message telling you that .NET
Framework installation is complete.
10. Click OK.
After a series of verification screens, the Launchpad displays again (note
that a red check appears next to .NET Framework v1.1, indicating that it
was successfully installed).
SOAP Toolkit Installation 11. Click the SOAP Toolkit v 3.0 button.
The SOAP Toolkit 3.0 screen displays.
12. Click Yes to begin the install.
© 2004 Schneider Electric All Rights Reserved 13Chapter 2 — Installation 63220-060-228B1
New Installation, System Manager DL and System Manager Standard 08/2004
13. When the Welcome screen displays, click Next.
14. When the SOAP Toolkit license agreement screen displays, click the “I
accept the terms in the License Agreement” radio button, then click Next.
The Customer Information screen displays.
15. Enter a user name and organization, or accept the default (from the
Windows operating system registry). This user name is used only for
SOAP toolkit; it does not need to match any other login information
(Windows or SMS).
The Custom Setup screen displays:
16. You can accept the defaults that are listed in the box. Click Install.
17. When the install is complete, click Finish.
After a series of verification screens, the Launchpad displays again (note
that a red check appears next to SOAP Toolkit, indicating that it was
successfully installed).
MSDE 2000 (SQL) Installation 18. Click the MSDE 2000 button.
19. When prompted to insert the MSDE 2000 CD, remove Disk 2 and insert
Disk 3 in the CD-ROM drive.
20. Allow the CD to completely load, then click OK.
21. When the Microsoft SQL Desktop license agreement screen displays,
click the “I accept the terms of the license agreement” radio button; then
click Next.
14 © 2004 Schneider Electric All Rights Reserved63220-060-228B1 Chapter 2 — Installation
08/2004 New Installation, System Manager DL and System Manager Standard
The SQL Desktop Destination Folder screen displays:
22. Browse to choose a location for SQL desktop, or accept the default. Click
Next.
23. When the Start Copying Files screen displays, click Next.
24. When the Machine Reboot Required message displays, click OK. At the
Windows login screen, you must log in with a Windows Administrator
password.
After the computer restarts, the Launchpad screen displays (note that
MSDE 2000 has a red check beside it, indicating successful installation).
System Manager 4.0 Installation 25. Click the System Manager Standard 4.0 (or System Manager DL 4.0)
button.
26. When prompted to insert the System Manager 4.0 CD, remove Disk 3
and insert Disk 4 in the CD-ROM drive.
27. Allow the CD to completely load, then click OK.
28. When the Welcome screen displays, click Next.
© 2004 Schneider Electric All Rights Reserved 15Chapter 2 — Installation 63220-060-228B1
New Installation, System Manager DL and System Manager Standard 08/2004
The SMS License Agreement dialog displays:
29. Before you continue, read the license agreement to be sure you accept
its terms. To continue the installation, click Yes. To terminate the
installation, click No.
The Customer Information screen displays:
30. Enter a user name and company name (these do not have to match any
other SMS or Windows information). Enter the serial number, which is
found on the CD case and on a card packed inside the software box.
Click Next.
16 © 2004 Schneider Electric All Rights Reserved63220-060-228B1 Chapter 2 — Installation
08/2004 New Installation, System Manager DL and System Manager Standard
The Destination Location screen displays:
31. It is recommended that you accept the default drive:
C:\POWERLOGIC\SMS. Click Next.
The SMS Account Setup screen displays:
32. You must add one level 1 (administrator) account for SMS. The user
name and password will be entered when you log on to SMS, both at the
Setup Utility and through the browser. This is NOT a Windows password.
For information about adding additional SMS user accounts, and for the
system features that are available at each level, see the SMS Setup
Utility online help file.
After you type the user account information, click Next.
© 2004 Schneider Electric All Rights Reserved 17Chapter 2 — Installation 63220-060-228B1
New Installation, System Manager DL and System Manager Standard 08/2004
The About the SMS Account Selection screen displays:
33. This screen describes the procedure for determining whether SMS will
run as a Windows service. Read this information; then click Next.
The Run Mode screen displays:
34. On this screen, you choose whether you will run SMS as a Windows
service. To ensure that data is always available to remote browsers, we
strongly recommend that you run SMS as a service. When you run SMS
as a service, the SMS server automatically restarts every time the server
computer is restarted.
To run SMS as a Windows service: Do not check the box at the top of
the screen. Enter a Windows administrator or power user account (or
select the account from the list in the box). The account cannot have a
blank password: enter the account’s password, then retype the password
to verify it. This account is used to synchronize the Windows account
with SMS components.
NOTE: . If you are installing SMS on a computer that has Server 2003 as
its operating system, you must enter a Windows Administrator
account that is also a member of the IIS Worker Process Group
(IIS_WPG group).
35. After you type the account and password, click Next.
36. When the Start Copying screen displays, click Next.
Several progress messages display, which can take several minutes.
18 © 2004 Schneider Electric All Rights Reserved63220-060-228B1 Chapter 2 — Installation
08/2004 New Installation, System Manager DL and System Manager Standard
When setup is complete, the Registration Form dialog displays:
37. Have your SMS 4.0 product serial number available before you
begin.The serial number, which registers ten SMS 4.0 client access
licenses, is printed on the CD case and on a card that is in your software
package. To register your SMS 4.0 software, click one of the option
buttons:
— Online Registration. Click this button to launch your Internet
browser and display the online registration form. Follow instructions
to complete the form. Click Next to review the information that you
enter. When the information is correct, click Submit to send it. Close
your browser, close the Registration window, and continue with step
38.
— Complete and Print. Click this button to display a copy of the
registration form. Complete the fields online; then print the completed
form. Close the registration form window and the Registration
window. Fax or mail the completed form to your local Schneider
Electric representative.
If you wish to register at a later time, click Close. The software
registration form will display when you restart your computer. If you close
that dialog without registering, locate the form on your computer at Start
> Programs > POWERLOGIC > DOCS.
38. When the Machine Reboot Required message displays, click OK. At the
Windows login screen, you must log in with a Windows Administrator
password.
© 2004 Schneider Electric All Rights Reserved 19Chapter 2 — Installation 63220-060-228B1
New Installation, System Manager DL and System Manager Standard 08/2004
After the computer restarts, the Launchpad screen displays (note that the
System Manager 4.0 button has a red check beside it, indicating
successful installation).
Information Manager Installation 39. Click the Information Manager button.
40. When prompted to insert the Information Manager CD, remove Disk 3
and insert Disk 4 in the CD-ROM drive.
41. Allow the CD to completely load, then click OK.
The Information Manager License Agreement dialog displays:
42. Before you continue, read the license agreement to be sure you accept
its terms. To continue the installation, click Yes. To terminate the
installation, click No.
Some installation messages display, followed by the Windows Account
Information screen (this account will be used to schedule reports; make a
note of the account and password that you enter for future use):
20 © 2004 Schneider Electric All Rights Reserved63220-060-228B1 Chapter 2 — Installation
08/2004 New Installation, System Manager DL and System Manager Standard
43. Enter a Windows Administrator account and password, and confirm the
password; then click OK.
44. When the Machine Reboot Required message displays, click OK. At the
Windows login screen, you must log in with a Windows Administrator
password.
After the computer restarts, the Launchpad screen displays (note that the
Information Manager button has a red check beside it, indicating
successful installation).
45. Click Finish.
46. When prompted to insert the Launchpad CD, remove Disk 5 and insert
Disk 1 in the CD-ROM drive.
47. Allow the CD to completely load, then click OK.
SQL Service Pack 3 Installation The following message displays:
48. Click OK.
49. When the Machine Reboot Required message displays, click OK. At the
Windows login screen, you must log in with a Windows Administrator
password. Remove Disk 1 from the CD-ROM drive.
50. If you have already installed SQL Service Pack 3 on the server
computer, you can skip these instructions. Go to “Optional Installs” on
page 22.
If you have not already installed SQL Service Pack 3 on the server
computer, you should do so now. You will use files from Disk 2 of your
SMS 4.0 software CDs.
Microsoft issued this service pack to defend against the “Slammer”
virus.The service pack should be installed on any PC on which a SQL
database is installed.
© 2004 Schneider Electric All Rights Reserved 21Chapter 2 — Installation 63220-060-228B1
Upgrade Installation, System Manager DL and System Manager Standard 08/2004
Service Pack 3A Prerequisites
1. If you are running SMS on a Windows XP operating system, you need to
upgrade the operating system to Windows XP Service Pack 1 before
running the SQL/MSDE Service Pack 3. You can download the Windows
XP Service Pack 1 from Microsoft’s website at:
http://www.microsoft.com/WindowsXP/SP1
2. Make sure that you have enough free space to run this install. You need
at least 400 MB of free space for this service pack installation.
Service Pack 3a Installation
To install the service pack, follow these steps:
1. Insert Disk 2 (from your SMS 4.0 installation set) in the CD-ROM drive.
2. Click Start > Run.
3. When the Run dialog displays, enter the following:
[CD drive]:\MSDE2000\setup.exe
NOTE: Replace [CD drive] with the letter of your CD drive.
4. Follow the on-screen instructions to install the service pack. The
installation will cause an automatic reboot of the PC when it is finished.
You are now ready to begin using SMS.
NOTE: If the Service Pack fails to install, we recommend that you download
and install the most recent MSDE service pack from the Microsoft website.
Optional Installs If you have purchased optional add-on software (for example, GFX or
WebXTR), you can install them now. Use the CD and installation instructions
provided with the add-on product.
Reinstalling Terminal Services If your SMS server is the using Microsoft 2003 Server operating system AND
Terminal Services was installed on the server computer before you installed
SMS, you had to uninstall it. Now is the time to re-install Terminal Services:
1. Click Start > Control Panel > Add or Remove Programs.
2. At the Add or Remove Components screen, click Add/Remove Windows
Components.
3. At the Windows Components window, check Terminal Server.
UPGRADE INSTALLATION, SYSTEM Use this upgrade installation to upgrade from SMS 3.3.2.3 to SMS 4.0.
MANAGER DL AND SYSTEM
MANAGER STANDARD Before you begin, ensure that you have all of the prerequisites listed in
“Prerequisites” on page 3, and that you have installed and activated IIS and
ASP.Net; then follow the steps below to upgrade from SMS 3.3.2.3 to SMS
4.0.
NOTE: Except for names at the top of screens, the System Manager DL and
System Manager Standard installs are exactly the same. These instructions
use screen captures for System Manager Standard.
22 © 2004 Schneider Electric All Rights Reserved63220-060-228B1 Chapter 2 — Installation
08/2004 Upgrade Installation, System Manager DL and System Manager Standard
Ethernet Gateway If you are using an Ethernet Gateway and you are moving SMS to a different
computer, you need to reinstall the Ethernet Gateway before you install SMS
4.0. The installation for the Ethernet Gateway is in your SMS 3.3 installation
set.
SMS 4.0 Launchpad Installation NOTE: After you begin the launchpad installation that follows, you should
complete all of the launchpad steps before you click Finish. If you click Finish
before you are instructed, you will see a message telling you that you have
not completed the installation. This message will display each time that you
restart the computer (until you complete all steps in the launchpad process).
1. Insert Disk 1 in the CD-ROM drive of the SMS 4.0 server computer.
If you have disabled your computer’s autorun feature, you will need to
launch the installation manually. To do this, click Start > Run, then
browse to locate the CD named LP_SMSSE (LP_SMSDL for System
Manager DL).
Double-click setup.exe. At the Run screen, click OK.
2. After a series of messages, the Welcome screen displays; click Next.
The Launchpad License Agreement dialog displays:
3. Before you continue, read the license agreement to be sure you accept
its terms. To continue the installation, click Yes. To terminate the
installation, click No.
4. When the Machine Reboot Required message displays, click OK. At the
Windows login screen, you must log in with a Windows Administrator
password.
© 2004 Schneider Electric All Rights Reserved 23Chapter 2 — Installation 63220-060-228B1
Upgrade Installation, System Manager DL and System Manager Standard 08/2004
After the computer restarts, the Launchpad screen displays:
If a component is already installed, a red check appears in the Installed
column; you do not need to re-install this component. These instructions
assume that none of the components are installed, and that you will
install them in the order given.
.NET Framework Installation 5. Click the .NET Framework v 1.1 button.
6. When prompted to insert the .NET Framework v1.1 CD, remove Disk 1
and insert Disk 2 in the CD-ROM drive.
7. Click OK.
8. When prompted whether you would like to install .NET Framework, click
Yes.
A progress bar displays, followed by the .NET Framework License
Agreement screen.
9. Click the “I agree” radio button, then click Install.
A progress bar displays, followed by a message telling you that .NET
Framework installation is complete.
10. Click OK.
After a series of verification screens, the Launchpad displays again (note
that a red check appears next to .NET Framework v1.1, indicating that it
was successfully installed).
SOAP Toolkit Installation 11. Click the SOAP Toolkit v3.0 button.
The SOAP Toolkit 3.0 screen displays.
12. Click Yes to begin the install.
24 © 2004 Schneider Electric All Rights Reserved63220-060-228B1 Chapter 2 — Installation
08/2004 Upgrade Installation, System Manager DL and System Manager Standard
13. When the Welcome screen displays, click Next.
14. When the SOAP Toolkit license agreement screen displays, click the “I
accept the terms in the License Agreement” radio button, then click Next.
The Customer Information screen displays.
15. Enter a user name and organization, or accept the default (from the
Windows operating system registry). This user name is used only for
SOAP toolkit; it does not need to match any other login information
(Windows or SMS). Click Next.
The Custom Setup screen displays:
16. You can accept the defaults that are listed in the box. Click Install.
17. When the install is complete, click Finish.
After a series of verification screens, the Launchpad displays again (note
that a red check appears next to SOAP Toolkit, indicating that it was
successfully installed).
System Manager 4.0 Installation 18. Click the System Manager Standard 4.0 (or System Manager DL 4.0)
button.
19. When prompted to insert the System Manager 4.0 CD, remove Disk 2
and insert Disk 3 in the CD-ROM drive.
20. Allow the CD to completely load, then click OK.
© 2004 Schneider Electric All Rights Reserved 25Chapter 2 — Installation 63220-060-228B1
Upgrade Installation, System Manager DL and System Manager Standard 08/2004
The Backup Recommendation screen displays:
21. If you have not already backed up your SMS databases (SMS_System
and SMS_History), click No to exit the install. Then launch SMS and go
the Database Services tool. Use Database Services to make backup
copies of the SMS databases. If you need help making the backup, see
the SMS online help file (click Help on the SMS toolbar).
If you have backed up your SMS databases, click Yes to continue the
SMS 4.0 installation.
22. When the Welcome screen displays, click Next.
The SMS License Agreement dialog displays:
23. Before you continue, read the license agreement to be sure you accept
its terms. To continue the installation, click Yes. To terminate the
installation, click No.
The Choose Destination Location screen displays:
24. It is recommended that you accept the default drive:
C:\POWERLOGIC\SMS. Click Next.
26 © 2004 Schneider Electric All Rights Reserved63220-060-228B1 Chapter 2 — Installation
08/2004 Upgrade Installation, System Manager DL and System Manager Standard
If your previous version of SMS has user accounts with blank passwords,
you will see this message:
The install will modify the password for the following user names to
match the user name. Please note that SMS no longer accepts blank
passwords.
A list of user accounts also displays. This list is displayed as a text file. It
is located at c:\SMSBlankPasswords.txt (assuming that you accepted the
default C drive in step 24.).
25. After you finish the SMS 4.0 installation, you can display this .txt file. If
you wish to change the passwords for these users, you need to use the
Setup User Accounts dialog in the SMS Setup Utility. To get started,
launch the Setup Utility, then click Setup > Administrative > User
Accounts on the toolbar.
The About the SMS Account Selection screen displays:
26. This screen describes the procedure for determining whether SMS will
run as a Windows service. Read this information; then click Next.
The Run Mode screen displays:
27. On this screen, you choose whether you will run SMS as a Windows
service. To ensure that data is always available to remote browsers, we
strongly recommend that you run SMS as a service. When you run SMS
as a service, the SMS server automatically restarts every time the server
computer is restarted.
To run SMS as a Windows service: Do not check the box at the top of
the screen. Enter a Windows administrator or power user account (or
© 2004 Schneider Electric All Rights Reserved 27Chapter 2 — Installation 63220-060-228B1
Upgrade Installation, System Manager DL and System Manager Standard 08/2004
select the account from the list in the box). The account cannot have a
blank password: enter the account’s password, then retype the password
to verify it. This account is used to synchronize the Windows account
with SMS components.
NOTE: . If you are installing SMS on a computer that has Server 2003 as
its operating system, you must enter a Windows Administrator
account that is also a member of the IIS Worker Process Group
(IIS_WPG group).
28. After you type the account and password, click Next.
29. When the Start Copying screen displays, click Next.
Several progress messages display, which can take several minutes.
When setup is complete, the Registration Form dialog displays:
30. Have your SMS 4.0 product serial number available before you
begin.The serial number, which registers ten SMS 4.0 client access
licenses, is printed on the CD case and on a card that is in your software
package. To register your SMS 4.0 software, click one of the option
buttons:
— Online Registration. Click this button to launch your Internet
browser and display the online registration form. Follow instructions
to complete the form. Click Next to review the information that you
enter. When the information is correct, click Submit to send it. Close
your browser, close the Registration window, and continue with step
38.
— Complete and Print. Click this button to display a copy of the
registration form. Complete the fields online; then print the completed
form. Close the registration form window and the Registration
window. Fax or mail the completed form to your local Schneider
Electric representative.
If you wish to register at a later time, click Close. The software
registration form will display when you restart your computer. If you close
that dialog without registering, locate the form on your computer at Start
> Programs > POWERLOGIC > DOCS.
28 © 2004 Schneider Electric All Rights Reserved63220-060-228B1 Chapter 2 — Installation
08/2004 Upgrade Installation, System Manager DL and System Manager Standard
31. When the Machine Reboot Required message displays, click OK. At the
Windows login screen, you must log in with a Windows Administrator
password.
After the computer restarts, the Launchpad screen displays (note that the
System Manager 4.0 button has a red check beside it, indicating
successful installation).
Information Manager Installation 32. Click the Information Manager button.
33. When prompted to insert the Information Manager CD, remove Disk 3
and insert Disk 4 in the CD-ROM drive.
34. Allow the CD to completely load, then click OK.
The Information Manager License Agreement dialog displays:
35. Before you continue, read the license agreement to be sure you accept
its terms. To continue the installation, click Yes. To terminate the
installation, click No.
© 2004 Schneider Electric All Rights Reserved 29Chapter 2 — Installation 63220-060-228B1
Upgrade Installation, System Manager DL and System Manager Standard 08/2004
Some installation messages display, followed by the Windows Account
Information screen (this account will be used to schedule reports; make a
note of the account and password that you enter for future use):
36. Enter a Windows Administrator account and password, and confirm the
password; then click OK.
37. When the Machine Reboot Required message displays, click OK. At the
Windows login screen, you must log in with a Windows Administrator
password.
After the computer restarts, the Launchpad screen displays (note that the
Information Manager button has a red check beside it, indicating
successful installation).
38. Click Finish.
39. When prompted to insert the Launchpad CD, remove Disk 4 and insert
Disk 1 in the CD-ROM drive.
40. Allow the CD to completely load, then click OK.
SQL Service Pack 3 Installation The following message displays:
41. Click OK.
42. When the Machine Reboot Required message displays, click OK. At the
Windows login screen, you must log in with a Windows Administrator
password. Remove Disk 1 from the CD-ROM drive.
30 © 2004 Schneider Electric All Rights ReservedYou can also read