Application Note Arduino Due Timer Control - Copperhill ...
←
→
Page content transcription
If your browser does not render page correctly, please read the page content below
Copperhill Technologies     Application Note: Arduino Due Timer Control

Application Note
Arduino Due Timer Control

By Wilfried Voss
Copperhill Technologies                                      Application Note: Arduino Due Timer Control

Published by
Copperhill Technologies
158 Log Plain Road
Greenfield, MA 01301

https://copperhilltech.com

© 2019 Copperhill Technologies Corporation. All rights reserved.

No part of this publication may be reproduced, stored in a retrieval system or transmitted in any form
or by any means, electronic, mechanical, photocopying, recording, scanning or otherwise, except as
permitted under Sections 107 or 108 of the 1976 United States Copyright Act, without the prior written
permission of the Publisher.

Trademarks

All trademarks or registered trademarks are the property of their respective owners.

Disclaimer

The information provided in this document is provided "as is" without warranty of any kind. Copperhill
Technologies Corporation disclaims all warranties, either express or implied, including the warranties
of merchantability and fitness for a particular purpose. In no event shall Copperhill Technologies
Corporation be liable for any damages whatsoever including direct, indirect, incidental, consequential,
loss of business profits or special damages, even if Copperhill Technologies Corporation or its
suppliers have been advised of the possibility of such damages.

Document Lifetime

Copperhill Technologies Corporation may occasionally update online documentation between releases
of the related application note. Consequently, if this document was not downloaded recently, it may
not contain the most up-to-date information. Please refer to the following link for the most current
information:

https://copperhilltech.com/application-note-arduino-due-timer-control/

Contact Us

Despite all efforts in preparing this eBook, there is always the possibility that some aspects or facts will
not find everybody’s approval, which prompts us, author and publisher, to ask for your feedback. If you
would like to propose any amendments or corrections, please send us your comment. We look forward
to any support in supplementing this eBook, and we welcome all discussions that contribute to making
the topic of this book as thorough and objective as possible.

To submit amendments and corrections please log on to our website at

https://copperhilltech.com/contact-us/

and leave a note.

© Copperhill Technologies Corp. 2021. All rights reserved.                                       Page 2 of 23
Copperhill Technologies                                                               Application Note: Arduino Due Timer Control

Table of Contents
1     Introduction ................................................................................................................... 4
2     The Arduino Due ........................................................................................................... 6
    2.1     THE ARM CORTEX-M3 PROCESSOR ..................................................................................................... 7

    2.2     SYSTEM DESCRIPTION .......................................................................................................................... 8

    2.3     THE ARDUINO IDE.............................................................................................................................. 10

3     Timer Control .............................................................................................................. 12
    3.1     DELAY FUNCTIONS ............................................................................................................................. 12

    3.2     ELAPSED TIME FUNCTIONS ................................................................................................................. 12
    3.2.1     micros() Resolution Using The Arduino Due ................................................................................ 13

    3.3     ARDUINO PLAYGROUND - TIMER SAMPLE CODE ................................................................................... 15

    3.4     ARDUINO DUE INTERRUPT-DRIVEN TIMER CONTROL ............................................................................ 15
    3.4.1     Interrupt-Driven Timer Control Sample ......................................................................................... 17
    3.4.2     Timer Control Sample C/C++ Code .............................................................................................. 19

4     Download The Code Sample ..................................................................................... 22
5     Recommended Literature ........................................................................................... 23

© Copperhill Technologies Corp. 2021. All rights reserved.                                                                              Page 3 of 23
Copperhill Technologies Application Note: Arduino Due Timer Control 1 Introduction The Arduino platform is not only the ideal solution for the hobbyist, due to low price and ease of programming; it is also a great tool for professionals who are looking for quick prototyping. This application note will address the very specific topic of timer control for the Arduino Due. The Arduino platform does provide library functions dedicated to timers, and they cover all Arduino boards, including the Arduino Due. However, the Due takes up a special position in the Arduino product line of processors. It is, after all, the first ARM-based Arduino development board, which accounts for special considerations compared to the standard, ATmega-driven boards. The ARM Cortex-M3 processor’s versatility opens the door to more sophisticated applications, and that includes timer programming. A timer is a clock that controls the sequence of an event while counting in fixed intervals of time. A timer is used for producing precise time delay. Secondly, it can be used to repeat or initiate an action after/at a known period of time. Most processors have timers incorporated on the chip. They not only generate time delays but they can also be used as counters. Source: EngineersGarage – https://www.engineersgarage.com/definitions/what-is-timer This definition of timers is important, because this document is not about timekeeping, i.e. the management of date and time of the day. The application of timers can be as simple as a blinking LED or as complex as detecting an interruption in a serial data communication. The following image demonstrates an example of timing a serial transmission between two nodes. © Copperhill Technologies Corp. 2021. All rights reserved. Page 4 of 23
Copperhill Technologies                                      Application Note: Arduino Due Timer Control

As is demonstrated in the picture, the message frequency will be between 50 to 200 msec.
A timeout will occur when a time of greater than 750 milli-seconds elapsed between two
message packets when more packets were expected. A timeout will cause a connection
closure.

A connection is considered closed when:
     1. The sender of a data message sends the last Data Transfer package.
     2. A timeout occurs.
Not all applications will be as complex, but this example demonstrates how important it is to
have a set of timer functions that integrate easily without the need of a major learning curve. My
timer library includes functions to initialize, load, start and stop a timer as well as checking the
timer count and status.
As I mentioned previously, the Arduino platform already provides library functions dedicated to
timers, and there are more samples available through the Arduino Playground. However, my
focus was not only on increased precision but also adaptability to other hardware platforms, e.g.
using the same concept on an NXP LPC17xx processor.
Last, but not least, the following assumes some basic knowledge of embedded programming
with the Arduino platform. Should that not be the case, please refer to the literature appendix,
especially the books written by Simon Monk. Be assured that the learning curve is minimal.
My point is, I will not engage in repeating topics that have already been covered extensively by
others, but I will reference resources where necessary.

© Copperhill Technologies Corp. 2021. All rights reserved.                                    Page 5 of 23
Copperhill Technologies Application Note: Arduino Due Timer Control 2 The Arduino Due There are a great number of ARM Cortex M3 developing and prototyping boards available in the marketplace. The Arduino Due is a very popular system that matched my selection criteria, which are low-cost, ease of programming, and great performance. The Due is the first ARM-based Arduino development board. The programming of the microcontroller is accomplished through the familiar Arduino IDE (Windows, Mac, Linux), keeping the programming as backward compatible to other Arduino systems as possible, thus allowing a smooth migration between processor systems. And while the Arduino Due is my favorite hardware for quick prototyping, there are a few caveats that I feel I should mention here. The ease of programming often comes hand-in-hand with limited debugging capabilities, and that is also the case here, i.e. it applies to the Due as well as other similar systems, for example, the mbed LPC1768 or the Teensy. I will, however, provide working programming samples, giving you a head start for any extensions and modifications. It is possible to program and debug Arduino Due sketches using a JTAG debugger in combination with, for instance, the Atmel Studio development environment. For more information, see: https://copperhilltech.com/blog/arduino-due-programming-and-debugging-using-jtag-ice-and-atmel- studio/ Another downside (related to the low cost aspect) is the mere fact that such boards are basically useless without additional hardware components. In order to save costs, but at the same time enabling the user to pay only for the interfaces needed for the project, the board design is limited to providing the processor with the bare necessities, while routing all interfacing signals “as is” to onboard connectors. For instance, the serial interfaces such as Controller Area Network (CAN) and UART (RS- 232/422/485) provide only TTL levels, and you will need additional hardware (transceivers) to make them hardware-compliant with their respective standards. The solution to overcome these restrictions comes in form of Arduino shields plus development and breakout boards that extend the Due’s functionality. However, for the mere purpose of timer programming, we don’t need any additional hardware components, since the timers are integrated in the ARM chip. © Copperhill Technologies Corp. 2021. All rights reserved. Page 6 of 23
Copperhill Technologies                                      Application Note: Arduino Due Timer Control

2.1            The ARM Cortex-M3 Processor

The ARM Cortex-M is a group of 32-bit RISC ARM processor cores licensed by ARM Holdings.
The cores are intended for microcontroller use, and consist of the Cortex-M0, M0+, M1, M3, M4,
and M7.

The ARM Cortex-M3 processor is very well suited for highly deterministic real-time applications,
even for low-cost platforms, such as automotive body systems, industrial control systems,
wireless networking and sensors, and many more.
Cortex-M3 microcontrollers are available from a number of semiconductor manufacturers such
as Texas Instruments, Infineon, Atmel, NXP (formerly Philips), Analog Devices, Toshiba,
STMicroelectronics, and more.
Key features of the Cortex-M3 core are:

     •    ARMv7-M architecture
     •    3-stage pipeline with branch speculation.
     •    Instruction sets:
     •    Thumb (entire).
     •    Thumb-2 (entire).
     •    32-bit hardware multiply with 32-bit or 64-bit result, signed or unsigned, add or subtract
          after the multiply.
     •    32-bit hardware divide (2-12 cycles).
     •    Saturated math support.
     •    DSP extension: Single cycle 16/32-bit MAC, single cycle dual 16-bit MAC, 8/16-bit SIMD
          arithmetic.
     •    1 to 240 interrupts, plus NMI.
     •    12 cycle interrupt latency.
     •    Integrated sleep modes.

Since the Cortex-M3 has been licensed to such a variety of manufacturers, their individual
processor products vary slightly in regards to processor speed, memory size, available
interfaces, etc.

The Arduino Due uses the Atmel SAM3X8E ARM Cortex-M3 CPU.

© Copperhill Technologies Corp. 2021. All rights reserved.                                    Page 7 of 23
Copperhill Technologies Application Note: Arduino Due Timer Control
Besides its great speed and more than sufficient amount of FLASH and RAM, the ARM Cortex-
M3 is the perfect choice for a myriad of embedded applications due to its support of a great
number of peripheral interfaces. They built-in features include:
• Ethernet
• USB Host and Device
• Controller Area Network (CAN)
• SPI
• I2C
• ADC
• DAC
• PWM
• Digital I/O
For more detailed information on the ARM Cortex-M3 processor, please refer to the literature
appendix in this book.
2.2 System Description
According to the official Arduino website, the Arduino Due is a microcontroller board based on
the Atmel SAM3X8E ARM Cortex-M3 CPU. It is the first Arduino board based on a 32-bit ARM
core microcontroller. It has 54 digital input/output pins (of which 12 can be used as PWM
outputs), 12 analog inputs, 4 UARTs (hardware serial ports), a 84 MHz clock, an USB OTG
capable connection, 2 DAC (digital to analog), 2 TWI, a power jack, an SPI header, a JTAG
header, a reset button and an erase button.
The board contains everything needed to support the microcontroller; simply connect it to a
computer with a micro-USB cable or power it with an AC-to-DC adapter or battery to get started.
The Due is compatible with all Arduino shields that work at 3.3V and are compliant with the 1.0
Arduino pinout.
© Copperhill Technologies Corp. 2021. All rights reserved. Page 8 of 23Copperhill Technologies Application Note: Arduino Due Timer Control
The Due has a 32-bit ARM core that can outperform typical 8-bit microcontroller boards. The
most significant differences are:
• A 32-bit core, that allows operations on 4 bytes wide data within a single CPU clock.
• CPU Clock at 84Mhz.
• 96 Kbytes of SRAM.
• 512 Kbytes of Flash memory for code.
• A DMA controller that can relieve the CPU from doing memory intensive tasks.
According to author Simon Monk’s “Programming Arduino – Next Steps, Going Further With
Sketches,” the Arduino Due is about ten times faster than the Arduino Uno or Mega 2560. It also
comes with significantly more SRAM and Flash memory.
The Arduino Due has two USB ports available. The Native USB port (which supports CDC serial
communication using the SerialUSB object) is connected directly to the SAM3X MCU. The other
USB port is the Programming port. It is connected to an ATMEL 16U2 which acts as a USB-to-
Serial converter. This Programming port is the default for uploading sketches and
communicating with the Arduino.
The USB-to-serial converter of the Programming port is connected to the first UART of the
SAM3X. It's possible to communicate over this port using the Serial object in the Arduino
programming language.
The USB connector of the Native port is directly connected to the USB host pins of the SAM3X.
Using the Native port enables you to use the Due as a client USB peripheral (acting as a mouse
or a keyboard connected to the computer) or as a USB host device so that devices can be
connected to the Due (like a mouse, keyboard, or an Android phone). This port can also be
used as a virtual serial port using the SerialUSB object in the Arduino programming language.
© Copperhill Technologies Corp. 2021. All rights reserved. Page 9 of 23Copperhill Technologies Application Note: Arduino Due Timer Control
Further Resources:
• Getting started with the Arduino Due:
https://www.arduino.cc/en/Guide/ArduinoDue
• Arduino Due Pin Mapping:
https://www.arduino.cc/en/Hacking/PinMappingSAM3X
• Arduino Due Schematics:
https://www.arduino.cc/en/uploads/Main/arduino-Due-schematic.pdf
• Atmel SAM3X8E ARM Cortex-M3 CPU Data Sheet:
https://copperhilltech.com/content/Atmel-SAM3X-Datasheet.pdf
2.3 The Arduino IDE
The following paragraph is helpful for those who are new to the Arduino platform and those
who are familiar with it but explore using the Arduino Due for the first time. If you are already
familiar with Arduino Due programming, please feel free to skip this section.
The Arduino Integrated Development Environment (IDE) is common to all Arduino boards,
including the Arduino Due. However, after installing the IDE (see reference below), you will find
that you cannot select the Due from the list of Arduino systems.
The Arduino IDE comes in two versions, offline and online (i.e. the Arduino Web Editor). In the
following, I will refer only to the (offline) Arduino Desktop IDE.
First, after installing the Arduino Desktop IDE, you need to add the Atmel SAMD Core (see
reference below). In addition, when using the IDE version 1.6.2. or higher (which is very likely),
you need to also install the core that supports the Arduino Due. It may sound confusing, but the
procedure is fairly simple. Select the Tools menu in the IDE, then Boards, then Boards
Manager.
It is highly recommended not only to install the newest IDE version but also check version
numbers frequently. This will prevent unpleasant surprises when working/downloading online
programming samples that won’t work with older IDE versions.
© Copperhill Technologies Corp. 2021. All rights reserved. Page 10 of 23Copperhill Technologies Application Note: Arduino Due Timer Control
References:
• Getting started with the Arduino Due, including :
https://www.arduino.cc/en/Guide/ArduinoDue
• Download/Install the Arduino IDE:
https://www.arduino.cc/en/Main/Software
• Arduino Boards Manager
https://www.arduino.cc/en/Guide/Cores
© Copperhill Technologies Corp. 2021. All rights reserved. Page 11 of 23Copperhill Technologies Application Note: Arduino Due Timer Control
3 Timer Control
The Arduino platform in general provides a number of timing functions (the Arduino Time library)
that are primarily focused on timekeeping, i.e. date and time of the day. Some of these functions
will need an external hardware such as a real-time clock, GPS module, or an Ethernet-based
network with time protocol. Functions that don’t depend on additional hardware usually deliver
the elapsed time since the Arduino board began running the current program, which is sufficient
for simple timer control but not necessarily for time-sensitive applications.
In the following, I will reference these standard functions without going into too much detail,
since they are very well documented on the Arduino website. My focus is, however, on interrupt-
driven functions that take advantage of direct access to the Atmel SAM3X8E ARM Cortex-M3
CPU’s hardware timers.
3.1 Delay Functions
The generic Arduino delay functions pause the program for the defined amount of time, either in
milliseconds or microseconds. They are:
• delay(ms) - Pauses the program execution for the amount as specified in milliseconds.
https://www.arduino.cc/reference/en/language/functions/time/delay/
• delayMicroseconds(μs) - Pauses the program execution for the amount as specified in
microseconds.
https://www.arduino.cc/reference/en/language/functions/time/delaymicroseconds/
Either function should be used with caution. They don’t interfere with interrupt-driven tasks and
to a certain degree they don’t interrupt the receiving of serial data. Nevertheless, their use
should be limited to simple test programs.
3.2 Elapsed Time Functions
The Arduino Time library provides two functions that allow measuring the elapsed time since the
Arduino board began running the current program. They are:
• millis() – Returns the time in milliseconds since the Arduino board began executing the
current program.
https://www.arduino.cc/reference/en/language/functions/time/millis/
• micros() – Returns the time in microseconds since the Arduino board began executing
the current program.
https://www.arduino.cc/reference/en/language/functions/time/micros/
© Copperhill Technologies Corp. 2021. All rights reserved. Page 12 of 23Copperhill Technologies Application Note: Arduino Due Timer Control
The resolution delivered by the micros() function will differ depending on the Arduino board
used, meaning the resolution is not as precise as one microsecond. The Arduino website does
not reference the resolution as delivered by the Arduino Due. See also the following paragraph.
Both functions can be used for a basic timer control as demonstrated in the following sample
code:
unsigned long previousMillis = 0;
const long interval = 1000;
void loop() {
unsigned long currentMillis = millis();
if (currentMillis - previousMillis >= interval) {
previousMillis = currentMillis;
}
}
This code sample uses the millis() function, but it can be applied the same way to micros(). The
code measures the elapsed time between two points in time, previousMillies and currentMillies,
and when the difference between the two exceeds interval, the program can start actions as
defined by the user. Setting previousMillies = currentMillies resets the timer.
The advantage of this approach is that it does not stop the program’s operation, meaning you
can use the loop() function for further tasks without major delay.
For more information on the Arduino Time Library functions see:
http://playground.arduino.cc/Code/Time
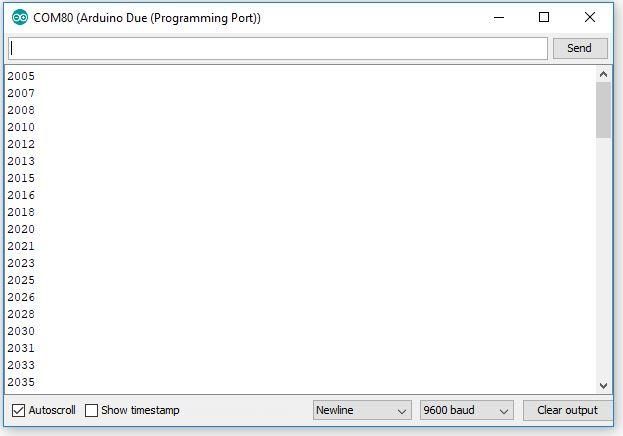
3.2.1 micros() Resolution Using The Arduino Due
The following provides information on the resolution of the micros() function running on the
Arduino Due, however, only as a reference, since there is no official information. Any application
that depends on a resolution of one microsecond must ultimately use interrupt-driven timers
and corresponding service routines.
According to the Arduino website, “On 16 MHz Arduino boards (e.g. Duemilanove and Nano),
this function has a resolution of four microseconds (i.e. the value returned is always a multiple of
four). On 8 MHz Arduino boards (e.g. the LilyPad), this function has a resolution of eight
microseconds.”
© Copperhill Technologies Corp. 2021. All rights reserved. Page 13 of 23Copperhill Technologies Application Note: Arduino Due Timer Control
There is, however, no official reference to the 84 MHz Arduino Due. Reading the previous
statement and applying some logic, the assumption must be that the Arduino Due should be
quite capable of delivering a resolution of one microsecond.
But the timing depends also on the loop() execution time, and timer functions based on micros()
are not interrupt-driven.
One Arduino forum entry suggested the following approach of testing the Due’s resolution:
unsigned long x[100];
void setup()
{
Serial.begin(9600);
for (int i=0;iCopperhill Technologies Application Note: Arduino Due Timer Control
3.3 Arduino Playground - Timer Sample Code
The Arduino playground provides two versions using a different method, meaning the program
assigns timers to functions (tasks) that are accomplished when the timer interval expired.
Upon execution of the task, the timers are re-started, unless the task is a one-time execution.
Both sample programs assign programs to a timer interval without using interrupts, avoiding
potential problems with data exchange between the main program and the interrupt service
routines. That also implies that these tasks are not embedded in the loop() code section.
For more information on these timer sample programs, see:
• http://playground.arduino.cc/Code/SimpleTimer
• http://playground.arduino.cc/Code/Timer
3.4 Arduino Due Interrupt-Driven Timer Control
The following is based on an Arduino forum entry at:
http://forum.arduino.cc/index.php?topic=130423.0
As I pointed out previously, any application that depends on a timer resolution better than those
delivered by millis() or micros()will require the use of an interrupt-driven hardware timer and the
corresponding interrupt service routine.
© Copperhill Technologies Corp. 2021. All rights reserved. Page 15 of 23Copperhill Technologies Application Note: Arduino Due Timer Control
This can be easily accomplished when you’re an experienced Atmel ARM Cortex programmer.
However, if your focus is mainly on programming the Arduino Due using its user-friendly IDE,
you won’t get much support from the official documentation.
That is where the digging through numerous forum entries starts, followed by testing (and quite
often dismissing) various code examples. Nevertheless, the above referenced forum entry
delivered a sample code that worked immediately for my purposes.
The code is very easy to implement, and it provides only two function calls:
• startTimer sets the interrupt frequency and the pointer to the interrupt service routine
(ISR).
• TC3_Handler is the actual ISR where you can place your code that will be executed with
the highest possible precision.
Interrupt-driven programs can be tricky, specifically when it comes to exchanging data between
loop() and the ISR. My recommendation is to keep the ISR task short and simple.
// -------------------------------------------------------------------
// Timer Interrupt Setup for Arduino Due
// -------------------------------------------------------------------
// Reference: http://forum.arduino.cc/index.php?topic=130423.0
void TC3_Handler(void)
{
TC_GetStatus(TC1, 0);
// Your code here…
}
void startTimer(Tc *tc, uint32_t channel, IRQn_Type irq, uint32_t frequency)
{
pmc_set_writeprotect(false);
pmc_enable_periph_clk((uint32_t)irq);
TC_Configure(tc, channel, TC_CMR_WAVE | TC_CMR_WAVSEL_UP_RC
|TC_CMR_TCCLKS_TIMER_CLOCK4);
uint32_t rc = VARIANT_MCK/128/frequency;
TC_SetRA(tc, channel, rc/2); //50% high, 50% low
TC_SetRC(tc, channel, rc);
TC_Start(tc, channel);
tc->TC_CHANNEL[channel].TC_IER=TC_IER_CPCS;
tc->TC_CHANNEL[channel].TC_IDR=~TC_IER_CPCS;
NVIC_EnableIRQ(irq);
}
© Copperhill Technologies Corp. 2021. All rights reserved. Page 16 of 23Copperhill Technologies Application Note: Arduino Due Timer Control
The above shown code is implemented in my Arduino Due Timer sample project. Obviously, you
can use the above code any which way you like and how it fits your application.
Initializing the timer system is accomplished as shown here:
#include
#define TIMERFREQUENCY 1000 // Time = 1 sec / TIMERFREQUENCY
setup()
{
// Set up the timer interrupt
// TC1 channel 0, the IRQ for that channel and the desired frequency
startTimer(TC1, 0, TC3_IRQn, TIMERFREQUENCY);
:
:
}
Unlike the millis() or micros() function calls, you are not bound to their time resolution, i.e. you
can define any frequency that fits your application best.
3.4.1 Interrupt-Driven Timer Control Sample
In the following, I will describe my implementation of a timer control code, which results in
function calls that are similar to those taken from the Arduino Playground, meaning they are
based on polling the timer.
However, my code does not bind specific functions to each timer, i.e. the function calls are
implemented inside the loop() section (or, of course, in subroutines that are being called within
loop()).
Also, while my code uses an interrupt service routine (ISR), there are no potential problems with
data exchange between the interrupt routine and loop().
The function calls are:
• TimerInit – Initializes the timer control, including ISR and timer resolution.
• TimerControl – Implemented into the ISR; manages all timers.
• TimerStart – Sets timer interval and starts operation of the selected timer.
• TimerReset – Resets and stops the timer.
Following the previously described interrupt service routine sample, TimerControl is
implemented as shown here;
// -------------------------------------------------------------------
// Timer Interrupt Setup for Arduino Due
// -------------------------------------------------------------------
// Reference: http://forum.arduino.cc/index.php?topic=130423.0
© Copperhill Technologies Corp. 2021. All rights reserved. Page 17 of 23Copperhill Technologies Application Note: Arduino Due Timer Control
void TC3_Handler(void)
{
TC_GetStatus(TC1, 0);
TimerControl();
}
TimerInit resets all timers and calls the startTimer function, using a timer frequency (i.e. the
timer resolution) defined as:
#define TIMER_FREQUENCY 1000 // Time = 1 sec / TIMERFREQUENCY
Certainly, you can adjust the timer frequency to fit your application needs.
The code allows setting a virtually unlimited number of timers, where all timers are represented
by a structure:
struct Timer
{
int nCount;
bool bStart;
bool bExpired;
};
• nCount – Timer Interval
• bStart – true activates the timer
• bExpired – true indicates the timer has expired
Multiple timers can be assigned as demonstrated here:
#define TIMERS 3 // Number of timers
#define pTimerLEDs pTimer[0]
#define pTimerCAN0 pTimer[1]
#define pTimerCAN1 pTimer[2]
The principle application of the code is as follows:
// Assign the timer
#define pTimerSerialPrint pTimer[0]
setup()
{
// Set the serial monitor baud rate
Serial.begin(9600);
// Initialize the timer control; also resets all timers
TimerInit();
// Start the timer
TimerStart(&pTimerSerialPrint, 1000); // 1 second
}
© Copperhill Technologies Corp. 2021. All rights reserved. Page 18 of 23Copperhill Technologies Application Note: Arduino Due Timer Control
loop()
{
// Check the timer
if(pTimerSerialPrint.bExpired == true)
{
Serial.println(“Hello World!”);
// Restart the timer
TimerStart(&pTimerSerialPrint, 1000);
}
}
3.4.2 Timer Control Sample C/C++ Code
The code that follows is all you need (besides the setup() and loop() sections) to implement
timer control functionality.
In my downloadable sample code project, I have separated the code into two files,
TimerControl.cpp and TimerControl.h
My focus was on keeping things simple and the ease of implementation, and it shows in the
very low memory requirements. And yes, there are a myriad of functionality enhancements that
come to mind that can be easily added, but for now I am going with the basics.
struct Timer
{
int nCount;
bool bStart;
bool bExpired;
};
// Timer structure
struct Timer pTimer[TIMERS];
#define TIMERS 3 // Number of timers (Example)
#define pTimerLEDs pTimer[0]
#define pTimerCAN0 pTimer[1]
#define pTimerCAN1 pTimer[2]
#define TIMERFREQUENCY 1000 // Time = 1 sec / TIMERFREQUENCY
// Function declarations
void TimerInit(void);
void TimerControl(void);
void startTimer(Tc *tc, uint32_t channel, IRQn_Type irq, uint32_t frequency);
void TimerStart(struct Timer* pTimer, int nCount);
void TimerReset(struct Timer* pTimer);
© Copperhill Technologies Corp. 2021. All rights reserved. Page 19 of 23Copperhill Technologies Application Note: Arduino Due Timer Control
// ------------------------------------------------------------------------
// Initialize the Timer Control
// ------------------------------------------------------------------------
void TimerInit(void)
{
// Initialize the timer array
for(int nIndex = 0; nIndex < TIMERS; nIndex++)
{
pTimer[nIndex].nCount = 0;
pTimer[nIndex].bStart = false;
pTimer[nIndex].bExpired = false;
}// end for
// Set up the timer interrupt
//TC1 channel 0, the IRQ for that channel and the desired frequency
startTimer(TC1, 0, TC3_IRQn, TIMERFREQUENCY);
}// end TimerInit
// ------------------------------------------------------------------------
// Timer Control (Interrupt Service Routine)
// ------------------------------------------------------------------------
void TimerControl(void)
{
// Declarations
int nIndex;
// Check all timers
for(nIndex = 0; nIndex < TIMERS; nIndex++)
{
if(pTimer[nIndex].bStart == true && pTimer[nIndex].bExpired == false)
if(--pTimer[nIndex].nCount == 0)
pTimer[nIndex].bExpired = true;
}// end for
}// end TimerControl
// ------------------------------------------------------------------------
// Timer Start
// ------------------------------------------------------------------------
void TimerStart(struct Timer* pTimer, int nCount)
{
pTimer->nCount = nCount;
pTimer->bStart = true;
pTimer->bExpired = false;
}// end TimerStart
// ------------------------------------------------------------------------
// Timer Reset
// ------------------------------------------------------------------------
void TimerReset(struct Timer* pTimer)
{
pTimer->nCount = 0;
pTimer->bStart = false;
© Copperhill Technologies Corp. 2021. All rights reserved. Page 20 of 23Copperhill Technologies Application Note: Arduino Due Timer Control
pTimer->bExpired = false;
}// end TimerReset
// ------------------------------------------------------------------------
// Timer Interrupt Setup for Arduino Due
// ------------------------------------------------------------------------
// Reference: http://forum.arduino.cc/index.php?topic=130423.0
void TC3_Handler(void)
{
TC_GetStatus(TC1, 0);
TimerControl();
}
void startTimer(Tc *tc, uint32_t channel, IRQn_Type irq, uint32_t frequency)
{
pmc_set_writeprotect(false);
pmc_enable_periph_clk((uint32_t)irq);
TC_Configure(tc, channel, TC_CMR_WAVE | TC_CMR_WAVSEL_UP_RC
| TC_CMR_TCCLKS_TIMER_CLOCK4);
uint32_t rc = VARIANT_MCK/128/frequency;
TC_SetRA(tc, channel, rc/2); //50% high, 50% low
TC_SetRC(tc, channel, rc);
TC_Start(tc, channel);
tc->TC_CHANNEL[channel].TC_IER=TC_IER_CPCS;
tc->TC_CHANNEL[channel].TC_IDR=~TC_IER_CPCS;
NVIC_EnableIRQ(irq);
}
© Copperhill Technologies Corp. 2021. All rights reserved. Page 21 of 23Copperhill Technologies Application Note: Arduino Due Timer Control 4 Download The Code Sample The Arduino Due Timer Control sample code (sketch) is a free download (zip file) and it can be downloaded here: https://copperhilltech.com/content/Arduino-Due-TimerControl.zip Neither the author nor the publisher are responsible for technical support of any project you derive from or add to the sample code. The Arduino Due Timer Control sketch is a free software; you can redistribute it under the terms of the GNU Lesser General Public License as published by the Free Software Foundation; either version 2.1 of the License, or (at your option) any later version. The program is distributed in the hope that it will be useful, but WITHOUT ANY WARRANTY; without even the implied warranty of MERCHANTABILITY or FITNESS FOR A PARTICULAR PURPOSE. With downloading this programming sample, you confirm that you have read and agree with these terms and conditions. © Copperhill Technologies Corp. 2021. All rights reserved. Page 22 of 23
Copperhill Technologies                                      Application Note: Arduino Due Timer Control

5              Recommended Literature
All recommended titles can be found on Amazon.com and their international sites.

Programming Arduino: Getting Started with Sketches
by Simon Monk
This thoroughly updated guide shows, step-by-step, how to quickly program all Arduino
models. Programming Arduino: Getting Started with Sketches, Second Edition, features easy-to-
follow explanations, fun examples, and downloadable sample programs. Discover how to write basic
sketches, use Arduino’s modified C language, store data, and interface with the Web. You will also
get hands-on coverage of C++, library writing, and programming Arduino for the Internet of Things.
No prior programming experience is required! More Information…

Programming Arduino Next Steps: Going Further with Sketches
by Simon Monk
In this practical guide, electronics guru Simon Monk takes you under the hood of Arduino and
reveals professional programming secrets. Featuring coverage of the Arduino Uno, Leonardo, and
Due boards, Programming Arduino Next Steps: Going Further with Sketches shows you how to use
interrupts, manage memory, program for the Internet, maximize serial communications, perform
digital signal processing, and much more. All of the 75+ example sketches featured in the book are
available for download. More Information…

The Definitive Guide to ARM Cortex-M3 and Cortex-M4 Processors
by Joseph Yiu
This new edition has been fully revised and updated to include extensive information on the ARM
Cortex-M4 processor, providing a complete up-to-date guide to both Cortex-M3 and Cortex-M4
processors, and which enables migration from various processor architectures to the exciting world
of the Cortex-M3 and M4.

This book presents the background of the ARM architecture and outlines the features of the
processors such as the instruction set, interrupt-handling and also demonstrates how to program
and utilize the advanced features available such as the Memory Protection Unit (MPU).

Chapters on getting started with IAR, Keil, gcc and CooCox CoIDE tools help beginners develop
program codes. Coverage also includes the important areas of software development such as using
the low power features, handling information input/output, mixed language projects with assembly
and C, and other advanced topics. More Information…

© Copperhill Technologies Corp. 2021. All rights reserved.                                   Page 23 of 23
You can also read