Ben 10 Protector of Earth - Walkthrough
←
→
Page content transcription
If your browser does not render page correctly, please read the page content below
Ben 10
Protector of Earth

    Walkthrough

         1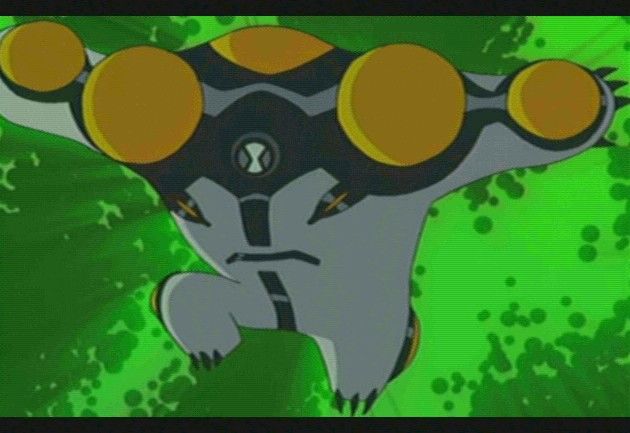
Introduction ......................................................................................................... 3
Alien Forms ......................................................................................................... 3
Controls ............................................................................................................... 6
Combo Attacks .................................................................................................... 6
The Omnitrix ........................................................................................................ 7
The HUD ............................................................................................................. 8
Power-ups ........................................................................................................... 9
Collectibles .......................................................................................................... 9
Unlockables ...................................................................................................... 10
Completion Points ............................................................................................. 11
Cheats ............................................................................................................... 12
Enemies ............................................................................................................ 13
Sub-Bosses ....................................................................................................... 16
Bosses .............................................................................................................. 17
The Level Select Screen ................................................................................... 19
Sumo Slammer Card Locations ........................................................................ 20
Sub-Boss Strategies ......................................................................................... 25
Boss Strategies ................................................................................................. 27

                                                            2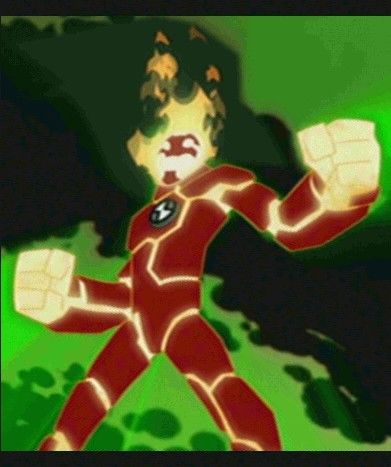
Ben Tennyson, better known as Ben 10,
is a ten-year-old boy who was gifted with
the Omnitrix during a camping trip with his
grandfather, Max, and his cousin, Gwen.
The Omnitrix, a watch-like device that he
wears on his wrist, grants him the fantastic
power to transform into a multitude of alien
forms. Yet no matter which form he takes,
he is still Ben inside and he is not above
using the Omnitrix to pull pranks, even in the direst circumstances. Ben is a
very unique boy who is resourceful and extremely courageous. He will stop at
nothing to protect the ones he loves and to one day become the hero he
envisions.

     Ben is capable of transforming into multiple alien forms, but with the powers
of the Omnitrix stolen, he is left with only a select few:

Fourarms is a big, brutish, four armed alien
beast that brings all the brawn to the battlefield.
He can perform devastating attacks that cripple
his enemies and his double-jump allows him to
reach areas that few other alien forms can
reach. His massive strength allows him to cling
to vine walls, and various other surfaces to
reach even higher areas.

Level Obtained: Grand Canyon
Special Ability: Able to climb vine walls and
ladders. His double jump also reaches the
highest of all forms, except XLR8's Warpspeed.

                                          3
Heatblast brings several ranged abilities into battle
                             along with some of the stronger, but slower
                             techniques. Heatblast can also slow his fall by
                             gliding to the ground when holding the B Button after
                             a jump or double jump. One of the most valuable
                             abilities Heatblast can perform is absorbing the fire
                             obstacles that are placed throughout the game.

                             Level Obtained: Grand Canyon
                             Special Ability: Able to put out fires by absorbing all
                             the heat, and can glide over short distances by
                             holding the B Button after a jump.

XLR8 offers the raw speed that Ben needs to get
him from place to place fast enough to keep up
with the ever-growing number of enemies. All of
his attacks are top-notch, but his greatest ability is
Warpspeed. Warpspeed allows him to instantly
move from one place to another, giving him the
ability to get to most of the out-of-reach places in
the game. Use care when attacking with him, or
his speed will cause you to overshoot the enemies
and will leave you vulnerable to attacks.

Level Obtained: Mesa Verde
Special Ability: Able to Warpspeed through lasers and other hazards.

                                          4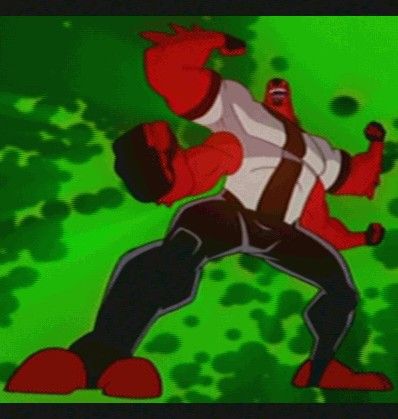
Cannonbolt is the top-heavy warrior, which
                                     spends most of his time curled up in Ball
                                     Form. Almost all of his combos transform
                                     him back into Ball Form, which grants him
                                     the ability to perform combos by switching
                                     from one to another fluidly. Overall his
                                     attacks are very powerful, but his
                                     movement outside of Ball Form is incredibly
                                     slow. Cannonbolt has catapults placed at
                                     certain areas in the game where he can
                                     launch himself over a long distance.

Level Obtained: San Francisco
Special Ability: Able to use catapults to jump large gaps, and turn into Ball
Form to damage enemies simply by running into them.

The Final alien form available to Ben during this
adventure is Wildvine. This vicious plant brings
to Ben's arsenal the unparalleled power to
obliterate numerous enemies at once. All of
Wildvine’s attacks strike at incredible range and
the Seed Pods attacks are some of the most
powerful combos in the game. His main
drawback comes from how slowly he moves, and
at times his range is not necessary, so you might
find that you end up overshooting the enemies
you were aiming for. Wildvine is capable of utilizing the Grapple Points that exist
in the later levels to cross large gaps, and to avoid certain obstacles.

Level Obtained: Effigy Mounds
Special Ability: Uses the Grapple Points to get to out of reach areas and has
the longest reach of any of the alien forms.

                                         5
Throughout the game there are a variety of standard moves available, such
as Running, Jumping and Attacking. All of these moves must be implemented in
order to progress through the game. The controls are listed below.

              Action                                        Controls
     Run                    Left or Right on the +Control Pad.
     Jump                   B Button. (Pressure Sensitive)
     Double Jump            B Button while in a jump.
     Block                  L or R Button.
     Light Attack           Y Button.
     Heavy Attack           X Button.
     Jump Attack            Y, X, or A Button while in a jump.
     Special Move           A Button.

     Each alien form has several combo attacks available. The combos vary with
the form, but they all activate through the same button input. Each button has a
specific function: The Y Button performs a quick, Light Attack, while the X
Button triggers a slower, Heavy Attack. The A Button triggers the Special
Attack, which is usually comprised of the slowest and most powerful attacks for
the character. Each of the combos are activated by pressing those three
buttons in varying sequences. A list of appropriate button sequences is as
follows.

Take care to experiment with each of the different alien forms' attacks to find
out which one is your favorite!

                                             6
The Omnitrix is the powerful alien device that allows Ben the
ability to change in-between different alien forms. You can
use the Omnitrix by touching the Touch Screen. By touching
the four green lights on the sides of the Omnitrix the alien
form changes. Tapping the middle of the Omnitrix, where the
alien form is displayed, changes Ben into that form. When
the alien form is selected the Alien Timer (shown below)
begins to count down.
The Score counter is at the top of the first section to the left
of the Omnitrix. The Score Counter keeps track of your
current score in a level. Every time an enemy is defeated it
awards the player a set score. That score is then multiplied to
the Combat Multiplier and then added to the overall score. If
the player is defeated the overall score is reset to the score
that the player started the area with.
The Combat Multiplier, the number below the Score with the
'x' in front of the number, is increased every time an enemy is
defeated without the player receiving damage. The maximum
multiplier the player can receive is eight. If the player
receives damage the Combat Multiplier resets to one.
The Lives Counter is in the lower section with the screen indicated by the
Omnitrix icon. The player begins each Level with five lives. After all five lives
have been depleted the player must restart the level from the beginning.
The Sumo Slammer Card Counter, at the very bottom, keeps track of how many
Sumo Slammer Cards the player has collected out of the 30 available.
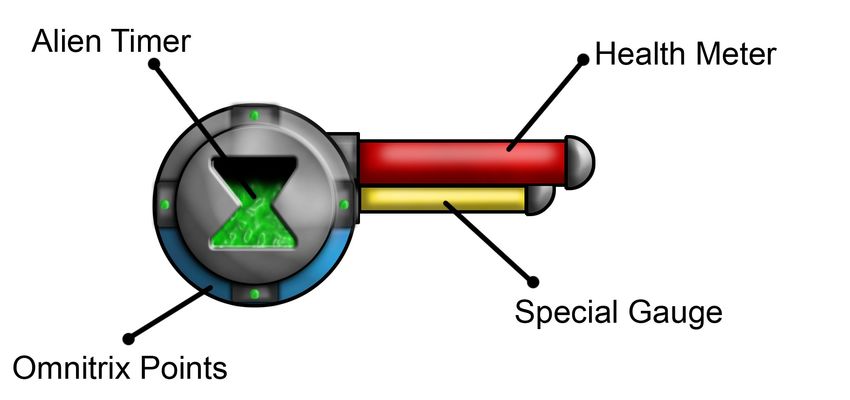
7Located in the upper-left corner of the top screen, this compact icon will explain
all of the various things relating to the state of your character.
The Health Meter is the red gauge on the right side of the icon. This displays
how much health the player currently has. When the Health Meter diminishes
completely the player loses a life.
The Special Meter is the yellow gauge and is depleted every time you use a
Combo Attack that uses the A Button. Make sure you have enough of the
Special Meter before you try the combo, otherwise you won't be able to perform
the attack. The Special Meter continuously refills after it has been diminished.
The Omnitrix Points is the blue ring that circles the Alien Timer. This displays
the number of Omnitrix Points the player currently has. The maximum number
of Omnitrix Points you can hold at one time is 500. Use these to purchase
upgrades between levels.
The Alien Timer is the hourglass shape in the middle. This displays how much
more time you have available to you in the selected form. When this gets low,
the Omnitrix (on the Touch Screen) will begin blinking red, so prepare to get
forced back into Ben form.
8Throughout the levels the player will be able to find and collect power-ups.
The available power-ups include:
Invincible Ice – Collecting an Invincible Ice refills the health bar to full and
makes the player invincible for a short while. The Health Bar turns blue
for the duration of the power-up.
Atomic Power – Collecting an Atomic Power will boost the Omnitrix, refilling the
Alien Timer and keeping it full for the duration of the power-up. During
this time the player to deals double damage. The Alien Timer turns blue
for the duration of the power-up.
Hero Score – Collecting a Hero Score will double the amount of points the play-
er gains, as well as the score the player is awarded for defeating ene-
mies, for a short while. This power-up will change the appearance of
the Omnitrix Points that circle the HUD for its duration.
Throughout the levels the player will be able to find and collect items. The
available collectables include:
Chrono Crystals – These refill the Omnitrix Points – Collecting these will
Alien Timer for a set amount provide a boost to the player's
and are available in both Omnitrix Points. These
small and large sizes. are typically found by de-
feating enemies.
DNAde – These refill the player’s Sumo Slammer Cards – Finding and
health for a set amount and collecting Ben’s beloved Sumo
are available in both small Slammer Cards will yield hidden
and large sizes. content and is a requirement to
complete the game at a full 100%.
9Throughout the game you will find Sumo Slammer Cards. There are 30 Cards
in all; 20 cards are scattered within the levels, 5 cards appear as rewards for
completing Green Challenge Levels, and 5 cards appear when completing Red
Challenge Levels.
Gaining 5 Sumo Slammer Cards unlocks a hidden Challenge Mode location
(Red Challenge Levels). These locations are available within the Level Select
Screen and are completely optional. Completing these bonus challenge mode
levels, however, not only rewards you with a Sumo Slammer Card but an
increase to health as well. Following is a chart to explain how levels are
unlocked, where cards can be found, and what they unlock:
Normal Storyline (25 Cards)
Cards may be gained in any order, one from each level
5 Cards: 5 Green Challenge Levels;
20 Cards: 20 Levels, each with a
Card awarded when target high
hidden Sumo Slammer Card
score is reached
Red Challenge Levels (5 Cards)
Health bonus gained for each Red Challenge Level defeated
1 Card: Defeated Red Challenge
Level 1 (5 cards required to unlock)
1 Card: Defeated Red Challenge
Level 2 (10 cards required to unlock)
1 Card: Defeated Red Challenge
Level 3 (15 cards required to unlock)
1 Card: Defeated Red Challenge
Level 4 (20 cards required to unlock)
1 Card: Defeated Red Challenge
Level 5 (25 cards required to unlock)
Final Unlockable
Insane Difficulty: Includes Master Control Form changing, which allows Ben
to transform from alien to alien without switching to Ben form (30 cards
required to unlock)
10You gain completion points reaching goals in various aspects during the
game. Such goals include completing levels, getting Ultra Scores on various
difficulties, entering the five cheats, or winning a multiplayer match. There are
300 completion points available to gain for a full clear of Ben 10: Protector of
Earth. Completion points are charted below.
11There are a number of cheat codes to unlock special skins and characters
for Ben 10. When a code has successfully been entered a distinct sound will
play. Each code should be entered from the Level Select menu:
There are three specific cheat codes to unlock the extras skins for Ben and his
alien forms:
Gwen 10: Left, Right, Left, Right, L Button, R Button, Select
Galactic Enforcers: A, B, X, Y, L Button, R Button, Select
Ultra Ben: Up, Right, Down, Left, A, B, Select
There is one cheat code to unlock an extra Challenge Level in the game. The
Level can be found on the Level Select Screen when unlocked.
Special Challenge: Left, L Button, Right, R Button, Up, Down, Select
There is one special alien form that can be unlocked, Upchuck. Upchuck can be
found in your Omnitrix once the code has been input.
Upchuck: A, Left, Y, Right, X, Up, B, Down, Select
12Vilgax Drones - Drones are the most basic enemy type,
found throughout all regions. There are many types of
Vilgax Drones, some that will charge in for melee
attacks, and some that will sit back and range attack with
projectiles.
Vilgax Hunters - Vilgax's deadly robotic
hunters search out Ben throughout all the
regions. Different types of Hunters exist,
some that fight unarmed, some with laser
swords, and some with shields to block
incoming attacks.
Forever Knights - Soldiers amongst Enoch's ranks, the
Forever Knights appear in the southwest as Enoch attempts
to use the Alien Technology of Area 51. These knights will
employ many weapons against Ben like swords, staves, and
shields
.
Forever Champions - Champions are the backbone of Enoch's
forces in the Southwest, exceptionally strong fighters in full suits
of armor. Some carry a large mace and shield, other more
powerful champions will only carry one large hammer.
13Thornhounds - Dog-like plant creatures from Wildvine's
homeworld that emerge from the ground on unsuspecting
prey. Like many flowers, they will come in different colors.
The Thornhounds tend to charge their prey from a distance
and then use biting and claw attacks while up close.
Maceroot - Lumbering giants from Wildvine's
homeworld, these dangerous creatures will toss cactus
bulbs at Ben from a distance, but will then swipe wildly
with their thorned arms when Ben comes too close.
Fangface - Nightmarish wolf creatures from
Ghostfreak's homeworld, Fangfaces will
lunge, swipe, and bite Ben at close range.
Fangfaces are very fast and agile, and will
often use a piercing howl on Ben to damage
him.
Mummies – Mummy-like enemies that appear wrapped
in gauze from Ghostfreak's homeworld that rise from
the ground to attack Ben. These creatures can extend
their unnaturally long arms to swing at Ben from
extreme range. They also regularly gather themselves
up and spin rapidly while lunging at Ben.
14Viktor – A huge lumbering monstrosity from Ghostfreak's
homeworld, he is an electrically charged monster that will
attack Ben at close range, but if Ben moves away he will
call down a stream of electrical energy to attack at range.
When Ben manages to defeat Viktor, the monster will blow
up in an electrical explosion to attempt to damage Ben, but
you can't keep a bad alien down – Viktor will reappear often
to thwart Ben along the way.
Feralines - Feralines are a volatile mix between Wildmutt and
a bobcat, created by Dr. Animo. Commonly found near Dr.
Animo's base in the South. These little mutations are quick
and foul-tempered, charging at Ben and swiping with their
claws and biting with their large teeth.
Crystal Claws - A mutation created by mixing the DNA of
Diamondhead and a bear creates these powerful creatures.
The Crystal Claws are very dangerous with powerful quick
attacks and devastating combo maneuvers. Beware of
Crystal Claws' long reach.
Detrovite Gladiators - An especially brutal
Vilgax minion, the gladiators will appear
during Vilgax's assault on the Earth in the
East Coast, supported the Drones and
Hunters. The Large brutish aliens will knock
Ben to the ground and Block many of Ben's
attacks.
15Enoch - Enoch is the leader of the Forever Knights and
appears in Area 51 with a regiment of his Knights and
Champions. Enoch is a powerful enemy and believes he is
the only one strong enough to defend the Earth against the
alien threat.
Kevin 11 - Kevin 11 escapes the Null Void and seeks
revenge on the Tennysons. With all of Ben's original
forms intact he is a formidable opponent. You will find
Kevin 11 hiding amongst the vegetation around Crater
Lake, where he has kidnapped Grandpa Max.
Hex - Ghostfreak possesses Hex and uses him to summon his
horde of minions to Earth. Hex can throw waves of arcane
energy and protect himself with a damaging magic shield. Hex
will not hesitate to summon Fangfaces, Viktor or Mummies to
protect himself.
16Clancy - This creepy bug infested man is an acquaintance of
Dr. Animo and commands many of the mutations created by
Animo. Clancy can summon swarms of insects to attack Ben
and shield himself. Clancy will also call Feralines and Crystal
Claws to fight for him.
Sixsix - Vilgax's top mercenary is sent to stop Ben from
reaching Vilgax in space. This ferocious assassin will use his
gun and set of grenades to stop Ben at all costs. Vilgax has
also bestowed a regiment of Drones, Hunters, and even some
Detrovite Gladiators to accompany Sixsix in his mission.
Armortron Crusader - This huge mechanical
monster is piloted by Enoch and appears at the
Hoover Dam to claim the needed power for the
Omnitrix Crystal. Armortron is equipped with a
chest laser and beam cannon on its left arm.
Snap Dragon - This alien lifeform was not so
dangerous originally, until it came into posession
of an Omnitrix crystal which caused it to grow to
huge proportions and spread its vile plant minions
throughout the Northwest. Snap Dragon takes
root on top of the Seattle Space Needle, using its
ability to exhale poison to fend off enemies.
17Ghostfreak - Ghostfreak is the ruler of host of
minions from his homeworld. Ghostfreak
wants to bring eternal night to Earth and
hopes to help Vilgax to attain their mutual
goal: the destruction of their only adversary,
Ben Tennyson.
Dr. Animo - Dr. Animo is a deranged scientist who
used the Omnitrix Crystals that Vilgax stole (when the
adventure began) for the DNA they contain. He
combines that DNA with some of Earth's more
fearsome creatures to make a host of dangerous
mutant animals.
Vilgax - A vicious space-faring brigand, Vilgax
is an oversized and ever-changing genetic
amalgam of predatory species, who leads an
army of bounty hunters and robots to wage war
on any unfortunate being that gets in his way.
His engineered DNA is cybernetically enhanced
and is serviced by an army of highly advanced
androids. Vilgax’s form is always in a constant
state of upgrade. Known throughout the
universe as “the evil that won’t die,” Vilgax has
survived every type of attack, only to return to
challenge his enemies more powerful and
dangerous than ever.
18The Level Select screen is your main source of information, destinations, and
upgrading your abilities. You can find all the useful information about the current
location you are at and all the levels you have previously beaten. By selecting
the Level Icon, you can view the Score, collected Sumo Slammer Cards and the
unlocked photo for that stage.
Before completing a level... And after...
You can also access the Upgrade Screen from the Level Select Screen by
hitting the Upgrade button. The Go button will take you to the currently selected
stage. If you have beaten the game, then it brings up a difficulty select option for
that stage before proceeding. In the higher difficulties enemies will have more
health.
The Upgrade Screen is where the player can purchase combo and alien
upgrades for all the different alien forms. Each Alien has five upgrades
consisting of three new combos, a defense boost upgrade, and an Alien Timer
upgrade. A profile can hold as many as 500 Omnitrix Points at a time, you use
these points to buy the upgrades.
19Collecting all of the Sumo Slammer Cards is
pivotal in achieving a perfect 300 Completion
Points. Below is a list of every Sumo Slammer
Card that you find hidden in the levels.
Grand Canyon
Area 1: Sumo Slammer Card Location
Once you begin the level, head right from the starting point and down the path
until you come to the area where platforms start jutting out of the wall, you'll
want to stick to the ground and head into the small cave to collect the Sumo
Slammer Card.
Mesa Verde
Area 2: Sumo Slammer Card Location
After the level begins and you move to the
right you find yourself faced with a wall that
you can't jump up. Switch over to XLR8 and
Warpspeed up on top of the building. Move
over the roof top to the right where the Vine
Wall is and then jump down. Over to the left
behind the fire you will find your second
Sumo Slammer Card.
Area 51
Area 4: Sumo Slammer Card Location
Switch to XLR8 before you leave the elevator
and stand near the right side. Warpspeed
straight up for a glimpse of the next Sumo
Slammer Card. You have to Warpspeed up once
and then over to the right to reach it.
20San Francisco
Area 3: Sumo Slammer Card Location
Move to the right past the first catapult and jump up
to the platform, then move to the right edge of the
road and jump to the next platform. Now move to
the right until you are standing on the second gray
platform. Fall off the left side of it to find the next
Sumo Slammer Card.
Redwood Forest
Area 1: Sumo Slammer Card Location
When you start the area you need to move to
the right of the level to where you come to a
place with a Vine Wall. Jump over and climb up
the Vine Wall to get on top of the rock pillar.
Then stand on the far right of the pillar and fall
straight down, where you'll land on a tree stump
and you'll collect the next Sumo Slammer Card.
Crater Lake
Area 3: Sumo Slammer Card Location
Head to the first ledge next to the plant and
Warpspeed straight up to the platform directly
above it. Move to the cliff to the left and Warpspeed
on top of it. Now, jump to the right to the next lily
pad-shaped platform and stand on the left-most
edge of that platform, jump and then Warpspeed up
and you'll find that you stop directly on top of a much smaller lily pad-shaped
platform. Jump the gap to your left to find the hidden Sumo Slammer Card.
21Effigy Mounds
Area 1: Sumo Slammer Card Location
Begin the area and proceed to the right
past the covered bridge and then up the
cliff. Move past the next covered bridge to
the first and only bridge that is broken.
Stand on the right edge of the bridge and
drop straight down to collect the Sumo
Slammer Card.
Plumber Base
Area 1: Sumo Slammer Card Location
Begin the area and proceed to the second Fight Room,
between it and the first laser hazard, Warpspeed up twice
with XLR8 to climb the platforms. Continue following the
platforms to the right and up till you see a Grapple Point.
Switch to Wildvine and grapple across to the left to the
Sumo Slammer Card.
Chicago Lake Front
Area 1: Sumo Slammer Card Location
Proceed into the unfinished building and
proceed up the level until you reach the
Wildvine Grapple. Hold the B Button to launch
yourself really high when you use the Grapple
Point. You'll find the hidden Sumo Slammer
Card on the ledge to the right.
22Historical Battlefield
Area 1: Sumo Slammer Card Location
Proceed up the first ramp and at the top,
jump up into the tower. Then, jump right onto
the collapsible platforms and jump across to
the other tower and the Sumo Slammer Card.
Bayou
Area 2: Sumo Slammer Card Location
Proceed past the first two gaps and past the first
Fight Room. Jump along the three broken
platforms and stand on the third one, before the
broken bridge. Warpspeed up and to the right.
You'll land on top of a platform. Move to the far
right of it. From there, Warpspeed up and to the
right to the next platform with the Sumo
Slammer Card on it.
New Orleans
Area 1: Sumo Slammer Card Location
Proceed into the sewer at the beginning of
the level and move to the right past the two
gaps. Exit the sewer using either
Cannonbolt or XLR8 and stand on the right
side of the sewer exit. Jump over the small
wall on the right side to collect the Sumo
Slammer Card.
23Washington DC
Area 1: Sumo Slammer Card Location
Proceed through the level to the left until a large
ship, whose entrance is blocked by fire, comes into
view. Stand to the right of the entrance and
Warpspeed to the top of the ship. The Sumo
Slammer Card sits slightly to the left of the edge.
Cape Canaveral
Area 2: Sumo Slammer Card Location
Begin the level and proceed past the
environmental fires and drop off of the edge of the
platform. Move back to the left past another
environmental fire to collect the hidden Sumo
Slammer Card.
The Merciless
Area 1: Sumo Slammer Card Location
Play through the level as normal, getting past the first Fight Room, then move
down into the shaft after the Catapult. Move to the back of the opening on the
left at the bottom of the shaft and proceed to the Sumo Slammer Card.
24Area 51
Enoch
Enoch, as you'll find, isn't a serious threat - you simply have to watch out for his
sword. If you stand far away from him he will throw his sword at you, but if you
stand next to him he will stab his sword into the ground. When he throws his
sword it will either be low or high. You'll find that it's probably safest to time it so
you jump over every attack, since it's hard to judge whether it will be high or low
until it is too late. Just remember that you have to jump over it when it passes
by you and when it comes back.
After Enoch takes a swing at you, you'll notice that he waits a short while to
attack again – take this time to land a combo on him, then run away quickly
before he stabs his sword into the ground. If you turn this into a battle of
attrition, you'll find that he'll win every time – he simply has more health than
you. Timing is critical so it may take a few times to get it down perfectly.
After you have knocked his health down a little he will jump off of the screen
and a few Forever Knights will attack you, as if Enoch wasn't enough. Defeat
the few Knights and Enoch will jump back into the fight. Repeat the combo and
run maneuver until he jumps off of the screen for the second time. This time you
are granted with some health collectibles, before you are attacked by even more
Knights and Champions.
After you finish off the Knights, Enoch will show up again. By now you have the
pattern down. Keep up your winning strategy. This time when you knock his
health all the way down he flees in the Mech and you have defeated the Sub
Boss Enoch.
25Crater Lake
Kevin 11
Just like Enoch, Kevin 11 has two attacks: a close attack and a far attack. When
you are far enough away, he'll fire wads of Stinkfly goo which will create a small
splash as they move across the screen, so time your jumps carefully. If you end
up getting underneath him, he'll use his Diamondhead arm to drop a jagged
piece of crystal-rock on your head.
Use Heatblast's Special Heavy (A Button->X Button) to hit him from afar, or
close the gap and use XLR8's Jump Heavy (B Button->X Button) in rapid
succession to keep him off-balance until he retreats.
Defeat each wave of enemies, and use whatever tactics take him down most
efficient for you, since his pattern doesn't change, you just need to make sure
you aren't losing too much life from his attacks and the waves of enemies. You'll
find that his fighting style bears a striking resemblance to Enoch's. You get
health from the first wave of enemies he releases, so if you can make it that far,
you should be ready to take on the rest of the fight.
Effigy Mounds
Hex
Hex will throw energy waves at you while you are away from him, some high,
some low. You can duck under the high ones and jump over the low ones.
When you get too close to Hex he will put up an energy shield that will damage
and knock the player back. XLR8's speed is very useful in this fight: Jump over
an energy wave as he starts to throw it. Land and immediately preform the (Y
Button->Y Button->X Button]) combo, then jump away or Warpspeed away
immediately. Hex will perform his close attack while you are safely away from
him. Continue this strategy and you'll find yourself the victor.
26Bayou Swamp
Clancy
Clancy is a lot like the previous sub-bosses. He'll throw two sets of projectiles,
one high and one low. If you are having problems killing him, try using
Heatblast, or Wildvine to deal some ranged damage, since his close-range
attack can be very dangerous. If you still prefer to get in close, then try XLR8's
Light Light Special (Y Button->Y Button->A Button), the other two alien forms
are quite a bit slower at executing their moves, so it'll be a bit more difficult to
use them.
Cape Canaveral
Sixsix
Sixsix acts similarly to Kevin 11, he'll stay in the air and fire lasers at you, and if
you get too close he'll throw a very powerful grenade at his feet, which will most
likely hit you. Getting underneath him with Heatblast, to perform his Heavy
Heavy Special (X Button->X Button->A Button) will most likely take him out, as
will Wildvine's Heavy Heavy Special. Try not to drag this fight on, since every hit
will have devastating impact. He is the last sub-boss and does the most
damage. Just keep moving, and you'll be fine.
Hoover Dam
Armortron Crusader (Phase 1)
There are a few things that you need to watch out for to successfully defeat the
Armortron Crusader.
First is the large Cannon on his left arm that fires a deadly blue beam across
the screen. Do not attempt to jump over the beam, because you'll fall right on
top of it and still take damage. Your best bet is as soon as you see him start to
27raise his arm to fire the cannon, duck. Duck and stay down until the beam has
passed.
Second is his chest cannon that fires a red beam of light that scans from the
right side of the dam to the left. When he fires the beam run all the way to the
left side of the dam and wait for it to approach. When the beam reaches the
road, perform a double jump straight up and the beam will disappear before you
hit the ground.
Third is the full, right arm swat he performs if you stay too close to him. To avoid
this... don't stay too close to him for an extended period of time. If he does start
to perform this attack just sit back and enjoy the free ride to the left side of the
dam, as this attack is almost impossible to avoid unless you are prepared for it.
Lastly, you have to watch out for the debris that shoots across the dam from his
ground slam attack. Right before his hand hits the ground start to perform a
double jump. The debris should pass right underneath you before you hit the
ground.
When the Armortron Crusader reaches the top of the dam, stay off to the far left
side and wait for him to slam his hand down into the road. Jump over the debris
and get on top of his hand that is now stuck in the road. Attack the Armortron
Crusaders chest cannon continuously until he is able to pull his hand free.
When he finally pulls his hand up retreat back to the left side of the dam and
wait for him to slam his hand down into the road again. Repeat the process until
you get his health halfway down and he falls into the road. Now you have the
Armortron Crusader down, but he is not out.
Armortron Crusader (Phase 2)
Here the Armortron Crusader should not give you too many problems if you just
keep moving. If you do find yourself stuck underneath him when he attempts to
hit you, move out of the way as fast as possible.
Now is a great time to listen to Grandpa Max and go destroy the generators.
There are two generators on the dam, one on the right side and one on the left.
Both generators have to be destroyed for you to be able to damage the
Armortron Crusader. To get to the generators you need either Fourarms or
XLR8, climb or jump up to the one of the generators and attack it until it begins
28smoking. Jump off of the tower and move directly over to the other side and do
similar things to the untouched generator.
The generators only stay destroyed for a set amount of time so you have to be
fast. If you have both of the generators destroyed a blue light will flash that
knocks the Armortron Crusader onto the ground. Here's your chance, rush
down and attack the blue globe that appears when the armor of his face parted.
The Armortron Crusader will eventually stand back up when one of the
generators comes back online, so you will have to return to the generators and
destroy them again before you can defeat the Armortron Crusader.
Seattle Space Needle
Snap Dragon
Snap Dragon makes a quick entrance, but don't be fooled, the bigger they are...
Break the sac on Snap Dragon's base as quickly as possible. Cannonbolt's Ball
Form is good for this, since Snap Dragon will be attacking you the entire time.
Once you break his sac, he'll spew Seed Pods into the air. These will come
back down centered on your location, so keep moving. The Seed Pods turn into
Catapults when they hit the ground, so keep yourself relatively close to Snap
Dragon. The third Seed Pod is the only Catapult that is large enough to launch
you up to hit Snap Dragon.
Just by hitting him with Cannonbolt in Ball Form, you'll knock him to the ground,
where you can deal with him properly. When you are up close to Snap Dragon's
base, he'll perform two motions, either whack you with his head, or attempt to
bite you. If you get too far away for him to beat you up, he'll spew poison gas in
three big clouds at you. You'll need to use someone like XLR8 to get height in
your jump if you hope to dodge the attack, however, you can also block the gas,
just make sure to block again, as it knocks you out of the blocking pose.
Assuming you got him on the ground you can take care of him in whatever form,
with whatever methods you prefer. Just note that you'll have to repeat the
process of knocking him down with Cannonbolt every time you are going to
make him vulnerable, so be prepared to shift forms back and forth a lot, if you
plan on beating up Snap Dragon with anyone other than Cannonbolt.
29Navy Pier
Ghostfreak
Ghostfreak is a bit more difficult than Snap Dragon, because he hits back while
vulnerable. You can damage him the entire fight, but it becomes leagues easier
to damage him if you hit the window in the middle of the room to shed some
light into his dank theatre. The light stuns him momentarily, damages him over
time, and dramatically increases the damage he takes when you hit him, so lay
into him with your favorite form in the precious seconds he covers his eyes.
After one or two serious combos he'll crash through the floor leaving you with
nothing to stand on. Now, in the basement, he is far more dangerous. After
damaging him slightly, he'll dive into the floor and summon a few minions.
Defeat them and he'll reappear. Don't linger on these enemies as they aren't the
real fight, just take them out as efficiently as possible, since you won't be getting
any health back in these fights.
Use someone like XLR8 here so that you can close the distance quickly. If he
gets a stray shot off on you it will send you flying. Heatblast and Wildvine offer
the strongest choices for ranged combat, while XLR8 can weave through his
attacks.
Oil Refinery
Dr. Animo
The good doctor is a far different fight than those before him. He will charge at
you relentlessly and deals a good amount of damage, so if you haven't gone
through and collected a few Health Upgrades, now would be a good time to
double-back.
Basically he'll keep rushing you, then back off to pound on his chest to taunt
you. It doesn't matter how you do it, but you have to hit him while he's taunting
like that. Wildvine is probably the best choice here, since his Special Attack (A
Button) will launch Seed Pods, knocking him silly. He'll charge off to the closest
oil rig, but be careful, if you charge in too soon he'll linger at the base of the rig
and swat you away.
30Once he climbs up to the top you have no choice but to beat on the rig he's
climbed to knock him down. As soon as he hits the dirt lay into him with all
you've got, because he'll get up very quickly. Repeat until he is defeated. There
is no good way to coerce him to taunt at you, just run away from his attacks.
Using XLR8 might be a good idea - for his speed - however, this puts you at a
disadvantage when he taunts: You may not be able to get to him in time to hit
him. Just play a defensive game and then go all out when you knock him off the
towers.
The Merciless
Vilgax
Vilgax is easily the toughest fight in the entire game - as he should be - he's the
most feared Space Pirate in the galaxy. You'll find that your attacks don't phase
him at all while he is as large as he is when he begins the fight. Spend all your
efforts on dodging his attacks and destroying the generator on the left side of
the screen.
Once you've shrunk Vilgax down to your size (comparatively speaking), he'll
enter a very obvious pattern of signaling his attack, then dashing forward. If you
constantly hit him while he is charging, he won't be able to move, use this to
your advantage to lock him in a place of your choosing.
This fight will be a VERY long one, so do not take any unnecessary risks.
Slowly whittle down his health so that you can survive the later phases of the
fight. At roughly three-fifths health he'll grow large again, this is nothing really
dangerous, simply avoid him again, and destroy the generator.
Once you get him around one-fifth of his health, he'll begin using a much wider
variety of attacks. He can perform several from the air: He'll charge up an
exploding grenade-like ball of energy, and throw it at you; Slam down quickly,
sending a shockwave of debris in your direction; And the most dangerous of all
of his attacks: Creating a channel of electricity between him and the floor, which
will deal absolutely massive amounts of damage if you get hit by it all three
times. Avoid this move at all costs.
He also has three ground attacks: He can exhale a dense mist, that has a
deceptively long range, stay away from him, or get on the other side of him
31during this attack; He has two whip attacks - one where he only swings the whip
once, afterward he'll be momentarily stunned - and the other where he swings
about three times, though it's hard to tell, if you get hit by it, you'll probably lose
most of your health. Both attacks have obvious load up sequences, so once you
figure out which one he's doing, prepare accordingly. If he's doing the long whip
attack, try your best to get behind him, since he covers most of the stage during
that combo.
So, to recap: Take it slowly, Vilgax has a LOT of health, you will not be able to
get through this fight in a timely manner. Learn his attack patterns early. He is
most likely going to defeat you once or twice, but you should be able to take him
down if you stick to a defensive style, and don't take too many risks.
32You can also read