Classic Boxer Machine - User Guide REDEMPTION MULTIPLAYER VIDEO CLASSIC
←
→
Page content transcription
If your browser does not render page correctly, please read the page content below
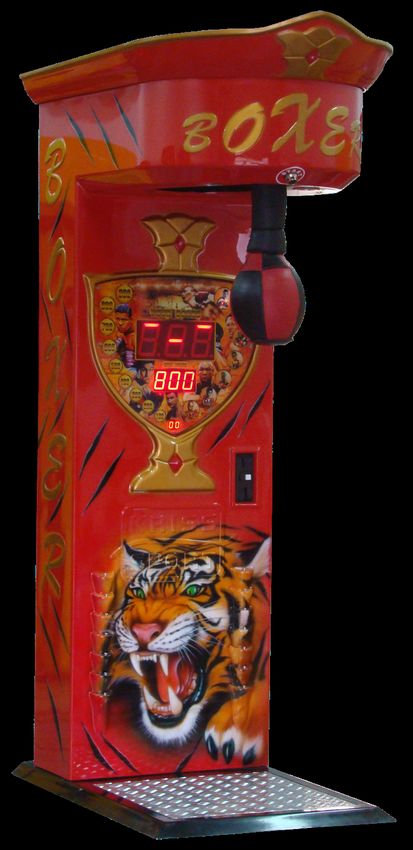
Classic Boxer Machine
       User Guide
                                 REDEMPTION
                                 MULTIPLAYER
                                       VIDEO
                                     CLASSIC

         Made in Europe by

                King of Boxers
WELCOME

Thank you for choosing our product!

Our machines are fully computerized coin-operated strength-testers used for amusement and
entertainment. You can use them in bars, pubs, amusement parks and other places of entertainment.

We made sure that all the components used for production as well as the machine itself are made of
best quality components and are safe for use.

Your machine is designed so that you can start using it right away.

                                                                                                     1
SAFETY PRECAUTIONS
BE SURE TO READ THE FOLLOWING
Warning: Always turn OFF power an unplug the game before opening or replacing any parts.
Warning: Always when unplugging the machine from electrical outlet, grasp the plug, not the cord.
Warning: Always connect the machine to grounded electrical outlet.
Caution: The wiring system is under voltage that is safe in normal use but may be harmful while
improper use.
Caution: Always use digital multimeter, logic tester or oscilloscope for testing integrated circuits.
Caution: Do not connect or disconnect any of the integrated circuits while the machine is ON.
Caution: Do not any fuse that does not meet the specified rating.
Caution: Do not subject the machine to extreme temperature variations.
2MACHINE DESCRIPTION AND TECHNICAL SPECIFICATION
What’s in the package
Machine is supplied with a full range of accessories to help you get started right away.
• Key set for service door and money door.
• Preinstalled SD card with sound files.
• Roof with set of screws.
3General information
Game type: power / strength tester
Allocation: indoor and outdoor
Notice: Before placing machine outdoor, make sure that roof is installed properly.
Construction and mechanism: steel
Ball release mechanism: servo-mechanism
Color: black or white
Machine dimensions and weight
Height: 210cm / 82.5 inches
Width: 70cm / 27.5 inches
Depth: 122cm / 48 inches
Weight: 130kg / 287 lbs
Electrical and operating requirements
Power: 90V - 250V
Current frequency: 50Hz - 60Hz
Average power consumption: 25W
Currency
Working with all kinds of bills, coins and tokens.
Possibility of installing both coin and bill acceptors.
Optional extensions
•SMS acceptor.
•Ticket printer.
•WiFi monitoring camera.
4Casing and glass
Casing: full fiberglass casing, minimum 4 mm thick, gelcoat coated.
Base plate: grooved aluminum plate.
Display glass: toughened polycarbonate, 6 mm / ¼ inch thick.
Displays
Segment display: red score, credit and best score display with 64 flashing points.
Software regulated features
•Volume, high tones and low tones.
•Credit settings.
•Free-play mode.
•Power correction.
•Game level.
•Best score limit.
•Best score drop-down delay.
•Demo mode delay.
•Clear active credits.
•Default settings recovery.
Notice: See full description of software regulated features in the Settings section.
5Operation modes
1. OFF
2. Normal operation mode
a. Standby
b. Game
3. Settings
4. Error
6INSTALLATION AND MAINTENANCE
The machine is designed so that you can set it up quickly and start using it right away.
Installation
1. Place the machine at the desired location.
Warning: If your machine version is not outdoor-ready, do not install the machine outdoors or in areas
with high humidity, direct water contact, high heat or extreme cold.
Warning: Do not install the machine in areas that would present an obstacle in case of an emergency.
Caution: To move the machine for transport, use a forklift and take care not to hit the package. Do not
stack heavy objects on top of the machine, as this may cause damage.
Notice: To move the machine for placement, use machine wheels.
2. Remove the package wrapping from the machine.
7Notice: Make sure that the machine stands securely on the ground.
3. If the machine is cold, open machines back door and wait about 30 minutes for the electronics to
warm up.
4. Connect the power cord to power outlet and check if machine is working.
5. Mount the roof on top of the machine.
Volume adjustment
1. Turn ON the machine and wait for normal operation mode.
2. Open back door and locate main board.
3. Insert credits or set the machine to Free Play Mode (described in Settings section).
4. Use S1 to navigate to position 02 in settings menu.
5. Use S2 and S3 buttons to adjust volume.
6. After adjusting restart your machine or navigate out of settings menu using S1 button.
Notice: You can also regulate volume by adjusting amplifier mounted to the speaker.
Cleaning
Use paper towels and window cleaner to clean the machine.
Do not apply window cleaner or any other liquid directly on the machine. Instead apply it on the paper
towel.
Caution: Machine works under high voltage. Always turn machine OFF before cleaning.
8HOW TO PLAY
1. Insert coin or bill.
2. Press START button and wait for the ball to be released.
3. Punch the ball.
4. Watch your score on the display.
9SETTINGS
How to access and browse through settings menu
1. Turn ON the machine and wait for normal operation mode.
Notice: Find out more about machine operation modes in Machine description and technical
specification section.
2. Open back door and locate main board.
Caution: Machine works under high voltage.
3. Press S1 button on the main board.
4. Use S1 button to browse menu and S2 and S3 button to change values.
10Settings description
1. PLL - Game level.
2. VoL - Game volume level.
3. BaS - Low tones adjustment.
4. trE - High tones adjustment.
5. FrE - Free-play mode.
6. bSt - Best score limit.
7. rEc - Best score auto drop-down time in hours.
8. Con - Demo animation delay in standby mode.
9. - 15. PL1 - PL7 - Credit setting for coin and bill acceptor channels.
16. - 22. Cn1 - Cn7 - Money counter setting for coin and bill acceptor channels.
23. - 25. Cr1 - Cr3 - Power correction settings for 1st, 2nd and 3rd game levels.
26. Money counter (erasable).
27. Money counter (total, non-erasable).
28. Credit counter (erasable).
29. Credit counter (total, non-erasable).
30. Bonus credit counter (erasable).
31. Bonus credit counter (total, non-erasable).
32. Adr - Address of GSM module.
33.CLr - Delete active credits.
34. dFL - Default settings.
11How to exit settings and apply changes
All values are stored immediately after making any changes. You don’t have to reboot the machine in
order to apply changes.
Browse through the menu using S1 button to exit the menu.
Best score drop-down
Machine is using auto drop-down function by default. This function will decrease the best score value
according to rEc settings. This function takes action only in standby mode and will not work if machine
is set to free-play.
Notice: If you don’t want to use auto drop-down function, set rEc to 099. This setting means that
every 99 hours (which is 4 days and 3 hours) auto drop-down function will decrease best score by 50.
How to erase best score
1. While in setting menu, use SELECT button and navigate to rEc (position no. 7 in settings menu).
2. Press both S2 and S3 buttons on the main board at the same time.
Notice: After erasing best score, new best score will be 000. You can make the first punch to set
current best score to a higher value.
Power correction multiplier
By adjusting positions 23, 24 and 25 you can change sensor sensitivity.
Increase this values to get higher scores with the same power of punch.
How to read counters
Counters can display large numbers (up to 6 digits) and are using both score and best score displays.
For example: when reading total game counter (position no. 26 in setting menu), you’ll see:
• 002 on the score display
• 26 on the credit display
• 491 on the best score display
It means that the machine received 2.491 worth of coins or bills in your currency. Number 26 on the
credit display is just an order number of this settings menu position and it’s not relevant to the counter
value.
12How to erase counters
1. While in settings menu, use S1 button and navigate to desired erasable counter.
2. Press both S2 and S3 buttons on the main board at the same time.
13ELECTRONICS DESCRIPTION
Main board
S3 S2 S1
Segment display
Power in
Lights
Servo
Mechanical counter
Coin acceptor
Bill acceptor Amplifier power out
Start button and ball sensor Audio out
14SD CARD REPLACEMENT AND MEDIA UPDATE
Card replacement
1. Turn OFF the machine, open back door and locate SD card on the main board.
2. Grab the card from both sides and pull it out of socket.
153. Insert new card securely.
4. Close the back door and turn on the machine.
SD card media update
1. Follow steps 1 and 2 from the Card replacement description.
2. Place the SD Card in card reader and connect it to your Mac or PC.
Notice: Make sure that your card reader is high quality and the USB cable can power the reader.
Some low-quality card readers need additional power supply to work correctly.
3. Go to the card directory and copy all files that it contains. Paste it to safe location on your computer.
Notice: In case of problem you will need those files to restore your card.
4. In second window go to directory with update files, copy all new files.
5. Go back to the card directory and paste update files. Allow to over-write files.
6. Remove card from card-reader using you operating system hardware removal tool.
a. Mac OS X: Right-click on the card icon, Eject.
b. Windows XP / Vista / 7 / 8: Use Safely remove hardware tool included in your operating system.
Notice: Removing card from the reader without the hardware removal tool might make the card
invisible to the machine.
7. Follow steps 3 and 4 from the Card replacement description.
16SUPPORT AND CONTACT INFORMATION
World wide
Kriss-Sport
Rybnicka Street No. 34
Żory (ZIP: 44-240), POLAND
Office:
fax: +48 32 43 42 328
mail: info@kriss-sport.com
Manager: Łukasz Bohosiewicz
phone: +48 50 17 45 222
skype: lukasz_bohosiewicz
mail: lukasz.bohosiewicz@gmail.com
Technical support: Krystian Stanik
phone: +48 60 15 21 140
skype: kriss-sport-support
mail: support@kriss-sport.com
17WARRANTY TERMS
1. Kriss-Sport warrants that the machine will be free from defects in electronics (main board, punch
ball sensor, power supply, buttons) and ball release mechanism for a period of two years from the
date of sale.
2. Third party electronics (coin acceptor, bill acceptor, ticket dispenser) are covered by the warranty for
a period of one year from the date of sale.
3. Warranty terms do not cover parts not included above.
4. Defect definition regarding mechanism: it will be considered as defective if un-welding or breaking
takes place during warranty period. It does not include scratching or rubbing out of any metal part
which results from heavy usage of the machine.
5. Defect definition regarding electronics: it will be considered as defective if any connection between
subcomponents on a particular board fails or any of them stops working itself. It does not include
damages which occurred due to misuse, unauthorized connection or modifications.
186. Kriss-Sport should be informed of the defect immediately after it occurred. The faulty part should be
dispatched to Kriss-Sport as soon as possible.
7. Customer pays for shipping the part to Kriss-Sport.
8. Kriss-Sport pays for shipping the part back to customer only if the part is still covered by the
warranty.
9. Kriss-Sport will diagnose that the defects were not caused by improper use, neglect, unauthorized
modifications, repair, setup or testing.
10.If the product prove defective during the warranty period, Kriss-Sport, at its option, shall:
a. Repair the defective part by means of telephone support or depot service at no charge for parts
or labor.
b. Replace the defective part with a comparable product which may be new or refurbished
11.Only parts recommended and approved by Kriss-Sport are covered by Kriss-Sport warranty terms.
12.Any unauthorized modifications will automatically void any existing warranty.
13.Under no circumstances shall Kriss-Sport be held of responsible for loses in profit, usage or
accidental serious damage to the machine.
19COPYRIGHTS
This document is published under CC BY-NC-ND 3.0 license.
You are free to copy, distribute and transmit this document under
the following conditions:
•Attribution — You must attribute the work in the manner specified
by the author or licensor (but not in any way that suggests that they
endorse you or your use of the work).
•Noncommercial — You may not use this work for commercial
purposes.
•No Derivative Works — You may not alter, transform, or build upon
this work.
© 2013 Kriss-Sport
www.kriss-sport.com
www.kriss-sportusa.com
2021
You can also read