Composting GUIDE Put Chicken Manure to Work in Your - Countryside
←
→
Page content transcription
If your browser does not render page correctly, please read the page content below

iamcountryside.com

      Composting
 UPDATED:
                               GUIDE
 Put Chicken
  Manure to
             r
 Work in You
   Garden!

Countryside Composting Guide                           1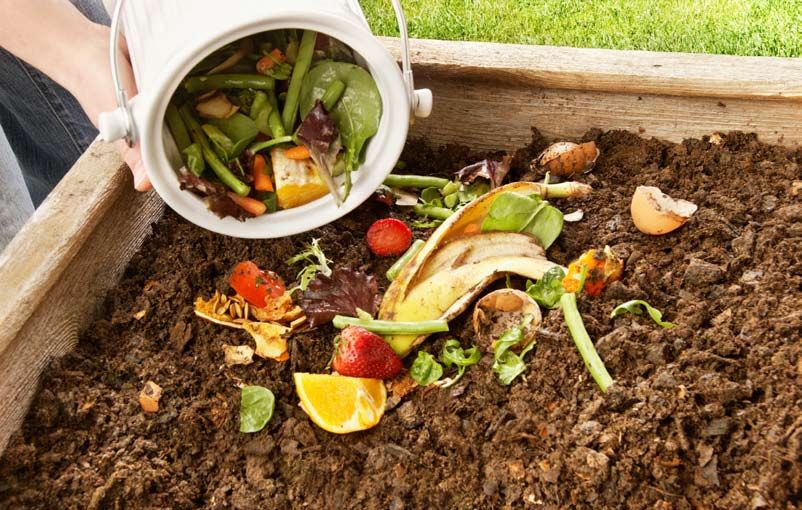
Index
      Compost: How It Happens......................................................................3

      Start With Some Compost, It’s Not Fertilizer But It Is ”Magic”...........4

      Sheet Composting Has Benefits, But Some Disadvantages Too..........8

      Composting Is For The Worms.............................................................10

      Make A Compost Barrel........................................................................11

      Making Compost In The City................................................................12

      An Easy Way To Sift Compost And Soil................................................13

      Quick And Easy Compost Method........................................................13

      What is the Best Manure for Gardens?................................................14

      How to Compost Chicken Manure.......................................................16

  2                                                                                Countryside Composting Guide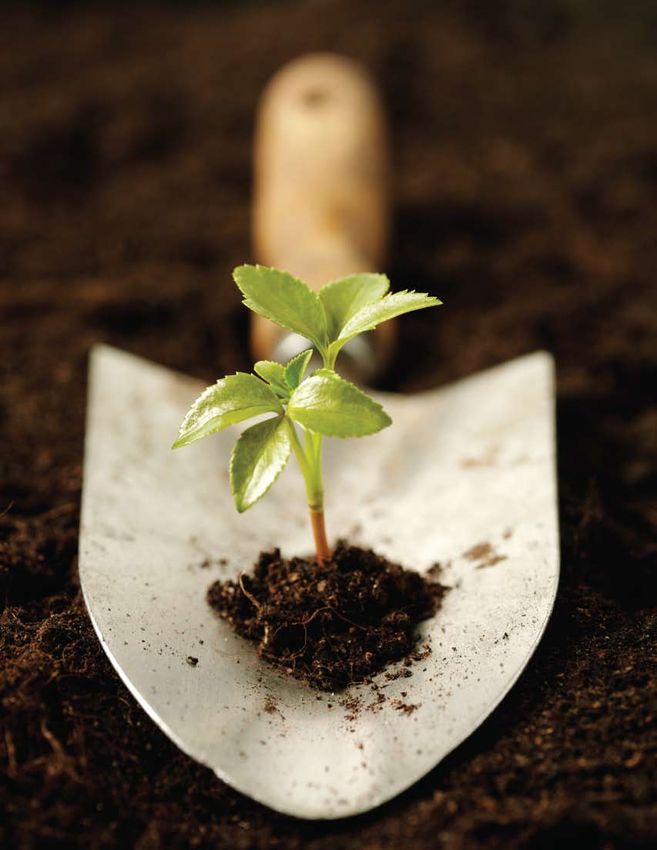
Compost:
                                                           How It Happens
                                Some bacteria that break down organic materials function only where there is air, or
                           oxygen (aerobic). Others survive only in an airless environment (anaerobic). Both kinds
                           will produce compost, but most gardeners prefer aerobic bacteria because they work much
                           faster. Many complaints about compost “not working” or taking too long can be traced to the
                           type of bacterial action taking place.
                                This is the reason for several steps compost-makers take to produce their black gold—
                           often without understanding why they are important. These include grinding or shredding,
                           moisture control, and turning.
                                Turning compost is one of the better-known requirements of the process, but why is it
                           so important? To provide air to the aerobic bacteria, so they can keep on working. Without
                           turning—which usually means transferring the material from one pile or bin to another—
                           a heavy wet mat forms. Aerobic bacteria can’t live in this environment, and the slower-acting
                           anaerobics take over.
                                However, even recently turned compost heaps can quickly develop pockets that
                           are sealed from the air if some of the components have a tendency to mat. Thus the
                           popularity of shredding or grinding the organic matter first. Shredded leaves, for example,
                           are much fluffier than unshredded leaves, and will allow the aerobic bacteria to work longer.
                           The added surface area of the shredded materials, especially those with thick stalks, is
                           another benefit of shredding.
                                Proper moisture is also an important
                           factor in composting. A water-logged heap
                           will smother the air-loving bacteria—
                           although a pile that’s too dry isn’t
                           their ideal environment
                           either.

Countryside Composting Guide                                                                                        3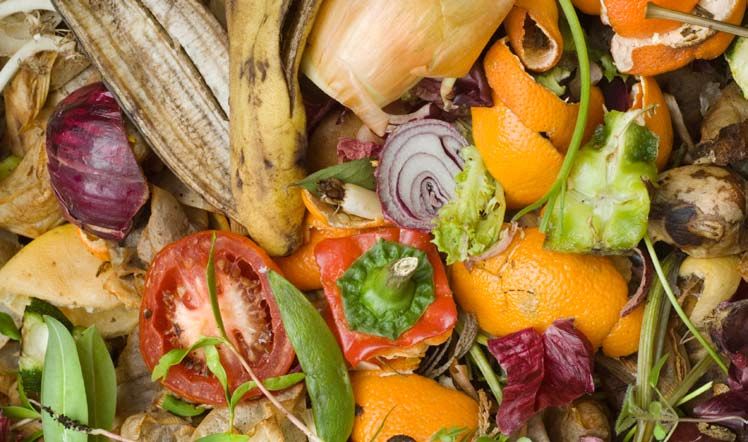
Start With Some Compost
                          It’s not fertilizer, but it is “magic”
                                                       By Crow Miller

W
        hen gardeners speak of soil, they are referring to earth that looks, feels, and smells pleasant; fertile soil with good
        structure, depending on the extent to which the inorganic soil particles, sand, silt, clay and humus are bound together.
        No matter how miserable your soil, it can be transformed into the stuff of which great gardens are made. Composting
starts the process. Compost is nature recycled. It is the garden rejuvenating itself in the form of humus, as plants and other
organic components decompose through microbial action.

    A compost pile is teeming with microbial life as the beneficial bacteria, fungi and protozoa go to work in this natural
cauldron. This process can take place slowly or in a matter of a few weeks, depending on the materials used, their relative
sizes and quantities, and how they are mixed together.

                                                      Gardener’s Gold
   Compost is multi-faceted, but not intended to be used as a fertilizer. In its finished form, compost offers a relatively low
proportion of nutrients, yet what it does is close to magical. When applied to your garden bed as mulch, compost reduces
                    evaporation, inhibits weed growth, and insulates the soil from extreme temperature changes—keep-
                           ing the topsoil cooler in the daytime and warmer at night. Yet compost has humble beginnings.
                               Common, easily accessible material such as lawn clippings, barnyard manure, and kitchen
                                   garbage decaying together in a pile will give your soil the gift of minerals and other com-
                                      ponents it needs.
                                              Regardless of the particular ingredients, making compost is akin to making bread or
                                          beer—similar to yeast, soil-digesting bacteria need warmth, moisture, air, and some-
                                           thing to feed on to keep them alive and growing. Almost all the practical problems
                                            associated with making compost stem from an imbalance of these basic factors.
                                                 The traditional method, referred to as fast or hot composting, produces a lot
                                             of compost in just a few weeks. Heat is the key element here. A well-constructed
                                             compost pile can reach temperatures of 160 to 170°F. In addition, a carbon to ni-
                                             trogen ratio of 30:1 must be maintained, and the pile must be turned every two to
                                           three days over a span of two to four weeks.
                                                Timing is crucial. Your pile is fully composted when it fails to heat up, after being
                                         turned. Then it is ready to use. Use it with a good feeling for its your garden’s natural
                                       fuel.
                                         Remember your objective: The foundation of every successful garden is to achieve
                                 healthy soil.

                                                                   Compost Basics
    Anyone today can make a compost pile to add to their soil’s nutritional diet. Include peels, tea bags, coffee grounds,
leaves and grass clippings (pesticide free, of course). You can also add manure, soil, old hay, straw, and weeds (as long as
they are not in the seeding stage). There is a place and use for everthing that will rot.
    Compost piles are easier to manage if they are small. If you do not have much space for a compost pile, you can build
mini-piles in several locations on your property, or build one in a large garbage can with holes punched in the bottom. You
can also purchase pre-made compost bins, or make them yourself out of plywood and chicken wire.
    The top of the pile needs to be slightly concave to catch rainwater. If the rains don’t come, water the pile once a week
with an inch of water to help it cook.
    It is best to layer what you add to the pile. Don’t stack two feet of grass clippings on top; sandwich them between layers
of manure, soil, non-animal kitchen scraps, and lime. This prevents matting in the heap and odor problems.
    Never add fat, meat, bones or any greasy scraps to the pile. They will attract scavengers and the pile will not break down
properly. Do add fish meal, bone meal or blood meal to heat up.
    Every two or three days take a pitchfork and turn the pile to let air circulate and help speed up the decomposition of the
materials. You can also put a steel, hollow pipe in the center of the pile to let air in, or build your pile around a large fence
post so that air gets into the pile.
  4                                                                                                Countryside Composting Guide
About two days after you have built your first compost pile, it will start to heat. The bacteria is digesting the carbon com-
pounds in the vegetable matter and giving off heat energy. This is a good sign! Manure tea, compost tea, or water should
be added to the pile frequently.
     Composting is a natural, non-toxic, and non-polluting mulch for the garden. Earthworms love it—they will reward you by
aerating your soil and providing nutrient-rich worm droppings. When spread around the base of fruit trees, compost seems
to increase production. It can be sprinkled on lawns and shrub beds, as well.
     On my farm, I use compost for drought management and to add mulch and nutrients to the soil around vegetables and
fruits. Tomatoes, peppers, melons, and strawberries all have higher yields if I mulch with compost.
     Because the compost pile is symbolic of nature’s best effort to build soil and because compost is so efficient and practi-
cal in its work in the garden, it has become the heart of organic growing. It is the basic tool for the job to be done by the
organic gardener: to give nature a hand and create the finest garden soil that he or she possibly can.

                                                       Composting Techniques
     Most composting methods rely on the bio-chemical processes of aerobic or oxygenic bacteria and fungi (there is also a
method that relies on an aerobic or non-oxygenic organisms that thrive in decaying organic materials). These invisible magi-
cians produce the valuable, dark, fluffy, humus-like compost that smells like the floor of a forest. There are various ways of
promoting the action of such beneficial microorganisms. These are discussed below.
     In order to thrive, the organisms in the pile must be given ingredients that supply both high-carbon and high nitrogen
materials in various ratios. These include: high-carbon “brown” substances like hay, leaves, ground bark and twigs; and high-
nitrogen “green” material like manures, fish meal, soybean or alfalfa meals, and moderate amounts of fresh grass clippings,
green weeds, and vegetable garbage. The final ingredients are water and warmth (aerobic bacteria require oxygen as well).

Method One
First, scrape or spade the grass from an area five feet wide by five feet long, or more. A heap any larger would be hard to
turn when it is time to fork it over to get air in.
     Bacteria come up into the heap from the bare soil. After the heap has cooled, earthworms appear, too.
     On the bottom, pile twigs or brush about eight inches thick. This allows the air to circulate. Add a series of layers as
follows:

    1. An eight-inch layer of dry, brown, high-carbon material like leaves, straw, spoiled hay, sawdust or wood chips.
    2. A three-inch layer of manure or other green, high-nitrogen material such as fish meal, alfalfa meal, cottonseed meal,
or soybean meal.
    3. A one-inch layer of garden soil.
    4. A sprinkling of rock minerals like dolomitic limestone, granite dust, and greensand to provide calcium, phosphate, and
potash.

     Repeat layers one through four until you build the pile up to five feet high.
     The pile needs water, so sprinkle every second or third layer as you build the pile and water the top. A pile that is too dry
will soon look white and moldy. A pile that is too wet will get soggy and smelly, so fork it open and give it more air.
     You need a regular method for turning over your compost pile. The easiest way is to move the entire pile to an adjoining
bin or spot using a large pitchfork. This should be done after the first week. (If you don’t want to move the whole pile, make
sure you fork it enough so that the warm insides mix sufficiently with the cool outside—almost like stoking a fire.) Wait at
least three weeks, fork again, and then repeat a month later. Fork once more a month afterwards. This method of compost-
ing will provide fluffy, fine compost in three to four months.

Method Two
In this easier method, you use the same materials, but pile them up slowly year after year in three bins. You never turn the
piles, and merely add more high-nitrogen materials and soil whenever you see that nothing is happening or that something
is amiss. The incorrect carbon to nitrogen ratio can really wreak havoc on your compost pile. Remember: it should be 30
parts carbon to one part nitrogen. An incorrect ratio results in putrefaction—a slimy mess that smells bad and should not be
used as a soil conditioner.
     The catch is that you have to wait three years for the materials to ripen and compost. The hazard is that you may lose
many good nutrients from leaching during that period.
      Countryside Composting Guide                                                                                            5
Method Three
A third method is very quick, but requires a lot of manpower. You need a shredder to first break the materials down into small
bits to accelerate decay. Use the same ratio of eight parts high-carbon material to three parts high-nitrogen material to one
part soil. Just turn your pile every three days or whenever you notice that it is beginning to cool off.

Method Four
A fourth method is the anaerobic process, mentioned above, which is accomplished by microorganisms that do not require
oxygen. Here those who do not like to turn piles can relax.
     Put all materials inside large, dark, double plastic bags (heavy-duty garbage bags will suffice), tie them tightly, and leave
them alone until the materials heat up and are eventually reduced to compost. This will take approximately six months, and it
is important to include high-nitrogen materials (in the same 30:1 ratio as method two). It is also possible to bury the materials
in a soil-covered trench and let them rot underground.
     Whichever way you go about it, composting is greatly satisfying. Even if you have no garden of your own and all you are
doing is converting garbage and leaves, you know that you have avoided waste and made something of value.

                                                      Spread It Around
     How should compost be applied?
     About two to four inches of compost should be spread over your garden once a year. There is no danger of burning from
overuse, as is the case with chemically concocted fertilizers.
     If you are ambitious, you can apply it twice a year. The amount depends on the fertility of your soil (determined by a soil test)
and on what and how much has been grown in it. One cubic yard of compost (27 cubic feet) weighs, on average, 1,000 pounds.
This figure varies according to the materials used and the length of time composted. However, half-finished (partially decayed)
compost should only be applied in the fall after harvest, not during the growing season, so that it has time to decompose.
     When applying either half-finished or finished compost, first turn over the soil thoroughly and then mix the compost in
the top five inches. If you use a rotary tiller, you can simply spread the compost on the soil surface and go over it a couple
of times to work it in.
     To quickly improve the structure and fertility of poor soil, give it a thorough compost treatment in the fall. Spade it up
to 12 to 18 inches deep and mix in all the half-rotted compost you have. Then leave the surface rough and cloddy so that
the freezing and thawing of winter will mellow it or plant a green manure crop that will add more fertility when tilled in next
spring.
                                                              Putting compost deep down in the soil gives your plants built-in
                                                           protection against droughts-the moisture will be held in the humus so
                                                           that plant roots can drink it up in dry weather-preventing your crops
                                                           from starving to death during a drought.

                                                                               Vegetables And Flowers
                                                                Apply compost to your vegetables. In the fall, bury it in trenches, put
                                                          it in the furrows when planting and in the holes when transplanting.
                                                                After the plants start shooting up, mix compost with equal amounts
                                                          of soil and use it as a top-dressing or heavily mulch the shoots with
                                                          partially rotted compost or raw compost materials such as hay, straw,
                                                          sawdust, grass clippings and shredded leaves.
                                                                Finely screened compost is excellent to spread around all grow-
                                                          ing flowers as a sidedressing. Compost tea watering is an excellent
                                                          way to give your plants supplementary feeding during their growing
                                                          season. Fill a can half-full of compost, add water, and let sit overnight.
                                                          Sprinkle liberally around the plants.

                                                              Lawns
     Want a lawn that stays green all summer, has no crab grass and rarely needs water? Then use compost liberally when
making and maintaining it.
    In building a new lawn, work in large amounts of compost to a depth of at least seven inches. The best time to make a
new lawn is in the fall, but if you want to get started in the spring, till in your compost and plant Italian ryegrass, which will
look quite neat all summer. Till under this green manure crop at the end of the summer and make your permanent lawn
when the cool weather comes.
    Feed your lawn regularly every spring. An excellent practice is to use a spike tooth motor-powered aerator. Make about
five holes per square foot, then spread a mixture of fine finished compost and bone meal over the soil. Rake this into the
holes made by the aerator. You can use a fairly thick covering of compost, just not thick enough to cover the grass. This will
feed your lawn efficiently and keep it growing a dense mass of roots that laughs at droughts.
  6                                                                                                 Countryside Composting Guide
Trees and Shrubs
    When planting trees and shrubs, make a mixture of equal parts compost, topsoil and peat moss or leaf mold. After mak-
ing a planting hole at least twice the size of the root ball in all directions, place the root ball in the hole and carefully fill in the
mixture around the ball, tamping it down as you put in each spadeful.
    Soak the ground well, then spread an inch or two of compost on top. A mulch of leaves or straw will keep the soil moist
and control weeds.
    Established shrubs should be fed yearly by working a half-bushel of compost into the soil surface, then mulching with
coca shells. When piling the soil around your rose bushes for winter protection, mix plenty of compost with it. They’ll get a
better start next spring.
    The ring method is best for feeding trees. Starting in a ring about two feet out from the trunk cultivate the soil shallowly
to a foot beyond the drip line of the braches. Rake one to two inches of compost into the top two inches of soil.
    The ring method is ideal for fruit trees, too. You can work in as much as four to six inches of compost, then apply a heavy
mulch, which will continue to feed the trees. Some organic gardeners merely pile organic materials as deep as two feet
around their fruit trees, adding more materials and a sprinkling of kelp meal as the covering decomposes.
    Composting waste material is perhaps the simplest example there is of people working in harmony with nature to keep
their habitat in order and ensure their own survival. The principle involved is simply the first law of good housekeeping:
When you’re finished using something, put it back where it belongs.

                             What can you throw on that compost pile?
                                High-nitrogen (green) material                             Weeds (not in seed stage)

                                Alfalfa meal                                               High-carbon (brown) materials

                                Coffee grounds                                             Ashes

                                Cottonseed meal                                            Ground bark (shredded tree bark)

                                Grass clippings                                            Leaves

                                Fish meal                                                  Sawdust

                                Manures                                                    Shrub prunings

                                Soybean meal                                               Spoiled hay

                                Vegetable scraps                                           Straw

                                (corn cobs are not recommended)                            Twigs

                                Tea bags                                                   Wood chips

                                 Do not use:
                                                Animal bones                                  Greasy scraps

                                                Fat                                           Meat or dairy products

      Countryside Composting Guide                                                                                                  7
Sheet Composting Has Benefits
                      But Some Disadvantages, too

F
    or years, I’ve read advice to put compost on your garden. I’ve never used compost. I always put the livestock manure
    directly on the garden. I put cow, rabbit, goat and pig manure on after the garden is done in late fall. I don’t till it under
    until spring, and it’s ready to plant. Everything seems to do great and my garden is full of earthworms. Is this the right
thing to do? Doesn’t it compost itself after it’s in the ground and the worms start working on it? Do the plant roots take up
anything from the raw manure we shouldn’t eat?—Reader from Indiana

     Your method is often used on farms where large-scale composting might not be possible or practical, and is called
sheet composting. It involves less work, especially if you use a manure spreader. You probably had a pretty good soil to
begin with. It might not take much to maintain fertility. Having said that, however, we should look into the additional ben-
efits a compost pile might provide.

                                                                           Benefits of Compost Piles
                                                             First, when you apply manure to the garden (or field) and let it
                                                        dry out on the surface, you’re losing a great deal of the nutrient value,
                                                        particularly nitrogen. You can salvage some of that by tilling it in as
                                                        soon as practical, but composting is better.
                                                             If you clean your barn more than once a year, you’re probably
                                                        just piling it until fall. That’s causing even more nutrient loss. (Some
                                                        homesteaders, who use a deep litter system, do clean out only once
                                                        or twice a year but the bulk of the compost makings then come in
                                                        spring... when there isn’t enough time for composting to take place in
                                                        the soil. Crops may be damaged by raw manure.) You can add to a
                                                        compost pile anytime, even when the garden is in full production. And
                                                        with a pile, you can add other materials, such as kitchen and garden
                                                        waste, whenever it’s available.

                                                                             When Manure Is Scarce
                                                              Where animal manure (and other compostables) are scarce, and/
                                                         or the garden soil is noticeably lacking in fertility, composting really
                                                         comes into its own. There are two primary reasons.
                                                             First, finished compost can be applied where, when, and how it’s
needed. With sheet composting you’re spreading the wealth over the entire garden, including the path and walkways.
Worse yet, the lettuce and radishes are getting as much as the corn and pumpkins, which require much more. You don’t
have anything to put in the holes at planting time to give rhubarb, asparagus, tomatoes, and others that extra boost. And
you don’t have the compost to side dress crops that could use a second feeding later in the growing season.
     If you have finished compost, you can put it exactly where it’s needed, in the amount required, at the proper time. You
might work it into the rows before planting, or use it on raised beds. While most gardeners never have enough manure, they
often have other materials: leaves, grass clippings, garden residue, kitchen trimmings, sawdust, etc. By themselves, none
of these will compost properly because they lack the required carbon-nitrogen ratio. Composting is not “rotting.” Building a
compost pile by knowledgeably layering a variety of materials, including manure, solves these problems.
     A properly built and maintained compost pile will turn organic materials into a rich, fragrant soil amendment much faster
than anything else. On top of the practical benefits, making compost is satisfying—and fun!
     Note that manure doesn’t “compost itself,” nor do worms work on raw manure. In fact, worms can’t survive in a high-
temperature compost pile. (They die at 130° F., and will move out long before that. Piles can reach 150-160° while they’re
composting.) The very high temperatures in “thermophilic” composting kills pathogenic organisms and weed seeds, al-
though home piles will work just as well at lower temperatures.
     The chief danger of raw manure in the garden is that plants or their roots will be “burned,” (chemically). It should always
be composted, in the pile or in the soil, before planting.
  8                                                                                              Countryside Composting Guide
A Back-To-Basics Guide To Self-Sufficiency

                      BACKYARD
      HOMESTEADING

  Backyard Homesteading addresses the needs of many people who want to take control
 of the food they eat and the products they use—even if they live in an urban or suburban
 house on a typical-size lot. It shows homeowners how to turn their yard into a productive
and wholesome “homestead” that allows them to grow their own fruits and vegetables, and
raise farm animals, including chickens and goats. Backyard Homesteading covers the laws
and regulations of raising livestock in populated areas and demonstrates to readers how to
                         use and preserve the bounty they produce.

                              To order visit:
        iamcountryside.com/shop/backyard-homesteading
 Countryside
          Composting Guide
                           Or call: 970-392-4419                                             9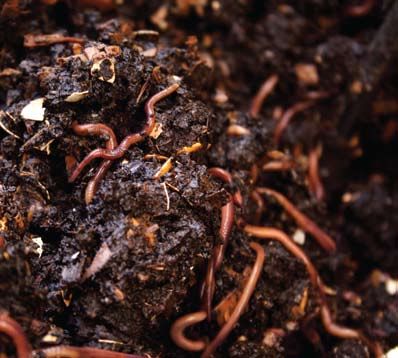
Composting is for the

                                                     worms
P
    reparing large holiday meals produces more than happy families with full tummies. It also produces waste—peelings,
    shreddings, and choppings—that make excellent worm feed. Don't stuff all that food waste down the garbage disposal:
    turn it over to a herd of worms. Red worms or red wigglers will turn those banana peels and apple cores into rich com-
post that can be used next spring.

     Vermicomposting (composting with earthworms) can be done anywhere, even under the kitchen sink. Bins located near
a hot water heater will save trips trudging through the snow and cold carrying wastes to the compost bin. And the heater
will keep the worms warm, ensuring optimum recycling results.

    Red wigglers tend to be surface feeders, so the bin shouldn't be more than eight to 12 inches deep. The length and
width of the bin will vary with the amount of waste produced by your family, although a good rule of thumb is to have one
square foot of surface area per pound of waste.

    Plastic bins with 1/4-inch holes in the bottom will provide good drainage and aren't as messy as wooden bins. Place
the bin lids underneath, supporting the bins on top with wooden slats. The liquid that is caught in the lids can be used as
plant fertilizer.

    The bedding can be made of shredded newspaper, cardboard, leaves, straw or peat moss. Keep the bedding moist, but
not water-logged. Throw in a handful of sand to provide grit for the worms' digestive system.

                                                                 Red worms can eat their own weight in food scraps and
                                                             bedding in one day. On the average, it takes two pounds
                                                             of worms to eat a pound of good waste in 24 hours under
                                                             optimum conditions.

                                                                 Composting worms can be purchased from a garden
                                                             supply store, bait shop or some garden supply catalogs.
                                                             When the worms arrive, add them to the top of the moist
                                                             bedding and they will disappear within a few minutes. Cover
                                                             the top of the bin with a moist burlap bag or straw to prevent
                                                             the bedding from drying out.

                                                                 The worms will eat all kinds of waste including coffee
                                                             grounds, tea bags, pulverized egg shells, and of course fruits
                                                             and vegetables. Bury the food in the bedding instead of lay-
                                                             ing it on top.

                                                                 Add scraps for two or three months, or until the bedding
                                                             disappears. Then it's time to harvest the worms and compost
                                                             the material.

                                                                Place the compost on a tarp in the sun to remove the
                                                           worms. They don't like the light, so they'll move to the bottom
                                                           of the piles. Scrape off a layer of compost until you reach the
worms at the bottom. Combine the piles and continue the process until you have a pile of compost and a pile of worms. Add
the compost to your garden and the worms to the bin, and begin making a new batch of compost.

  10                                                                                        Countryside Composting Guide
Make a Compost Barrel
I
f you can find a large old (used and discarded) oil barrel, cut a hatchway out of one side; about — 20” x 30” will do.
Cut holes exactly in the center on each end to match the size of steel water pipe you plan to use. Measure the total
length of the barrel and set in two big fence posts about two or three inches from each end so the barrel will turn
easily.
Now cut a slot or “V” notch on the top of each post to set the
center pipe on. If you can’t weld or cut steel yourself, then you
will have to take it to someone who can. Make sure you cut or
drill small holes ½ inch wide about every six inches in the sides
of the barrel — these will let in air.
Next cut 3” x 36” baffles and have all of them welded onto the
inside of the barrel, evenly spaced. (See drawing.) These can
be easily welded in place through the 20” x 30” doorway. These
baffles (No. A to I) will toss your vegetable or manure compost to
allow air to circulate evenly. Turn at least once a day. (The steel
door must be latched so that it will not open when you turn it.)
When the compost is done, open the hatchway and turn the
barrel so the door is at the bottom. Your compost should fall out
easily.
—Reader from Washington
Countryside Composting Guide 11Making Compost In The City
COUNTRYSIDE: For many years we lived in a large city in Germany, in a second floor apartment. The only garden I had was
in flower boxes or pots on our balconies. One day I heard a radio program about recycling and the speaker was telling how
to make compost if you live in an apartment. I followed her directions and found that it really worked. This is how I did it…
Whenever I had vegetable scraps (and we had lots since most of the vegetables purchased at the markets came with
all the greens on them), I cut them coarsely and put them in the blender. When the blender was full I added enough water
to make it mix well and blended it on slow speed. I drained off the extra water and used it to water plants. Then I took the
vegetable mush to the balcony where I had three large buckets, one of them filled with soil (potting soil since I didn’t have
access to any other). All three buckets had loose-fitting lids.
I put a scoop of potting soil into one of the empty buckets, dumped the blend on top and sprinkled a little more soil on
top. I repeated this every time I had a blender full, basically just layering soil and vegetable waste. If it got too moist I left
the cover off until it dried out a bit.
Every so often I would dump the contents of the bucket into the third bucket (empty at the time) to mix and aerate it.
There was always one bucket with soil, one with compost, and one waiting empty. When the bucket of compost got nearly
full I aerated it, then let it set for awhile. Before long it was ready to use.
The outside temperature had an effect on how quickly it was ready but since it never got below freezing for long periods
it was ready quite soon.
The first time I used some of the finished compost was when I needed to add soil to some flower boxes. I added pot-
ting soil to fill one up and used compost to fill the other. After planting the flowers and watching them for about two weeks it
became obvious which box had the compost…it required less water and the plants were much bushier and more vigorous.
The difference was really incredible and made a believer out of me!
-Reader from Illinois
12 Countryside Composting GuideAn Easy Way To
Sift Compost And Soil
COUNTRYSIDE: Do you need to sift a lot of compost but do not have an adequate screen? Give this low/no cost system a try:
Obtain a plastic bread/pastry tray that route delivery people use for carrying their products to supermarkets. These are
typically molded plastic, several feet square, with holes in the bottom. Those with uniformly-sized holes work best for this
project.
Note: We do not condone “borrowing” one of these from behind a grocery store. We found two along the shoulder of
the Interstate.
Place the tray on a sturdy wheelbarrow and scoop a shovelful of compost onto it. Wearing thick leather gloves, move the
compost around so it passes through the holes in the tray and falls into the wheelbarrow. Deposit the matter left over onto a
separate compost pile for further decomposition. Take the wheelbarrow loaded with compost to the garden for use.
If you do not have a wheelbarrow, you can use a trash can or similar container to catch the compost. Do not use a
container that was used for toxic or hazardous materials. If you want finer compost, use “rabbit wire” mesh attached to the
inner surface of the tray.
The tray can be cleaned with a stiff brush and garden hose, or even left in the rain for a while. During the off season,
the tray can be used to dry onions or store potatoes or winter squash. Finally, you can hang it on a nail in your garage or
shed until it is needed.
-Reader from North Carolina
Quick And Easy
Compost Method
COUNTRYSIDE: I have been reading many articles on composting and most of them
complain about the backbreaking work of turning the compost. I have come up with an
easy way.
Using my front tine tiller to loosen the dirt, I dig a trench about three feet long, three
or four feet long, and a foot-and-a-half or two feet deep.
I shred and store dry leaves in the fall. Each time my husband mows the lawn during
the summer he dumps grass clippings in the trench. I add the desired amount of leaves,
mix them with the tiller, and use the garden hose to give them the right moisture. About
every three days I run the tiller through them and add moisture if needed. This method will
produce useable compost in two weeks. It sure beats turning by hand or waiting a year to
get compost without turning.
Countryside Composting Guide 13What is the Best Manure
for GARDENS?
Before Using Chicken Manure as a Fertilizer,
It Must be Properly Processed
By Rhonda Crank
T
he best manure for gardens is properly composted manure. It’s often called black gold, especially when it contains
cow manure. When running a homestead, you have many different types of manure. Wonderful for us, all of the live-
stock manure can be used as fertilizer.
If you have livestock on your homestead, then you’re familiar with the abundance of manure. For some, dealing with
the amount of manure can become a problem. Just think about it, with even a few animals on a small homestead, you can
have up to a ton of manure in just one year! So the question is what to do with all that waste.
The number one way most of us use manure is to improve the fertility of the soil. Not only do we use it in the gar-
den, but it’s also used in fruit orchards and container beds. The best manure for gardens can easily be made right on your
homestead with proper composting.
I should straight off caution you on the use of fresh manure as a fertilizer. Fresh manure is also called “hot” manure.
This means it can harm our kill plants.
My grandfather said he would only use cow manure straight from the barn to the garden. I think it was because
of the low nitrogen levels in cow manure because of their four stomach system. This meant he could plow it under and it
wouldn’t harm the plants. However, to avoid weeds and grasses being transferred to your soil, it’s best to compost manure
to achieve the best manure for gardens.
The amount of time needed for proper composting of manure depends on the season because of the varying tem-
peratures and moisture levels. You can add them to your existing compost bin of organic matter such as grass and leaves
and appropriate kitchen scraps. Some farmers have a muck pile. They let it sit without adding it to their compost piles. When
the manure stops producing heat and is not smelly when it’s dry, it’s ready for the garden.
The way I prefer to use manure in the garden, raised beds and container beds is to overwinter it. This means
spreading the manure over the garden spot you wish to fertilize, placing a mulch layer to cover it and letting it sit all winter.
Come spring it’s ready for you to plant.
Whether your homestead has manure from cows, pigs, horses, poultry, sheep, goats, and/or rabbits, the manure
is a gold mine for improving the quality of your soil. I am told that sheep, goat and rabbit manure is easier to compost and
spread because of the pellet shapes of the poop. I haven’t raised sheep or rabbits, but I know goats are abundant makers
of nice roundish pellets!
14 Countryside Composting GuideI’m originally from an area where commercial chicken houses were abundant. Many non-organic farmers would
spread the chicken manure as fertilizer in their fields. I wouldn’t do this as I am an organic homesteader and I know you can’t
spread uncomposted chicken manure in the garden. The high nitrogen and ammonia levels can burn plant roots.
Be aware, if you are an organic gardener and you get your manure from a source other than your homestead, be
sure you know what the farmer fed his animals. Manure from an animal fed non-organic feed will contaminate your organic
garden. If you’re not an organic gardener, many farmers will be happy to allow you get all the manure you can carry from
them.
Composting chicken manure provides rich, nitrogen laden compost. This is especially great for those areas of your
garden where you will plant heavy nitrogen feeders like corn or popcorn. Since chickens create a lot of manure, they provide
a free fertilizer for the homesteader.
When we clean out the barn or coops, we add it to the vermiposting bins (composting with worms). Using worms
for composting is one of the best decisions we have made for the health of our garden soil. They are especially beneficial in
preparing horse manure for gardens. Of the many things we have added to our vermiposting bin, we have found they love
horse manure better than most other things.
CAUTIONS There are a few things to be cautious of when adding manure to your garden:
1) Don’t use dog or cat manure in your garden. While you may think this should
be common sense, it needs to be said because of the high risk of diseases being
transferred to humans from the feces of dogs and cats.
2) Although some people use human manure and urine in their garden, after
composting of course, you should never use sewage sludge from treatment
plants as fertilizer in your garden unless you have tested it for contaminations.
3) Remember not to use fresh manure in your garden while you have live plants
in there. The high nitrogen and ammonia levels can kill your plants at the root.
While cow manure won’t burn anything, you can get weeds and grasses trans-
ferred to you soil and these will grow when nothing else will!
4) NEVER use manure from a sick or diseased animal. Not even composting it,
remove it from your homestead to prevent the spread of disease or sickness.
Countryside Composting Guide 15How to Compost
Chicken
Manure
By Janet Garman
C
hickens provide us with hours of companionship, fresh eggs, and manure! Lots of manure. About one cubic foot
of manure is produced by each chicken in approximately six months. Multiply that by the six chickens in an aver-
age backyard chicken flock and you have a mountain of manure every year! If you reside on homesteading land,
that may not be a problem, but in a backyard and in a neighborhood, there has to be a plan to take care of the chicken
manure. How can you turn your pile of chicken manure into something beneficial like the delicious eggs your hens are
producing? With a little extra effort, you can learn how to compost chicken manure for your garden and maybe you will
have enough to share with the neighbors, too.
Most chicken owners know that fresh chicken manure can contain Salmonella or E.Coli bacteria. In addition, the fresh
manure contains too much ammonia to use as a fertilizer and the odor makes it unpleasant to be around. But, when prop-
erly composted, chicken manure is an excellent soil amendment. Compost does not have the unpleasant odor. Chicken
manure compost adds organic matter back into the soil and contributes nitrogen, phosphorus and potassium to the soil.
Two Reasons to Start Composting Chicken Manure
1. Adding the manure directly to the garden can spread pathogenic organisms to the soil which can be picked up by low
growing leafy greens and fruit.
2. Fresh manure will burn the plant’s roots and leaves because it is too strong or “hot” unless it is composted.
How to Compost Chicken Manure
All chicken owners need to learn proper techniques for how to clean a chicken coop. Waste you scrape out of the chicken
coop, including all of the shavings, sawdust, straw and hay can be added to a purchased or homemade compost bin with
the fresh manure. Compost components are usually labeled either brown or green. The bedding materials, along with
any additional yard plant debris, leaves, small sticks, and paper would be your brown parts. The manure and kitchen
scraps would be the green parts. When using chicken manure, a recommended level of 2 parts brown to one part green
is recommended because of the high nitrogen content in the manure. Place all the materials in the compost bin or com-
poster. (One cubic yard is recommended for the size of the bin). Mix and regularly stir and turn the composting material.
Occasionally check the inner core temperature of the material. A temperature of 130 degrees F or up to 150 degrees is
recommended to allow the soil bacteria to break down the pathogenic bacteria from the manure. Turning and stirring the
pile allows air to enter and the good bacteria need some fresh air to continue working. After approximately one year, you
should have some very rich, valuable compost suitable for your garden. All of the E.Coli and Salmonella should have been
destroyed by the heat produced during composting. It is still advisable to carefully wash any produce grown in a compost-
fed garden.
A Few Safety Precautions
• Always wear gloves when handling manure.
• Do not add cat, dog, or pig feces into your compost.
• Always wash produce thoroughly before eating. Individuals with
compromised health should not eat raw food from a manure-fed garden.
16 Countryside Composting GuideYou can also read


