CYCLING SKILLS Ontario's Guide to Safe Cycling - Ontario.ca
←
→
Page content transcription
If your browser does not render page correctly, please read the page content below
CYCLING
SKILLS
Ontario’s Guide to Safe Cycling
2

    INTRODUCTION
    Cycling can be enjoyed safely when you understand the rules of the road and
    practise proper safety and handling techniques. This is your guide to cycling safety.
    Whether you’re new to cycling or you are an experienced cyclist, this guide contains
    important information, tips and techniques to make you a safe, confident rider.
    You may want to take a cycling course to help boost your skills, safety and
    cycling pleasure. To find out more or search for cycling training opportunities in your
    area, please see the links provided on page 54.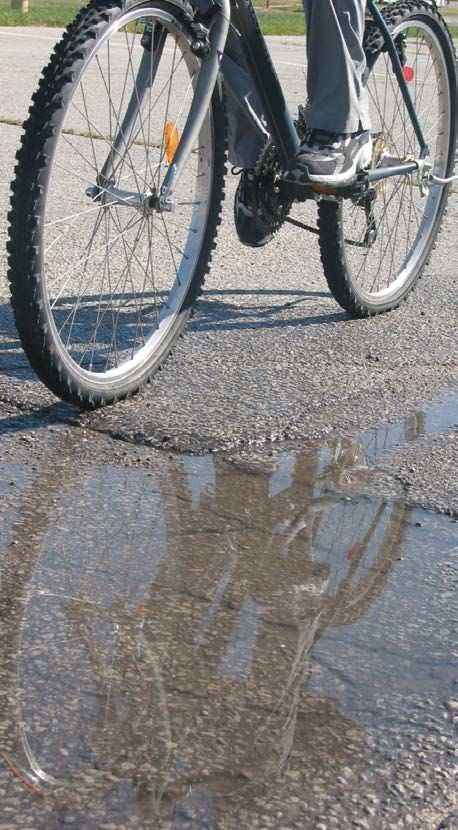
WHAT’S INSIDE?
                                                            1. Safety ......................................................... 4
                                                            2. Handling Skills........................................12
                                                            3. Where to Ride ......................................16

Cycling is a fun,                                           4. Obstacles and Other Hazards ...........42
                                                            5. Power-Assisted Bicycles

healthy activity and                                           (electric bike/e-bike) ............................46
                                                            6. Road Signs and Traffic Signals .............50

an inexpensive way                                          7. The Law and Cyclists ...........................52

to get around.
...be equipped   ...know the rules   ...watch for hazards        ...ride responsibly

                                                                                                                               3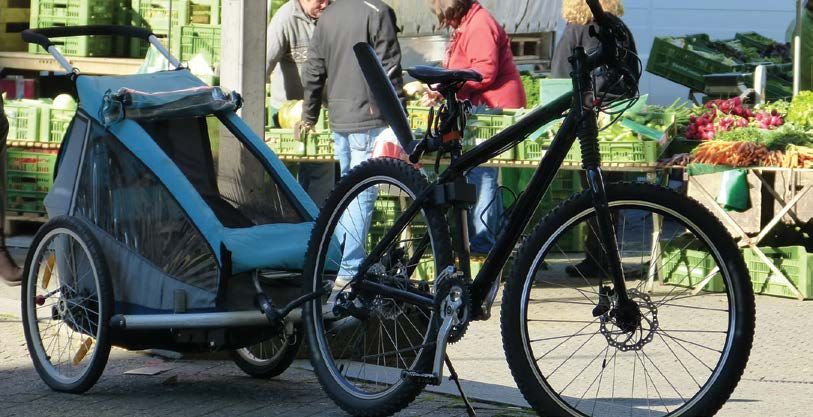
1
    4

        SAFETY
        SIZING YOUR BIKE
        There is a variety of bicycles on the market. Whether you’re choosing a touring,
        sport, mountain or hybrid bicycle, it should fit properly, making it easy to control and
        comfortable to ride. Check these important fitting points on your bicycle.

        FRAME SIZE
        Frame size varies by type of bicycle, but as a general rule, you should be able to
        stand flat-footed over your bike’s frame (top tube) with two to five centimetres
        of space. For a woman’s frame bike, when sitting on the seat, the base of the seat
        should be at least five centimetres above the seat tube when the tips of both feet
        touch the ground.

4
5
SEAT AND HANDLEBAR HEIGHT
ADJUSTMENT
Seat – Positioning your seat properly will help make your pedalling more efficient and
reduce strain on your knees. To ensure your seat is at the correct height, sit on the
seat with the balls of your feet on the pedals. At the bottom of the pedal stroke, your
legs should be almost straight with your knees slightly bent.
Handlebars – Ensure that your handlebar is set at the right height. In a normal
riding position, your weight should be evenly balanced, allowing you to rest your hands
lightly on the handlebars. You can adjust the tilt of your seat and the height of your
handlebars to achieve a good balance of weight. Your handlebar stem and seat post
should be fastened tightly and must be at least five centimetres into the frame. Both
usually have a mark indicating the maximum extension point. Longer seat posts and
stems are available if you need them.

SAFETY CHECK
Every cyclist needs to know how to tell when their bicycle is unsafe to ride and needs
repair. This section includes a basic bicycle safety and tune-up checklist.

                                                                                              5
BASIC BICYCLE
                                            SAFETY CHECKLIST
    A well-maintained bike is key to a safe ride. Before each ride,   Brake Levers and Pads
    conduct a basic safety check of your bicycle.                     Squeeze your brakes to ensure levers stop at least 2.5
    Tire and Wheels                                                   centimetres from the handlebars when fully applied and to
                                                                      ensure your cables are not frayed or stretched. Check the
    Inflate tires to the recommended pressure as shown on the
                                                                      brake pads in the front and back to be sure they are hitting
    tire. Check for and replace loose, bent or broken spokes.
                                                                      only the rims and not the tires.
    Make sure wheels are centred in the forks and check for
    side-to-side wobbles and up and down hops by watching             Lights and Reflectors
    the wheel spin past the brakes or frame.                          Make sure that all mandatory lights and reflectors are in
    Chain and Gears:                                                  good and working condition.
    Make sure the chain does not slip and that your chain stays       Keep Your Bike Secure
    on the sprockets.                                                 Always carry a quality bicycle lock when riding and always
                                                                      lock your bike and quick release items, like your wheels
                                                                      and seat, to something solid.

6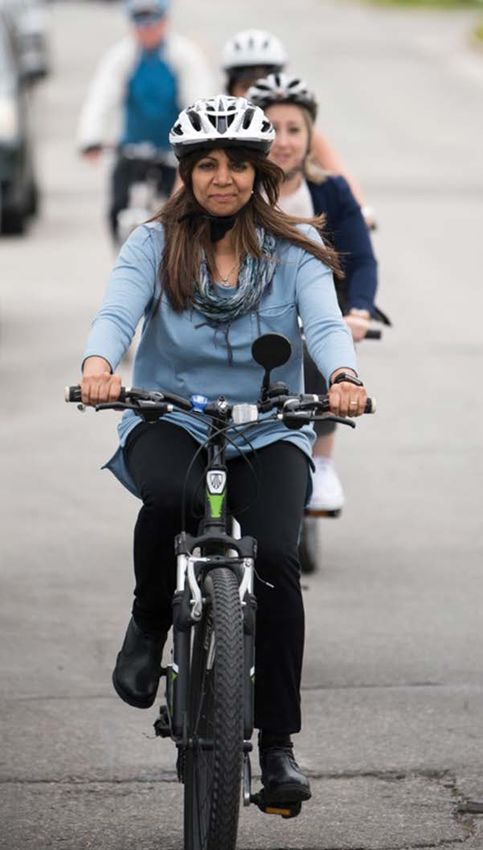
TUNE-UP CHECKLIST
5 Bolts/Quick Release Levers – Check that                  5 Derailleur Movement – On derailleur
   bolts and/or quick release levers on the seat, seat        bikes, try shifting through all your gears and
   post, handlebar stem and axles are tight.                  make sure your derailleur does not throw
5 Headset – Check that it turns freely and                    the chain off the sprockets.
   doesn’t rattle.                                         5 Tires – Inflate to the recommended tire pressure
5 Brakes – Check that the nuts on the brakes are              as shown on the tire.
   tight. Brake pads should not touch the rims unless      5 Spokes – Check for and replace loose, bent or
   you are squeezing the brakes. Brake levers should          broken spokes.
   stop at least 2.5 centimetres from the handlebars       5 Wheels – Make sure wheels are centred in the
   when the brakes are fully applied.                         forks and not touching the brake blocks. Check the
5 Axles – Check bearings for looseness by shaking             rim for side-to-side wobbles and up and down hops
   the wheel side to side. Make sure quick release            by watching the wheel spin past the brakes or frame.
   levers are clamped tight.                                  More than half a centimetre of wobble is cause for
5 Shift Levers – Derailleur levers should move                concern.
   easily only when shifting. A screw, butterfly nut, or   5 Coaster Brakes – Check that the bolt holding
   similar device lets you adjust the movement of some        the brake arm to the frame clip is tight.
   types of shifter levers.

                                                                                                                     7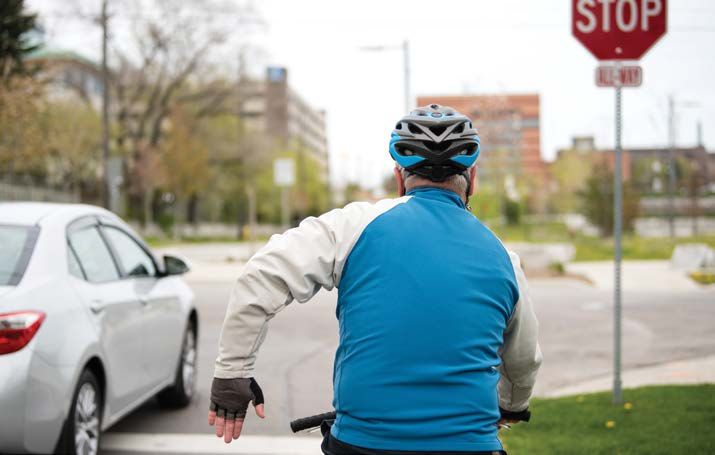
REQUIRED SAFETY EQUIPMENT

It’s important for cyclists to be seen and heard
by other road users.
                                                              Vertical
                                                              safety flag
The law requires that you equip your bike with:
                                                                                   Rear view
    5 A bell or horn in good working order                    Reflective           mirror
                                                              clothing
    5 A white front light and a red rear light or                                  Bell or horn
       reflector if you ride between 1/2 hour before          Rear light
       sunset and 1/2 hour after sunrise                      or reflector
                                                                                   Front light
    5 White reflective tape on the front forks and            Red reflective
       red reflective tape on rear forks                      tape on rear forks   Reflective
                                                                                   tape on the
You may consider optional equipment such as:                                       front forks
                                                              Horizontal
    5 A horizontal safety flag encourages motorists           safety flag
       to pass at a safe distance (one metre)
    5 A vertical safety flag makes you more visible
    5 A rear view mirror lets you see what is
       approaching from behind and makes it easier to check
       traffic before passing
    5 Reflective clothing helps you to be seen by other
       vehicles on the road.

8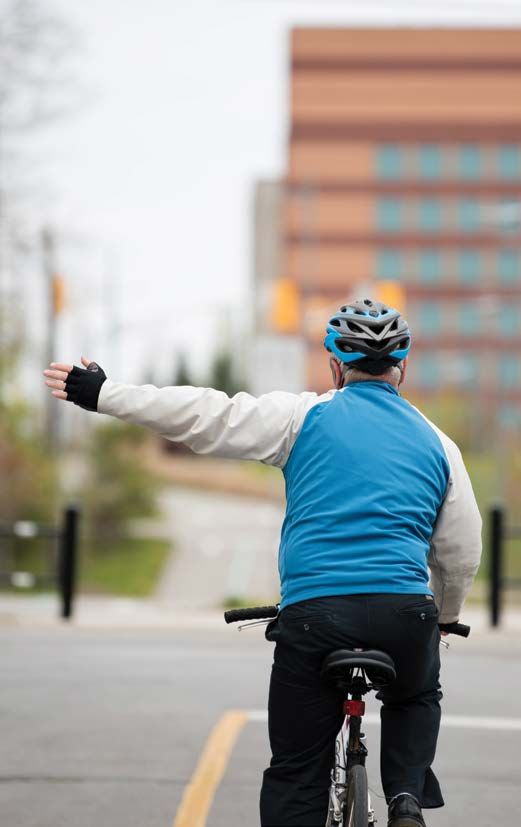
Be Alert
Avoid wearing earphones, texting and talking on the phone while riding your
bike. These distractions put your safety at risk as they prevent you from being
fully aware of what is going on around you.
Be Heard
Bicycles are very quiet vehicles, so it is important to warn other cyclists,
pedestrians and motorists of your approach and intentions. Use your bell, horn,
hand signals or voice to communicate that you are passing, approaching or are
close by.
Always Ride Sober
Impairment caused by alcohol or drugs can increase your risk of collision and
injury. Some prescription and over-the-counter medications can impair your
ability to ride safely.

                                                                                  9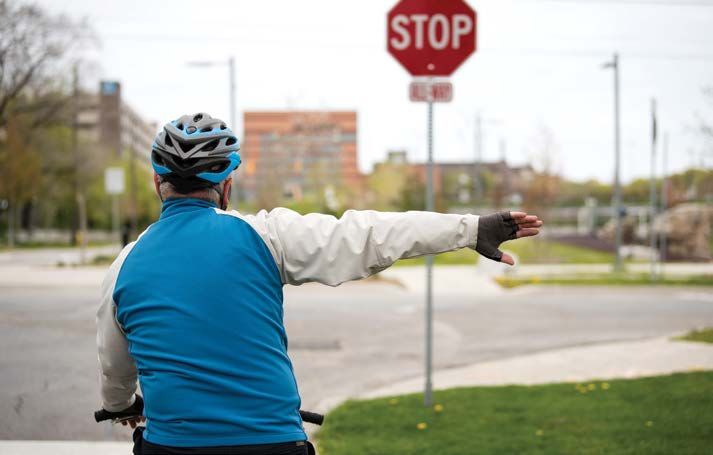
10
     BE PROTECTED, WEAR A HELMET

     In Ontario, 63 per cent of cyclists who died between 2010 and 2014,
     as the result of a cycling collision, were not wearing a helmet.

     An approved bicycle helmet can greatly reduce the risk of permanent injury
     or death in the event of a fall or collision.
     If a helmet has been in a collision, it should be replaced, even if there is no
     visible damage.
     Look for a safety standards sticker that meets the approval of safety organizations
     such as: Snell, ANSI, ASTM, BSI, SAA, CPSC.
     The Proper Fit
     The best helmet is one that fits properly, is worn correctly and has been
     manufactured to meet strict safety standards.

10
11
To provide maximum protection, the helmet should fit level and square on your head.
It should fit snugly and not slip when you move your head.
» There should be two finger widths between your eyebrows and the helmet. It’s the law! In Ontario,
» The straps should be flat against the face. every cyclist under the
age of 18 must wear an
» The side straps should meet just below the ear making a V-shape under your
approved bicycle helmet.
ear lobe.
But wearing a helmet is
» The chin strap should be fastened snugly with enough room to fit one finger best practice for every
between your chin and the strap. cyclist.
» Use the dial at the back or the sizing pads provided with the helmet to adjust
the fit.
✔ correct fit ✘ incorrect fit ✘ incorrect fit
112
12
HANDLING
SKILLS
SELECTING AND SHIFTING GEARS
Handling skills are easier to learn in a low easy gear when you can quickly and
easily pedal providing better balance, less fatigue and more speed. It also reduces
knee strain.
The basic rules for gear use are:
» Shift into a low, easy gear before you stop.
» Use low, easy gears when going up hills. Shift into lower gears
before you begin to work too hard.
» Use higher, harder gears when you begin to bounce on the seat
from pedalling too fast.
» On level ground, use a gear that gives you fast, easy leg spin –
about 70 to 100 rpm.
» Avoid pedalling slowly and pushing hard in your highest gears.
1213
STRAIGHT-LINE RIDING
Riding in a straight line is the key to riding safely in traffic. Practise by following a
painted line in an empty parking lot. Try not to move your upper body as you pedal –
let your legs do the work.
SHOULDER CHECKING
Shoulder checking involves looking back over your shoulder to see what the traffic
behind you is doing. This manoeuvre is vital for making safe turns in traffic. It is also
difficult to do without wandering from a straight path. Practice riding in a straight line
while checking behind you over both shoulders.
SIGNALLING
Just like drivers, cyclists must signal their intentions, to turn or change lanes, to
other motorists. Signaling requires being able to ride with only one hand on the
handlebars. Because it is very easy to go off course when riding one-handed,
practise signalling while riding along a straight line. Keep both hands on the
handlebars while actually turning.
13Left Turn Right Turn Stop Alternative Right Turn 14
15
Make sure to hold your hand signals long enough for drivers to see your signals
and react accordingly and always shoulder check before signalling to
make a turn and, again, just before making the turn.

EMERGENCY-HANDLING SKILLS
The first step in collision prevention is to scan the road ahead for potential
hazards. Steer clear of debris and holes in the pavement and learn to anticipate
errors by motorists, pedestrians and other cyclists. Don’t assume they see you.
No matter how skilled or careful a rider you are, you will encounter hazards that
leave you little time to react.

BRAKING
Quick stops can be crucial in an emergency. Caution is required when braking
quickly to ensure you don’t flip over your handlebars. Keep a cushion of space
around your bike to ensure you have time to react and stop safely. In wet weather,
it takes longer to stop, so be sure to leave more room.

                                                                                     15
WHERE 3
TO RIDE?
The Ontario Highway Traffic Act (HTA) defines a bicycle as a vehicle that belongs on
the road. Riding on the road means riding with other traffic. This is only safe when all
road users follow the same rules of the road.
When everyone follows the same rules, actions become more predictable. Drivers
can anticipate your moves and plan accordingly. Likewise, you too can anticipate and
deal safely with the actions of others.
It is important to note that bicycles are prohibited on certain provincial controlled
access highways, such as the 400 series, the Queen Elizabeth Way, Ottawa
Queensway, the Kitchener-Waterloo Expressway and on roads where “No Bicycle”
signs are posted.
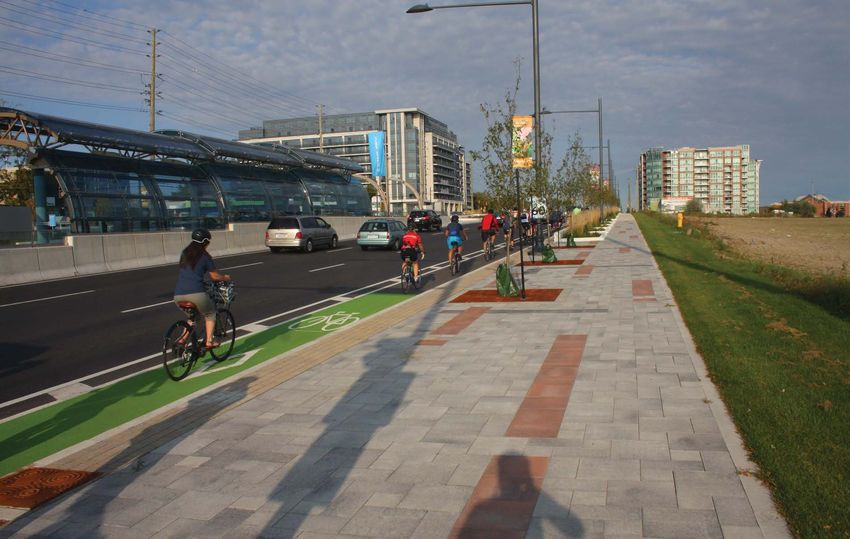
16CYCLING FACILITIES
Many municipalities in Ontario offer bicycle facilities
specially designed with cyclists in mind. The different types
of facilities can be organized into two categories: on-road
and in-boulevard bicycle facilities.
On-Road Bicycle Facilities
» Shared Roadway and Signed Only Bicycle Route
» Signed Bicycle Route with Paved Shoulder
» Conventional Bicycle Lane
» Separated Bicycle Lane
» Raised Cycle Track
» Bicycle Priority Streets
In-Boulevard Bicycle Facilities
» Active Transportation / Multi Use Path
» Raised Cycle Track
17RIDING IN TRAFFIC RIDING AROUND PARKED
Because bicycles usually travel at a lower speed, there are two VEHICLES
rules of the road to which cyclists must pay special attention: Ride in a straight line at least one metre away from parked
1. Slower traffic stays right vehicles. Even if the cars are parked far apart from one another,
2. Slower traffic must give way to faster traffic when safe and don’t swerve or zig zag. Keep riding in a straight line.
practical. When riding around parked vehicles, watch for parked vehicles’
Accordingly, any vehicle moving slower than the normal traffic doors opening and for cars entering or exiting from driveways
speed should travel in the right-hand lane, or as close as or laneways.
practicable to the right edge of the road except when preparing
to turn left, when passing another vehicle, when going faster
than other vehicles or if the lane is too narrow to share.
YES
GOING STRAIGHT AHEAD
When going straight ahead, use the right-hand through lane. Stay
as close as practicable, about one metre, from the right curb
of the roadway to avoid curbside hazards. Remember to be
NO
predictable and ride in a straight line.
18TAKING A LANE
The lane you take depends on your speed relative to other traffic. Slower traffic
stays to the right in the curb lane. Cyclists must ride far enough out from the curb
to maintain a straight line, clear of sewer grates, debris, potholes, and parked cars.
When your safety warrants it, it is legal for a cyclist to take the whole lane
by riding in the centre of the lane. Never compromise your safety for the convenience It is not safe to
of a motorist behind you. take a lane on
high-speed roads.
LANE CHANGING TECHNIQUES
Mastering the proper techniques for turning and changing lanes makes it safer for
cyclists to share the road with other vehicles.
Vehicles travelling in the other lane have the right-of-way. Wait until you have enough
space to merge between motor vehicles safely.
1. Shoulder check 2. Signal lane change 3. Shoulder check again 4. Change lane
19TRAFFIC TURNING RIGHT
When turning right, motorists do not always check to see whether there are cyclists.
Be extra careful. Cars may move to the right
» Maintain a safe distance of at least one metre from the curb. side of your lane prior to
making a right-hand turn.
» If a vehicle is turning right:
• Stay behind it, or Cyclists should stay behind
• Pass it on the left if you can perform the manoeuvre safely. OR pass on the left if you
can perform the manoeuvre
safely. NEVER pass a right-
turning vehicle on the
right.
1. Shoulder check 2. Signal lane change 3. Shoulder check again 4. Pass on the left
when it is safe to do so
20GOING THROUGH INTERSECTIONS
Intersections are where many collisions occur, so stay alert. Any point where the paths of two
vehicles can cross is an intersection. Often residential areas contain many mini-intersections
where driveways and alleys enter streets. Stay at least one metre from curbs in residential
areas so that drivers about to enter the road can see you and you can see them.
At intersections, it is usually better to move into the lane before the intersection so that
motorists turning right stay behind you.
In residential areas, cyclists must watch for cars entering and exiting driveways
and alleys.
21RIGHT-OF-WAY WITHOUT TRAFFIC CONTROLS
Right-of-way determines who goes through an intersection When you approach an intersection without traffic control
first. It is important to be cautious before proceeding into signals, stop signs or yield signs at the same time as another
an intersection. Make sure to give way to pedestrians and vehicle, you must yield the right-of-way to the vehicle
vehicles already in the intersection or approaching the approaching from the right.
intersection so closely that you would not have enough time
to proceed safely ahead of them. The following outlines the
right-of-way at intersections with and without traffic controls.
Cyclist must yield the right-of-way to the car approaching on
the right.
22ALL-WAY STOP
The first to come to a complete stop has the right-of-way regardless of whether it is a
cyclist, motorcyclist, motorist or the driver of a heavy vehicle. If two vehicles arrive at
an intersection at the same time, the vehicle on the right has the right-of-way.
» If another vehicle has the right-of-way, the cyclist can indicate that the other
vehicle has the right-of-way by a hand signal or by putting a foot on the ground.
» If the cyclist has the right-of-way, before entering the intersection, the cyclist
should make visual contact with the driver to ensure that he or she will yield the
right-of-way.
» If a pedestrian enters the intersection, the cyclist must stop and let the pedestrian
go by.
At an all-way stop, the vehicle that arrives
first has the right-of-way.
TRAFFIC SIGNAL INTERSECTIONS
» Watch out for traffic signal changes and get ready to stop, unless you are already in
the intersection.
» Watch out for vehicles turning across your path or that are passing and be
prepared to avoid them.
23RIGHT TURNS Keep to the far right of the road before and after you turn. Watch out for pedestrians because they have the right-of-way and wait for them to clear your path, before turning. Stop for red lights and stop signs before turning. At pedestrian crossovers, cyclists must wait for pedestrians to cross the street and safely reach the sidewalk before turning. Refer to page 33 for more information about cyclists’ responsibilities at pedestrian crossovers. 1. Shoulder check 2. Signal to turn right 3. Shoulder check again 4. Turn right when the way is clear 24
DESIGNATED RIGHT
TURN LANES
If you wish to continue straight ahead at a multiple-lane           By placing yourself between both lanes, you will be able to
intersection with a designated lane for right turns:                proceed straight across the street once the light turns green,
» Signal your intention to move to the left lane                    reducing any potential conflicts with vehicles that are turning
                                                                    right or proceeding straight.
» Position yourself between the lane reserved for right turns
    and the one for vehicles continuing straight ahead
» Return to the far right side of the lane after going through
    the intersection

                                 1. Shoulder check 2. Signal 3. Shoulder check again 4. Change lane to right side of the lane at the
                                 front of the queue 5. When the light is green, go through the intersection and return to the right-
                                 hand side of the road
                                                                                                                                      25
LEFT TURNS MULTI-LANE LEFT TURNS
There are two ways to turn left at an intersection depending on These manoeuvres are quite complex and require sufficient
your cycling skills and the volume and speed of traffic: skill to safely move from one lane to the next until you are
• Pedestrian-type turn (L-turn) – Walk the bike across in a good position to turn. A cyclist must be able to shoulder
the pedestrian crosswalk. check without swerving, judge gaps in traffic, signal intentions
• Vehicle-type turn – This is the most practical way of to motorists, shoulder check and move decisively and quickly
turning left, except when traffic is heavy. Vehicle-type turns when safe to do so. You can develop these skills by practising on
can be relatively simple on quiet residential streets but quiet streets first. As you gain confidence and skill, you will find
require greater skill on multiple-lane roads. it easier to turn left on busier streets.
» To turn left on a multi-lane road, you should use the lane
changing technique until you are in the left-turn lane.
» Remain on the right-hand side of the turning lane and wait
for the traffic signal.
» Remember, it is legal for a cyclist to take the whole lane by
riding in the centre.
» Turn only when the way is clear of vehicles, cyclists or
pedestrians and the light is green.
» Once you have completed your turn, use your lane-changing
skills to move back, lane-by-lane, as close to the curb as is
appropriate for the road conditions.
Vehicle-Type Left Turn
1. Shoulder check 2. Signal 3. Shoulder check again 4. Take the
lane when the way is clear 5. Signal, shoulder check once more,
and complete your turn. Return to right side of the road
26Always complete your turn into the equivalent of the lane from which you turned. Once the turn is complete, use your lane-
changing skills to move over lane-by-lane to the right, as close to the curb as is appropriate for the road conditions.
1. Shoulder check 2. Signal 3. Shoulder check again 4. Complete your turn when the way is clear 5. Return to the right-hand
side of the road
27ROUNDABOUTS
A cyclist has two choices at a » Wait for a break in traffic to
roundabout. Your choice will enter the roundabout; DO
depend on your degree of comfort NOT enter beside a driver that
riding in traffic. is already in the roundabout
For less confident cyclists Turning Right (Bike A)
» Dismount and walk your bicycle » Signal right as you approach
at the pedestrian crossing the roundabout
» Maintain your signal through
For experienced cyclists:
the roundabout
» Adjust your speed and prepare
» Maintain your signal as you exit
to yield to pedestrians and
to traffic in all lanes of the Going Straight (Bike B)
roundabout » Do not signal as you approach
» Choose your exit and identify the roundabout
the appropriate travel lane
» Signal right prior to your
» Use your lane changing skills exit only
to merge into the appropriate
travel lane before the bike lane
or shoulder ends
» Ride in the centre of your lane;
don’t hug the curb
28Turning Left (Bike C)
» Signal left as you approach the roundabout
» Maintain your signal through the roundabout
» Signal right prior to your exit
Going full circle (U-turn) (Bike D)
» Signal left as you approach the roundabout
» Maintain your signal through the roundabout
» Signal right prior to your exit
» Watch out for drivers’ blind spots
Be cautious.Vehicles may be in the wrong lane or may not signal
correctly for their intention to exit.
29Bike Boxes
Green-painted bike boxes are used to make cyclists easier to When the bike box extends across the entire intersection,
see and make drivers more aware of their presence. Bike boxes cyclists can move from the right side of the road towards the
are located at signalized intersections between the crosswalk left, when the light is red, to make a left turn. Cyclists should
and the stop bar for motorized traffic allowing cyclists to wait signal their intention to turn left.
ahead of queuing traffic at a traffic light.
Turning left from a bike box
• When the light is red:
1. Move to left side of the green area 2. Signal 3. Turn when the light turns green.
• When the light is green:
Use the multi-lane left turn technique(page26) to complete your left turn.
30Jug Handles
At T-intersections, jug handles allow cyclists to reorient their
bike before crossing the road. Use the jug handle like you would
use a two-stage left turn queue box in a four-way intersection.
» On the green signal, move out of your travel lane and
proceed into the jug handle
» Position your bike in the direction you plan to go and wait
for a green signal
» When the light changes to green, proceed through the
intersection into the bike lane in front of the jug handle
31Two-Stage Left Turn Queue Box
Two-stage left turn queue boxes are
provided at signalized intersections to
allow cyclists to wait ahead of traffic
before turning left. The boxes are green
with a white rectangular or square box
and a turn arrow pointing in the direction
cyclists are turning.
» On the green signal, move out of your
travel lane and proceed into the two-
stage left turn queue box. If the box is
located behind the crosswalk, yield to
pedestrians.
» Position your bike in the direction
you plan to go and wait for a green
signal.
» When the light changes to green,
proceed through the intersection into
the bike lane in front of the box.
. On green signal, signal and move out of your travel lane to the queue box.
1
2. Position your bike in the direction you plan to go and wait for green signal
3. Proceed through intersection when the light turns green
32PEDESTRIAN CROSSOVERS
At a crossover, cyclists on the road need to: When crossing with pedestrians:
» Be prepared to stop for pedestrians » Dismount your bike
» Not pass another bicycle or vehicle within 30 metres of » Wait for traffic to stop
the crossover » Make eye contact to ensure motorists see you
» Stop behind the yield line » Walk your bike across the road
» Wait until pedestrians have completely crossed the road
before proceeding
3334
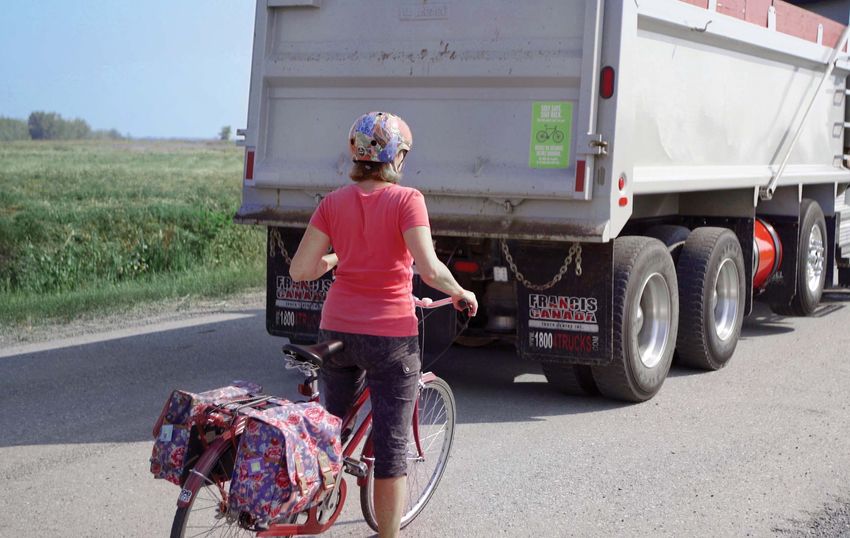
SHARING THE ROAD WITH LARGE VEHICLES
Bus and truck drivers have large blind spots where they are unable to see passing vehicles, particularly
bicycles. It is extremely important to stay out of their blind spots.
Trucks and buses are wider than most passenger vehicles and occupy more space on the road, meaning
cyclists should never share a lane with them. Always watch for trucks and buses that may make a right-hand
turn in front of you.
If you can see the eyes of the driver in their mirror, they can see you. Try to catch the driver’s attention, or
stay well ahead of, or well behind, their vehicle.

Truckdriver’sblindspots
                                                                                                                   35
TRUCKS
Cyclists need to take extra care when entering intersections drivers practice this technique, so always take extra care and watch
with trucks. Trucks have large blind spots and may not be able for right-turning trucks.
to spot cyclists when making right-hand turns. An experienced Position yourself in front or behind a truck near intersections.
truck driver will use lane closure (crowd the curb) to shut down
The experienced cyclist may choose to pass on the left in
the lane to bikes and small vehicles before making a right turn.
the passing lane. If you sit between the curb and a truck at an
Truck drivers then must swing out away from the curb to allow
intersection, you lose the space needed to get out of the way if
the truck’s rear wheels to complete the turn. Not all truck
the truck starts to turn.
36SAFETY TIPS FOR CYCLING AROUND TRUCKS
» Leave extra room when stopped behind a truck to » At low speed and when starting from a stop, bikes tend to
prevent a “roll-back” collision. When a truck driver takes wobble, which can contribute to your handlebars knocking
their foot off the brake to release the clutch, a heavy into the vehicle beside you. Cyclists should gear down at
load can cause the truck to roll back. stops to reduce the wobble effect at start-up.
» Trucks require a lot of space to stop. Always ensure » Do not rely on your bell, horn or voice to alert the truck
there is a large distance between your bike and a truck driver of your presence. Respect the driver’s limitations
before you pull in front. and keep a safe distance away.
» The length of a truck affects the driver’s visibility. If you’re » Trucks passing cyclists can create a gust of wind powerful
riding behind a truck, stay far enough back so that the driver enough to throw a cyclist off balance. When you can
is better able to see you in the side-view mirror. anticipate a truck coming up on your side, stop pedalling
» Ride on the inside section of a bike lane when a truck and concentrate on keeping your front wheel straight.
is near you. If you’re sharing the road, ride far enough
behind the truck so that you appear in its mirrors.
37SCHOOL BUSES STREETCARS When the upper red lights of a stopped school bus are flashing By law, you must pass streetcars on the right. When they stop to and the flashing stop arm is extended, traffic in both directions pick up or let off passengers, you must stop two metres behind must stop. If you are coming from behind the bus, stop at least the rear door until all passengers have boarded and disembarked 20 metres away, and a safe distance when approaching from on the sidewalk. the opposite direction. The only exception is if you are on a road divided by a median strip. In this case, only vehicles approaching a school bus from behind must stop. You may not proceed until the bus resumes motion or the red signal lights have stopped flashing and the stop arm is retracted. Failing to stop for a school bus is against the law and, if charged, you could be subject to a fine of $400 to $2,000. This law applies on all roads and to all drivers, including bicyclists. 38
39
TRAVELLING IN GROUPS
There are a few safety tips to keep in mind when travelling in groups.
» Ride in single file on two-lane roads or when traffic is heavy on
    multi-lane roads.
» Keep at least one metre apart from other cyclists in the group and
    keep several lengths apart when going downhill at high speed.
If you are travelling in a large group, break up into smaller groups of
about four to six. Keep about one kilometre between groups to allow
traffic to pass.

                                                                          39
RIDING ON SIDEWALKS AND SHARED
PATHS
Cycling on sidewalks can be dangerous. Many collisions between cyclists and
motor vehicles occur where sidewalks, driveways and parking lot entrance/exits
become unexpected intersections. Make sure you know and obey your local by-laws
concerning sidewalk riding.
When riding on shared bike/walking paths, cyclists should:
» Ride at a slow speed
» Use a bell or horn to signal your presence when approaching pedestrians
from behind
» Be ready to stop and allow pedestrians to go first
» Stop before every intersection and look all ways for motor vehicles
» Watch for motor vehicles entering or exiting from driveways/laneways
» Walk your bike across a crosswalk (it is illegal to ride across a crosswalk)
When walking your bike on a roadway where there are no sidewalks, you are
considered a pedestrian and you should walk on the left-hand side of the road facing
traffic. If it is not safe for you to cross the road to face traffic, you may walk your bike
on the right-hand side of the road.
Always check for local regulations that affect where you may cycle in your municipality.
4041
RIDING WITH CHILDREN
Use care and caution when cycling with young children who are too young to ride by
themselves. Keep in mind that a child bike seat mounted behind the bicycle seat alters
your centre of gravity while riding and may increase the risk of losing balance.
It’s the law! In Ontario,
Take extra caution when placing and removing the child from the carrier. Never leave every cyclist under the age
your bike unattended when a child is in the carrier. An alternative way to carry children of 18 must wear an approved
is to use a child bicycle trailer towed behind your bicycle. Bike trailers are stable and bicycle helmet. Children are
not prone to tipping. Most trailers are attached either directly to the bike frame or the required to wear an approved
seat post by means of a u-joint. bicycle helmet when
riding in a child carrier
or a bicycle trailer.
41OBSTACLES 4
AND OTHER
HAZARDS
Surface hazards exist on every street but they are most common close to the curb,
where much of your riding is done.
Cyclists must always watch for:
» Holes and depressions or raised surfaces that can buckle wheels
or throw the rider. Avoid them with gradual course changes and go through
them slowly.
» Loose or slippery surfaces that can cause you to lose control. Go over
them slowly and corner carefully, keeping the bicycle as upright as possible.
» Sharp objects can cut or puncture tires, sometimes causing blowouts that
result in spills or crashes. Watch for nails, tacks, glass, staples, wire, pins, sharp
rocks and sharp pieces of metal.
42If you get a flat tire, slow down gently to
a stop and walk your bike to avoid ruining
the tires and rims.
If an obstacle forces you to move to
the left:
1. Signal your intentions in advance.
2. Look over your left shoulder to see
whether the way is clear.
3. Maintain a trajectory that is as
straight as possible.
4. Return to the right-hand side of the
road (initial position) as soon as you
pass the obstacle.
43RAILWAY AND STREETCAR TRACKS
Railway and streetcar tracks are very dangerous. Crossing at the wrong angle
could cause you to fall or damage your bicycle wheels. Remember, tracks are
slippery when wet.
Always cross the tracks at right angles. If the tracks are at an angle to the road, you
may need a full lane. Use hand signals to position yourself in the lane where you have
enough room to cross the tracks at a 90 degree angle. Go slowly and stand on the
pedals when crossing over particularly bumpy tracks.
If it is too difficult to cross the tracks safely, dismount and walk your bike
across instead.
1. Shoulder check 2. Signal 3. Shoulder check 4. Move left
5. Shoulder check, signal, shoulder check 6. Cross at right angle
4445
WEATHER HAZARDS
Wet weather makes roads slippery and cyclists need to take extra caution when riding
in wet conditions.
Braking – Most bicycle brakes work poorly in the rain. If steel rims, ride slowly
and allow extra time for braking. Brake hard only after your brakes start to grab.
Aluminium and alloy rims work best in wet weather.
Puddles – Avoid puddles, if possible, or go through them slowly.
Metal, paint and wood – Metal plates, service covers, tracks and painted lines are
all very slippery when wet. Slow down and corner carefully on all such surfaces.
Cornering – You have less traction on wet roads, so corner slowly with little leaning.
Visibility – Visibility can be poor in wet weather. Wear bright and reflective
outerwear garments so that drivers can see you better.
455
POWER-ASSISTED
BICYCLES
(ELECTRIC BIKES/e-BIKES)
Power-assisted bicycles (e-bikes) are motorized bicycles that assist the rider in
pedalling and increase the amount of power to the wheel.
WHAT IS AN e-BIKE?
E-bikes in Ontario must have:
» steering handlebars » a maximum weight of 120 kg
» working pedals » a permanent label from the
» an electric motor not exceeding manufacturer in both English and
500 Watts French stating that your e-bike
conforms to the federal definition
» a maximum speed of 32 km/h of a power-assisted bicycle
4647
It is illegal to modify your e-bike’s motor to make it more powerful or to
increase the speed of your e-bike.
WHAT DO e-BIKE RIDERS NEED?
You don’t need a driver’s licence, vehicle permit, licence plate or motor
vehicle insurance to ride an e-bike, but you do need to: Traffic laws that apply to
bicycles also apply to e-bikes,
» Be 16 years of age or older so you must follow the same
» Wear an approved bicycle or motorcycle helmet rules of the road as regular
» Keep your e-bike in good working order cyclists.
47ADVICE FOR
e-BIKES RIDERS
1. Get familiar with your electric bicycle, including the extra 6. Don’t use the front brake alone. Be extra cautious when
power and weight, in a calm and safe environment before braking at sharp corners and when the road is wet or
you go out in traffic. slippery.
2. Remember that the engine may continue its pull a few 7. Make sure to have your full attention focused on traffic –
seconds after you have stopped pedaling. mobile/music devices take away your focus.
3. Be aware of your surroundings. Your higher speed may 8. Always wear your helmet (it’s the law!).
surprise other road users. 9. When not signaling, always keep both hands on the
4. Adjust your speed to road and traffic conditions. handlebars.
5. Make yourself as visible as possible in traffic. 10. Make sure that your bicycle is well maintained.
4849
WHERE CAN e-BICYCLISTS RIDE?
You can ride your bike or e-bike on most roads and highways where conventional
bikes are permitted, with some exceptions. You CANNOT ride your e-bike:
» On certain provincial controlled access highways, such as the
400 series, the Queen Elizabeth Way, the Ottawa Queensway
or the Kitchener-Waterloo Expressway
» On municipal roads, including sidewalks, where bicycles are banned under
municipal by-laws
» On municipal roads, sidewalks, bike paths, bike trails or bike lanes where e-bikes
are prohibited
The following are not bicycles and are subject to different rules for use
in Ontario.
» Limited-speed motorcycles
» Mopeds (motor-assisted bicycles)
» Low-speed vehicles
» Electric and motorized scooters
» Pocket bikes
» Segways
Visit Ontario.ca/transportation for more information.
49ROAD SIGNS 6
AND TRAFFIC SIGNALS
TRAFFIC SIGNS FOR CYCLISTS
Bicycles are Cyclist are required
No bicycles allowed
permitted on to dismount and walk
on this road.
this road. their bikes.
Stop and wait until the way is clear before
Diamond signs indicate lanes for entering the intersection.
specific types of vehicles, either all the
time or during certain hours. They
can include: buses, taxis, bicycles and Yield to traffic in the intersection or close
vehicles with three or more people. to it. Stop if necessary and go only when
the way is clear.
50Railway crossing
Cyclists are expected
ahead. The sign also Roadwork ahead. The
to share the space
shows the angle at speed limit and lanes
on the path with
which the railway may be reduced.
pedestrians.
tracks cross the road.
Directs pedestrians,
Cyclists are
cyclists and other One-way road. Travel
required to yield to
users to a specific in direction of arrow.
pedestrians.
lane of the path.
TRAFFIC SIGNALS
A flashing green light or left-pointing green arrow with a green light permits you to turn left, go straight
ahead or turn right from the proper lane. Oncoming traffic still faces a red light.
Flashing yellow light: Slow down and proceed with caution through intersection.
Flashing red light: Stop and move through the intersection when it is safe to do so.
Similar to regular traffic signal lights, bicycle traffic signal lights direct cycling traffic at intersections. If
both a bicycle traffic signal and a regular traffic signal apply to the same lane, cyclists in that lane must
obey the bicycle traffic signal.
Remember, during a power failure, intersection traffic lights will not
work. Treat the intersection as an all-way stop. Yield the right-of-way
and use caution.
51THE LAW 7
AND CYCLISTS
A bicycle is considered a vehicle under the Ontario Highway Traffic Act (HTA). This
means that cyclists have the same rights and responsibilities to obey all traffic laws as
other road users and they can be charged for disobeying traffic laws. The following
are key sections of the HTA relating to cyclists:
(HTA section) Offence Set Fine
HTA 62(17) Improper lighting $ 85.00
HTA 64(3) Improper brakes $ 85.00
HTA 75(5) No or defective bell/horn $ 85.00
HTA 104 Fail to wear proper helmet $ 60.00
HTA 140(1)(a) (b) (c) Fail to yield to pedestrian $ 150.00*
HTA 140(6) / 144(29) Cyclist - ride in a crossover or crosswalk $ 85.00
HTA 142 Fail to signal a turn $ 85.00*
52(HTA section) Offence Set Fine
HTA 144/136 Traffic signals and signs $ 85.00*
HTA 144(10) Fail to obey bicycle traffic control signal $ 85.00*
HTA 144(18) Fail to stop at a red light $ 260.00*
HTA 147 Slow moving traffic travel on right side $ 85.00*
Bicycle fail to turn out to right when
HTA 148(6) $ 85.00*
overtaken
HTA 153 Drive wrong way - one way street $ 85.00*
Fail to stop two metres behind streetcar
HTA 166 $ 85.00*
doors and yield to passengers
HTA 175(12) Fail to stop for stopped school buses $ 400.00
HTA 178(1) Attaching to a vehicle $ 85.00
Passengers not allowed on bicycle built
HTA 178(2) $ 85.00
for one
HTA 218 Cyclist - fail to stop or to identify self $ 85.00
HTA Reg 630 Riding on expressways $ 85.00
For complete information on Ontario’s Highway Traffic Act and the laws and
regulations pertaining to cycling, visit ontario.ca/laws
* increased fines when committed in a community safety zone
53FOR MORE INFORMATION ON SAFE CYCLING
AND CYCLING ACTIVITIES, VISIT:
Cycling in Ontario ontario.ca/cycling
Cycling in Toronto toronto.ca/cycling
Ontario Cycling Association ontariocycling.org
Citizens for Safe Cycling safecycling.ca
Cycling Canada canbikecanada.ca
CAA Bike Safety bikesafety.caa.ca
Share the Road Cycling Coalition sharetheroad.ca
5455
ROAD SAFETY.
55For more information about cycling safety, contact:
MTO Info General Inquiry:
1-800-268-4686 or (416) 235-4686 in GTA
TTY Users:
1-866-471-8929 or (905) 704-2426 in Niagara
Website: ontario.ca/transportation
For more information on the Highway Traffic Act, Statutes and
Regulations of Ontario, visit ontario.ca/laws
56You can also read