ENJOY IT - MANUAL WIFI LAMPCAM HOS-X20 - BLAUPUNKT
←
→
Page content transcription
If your browser does not render page correctly, please read the page content below
Manual
WiFi LampCam HOS-X20

                                Enjoy it.

                       Home Observation System
EN   Manual                        4
     WiFi LampCam HOS-X20
DE   Gebrauchsanleitung            13
     WiFi LampCam HOS-X20

FR   Manuel                        22
     WiFi LampCam HOS-X20

IT   Manuale                       31
     WiFi LampCam HOS-X20

ES   Manual de usuario             40
     WiFi LampCam HOS-X20

PL   Instrukcja obsługi            49
     WiFi LampCam HOS-X20

FI   Käyttöopas                    58
     WiFi LampCam HOS-X20

                            Enjoy it.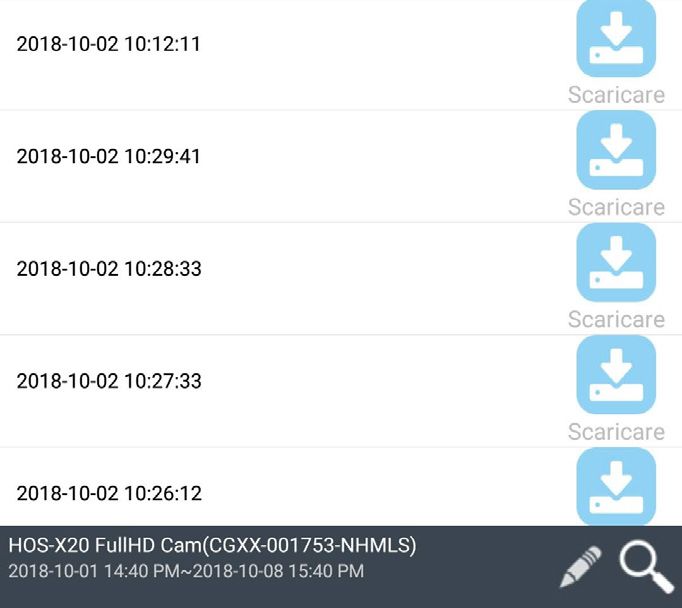
English | Manual
English

          1. Kit Content

                         a                                   b                                 c
                        HOS-X20                             Antenna                            Mounting
                        LampCam                                                                Bracket

                         d                                   e                                  f
                        Installation                        1x Hex Wrench                      Reset Pin
                                                            2x Screws
                        Positioning Map                     2x Plastic
                                                            Dowels

          2. Product Description

                                                 Antenna

               LED Lamp

          Camera Lens                                                                          Speaker
               PIR Sensor                                                        USB   RESET

                                                                                               Reset Button
              Microphone                                                                       Power LED
              Light sensor                                                                     Indicator
                                                                                               Network
                Mounting                                         MicroSD                       Indicator
                 Bracket &                                       Card Slot                     Micro USB
                    Power                                                                      port
              Transformer

          NOTE:
          This manual explains the installation and 1st time configuration of the HOS-X20.
          For any further information or latest updated versions, please visit our website
          http://security.blaupunkt-service.com

          4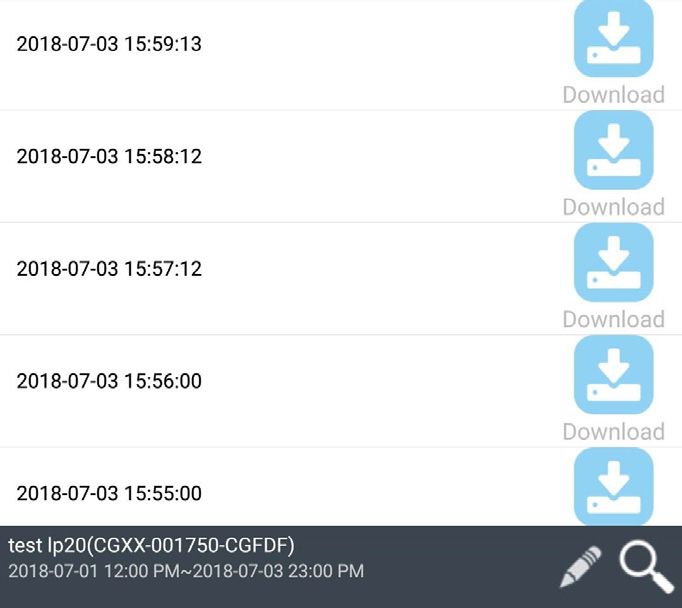
3. Installation

                                                                                                                   English
3.1. IMPORTANT – Read before installing
••      Before the installation, please make sure the make sure the wall structure / installation surface can at
        least support 3x weight of the LampCam.
••      Check your Wi-Fi signal strength. To make sure that your LampCam’s connection is as stable as
        possible, make sure that the Wi-Fi signal is very strong at the location of your LampCam. The
        suggested Internet bandwidth is 1Mbps (upload/download speed).
••      Recommendation: Avoid the lens aiming directly into the sunshine and if possible install the
        LampCam under a roof or eave (Pic.1) or a position which offers a good protection against heavy
        rain.
••      If you desire to install a microSD card we recommend doing it before the installation process. Please
        refer to microSD card installation for more information.
••      For best performance, please install the LampCam at a height of 2.5 meters. (Pic.2)

                                       Pic.1                                    Pic.2
                                                                                5m PIR Detection Range

                                                                                        Motion Detection 90°
                                                             2.5m Hight

3.2. Micro SD Card installation
     Step 1:      At the bottom of the LampCam open the compartment by
                  unscrewing the screw A .                                           A
     Step 2:      Install the SD-Card into the indicated SD-card slot.

     Step 3:      Close the compartment by placing the cover and fasting the screw.

     NOTE:
     The Micro SD card is mandatory for local recording. Please make sure the MicroSD is CLASS10 rated.
     Supported are MicroSD cards from 8GB to 128GB.

3.3. Optional: Pre-Installation testing of the LampCam
Before installing it is possible to turn ON the LampCam via the micro USB port with a power bank or 2A
micro USB power supply. Wait until the LampCam makes a double beep tone and the Blue LED indicator
at the bottom of the LampCam starts flashing. (This process would take around 60 seconds, make sure the
LED is flashing in blue). Then refer to chapter “4.1. Learn in a LampCam”.
Note: The led light of the LampCam won’t turn on when connected via USB.

                                                                                                               5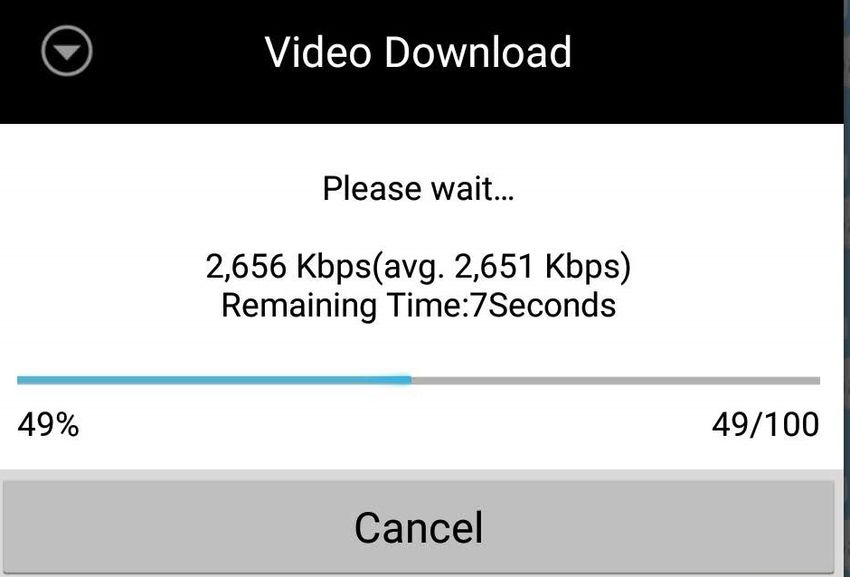
3.4. LampCam Installation
English

                                                                   5
              IMPORTANT:
              Setup and installation of the LampCam should
              only be performed by a person with adequate                A
              knowledge in handling electricity power.
              DO NOT attempt installation if you do not
              possess required skill.

              Step 1:
          Please make sure you have turned OFF the power
          from the circuit breaker before this step.                Step 6:
                                                                  Lead the AC wires from the wall through the back
                                                                  of mounting bracket and connect them in the
           1                                                      following way:
                                                                  - Phase wire (brown) to terminal block
                        Off                                        with brown cable.
                                                                  - Neutral wire (blue) to terminal block
                                                                   with blue cable.
                                                                  - Protective earth wire (Yellow/Green): Leave it
                                                                   hanging out, it will be connected in Step 8.
                                                                  Now place the terminal block back into the
                                                                  mounting bracket.

                                                                   6
              Step 2:
          Find the desired installation location for the
                                                                                          terminal blocks
          LampCam. The installation location needs to have
          220V AC wires (grounding, phase and neutral wire).
          (e.g. of a previously installed Outdoor Lamp.)
                                                                                                 Up

              Step 3:
          Place the included installation positioning map on
          the wall and mark with a pencil the two holes that
          need to be drilled.
                                                                    Step 7:
              Step 4:                                             Take the screws included in the installation
                                                                  accessories set and fasten the mounting bracket to
          Drill the 2 mounting holes on the wall. Take            the wall. Make sure that the “UP” sign is at the top.
          the plastic dowels included in the installation
          accessories set and insert them into the 2 holes that
          where just drilled.                                      7
                                                                                     Up
              Step 5:
          Perforate a small hole with a sharp object at
          position A in the rubber pad and lead the AC
          wires from the wall through the back of the
          mounting bracket to the terminal blocks.

          6
Step 8:                                              Step 11:

                                                                                                              English
Take the protective earth wire (yellow/green) and   Adjust the tilt angle of the LampCam by fasting the
connect it to the green screw with an earth icon at “adjustment screws”.
the back of the camera.
Then connect the cable from the LampCam to the       11
black junction box located at the mounting bracket.

 8

          Up
                                                                                  tilt adjusment screws
                      Connect here

 Step 9:
Install the LampCam on the mounting bracket.
                                                      Step 12:
 9                                                   Adjust the horizontal angle of the LampCam approx
                                                     30 degrees to left or right. Loosen the screw on
                                                     the back using the hex wrench included in the
                                                     installation accessories set. Screw it firmly when you
                                                     are done.

                                                     12

                                                                  pan angle
                                                              adjusment screws

 Step 10:
Fasten the screw to the mounting bracket using the
included hex wrench.

                                                      Step 13:
10                                                   Once the installation is completed turn on the
                                                     power from the circuit breaker and the led lamp of
                                                     the LampCam will power up.

                                                     13

                                                                                                          7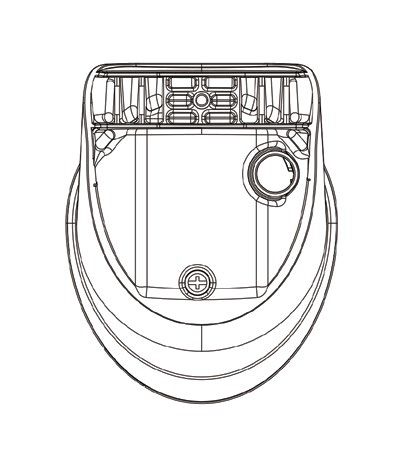
4. Usability of LampCam and APP
English

          4.1. Learn in a LampCam:
              Step 1:   Download and install the “OMGuard HD” APP
                                                                                                        For iOS

                        to your smartphone.
                                                                                                      and Android

              Step 2:   Take your smartphone, go to your Wi-Fi settings and select the new Wi-Fi Network starting
                        with HD (example HD-15584) to connect to it. This network is a Wi-Fi created by the
                        LampCam to enable the setup procedure.

              Step 3:   Enter the LampCam Wi-Fi default password 12345678 and save the settings to connect.
                        You will not have internet connection, but you will be able to continue the LampCam setup
                        procedure.

              Step 4:   Now start the OMGuardHD App and tap the “add camera”              button.

              Step 5:   At “System Name” type any desired name for your LampCam. E.g. “Front door”

              Step 6:   Tap “Scan DID label” for Android) or    5
                        the QR icon (for iOS) and scan the QR                      Front door
                        code label located at the back of the
                        LampCam.
                                                                7
              Step 7:   At Security code enter the default
                        Security Code 123456.
                                                                                                8
              Step 8:   Tap “Save”.
                                                                     6

          4.2. Wi-Fi settings:
              Step 1:   On the LampCam menu tap the config LampCam icon          and tap the settings icon
                        from the desired LampCam. Then tap the “Advanced” button

              Step 2:   Enter the “Admin password” (default 123456).

              Step 3:   For security reasons the APP will request to modify the default Admin password.
                        (The Admin password will be used to access the settings menu and to arm / disarm the
                        LampCam). We recommend to write down this password in a safe place. Otherwise if you
                        forget it you would need to factory reset the camera.

              Step 4:   Scroll down to Wi-Fi settings and tap “Manage Wi-Fi network”

              Step 5:   Select your home Wi-Fi Access Point from the scroll down menu and input your Wi-Fi
                        password. Then tap “OK”

              Step 6:   The LampCam will be offline for around 60 seconds while rebooting. When the LampCam
                        connects to the Wi-Fi router correctly, the blue Network Indicator LED will be turned ON
                        permanently. From now on, you can remotely access to the LampCam at any time and
                        from any place.

          8
5. LampCam configuration

                                                                                                                        English
On the LampCam menu list tap the config LampCam icon and tap the settings icon from the desired
LampCam. Then tap the “Advanced” button to enter the “Advanced Settings Menu”. For security reasons
you will be asked to enter the “Admin password”.

5.1. Sensitivity Setting:
Scroll down to “Sensitivity Setting”. At “Detect Mode” select “PIR” to activate PIR motion detection (factory
default setting). The PIR motion detection has a 5m detection range. To deactivate motion detection
select “OFF” .

5.2. Lighting Setting:
Scroll down to “Lighting Setting” and select the desired “Lighting auto mode”.
By trigger: Select this option to turn the light ON for 1 minute after PIR motion detection. (Please check
in chapter 5.1. that PIR detection is activated) After one minute the light will turn OFF. (PIR needs to be
selected on “Sensitivity Settings”). Light will turn ON only if there is a low environment illumination.
By manual Schedule: Select this option to turn the light ON according to a pre-
configured schedule. To set up a schedule select “Lighting Schedule Modify”.
Select a Starting time: Click the 00:00AM blue button at the top. At the top select
the days of the week to be included. Select the time when the light should be
turned ON. Time format is 12H, select AM or PM to define the time.
Select a Ending time: Click the 00:00AM black button at the bottom. At the
bottom select the days of the week to be included. Select the time when the light
should be turned OFF. Time format is 12H, select AM or PM to define the time.
Click the “Save” button at the bottom to save all the settings.
Note: It is mandatory to select the days of the week, otherwise the schedule wont work.

 Note:
 PIR trigger for motion detection and manual schedule will work only under AUTO mode. Refer to
 chapter “6. Live View Functionalities” for more details.

5.3. SD Card Setting:
Click “Format SD-Card” to perform a SD-Card format. This will erase all the videos and images on the SD-
Card. If the “Over write SD-Card” check box is activated the LampCam will overwrite the oldest recording
once the storage is full. If deactivated the LampCam won’t record any event once the storage is full.

5.4. Notifications:
Push notifications: Scroll down to “Notify Enable”. Enable       SSL            Activate / deactivates SSL encryption
/ Disable push notifications when movement is detected
under arm mode. (Enabled by default)                             SMTP Server Input the server SMTP address.
                                                                                To learn more, check instructions
                                                                                from your e-mail provider.
                                                                                For Gmail use smtp.gmail.com
Email notifications: To enable the same information as push
notifications for e-mail, scroll down to “Email Setting” and     SMTP Port      If SSL is not activated use “25”
                                                                                If SSL is activated use “465”
click “Set e-mail”. Config according to the right hand chart.
                                                                 Username       The user name of the sender email
Note: Ensure that “Two-factor authenticator” is disabled on                     account. E.g: username@gmail.com
your sending e-mail account. (e.g. Google, Outlook365). To       Password       The password of sender email
learn more, check instructions from your e-mail provider.                       account.
                                                                 Receiver       Receiver email address

                                                                                                                    9
6. Live View Functionality
English

           Step 1:   Launch the OMGuard HD app.

           Step 2:   On the LampCam list menu double tap the desired LampCam to access livestream.

           Step 3:   For security reasons the first time you log in to the LampCam the APP will request to
                     modify the default Security code. (The Security Code is used to establish a communication
                     between the LampCam and the smartphone. This is not the same as the Admin password).
                     We recommend to write down this password in a safe place. Otherwise if you forget it you
                     would need to factory reset the camera.

           Step 4:   Refer to the bellow table to learn more about the operations that are available on the Live
                     Stream menu.

                                     Click on the arm / disarm button to arm or disarm the LampCam.
                                     The App will ask for the admin code to perform this action.
                                     If the camera detects movement during arm mode, it will send a push
                                     notification and start a 60s video recording.
                                     Note: Push notifications and PIR motion detection need to remain en-
                                     abled in advanced settings (enabled by default).

                                     Take a snapshot from the current video stream.
                                     The Snapshot will be stored on the smartphone and can be found on
                                     your smartphone photo gallery.

                                     Start a 60 seconds video recording without pause to the LampCam
                                     micro-SD card. SD-Card Is mandatory for this feature.
                                     To find the videos please refer to the “Event playback” menu.

                                     Activates / deactivates the microphone to listen through LampCam.

                                     Push To Talk button: Push this button and keep pressing to talk from your
                                     Mobile Phone through the LampCam. To stop talking release the button.

                                     Tap this button to launch a 60 seconds siren alarm. It’s possible to stop
                                     the siren by tapping the icon again.

                                     Return to LampCam list menu

                                     Slide the bar to adjust the brightness of the LampCam from 0 to 800lm.
                                     Tap the bulb icon to turn the light ON / OFF or AUTO.
                                     ON: The light of the LampCam will be turned ON permanently.
                                     OFF: The light of the LampCam will be turned OFF.
                                     AUTO: The light will turn ON automatically according to your lighting
                                     trigger setting. see chapter 5.2.
                                     PIR trigger for movement detection and manual schedule will work only
                                     under AUTO.

          10
7. Event Playback
English
Important: For this feature to work it is mandatory to have a micro SD-card installed on the LampCam.
Refer to chapter “3.2. Micro SD Card installation”.
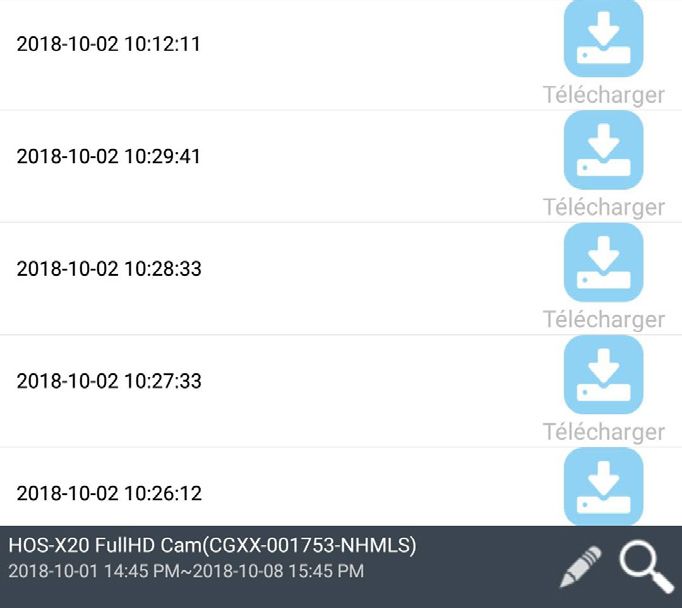
Step 1: Step 4:
On the LampCam list menu tap the config To download a video click the right download
LampCam icon and then tap the notepad icon from icon from the desired video. The video would be
the desired LampCam. downloaded to your smartphone and could be
found in your smartphone gallery. A downloaded
video will be displayed with the name in red.
Step 2:
Select a starting and ending point for the LampCam
to search for video recordings. Then click “OK”.
Step 5:
To watch the video without downloading it you can
click on the desired video and the video. Now the
video will be streamed to your smartphone.
Step 3:
The LampCam will display all the video recordings
from the previous time range. Each video will
display the date and time from when the video was
recorded.
Step 6:
To delete a video from the micro-SD card select the
pencil icon, then select the video and tap the trash
icon.
118. Maintenance
English
•• Please turn off the power and unplug the power cable, if there is any smoke, disgusting smell, or
noise. Please contact your local retailer or customer service center for help.
•• Avoid oil stain and or chemicals tarnishing and damaging the lens surface.
•• All the examination and repair work should be done by qualified service engineers. We are not liable
for any problems caused by unauthorized modifications or attempted repair.
8.1. Firmware Upgrade
The LampCam will look for firmware upgrades automatically. When the
LampCam detects a new firmware it will download it automatically. The
next time the user logs on the LampCam the app will ask if the user want to
upgrade the system. Click “OK” to start the Firmware upgrade. This process
takes around 5 minutes.
8.2. Factory Reset
Step 1: At the bottom of the LampCam open the compartment by unscrewing the screw.
Step 2: Use the included reset pin and press the reset button for 10 seconds.
Step 3: The power LED will starting flashing and factory reset will began.
Step 4: This process would take around 60 seconds. Wait until the LampCam makes a double beep
tone and the Blue LED indicator starts flashing.
Step 5: Close the compartment by placing the cover and fasting the screw into it.
SB RESETU
reset button reset pin
9. Support
For more product information, please visit
www.blaupunkt.com/service
Blaupunkt Competence Center Security & Care
www.blaupunkt.com
Security Brand Pro GmbH
Mondstrasse 2-4
85622 Feldkirchen-München, Germany
© Technical changes and errors excepted
NOTE:
•• This manual is for reference only. Slight difference may be found in the user interface.
•• All the designs and software here are subject to change without prior written notice.
•• All trademarks and registered trademarks mentioned are the properties of their respective
owners.
•• Please visit our website or contact your local service engineer for more information at:
http://security.blaupunkt-service.com
12Deutsch | Gebrauchsanleitung
1. Lieferumfang
Deutsch
a b c
HOS-X20 Antenne Montage-
LampCam halterung
d e f
Montage- 1x Imbusschlüssel Reset-Nadel
2x Schrauben
schablone 2x Kunststoffdübel
2. Gerätebeschreibung
Antenne
LED-Lampe
Kameraobjektiv Lautsprecher
PIR-Sensor USB RESET
Reset-Knopf
Mikrofon Stromindikator
Lichtsensor LED
Netzwerk-
Montage- MicroSD- indikator LED
halterung & Kartensteckplatz Micro-USB-
Netzteil Anschluss
HINWEIS:
In dieser Anleitung wird die Installation und Erstkonfiguration der HOS-X20 erläutert.
Für weitere Informationen oder neueste aktualisierte Versionen besuchen Sie bitte unsere Website:
http://security.blaupunkt-service.com
133. Montage
3.1. WICHTIG - Lesen Sie dies vor der Montage
•• Bitte stellen Sie vor der Installation sicher, dass die Wandstruktur/ der Montageuntergrund
Deutsch
mindestens das dreifache Gewicht der LampCam tragen kann.
•• Überprüfen Sie Ihre WLAN-Signalstärke. Um sicherzustellen, dass Ihre LampCam-Verbindung so
stabil wie möglich ist, vergewissern Sie sich, dass das WLAN-Signal am geplanten Montageort so
stark wie möglich ist. Die empfohlene Internetbandbreite beträgt 1 Mbit/s (Upload- / Download-
Geschwindigkeit).
•• Empfehlung: Vermeiden Sie es, die Linse direkt in die Sonne zu richten und installieren Sie die
LampCam wenn möglich unter einem Dach, einer Traufe (Abb.1) oder einer Position, die einen guten
Schutz gegen Starkregen bietet.
•• Wenn Sie eine MicroSD-Karte installieren möchten, empfehlen wir, dies vor der Installation zu tun.
Weitere Informationen finden Sie in Abschnitt “3.2. Installation der MicroSD-Karte).
•• Für eine optimale Leistung installieren Sie die LampCam in einer Höhe von 2,5 Metern. (Abb.2)
Abb.1 Abb.2
5m PIR Reichweite
Bewegungerkennung 90°
2.5m Höhe
3.2. Installation der MicroSD-Karte
Schritt 1: An der Unterseite der LampCam öffnen Sie das Fach durch
Lösen der Schraube A . A
Schritt 2: Setzen Sie die SD-Karte in den angegebenen SD-Kartensteckplatz ein.
Schritt 3: Schließen Sie das Fach, indem Sie die Abdeckung anbringen und die Schraube festziehen.
HINWEIS:
Die MicroSD-Karte ist für die lokale Aufzeichnung erforderlich. Bitte stellen Sie sicher, dass es sich um
eine CLASS10 MicroSD handelt. Unterstützt werden MicroSD-Karten von 8 GB bis 128 GB.
3.3. Optional: Testen der LampCam vor der Installation
Vor der Installation ist es möglich, die LampCam über den Micro-USB-Anschluss mit einer Power Bank
oder einem 2A Micro-USB-Netzteil einzuschalten. Warten Sie, bis die LampCam einen doppelten
Signalton ausgibt und die blaue LED an der Unterseite der LampCam zu blinken beginnt. (Dieser Vorgang
dauert etwa 60 Sekunden. Stellen Sie sicher, dass die blaue LED blinkt). Informationen zum Einlernen der
Lampcam finden Sie in “Kapitel 4.1. “.
Hinweis: Das LED-Licht der LampCam schaltet sich bei Anschluss über USB nicht ein.
143.4. Montage der LampCam
HINWEIS:
5
Die Installation und Montage der LampCam
sollte nur von einer Person durchgeführt A
Deutsch
werden, die über ausreichende Kenntnisse im
Umgang mit Strom verfügt. Falls Sie NICHT über
die erforderlichen Fähigkeiten im Umgang mit
Strom verfügen, sollten Sie in keinem Fall die
Installation selbst durchführen.
Schritt 1:
Bitte stellen Sie sicher, dass Sie vor diesem Schritt die Schritt 6:
Stromversorgung des Leistungsschalters an Ihrem
Sicherungskasten ausgeschaltet haben. Führen Sie die Kabel von der Wand durch die
Rückseite der Halterung und verbinden Sie diese
1 wie folgt:
- Leiter (braun) an die Anschlussklemme mit
Aus braunem Kabel anschließen.
- Neutralleiter (blau) an die Anschlussklemme mit
blauem Kabel anschließen.
- Schutzleiter (gelb / grün): Lassen Sie diesen
heraushängen, er wird in Schritt 8 angeschlossen.
Setzen Sie die Anschlussklemmen nun wieder in die
Halterung.
6
Schritt 2:
Suchen Sie den gewünschten Installationsort für Anschlussklemmen
die LampCam. Der Installationsort muss über ein
230V Wechselstromkabel (Erdungs-, Phasen- und
Neutralleiter) verfügen. (z. B. von einer zuvor Oben
installierten Außenleuchte.)
Schritt 3:
Legen Sie die mitgelieferte Montageschablone an
die Wand und markieren Sie mit einem Bleistift die
beiden Löcher, die gebohrt werden müssen.
Schritt 7:
Schritt 4: Nehmen Sie die im Lieferumfang des
Installationszubehörs enthaltenen Schrauben und
Bohren Sie die 2 Befestigungslöcher in die befestigen Sie die Halterung an der Wand. Stellen
Wand. Nehmen Sie die Kunststoffdübel, die im Sie sicher, dass das”Oben-Zeichen” oben steht.
Installationszubehörsatz enthalten sind, und führen
Sie diese in die 2 Löcher ein, die gerade gebohrt 7
wurden.
Oben
Schritt 5:
Perforieren Sie ein kleines Loch mit einem spitzen
Gegenstand an Position A in der Gummiunterlage
und führen Sie die Kabel von der Wand durch die
Rückseite der Halterung zu den Anschlußklemmen.
15Schritt 8: Schritt11:
Nehmen Sie den Schutzleiter (gelb / grün) und Stellen Sie den Neigungswinkel der LampCam mit
verbinden Sie ihn mit der grünen Schraube (mit den “Neigungsverstellschrauben” ein.
einem Erdungssymbol) auf der Rückseite der
Kamera. Verbinden Sie dann das Kabel von der
LampCam mit der schwarzen Anschlussdose an der 11
Deutsch
Montagehalterung.
8
Oben
Neigungsverstell-
schrauben
Hier anschließen
Schritt 9:
Installieren Sie die LampCam an der Montage-
halterung. Schritt12:
9 Stellen Sie den horizontalen Winkel der LampCam
um ca. 30 Grad nach links oder rechts ein.
Lösen Sie die Schraube auf der Rückseite mit
dem im Installationszubehörsatz enthaltenen
Inbusschlüssel. Schrauben Sie die Schraube fest
sobald der optimale Winkel eingestellt ist.
12
Einstellschraube
(horizontaler Winkel)
Schritt10:
Befestigen Sie die Schraube mit dem mitgelieferten
Imbusschlüssel an der Halterung.
Schritt13:
10 Sobald die Installation abgeschlossen ist, schalten
Sie den Strom am Sicherungskasten ein und die
LED-Lampe der LampCam schaltet sich ein.
13
An
164. Verwendung von LampCam und App
4.1. Einlernen der LampCam:
Schritt 1: Downloaden und installieren Sie die “OMGuard HD” App
Für iOS
Deutsch
auf Ihrem Smartphone.
und Android
Schritt 2: Nehmen Sie Ihr Smartphone, gehen Sie zu Ihren WLAN-Einstellungen und wählen Sie das
neue WLAN-Netzwerk beginnend mit HD (Beispiel HD-15584). Verbinden Sie sich nun
mit diesem WLAN-Netzwerk. Dieses WLAN-Netzwerk ist ein von der LampCam erstelltes
Netzwerk, um den Setup-Vorgang zu ermöglichen.
Schritt 3: Geben Sie das LampCam WLAN-Standardkennwort 12345678 ein und speichern Sie die
Einstellungen für die Verbindung. Sie haben keine Internetverbindung, aber Sie können die
LampCam-Einrichtung fortsetzen.
Schritt 4: Starten Sie nun die OMGuard HD App und drücken Sie auf das Icon “Kamera hinzufügen”
Schritt 5: Geben Sie unter “Systemname” einen beliebigen Namen für Ihre LampCam ein, z.B. “Haustür”.
Schritt 6: Drücken Sie auf “DID-Etikett 5
scannen” (für Android) oder das Haustür
QR-Symbol (für iOS) und scannen Sie
das QR Code-Label auf der Rückseite
der LampCam. 7
Schritt 7: Geben Sie unter Sicherheitscode
den Standard-Sicherheitscode
123456 ein.
8
Schritt 8: Drücken Sie auf “Speichern”.
6
4.2. WLAN-Einstellungen:
Schritt 1: Drücken Sie im LampCam-Menü auf das LampCam-Symbol der Konfiguration und
drücken auf das Einstellung-Symbol von der gewünschten LampCam. Drücken Sie dann
auf die Schaltfläche “Menü” Menü
Schritt 2: Geben Sie das “Admin-Kennwort” ein (Standard 123456).
Schritt 3: Aus Sicherheitsgründen wird die App das Standard-Admin-Passwort ändern.
(Das Admin-Passwort wird verwendet, um auf das Einstellungsmenü zuzugreifen und
die LampCam scharf / unscharf zu schalten). Wir empfehlen, dieses Passwort an einem
sicheren Ort aufzuschreiben. Falls Sie das Passwort vergessen haben müssen Sie die
Kamera auf die Werkseinstellungen zurücksetzen.
Schritt 4: Scrollen Sie nach unten zu den WLAN-Einstellungen und drücken Sie auf “WLAN-
Netzwerk verwalten”.
Schritt 5: Wählen Sie Ihren Heim-WLAN-Zugangspunkt aus dem Dropdown-Menü und geben Sie
Ihr WLAN-Passwort ein. Drücken Sie dann auf “OK”.
Schritt 6: Die LampCam ist beim Neustart etwa 60 Sekunden lang offline. Wenn die LampCam
korrekt mit dem WLAN-Router verbunden wird, leuchtet die blaue Netzwerkindikator-LED
dauerhaft auf. Von nun an können Sie jederzeit und von jedem Ort aus auf die LampCam
zugreifen.
175. LampCam Konfiguration
Drücken Sie in der LampCam-Menüliste auf das LampCam-Symbol und drücken Sie auf das
Einstellungssymbol der gewünschten LampCam. Drücken Sie dann auf die Schaltfläche “Menü”, um das
Menü “Erweiterte Einstellungen” aufzurufen. Aus Sicherheitsgründen Menü
werden Sie aufgefordert, das “Admin-Passwort” einzugeben.
Deutsch
5.1. Empfindlichkeitseinstellung:
Scrollen Sie nach unten zu “Empfindlichkeitseinstellung”. Bei “Erkennungsmodus” wählen Sie “PIR”, um
die PIR-Bewegungserkennung zu aktivieren (Werkseinstellung). Die PIR-Bewegungserkennung hat einen
Erfassungsbereich von 5m. Um die Bewegungserkennung zu deaktivieren, wählen Sie “AUS”.
5.2. Beleuchtungseinstellung:
Scrollen Sie nach unten zu “Beleuchtungseinstellung” und wählen Sie den gewünschten
“Beleuchtungsautomatikmodus”.
Nach Auslöser: Wählen Sie diese Option, um das Licht nach der PIR-Bewegungserkennung eine Minute
lang einzuschalten. (Bitte überprüfen Sie in Kapitel 5.1, dass die PIR-Erkennung aktiviert ist) Nach einer
Minute wird das Licht ausgeschaltet. (PIR muss unter “Empfindlichkeit Einstellen” ausgewählt werden). Die
Beleuchtung wird nur eingeschaltet, wenn die Umgebungsbeleuchtung schwach ist.
Nach manuellem Plan: Wählen Sie diese Option, um das Licht gemäß einem vorkonfigurierten Zeitplan
einzuschalten. Um einen Zeitplan zu erstellen, wählen Sie “Lichtplan ändern”.
Wählen Sie eine Startzeit: Klicken Sie oben auf die blaue Uhrzeit 00:00 AM.
Wählen Sie oben die Wochentage aus, die berücksichtigt werden sollen. Wählen
Sie die Zeit, zu der das Licht eingeschaltet werden soll. Zeitformat ist 12H, wählen
Sie AM oder PM, um die Zeit zu definieren.
Wählen Sie eine Endzeit: Klicken Sie oben auf die schwarze Uhrzeit 00:00 AM.
Wählen Sie am unteren Rand die Wochentage aus, die berücksichtigt werden
sollen. Wählen Sie die Zeit, zu der das Licht ausgeschaltet werden soll. Zeitformat
ist 12H, wählen Sie AM oder PM, um die Zeit zu definieren. Klicken Sie auf die
Schaltfläche “Speichern” am unteren Rand, um alle Einstellungen zu speichern.
Hinweis: Es ist zwingend erforderlich, die Wochentage auszuwählen, sonst funktioniert der Zeitplan nicht.
Hinweis:
Der PIR-Trigger für Bewegungserkennung und der manuelle Zeitplan funktionieren nur im
AUTO-Modus. Siehe Kapitel “6. Live View-Funktionalität“ für weitere Details.
5.3. SD-Karteneinstellung:
Klicken Sie auf “SD-Karte formatieren”, um die SD-Karte zu formatieren. Dadurch werden alle Videos
und Bilder auf der SD-Karte gelöscht. Wenn das Kontrollkästchen “SD-Karte überschreiben” aktiviert
ist, überschreibt die LampCam die älteste Aufzeichnung, sobald der Speicher voll ist. Wenn deaktiviert,
zeichnet die LampCam kein Ereignis mehr auf, sobald der Speicher voll ist.
5.4. Benachrichtigungen:
Push-Benachrichtigungen: Scrollen Sie nach unten zu SSL nutzen Aktiviert / deaktiviert die SSL-Ver-
“Benachrichtigen aktivieren”. Aktivieren oder deaktivieren schlüsselung
sie Push-Benachrichtigungen, wenn im Scharf-Modus eine SMTP-Server Geben Sie die SMTP-Adresse des
Bewegung erkannt wurde. (Standardmäßig aktiviert) Servers ein. Weitere Informationen
erhalten Sie in den Anweisungen
Ihres E-Mail-Anbieters. Für Google
E-Mail-Benachrichtigungen: Um dieselben Informationen Mail verwenden Sie smtp.gmail.com
wie Push-Benachrichtigungen für E-Mails zu aktivieren, SMTP-Port Wenn SSL nicht aktiviert ist, benu-
tzen Sie “25”, wenn SSL aktiviert ist,
scrollen Sie nach unten zu “E-Mail-Einstellungen” und klicken benutzen Sie “465”
Sie auf “E-Mail einstellen”. Konfigurieren Sie diese anhand
Benutzer Der Benutzername des E-Mail-Ac-
dem rechten Diagramm. Hinweis: Stellen Sie sicher, dass der counts des Absenders. Beispiel:
“Zwei-Faktor-Authentifikator” in Ihrem sendenden E-Mail- benutzername@gmail.com
Konto deaktiviert ist. (z. B. Google, Outlook365). Weitere Passwort Das Passwort des E-Mail-Konto des
Absenders.
Informationen erhalten Sie in den Anweisungen Ihres E-Mail-
Anbieters. Empfänger E-Mail-Adresse des Empfängers.
186. Live View-Funktionalität
Schritt 1: Starten Sie die OMGuard HD App.
Schritt 2: Drücke im LampCam-Listenmenü zweimal auf die gewünschte LampCam, um auf den
Livestream zuzugreifen.
Deutsch
Schritt 3: Aus Sicherheitsgründen wird Sie die App bei der ersten Anmeldung an Ihrer LampCam
auffordern, den Standard-Sicherheitscode zu ändern. (Der Sicherheitscode wird
verwendet, um eine Kommunikation zwischen der LampCam und dem Smartphone
herzustellen. Dieses ist nicht identisch mit dem Admin-Passwort. Wir empfehlen, dieses
Passwort an einem sicheren Ort aufzuschreiben. Andernfalls müssen Sie die Kamera auf die
Werkseinstellungen zurücksetzen falls Sie dieses vergessen.
Schritt 4: In der folgenden Tabelle finden Sie weitere Informationen zu den im Live View-Menü
verfügbaren Funktionen.
Drücken Sie auf die Armed/Disarmed Schaltfläche zum scharf / unscharf
schalten der LampCam. Die App fragt nach dem Admin-Code, um diese
Aktion auszuführen. Wenn die Kamera Bewegungen im Scharf-Mo-
dus erkennt, sendet sie eine Push-Benachrichtigung und startet eine
60-Sekunden-Videoaufnahme.
Hinweis: Push-Benachrichtigungen und PIR-Bewegungserkennung müs-
sen in den erweiterten Einstellungen aktiviert bleiben (standardmäßig
aktiviert).
Erstellen Sie einen Schnappschuss aus dem aktuellen Videostream.
Der Schnappschuss wird auf dem Smartphone gespeichert und kann in
der Fotogalerie Ihres Smartphones gefunden werden.
Starten Sie eine 60-Sekunden-Videoaufnahme ohne Pause auf die
MicroSD-Karte der LampCam. Eine SD-Karte ist für diese Funktion obliga-
torisch. Die Videos finden Sie im Menü “Ereigniswiedergabe”.
Aktiviert / deaktiviert das Mikrofon, um durch die LampCam zu hören.
Sprechen-Taste: Drücken Sie die Sprechen-Taste und halten Sie diese
gedrückt, um von Ihrem Mobiltelefon aus über die LampCam zu sprech-
en. Um mit dem Sprechen aufzuhören, lassen Sie die Taste los.
Klicken Sie auf diese Schaltfläche, um einen Sirenenalarm von 60 Sekun-
den zu starten. Es ist möglich, die Sirene anzuhalten, indem Sie erneut
auf das Symbol drücken.
Wechseln Sie zum LampCam-Listenmenü.
Schieben Sie die Leiste, um die Helligkeit der LampCam von 0 bis 800 lm
einzustellen. Drücken Sie auf das Glühbirnen-Symbol, um das Licht EIN /
AUS oder AUTO zu schalten. EIN: Das Licht der LampCam wird dauerhaft
eingeschaltet. AUS: Das Licht der LampCam wird ausgeschaltet. AUTO:
Das Licht wird entsprechend Ihrer Lichtauslösereinstellung automatisch
eingeschaltet. Siehe Kapitel “5.2. Beleuchtungseinstellung”.
Der PIR-Trigger für die Bewegungserkennung und den manuelle Zeitplan
funktioniert nur unter AUTO.
197. Ereigniswiedergabe
Hinweis: Damit die Ereigniswiedergabe funktioniert, muss eine MicroSD-Karte in der LampCam installiert
sein. Siehe Kapitel “3.2. Installation der MicroSD-Karte “.
Deutsch
Schritt 1: Schritt 4:
Tippen Sie im LampCam-Listenmenü auf das Um ein Video herunterzuladen, klicken Sie auf
LampCam Konfigurieren-Symbol und anschließend das rechte Download-Symbol des gewünschten
auf das Notizblock-Symbol der gewünschten Videos. Das Video wird auf Ihr Smartphone
LampCam. heruntergeladen und befindet sich nun in Ihrer
Smartphone-Galerie. Ein heruntergeladenes Video
wird mit einem roten Namen angezeigt.
Schritt 2:
Wählen Sie einen Start- und Endpunkt für die
LampCam, um nach Videoaufnahmen zu suchen.
Klicken Sie dann auf “OK”.
Schritt 5:
Um das Video ohne Download zu sehen, können
Sie auf das gewünschte Video klicken. Jetzt wird
das Video auf Ihr Smartphone gestreamt.
Schritt 3:
Die LampCam zeigt alle Videoaufnahmen aus dem
definierten Zeitraum an. Jedes Video zeigt das
Datum und die Uhrzeit ab dem Zeitpunkt an, an
dem das Video aufgenommen wurde.
Schritt 6:
Um ein Video von der MicroSD-Karte zu löschen,
drücken Sie auf das Stift-Symbol und wählen dann
das zu löschende Video aus und tippen daraufhin
auf das Papierkorb-Symbol.
208. Wartung
•• Bitte schalten Sie das Gerät umgehend aus und ziehen Sie das Netzkabel ab, wenn Rauch,
unangenehmer Geruch oder ungewöhnliche Geräusche auftreten. Bitte wenden Sie sich an Ihren
Händler vor Ort oder an den Kundenservice.
•• Vermeiden Sie Ölflecken und / oder Chemikalien, die die Linsenoberfläche beschädigen.
Deutsch
•• Alle Untersuchungs- und Reparaturarbeiten sollten von qualifizierten Servicetechnikern
durchgeführt werden. Wir haften nicht für Probleme, die durch nicht autorisierte Änderungen oder
Reparaturen verursacht werden.
8.1. Firmware-Aktualisierung
Die LampCam sucht automatisch nach Firmware-Upgrades. Wenn
die LampCam eine neue Firmware erkennt, wird sie automatisch
heruntergeladen. Wenn sich der Benutzer das nächste Mal an der LampCam
anmeldet, fragt die App, ob der Benutzer das System aktualisieren möchte.
Klicken Sie auf “OK”, um das Firmware-Upgrade zu starten. Dieser Vorgang
dauert ungefähr 5 Minuten.
8.2. Werkseinstellungen zurücksetzen
Schritt 1: An der Unterseite der LampCam öffnen Sie das Fach durch Lösen der Schraube.
Schritt 2: Verwenden Sie die mitgelieferte Reset-Nadel und drücken Sie den Reset-Knopf für
10 Sekunden.
Schritt 3: Die Power-LED beginnt zu blinken und der Werksreset wird durchgeführt.
Schritt 4: Dieser Vorgang wird ungefähr 60 Sekunden dauern. Warten Sie, bis die LampCam einen
doppelten Signalton ausgibt und die blaue LED zu blinken beginnt.
Schritt 5: Schließen Sie das Fach, indem Sie die Abdeckung aufsetzen und die Schraube festziehen.
SB RESETU
Reset-Knopf Reset-Nadel
9. Support
Für weitere Produktinformationen besuchen Sie:
www.blaupunkt.com/service
Blaupunkt Competence Center Security & Care
www.blaupunkt.com
Security Brand Pro GmbH
Mondstrasse 2-4
85622 Feldkirchen-München, Germany
© Technische Änderungen und Irrtümer vorbehalten
Hinweis:
•• Diese Kurzanleitung dient nur als Referenz. Geringfügiger Unterschiede können in der
Benutzeroberfäche gefunden werden. Alle Designs sowie die Software können sich ohne
vorherige schriftliche Ankündigung ändern.
•• Alle erwähnten Marken und eingetragenen Warenzeichen sind Eigentum ihrer jeweiligen
Inhaber.
•• Bitte besuchen Sie unsere Website oder kontaktieren Sie Ihren lokalen Servicetechniker für
weitere Informationen unter: http://security.blaupunkt-service.com
21Français | Manuel d’utilisation
1. Contenu du kit
a b c
HOS-X20 Antenne Montage
Français
LampCam
d e f
Plaque de 1x Clé Allen Aiguille de
2x Vis réinitialisation
montage 2x Chevilles
2. Description de l’appareil
Antenne
LED-Lampe
Objectif Haut-parleur
PIR-Sensor USB RESET
Reset
Micro Courant Témoin
Capteur LED
Témoin LED
Montage MicroSD Réseau
Support et Logement carte Témoin LED
Alimentation Micro USB
REMARQUE:
Ce manuel explique l’installation et la configuration initiale du HOS-X20.
Pour plus d’informations ou les dernières versions mises à jour, veuillez consulter notre site Internet :
http://security.blaupunkt-service.
223. Montage
3.1. IMPORTANT - Lisez ceci avant le montage
•• Avant l’installation, veuillez-vous assurer que la structure murale / la surface de montage peut
supporter au moins trois fois le poids de la LampCam.
•• Vérifiez la puissance de votre signal WLAN. Pour garantir une connexion LampCam aussi stable
que possible, assurez-vous que le signal WLAN à l’emplacement prévu est aussi fort que possible.
La bande passante Internet recommandée est de 1 Mbit / s (vitesse d’upload / download).
Français
•• Recommandation : Évitez de diriger l’objectif directement vers le soleil et installez la LampCam
sous un toit ou un avant-toit si possible (Fig.1) ou dans une position qui offre une bonne
protection contre la pluie abondante.
•• Si vous souhaitez installer une carte microSD, nous vous recommandons de le faire avant de
l’installer. Voir Section “3.2 Installation de la carte microSD” pour plus d’informations.
•• Pour des performances optimales, installez la LampCam à une hauteur de 2,5 mètres. (fig.2)
fig.1 fig.2
5m PIR Plage de détection
Détection de
mouvement 90°
2.5m Hauteur
3.2. Installation de la carte microSD
Etape 1: An fond de la LampCam, ouvrez le compartiment en
desserrant la vis. A A
Etape 2: Insérez la carte SD dans le logement prévu à cet effet.
Etape 3: Fermez le compartiment en fixant le couvercle et en serrant la vis.
REMARQUE:
La carte Micro SD est nécessaire pour l’enregistrement local. Veuillez-vous assurer qu’il s’agit d’une
carte MicroSD CLASS10. Les cartes MicroSD de 8 Go à 128 Go sont supportées.
3.3. Optionnel : Test de la LampCam avant l’installation
Avant l’installation, il est possible d’allumer la LampCam via le connecteur Micro-USB avec un bloc
d’alimentation ou une alimentation Micro-USB 2A. Attendez que la LampCam émette deux bips et que
la LED bleue en bas de la LampCam commence à clignoter. (Ce processus prend environ 60 secondes.
Assurez-vous que la LED bleue clignote). Pour plus d’informations sur l’enseignement dans la Lampcam,
reportez-vous au “Chapitre 4.1 “.
Mention : Le voyant LED de la LampCam ne s’allume pas lorsqu’elle est connectée via USB.
233.4. Montage de la LampCam
NOTE:
5
Installation et montage de la LampCam
ne doit être effectuée que par une seule A
personne qui a une connaissance suffisante
de la manipulation de l’électricité. Si vous
n’avez PAS les compétences nécessaires pour
manipuler l’électricité, vous ne devriez jamais
Français
effectuer l’installation vous-même.
Etape 1:
Veuillez-vous assurer que vous avez lu et compris le Etape 6:
L’alimentation du disjoncteur de votre boîte à
fusibles a été débranchée. Faites passer les câbles du mur par l’arrière du
support et connectez-le comme suit :
1 - Raccordez le conducteur (marron) à la borne à
l’aide du câble marron.
Désactiv - Conducteur neutre (bleu) vers la borne à l’aide
d’un câble bleu.
- Conducteur de protection (jaune / vert) :
accrochez-le, il est connecté à l’étape 8. Replacez
maintenant les bornes de raccordement dans le
support.
6
Etape 2:
Trouvez l’emplacement d’installation souhaité pour Blocs de jonction
la LampCam. Le lieu d’installation doit être défini par
l’intermédiaire des Câbles 220 V AC (terre, phase et
neutre). (p. ex. à partir d’un éclairage extérieur déjà Haut
installé.).
Etape 3:
Placez le gabarit de montage fourni sur le mur et
marquez les deux trous à percer avec un crayon.
Etape 7:
Etape 4: Prenez les vis fournies avec les accessoires
d’installation et fixez le support au mur. Assurez-
Percer les 2 trous de fixation dans le mur. Prenez les vous que le panneau “Haut” est bien en haut.
chevilles en plastique qui se
trouvent dans et les insérer dans les 2 trous qui
viennent d’être percés. 7
Haut
Etape 5:
Perforez un petit trou avec un objet pointu en
position A dans le caoutchouc et faites passer
les câbles depuis le mur à travers l’arrière du
support jusqu’aux bornes.
24Etape 8: Etape11:
Prenez le fil de terre (jaune / vert) et connectez-le églez l’angle d’inclinaison de la LampCam à l’aide
à la vis verte (avec un symbole de terre) à l’arrière des vis de réglage d’inclinaison
de l’appareil. Connectez ensuite le câble de la
LampCam à la boîte de jonction noire sur le support
de montage. 11
8
Français
Haut
Vis de réglage
d’inclinaison
Connectez ici
Etape 9:
Installez la LampCam sur le support de montage.
Etape12:
9 Réglez l’angle horizontal de la LampCam d’environ
30 degrés vers la gauche ou la droite.
Desserrez la vis à l’arrière à l’aide de la clé Allen
fournie avec le kit de montage. Serrez la vis dès que
l’angle optimal est réglé.
12
Vis de réglage
(angle horizontal)
Etape10:
Fixez la vis au support à l’aide de la clé Allen fournie.
Etape13:
10 Une fois l’installation terminée, allumez la boîte à
fusibles et la LED LampCam s’allumera.
13
Allumer
254. Utilisation de LampCam et APP
4.1. Enseignement dans la LampCam
Etape 1: Téléchargez et installez l’application “OMGuard HD” sur votre
Für iOS
smartphone.
und Android
Etape 2: Prenez votre smartphone, accédez à vos paramètres sans fil et sélectionnez le nouveau
réseau sans fil commençant par HD (exemple HD-15584). Connectez-vous maintenant à
Français
ce réseau WLAN. Ce réseau WLAN est un réseau créé par la LampCam pour permettre le
processus d’installation.
Etape 3: Entrez le mot de passe par défaut du réseau local sans fil LampCam 12345678 et enregistrez
les paramètres de connexion. Vous n’avez pas de connexion Internet, mais vous pouvez
continuer l’installation de LampCam.
Etape 4: Lancez maintenant l’application OMGuardHD et appuyez sur l’icône “Caméra”.
Etape 5: Entrez le nom de votre LampCam sous “Nom du système”, par exemple “Porte d’entrée”.
Etape 6: Appuyez sur le bouton “Scan DID 5
Label” pour Android ou sur le Porte d‘entrée
bouton QR (pour iOS) et scannez
l’étiquette QR code au dos de la
LampCam. 7
Etape 7: Sous Code de sécurité, entrez le
code de sécurité par défaut 123456.
8
Etape 8: Appuyez sur “Enregistrer”.
6
4.2. Réglages Wlan:
Etape 1: Dans le menu LampCam, appuyez sur l’icône LampCam de la configuration et appuyez
sur l’icône de paramétrage Appuyez ensuite sur le bouton “Menu”.
Etape 2: Entrez le “Mot de passe administrateur” (par défaut 123456).
Etape 3: Pour des raisons de sécurité, l’APP changera le mot de passe administrateur par défaut.
(Le mot de passe administrateur est utilisé pour accéder au menu Paramètres et activer /
désactiver la lampe). Nous vous recommandons de noter ce mot de passe dans un endroit
sûr. Si vous avez oublié votre mot de passe, vous devrez réinitialiser l’appareil photo aux
réglages d’usine.
Etape 4: Faites défiler jusqu’aux paramètres WLAN et appuyez sur “Gérer le réseau WLAN”.
Etape 5: Sélectionnez le point d’accès WLAN de votre domicile dans le menu déroulant et entrez
votre mot de passe WLAN. Appuyez ensuite sur “OK”.
Etape 6: La LampCam est éteinte pendant environ 60 secondes au redémarrage. Si la LampCam est
correctement connectée au routeur sans fil, le voyant lumineux bleu du réseau s’allume
en permanence. Désormais, vous pouvez accéder à la LampCam à tout moment et de
n’importe quel endroit.
265. Configuration de la LampCam
Dans la liste du menu LampCam, appuyez sur l’icône LampCam et appuyez sur l’icône de réglage de la
LampCam souhaitée. Appuyez ensuite sur la touche “Menu” pour ouvrir le menu “Paramètres avancés”.
Pour des raisons de sécurité vous serez invité à entrer le
“Mot de passe Admin”.
5.1. Réglage de la sensibilité:
Faites défiler vers le bas jusqu’à “Réglage de la sensibilité”. Pour “Detection Mode”, sélectionnez “PIR” pour
activer la détection de mouvement PIR (réglage d’usine). La détection de mouvement PIR a une portée de
Français
détection de 5m. Pour désactiver la détection de mouvement, sélectionnez “OFF”.
5.2. Réglage de l’éclairage:
Faites défiler vers le bas jusqu’à “Light Setting” et sélectionnez le “Auto Light Mode” désiré.
Après le déclenchement : Sélectionnez cette option pour allumer la lumière pendant une minute après la
détection de mouvement PIR. (Veuillez vérifier au chapitre 5.1 que la détection PIR est activée) Après une
minute, le voyant s’éteint. (PIR doit être sélectionné sous “Adjust Sensitivity”). L’éclairage ne s’allume que
lorsque l’éclairage ambiant est faible.
Selon un plan manuel : Sélectionnez cette option pour allumer l’éclairage selon un horaire préconfiguré.
Pour créer un planning, sélectionnez “Modifier le plan d’éclairage”.
Sélectionnez une heure de début : Cliquez sur l’heure bleue 00:00 AM ci-dessus.
Sélectionnez les jours de la semaine à prendre en compte ci-dessus. Sélectionner
l’heure à laquelle la lumière doit s’allumer. Le format de l’heure est 12H,
sélectionnez AM ou PM pour définir l’heure.
Sélectionnez une heure de fin : Cliquez sur l’heure noire 00:00 AM en haut. En bas,
sélectionnez les jours de la semaine à prendre en compte. Sélectionnez l’heure
à laquelle la lumière doit être éteinte. Le format de l’heure est 12H, sélectionnez
AM ou PM pour définir l’heure. Cliquez sur le bouton “Enregistrer” en bas pour
enregistrer tous les réglages.
Conseil : Il est obligatoire de sélectionner les jours de la semaine, sinon l’horaire ne fonctionnera pas.
Conseil :
Le déclencheur PIR pour la détection de mouvement et la programmation manuelle ne fonctionnent
qu’en mode AUTO. Voir chapitre “6ème Fonctionnalité Live View” pour plus de détails.
5.3. Réglage de la carte SD:
Cliquez sur “Formater la carte SD” pour formater la carte SD. Ceci effacera toutes les vidéos et images de
la carte SD. Si la case “Écraser la carte SD” est cochée, la LampCam écrase l’enregistrement le plus ancien
lorsque la mémoire est pleine. Si elle est désactivée, la LampCam n’enregistrera plus d’événement une fois
la mémoire pleine.
5.4. Notifications:
Notifications poussées : Faites défiler vers le bas jusqu’à Avantages Active / désactive le cryptage SSL
“Activer la notification”. Active ou désactive les notifications de SSL
de poussée lorsque le mouvement est détecté en mode de Serveur Entrez l’adresse SMTP du serveur.
mise au point. (Activé par défaut) SMTP Pour plus d’informations, consultez
les instructions de votre fournisseur
de messagerie. Pour Google Mail
Notifications par e-mail : Pour activer les mêmes informations utilisez smtp.gmail.com
que les notifications push pour les e-mails, faites défiler Port SMTP Si SSL n’est pas activé, utilisez “25”.
vers le bas jusqu’à “Email Settings” et cliquez sur “Set Email”. Si SSL est activé, utilisez “465”.
Configurez-les à l’aide du diagramme de droite. Note : Utilisateur Le nom d’utilisateur du compte de
courrier électronique de l’expéditeur.
Assurez-vous que “l’authentificateur à deux facteurs” est Exemple: benutzername@gmail.com
désactivé dans votre compte de messagerie d’envoi. (P. ex.
Mot de Le mot de passe du compte e-mail
Google, Outlook365). Pour plus d’informations, veuillez passe de l’expéditeur.
consulter les instructions de votre fournisseur de messagerie Receveurs Adresse e-mail du destinataire.
électronique.
276. Fonction de visualisation en direct
Etape 1: Démarrez l’application HD OMGuard.
Etape 2: Dans le menu de la liste LampCam, appuyez deux fois sur la LampCam désirée pour
accéder aux diffusions en direct.
Etape 3: Pour des raisons de sécurité, l’APP vous demandera de changer le code de sécurité par
défaut lors de votre première connexion à votre LampCam. (Le code de sécurité est utilisé
pour établir la communication entre la LampCam et le smartphone. Ce n’est pas la même
chose que le mot de passe administrateur. Nous vous recommandons de noter ce mot de
Français
passe dans un endroit sûr. Sinon, vous devrez réinitialiser l’appareil aux réglages d’usine si
vous oubliez de le faire.
Etape 4: Le tableau suivant fournit plus d’informations sur les fonctions disponibles dans le menu
Affichage en direct.
Appuyez sur le bouton pour activer / désactiver la LampCam. L’applica-
tion demande le code administrateur pour effectuer cette action. Lor-
sque la caméra détecte un mouvement en mode de mise au point, elle
envoie une notification et commence un enregistrement vidéo de 60s.
Remarque : Les notifications push et la détection de mouvement PIR
doivent rester activées dans les paramètres avancés (activées par défaut).
Créez un instantané à partir du flux vidéo actuel.
L’instantané est stocké sur votre téléphone et peut être trouvé dans la
galerie de photos de votre téléphone.
Démarrez un enregistrement vidéo de 60 secondes sans faire de pause
sur la carte micro SD de la LampCam. Une carte SD est obligatoire pour
cette fonction. Les vidéos se trouvent dans le menu “Retransmission
d’évènements”.
Active / désactive l’écoute du microphone à travers la LampCam.
Bouton de communication : Appuyez sur le bouton de communication
et maintenez-le enfoncé pour parler depuis votre téléphone portable via
la LampCam. Pour arrêter de parler, relâchez le bouton.
Cliquez sur ce bouton pour déclencher une alarme sirène de 60
secondes. Il est possible d’arrêter la sirène en appuyant à nouveau sur
l’icône.
Passez au menu de la liste LampCam.
SFaites glisser la barre pour régler la luminosité de la LampCam de 0
à 800 lm. Appuyez sur l’icône de l’ampoule pour allumer / éteindre la
lumière.
OFF ou AUTO. ON : La lumière de la LampCam est allumée en perma-
nence. OFF : La lumière de la LampCam est éteinte. AUTO : L’éclairage
s’allume automatiquement en fonction de votre réglage de déclenche-
ment de l’éclairage, voir chapitre 5.2.
Le déclencheur PIR pour la détection de mouvement et la programma-
tion manuelle ne fonctionne que sous AUTO.
287. Retransmission d’événements
Conseil: Pour que cette fonction fonctionne, une carte Micro SD doit être installée sur la LampCam. Voir
chapitre “3.2 Installation de la carte microSD”.
Etape 1: Etape 4:
Dans le menu de la liste LampCam, appuyez sur Pour télécharger une vidéo, cliquez sur l’icône de
l’icône Configure LampCam, puis appuyez sur téléchargement à droite de la vidéo désirée. La
l’icône du bloc-notes de la LampCam souhaitée. vidéo sera téléchargée sur votre smartphone et se
Français
trouve maintenant dans votre répertoire
Galerie des Smartphones. Une vidéo téléchargée
s’affiche avec un nom rouge.
Etape 2:
Sélectionnez un point de départ et un point
d’arrivée pour que la LampCam recherche des
enregistrements vidéo. Cliquez ensuite sur’OK’.
Etape 5:
Pour visionner la vidéo sans la télécharger, vous
pouvez cliquer sur la vidéo désirée. La vidéo est
maintenant diffusée sur votre smartphone.
Etape 3:
La LampCam affiche tous les enregistrements vidéo
de la période définie. Chaque vidéo affiche la date
et l’heure à partir du moment où la vidéo a été
enregistrée.
Etape 6:
Pour supprimer une vidéo de la carte microSD,
sélectionnez l’icône crayon, puis sélectionnez la
vidéo et appuyez sur l’icône Corbeille.
298. Maintenance
•• Veuillez éteindre immédiatement l’appareil et débrancher le cordon d’alimentation en cas de fumée,
d’odeur désagréable ou de bruit anormal. Veuillez contacter votre revendeur local ou le service
après-vente.
•• Évitez les taches d’huile et/ou les produits chimiques qui pourraient endommager la surface de la
lentille.
•• Tous les travaux d’inspection et de réparation doivent être effectués par des techniciens qualifiés.
Nous ne sommes pas responsables des problèmes causés par des modifications ou des réparations
non autorisées.
8.1. Mise à jour du micrologiciel
Français
La LampCam recherche automatiquement les mises à jour de
firmware. Lorsque la LampCam détecte un nouveau firmware, elle va
automatiquement télécharger. La prochaine fois que l’utilisateur se
connecte à la LampCam, l’application lui demande si l’utilisateur souhaite
mettre à jour le système. Cliquez sur ‘OK’ pour lancer la mise à jour du
firmware. Ce processus dure environ 5 minutes.
8.2. Réinitialisation des réglages
Etape 1: En dessous de la LampCam, ouvrez le compartiment en desserrant la vis.
Etape 2: Utilisez l’aiguille de réinitialisation fournie et appuyez sur le bouton de réinitialisation
pendant 10 secondes.
Etape 3: La LED d’alimentation commence à clignoter et la réinitialisation d’usine est effectuée.
Etape 4: Ce processus prendra environ 60 secondes. Attendez que la LampCam émette deux bips et
que la LED bleue commence à clignoter.
Etape 5: ermez le compartiment en remettant le couvercle et en serrant la vis.
SB RESETU
Touche de réinitialisation Aiguille de réinitialisation
9. Support
Pour de plus amples informations :
www.blaupunkt.com/service
Blaupunkt Competence Center Security & Care
www.blaupunkt.com
Security Brand Pro GmbH
Mondstrasse 2-4
85622 Feldkirchen-München, Germany
© Sous réserve de modifications techniques et d’erreurs.
Conseil:
•• Ce manuel est à titre de référence seulement. Une différence mineure peut être trouvée dans
l’interface utilisateur. Tous les designs et logiciels sont sujets à changement sans préavis.
•• Toutes les marques déposées mentionnées sont la propriété de leurs dépositaires respectifs.
•• Veuillez visiter notre site Web ou contacter votre technicien d’entretien local pour plus
d’informations à l’adresse suivante : http://security.blaupunkt-service.com
30You can also read