ESOP COMMUNITY COOKBOOK: 2020-2021 - PRESENTED BY STUDENT SENATE AND ODI - FAO UNC Eshelman ...
←
→
Page content transcription
If your browser does not render page correctly, please read the page content below
ESOP
  COMMUNITY
  COOKBOOK:
      FOOD. CULTURE.
        DIVERSITY.
            2020-2021
        A collection of hearty
      and filling recipes from the
          ESOP community

PRESENTED BY STUDENT SENATE AND ODI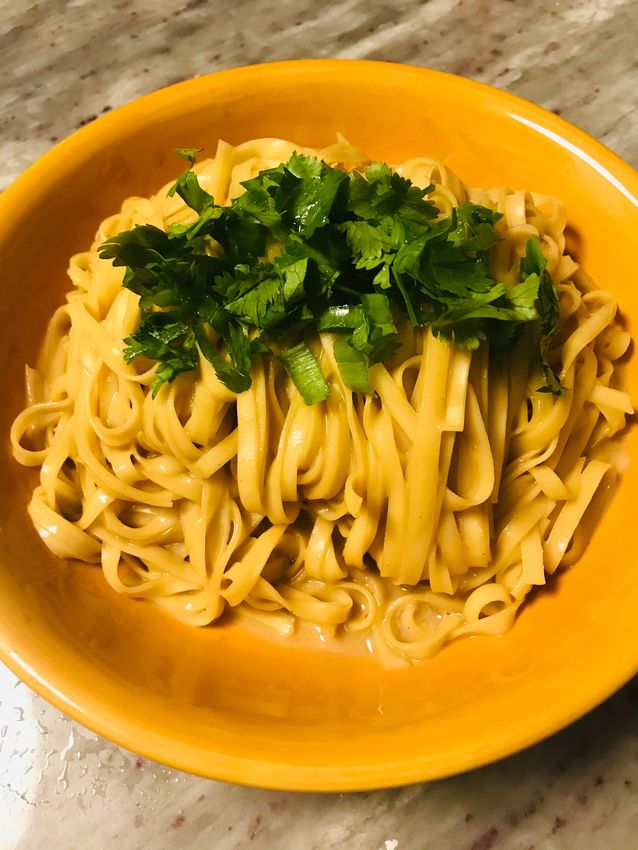
Student Senate and ODI present the official
ESOP Community Cookbook. It is our pleasure
 to share the different culinary creations from
students, faculty and staff from the Eshelman
          School of Pharmacy family.

 We encourage you to indulge in the different
 dishes from around the world while learning
 some of the diverse culture of our very own
                community.

We believe that food is the ingredient that bring
                  us together.

           Food. Culture Diversity

            Map of the location of origin of each recipe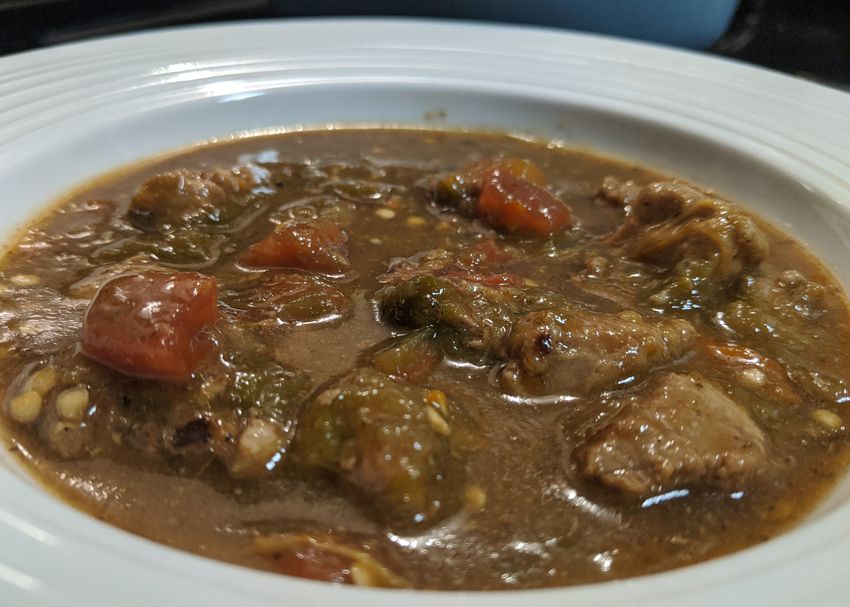
PALAČINKA

                                (PALA-CH-INK-A)

                                          Dish Origin: Serbia

  "My family makes this during holidays or whenever
                        family is visiting."
                        -Rada Zunich, PY2

                                   PROCEDURE
DISH INFORMATION
Meal Type: Breakfast, Dessert      1. Combine all
Servings: Variable
                                   ingredients.
Prep Time: 30 minutes

                                   2. Cook in a small
                                   frying plan (like a
INGREDIENTS                        pancake).
   2 eggs
   ½ cup milk                      3. Fill with toppings
   ½ tsp salt
   1 tsp sugar
                                   and roll.
   ½ cup flour
   Fillings: Nutella,              4. Bake on 350 for 30
   bananas, jams, fruit,
   etc.
                                   minutes.
CHOCOLATE GRAVY

                                           Dish Origin: American South - Family Recipe

"My grandmother was one of 11 children growing up in Franklin, NC during the Great
 Depression. They were a farming family. Her mother used to make this dish for her
     children as it was something they enjoyed that was inexpensive to make. My
grandmother then made it for her eight children, and my mother made it for her four
children. I now occasionally make it for my son as a treat. It is more like a dessert than
                 breakfast. It gives me warm memories of childhood."
     "It is traditionally served as a liquid topping over warm biscuits and butter."
                                 -Charlene Williams,
                     Faculty- Director of Preceptor Development

DISH INFORMATION                            PROCEDURE
Meal Type: Breakfast
                                            1. Pour milk and vanilla into
Servings: 4
                                            cooking pot.
Prep Time: 30 mins

                                            2. Stir together dry ingredients
                                            (cocoa, sugar, flour) in a separate
                                            small bowl.
INGREDIENTS

                                            3. Slowly stir dry ingredients into
      2 Tbsp cocoa
                                            milk mixture.
      1/2 cup sugar
      3 Tbsp of all                         4. Cook over low heat string
      purpose flour                         continuously until dry ingredients
      2 cups whole milk                     are dissolved and it is at desired
      2 Tbsp vanilla                        thickness.

                                            5. Serve over warm biscuits and
                                            butter.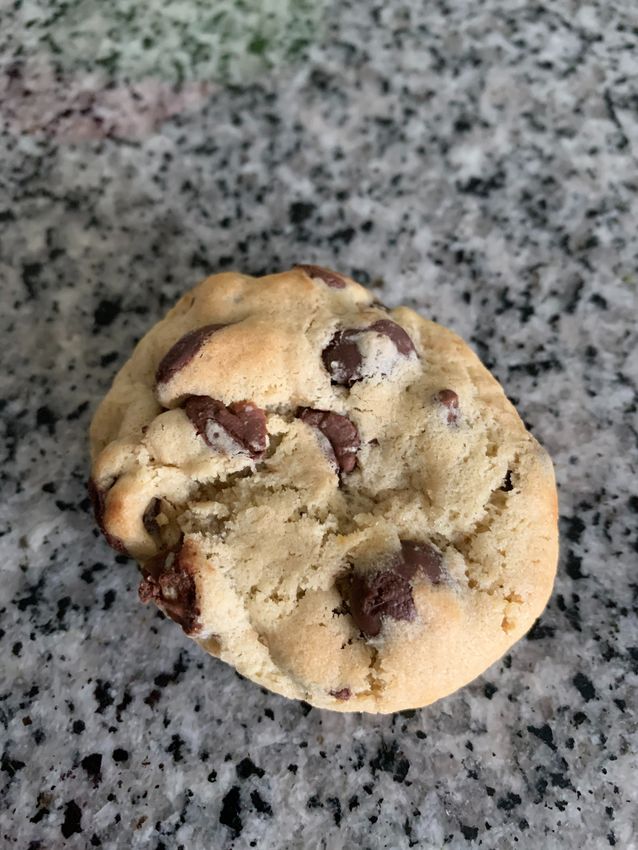
CHILE VERDE CON CERDO

                                                (GREEN CHILI WITH PORK)

                                                                Dish Origin: New Mexico

                                                           INGREDIENTS
   DISH INFORMATION
                                                         2 lbs pork roast or tenderloin
   Meal Type: Breakfast, Lunch,                          1/2 sweet onion, diced
                                                         4 Roma tomatoes, roughly diced
   Dinner                                                2 garlic cloves, minced
                                                         5 large roasted green chiles (hatch or anaheim),
   Servings: 6-8                                         roughly diced (can use frozen or canned green
                                                         chile)
   Prep Time: 90 mins                                    2 Tbsp of olive oil
                                                         2-3 cup chicken broth, low sodium
                                                         2 Tbsp all-purpose flour
                                                         1 tsp cumin
PROCEDURE                                                1 tsp mexican oregano
                                                         1/2 fresh ground pepper
Chile Verde Con Cerdo                                    Salt to taste

1. Cut pork roast into 1/2 to 1-inch cubes.

2. Place dutch oven or pot on the stove with a medium-hot heat.
3. Dice half a sweet onion. Add 1-1/2 tablespoons of oil to the pot and add the onion and paper. Saute
until translucent.
4. Add minced garlic and continue to cook for 3 minutes.
5. Add cubed pork. Stir occasionally until pork is cooked and starts to lightly brown.
6. Reduce heat to medium heat.
7. Add flour, cumin, and oregano. Stir continuously for 3-5 minutes. The meat should continue to
brown, but not burn.
8. Add 1 cup of chicken broth and stir until thickened, then add another cup of broth.
9. Add the tomatoes and green chiles
10. Reduce heat to low heat and cover. Occasionally stir and allow to simmer for 20 minutes.
11. Depending on how you like your chile and how it will be served, you can add additional chicken
broth to make it soupier. Do not add if you want the chile to more like a sauce.
12. Taste and add salt if desired. The chile will continue to simmer for an additional 40 minutes, so
add salt slowly as the taste will develop as it cooks.
13. Continue to allow to chile to simmer while covered for 40 minutes. Stir occasionally.
Note: You can allow to chile to simmer longer if desired. It will allow the meat to tenderize and the
chile flavor to develop.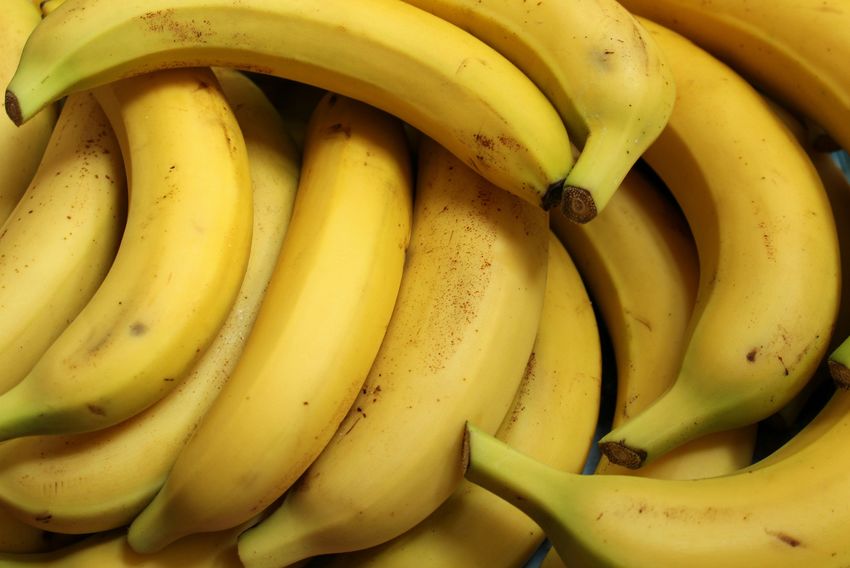
Roasting Chiles
1. Preheat broiler to 425°F and line a baking sheet with foil.

2. Lightly coat green chiles with olive oil and place them on the baking sheet.

3. Place the baking tray in the upper third of your oven, and roast for about 10 minutes, until the chiles start
to blister and brown.

4. Using tongs, turn the chiles over to roast on the other side for another 10 - 15 minutes. Rotate if needed to
prevent burning

5. After the chiles skins have blistered and blackened, remove from the oven.

6. Place the roasted chiles in a bowl (while hot), and cover with wet paper towels and plastic wrap.

7. Once cool enough to handle, peel the skins of the peppers. I recommend wearing gloves. If you don't like
heat, consider removing the seeds and membrane from the chile peppers while peeling the skin.

Note: This process can be done in advance; just let the roasted chiles cool and then place in the airtight
freezer bag. Store in the freezer until ready to use.

   "Green (and red) chile are staples in Mexican cuisine in the southwest and northern
   Mexico (Sonoran). Mostly due to the fact that the best chiles in the world are grown
   along the Rio Grande River. Hatch, NM is famous for their greens chiles, proudly
   name Hatch Chile, and as a child I remember driving to Hatch every fall to buy
   bushels of chiles from various farms. Chile growing, harvesting, picking, roasting and
   cooking is an art and has been perfected by the people of this region. It's essentially
   part of the regions identity and its a part of my culture I hold dear. My grandfather
   made sure I was a chile connoisseur."
   "Chile Verde con Cerdo is so versatile that it is used in many dishes. It can be eaten as
   a stew or sauce. My favorites are huevo rancheros, smothered over a bean burrito, or
   with a chile rellano."

   "There are no limits on how you can eat Chile Verde. If eating like a stew, a spoon is
   the easiest but when I was growing up it was mostly with your hands and a tortilla.
   Use as a sauce over some of your favorite Mexican dishes."

   "This dish will never come out the same. As the pepper heat, texture, and taste will
   differ based on the region it was grown and harvest. The green chiles are the star of
   this dish, so I recommend using fresh Hatch chiles. The best flavor comes from fire-
   roasted chiles. If you can't find Hatch chiles, Anaheim chiles will do. Don't have time
   to roast fresh chile? Use frozen green chile (I can find frozen Hatch chile at Harris
   Teeter). As a last resort, canned green chiles will work, but is definitely not the same.
   Chile Verde is better the next days, and the favor profile continues to build. Always
   allow the Chile Verde con Cerdo to cool completely before storing it in the
   refrigerator."
                                               - Sara Pettaway,
                             Staff- Executive Assistant, Office of the Dean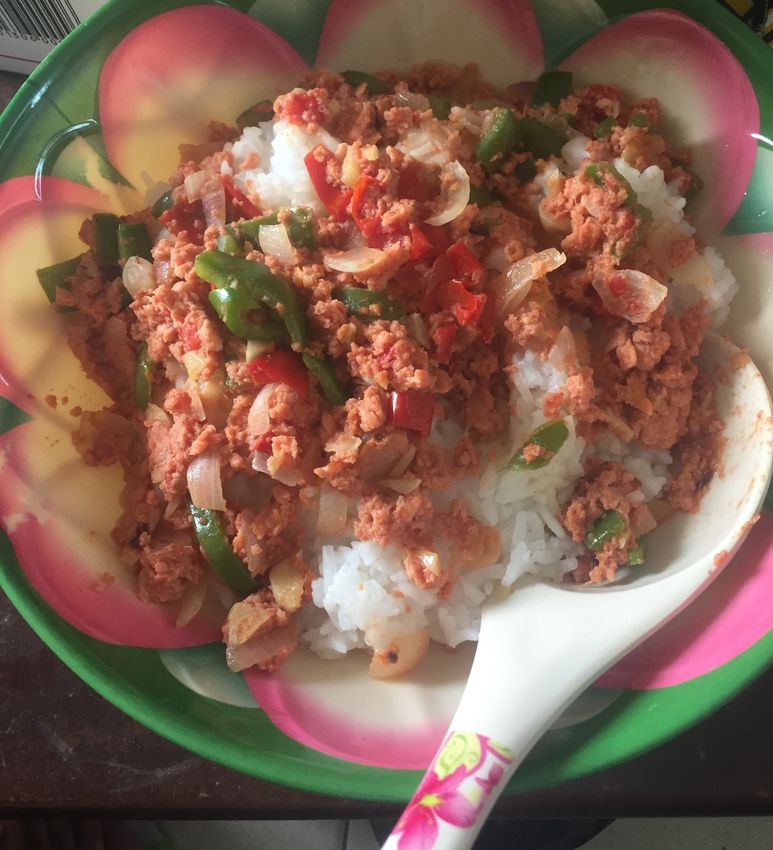
拌⾯
                                                       (PINYIN: BÀN MIÀN)

                                                                   Dish Origin: Fuzhou, China

   "Due to the vastness of China, every province has its own unique cuisine. My family is from Fuzhou
 (Fujian province), and bàn miàn is one of the most popular dishes there! I remember eating this when I
was a child living with my grandparents in Fuzhou. My mom also made this for us when we were growing
                               up, so it is definitely a comfort food for me."
"Bàn miàn is a very easy and quick dish that can be eaten as a snack or for breakfast, lunch, or dinner. It is
found on most street corners in Fuzhou as well as in Little Fuzhou in NYC. It is served simply on a plate or
                                                   bowl."
                                              -Aimee Ho, PY2

 DISH INFORMATION                                     PROCEDURE
 Meal Type: Breakfast, Lunch,
 Dinner, Snack
                                                      1. Cook noodles according to
                                                      package instructions.
 Servings: 1
 Prep Time: 5 mins
                                                      2. Mix peanut butter, soy sauce,
                                                      and sesame oil (and chicken stock
                                                      powder and rice vinegar if using)
 INGREDIENTS
  One serving of noodles (any kind is                 in a separate bowl
  fine but the best are thick wonton
  noodles)
                                                      3. Add couple tablespoons of water
  3 Tbsp creamy peanut butter
  1 Tbsp soy sauce (more or less                      you used to boil noodles to the
  depending on preference)                            sauce to your desired consistency.
  1 Tbsp sesame oil (more or less
  depending on preference)
  Couple Tbsp of water you used to                    4. Combine noodles and sauce.
  boil noodles (to thicken the sauce)                 Mix well.
  Handful of green onions

                                                      5. Top with green onions (and
   Sprinkle of chicken stock powder
                                                      cilantro if using)
   (optional)
   Dash of rice vinegar (optional)
   Cilantro for garnish (optional)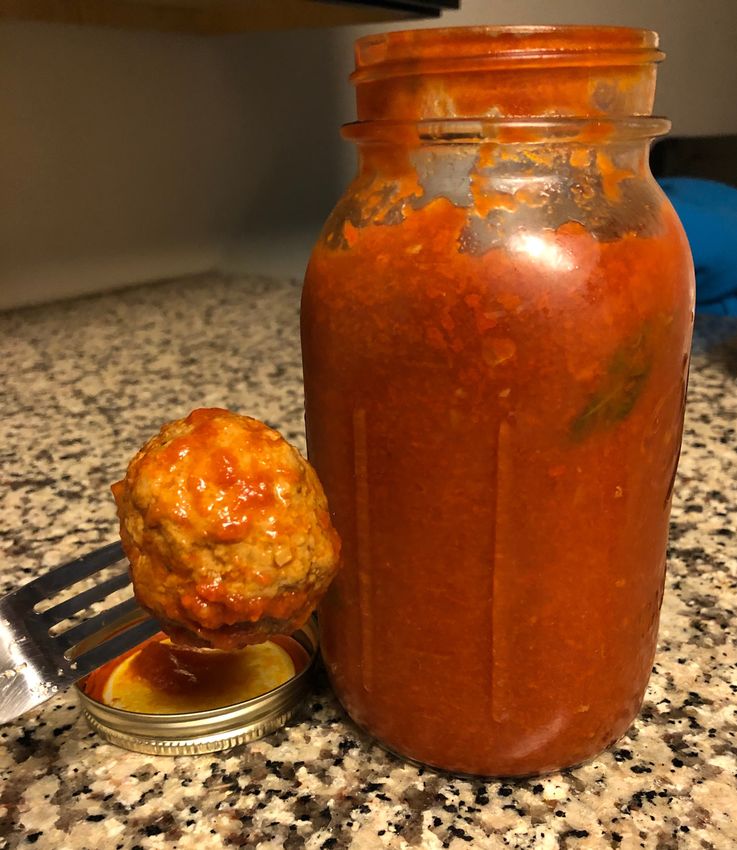
GHANAIAN EGG SAUCE

                                                       Dish Origin: Ghana

"I learned to make this when I studied abroad for a semester in Ghana during
                                     undergrad."
 "You can eat it with a fork, spoon, or your right hand. For cultural reasons,
              Ghanaians consider using the left hand to be rude."
                            -Christian Brown, PY2

DISH INFORMATION                          PROCEDURE
Meal Type: Lunch/Dinner                   1. Prepare rice according to directions or
Servings: 5                               preference.
Total Time: 25-30 mins
Prep Time: 10 min                         2. Heat oil in 5 qt pan
Cook Time: 15-20 minutes
                                          3. Lightly brown garlic and ginger.

                                          4. Lightly saute red onion and green
INGREDIENTS                               pepper slices (max 1 cm thickness).

    Olive or avocado oil to coat
                                          5. Add diced tomatoes and tomato paste.
    pan
    1 heaping tsp of minced garlic
    1 heaping tsp of minced ginger        6. Dissolve Maggi cubes in 1 tbsp of hot
    1-2 medium red onions, sliced         water and add to vegetables.
    2 -3 medium green bell
    peppers, sliced                       7. Scramble eggs in mixing bowl and add
    3-4 Roma tomatoes, diced              spices if desired.
    6oz can of tomato paste
    6-8 large eggs
                                          8. Add eggs to vegetables and cook,
    2 shrimp Maggi cubes
    1-1.5 cups white rice                 turning frequently.
    Pepper and garlic powder,
    optional                              9. Serve over rice and enjoy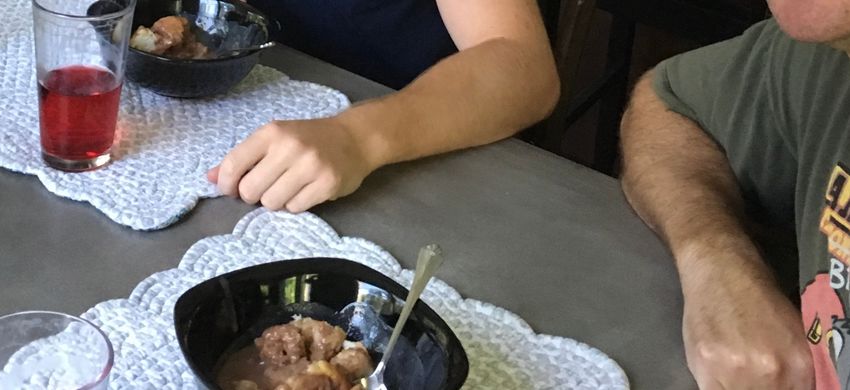
唐揚げ
                                                 KARAAGE (KA·RA·A·GE)

                                                                       JAPANESE FRIED

                                                 CHICKEN

                                                                  Dish Origin: Japan

"This fun fact is about American fried chicken in Japan: people often get a bucket of KFC on Christmas,
  largely due to a marketing campaign in the 1970s. It's so popular that you can order ahead of time to
                          guarantee your chicken and it even comes with cake."
   "It's usually serviced with a slice of lemon and a side of rice. You can dip in mayo if you want (use
Japanese mayo if you're feeling adventurous). It's sold at a variety of restaurants but I enjoy it the most at
an izakaya, which serves small plates and alcohol similar to tapas. My mom also always stuffed leftovers
                       into my bento box which was something to look forward to."
                                           -Sophia Nies, PY2

                                                     PROCEDURE
DISH INFORMATION
                                                1. Cut the chicken into bite size pieces.
Meal Type: Lunch, Dinner
                                                2. Add the chicken, cooking sake, soy sauce, grated
Servings: 2
                                                ginger, and grated garlic in a bowl and mix. Cover
Prep Time: 60 mins                              and marinate in the refrigerator for 30 min.
                                                3. Add flour and cornstarch to the bowl and coat the
                                                chicken evenly.

                                                4. Add about 2 cm of oil to a pot. Bring the oil to 170
INGREDIENTS                                     C and add the chicken. Cook on medium heat for 4-
    300 gram boneless                           5 min or until cooked through.
    chicken thigh with or
                                                Pro tip: don't add too much oil. The crisp comes from
    without the skin
                                                being exposed to the air, so deep fry one side and then flip
    1/2 lemon                                   half way to cook both sides. If you REALLY want the
    3 Tbsp cornstarch                           chicken to be crispy, fry the chicken twice by taking it out
    3 Tbsp flour                                of the oil, raising the temperature to 190 C, and adding it
    2-3 cups of oil                             back in the oil for one minute, but this is optional. Also, the
                                                temperature of the oil will drop when you add the chicken
                                                so let the temperature rise in between each batch.
    1 Tbsp Japanese cooking
    sake (can substitute with                   5. Take the chicken out of the oil and place it on a
    dry white wine or milk)                     plate lined with a paper towel. Cut the lemon into
    1 Tbsp soy sauce                            wedges and plate the chicken if you're fancy but if
    1/2 tsp grated ginger                       not just squeeze the lemon on the chicken. Enjoy!

    1/2 tsp grated garlic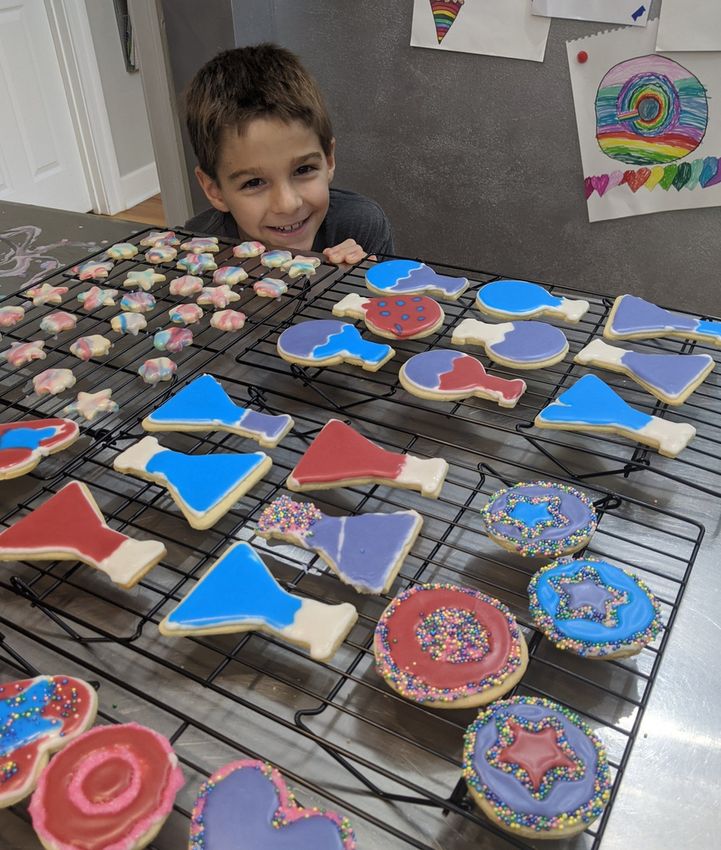
OTBYVNI

                                       (RUSSIAN PORK

                                       MILANESE)

                                                Dish Origin: Ukraine/Russia

    "This dish is popular in Russia, but obviously sriracha is not very
traditional. My mom has actually tweaked the recipe to make it her own
 and I follow her recipe to the letter because I like her version the best."
                          -Anastasia Bordai, PY2

DISH INFORMATION                      PROCEDURE
Meal Type: Dinner
                                      1. Tenderize pork chops (pound
Servings: 6                           until less than half an inch thick)
Prep Time: 45 mins
                                      2. Mix mayo, milk, sriracha,
                                      paprika, salt, black pepper, and
                                      garlic powder into a container.

INGREDIENTS
                                      3. Add pork chops to the above
                                      mixture and allow to marinate
    6 pork chops (boneless)           overnight
    All purpose flour (for
    dredging)                         4. In a separate bowl whisk eggs
    2 eggs                            and water together to make an egg
                                      dredge
    1/4 cup water
    1/2 cup milk                      5. In another bowl add flour to
    1 cup mayonnaise                  make a flour dredge
    1/4 cup sriracha
    1 tsp paprika                     6. Add olive oil to a medium pan
                                      and apply medium heat
    1 tsp salt
    1/2 tsp black pepper              7. Dredge pork chops in egg then
    1/2 tsp garlic powder             flour. Then fry in pan until golden
    3 tbsp olive oil                  brown (4-5 minutes each side)
THE BEST ITALIAN
MEATBALLS
Dish Origin: Naples, Italy
"My nonna (which means "grandmother" in Italian) showed me how to make this meatball dish
when I was little and it was a Sunday-dinner-staple growing up. While I love the southern
comfort food North Carolina has to offer, I always make sure to stock up on frozen meatballs and
tomato sauce when visiting home because I haven't been able to find any Italian food that lives up
to what I grew up with."
-Mia DeMarco, PY3
DISH INFORMATION PROCEDURE
Meal Type: Dinner 1. Chop up your onion and garlic.
Servings: 4 2. Measure and pour the bread crumbs, parmesan cheese,
Total Time: 60 mins romano cheese, pepper, salt, and parsley into the large bowl.
3. Mix the dry ingredients so they're roughly uniform.
3. Add the egg, ground beef, chopped onion, and chopped
garlic to the bowl.
INGREDIENTS 4. Mix/knead the contents with your hands until everything
1 lb ground beef (can use ground sticks together. The consistency you're aiming for is similar to
chicken or turkey, but they will
playdoh. If the mixture sticks to your hands too much even
add some additional moisture)
after a few minutes of mixing, try adding some more bread
1 cup of Italian-seasoned bread
crumbs crumbs. If it's too dry and crumbly, you can try adding another
1/4 cup of grated parmesan egg.
cheese 5. Now it's time to start breaking off pieces of your giant
1/4 cup of grated romano cheese
mixture and rolling meatballs! I tend to roll them between my
1 egg
3 cloves of garlic (or 1 teaspoon hands until they stop breaking off into pieces. Little meatballs
of chopped garlic) cook faster and can be good in soup, while larger meatballs can
1 small onion (or half of a large be added to pasta dishes or just eaten on their own.
onion)
6. Once your meatballs are rolled, set them aside on your plate
1/2 tsp of pepper
1/4 tsp of salt and add your olive oil to a frying pan and turn your stove to
1/4 cup of chopped parsley medium heat.
(fresh is best, but dried works 7. As the stove is heating up, add your meatballs to your pan in
great too)
one layer. Keep an eye out for when they start to brown since
1 Tbsp of olive oil
that will be your cue to flip them with your tongs or fork.
8. Once the other side browns, feel free to add a sauce of your
choosing to the frying pan to ~elevate~ your meatballs.SESAME PEAS
Dish Origin: American South
"Margaret Eubanks, a dear sweet lady filled with Southern charm."
"Presented in a fine china bowl and served with a silver serving spoon,
but best with with whatever comes from a family's kitchen cabinet
and served with love."
-Dottie Forthman,
Staff - Administrative Support Specialist, Center for Integrative Chemical Biology and Drug Discovery
DISH INFORMATION PROCEDURE
Meal Type: Dinner
Servings: 4 1. Open can of peas and drain
Prep Time: 20 minutes liquid.
2. Empty peas into medium
pot.
INGREDIENTS
1 can Le Seuer 3. Add butter and sugar
Sweet Peas, drained 4. Heat through until bubbly.
2 Tbsp butter (can
substitute 5. Pour into serving bowl.
margarine)
1/4 cup sugar (or 6. Sprinkle sesame seeds on
sugar substitute) top to garnish.
2 tsp sesame seeds
(roasted if you 7. Enjoy!
wish)POT-STICKERS
(DUMPLINGS)
Dish Origin: Taiwan/China
"My grandma used to wrap dumplings and freeze them so whenever we ever ran out of
food in the refrigerator we would take them out and pan-fry/cook them for a quick
lunch/dinner. Also, when wrapping the dumplings it was a family affair so we would all
get around the kitchen and make our own (even as kids)."
"Usually dumplings are not really for special occasions (with the exception of Chinese
New Year), but we would serve it with a dipping sauce of soy sauce + raw garlic or hot
sauce (Siracha)."
-Christopher Wang, PY4
DISH INFORMATION PROCEDURE
Meal Type: Dinner 1. Mix the dumpling filling together and set
Servings: 12 aside.
Note: You will probably need to watch a Youtube
Prep Time: 30 mins
video to figure out how to fold the dumplings
properly. Alternatively you can try to make them
however which way you would like.
2. Place 1 spoon-full of pork filling onto each
INGREDIENTS dumpling/wonton skin.
Dumpling skin: 3. Moisten edges with water and fold edges
Dumpling skin/wonton wrappers over to form a half-circle/triangle shape.
from your local Asian supermarket 4. Seal edges by pressing the skin together to
Dumpling filling: seal in filling.
1 lb ground pork 5. Set dumplings aside on a floured surface to
1/4 head of Napa cabbage (salt for a prevent sticking until ready to cook.
few minutes and squeeze out water 6. Heat oil in a large pain and place the
otherwise the dumpling will get
dumplings bottom side down and pan-fry for
soggy)
a few minutes before turning town to medium
2 cloves of garlic
heat and adding 1/4 cup of water and cover
1 Tbsp grated ginger
3/4 cup of green onion (sliced)
with a lid.
4 Tbsp of soy sauce 7. Cook for about 5-10 minutes depending on
3 Tbsp of sesame oil the size of the dumpling.
1 beaten egg 8. Serve with a dipping sauce or pre-made
dipping sauce!
Few dashes of white pepper powderTURKEY BREAST ROULADE
WITH APPLE AND RAISIN
STUFFING
Dish Origin: Family Recipe
"My mom taught me to cook growing up."
-Kristy Ainslie,
Faculty- Vice Chair, Division of Pharmacoengineering and Molecular PharmaceuticsProfessor, Division of
Pharmacoengineering and Molecuar Pharmaceutics, UNC Department of Biomedical Engineering, UNC Department
of Microbiology and Immunology
PROCEDURE
DISH INFORMATION 1. Preheat oven to 350 degrees F (175 degrees C). Place a rack
into a roasting pan.
Meal Type: Dinner
Servings: 8 2. Place the water, butter, and raisins into a saucepan; bring
to a boil. Remove from the heat, stir in the stuffing mix,
Prep Time: 2 hours cover, and let stand until the stuffing mixture absorbs the
30mins liquid, about 5 minutes.
3. Stir into stuffing 1 tablespoon of poultry seasoning and
the apple lightly into the stuffing. Allow the stuffing
mixture to cool.
INGREDIENTS
4. Ask a butcher to debone the breast and remove the skin.
1 ½ cups water
Make sure they know to keep the skin and to try and keep
¼ cup butter in a single piece if possible, as well as keep the breast in a
⅓ cup raisins single piece. Also you can debone and skin the breast via
1 (6 ounce) package low instructions from an online video or other source. Carefully
remove the turkey breast skin in one piece without tearing
sodium stuffing mix
the skin, and set aside.
(such as Stove Top)
1 Tbsp poultry 5. Layout the breast with the inside facing up. Sprinkle the
seasoning inside of the breast with salt, pepper, and 1 tablespoon of
1 apple - peeled, cored, poultry seasoning.
and chopped 6. Spread the stuffing mixture all over the inside of the
1 (6 lb) whole bone-in breast meat piece, and firmly roll the stuffed breast into a
turkey breast with skin compact roll. Spread the reserved turkey skin out, and place
Salt and pepper to the stuffed roll in the middle of the skin. Pull and roll the
skin over the stuffed meat, and tie the stuffed roll together
taste with cooking twine. Place the roll onto the roasting rack
1 Tbsp poultry with the seam side down.
seasoning
7. Roast the stuffed breast in the preheated oven until the skin is
golden brown, the meat is no longer pink inside, and the
temperature of the roll, measured at the thickest part, reads 170
degrees F (75 degrees C), 1 1/2 to 2 hours. Allow the roast to stand
covered with a tent of aluminum foil for at least 10 minutes
before removing the twine for slicing.KUGEL
Dish Origin: Jewish culture
"My mother used to make this dish frequently when I was a child, the recipe was given
to her by my grandmother. Traditionally eaten during various holidays but we did not
follow any sort of guidance on how and when to eat it."
"Served as a side dish at dinner. It is usually in a casserole dish to be cut and served. "
"Also known as noodle pudding. Kugel can technically be made with other starches but
is most popularly made with noodles."
-Brendan Collins, PY2
DISH INFORMATION
PROCEDURE
Meal Type: Dinner
Servings: 8 1. Combine all ingredients
Prep Time: 90 mins (except cinnamon) in a large
bowl.
INGREDIENTS 2. Pour ingredients into
Kugel:
greased 9 x 13 pan.
1 lb cooked egg noodles
4 eggs
1 cup sugar
1 lb small curd cottage cheese
3. Sprinkle with cinnamon and
1/4 cup melted butter bake at 350° for 1 hour.
2 cups milk
1 tsp vanilla
1 large container of sour cream Note: If making with crunchy
Cinnamon for topping topping, simply add topping prior
Optional Topping:
to baking and cook as normal.
4 cups crushed corn flakes May take a few extra minutes to
1/2 cup brown sugar completely bake through.
1 stick melted margarineLUMPIANG SHANGHAI
(LUM-PE-Ã SHANG-HI)
(FILIPINO EGGROLLS)
Dish Origin: Indonesia, Philippines
"These eggrolls were a staple of every Filipino party I grew up attending. My mom
makes them best I have wonderful memories of learning how to make these with her,
and her teaching my two daughters to also wrap the perfect eggroll."
"This is typically served as a snack or appetizer at parties because it makes a big batch.
Eggrolls can be served whole or cut (slanted) in sections for smaller portions."
-Suzanne Harris,
Faculty- Assistant Professor, Division of Practice Advancement and Clinical Education
Director of Well-Being and Resilience
PROCEDURE
DISH INFORMATION 1. Combine and blend well the top seven ingredients.
Meal Type: Appetizer,
2. Add salt and pepper.
Dinner
Servings: 20-30 3. Separate eggroll wrappers into single sheets. Cut
into half, diagonally, to make 2 large triangles.
Prep Time: 45 mins
4. Spoon a small amount (2 tbs) of meat mixture and
place horizontally in a thin line in the long edge of
the wrapper.
INGREDIENTS
5. Wrap into rolls, tucking in ends half-way through
1 lb of lean ground pork wrapping. Try to keep wrapper tight.
3/4 cup uncooked shrimp, 6. Wet the last corner edge of the wrapper with a
finely chopped touch of water for sealing.
1 cups water chestnuts, finely
chopped 7. Should get a long, thin eggroll. Continue steps 1-7
1/2 cup onion, finely minced for remaining meat mixture and wrappers.
3 stalks fo green onion, finely
chopped 8. In skillet/wok or over medium heat, pour in
2 eggs, beaten vegetable oil. When oil is hot, fry egg rolls.
2 Tbsp soy sauce
Salt and pepper to taste 9. Fry both sides until golden brown, cut open one
Thin egg roll wrappers (large) to ensure meat is cooked thoroughly.
Vegetable oil for frying
10. Extra, serve with any side sauce of choice (e.g.
sweet and sour sauce).POOR MAN'S BREAD
Dish Origin: Ireland
"This is my great-great-grandma's recipe. It is over 100 years old!"
-Libby Powell, PY2
DISH INFORMATION PROCEDURE
Meal Type: Baked Goods
1. Preheat oven for 350 and
Servings: Variable
grease bread pan.
Total Time: 1 hour 20 mins
2. Mix first 3 ingredients in a
bowl.
INGREDIENTS
4 cups of brown sugar
1 cup Crisco 3. Remove ~1 cup of the mixture
4 cups flour for the topping.
2 cups sour milk (to make
sour, add 2 tablespoons of
vinegar
4. Then add the rest of the
2 tsp baking soda ingredients and mix thoroughly.
dissolved with a little hot
water
5. Put in a bread pan (should be
1 tsp cloves
1 tsp cinnamon about 1/3 full) and add the
1 cup of nuts of your topping.
choice
1 cup of raisins
6. Bake for 45-55min at 350F.CHOCOLATE
HAZELNUT CIGARS
Dish Origin: Family Recipe
"I first made it with my younger son Max when he was five."
-Kristy Ainslie,
Faculty- Vice Chair, Division of Pharmacoengineering and Molecular PharmaceuticsProfessor, Division of
Pharmacoengineering and Molecuar Pharmaceutics, UNC Department of Biomedical Engineering, UNC
Department of Microbiology and Immunology
PROCEDURE
DISH INFORMATION
1. Defrost phyllo dough in the
Meal Type: Dessert, Snack
refrigerator at least overnight.
Servings: 25
Prep Time: 20 minutes 2. Preheat oven to 400 degrees F
3 . Place one sheet of phyllo dough on a
work surface. Brush half the sheet with
INGREDIENTS butter; fold sheet over.
1 (8 ounce) package
4. Spread about 1 tablespoon chocolate-
phyllo dough, hazelnut spread in a 1/2-inch strip 1 inch
thawed if frozen from the bottom and sides of the folded
phyllo. Spread butter over remaining
½ cup melted butter dough surface.
½ (13 ounce) jar
5. Fold the sides of the phyllo dough over
chocolate-hazelnut the ends of the chocolate layer, and roll
spread (such as into a cigar shape, starting from the
bottom. Place on a baking sheet. Repeat
Nutella®)
with remaining phyllo, butter, and
chocolate-hazelnut spread.
6. Bake in the preheated oven until
golden brown, about 10 minutes.SOUR CREAM SUGAR
COOKIE CUTOUTS
Dish Origin: Family recipe
"My mom would make these cookies every Christmas and hand them out
to neighbors and friends. Now this is my younger son's favorite recipe
because he likes to decorate the cookies. Both my sons like to eat them. We
make them for just about every holiday and in between for co-workers
and friends."
-Kristy Ainslie,
Faculty- Vice Chair, Division of Pharmacoengineering and Molecular PharmaceuticsProfessor, Division of
Pharmacoengineering and Molecuar Pharmaceutics, UNC Department of Biomedical Engineering, UNC
Department of Microbiology and Immunology
DISH INFORMATION PROCEDURE
Meal Type: Dessert 1. Sift or stir together the flour, baking powder,
Servings: 36 cookies baking soda and salt in a bowl and set aside.
2. Cream together the margarine/butter,
Prep Time: Overnight, 45 shortening, and sugar until smooth.
minutes 3. Beat in the eggs and vanilla.
4. Alternate flour mixture with sour cream, mixing
at each stage.
5. Wrap dough and chill overnight in refrigerator.
6. Remove dough from fridge 15 minutes before
INGREDIENTS
using. Preheat oven to 350 degrees C.
4 cup flour with extra for 7. Divide dough in thirds. Take one-third and cover
rolling liberally with flour. Flour the rolling surface and
1 tsp baking powder rolling pin. Roll dough into 1/4 inch thickness and
1/2 tsp baking soda add flour to prevent sticking.
1/2 tsp salt 8. Cut with cookie cutters of your choice and move
1/4 tsp nutmeg to ungreased cookie sheet with a spatula. Place
1/2 cup butter or margarine cookies at least 1/2 inch apart.
9. Dough can be kneaded together and rolled out
1/2 cup vegetable
approximately 2-3 more times until stiff.
shortening
10. Bake cookies 8-10 minutes until light golden
1 1/2 cup sugar
brown on edges.
1 egg 11. Cook on cooling rack before frosting. Colored
1 tsp vanilla sugar crystals can be added to cookies prior to
1/2 cup sour cream, light or baking if desired for decoration. Excess flour can be
low fat can be substituted removed from cookies with a brush if desired.ARMENIAN CHOCOLATE CHIP
COOKIES
Dish Origin: Armenia
"My grandma learned the recipe from family members that immigrated to America from Armenia in
1917 during the Armenian Genocide. The women who immigrated from Armenia provided for their
families by coming together in the basment of their church to cook and prepare traditional dishes that
they would then sell to the public. This particular recipe was my great-grandma's spin on the traditional
"American" cookie that she though was "too bland."
They should be thick cookies with a sligh crunch on the outside but very soft on the inside. Eaten by
dunking them in coffee/espresso or by themselves. Just as great at room temp as they are warm.
-Emily. Vanerian, PY2
PROCEDURE
DISH INFORMATION In 1st big bowl:
1. Combine with your wooden spoon the white and brown sugar with
Meal Type: Dessert your ~softened~ butter until it's looking pretty creamy
Servings: 18 cookies 2. Add 2 eggs and vanilla, mix it up some more
3. In a little bowl or cup, mix the instant coffee and a lil bit of water (no
Prep Time: 60 mins more than a tablespoon), then add that to the big bowl
4. Add your real maple syrup (emphasis on the real, it's for flavor not
sweetness)
5. Lastly, add all your chocolate chips (the more the merrier)
In 2nd big bowl:
6. Put all the flour in, don't worry if you overdo it, but aim for 3.5 cups
7. Add baking soda and baking powder (make sure ingredients aren't
INGREDIENTS expired, these two things make the ~chemistry~ happen)
1 cup (2 sticks) salted 8. Lastly add your salt and mix it all together
butter
1 cup white (granulated) Back to the 1st big bowl:
sugar 9. Start by adding 1/4 of your flour mixture to the sugar mixture, and stir
1 cup light brown sugar that all together
2 Tbsp real maple syrup 10. Continue adding flour in parts until it's all mixed together
1 Tbsp Nescafe Clasico
instant coffee + 1 Tbsp Baking instructions:
water 11. Roll about 1 quarter cup of room temp dough into balls (make sure
1 Tbsp pure vanilla extract they are pretty spherical)
2 large eggs 12. Place dough balls approx. 2 inches away from each other on
3.5 cups all-purpose flour parchment paper on baking sheet
(substitutes: oat or almond 13. Bake for 12 minutes at 375. These shouldn't spread out that much.
flour, or combining both) Once you see slight browning on the surface, it's time to take them out.
1 tsp baking soda (try not to open the oven to check because that lets the heat out)
1/2 tsp baking powder 14. Take cookie sheet out of oven and let cookies sit on the sheet for
1 tsp sea salt (flaky) or 1/2 approx. 3-5 min (they will continue to cook)
regular salt 15. Remove cookies from sheet with your spatula, bc they are still hot,
1 10oz bag of Nestle 53% and put them on a plate. Don't cover plate until they have completely
Cocoa Dark Chocolate come to room temp
Chips 16. You can reuse the parchment paper for baking a couple times over
1/4-1/2 12oz bag of semi-
sweet chocolate chips (pref Note: If you choose to refrigerate the dough, make sure you wrap it tightly in
ghirardelli or godiva) plastic wrap so it doesn't dry out. Also, when baking cold dough, I recommend
that you increase the time to 15-17ish minutes, but watching the color is the best
indicator for when they are done.ITALIAN KNOT COOKIES
Dish Origin:Italy
"The cookies come from the Italian side of my family and I learned to make them from my mom. My
family makes these cookies for many holidays. We like to switch up the color of the sprinkles to match
the season (e.g. red and green for Christmas, pink for Easter)."
"Once the glaze on the cookies has set, set the cookies out on a large tray. These cookies are very light and
make a great after dinner treat served with coffee."
"You can prepare this recipe ahead of time and freeze the iced cookies in a tupperware container for a
few weeks; they will stay fresh. Just be sure to pull the cookies out early and let them defrost when ready
to eat."
-Lauren Passero, PhD Student
PROCEDURE
DISH INFORMATION 1. Mix butter and sugar well in stand mixer.
2. Add eggs, vanilla, and sour cream to stand mixer and blend.
Meal Type: Dessert
3. Add salt and baking powder and mix.
Servings: 40 4. Add 4 cups of flour one at a time mixing at a low speed. If you
mix at a high speed, the flour will go everywhere!
Prep Time: 2 hours 5. Once dough is fully mixed, cover with plastic wrap or a clean
towel and refrigerate for 1-2 hours. You need to chill the dough
so it will hold its shape when forming the knots.
6. Clean a space on your kitchen counter and cover with flour.
This will be your workstation for shaping the cookies.
INGREDIENTS 7. Take the dough out of the refrigerator and divide into 4
Cookies: sections. Roll each section of dough into large cylinder (like a
1 cup butter, softened soda can). Cut the cylinders into 1/4 inch pieces. Roll each 1/4
4 eggs
inch piece into a long thin cylinder, approximately 5 inches long
4 cups flour
and a half inch in diameter. Twist/tie the dough piece into a knot
1/2 tsp salt
3/4 cup sugar and place on a cookie sheet. Rolling the cookies can take a while.
1 tsp vanilla If the dough is starting to get sticky and difficult to work with,
2 Tbsp baking powder you can sprinkle a little bit more flour on top or put the dough
1/4 - 1/3 cup sour cream back in the refrigerator for a while.
Extra flour for rolling cookies
8. Bake the cookies for 8 minutes at 350 degrees. The cookies
Icing:
should become browned on the bottom, but not on the tops.
2 cups powdered sugar
3 Tbsp milk Remove from the oven and cool. You must let the cookies cool
2 tsp lemon juice before icing or they will fall apart.
Optional: colored sprinkles 9. Combine the powdered sugar, lemon juice, and milk in a small
bowl. Mix well until a glaze forms. The icing should have the
These ingredients make a lot of cookies!
consistency of a thick smoothie.
You can always freeze the dough for
10. Take each cookie and dip the top into the glaze. Set on wax
later if you don't want to make all the
cookies at once. paper with the glaze facing up. If you want to add sprinkles,
sprinkle a little bit on the top of each cookie after glazing.PESTO BOWL
Dish Origin: Family Recipe
"I came up with this in college and it was based on a dish that was
discontinued from one of my favorite restaurants on campus
(Freshii- University of Kentucky)"
-Elizabeth Caudill, PY1
PROCEDURE
DISH INFORMATION
1. Heat water in saucepan
Meal Type: Lunch,Dinner
2. Turn off heat and put rice noddles in
Servings: 4
for about 10 min or until fully cooked,
Prep Time: 25 minutes
then strain
3. (optional) Cook chicken however
desired and chop if you are going to add
INGREDIENTS
1 bag of fresh spinach it to the bowl
1 package of cherry 4. Dice cherry tomatoes (could cut them
tomatoes in half or 1/4s depending on preference)
1 package of rice noodles
5. Cut kalamata olives in half, cut limes
1/2 jar kalamata olives
7. Qarm pesto in small bowl then add salt,
4-6 oz feta cheese
1 lime pepper, and lime juice (to taste)
salt 8. Add spinach, rice noodles, tomatoes,
pepper
olives, and feta cheese to large bowl
~ 6 oz pesto (add to taste)
9. (optional) Add chicken
Grilled chicken (optional)
10. Top with pesto sauce and mix
11. Serve in a bowl and enjoyMOM'S BEST BANANA
BREAD
Dish Origin: Family Recipe
"This is my no-fail, works every time, banana bread! In my house, no
one touches the ripe bananas when there are just 3 left so I can make
this bread!"
-Christy Holland, Staff
DISH INFORMATION PROCEDURE
Meal Type: Breakfast 1.Preheat oven to 350. Prep loaf
Servings: 8-10
pan with butter or nonstick
Prep Time: 1 hour
spray.
2. Stir together butter and sugar.
INGREDIENTS
3. Add eggs, bananas, and
1 stick of butter, softened
or melted vanilla. Stir well.
1 cup of sugar 4. Add remaining dry
2 eggs
3 ripe bananas, mashed ingredients. Stir well.
1 1/2 cups all purpose 5. Pour batter and spread evenly
flour
1 tsp baking powder in loaf pan.
1 tsp baking soda 6. Bake for 45-50 minutes, until
1/2 tsp salt
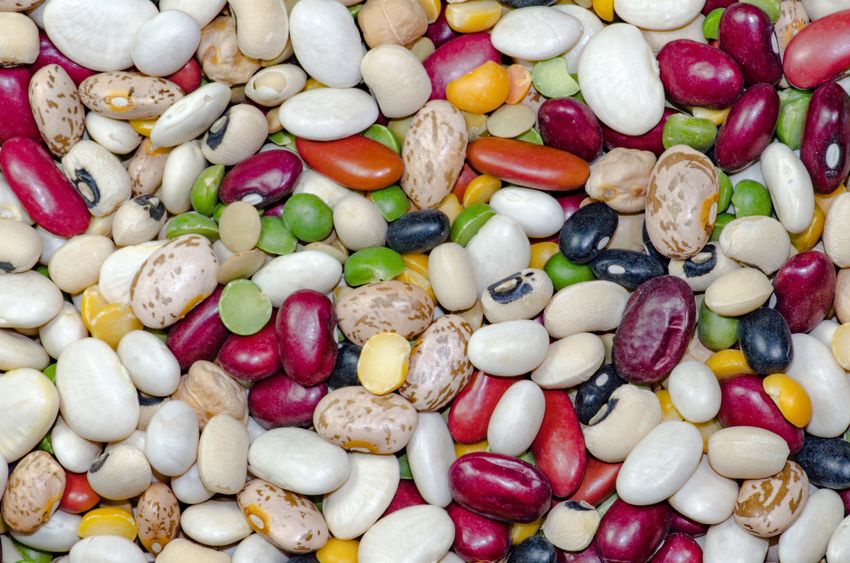
1 tsp vanilla extract browned and the middle is set.CAROLE'S INSTANT
BLACK BEAN SOUP
Dish Origin: Family Recipe
Recipe by Kim Swain, Staff
PROCEDURE
1. Place beans (including
DISH INFORMATION
liquid) in a saucepan and
Meal Type: Lunch, Dinner
Servings: 2-3 partially mash with a potato
Prep Time: 15 minutes masher. Heat on high, then
stir in salsa, chili powder and
broth.
INGREDIENTS
2 - 15oz cans of black 2. Bring to a boil.
beans
1/2 C bottled salsa 3. Ladle into soup bowls.
1 TBS chili powder 4. Garnish with shredded
2 C chicken broth
cheese, avacado and/or sour
cream as desired.GINGERBREAD
CHEESECAKE LAYER CAKE
Dish Origin: Virginia/Christmas Traditions
Gingerbread cookies have become a staple during the Christmas holiday but the
cultures who made it what it is today is quite diverse: Ginger root was first cultivated in
China where it was commonly used in medicinal treatment, recipes for gingerbread
have been reported as far back as 2400 BC in Greece & gingerbread houses originated
from Germany in the 16th century. So as you're mixing this recipe together, think of it
as a "melting bowl" of diverse cultural impacts!
-Danielle Shelton, PY3
INGREDIENTS FOR GINGERBREAD CAKE
DISH INFORMATION
¾ cup unsalted butter, room temp
Meal Type: Dessert • 1 cup packed brown sugar
Servings: 8-10 • ¾ cup molasses
Total time: 2.5-3 hours, • 1 tsp vanilla extract
Cheesecake Prep: 15 minutes, • 3 large eggs, room temp
Cheesecake Bake Time: 40-50 • 2 ¾ all purpose flour
• 2 ½ tsp baking powder
minutes
• 3 tsp ground ginger
Gingerbread Cake Prep: 15
• 3 tsp ground cinnamon
minutes, Gingerbread Bake
• ½ tsp salt (if using salted butter then leave
Time: 25-30 minutes out)
Frosting Prep Time: 10 minutes; • ¾ cup milk
Assembly & Decor: 20 minutes • ¼ cup water
INGREDIENTS FOR CHEESECAKE INGREDIENTS FOR FROSTING
• 2 Packages (8oz each) cream
• 3 packages (8 oz each) cream cheese,
cheese, softened
softened
• ½ cup sugar
• ½ cup sour cream (or Greek • 1 ½ cup butter, softened
yogurt) • 1 tbsp vanilla extract
• 1 ½ tsp vanilla extract • 2-3 cups of confectionery sugar
• 2 large eggsTo make the Cheesecake: 1. Preheat oven to 325F. 2. Line bottom of a 9-in spring-form pan with parchment paper – grease paper. 3. In a large bowl, beat cream cheese and sugar until smooth (no lumps!). Beat in sour cream and vanilla. Add eggs one at a time; beat on low speed just until blended (don’t over mix the eggs into batter!). 4. Pour into 9” spring-form pan. Place on a baking sheet. Pour water into another casserole dish or separate baking pan - place on oven rack below cake. Bake cheesecake until center is set, 40-50 minutes. 5. Cool on a wire rack 10 minutes. Loosen sides from pan with a knife. Cool 1 hour longer then refrigerate until ready to assemble – covering when completely cooled. To make the Gingerbread Cake: 1. Preheat oven to 350F. 2. Prepare two 9-inch cake pans with parchment paper circles in the bottom and grease the sides. 3. In a large mixing bowl, cream the butter and sugar together until light in color and fluffy, about 3- 4 minutes. 4. Add the molasses and vanilla extract and mix until well combined, scraping down the sides of the bowl as needed to make sure the molasses gets combined. 5. Add the eggs one at a time, mixing until mostly combined after each. Scrape down the sides of the bowl as needed to be sure all ingredients are well incorporated. 6. Combine dry ingredients in a separate bowl (flour, baking powder, ground ginger, ground cinnamon, ground cloves, salt) then combine milk and water in a small measuring cup. 7. Add half of the dry ingredients to the batter and mix until well combined. Add the milk mixture and mix until well combined. Batter may look a little curdled. – Add the remaining dry ingredients and mix until well combined. Batter should smooth out and not look curdled anymore. Scrape down the sides of the bowl as needed to be sure all ingredients are well incorporated. 8. Divide the batter evenly between the cake pans and bake for 27-30 minutes or until a toothpick comes out with a few crumbs. 9. Remove cakes from the oven and allow to cool for about 2-3 minutes then remove to cooling racks to cool completely. To make the Frosting: 1. In a large bowl, beat cream cheese, butter, and vanilla extract until smooth. 2. Gradually beat in enough confectionery sugar to reach desired consistency & sweetness. Assembly: 1. Flatten the gingerbread cake layers if needed to ensure a flat surface for stacking. 2. Spread ~1/2 cup frosting onto the top of the cheesecake layer. 3. Place one gingerbread layer on top of cheesecake layer. 4. Then place a serving plate upside down on top of the stacked gingerbread layer (with cheesecake under). Flip the 2 layers upside down onto the serving plate. 5. Spread with ~1 cup frosting onto the top and side of the 2 layers. 6. Top with remaining gingerbread cake layer. 7. Frost top and sides of cake with remaining frosting (~1 cup). 8. Decorate cake with optional rosemary, cranberries, & gingerbread men. 9. REFRIDGERATE OVER NIGHT BEFORE SERVING! 10. Optional Décor: Gingerbread men, cranberries, and rosemary.
FOOD. CULTURE. DIVERSITY
You can also read