Flocare Infinity Unrivalled accuracy. Advanced simplicity - Instruction Book & Guide
←
→
Page content transcription
If your browser does not render page correctly, please read the page content below
Flocare Infinity
Unrivalled accuracy. Advanced simplicity.

Instruction Book & Guide
Flocare Infinity
pump & stand
Setting up your pump – step by step

       1    Wash your hands
            before you start
                                                       4   IMPORTANT: Stand
                                                           pack on flat surface
                                                           before connecting

       2    You will need a new
            giving set, new feed
            and a syringe for water
            (as prescribed by your
                                                       5   Hold pack at base of
                                                           spout and pierce foil.
            Dietitian) to flush the                        Take care not to touch
            feeding tubes                                  ENPlus set connector
                                                           end or top of pack
                                                           spout. Do not touch
                                                           spike or foil seal

       3    Remove the giving set from its packaging

Setting up your pump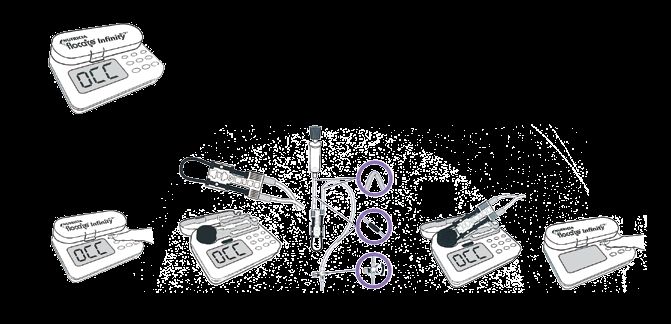
Setting up your pump (continued)

  6   Hang the pack / container of feed on the
      drip stand
                                                          9    Insert the giving set by placing looped
                                                               section over the rotor wheel. Stretch to
                                                               the right until the giving set slots in place.
                                                               Close the pump door, pinching the catch
                                                               as you close it. Flush feeding tube with
  7    If your giving set has a drip chamber,
      squeeze it until it is 1/3 full of feed. If there
                                                               sterile or cool boiled water
      is no drip chamber, proceed to next step

  8   Open pump door by
      pressing up on the lower
      part of door and lifting
      upwards (see arrows).
      Please make sure to                                 10   Check the position of the feeding tube if
      pinch the catch on the                                   you have been advised to do so by your
      door when closing                                        hospital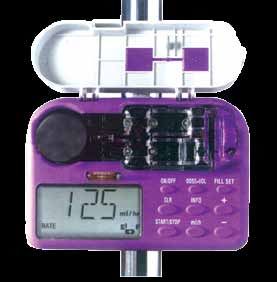
Programming your pump – step by step
1 3 Press and hold the
fill set button until the
Press and hold the word "fill set" appears.
ON/OFF button until it The machine will beep and
beeps begin to fill the giving set
automatically. The feed will automatically
stop close to the feeding set end.
However you can watch the feed and
when you want it to stop, press the fill
set button again. To continue filling all
2 a. Wait for the word "VOLUME" to appear
on the screen; the number above it is the
the way to the end, press the fill set
button for a further 2 seconds to start the
previous amount of feed delivered during flow again. If you are using a mobile giving
the last feed set the machine will over fill the set. To
avoid this please watch the flow and press
the fill set button again to stop it from
flowing
VOLUME
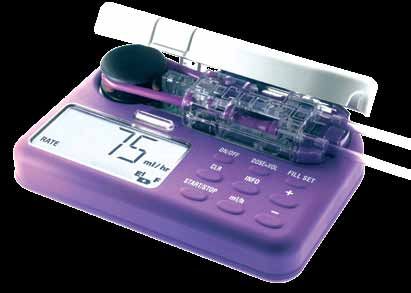
4 The rate in
ml/hr is now
b. Press the CLR button and on screen.
release immediately. Pump If necessary
will not beep press + / –
button to reach the desired rate
Programming
your pump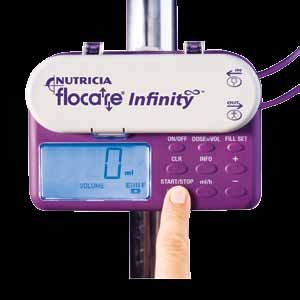
Programming your pump (continued)

 5    a. Now press the DOSE=VOLUME
         button. "CONT" will
                                                  7   Press START and the word "run" will
                                                      appear in the top right of the screen.
         appear on screen. If it                      If you wish to pause the feed, press the
         does not, press the CLR                      START/STOP button. To restart press
         button for continuous                        START/STOP again
         feeding

                                                                                           run
                 CONT

      b. T
          o set a dose (total amount of feed),
         press + button to reach the desired
         amount. The pump will
         alarm and stop running
         when full dose has been
         delivered

 6   Connect giving set to feeding tube, open
     clamp if necessary
                                                  8   When the feed has finished, turn off the
                                                      pump and flush the feeding tube with
                                                      water as prescribed by your Dietitian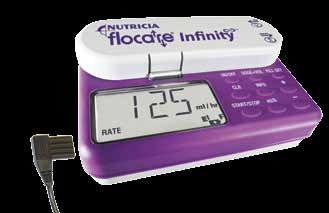
If your feeding rate remains the same and if you have not set a specific dose.
For example you feed continuously until the pack is finished.
Please follow these 4 simple steps:

  1   Press ON/OFF button
      until it beeps
                                               3    Press and hold the
                                                    fill set button until the
                                                    machine beeps and begins
                                                    to fill the giving set

                                               4    When set is filled, Press START and the
                                                    word "run" will appear in the top right of
  2   Press the CLR button for
      continuous feeding
                                                    the screen

                                                                                          run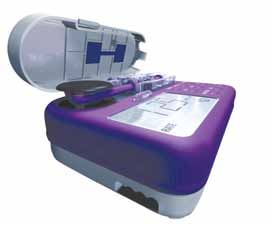
Troubleshooting & pump alarms – step by step
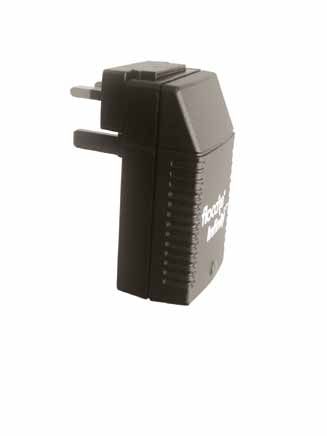
Important: No Power Supply
Plug Symbol
Visible while the pump
is connected to the
electrical supply
Power indicator light Light off Light on
Reason Solution
oose wire or the plug adaptor pins have
L heck that the part where the three pins are has
C
moved not become loose and separated from the main
body of the adaptor. If this has happened, simply
push back together so the top of the charger is
totally flat (see above)
Troubleshooting &
pump alarms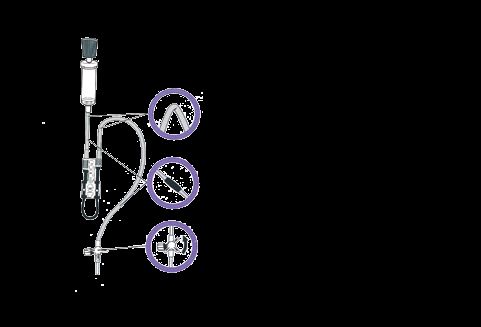
Troubleshooting & pump alarms (continued)

  Important: No Power Supply (continued)

  Reason                                       Solution
       The charger is not connected to pump     nsure the charger is fully pushed into the pump
                                                E
  or                                            (with grooves facing you as shown above)
       The wall socket doesn't work             ry connecting the plug to an alternative wall
                                                T
  or                                            socket
       The adaptor is damaged                    ontact your Patient Care Freephone number to
                                                C
                                                replace the adaptor
Troubleshooting & pump alarms (continued)
If your pump alarms, please follow the steps below:
1 Read the screen
2 Press START/STOP to
silence the alarm
3 See overleaf for a list of
reasons why your pump is
alarming and how to deal
with each alarmTroubleshooting & pump alarms (continued)
Reason Solution
he set is not fitted or is fitted
T einsert the giving set as per
R
incorrectly instructions
NO SET
or Clean the sensors and reinsert
The pressure sensor is dirty cassette
Reason Solution
oor is broken, cracked or not
D ake sure that the door is
M
closed closed
Tape door to pump tightly
DOOR to continue feeding and call
your Patient Care Freephone
number to arrange for a
replacement
Reason Solution
he pump has been paused
T y pressing the START/STOP
B
for 3 or more minutes button to silence the alarm,
PUSH START a further 3 minute pause
commences. When ready
to restart feeding, press the
START/STOP buttonTroubleshooting & pump alarms (continued)
Reason Solution
Air bubble in the giving set isconnect the giving set from
D
or the feeding tube and place in
a bowl. Press the FILL SET
The giving set is empty
button until the air bubble has
or passed out of the giving set
The air sensor is dirty Replace the empty feeding
AIR or reservoir and recommence
The giving set has been used feeding. You may have to refill
for 24 hours or more the line by pressing FILL SET
or lean the sensor area following
C
The end of the giving set has the cleaning guidelines
not fully pierced the foil eplace the giving set with a
R
fresh one
Reason Solution
he pump has administered
T ress and hold the ON/OFF
P
the dose button until it beeps and is
powered off
END OF DOSE If the end of dose alarms
inappropriately when no dose
has been set, press the dose
button and then press clr.
Ensure that "cont" appears
on the screenTroubleshooting & pump alarms (continued)
Reason Solution
he pump detected an
T nsure there are no kinks in
E
occlusion between the feed the tubing, that clamps are
OCC IN and the pump not closed between the feed
container and pump, and that
or
the foil has been pierced
The sensor is dirty Clean the sensor area
Caution Reason Solution
DO NOT use the
FILL SET function he pump detected an
T If relevant, ensure clamp is open
when there is a
occlusion between the pump nsure there are no kinks in
E
set occlusion
as this may and the patient the giving set or feeding tube
cause the pump
to incorrectly nsure the three way tap is in
E
calibrate a straight line to allow feed to
or pass through
lush the feeding tube to
F
ensure there is no blockage
The sensor is dirty lean the sensor area (see
C
OCC OUT cleaning guidelines), reinsert
the giving set in the pump and
restart the pumpTroubleshooting & pump alarms (continued)
If you see the OCC alarm, you
need to follow the below steps:
1. Press START/STOP 2. Detach the 3. Solve the 4. Re-insert 5. Press START/STOP
button feeding set occlusion problem the feeding set button
See other sideTroubleshooting & pump alarms (continued)
The most common set occlusions
Tube kinking → Narrow the tube, release kinking
Tube clogging → Flush with mildly warm water using a
10 - 20 ml syringe
Stop cock closed → Open the stop cock
If you encounter persistent problems please contact Nutricia Medical on Freephone: 1800 22 1800 (ROI), 0800 169 5173 (NI)Troubleshooting & pump alarms (continued)
Reason Solution
he battery capacity is running
T onnect the pump to the
C
low. There is approx 1 hour of electrical supply and charge
feeding left when a rate of for 6 hours. The pump can be
125 ml/hr is set used while connected to the
electrical supply
BATT
Reason Solution
The battery has failed ontact your Patient Care
C
Freephone number to arrange
for the pump to be serviced
"BATT" "E" "F"Troubleshooting & pump alarms (continued)
Reason Solution
he current feeding regimen
T lease see set up menu at the
P
has been locked into the end of this section
machine to prevent accidental Call your Patient Care
changing of regimen Freephone number
LOCK
Reason Solution
The self test detected a fault ontact your Patient Care
C
Freephone number to arrange
ERROR with a service of the pump
number, e.g.
ERROR 12 or 13Set up menu – step by step
1 Press and
hold the
4 To continue with set up
mode, press the fill set
ON/OFF button; you are now in the
button and keypad lock mode. To
the + button lock the keypad, press the
at the same time + button, to unlock, press the – button
2 The first item to appear 5 If you are finished in the set
up menu, press and hold
in this menu is the alarm
the ON/OFF button for 2
volume mode. To adjust
seconds
the alarm to beep at high
volume, press the + button
or to adjust the alarm to beep at low
volume, press the – button 6 To continue with set up
mode, press the fill set
button again; you are now
in the mute when done
3 If you are finished in the set
up menu, press and hold
mode. To set the pump to
alarm when the feed is finished, press the +
the ON/OFF button for 2 button to set. To set the pump to remain on
seconds mute when the feed has finished, press the
– button
Set up menuSet up menu (continued)
7 If you are finished in the set
up menu, press and hold
9 If you are finished in the set
up menu, press and hold
the ON/OFF button for 2 the ON/OFF button for 2
seconds seconds
8 To continue with set up mode, press the
fill set button again; you are now in
10 To continue with set up mode, press the
fill set button again; you are now in
the background light mode. To switch the nurse call / PDMS mode. Please
light on, press + button or to switch off, ignore this mode. If you are finished in
press – button the set up menu, press and hold the off
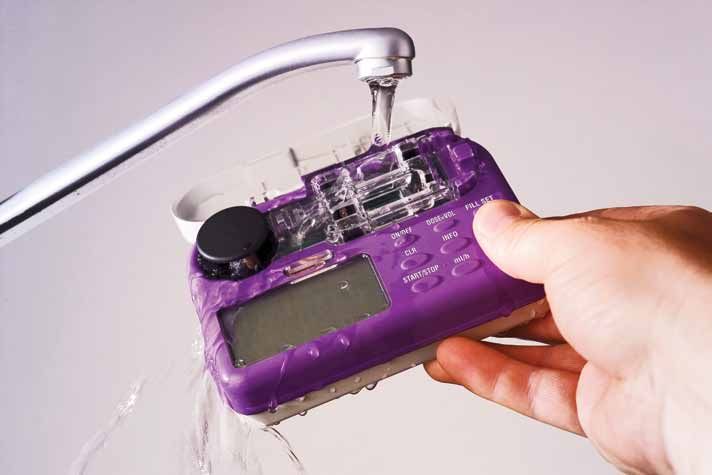
button for 2 secondsCleaning guidelines for the Flocare Infinity pump – step by step
Please Note:
✘ AVOID immersing pumps in water,
detergents or other fluids. Pumps
may be wiped with a wet cloth and
detergent and rinsed under running
water.
✘ AVOID sterilising (autoclave, ETO, etc.)
and do not use cleaning chemicals such
as Acetone, Benzene, Iodine, etc.
✘ AVOID storing the pump in extreme
heat or cold (outside the range of
-40ºC up to +50ºC).
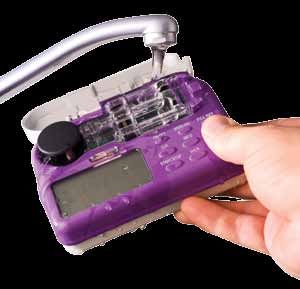
Cleaning guidelinesCleaning guidelines for the Flocare Infinity pump (continued)
1 efore Cleaning:
B
Avoid immersing pumps in water, detergents
or other fluids. Pump may be wiped with a
wet cloth and detergent and rinsed under
running water
2 Cleaning pump:
The pump may be wiped with a wet cloth
and general purpose detergent. Rinse clean
under warm running water. Avoid immersing
pump. If necessary, use a moist cotton bud
to clean sensor area
3 Drying pump:
Shake pump to remove excess water and
allow to air dry for approximately 30 mins or
until completely dry
4 Pumps in need of decontamination:
These pumps should be dealt with according
to your hospital policy. If you are at home,
the pump must be put in a plastic bag before
returning it to Nutricia MedicalThe Flocare Infinity pump requires servicing every 2 years. Please contact
the Patient Care Freephone number at Nutricia Medical to arrange a service.
Flocare Infinity pumps are supplied on loan from Nutricia
Medical. When you no longer need your feeding pump
please remember to call Nutricia on your Patient Care
Freephone number to arrange collection. Thank you.
Patient Care Freephone number for queries or problems:
1800 22 1800 (ROI) 0800 169 5173 (NI)For further information please contact: Nutricia Medical, Block 1, Deansgrange Business Park, Deansgrange, Co. Dublin. Tel: +353 1 289 0283 Fax: +353 1 289 0255 www.nutricia.ie Patient Care Freephone: 1800 22 1800 (ROI), 0800 169 5173 (NI) Email: patientcare.ireland@nutricia.com Opening Hours: 9am-5pm, Monday-Friday (excluding bank holidays) www.nutricia.ie
You can also read