Google Earth Pro: A tutorial
←
→
Page content transcription
If your browser does not render page correctly, please read the page content below
Google Earth Pro: A tutorial

             1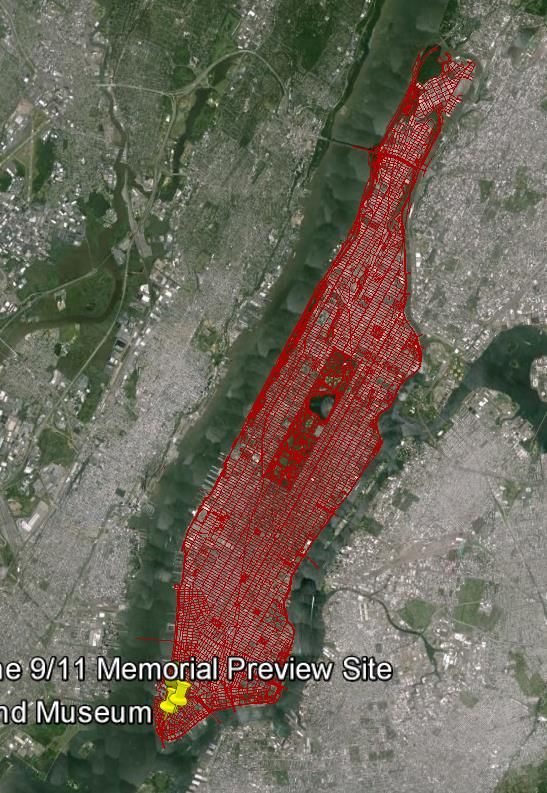
OVERVIEW
As of early 2015, Google Earth Pro, which used to be a $400 product, is now free. This is a powerful yet
simple tool for viewing information geographically—whether it is viewing climate information, analysing
change over time, seeing the world the same way you’re used to seeing, or remembering routes taken
while on vacation. In this tutorial you will learn how to create placemarks (points of interest), analyse
elevation changes over the landscape, import images, utilize the built in library (3D buildings, weather,
photo gallery, etc.), view historical imagery, navigate to a city with the directions module, import shape
files, geocode addresses, and create a route.

 If you are familiar with the standard Google Earth version, much of this tutorial will be review. There are
however new and interesting features that are in the pro version that are quite useful that will be
covered. The interface is shown in Figure 1 below.

Figure 1

The sidebar on the left hand side of the screen contains a few different modules. At the top is the
Search module which can be used to search for locations using various methods, such as
latitude/longitude, cities, provinces/states, nations, administrative boundaries and addresses. In the
middle is the Places module where location information is saved and organized. At the bottom is the

                                                     2
Layers module, which contains a variety of information, or layers, created by the Google Earth
community that can be checked on and off for viewing purposes. Examples of these layers include
photos, weather, labels, demographics (US only), and 3D buildings.

The toolbar at the top of the Google Earth interface gives access to a variety of features provided within
Google Earth, including Placemarks, creating polygons, , image overlays, historical imagery, and so forth.

The bottom of the screen provides helpful information such as the current latitude and longitude
coordinates and elevation of where your cursor is pointing. Off to the right you can also find the Eye
altitude, or the altitude that Google Earth is currently viewing the world from.

LEARNING OBJECTIVE
The objective of this tutorial is to create a walking tour of the area surrounding Ground Zero of the
September 11th terrorist attack in New York City. You will learn how to create Placemarks (points of
interest) with descriptions and supplemental information both by hand and geocoding (Importing a list
of addresses and having Google Earth generate the placemarks from that information), and then how to
create a route connecting all your Placemarks. You will also learn how to automate this tour with a video
recording of your animated map, as well as adding ESRI shape files to enhance your end product.

NAVIGATIONAL TIPS
Google Earth has numerous methods of navigating physical space on your screen, including non-mouse
controllers such as keyboards, touchpads, and joysticks. Depending on your device, the methods may
vary slightly from one to another. The two most common platforms, however, are Macs and PCs.
Therefore, the table below provides an overview of basic keyboard shortcuts for Mac and PC.

  Command                 Windows Keystroke(s)                             Mac Keystroke(s)                             Result
Linear                                                                                                   Moves the viewer in the
                     Left, right, up, or down arrow            Left, right, up, or down arrow
movement                                                                                                 direction of the arrow.
Rotate                                                                                                   Rotates the view around
                     Shift + left, right, up, or down arrow    Shift + left, right, up, or down arrow
(perimeter)                                                                                              the map’s perimeter.
Rotate                                                                                                   Rotates the view from
                     Ctrl + left, right, up, or down arrow         + left, right, up, or down arrow
(on-the-spot)                                                                                            the current position.
                                                                                                         Tilts the viewer to/from
Tilt                 Shift + up or down arrow                      + up or down arrow                    “horizon” or “top-down”
                                                                                                         View changes to mimic
Look                 Ctrl + left mouse button + drag               + mouse button + drag                 head movement.
Stop current                                                                                             Stops movement when
                     Spacebar                                  Spacebar
motion                                                                                                   viewer is in motion.
Return to                                                                                                Rotates view back to
                     N                                         N
“North-up” view                                                                                          ‘N’orth-up.
Return to “Top-                                                                                          Resets tilt to “top-down”
                     U                                         U
down” view                                                                                               or ‘U’p mode.
Reset tilt and                                                                                           ‘R’esets tilt and rotation
                     R                                         R
compass view                                                                                             to default positions.
Show/hide                                                                                                Displays or closes
                     Ctrl + M                                  Shift + Option (Alt) +       +M
Overview                                                                                                 overview window.
     Tip: When rotating the view (perimeter or on-the-spot), use the up or down arrow to fluidly tilt the view while rotating.
         Tip: Use the Alt key together with most of these keystrokes to slow down the motion of your desired movement.
   Table and tips adapted from Google Earth Help page, “3D viewer navigation” (https://support.google.com/earth/answer/148115?hl=en).

                                                                   3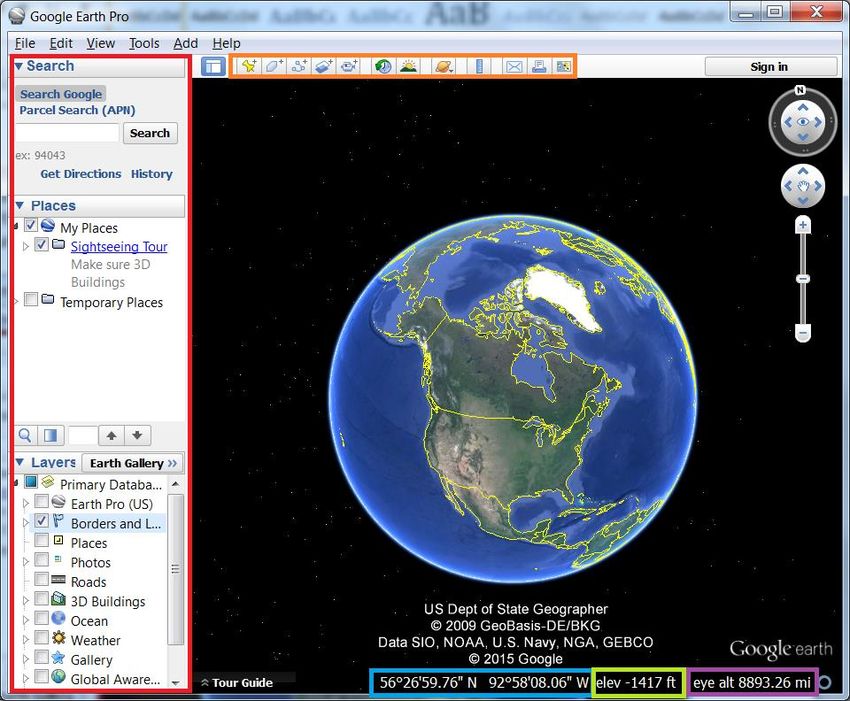
Historical Imagery

Historical Imagery can be a very useful tool when utilized in the right circumstance. It enables the user
to analyse change in the landscape overtime. For example we can use the historical imagery to view the
progress of the cleanup after the terrorist attacks on the World Trade Centre in 2001.

Objective

Find the location of the twin towers in New York and notice the
changes in the site over the months and years of the attack
using the Historic Imagery function in Google Earth.

Step by Step

In the ‘search’ text box in the upper left-hand corner, enter
‘World Trade Centre New York’ and click ‘Search’

After viewing the area select the ‘Show historical imagery’
button in the upper middle area of the screen just above the
map as seen in Figure 2.

A scroll bar will appear on the top left of your screen in the map
window. Use it to scroll through imagery from different dates.
You can see the before and after imagery from the event. Feel
free to examine other areas of interest to see what imagery is
available and how much the land has changed.
                                                                     Figure 2

CREATING A PLACEMARK
Placemarks have a variety of uses in Google Earth but essentially
represent Points of Interest you can refer back to after. For
example they can be used to show where a Hotel is located. The
name of the placemark could be “Hotel” and its address,
accommodations, continental breakfast hours, video tour, floor
plan, photo etc. This information can be displayed when the
Placemark is selected (Figure 3).

                                                                        Figure 3
STEP-BY-STEP
To start, type “World Trade Centre” into the search box at the top left of your screen and hit enter or
click Search (see Figure 4).

                                                    4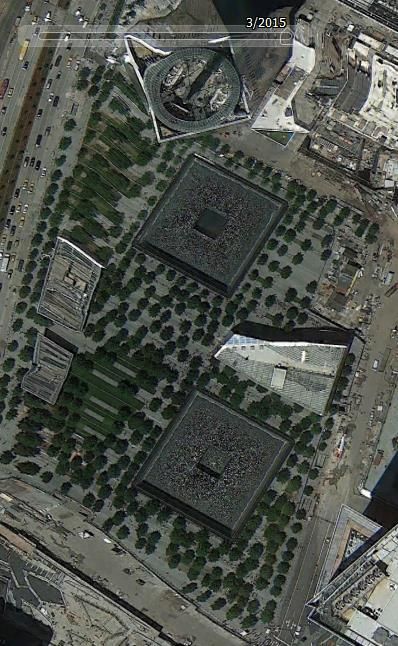
Figure 4

Next, click the Add Placemark button in the toolbar as seen in Figure 4. This will open the New
Placemark window (see Figure 4), which allows you to enter information about your Placemark. In the
Name field, type “Ground Zero” and leave the other
options as their defaults.

Leaving the window open, you will now position the
Placemark over the target. On the map, you will see a
yellow pin in a flashing crosshairs. Drag the pin to position
the placemark between the two fountains, then click OK to
create your new Placemark.

If you need to modify the properties of the Placemark
(including its location) after you’ve created it, there are
several ways to open the Edit Placemark window: you can
right-click on the pin in the map itself or in the sidebar and
choose Properties. If you only need to change the name,
you can right-click (again, in either location) and choose
Rename. The location can only be modified when the Edit
Placemark window is open. You can also change the
symbol for your Placemark (see Figure 6 by clicking on the
icon to the right of the Name field (see Figure 5).              Figure 5

Note: On a Mac, access the Edit Placemark window by
control/secondary-clicking the pin, then choose Get Info.

DESCRIBE A PLACEMARK
In the description tab of the Edit Placemark window, you
can add information to your Placemark such as text, audio,
video, and photos. This information is displayed by clicking
on the Placemark while navigating the map. You are now
going to add some additional information about the
Placemark you just created.

STEP-BY-STEP
Right-click the Placemark and choose Properties. In the
Edit Placemark window, click inside the description box
and type the location text from Figure 7.
                                                                 Figure 6
                                                      5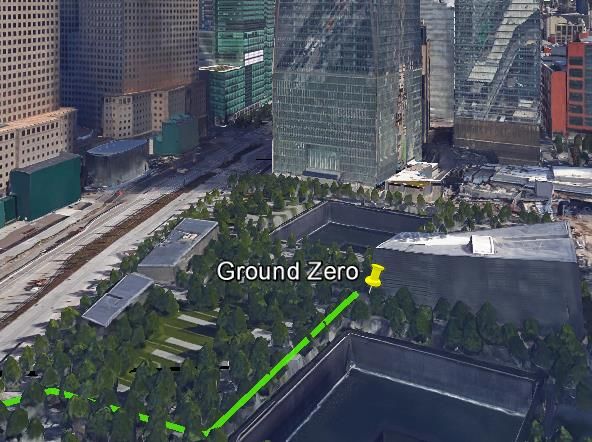
An image can be added by selecting the Add image…
button and entering the image URL.

                                                                 Figure 7

ADD YOUR OWN PHOTO
If you don’t have an online image that you can link to, there are two different
ways Google Earth supports adding photos directly from your computer. The
first way is inserting the picture as a separate object, which we will cover first.
These appear differently in Google Earth inasmuch as they “float” above the
earth’s surface and are not displayed in the additional information window
the way linked images are.

Google Earth also allows you to create folders under the “My Places” heading
to help keep your projects, Placemarks, and photos organized. In the following Figure 8

steps, you will undertake both of these tasks.

STEP-BY-STEP
To start, double click on the “Ground Zero” Placemark you
just created. This allows Google Earth to zoom into the view
showing the Placemark. You can alternately zoom in and out
using the “+” and “–” keys to adjust the “eye altitude” that
Google Earth is currently viewing the world from.

A photo can be added by clicking on the Add menu and
selecting Photo (see Figure 8). The New Photo Overlay
window opens (Figure 8), where you can enter the photo
name and make any necessary adjustments. For this tutorial,
simply keep the default settings. Browse to the photo you
would like to use and select it, then click OK.

                                                                    Figure 9

                                                       6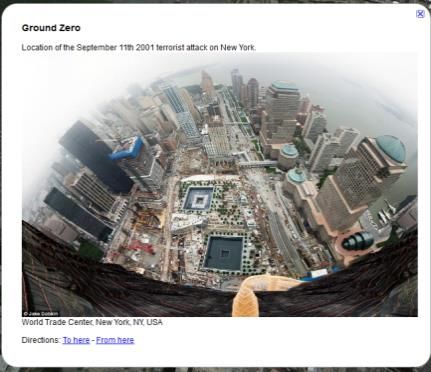
At this point, you will need to create a new folder under “My Places” to keep multiple Placemarks,
photos, and routes together. It is very important that you include all of your points in the same folder
when you want to share them.

To create a new folder, click on the Add menu and choose Folder. The New Folder window opens,
where you can enter the desired folder name (‘My Tour’). When the new folder is created, drag the
Placemark and photo into the folder (Figure 10).

You may wish to have your own personal picture inserted into the information dialog. To do this,
simply upload your image to an image hosting platform, such as Imgur or Facebook (You can set the
privacy setting on Facebook to be Only Me and this will still work). Upload your images, open them on
Facebook and right click on the image (somewhere
other than someone’s face if there are people in
the photo) and select Copy Image URL. This may be
slightly different between other browsers. (Figure
11) The procedure is similar for Imgur.

                                                               Figure 10

           Figure 11

Our final step now is to open the edit placemark window (Steps found on page 3), and click the “Add
image…” button. Paste the image path we just copied from online, click the OK button next to the
path you entered, and then click the OK button at the bottom right of the window. (Figure 12) Your
image will now be inserted into the description.

             Figure 12. Link may not be exactly the same for you, as I pulled this from my Facebook.

                                                           7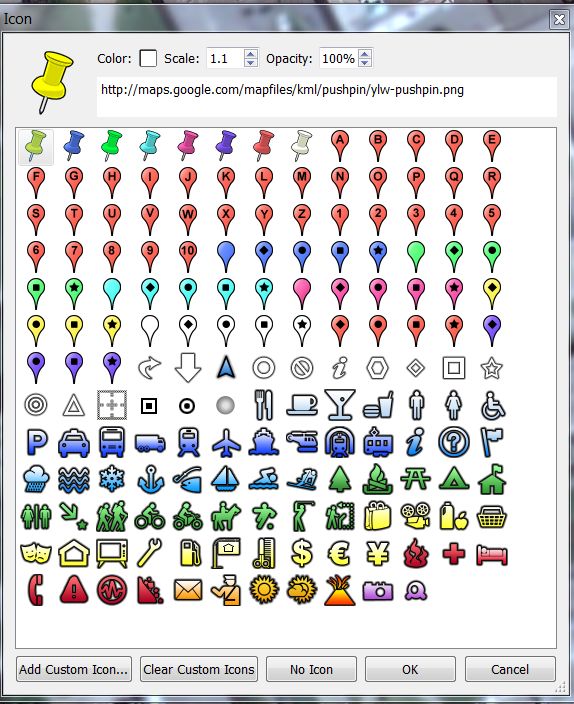
Before proceeding to create a walking tour, you will need to create and describe two more Placemarks
for The National September 11th Memorial and Museum (Albany St. & West St.) and The 9/11 Memorial
Preview Site (Vesey St. and Church St.). To add these two placemarks, we are going to do what is
referred to as Geocoding. This is the process of converting tabular data containing street addresses into
georeferenced point locational data that can be easily mapped.
Drag and drop the file Addresses_NY.csv into Google Earth Pro. If you are repeating the process of
adding markers with out Lat/Long then just apply a style template. Click Next on the first screen, and
ensure that the second screen has the option “This dataset does not contain latitude/longitude
information, but street addresses” checked off. (Figure 13)

Figure 13

Set the fields to be as pictured in Figure 14 (City
field = CITY, State field = STATE, Zip/postal code =
ZIP CODE, and Country = COUNTRY).
When Google Earth asks you if you wish to apply a
Style template, click Yes and select Create a new
style template.
Set the name field to be NAME on the Name tab,
and choose the colour and icon style that you want,
and then click OK. Click and drag the .csv file that
has been created into the ‘My Tour’ folder to
ensure that they get saved into the My Places              Figure 14
folder. Add information as we did in the Ground
Zero steps.

CREATE A WALKING TOUR
The direction tool can be used to quickly and efficiently navigate from one position to another by car,
bike, walking or public transit. The objective here is to use the tool to create a walking route connecting
all three Placemarks.

STEP-BY-STEP
You will begin by creating a walking path connecting Ground Zero to the first museum. To draw such a
route, you will need to right-click the “Ground Zero” Placemark and make it your starting point by

                                                       8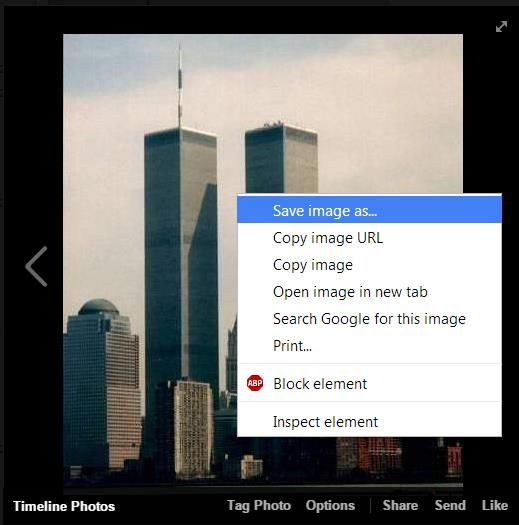
selecting “Directions from here” (Figure 15). Now right-click “The National September 11 Memorial and
Museum” Placemark and make it your destination by selecting “Directions to here” (Figure 16).

Figure 15                                         Figure 16

You now see the route Google Earth has plotted from A to B, which by default is for vehicles and
therefore uses streets. However, since this is a walking tour, you can change the method of transit to
walking by clicking on the appropriate icon (see Figure 16). You will notice the driving route along using
streets will be changed to a walking route using sidewalks.

                        Figure 17                        Figure 18

Next you will need to save the route to “My Places”. Underneath the directions in the side panel, click
the      icon to save the route to My Places. Close the Directions panel. Now drag the newly saved
folder into the folder you created earlier and rename it “Ground Zero to Museum 1” (Figure 19).

                                                     9
Figure 19
You can expand the folder and uncheck the intermediate pushpins telling you to turn if you wish.
Repeat these steps to create a new walking route from the first museum to the second museum. The
final walking route should look like Figure 20 below. You can change the colour of the route by opening
the properties of the Route object in the folder subtree.
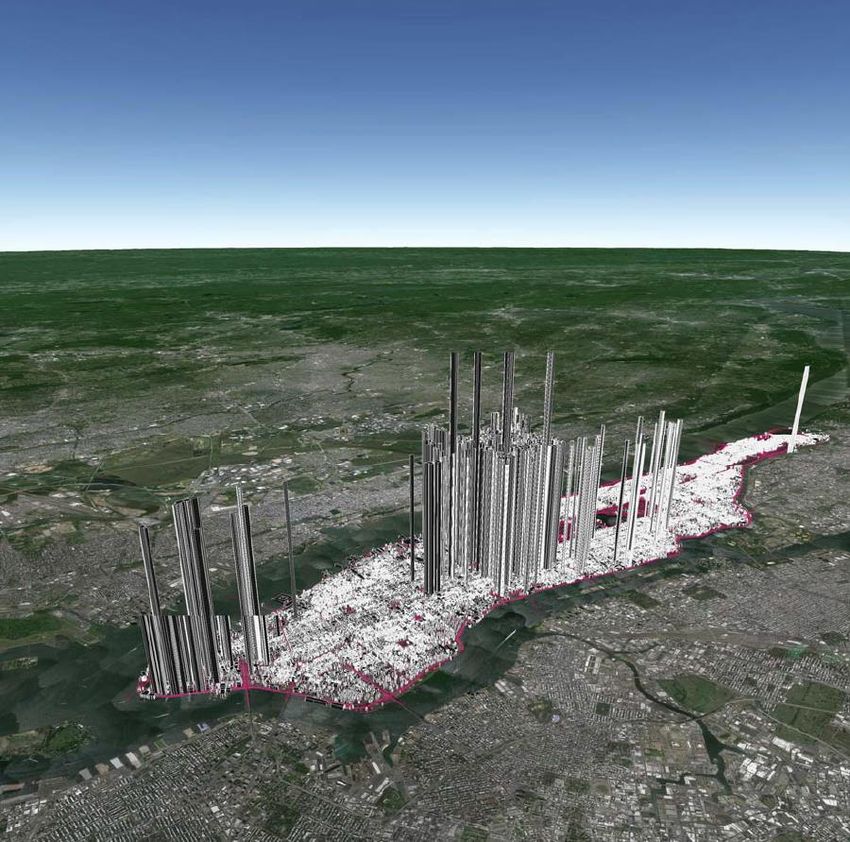
Figure 20
10For your tour, if you wish to add supplementary GIS data, you can now do this easily in Google Earth Pro,
rather than having to convert your shape files to KML. To add an ESRI .shp file, simply drag and drop the
shape file you wish to have added to Google Earth. For this, we are going to import a small subset of the
street network of New York. You are going to be prompted if you want to import a sample of the data or
if you wish to import the entire data set. For this, we are going to import all the streets, but Google
Earth will tend to lag if you bring in a very large shape file.
Figure 21
For the Style Template, set the Name field to be
NAME, and choose the colour you want the streets
to be in the Color tab. Drag the nyc_streets folder
from within the nyc_streets.shp located within the
Temporary Places location to My Places. Once set
visible, it should look similar to Figure 22.
Figure 22
11Part Two
CREATE A NARRATED AND ANIMATED TOUR
At this stage, you will create and record a tour that navigates your route in Google Earth’s 3D
environment. You can also add audio commentary to your tour, which will be explained in this next
section.
STEP-BY-STEP
To start, Click the Ground Zero Placemark, which will be the starting point for the tour. In the Layers
panel, turn on the Photos and 3D Buildings layers (Figure 1). Then click the Record a Tour button
in the toolbar, or select Tour from the Add menu. The tour recording tools appear in the lower-left
corner of the window (Figure 2).
Figure 2
Figure 1
Click the Record button to start recording your actions and movements in Google Earth. The button
changes to red and the time counter begins counting up, showing the duration of your current
Tour. You will notice there is a 3D building for the World Trade Centre in the 3D viewer (Figure 3). Use
the Navigation Controls in the top right corner and your mouse to move, tilt, rotate the globe and
zoom in around the 3D building (Figure 4).
Figure 3 Figure 4
12There are a lot of photo icons surrounding the World Trade
Centre (Figure 3). Click one and a pop- up window showing the
photo and its description appears (Figure 5).
Once the 360 degree view of the World Trade Centre is finished,
you can press the stop recording button. Tour Player appears in
the bottom-left corner of the 3D viewer (Figure 6). You can play
the tour after the recording is done.
To save the tour, click the Save to File button in the Tour Player,
and give it a name. The new KML file will be saved in “My
Places”. Drag it into the “My walking trip” Folder.
Figure 5
RE-RECORD A TOUR TO ADD NEW ACTIONS
You can modify and extend a previous tour by re-
recording a new tour while playing back the original tour.
The new tour will add a new action to move around the
routes you created in tutorial one. You are also going to
create a 360 degree pan around the two museums.
STEP-BY-STEP
To add a new action into the existing tour, click the Figure 6
Record a Tour button in the toolbar. The
Record Tour Controls appear on the top of the Tour
Player in the lower-left corner (Figure 7).
Next click the Record button to start recording a new Figure 7
tour, then play the tour that you just created. Wait
until the original tour finishes playing back.
Since you are still recording, you can continue to add new actions. Click the Ground Zero to Museum 1
route file in the “My Places” Panel and then click “Play Tour” button as seen in Figure 7. This allows you
to add a tour along a route. Repeat the same procedure to play a tour along the two museum route.
Next click The National September 11 Memorial and Museum placemark in the “My Place” panel and
switch to Google Street View mode. On the Navigation Controls in the top right corner (Figure 4), and
using your mouse to pan, create a 360 degree pan view of the earea.
Once this is done, you can press the stop recording button and click the Save to File button in the Tour
Player, and give the new tour a name (e.g. “Walking tour new”). What many students have done in the
past is add text like ‘PAUSE HERE’ for the user to pause the video and click on certain icons themselves.
Others have created multiple tours which makes creating them more manageable.
13RECORDING AUDIO COMMENTARY
Once the tour has been created, you can add an audio recording. Adding an audio clip in this way is
easy, but the quality of the commentary can be improved if you prepare a script in advance. You must
have a microphone linked to your computer.
STEP-BY-STEP
First you will play the tour recording again to figure out how long each segment of the tour takes. A
segment could be a 360 degree view of the World Trade Centre. Write a script exactly for what you will
say in the time that each segment takes, for instance “We are now walking around the location of the
September 11th terrorist attacks on the World Trade Centre…”. Test your comments to see they fit the
time slot.
Re-record a tour, but this time click the microphone button instead of the record button. The
recording will start and Google Earth will capture audio from your computer's microphone. You can also
turn on/off audio recording by clicking the microphone button again.
When you're happy with the result, click the “Save” button in the Record Tour Controls to save the tour.
Audio recorded through your microphone is captured as an .mp3 file when you save the entire folder
under “My Places” as a KMZ file.
ADD A LEGEND OR OTHER SCREEN OVERLAY
You will learn how to add a legend/logo on the Google Earth screen by creating an image file and a
simple screen overlay KML file.
STEP-BY-STEP
First you will need to find a computer program which can be used to
create drawings on either a blank drawing area or an existing image
(e.g. Microsoft Paint). Once completed, you will save the image file as
either JPEG or PNG format to your computer. The image file size
should be relatively small (Figure 9).
Figure 9
Next you will need to create a simple screen overlay KML file as shown
below.
Absolute Positioning: Top left
1
http://kml-samples.googlecode.com/svn/trunk/resources/top_left.jpg
14This Placemark KML file contains the following key elements:
• this is used as the label for the Placemark
• icon that appears in the screen overlay.
• overlayXY and screenXY controls the location of the legend on the screen
• Specifies the size of the image for the screen overlay
Measuring area
In Google Earth Pro, you get a few other options to find information about an area, primarily the
Measurement tool. In the standard release of Google Earth, only linear measurements are allowed. In
Pro, you can find out the area by drawing a polygon, either a square or free-form. To use the Measure
tool, click the ruler button ( ) in the toolbar.
Figure 10
To draw a polygon, click where you want the corner points to be. The area and perimeter values will
update automatically when you add new control points.
FINAL TOUCHES: TEXT & SAVING
You may want to add a title for this walking tour, and the easiest way to add a title is to create a
Placemark, then remove its icon. Click the “Add Placemark” button. Drag the new Placemark so that it
points approximately at the route you just added. Enter a descriptive title for the map (i.e “A Short
Walking Tour of Three Academic Institutes”). Click the Icon button, just to the right of the Name field. At
the bottom of the new dialogue box, click ‘No Icon’ to remove it from view.
Right click on the walking trip folder in “My Places”, and select “Save Place As” (Figure 10) to create a
KMZ file, which contains all information in the folder and can be shared with others via e-mail,
Facebook, or Twitter. Whoever receives the file will see exactly what you see when opening it up in
Google Earth.
15ADDITIONAL TIPS
You can add a new action into a tour
but it isn't possible to edit parts of
the tour (e.g. change the view) in
Google Earth
You may find you don't get the audio
correct first time even when you've
worked out a script. In this case, try
again
You can export your tour as a 1080p
video in Pro.
REFERENCES
Creating a Narrated Tour in Google Earth
Figure 10
http://www.google.com/earth/outreach/tutorials/kmltours.html
Navigating on the Earth
http://support.google.com/earth/bin/answer.py?hl=en&answer=176674
Creating Tours How To 3: Adding Audio
http://googleearthdesign.blogspot.ca/2009/08/creating-tours-howto-3-adding-audio.html
Record a movie based on an existing tour
http://support.google.com/earth/bin/answer.py?hl=en&answer=176684
16You can also read