GUIDELINES FOR REMOTE LEARNING TOOLS - UTLC Helpdesk ...
←
→
Page content transcription
If your browser does not render page correctly, please read the page content below

GUIDELINES FOR
REMOTE LEARNING
TOOLS
TABLE OF CONTENTS
                                                  Page

REMOTE LEARNING TOOLS

1.0   Introduction                                5
2.0   WhatsApp and Telegram                       5-13
3.0   Padlet                                      14-23
4.0   Mentimeter                                  24-39
5.0   Nearpod                                     40-45
6.0   Quizlet                                     46-53
7.0   Socrative                                   54-59
8.0   Edpuzzle                                    60-64

REFERENCES

                                       2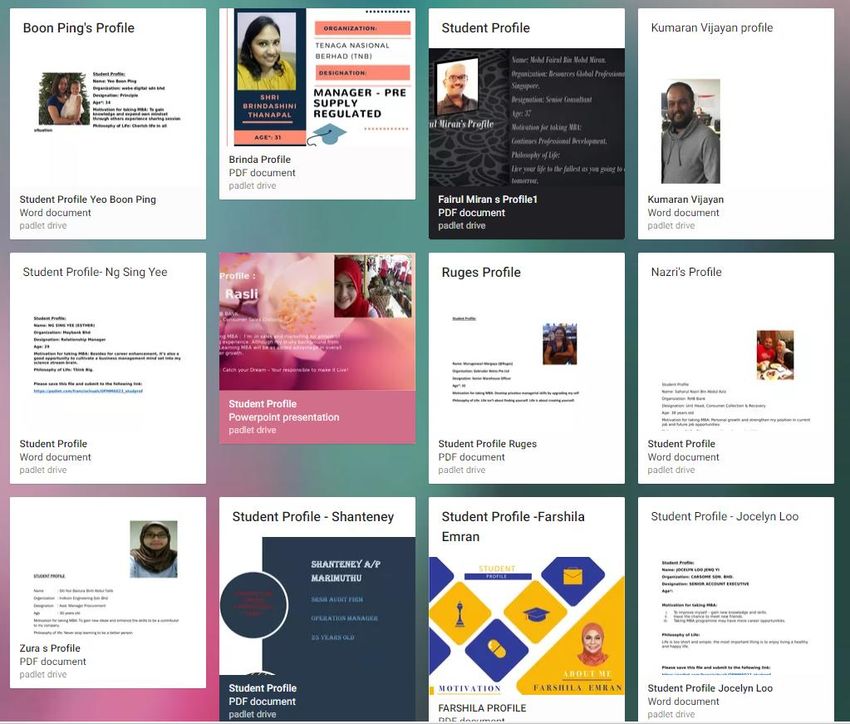
LIST OF TASKFORCE MEMBERS
                       ADVISOR

            YBrs. Prof. Dr. Yusnidah Ibrahim
    Deputy Vice Chancellor (Academic & International)

                   CHAIRPERSON

             Prof. Dr. Nurahimah Mohd. Yusoff
Director of Academic Excellence Development Unit (AEDU)

                     COMMITTEE

              Assoc. Prof. Dr. Norliza Kushairi
                    Dr. Chuah Chin Wei
                 Dr. Farah Mohamad Zain
                   Dr. Siti Nazuar Sailin
       Dr. S. Kanageswari A/P Suppiah Shanmugam

                    SECRETARIAT

                     Azian Nafiah
                   Zairi Afandi Ishak

                     24 April 2020

                             3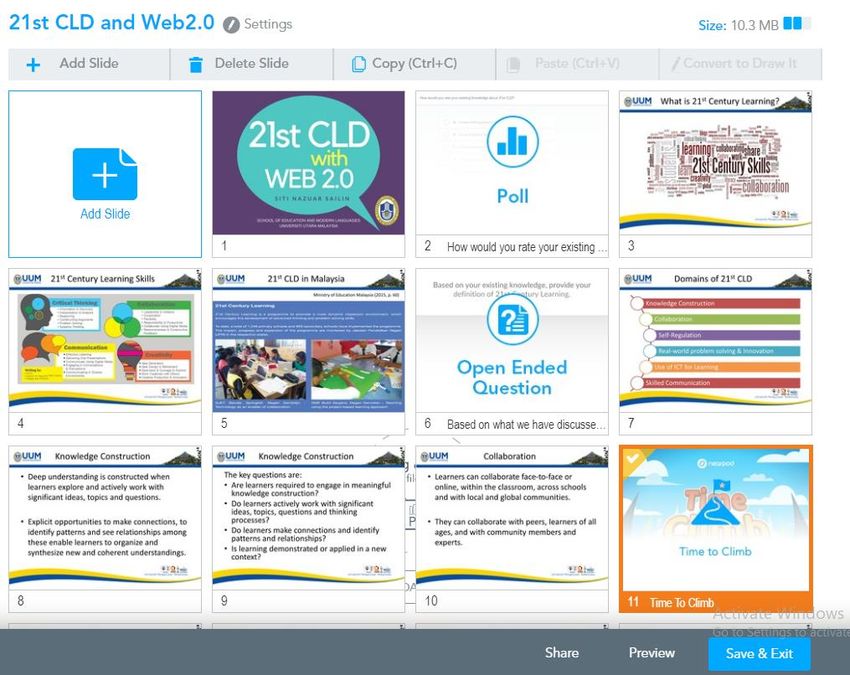
PREFACE

As we are all aware, the teaching and learning (T&L) and assessment activities at the Universiti
Utara Malaysia have been affected by the global COVID-19 outbreak and the subsequent
nationwide enforcement of the Movement Control Order (MCO) commencing 18th March 2020
until 31st March 2020, which has now been extended until 12th May 2020.

Upon the advice and in reference to the guidelines issued by the Ministry of Higher Education and
the Higher Education Programme Management Post Movement Control Order (MCO) COVID-19
by the Malaysian Qualifications Agency (MQA), the University has undertaken due diligence of
the lecturers’ and students’ preparedness and the state of readiness of associated infrastructure.
Thus, it has been decided that the T&L process shall proceed as follows:

Firstly, all teaching and learning (T&L) activities will be conducted using online learning or
remote learning methods.

Secondly, any forms of assessment, whether mid-semester exams, assignments, quizzes, project
presentations and others, including final exams, will be carried out via online or remote learning.

To ensure the smooth implementation of the T&L for all academic programmes at UUM during
this uncertain and challenging time, the remote learning mode is adopted in place of the face-to-
face (traditional) method. It is thus essential that a guideline for the implementation of the
remote learning tools be developed.

This Handbook provides a guideline for instructors (whether they are teaching the undergraduate
or postgraduate programmes) with several online tools frequently used for remote learning. The
handbook is for internal circulation only.

It is hoped that these guidelines will assist instructors to make decisions on best practices that
can be adopted and adapted for their classroom use.

                                                    4
REMOTE LEARNING TOOLS
1.0 INTRODUCTION

The following tools are suitable to be used for online and remote learning. Each has its own
benefits and limitations. Instructors are advised to choose which tool to use for the classroom
activities in relation to the course learning outcomes and the types of assessment.

2.0 WHATSAPP AND TELEGRAM
WhatsApp Messenger, or simply WhatsApp             , is an American freeware, cross-platform
messaging and Voice over IP service owned by Facebook, Inc. It allows users to send text
messages and voices messages, make voice and video calls, and share images, documents, user
locations and other media. WhatsApp is available on Android’s Google Play and iOS App Store.
For desktop version (Windows / Mac), user can download the installer from the following link:
https://www.whatsapp.com/download

Telegram        is a cloud-based instant messaging and voice over IP service. Telegram client apps
are available for Android, iOS, Windows Phone, and desktop version (Windows / Mac / Linux).
Users can send messages and exchange photos, videos, stickers, audio, and files of any type.
Telegram is available for desktop installation from the following link:
https://desktop.telegram.org/

2.1 Step 1: Convert / Save Each Slide In Your Chapter As Picture.

  i.   Instructors are advised to convert individual slide in their chapter as a picture and save the
       material into a dedicated folder. The conversion of slides to pictures can be done by
       pressing “Ctrl + Print Screen” or “Alt + Print Screen” through the keyboard.
       Alternatively, for those on the Windows operating system, a handy tool named “Snipping
       Tool” is available for your use.
ii.    Once launched, click on “New” and the software now enables instructors to screenshot the
       PowerPoint slides and save it as picture.

iii.   Once the slides has been snapshot, instructors will have to “SAVE” the snapshot as picture
       format to be used as teaching material in WhatsApp or Telegram.

                                               6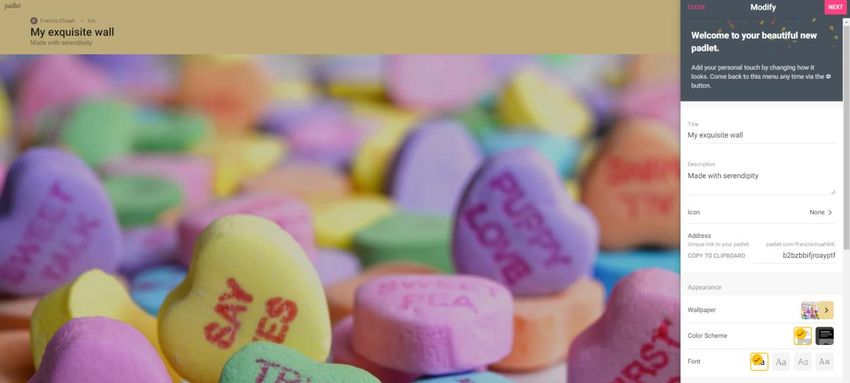
2.2 Step 2: Insert Pictures Into WhatsApp/Telegram Group and Start Lecturing

   The next step is to insert the pictures into WhatsApp/Telegram class group.

                                              7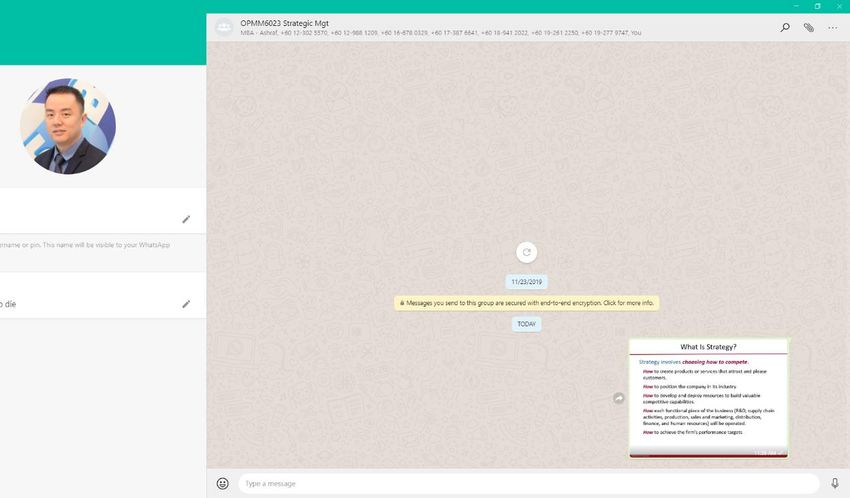
A. WhatsApp

 i.   Select insert “Photo & Video” and navigate to the picture file saved earlier

ii.   Once the picture is delivered into the group, instructors can begin lecturing by pressing the

      microphone       button available at the bottom right in the WhatsApp group. The instructor
      can continue lecturing by uploading the second/subsequent slides repeatedly.

                                                8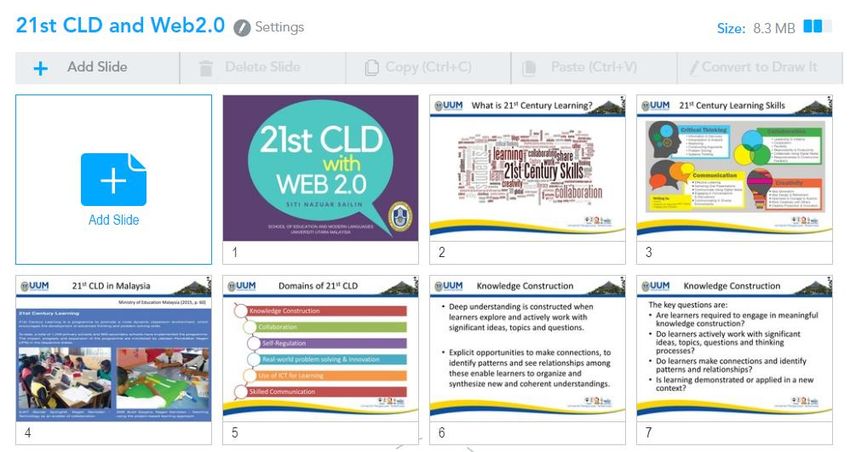
9
B. Telegram

i.   Click on the insert      button available at the left-hand side of the chat box. Select insert
     “Photo & Video” and navigate to the picture file saved earlier. Choose “Send as a photo”
     and you can as well insert a caption of the slides to send to the group.

                                              10
ii. Once the picture is delivered into the group, instructors can begin lecturing by pressing the
microphone button available at the bottom right in the WhatsApp group. The instructor
can continue lecturing by uploading the second/subsequent slides repeatedly.
11iii. Once the picture is delivered into the group, instructors can begin lecturing by pressing the
microphone button available at the bottom right in the WhatsApp group. The instructor
can continue lecturing by uploading the second/subsequent slides repeatedly.
122.3 Additional function of Telegram in facilitating Teaching and Learning
Telegram quizbot can be utilized to facilitate teaching and learning. For more details please refer
to the following links:
https://www.canva.com/design/DAD5bCr6GGk/HLlydLpl0ruHdBJ4y9STKA/view?utm_content
=DAD5bCr6GGk&utm_campaign=designshare&utm_medium=link&utm_source=viewer#1
133.0 PADLET
3.1 Remote learning using Padlet
Padlet is an online virtual “bulletin” board, where people use to make and share content with
others. Somewhere between a doc and a full-fledged website builder, Padlet empowers everyone
to make the content they want, whether it is a quick bulletin board, a blog, or a portfolio
Padlet is:
● Easy and Intuitive - you will not find a simpler way to publish original content on the
internet.
● Inclusive - people of all ages, skill levels, and abilities can use Padlet.
● Collaborative – you may invite others to work with you on shared projects,
assignments, and activities.
● Flexible – you may add any file type you wish, organize however you want, and make
it as public or as private as your heart desires.
● Portable - iOS, Android, and Kindle apps are available.
● Beautiful - many designs to choose and customize.
● Private and secure – you can make your padlet viewable only to a select group of
people. Data can be transfered via SSL which go through regular security and
vulnerability testing, and encrypt all pages.
● Supportive – has an interactive support system at hello@padlet.com.
14Getting started:
1. Go to www.padlet.com
2. Click on “Sign Up” to create a new Padlet or you can “Login” if you have already had an
account.
3. For first time sign up, you can choose for “Basic” – Free Forever package or “Pro” – RM 12
a month package.
15Your homepage
1. Make a Padlet – The “Make a Padlet” function allows you to create your own Padlet.
2. Join a Padlet – The “Join a Padlet” function allows you to join a Padlet created by
someone else.
3. Gallery – The “Gallery” function allows you to look for sample Padlet from the Padlet
team and user community to be used for inspiration and remade as templates.
4. Recents – The “Recent” tab on the left of your panel allows you to access your recently
viewed or updated Padlets.
5. Made – The “Made” tab on the left of your panel allows you to view all the Padlets you
have made.
6. Shared – The “Shared” tab on the left of your panel allows you to view all the Padlets
shared with you.
7. Liked – The “Liked” tab on the left of your panel allows you to view all the Padlets that
you liked.
8. Archived – The “Archived” tab on the left of your panel allows you to view all the Padlets
that you archived.
169. New Folder – The “Pro” version of Padlet allows you to create folder to organize your
Padlet.
Designing your Padlet
1. Click on “Make a Padlet” to create a new Padlet. You will be asked to select a layout for the
Padlet. Click on “Select” to pick up a layout of your choice.
2. An example of an empty Padlet is now being created below. The panel on the right allows you
to edit the properties of your Padlet which includes creating the title and description for your
newly designed Padlet as well as creating a unique link to your Padlet.
173. The following diagram shows in detail the component of properties of your Padlet that you can
edit and setup.
4. Once the setup is done, you will receive a confirmation from Padlet that you are now set to
start posting.
18Start your Padlet
1. Click on the “+” sign at the bottom right of your Padlet page to begin posting.
2. A simple tab will appear in the Padlet (refer following diagram) that allows you to post
your content.
Insert the title of
topic of discussion
Insert details content
of discussion
Additional
Function
Upload content
from PC
Link to resources Search engine for Photo booth
(YouTube, materials from (Access to
website etc) webpages Camera)
193. Click on the search engine function will allows you to search for images, videos, GIFs,
audio, websites, and more. A new tab will appear on your right to facilitate the search.
4. Click on the “three dots” ( … ) to have access to additional function on Padlet.
20Using Padlet for classes
1. Instructors can upload class material such as syllabus for learners as well as guideline for
assignments to learners in Padlet. Similarly, instructors can attach useful resources from
webpage or YouTube to facilitate classes. The following is an example.
212. The instructors can use Padlet to conduct online activity (synchronous) with learners
using Padlet. For example, activity introducing themselves to other learners. The
following is an example.
223. The instructors can also consider using Padlet for submission of project presentation file
to be used in an online presentation.
234.0 MENTIMETER
4.1 What is Mentimeter?
Mentimeter is a student response system (known as SRS), a software to capture live and real-time
responses in the actual presentation whilst it is being delivered. If you have been using ‘Clickers’,
then Mentimeter has very much similar features.
Figure 1: The interface of Mentimeter
Figure 2: The latest Mentimeter logo
4.2 More facts about Mentimeter
4.2.1 It is a web-based system (such as Socrative and Poll Everywhere) which means that
preparation and implementation of MM needs the internet connection. While
Mentimeter is being prepared, it autosaves the work in the cloud storage.
4.2.2 The most exciting feature of Mentimeter is that presenters are not limited to the use of
the online platform.
244.2.3 During preparation and presentation, instructors do not need to download or install
Mentimeter, but can simply create an account at www.mentimeter.com.
4.2.4 Learners are given a specific URL and a code to access the portal and from there submit
their responses to questions posed.
4.2.5 Mentimeter has a plug-in that can be downloaded and integrated into PowerPoint so
that users enjoy the graphics and animation elements of Powerpoint while at the same
time utilizing the strong interactive elements of Mentimeter.
4.3 The Advantages
4.3.1 Reduces the logistical burden on the instructor by letting students use their own mobile
devices to participate in the activity via the device’s internet browser and a six-digit
code sign-in to the quiz.
4.3.2 Removes the process of handing out and collecting voting devices, thereby saving
valuable time for teaching and learning.
4.3.3 Engages learners as it is capable to project answers on the screen and provide
leaderboard to allow students feel a bit of competitiveness.
4.3.4 Can be done in group-challenge, as in quiz format.
4.3.5 More suitable for formative assessment.
4.3.6 Have 13 interactive question types including word clouds and quiz to choose from.
4.3.7 Build entire presentations quickly and easily with Content Slides.
4.3.8 Have options to select from different presentation themes or build your own (paid
version).
4.3.9 Integrated with free stock image and GIF libraries.
4.4 The Paid and Free Version
The use of Mentimeter depends on the version of Mentimeter subscribed. The free version offers
a variety of usage surrounding teaching, learning and assessment.
Feature Free version Paid version
Type of license Free Basic, Pro and
Enterprise
Audience size Unlimited Unlimited
25Content slides (number of Unlimited
slides with text and images
only, and without questions or
quiz)
Questions per presentation 2 Unlimited
(number of slides)
Quiz per presentation 5 Unlimited
(number of slides)
Q&A
Import presentations All
Make presentations private Enterprise only
Create presentation templates Enterprise only
Image and PDF export Only image and pdf, Image, pdf and excel
not Excel format
Create Quick form (collect Not available Only Pro and Enterprise
email addresses and other
information just like in google
form and export in Excel
format for extended use)
With the free account, you get access to most of the Mentimeter features. If you would like to use
more quiz or questions, just create a new presentation.
The paid version offers extended features (among them is additional slide numbers) but the
interesting feature is that the data gathered via survey, poll or quiz can be exported to Excel, hence
allowing the data to be used for research purposes.
4.5 Why use Mentimeter?
The slogans of equal education as advocated by UNESCO as in ‘Every child matters’ and “No one
left behind” (UNESCO 2009) depict the importance of equal opportunity with regards to access to
education by every learner. Hence, the following explains why Mentimeter is favorable and apt as
a teaching and learning and assessment tool:
4.5.1 due to its SRS feature, it allows every learner enough room to voice his/her opinion
over the query posted by the learners, ensure everybody is heard even in online class
meetings.
4.5.2 encourages an immediate feedback to gauge the extent to which learners learn.
4.5.3 learners can be polled, quizzed, questioned, given points and declared winners during
a presentation.
4.5.4 engage and interact with colleagues or learners using variety of options including live
polls, word clouds, multiple-choice questions and many more.
264.5.5 provides immediate feedback on instructors teaching practices in order to continually
improve, both pre and post sessions.
4.5.6 enable Q&A so that queries and questions can be discussed to avoid
misunderstandings.
4.5.7 pose a question easily and within a minute or two, can have aggregated responses from
every participant, therefore;
4.5.8 avoid prone to omissions, selective bias, and favoring extroverts and those who are
articulate
4.5.9 address the difficulties of getting the right information from participants and get the
full picture from the participants.
4.5.10 responses can be shared anonymously, or learners can be identified and linked to
responses.
4.5.11 responses can be exported and stored in other formats such as Microsoft Excel and
used to inform other presentations.
4.5.12 questions placed on the Mentimeter platform can be reused in other presentations and
data collected can be added to responses given in previous sessions.
4.5.13 analyzes the data collected to identify trends and patterns and data collected against a
question can be erased to facilitate the use of selected questions.
4.5.14 collaboratively rank and prioritize questions and initiatives
4.5.15 hence, capable to be linked to increased examination scores.
4.5.16 instructors can also track how many team members are connected to a presentation.
4.5.17 maintain a strong team culture across distance.
4.6 How can Mentimeter be used in teaching, learning and assessment?
The traditional way of using Mentimeter is for quizzes just as any other SRS does. In other words,
Mentimeter is by default an assessment-like quiz infused in teaching and learning activities. Based
on that feature, it is suitable for classroom-based assessment.
However, educators are open to manipulate the features in Mentimeter to achieve different
objectives. The ultimate goal of using this kind of SRS is to engage learners and navigate them
towards meaningful learning.
27There are a number of ways to use Mentimeter in order to enhance teaching, learning or assessment
activities:
4.6.1 as a learning appetizer – gauging level of students’ readiness or their previous
knowledge before new lesson/topic is introduced
4.6.2 to design attractive questions that relate with learner’s experience
4.6.3 to test learners’ previous knowledge
4.6.4 to highlight gaps in learners’ knowledge
4.6.5 to test taught content (normally done in a quiz form)
4.6.6 to conduct a survey
4.6.7 as an evaluation tool - Software such as this could offer a method of in-session group
completion of module evaluations, affording a rich data set with the varied question
types
4.6.8 the word-cloud, 2 by 2 axis and 100-point distribution questions would be useful for
performing in-house evaluations of assessments
4.6.9 learner-led teaching - While SRS can be used as a method of ‘testing’ learnt content,
there is a significant potential in deploying them to create free-form teaching activities
where the session is driven by the learners’ answers to in-class questions. This would
be particularly useful in the lead-up to assessments, for recapping content or for
reflecting upon assessments that have been completed.
4.6.10 smooth presentation as it is can be switched between apps (presentation tool and
Mentimeter)
4.6.11 display the results on a 2x2 matrix to impress learners.
4.7 How to create engaging Mentimeter presentation
4.7.1 Getting started in three simple steps:
28STEP 1: In google, go to: www.mentimeter.com.
No installations or downloads needed.
Just simply create an account on the website.
STEP 2: Create your first presentation (go to 1.4.2 for details)
Fill your presentation with questions that you would like to ask your learners or
audience.
Gifs can be a unique way to enhance the visuals your presentations. As not many
presenters use Gifs, your learners will find your presentation fresh and engaging.
29An audience that is more engaged is more likely to really understand and
appreciate your message.
STEP 3: Engage your learners
Once done, show your presentation to begin audience participation. Share the
code for your audience to join.
304.7.2 How to create a presentation
The following steps illustrate the details of creating a presentation
STEP 1: Prepare
Online editor
Edit View Pane
Log into Mentimeter. Use the online editor to build interactive presentations. Depending
on your objectives, you have many options from merely building content slides, to building
quizzes or polls. You can use and add images, gifs and more to your presentation to create
fun and engaging presentations.
STEP 2: Engage
Share the code Or share the voting link
a) Once created, ask your learners to use their smartphones to connect to the
presentation where they can answer questions. To connect, learners need to type in
the code which can be seen on your screen, on their mobile.
31b) Engage them by projecting their answers on the board or screen (remote through
your computer screen shared over virtual platform, or physically if you are having
the session in a physical building).
c) you can add some bursts of fun to your presentations by using gifs
d) Visualize their responses in real-time to create fun and interactive experiences.
32Step 3: Follow-up
Export results
Once your Mentimeter presentation is over, share and export your results for further
analysis and even compare data over time to measure the achievement.
4.8 How to join Mentimeter presentation (for learners)
Figure 3 illustrates the steps to join the presentation for learners, or audience. Make sure you
pass the code to the audience by projecting your screen.
Figure 3 How to join Mentimeter as voters or participants
334.9 How to use Mentimeter for remote working
Figure 4 shows the steps to present Mentimeter remotely, that is, when you and your learners are
not at the same place.
Figure 4: Steps to present Mentimeter remotely
344.10The Do’s and Don’ts of Using Mentimeter
Dos Don’ts
When using image (particularly emoticon or Don’t choose image without the Creative
smileys) check whether you need the Commons (CC) license.
background or not. It is advisable to use
transparent image. Hence, if you capture the
image from the Internet, remember to
include the word 'transparent' or ‘png’ in the
search box.
Use Gifs to grab attention Don’t think of adding a video of your own
Do add video from youtube by giving the from your computer because, the feature is
link. still not available.
Open both your Mentimeter and Don’t forget to close other apps and
presentation tool in “Presentation’ mode if documents irrelevant with your presentation
you would like to use between them while to ensure smooth delivery.
presenting.
Do check the Configure settings: Don’t manually advance the slide if you
In the edit view of Mentimeter, there is a would like the learners to answer at their
Configure option in the top menu. Here you own pace. Setting to ‘audience pace’
can find some important settings that you ensures automatic slide advancement.
should adjust whilst creating your
presentation (voting pace, language, etc. to
help the flow of presentation).
Make sure that you set the quiz or
presentation to the “audience pace”, if you
would like to the slides to automatically
advance by itself (means instructors don’t
have to manually move the slide), and for
the learners to respond at their own pace.
Set to “teacher pace” if time is an important
factor in your assessment.
Remember to share a different code after Don’t leave the presentation more than four
you leave a presentation more than four hours if you want to use the same code. The
hours. The presentation content and results code is only temporary and valid for four
aren't affected by the code expiring). hours.
Share the voting link with your learners or
give the QR code (print) if you plan to use
the presentation some other time. These are
35unique to your presentation and always stay
the same.
Follow the recommended maximum Don’t add more options than allowed, so
number of answer options you can set for that the content you input (text, images,
your questions: etc.) do not get too small or crowded out by
Multiple Choice - 10 one another.
100 Points - 10
Scales - 6 In Quick Slides, don’t add more than 7
2 by 2 Grid - 10 bullet points.
Who will Win? - 10
For Quiz, don’t put more than 6 answer
options so that your audience can see all of
them on their smartphone screens.
For the Image Choice question, do not have
more than 8 options as the feature only
supports 8 to visualize your images nicely.
The free account is limited to 2 questions Don’t panic if you cannot add more slides
(of any type) and 5 Quiz questions. If you or use more features. Check your license
need more questions, you can simply create credibility and eligibility.
another presentation!
If you want to reuse the same presentation Don’t panic if your copied question doesn't
with different audience and want to show up in your presentation straight away.
generate new data with the new audience, Do refresh your browser and the question
do download the results first before clicking should appear.
‘reset results’. Otherwise you will lose the
previous data.
Do test run your presentation before the Don’t assume nothing will go wrong. The
presentation time. internet connection malfunction is your
worst enemy while presenting.
To help give you a better understanding of
how Mentimeter works for your audience
and will make you a more confident
presenter, do rehearse the presentation by
playing the role as a voter using your
smartphone to connect to the presentation
Make sure your audience has a smartphone
or computer
36Ensure that you have a good internet
connection on the computer you are using to
show your presentation
To introduce Mentimeter to your learners Don’t expect your learners or audience will
for the first time, do start off your cooperate in your presentation. Have some
presentation using Mentimeter as an chat to build rapport with your them.
icebreaker. It will be fun, and a good Starting off with ‘Do you wanna play a
simulation of Mentimeter. game?’ would sound attractive.
Remind your audience to bring their
smartphones to the presentation so they can
vote.
To ask your audience to use Mentimeter,
simply say “Go to menti.com and enter the
code on the top bar of the screen to vote”.
Show the audience the expanded Don’t talk too much on the instruction. Just
instructions you have set up, do press the ‘i’ present the instruction.
on the keyboard or simply click the bar at
the top of the screen Don’t ignore learners who have difficulty in
handling their device or the connection.
Remember to attend the learners with
difficulty and assist them before starting the
quiz.
Avoid clumsiness and clutterness. Do Don’t straight away start with a new
organize your presentations into different presentation. Consider avoiding frantic
folders in Mentimeter. searching amidst presentation.
Please note that it is not possible to create
folders within folders. So do plan on how to
organise the folders.
Check that you are presenting from the first Don’t rush into a presentation. Avoid “syok
slide. Check that your screen is connected sendiri’ situation.
to your computer, and is working;
Make sure you hide the edit view by Do not start the presentation unless the
pressing "Present". Go into full screen by number of the members enrolled has
pressing "F" reached your target. Let’s say there are 50
learners, in the room and you’d like all of
Remember to take into account that your them to participate, wait until the learners
audience will need time to connect their joined reaches 50.
smartphone if you have a time limit on your
presentation.
37Make sure that you give enough time for
your audience to answer questions that you
have included in the presentation.
If you want to discuss the results of your
presentations, you should allocate time for
this too
Do read mentimeter’s blog article, for more Don’t panic if you are caught in the middle
presentation tips: The ultimate guide to of problems.
creating amazing presentations.
Audience to download results: In this Don’t panic if the agent does not response
configure option you can decide if at the to you immediately. Check your license.
end of your presentation you want to give Only paid version will have direct support.
your audience the option to fill out their Otherwise, go to ‘Help’ for FAQs.
email address in order to receive the results
of the presentation.
Check that Quiz questions have a right Don’t select wrong answers as this affect
answer selected. your credibility as the instructor. Learners
must not outsmart the instructors!
Add any Reactions you want to use to your Don’t show that you are not ready and well-
presentation slides to add more fun hence prepared with your presentation. Learners
engagement. must not sense the instructor’s
incompetence. But you may welcome them
as your co-learner in a co-learning
atmosphere.
Get familiar with keyboard shortcuts.
Run through your presentation
in Presentation View by pressing the
“Present” button in Mentimeter;
Press F on your keyboard to go into full-
screen mode. This will hide your browser
tabs and anything else showing on your
screen;
Show bullet points, and go to the next slide
by pressing the right arrow on your
keyboard;
Start a quiz question by pressing the return
key on your keyboard;
38Make sure that the audience has access to Make sure that the audience has access to
the internet. For larger audiences we the internet. For larger audiences we
recommend that they use their mobile data recommend that they use their mobile data
rather than the WIFI; rather than the WIFI.
Once you are happy with the content, you
should run a test vote. You should do this
for two reasons. Firstly, to make sure you
know how the voting function works, and
secondly, to help you understand
the audience experience. This will help you
to become a better presenter.
If you want to preview your presentation
with test data, you can show test votes;
Remember to delete after testing.
395.0 NEARPOD
5.1 What is Nearpod?
Nearpod is an interactive teaching and learning application that can be used synchronously and
asynchronously to support remote learning. Nearpod also integrates formative assessment tools
within the application.
5.2 Why use Nearpod?
Instructor can create interactive presentation that contains Quiz, Polls, Open ended-questions,
Drawing-Boards, Web Content and others in between the presentation. The learners can access the
Nearpod lesson with a code. When conducted synchronously, the instructor has the capability to
control the viewing slides of the learners. Whereas, when conducted asynchronously, learners can
go through the lesson and complete the activities at their own pace. Both ways, instructor can track
and analyse students’ participation and performance.
5.3 Creating a Nearpod Lesson
5.3.1 Go to www.nearpod.com. Sign up for an account or login to your account.
5.3.2 To create a new lesson, choose either ‘Lesson in Google slides’ or ‘Lesson in
Nearpod’.
5.3.3 You can either ‘Drag & Drop’ or ‘Upload Files’ (Power Point, PDF or Google Slides)
to convert it into a Nearpod lesson or make your own by clicking ‘Add Slide’.
405.3.4 This example shows the slides that have been added by uploading an existing Power
Point file. Limits your slides to 10-15 pages only to reduce the uploading times. (Tips:
Preparing slides in MS Power Point is easy to design. However, when uploaded, the
slides are converted into image files and difficult to be edited further).
5.3.5 To add more slides, click on ‘Add Slide’. A new menu appears. Then, select between
‘Add Content’, ‘Add Web Content’ or ‘Add Activity’. More options are available
under each menu.
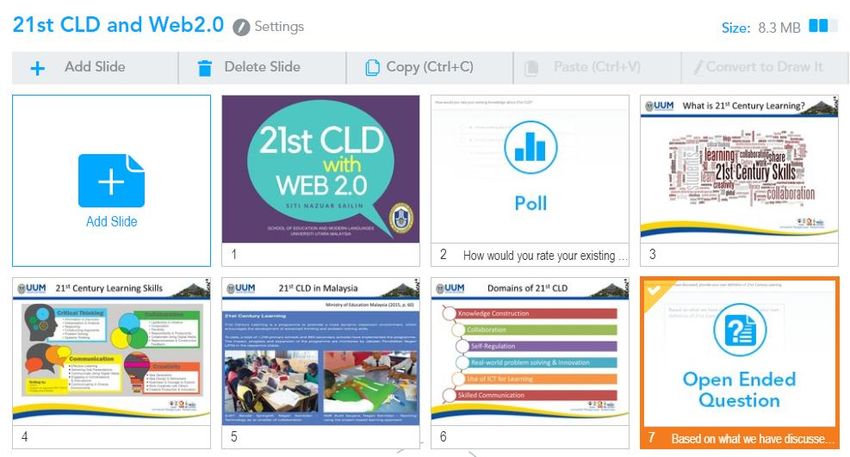
5.3.6 To add activities in between slide, ‘Add Activity’ and choose the option. For example,
instructor can add ‘Poll’ or ‘Open Ended Question’.
415.3.7 Instructor can add poll at the beginning of a lesson, to collect some preliminary
information on the learner’s knowledge. Click on ‘Poll’, add question and answers.
Instructor can ‘Add Timer’ and ‘Add reference’ (image/audio) in the poll. Click ‘Save’
when done. Notice a poll has been created at the second slide. To change the position,
just ‘drag and drop’.
425.3.8 Instructor can conduct open-ended question in Nearpod to check on students’
understanding after discussing the topic based on several slides. Click on ‘Add
Activity’, then choose ‘Open Ended Question’. Type in the question, ‘Add Timer’
and/or ‘Add reference’. Instructor can ‘Enable Student Audio Recording’ in Beta
version. Click ‘Save’ when done. An open-ended question slide has been created. To
change the position, just ‘drag and drop’.
5.3.9 Instructor can gamify the lesson by adding ‘Time to Climb’ activity. It is a
“competition-like” activity to foster learners’ engagement, while assessing learners’
understanding. In this game, learners will race to the top of the mountain against the
clock, by answering multiple choice questions. Instructor can embed this activity for
reviews, exit tickets and others.
5.3.10 Click on ‘Time to Climb’. Type in the question and provide the answer options. Click
‘Add Answer’ to add more options. Click ‘Add Question’ to add more questions.
Repeat the process until done, then click ‘Save’. The ‘Time to Climb’ activity has been
created. To change the position, just ‘drag and drop’. (Tips: Time to Climb does not
support Student-Paced mode).
435.3.11 When you are done adding activities and organising the slides, select ‘Preview’ to see
how the learners will see the lesson. Then, click ‘Save & Exit’. A pop-up will appear
to insert lesson’s details, such as grades and subject. Then, the lesson will be added
into your Nearpod Library.
5.4 Launching an engaging Nearpod Lesson
5.4.1 To launch a Nearpod lesson, choose the lesson from ‘My Library’. Decide if you want
to launch the lesson as a synchronous ‘Live Lesson’ or in ‘Student-Paced’ mode.
445.4.2 Share the generated code with the learners. For the Student-Paced mode, instructor can
set the time frame for students to access. Learners need to key in the code to join the
session at the Nearpod site (join.nearpod.com) or on the mobile app without signing
in.
5.4.3 Live-lesson (synchronous) connects learners with the instructor's device and creates
an engaging learning experience. Instructor can see which learners have joined the
session and control students’ view of the slides and activities. Instructor can see
learners reply to the interactive activities and push the selected results of quizzes to
learners’ devices. Student-paced (asynchronous) is self-paced and independent. The
instructor receives all formative assessment data from each learner in a Nearpod
Report. Students can join a lesson anytime, from anywhere.
5.4.4 In a student-paced mode, instructor can monitor and moderate learners’ responses in
teacher view. Click ‘View Progress’ to view student responses in real time or to
remove students from the lesson/report. Learn more about teacher view at
https://youtu.be/pP1avvwTCV4.
5.4.5 Instructor can analyse report of the formative assessment conducted within the
Nearpod Activities for each lesson that has been conducted either synchronously or
asynchronously by accessing the ‘Report’. Learn more about ‘Report’ at
https://youtu.be/QlnJcKR7CkA.
456.0 QUIZLET
6.1 What is Quizlet?
Quizlet integrates self-learning tools or known as study sets, and formative assessment. A study
set in Quizlet is a list of terms paired with their matching definitions or a set of questions with their
matching answers. Study sets can include words, images, diagrams, and audio.
6.2 Why use Quizlet?
Quizlet can be a powerful tool for supporting remote learning. Instructors can convert a study set
into different learning modes, from basic flash cards to tests that mix and match question types
(e.g., true and false, multiple choice, written answer). Learners can use study sets that instructors
assign, create their own, or use one from the content library. Learners can study the contents using
Quizlet's study modes and games at their own-paced. During synchronous lesson, instructor can
gamify the learning activities by conducting Quizlet Live, a quiz-based learning activitiy.
6.3 Creating Quizlet study set
6.3.1 Go to www.quizlet.com. Sign up for an account or login to your account.
6.3.2 To create a new study set, select ‘Create’, then enter a ‘title’ and ‘description’ for the
set.
466.3.3 Add the ‘term’ and ‘definition’. Choose the language if needed. Chemistry and
Math/Symbols are available in addition to other languages.
6.3.4 Click on ‘+’ symbol or select ‘Add card’ to add more terms and definitions. Click
‘Create’ to save and publish the study set.
6.3.5 The study set can be added into a class or a folder, edit and share with learners and
other instructors.
Add this set to a
Edit Share
class or folder
6.3.6 Study sets that have been created or studied can be found on the instructor’s or
learner’s dashboard.
476.3.7 Instructor can ask students to create their own study set and share it with the instructor
as well as their peers. These are examples of study sets created by learners. (Tips:
Instructor can divide topics to individual student for them to come up with a study set.
Share with the whole class so that every student can get access to all study sets of
different topics).
486.4 Creating Engaging Learner-paced Quizlet lesson
6.4.1 Instructor can share the link of the study set created earlier with the learners. Learners
can study the contents in various modes such as Flashcards, Learn, Write, Spell or Test
at their own pace (asynchronous).
6.4.2 ‘Flashcard’ study mode. Learners click anywhere on the term card to flip for definition.
6.4.3 ‘Learn’ study mode.
496.4.4 ‘Write’ study mode.
506.4.5 ‘Test’ study mode.
6.5 Fun learning and gaming using Quizlet
6.5.1 Quizlet also support fun learning and gamification. Using the ‘Play’ feature, learners
can do self-assessment through a time-based quiz-like activity namely ‘Match’ and
‘Gravity’.
6.5.2 These are the examples of ‘Match’ and ‘Gravity’ play. (Tips: These games might not
be suitable for higher education learning, but it depends on the learning outcome to
be achieved.).
516.5.3 Quizlet is popular for its Quizlet Live, a team-based or individual competition
learning game.
6.5.4 Learners need to work together in ‘TEAMS’ to correctly match a Quizlet set's terms
and definitions. The first team to match all in a row will win. Each student needs
his/her own device such as a smart phone, tablet, or laptop as he/she will go around
the class to find the team members. It is also helpful to have a projector in front of
the class so instructor can display the scoreboard.
6.5.5 For supporting remote learning, instructor can choose ‘INDIVIDUAL’ setting to run
the Quizlet Live. The game can be run during synchronous lesson supported by video
conferencing tool such as Webex or Zoom to screen the scoreboard.
526.5.6 To learn more about Quizlet Live go to https://youtu.be/q64qTBfK0iE.
537.0 SOCRATIVE
7.1 What is Socrative?
Socrative is a teaching and learning tool that empowers instructor to engage with learners in
classroom or remote learning. Socrative provides a platform to generate quiz questions, observe
learner scores and monitor students’ progress (Mohamad et al., 2019). It also offers an efficient
way to evaluate learning that saves time for instructor while delivering fun and engaging
interactions for learners.
7.2 Why Socrative?
Socrative is cloud based and free where learner can access using any device. Activities can either
be instructor-paced (for use during a classroom discussion) or learner-paced (for use as a more
traditional class-end “exit ticket” or quiz). There is also a gaming element called “Space Race”
and this feature can set up a quiz so that teams of learners can compete against one another to
launch rockets into space. Besides that, Socrative quizzes can also be shared with other instructors.
Importantly, instructor would have a "paperless" way to track learner performance based on
content they have chosen.
7.3 How to create Socrative?
There is simple procedure to login this tool and it can be run on laptops, smartphones and tablets.
7.3.1 Register & Log In
a) Go to www.socrative.com. Click “login” and “Sign Up Now”.
b) You have to choose between signing up for the free plan or paying a fee called “pro”
plans.
c) The free version allows instructor to work with 1 room, 50 students and 1 activity at a
time, whereas the pro plans allow to use 10 rooms and up to 10 activities at once.
54d) Once, we have registered, a classroom code will always appear at the top of the
dashboard. Instructor will give this code to learners so they can join the session.
e) Learners do not register for personal account. They only enter instructor’s unique
Room Code.
7.3.2 Creating & Editing Quiz
a) Instructor can combine different types of question (true/false, multiple choice and short
answer).
b) There is no limit to the number of questions per activity or quiz. Instructor can also
store the quizzes and share them with other instructors.
c) Choose “QUIZZES” and click “ADD QUIZ”.
55d) Create Multiple Choice. A combination of multiple choice question with new
technologies offer an active, creative and comprehensive learning experience.
Add another question
e) Create True False is a way to run a quick poll.
56f) Create Short Answer. Using the short answer will give each learner an opportunity to
share their ideas before engaging in class discussion. For those students who might
need more time to formulate their thoughts, this can be a great way to share their ideas.
g) Create Space Race to provide some element of competition for learners. This feature
allows learners to work in pairs or small groups.
57h) Create Exit Ticket. Exit ticket is an effective way to gather end-of-class feedback. It
gives learners an opportunity to reveal what they have learned and for instructor to
confirm that teaching objectives were achieved.
7.3.3 Reports & Results
a) Socrative can also be used for assessment purposes.
b) After a session, instructor can receive an Excel report in the email account. This shows
each learner or group’s answers for each question.
c) In smaller groups, instructor can send each of their learner individual pdf including the
questions and their answers, which can be used for reviewing or recording purposes.
Decide how you would
like to receive your reports
Whole Class Excel
58Individual Student PDFs
Question-Specific PDF
7.4 How can Socrative be used in Remote Learning?
7.4.1 Deliver self-paced, practice, check for understanding assessments
7.4.2 Unit testing and exams
7.4.3 Asynchronous and synchronous room modes
598.0 EDPUZZLE
8.1 What is EdPuzzle?
EdPuzzle is an interactive visual tool where instructor can make any video lesson or find video
lessons created by other teachers, including formative assessment. It is a great way to encourage
deeper thinking and to check how learners are engaging with the course. Instructor can choose
video from a variety of the most popular online video sources including YouTube, Khan Academy,
National Geographic, TED Talks, Veritasium, Numberphile, Crash Course, and Vimeo. Each of
these sites can be searched by course topics or by video title. Once a video has been chosen,
EdPuzzle offers a variety of tools to supplement students’ learning experiences. These tools
include cropping, voiceover, quizzing, text boxes, reporting, and sharing (David, 2017). This tool
is suitable for remote learning because it allows learners to learn about topics at their own pace
and speed.
8.2 Why EdPuzzle?
EdPuzzle allows the instructor to insert questions directly into a video to focus attention and
retention. When learners are watching the video, they must answer the question that pops up on
the screen. Learners can watch the video without skipping any parts of the video. EdPuzzle also
puts the learner in control as they can re-watch and respond to written questions or quizzes.
8.3 How to create WdPuzzle?
There is a simple procedure to login this tool and it can be run on laptops, smartphones and tablets.
8.3.1 Register & Log In
Go to www.edpuzzle.com and click “Sign Up”. Then, sign up as a teacher.
608.3.2 Creating Video Lessons
a) Instructor can search or choose video from a variety of the most popular online video
sources.
b) The video can now be edited. Instructor can use the CUT feature in the editing
section to include only what he needs.
61c) To record a voiceover, click on the “voiceover” and select the spot in the video where
you want to record audio by clicking on the timeline bar. A voiceover is an audio
recording that plays over the original audio of the video. This is useful to add a new
lecture or commentary to an existing video.
d) Click on the “Questions” to embed a question in your video. Select “Multiple-choice
question”, “open-ended question” or “Note” from the options given and add the
question or note. You can click the play button to confirm that they appear in the video
at the right spot and timing.
Adding a quiz can ensure learners are engaging with the video and paying attention to the
video as it plays, rather than testing at the end.
8.3.3 Saving and Assigning a Lesson
a) After the instructor has edited video lesson, assign it to a class directly.
62b) Choose the classes you want to assign the video to:
“assign all” to assign the video to all the learners in your class.
“assign manually” to assign the video to specific or certain learners in your class.
Set a due date and
due time
Choose “Assign
all” or “Assign
Manually”
c) Learners can join the classroom by the given link or embed this video on LMS such
as Google Classroom or Edmodo.
d) Instructor can also check their learner’s progress in “Gradebook”. It shows the total
score, total time spent, turned in late, individual student report and also download
progress
638.4 How can EdPuzzle be used in Remote Learning?
8.4.1 Pre-assessment for course or topic - Create an introduction video to introduce the
instructor to the class or topic and review the course learning objectives.
8.4.2 Peer-to-peer learning - Learner can create their own video and upload to YouTube.
Then the instructor can add those YouTube videos into EdPuzzle and assign learner to
peer review one another’s work using the comments feature.
8.4.3 Instructional lesson/demonstration – create a demonstration video of a difficult-to-
understand topic area.
8.4.4 Interactive instructional videos – Embed questions to assist students in analyzing,
reflecting and making connection on topics.
64REFERENCES
Davis, V. (2017). Why I use Edpuzzle: An Edpuzzle review. Retrieved from
http://www.coolcatteacher.com/edpuzzle- review/
Ferrari, E. (2019). How nearpod makes distance learning easy. Access from:
https://nearpod.com/blog/distance-learning/
Meirose, C. (2020). Remote learning and Quizlet Live: Everything you need to know. Quizlet in
Education & Teachers. Access from: https://quizlet.com/blog/remote-learning-and-
quizlet-live-everything-you-need-to-know?source=blog_post
Mohamad, M., Lestari, D.D., Zahidi, A.M., & Matore, M.E.M. (2019). Socrative in teaching
tenses: Indonesian students and lecturers’ perceptions. Creative Education, 10, 140-150.
Shearer, C. (2020). New! Play Quizlet Live #alonetogether with Individuals mode. News &
Teachers. Access from: https://quizlet.com/blog/new-play-quizlet-live-alonetogether-
with-individuals-mode
65You can also read