Hand crafted site editor - pulsecms.com 1st Edition / For Pulse 5.3.9 or higher 2nd January 2020 - Pulse CMS
←
→
Page content transcription
If your browser does not render page correctly, please read the page content below
Hand crafted site editor.

pulsecms.com
1st Edition / For Pulse 5.3.9 or higher
2nd January 2020
Introduction to Pulse ...........................................5
   What’s new in Pulse 5 .......................................................................................................5
   Version History ...............................................................................................................13
   How to start with Pulse ...................................................................................................13
   How to upgrade from Pulse 4.x ...................................................................................... 14
   How to upgrade from Pulse 5.x.......................................................................................15

Get Started .........................................................16
Installation in just a few seconds ....................................... 16
   Local installation for development .................................................................................16
   Installing on a remote server .......................................................................................... 16
   Server Requirements....................................................................................................... 17
   Troubleshooting ..............................................................................................................17

Basic Usage ........................................................19
Adding your first content.................................................... 19
   Blocks Basics ...................................................................................................................19
   Pages Basics .................................................................................................................... 20
   Blog Basics ...................................................................................................................... 22
   Adding a Blog.................................................................................................................. 22
   Managing Media ............................................................................................................. 24
   Adding Galleries .............................................................................................................25
   Adding a Contact Form................................................................................................... 25
   Backup your Pulse Site ...................................................................................................26
   Track Site Visitors...........................................................................................................26

Pulse Tags............................................................................27
   Block Tag......................................................................................................................... 27
   Super Block Tag ..............................................................................................................27
   Gallery Tags ....................................................................................................................27
   Blog Tags......................................................................................................................... 28
   Newsletter Signup Tag ................................................................................................... 28
   MailChimp Tag ...............................................................................................................28
   Form Tag ........................................................................................................................28
   Just Forms Tag ............................................................................................................... 29
   Localizer Tag................................................................................................................... 29
Social Tag ........................................................................................................................29
   Googlemaps Tag ............................................................................................................. 29
   Recent Posts Tag............................................................................................................. 29
   OGP Tag ..........................................................................................................................30
   Dropzone Tag ................................................................................................................. 30
   Media Player Tag ............................................................................................................ 30
   Navigation Tag ............................................................................................................... 30
   Breadcrumb Tag ..............................................................................................................31
   Login/locked Tag ............................................................................................................ 31
   Search Tag .......................................................................................................................31
   Domain Tag ..................................................................................................................... 31
   Link Tag ..........................................................................................................................32
   Policy Tag ........................................................................................................................ 32
   GDPR Tag ....................................................................................................................... 32
   Cookie Consent Tag ........................................................................................................32
   Custom Post Type Tag ....................................................................................................32
   Custom Tags ................................................................................................................... 33
   Dedicated Loop Tag ........................................................................................................33
   Pulse Commerce .............................................................................................................34
   Stripe Tag ........................................................................................................................34
   PayPal Tag ...................................................................................................................... 36
   Visual Sitemap ................................................................................................................36
   Olark ............................................................................................................................... 36

Settings ................................................................................37
   General ............................................................................................................................37
   Forms ..............................................................................................................................39
   Security ...........................................................................................................................40
   Permissions .................................................................................................................... 40
   Extend............................................................................................................................. 40

Intermediate Usage............................................41
Going a little bit further ......................................................41
   Migrating a blog from WordPress or another blog system ............................................ 41
   Themes and Child Themes..............................................................................................41
   Rebranding Pulse ............................................................................................................ 41
Favicon and Apple icons .................................................................................................41
   Adding a second Blog to your site................................................................................... 41
   Inline editing & logged in bar .........................................................................................41
   Client notes on dashboard ..............................................................................................41
   META data per post & page ............................................................................................41
   Embed individual Blocks on non Pulse template pages ................................................42
   Blog Draft mode.............................................................................................................. 44
   Securing Pages for preview or Members area................................................................44
   Making multi-lingual sites ............................................................................................. 44
   Offline Desktop apps for Blogging .................................................................................44
   Unlimited user management.......................................................................................... 45
   Pulse Commerce .............................................................................................................45

Advanced Usage ................................................46
Taking it further .................................................................46
   Custom CSS / JS per page or whole site ........................................................................ 46
   Body tag helper CSS .......................................................................................................46
   Custom Post Types ......................................................................................................... 46
   Install a Plugin ................................................................................................................46
   Get more addons ............................................................................................................46

Making Templates .............................................47
Create customised templates .............................................. 47
   Don’t need to, can use on non-Pulse template sites ......................................................47
   Converting from HTML ..................................................................................................47
   Using RapidWeaver ........................................................................................................ 47
   Using Blocs...................................................................................................................... 47
   What to include ..............................................................................................................48
   Inline Editing .................................................................................................................. 49
   3rd Party Developers: Templates and Addon ................................................................49

Appendix............................................................50
   Tag Cheatsheet ...............................................................................................................50
   Quick Installation ...........................................................................................................50
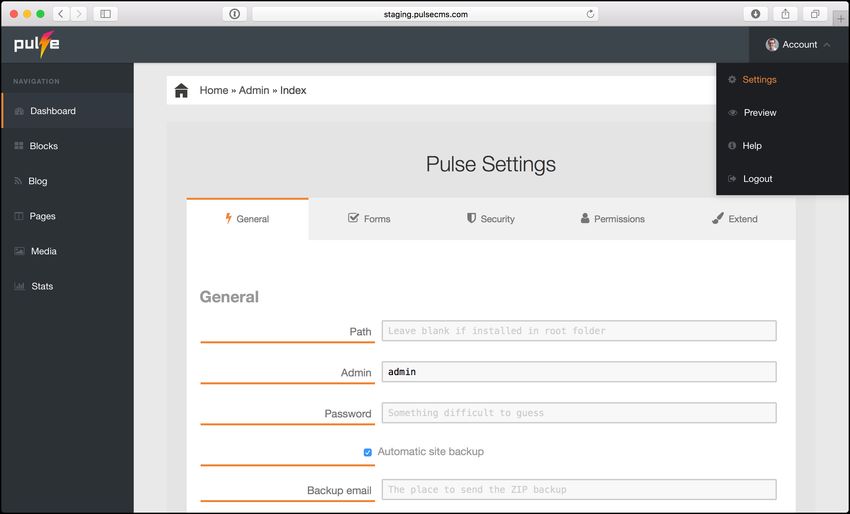
Introduction to Pulse
Turn your existing beautiful web pages into editable pages. No need to install overkill CMS
apps anymore. Add Pulse with copy & paste and you and your clients can enjoy updating
websites again.

What’s new in Pulse 5
It’s been a great journey getting to V5 and it gets better and better from here. Here’s all the
new things added since Pulse 4 (it’s long!):

PULSECORE

* Config.php now replaced by JSON storage in a folder called "pulsecore"

* JSON will open up _lots_ of possibilities for 3rd Party Developers to get into :)

* JSON also means password is now no longer able to be seen in plain text. The password is
  hashed and salted and no longer printed naked in config file - using bcrypt. Is now as strong
  as the server and difficult to hack.

* New settings page - control all from settings. No longer need to edit config.php when install
  just upload and go to /admin/ (password is "demo"). If want to edit on the code level
  pulsecore > storage > config.json / but shouldn't be needed. Config.php is just needed for
  the initial login.

* Settings now has dropdown option for all time zones

* You can now include blocks outside of the main Pulse page area and still process Pulse
  tags within them. E.g in template  and tags inside Blocks
  will be processed

* Pulsecore added to template.php to style core elements needed like buttons or blog tags,
  but designers can leave out or override with their stylesheets should they wish

USERS

* New user "Editor" added. This user cannot see settings page and only edit content. Good
  for client user. Designer (admin) can change their password (which is also hashed) and add
  2 step authentication. This also includes secure forgot password emailing functionality.

* Designer can also restrict what pages / blocks editor can edit. For example, just want to
  create a blog for a client, you can do that now. Or we definitely do not want editors going
  into the pages section. They already find it hard to understand the concept.
TEXT EDITOR

* Latest Redactor Editor includes many bug fixes, better mobile use, support for powerful
  codemirror in HTML mode, classes/ids on images for things like animation or lightboxes,
  added snippets (such as "more" for blog posts), can paste as plain text automatically and
  many more…

* Redactor II added. Sharp and sleek icons in the toolbar and more plugin compatibility and
  bug fixes in the editor

* Can use Redactor Editor on Pages or just HTML. No longer client scary!

* Added "MORE" to Redactor toolbar

* Redactor Font colour, Font family and Font size options added!

* Markdown now in Blocks

* Issue with pasted links in a text.

* Improved some improvements when a text inserting from MS Word

* Spammails are annoying. Easily and securely paste an email address into a Block with a
  button - which auto makes mailto: and @ in the source code, so invisible to all spambots

* Videos embedded from YouTube/Vimeo or other sites will be automatically responsive and
  display in columns of narrow width or on mobile devices.

BLOCKS

* Blocks can now move folders! There is a select below the text editor.

* New page or block creation now has a radio button for "page" or "folder" and auto adds .txt
  to pages and blocks so more user-friendly.

* Pages and Blocks creation - no need to type .txt! And if file or folder select from the radio
  buttons

* Embed individual blocks on non Pulse template pages liken previous Pulse versions. Embed
  URLs are now included for blog, blocks and galleries to add to non Pulse template pages
  that are in the same folder (HTML and PHP options).

  LOGIN

* Forgot password added. Sends email to user registered in settings.

* Customize login stylesheet added in admin / admin.css so designers can easily style the
  login page

* 2 step authentication added - this is **_cool_** - so can lock down with smartphone
  verification for extra security with a secret key. Use Google Authenticator app to access
  Pulse admin, along with usual password.

* Login has its own CSS file login.css to make it easy to customize the login screen.
* Gorgeous login UI added based on Justin from http://www.pulse-fusion.net and his popular
  Aero login addon. Image, icon can be changed in the "Branding" folder and colors easy to
  change in the admin.css

SECURITY

* Security fix for Contact Form - latest version of PHP Mailer added

* Error reporting is now always on for developers

* Various security fixes and tighten of file permissions and other things

* New tag to add One Time Password to any page on front-end - not just password plugin
  using: {{sb_login:test:1234567890:testblock}}

* Latest jQuery included! (3.x.x)

* Sanitisation for private directories and turning off access to private urls. Adding rules to
  the .htaccess to block access too.

* htaccess and index.html files added in some directories to stop content and stats being
  reached from an absolute URL - more security features

* Offsite emailed backup to admin's email so a backup is kept on the server and off the
  server. This can still be switched off in the settings.

LANGUAGES

* Admin UI ships in English, German, Japanese, Dutch, Hungarian, Polish, Czech and Slovak.
  These can be easily changed in-app with the new Language Selector in Settings

* WYSIWYG Editor is also translated to those language for a full localised experience

* Multilingual out of the box! Use the {{localizer:block}} tag to translate your content into any
  language you want. And use links like Deutsch to change the
  language on your site.

* UTF-8 in all blocks so non English characters now render correctly

* More language variables added for Bounce rate in stats, Blog UI meta data, title, description
  and the embed instruction

* Language variables added to signup / email list block

SEO

* Sitemaps auto-generated and placed in root as sitemap.xml including blog posts

* OGP Tags

* Each blog post now has individual title + description meta tags - different to the blog page
  also which has it's own (SEO upgrade)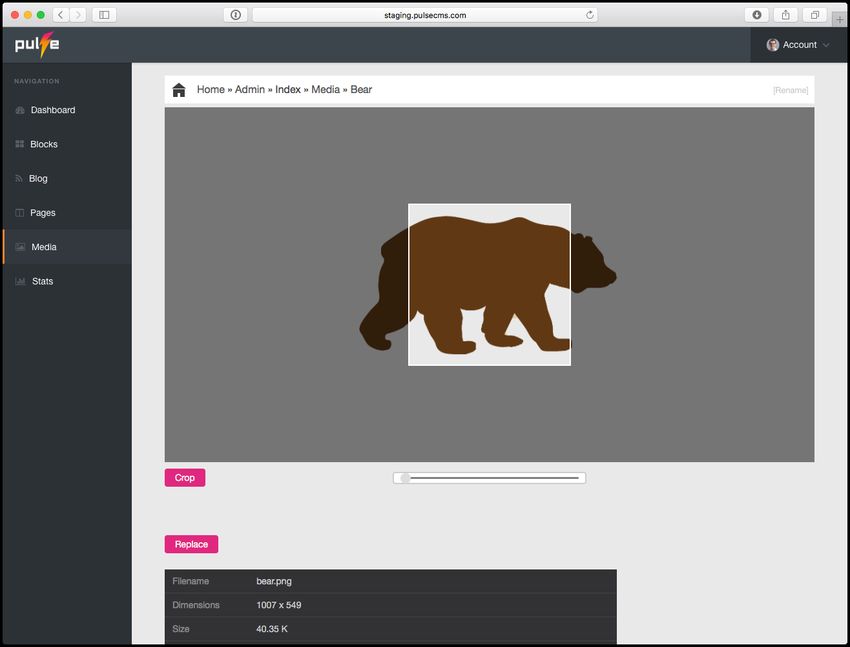
NEW TAGS

* Breadcrumb, Mailchimp, Recent Posts, Googlemaps, Policy, Search, Gallery tags, Social,
  OGP, Dropzone (upload client files), Navigation, SB_login, Masonry, Thumbnail, Domain,
  Blog List, Blog Show.

THEMES

* Upload templates now possible from the admin! No need to SFTP to the server. Just upload
  a theme zip of the contents then select from the theme drawer in settings!

* Themes chooser - you can add more themes in the template folder in sub-folders and select
  them from settings dropdown for easy template changing on the site.

* Themes can also be set per page too for multi-theme sites.

* Easy to flip front end home page from home > blog - if want to land on blog

* Can flip admin landing page to dashboard, blog, stats etc for more customised login

* There is now a google analytics placeholder replacement tag. Add this to template.php to
  be replaced by Google Analytics added to the settings in admin ui

* The per page inline css/js and the general inline css/js in the settings page are now loaded
  for each page so you can overwrite the CSS/JS without looking in the template files on the
  server!

* {{navigation}} tag added and it's autogenerated on load! The first run sets the menu up. This
  also includes sub-menu support and organisation (drag and drop sub too!) You can also
  easily hide menu entries, or delete items, that are no longer needed

* There is now a "body tag helper". This adds classes to the body tag depending on the
  context of the page so that CSS can be targeting styles more closely. E.g style just the
  About page or just the Contact page with a separate stylesheet or styles

PLUGINS

* Plugins can now also be updated! Drop the Zip into settings then start using the Tag in your
  blocks and pages!

* The number of Tag variables (for developers) is now 6

CUSTOM POST TYPES

* Custom post types added and a new Pulse tag. The idea is that a site selling books (for
  example) would have fields for ISBN, cover image, date published, price, availability etc.
  These can be created and managed from the settings panel. Then using the new tag, for
  example {{custom_post_type:book/hercules}} the custom post data will appear on the front
  end. Useful for listing data or create e-commerce sites.
MEDIA

* Forms, Gallery, Slider tags better compatibility with Pulse in sub folders

* Upload media now using drag and drop for multiple files and ease of use

* Media files can now be moved into other gallery folders. Sub folders can be created too
  (new media button)

* New Masonry tag {{masonry:gallery1}} has been added! Image galleries can be auto-
  formatted into a responsive masonry grid (the format for the masonry tag is
  {{masonry:gallery1:all}} The all parameter can be left off since its the default.)

* Crop tool added so easily upload photos and then crop them to size without needing to use
  an external tool

* Order images button in Media. Order images to latest uploaded. Handy if you want to show
  your latest images in a gallery / portfolio first (automatically). But want to show your best
  first? Re-order with drag and drop.

* Upload images can now be resampled or original quality. Good for creating an upload
  repository for photographers for example.

* Replace media link added - so can replace images in Media folder without having to delete,
  re-upload and then re-paste into Blocks. Overwrite with same filename

* New Slider framework latest flexslider version and upgraded to new gal format so
  {{slide:gallery1}}. The slide is {{slide:gallery1}} and shows all images The slide uses the image
  alt and the link title attributes.

* Images can now take links in the media page. The gallery.txt now can store a link url. This is
  done in the media item page where the caption and alt tags are set

* New tag {{thumbs:gallery1}} is now added. This is using the new galley load/save code. This
  allows you to make thumbnail links to galleries for quick portfolio sites with multiple
  galleries

* The admin gallery page now has an order button. This orders the galley items by upload/
  modification date

* The media image edit now shows the alt tag text block. The captions editing/adding code
  has also been hugely reduced.

* "Add image" in the editor now allows images to be selected from galleries and folders

* The media image edit now shows the ALT tag text block. Images / gallery / slider images
  now all have the ALT tag along with Title tag for better SEO and accessibility purposes

* Can now select media from sub-folders when editing blocks and pages - not just media root
  folder

* The gal tag now accepts the number of images in the second parameter eg
  {{gal:gallery1:all}} or {{gal:gallery1:5}} for last 5 images...The size default is all, so that can be
  left off (with or without inverted "" commas for convenience - they get stripped out)

* New lightbox gallery in the {{gal}} tag. Much better touch and responsive, modern gallery.
  The caption is set by the link title and image alt tags for better SEO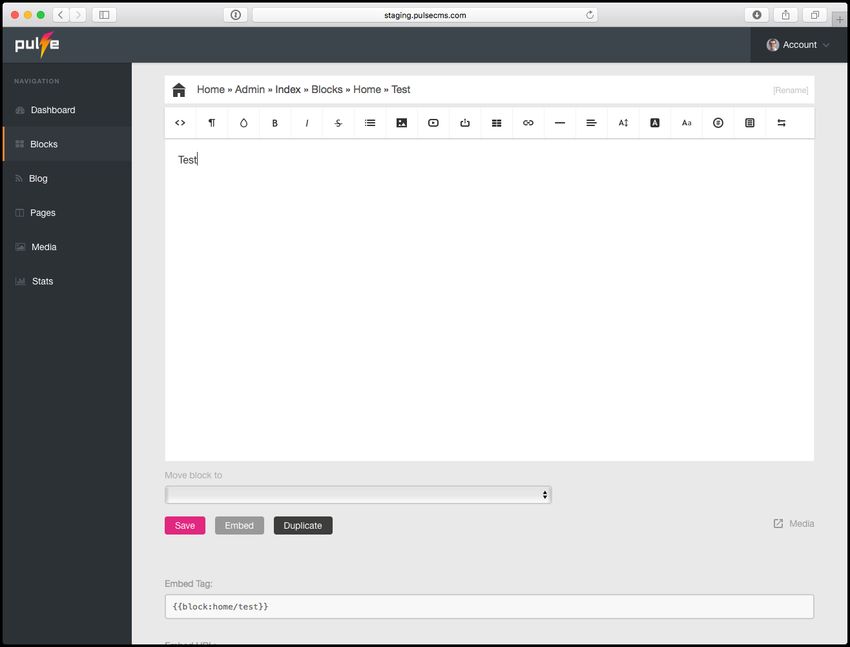
USER INTERFACE

* Modern, minimal and more user-friendly admin UI added! Beautiful responsive admin UI
  with a constant fixed sidebar and dropdown on mobile so all menu items, settings and help
  docs are just one-click away.

* New Feature - Drag and drop navigation UI found under settings. Much easier to create
  navigation over sb_nav.txt for users who don't want to edit HTML links. You can also easily
  add sub-menu items, hide menu entries, or delete items, that are no longer needed.

* "Branding" folder in Content>Media now includes all images to change branding. Logo,
  favicon, Apple Touch Icon and more in future. This is for easy replacement and also future
  images can go in here for easy changes by designer and user.

* Added favicon + apple icon to login screen

* If logged in, the top bar shows for logged in users on the front end (matching the settings)
  for short cut entries!

* SweetAlerts added to user admin! Admin now gives alert messages of success, rather than
  just reloading to the dashboard. More intuitive.

* Front-end editing now available! If logged in and browse the site, the user can edit the
  content without visiting the admin panel!

* Auto focus on input fields when page loads for easier user experience

* Pagination inside admin is also improved. No longer just 10 blocks and "next" and
  "previous" but also numbers for exact selection and also the amount of blocks to be shown
  can be set in the settings. This is all part of the new gorgeous UI.

* Active links added to navigation menu! User can see what page they are on (in the front-end
  sites)

DASHBOARD

* Dashboard added! Now get quick shortcuts to all pages including last worked on blocks,
  blogs, backups quick links, last media added along with dates and file size. // (leaves space
  in future to be updated with notes spaces, down time, stats etc) - thanks to Tim Plumb of
  http://www.pulse-style.com/

* New notes for clients on dashboard. Add Block dashboard-notes.txt (dashnotes) and
  anything you type in there will appear on the front after login. It's a space the developer can
  add notes such as shortcodes needed for site, add own contact details for contact etc..

INSTALL

* The path is now auto detected - so install is just deploy to server and visit /admin - login
  with "demo" then go to settings and change what you need!

* Reqs information now included in admin/install.php for easier server checking after
  uploading (diag.php now install.php)
* Recommend in most cases run the admin/install.php page firstly to auto-set the path, no
  need to set it and will run super smoothly!

* Anyone still using less than PHP 5.6 gets redirected to install.php to make them realise they
  have to upgrade - even PHP 5.3 ended security support in August 2014! Minimum now PHP
  5.6

* PHP7 compatibility! Upgrade to PHP7 to get a really fast, secure and powerful website

* Pulse no longer requires a serial number! Just install on as many sites as you want to make.

BLOG

* Blog titles (filenames) can be anything - not “1.txt”, “2.txt” anymore!

* When creating a blog post just hit "create" - no need to label "filename.txt" anymore - auto
  assigns an ID so quicker to get going and less complicated! And goes straight to blog post
  to start typing. No need to see the .txt and get confused!

* Blog ordering is done! Blog articles are now ordered by the published date in the calendar
  UI pickaday, and not the .txt string

* The .txt extension is hidden on the admin blog/block/page list pages and dashboard and
  doesn't need to be shown during creation

* Filenames of blogs hidden from list of blogs page so less confusing for users

* Draft blog feature! Add "draft" before blog file name to put it in draft mode so "draft1".
  Delete "draft" to put it live!

* RSS now works with http or https + tag content now appears in rss.php

* Blog page can now use an alternative template. In previous versions this wasn't possible
  and would result in a linking error

* Migrate / Import blog feature! Import your Wordpress, Tumblr, Blogger, RapidWeaver or any
  blog using an RSS / atom feed and migrate to Pulse without manually porting it over! Text,
  videos and images included.

* Blog import even more in-depth and powerful! Options added for the page extension name
  and max number of pages for a deeper and wider RSS crawl. It's now a more flexible
  approach to different kinds of sources and will loop through even long and heavy
  WordPress blogs over multiple pages with 100s of blog posts!

* Blog now has tags in the META drawer, which can be seen on the front end too and when
  clicked show all posts in that tag. Blogs posts have the list of tags at the end of the post
  e.g. "#tag1 #tag2". If no tags are selected then the tag list at the end of the blog post does
  not appear.

* Some great updates to the Blog engine. Now there are blog-related tags:

  {{blog:"":[[featured-image]] [[blog-content-loop(
    )]]}}

  So you can layout if you want your blog page to show author (taken from admin or editor
names) date, featured images (add in media folder "featured_images" and the main content)
or move these around in order of appearance. (The old {blog}} tag will still work. The first
parameter to the blog tag is an optional prefix so passing an empty string keeps that
working. You can add in here (without the "") the name of the blog to embed one of your
blogs. Any of the square bracket tags can be left off, although blog-content-loop is needed
to show the items)
* There is a tag widget for editing tags!
* Gorgeous date picker added for blog posts!
* The blog meta data for the date now uses the date format set in the config. The blog-item-
date tag is responsible for formatting the date for display. Easier to setup and localisation!
* The locale and timezone are now set in one place in settings
* The date is now locale sensitive so dates showing in language and locale!
* The settings have a blog date format which can be adjusted to include the day of week or
time. The actual date still needs to be formatted here
* Extra Meta data added for blog posts and pages. Checkboxes for nofollow/index and
support for custom meta to fine-tune your SEO settings
* Blogs now have a url meta field!
* RSS blog import converts input to UTF-8
* Blog layout now has Masonry option!! This can be found in the settings
* Blog list tag added for listing short version of the blog list items {{blog-list:"blog"}}. This
shows the title/author/date for a blog
* Have more than 1 blog per Pulse site! New tag - "blog-show" for showing any blog. For the
blogs, sub-folders in the blog directory hold the blog data. Its exactly like Pages/Blocks
* Blog single posts now have "back" button to return to blog top page
* Blog preview button has the proper single post blog link!
* There is now a blog and page "duplicate" button to make it easier to add more of the same
content
* This includes featured images for blog posts!
* Now add {{blog-tags}} (new tag) {{blog-tags:"blog"}} and prints all blog tags so can select
what want to read - with numbers for amount of posts in each, and links!
* Pagination is now also added for blog - so no longer just "next" and "previous" but numbers
also for quicker access to bigger blogs
STATS
* Stats UI improvements in some languages & more variables added
* New Stats! Browsers, countries, devices and Systems added to stats package.PERFORMANCE
* New - there is now a cache layer on the front end output so sites are much faster as the
server doesn't have to render the plug-ins or do any file handling etc. so good for
performance. Exists for 24 hours and can be switched on/off in settings
* Cache added! So front end content appears faster and more reliable in the browser to
speed up your Pulse sites even more!
FORMS
* Form fix to block page reload sending the email again
* Form builder app - Just Forms added (to make multi-page interactive forms and surveys
with form logic and stats)
* New Just Forms Tag included in the Pulse Core. Just add {{justforms}} to any page followed
by options for form ID and form height and you can easily embed your forms e.g
{{justforms:formid:height}} so {{justforms:1:300}}
* Standard Contact form auto responder for the {{form}} tag - any contact form submissions
will automatically receive a thank you email from the admin address in config.php. You can
change the message in the language files
* Form now has SMTP settings in the settings page
* reCAPTCHA added to the built-in contact {{form}} tag
* Config / settings edit option for contact form subject line has been added
* Option added to easily redirect {{form}} tag to a page upon successful submission. More
than just a success message this can take users to a "thank you" page.
And a whole variety of bug fixes (loads), problems and issues overcome and cleaned up!
Version History
To see an up to date and complete version history (including the latest updates) see our
update log: https://www.pulsecms.com/latest/version-history/
https://www.pulsecms.com/latest/
How to start with Pulse
Download Pulse from your Pulse account. Unzip pulse.zip and upload the all the files/
folders inside to the root of your domain. Do not upload the "pulse" folder itself, just the
files/folders inside of it. However, if you wish to install into a sub-folder for development,
then you can upload the whole package as domain.com/pulse.How to upgrade from Pulse 4.x We recommend using Pulse 5 in new Pulse projects and if so you can jump to "Getting Started" on page 15 below. But for upgrading from Pulse 4.x here are the steps: 1. Back up all files of your Pulse 4.x site if it’s on a live server 2. Replace all files (even .htaccess file) with everything in the Pulse5 folder, except for your "theme" and "contents" folders 3. Go to yoursite.com/admin/install.php to run the installer 4. Go to yoursite.com/admin and login with password "demo" 5. You’re in and installed! Next, go to "settings" and change the password. You can do all this from the Pulse admin. Installing in the root or a sub-folder should be auto-detected by running this install command in step 4 6. Check your Theme is compatible with any new Theme tags if you want to take advantage of them - see "making templates" below. For example new tags like OGP placeholder, Pulsecore CSS etc 7. Check all your pages are rendering and most cases this will be working. If not, go through the Pulse tags and update any that have changed and "save" the pages 8. Enjoy your new Pulse 5 site!
How to upgrade from Pulse 5.x

Updating Pulse is really easy.

To update automatically:

If you are running version 5.1 or higher, login as the Admin and go to > settings > update
and you can update it from within Pulse. Upload the latest Pulse ZIP from your Pulse
dashboard. It's best to take a quick backup before proceeding but Pulse will also do this.

To update manually:

From e.g. Pulse 5 > 5.0.1 you only need to upload the core files. As your content is separate
to the Pulse files you can update without impacting your site.

Please upload all Pulse files except for:

       •      template (folder)

       •      content (folder)

       •      pulsecore/storage/ (folder)

And it should work without needing any further setup or installing again.

If you've made any customisations or added tags/plugins into the "inc" folder then you'll
also have to factor these in. These will be overwritten so back these up and reapply them
after updating.

Also please take a quick backend before hand too, just incase anything goes wrong and
you need to rollback.
Chapter 1 Get Started Installation in just a few seconds Local installation for development Pulse also works locally with MAMP to test on your local machine before uploading to your server. Installing on a remote server - Upload Pulse to your remote server - Go to yoursite.com/admin/install.php - Go to yoursite.com/admin and login with password "demo" - You’re in and installed! Next, go to "settings" and change the password! Then have fun setting up your site. You can do all this from the Pulse admin. Installing in the root or a sub-folder should be auto-detected by running this install command. Installation video + Local Install: https://youtu.be/lYVcn8Py4_4 Using MAMP: https://youtu.be/Lz3aq_p04rw
Server Requirements
Pulse requires an Apache based server with at least PHP 7.0* (or higher) installed. For
example, Dreamhost, 1und1, Bluehost, DigitalOcean. It also works with higher versions of
PHP 7, Nginx and cloud services like Amazon EC2.

To pre-test your server, use the Server Testing Tool found here.

Unzip the "reqs.zip" file and upload reqs.php to your server. Then go to yoursite.com/
reqs.php to view the results.

If you have Pulse installed already, just go to yoursite.com/admin/install.php to make
sure you fulfil all the requirements.

You can host your Pulse CMS install on any Apache or Nginx compatible server. Most
servers meet the basic requirements as above.

          *We require at least PHP 7.0 because of security issues (anything
          less is "end of life") and we now need at least 7.0 or higher for some
          specific features in Pulse.

Troubleshooting
In the rare occasion Pulse doesn’t install first run here are the most likely reasons and
solutions:

- the .htaccess file wasn’t transferred in the upload.

- PHP on the server is not version 7.0 or higher (most likely 5.6!)

- Go to "yoursite.com/admin/install.php" and run this. It will attempt to rectify any
  issues, including any permissions that need setting on folders (e.g. the Cache (x3)
  directories in pulsecore/storage needs to be set to 777 writable permissions (pulsecore/
  storage/cache, pulsecore/storage/log and pulsecore/storage) + pulsecore/vendor/
  browscap/browscap-php/resources should be 775 so needs to be server writable.

For more go to https://www.pulsecms.com/resources/articles/troubleshooting.pdf

NB: For large sites with Blocks somewhere around 400-500 it might be necessary to
increase the server max input variables (max_input_vars) PHP memory limit. Do this on
your server via the php.ini or .htaccess file and try something like max_input_vars =
3000; See your host's wiki on the correct method to adjust this for your server. For
example with GoDaddy like this.

NB2: If you are having issues uploading larger files via Media Folder or Dropzone tag
uncomment lines 2 and 3 in the .htaccess file to increase the upload sizes and change the values. This is also host dependent.
Chapter 2

Basic Usage
Adding your first content

Blocks Basics
Blocks are sections of content that you can edit with an easy to use WYSIWYG editor
(Redactor). Just hit Blocks, New and type the name of your Block.

Blocks are useful for sections of content that repeat or if you just want to make editing
easier for someone who prefers not to edit pages in html or markdown.

To place a block into a page, use the following syntax:

{{block:myblock}}

This tells Pulse to look for a block in the blocks folder called 'myblock.txt' and place its
content at the current position.
How to use Redactor Editor Type in text, add images, videos and any content you want just like typing documents or email. You can set fonts, colors and other standard stylings. Most of the styles will be automatically applied by your template’s CSS so don’t hesitate to go wild in here. Moving Folders If you want to move Blocks into another folder (to make it easier to understand how the Blocks are grouped on a page) just select the "move block to" option underneath the edit area. Pages Basics The Pages feature is how you create and edit the pages on your website. If you create a new page called 'about' it will be accessible from a web browser at 'yoursite.com/about'. Editing Pages Pages can be composed in either plain HTML or Markdown.
To place an image into your page, use the 'Media' feature to upload an image. Then click
the image to get the HTML code. Once you have the HTML you can paste it into your
page.

To enter the page title and description, click the 'Meta' button to reveal input fields for
both.

Delete, Rename, Move Pages
To delete a page, go to the pages list view and click the delete icon next to the page you
want to delete.

To rename a page, first click into the page, then click "rename" which is located in the top
right corner.

To move a page to another folder use the rename feature and add or edit the folder in
front of the file name.

Using Blocks With Pages
While advanced users will have no problem editing page content in HTML or Markdown,
some users may prefer to use a WYSIWYG editor. This is where blocks come in as
explained above.

Manual Editing of Pages
It is also possible to manually edit a page in your favourite text editor.

But in order to do so, you need to understand how page .txt files are formatted. Here is an
example of a simple page:

Page Title

This is where the page description goes.

And finally the content goes here.
Some more content here.

The first line of the file is reserved for the page title. Then an empty line followed by the
meta description. After another empty line begins the content of the page which can be
either HTML or Markdown.
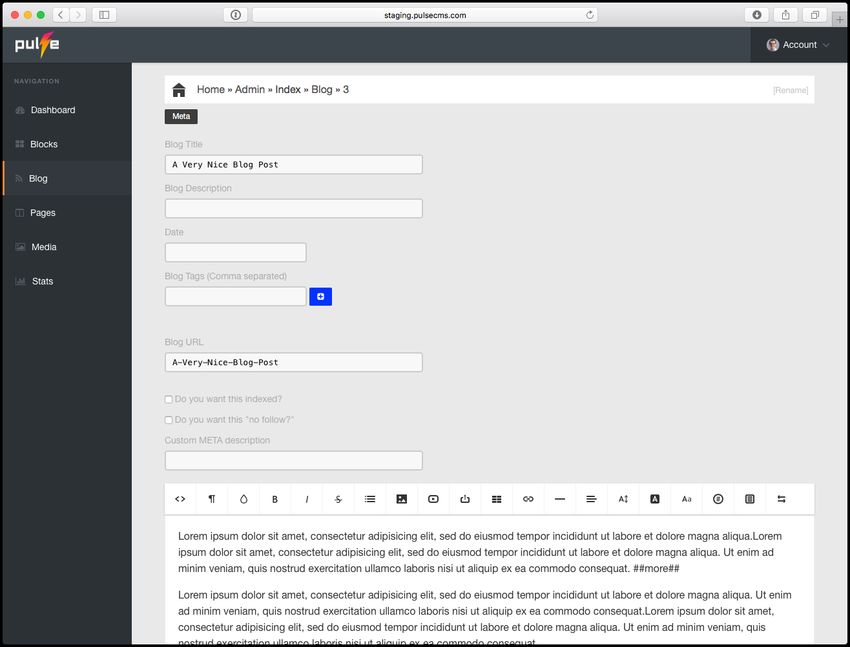
Blog Basics

Add a blog post (hit new and then create) and and when editing the Meta drawer gives
you lots of useful options such as SEO Meta data, date, tags to categorise the blog posts,
Blog URL and others.

One thing to note is with the Custom META description you must enter your custom tags
in the standard way, for example:

Adding a Blog
Navigate to Blog and "new" to create multiple blogs on your site. To embed the Blog in
your pages you have a few options. This is the standard Blog tag and calls the Blog name
and a few options (which can be included or excluded). For the top level blog:
{{blog}} {{featured-image}} {{blog-content-loop}} {{blog-item-
author}} {{blog-item-date}} {{blog-item-featured-image}} {{blog-
item-title}} {{blog-item-content}} {{/blog-content-loop}} {{/
blog}}

The old way (which still works currently) is:

{{blog:"":"[[featured-image]] [[blog-content-loop(    )]]}}

For sub-blogs:

{{blog-show:blogname:blog}} {{featured-image}} {{blog-content-
loop}} {{blog-item-author}} {{blog-item-date}} {{blog-item-
featured-image}} {{blog-item-title}} {{blog-item-content}} {{/
blog-content-loop}} {{/blog}}
The old way (which still works currently) is:

{{blog-show:blogname:blog:[[featured-image]] [[blog-content-
loop(    )]]}}

NB preserve the spaces between tags for the parser

Copy and paste this Pulse tag into your page and replace blogname with the name of your
blog. This is what tells Pulse which Blog to show on that page.

If you want the blog variables (author, featured image, date etc) to appear in a different
order, move them around, or just delete them. Add featured images in the media folder
"featured_images" and the main content). Featured images are image files that match the
blog ID. That’s the same as the blog filename.

Sub-blogs allow you to show more than one blog on a website. Please note that using the
blog-show tag is a more simplified blog showin all items listed without pagination. Classes
are added to the pagination view helper so pagination links can be styled or hidden in
standard blogs, via CSS classes in the Pulse template CSS.

If you want to just use the default Blog layout then a simple :

{{blog}}

For sites with single blogs:
{{blog-show:blogname}}
For sites with more than one blog. Replace blogname with the name of your blog.
For RSS feeds:
The url for sub-blog RSS is [blog name]/rss
For Blog tags (categories):
{{blog-tags:blog}}
This can be used anywhere on the site. It's best in some layouts to create a grid layout in
your Blog page. Add the Blog in the main panel and the Blog categories in the sidebar. The
demo project shows one way of doing this.
For Blog tags (categories) in sub-blogs:
{{blog-tags:blog/[subblogname]}}
For more complex and custom Blog layouts:
If you are wanting to custom your own Blog loop pin more detail (separate the layout from
the code a little) then you can use this:
{{blog-loop-start}}
...my own layout with divs, cards, whatever {{blog-title}} {{blog-
content}} etc.
{{blog-loop-end}}
The blog-loop tag allows the elements to be freely positionable and allows you to work
with other CSS layout frameworks.
The full tag example would be:
{{blog}} {{featured-image}} {{blog-content-loop}} {{blog-item-
author}} {{blog-item-date}} {{blog-item-featured-image}} {{blog-
item-title}} {{blog-item-content}} {{/blog-content-loop}} {{/
blog}}
Managing Media
The Media folder is where all media content such as photos, pdfs, docs, etc are stored.Upload (drag and drop),
order, and edit media assets such as image crop, add captions, ALT tags and links to
images for galleries. You can also replace images and keep their links intact inside your
site.
Adding Galleries
To create a lightbox image gallery, just create a new folder and upload images into it. Then
you can place it into a page or block using this syntax:
{{gal:galname}}
There’s also slides, masonry and thumbnail galleries which you can read about below.
Adding a Contact Form
The form feature in Pulse allows you to easily create and customize a simple form for your
website. To get started add this code to any page:
{{form}}You can set the options for your form such as redirect on success, SMTP settings, fields, reply receipts and so on from the Pulse Admin settings. For more complex forms, go to the Form Builder inside your Pulse Dashboard Account, create your form and embed it using the Just Forms tag. Backup your Pulse Site The backup feature in Pulse is fully automatic and operates silently in the background. There is nothing you need to configure or install. Each time you edit Pulse, it checks if a backup exists for this day. If not, one is created. A maximum of one backup per day is created and the 5 most recent backups are stored in the 'content/backups' folder. When a backup is created, it zips up all the files in the 'content' folder. If you have a custom template, you will need to back that up separately. This can be switched on/off in settings, and you can also set an email address to catch an off-site (off your server) backup. Track Site Visitors Make sure you have the tracking code in your site template to make use of the Stats feature. This is powerful and can be switched off. To work well, pulsecore/storage needs to be set to 777 writable permissions (pulsecore/storage/cache, pulsecore/storage/log and pulsecore/storage).
Pulse Tags
Let’s run through all the Pulse tags

Block Tag
{{block:myblock}}

Super Block Tag
Super blocks are like regular blocks with two differences. First the editor is removed and a
plain text editor is provided. Second, you can have code such as PHP and JS in the block.
To create a Super Block, just create a new block and prefix the name with 'sb_', for
example 'sb_myblock'.

Gallery Tags
There are a few of these:

Gal
{{gal:galname}}

{{gal:gallery1:5:yes}}
Two more variables: Number of images and pop-up images.

- For last 5 images...The size default is all, so that can be left off if want to show all.
- Yes or No for showing all of the images in a folder or not. No is the default.

This format can also be used for Masonry, Thumbs and Slider as below.

Masonry
{{masonry:galname}}
This makes a masonry gallery.

Thumbs
{{thumbs:galname}}
This makes a page of thumbnails, without the Lightbox feature of “gal”. Useful if you want
to link to different pages to show off a portfolio or link to individual Gal Lightbox pages,
for example. Set the links on each image individually as mentioned above.

Slider
{{slide:galname}}
Blog Tags
{{blog}}
When writing Blog posts add ##more## to truncate posts.
Blog Categories/Tags Tag
{{blog-tags:blogname}}
Prints all blog tags (categories) with numbers for amount of posts in each and links to
them. Replace blogname for the name of your blog to show.
Blog-list
{{blog-list:blog}}
Blog list tag added for listing short version of the blog list items. This shows the title/
author/date for a blog. Replace blog for the name of your blog to show.
{{blog-list:blog:title,author,date:5}}
If you want to add further control to this tag. The second parameter is the lines to show
author/date/title and the last is the number of items on a page.
Blog-show
{{blog-show:blogname:blog}} {{featured-image}} {{blog-content-
loop}} {{blog-item-author}} {{blog-item-date}} {{blog-item-
featured-image}} {{blog-item-title}} {{blog-item-content}} {{/
blog-content-loop}} {{/blog}}
Specify more options, move them around and leave off what you don’t want. This allows
you to show more than one blog per site. It will show any posts in the blogname folder.
Newsletter Signup Tag
{{email-list}}
This will create a newsletter signup Block with all the email addresses.
MailChimp Tag
{{mailchimp:user:formid:itemid}}
Signups go straight to your Mailchimp list.
Form Tag
{{form}}Just Forms Tag
{{justforms:formid:height}}
Localizer Tag
{{localizer:block}}
Use links like Deutsch to change the language and label Blocks
as "blockname-ja", "blockname-en", "blockname-de" - depending on the language code.
There is also a {{sb_localizer}} tag which works like {{sb_blocks}}
Social Tag
{{social}}
Facebook, Twitter, Email, Pinterest and Google+ all included with auto URL building.
Googlemaps Tag
{{googlemaps:address=brooklyn children's museum-new york-usa}}
Or
{{googlemaps:address=brooklyn children's museum-new york-
usa,width=600,height=300,zoom=12}}
Recent Posts Tag
{{recentposts}}
Add it to any block, blog or page to see your recent blog posts. The tag takes two
parameters (both optional). The first is the number of posts to show and the second is the
blog to use. eg {{recentposts:"10":"blog/another"}} for a sub blog.
{{recentposts_visual}}
This is used if you want more control over the recent posts list with images, preview text
and more features. Example is as follows:
{{recentposts_visual:"limit":"location":"no_date":"limit text"}}
• limit is the number of posts to show
• location is the blog to show eg "blog" or "blog/anotherblog"
• no_date controls if a date is shown in the output (true or false)
• limit text is the number of characters to show after the tags are stripped outThe image used is either the featured image for the blog post, or the blog content is
scanned for the first image.
OGP Tag
Add in the site template the following placeholder tag (and it will be replaced by the OGP
information):
The old OGP plugin is still there but it’s now not used (deprecated). The new
social_exposure feature has the output replacing the OGP placeholder in the layout file.
The images used come from the media/opengraph directory with the pages coming from
media/opengraph/page/
media/opengraph/page/ needs the page images. For each page an image is loaded from
here (or a default /media/branding/pulse5_banner.jpg is used as set in settings)
There are more options in settings for social media keys and accounts if needed.
Dropzone Tag
{{dropzone:media/gallery1}}
Dropzone allows you to collect files from clients into any media folder. Safety measures
are in place for only docs, images, videos and zips. Change "gallery1" to any folder you
wish.
Media Player Tag
{{media_player://filename.mp3:kind:kind:size}}
{{media_player://domain.com/content/media/
CheersThemeTune.mp3:audio/mp3:audio}}
{{media_player://domain.com/content/media/rotate_set.mov:video/
mp4:video:400:300}}
Play any audio or video content from the web or your Pulse Media folder.
Navigation Tag{{navigation}}
This also includes sub-menu support and organisation (drag and drop sub too) from
settings. Note that the navigation drag-and-drop area is now organised by collection. So
each collection can be selected by {{navigation:name}} with the default being "all".
Navigation also allows for Classes if needed (such as with Bootstrap 4)
You can use something like:
{{navigation:"all":"css classes"}}
The first parameter is the label parameter which is used to select a menu. The default is
“all". This can also be used for the navigation-logged-in menu.
Breadcrumb Tag
{{breadcrumb}}
This puts some breadcrumb links where the tag appears on the front-end templates.
Login/locked Tag
{{sb_login}}
Locks down any page or Block so that it is password protected. Only alpha-numeric
characters work - no spaces, hyphen, period or other extended keys.
{{sb_login:password:sharedsecret:blockname:errormessage}}
Add the password, the shared secret needed for One-Time Password (leave empty for just
a password) and finally the content to load if login succeeds. You can also customise the
error message here or leave blank to customise via the language file strings. An empty
block name leads to locking the page instead of the block.
Search Tag
{{search}}
Add this to your page to create a search engine for your site.
Domain Tag
{{domain}}
Add this to your page to show the domain - useful for some tags or blocks.Link Tag
{{link:folder:page}}
What if you have a page not in the navigation and want to link to it? The two examples
below will create links to pages in a Pulse site.
{{link:page/animal/hippo}} {{link:blog/1}}
Policy Tag
{{policy:company:location:date}}
Generate a simple Terms of Service and Privacy Policy statement for your website (English
only) and substitute location and business name. NB this defaults to the last time the file
was changed if the third tag parameter is not present.
GDPR Tag
{{gdpr:additional text}}
Add a GDPR pop-up box to your page. It only has one optional parameter for extra text
that is included in the popup. Once the popup is accepted, it creates a session cookie (via
Javascript) that blocks the popup appearing again. If the popup is not selected, it will
appear on the next page reload. There are also settings in the language files.
Cookie Consent Tag
{{cookieconsent:backgroundcolour:buttoncolour:layout:position:link
}}
Setup a Cookie Consent banner on your site. Based on Cookie Consent and the options can
be seen on their download page. Here's an example to add to your Pulse site:
{{cookieconsent:#000:#f1d600:edgeless:bottom:www.pulsecms.com}}
Custom Post Type Tag
The idea is that a site selling books (for example) would have fields for ISBN, cover image,
date published, price, availability etc. These can be created and managed from the settings
panel. Then using the new tag, for example:
{{custom_post_type:book/hercules}}
The custom post data will appear on the front end. Useful for listing data or creating e-
commerce sites and anything data intensive.
Custom Post Types can have multiple tags and basic audio/video/image support (entryneeds full URL to support this).
Custom Tags
Not only does Pulse come with a set of default tags, but you can create your own. This is a
really powerful feature that also very easy to use. You can think of these like plugins as
they allow you to create new embeddable features in Pulse.
For example, let's say you have a small PHP script that displays a random image each time
the page loads. Just paste the code into a new file called 'rand.php' in the 'inc/tags' folder.
Now you can call this script into any page or block simply by typing:
{{rand}}
So that is a very simple example of creating a custom tag. But in some cases you will need
more than just that. Let's say that in the example above, you want to call the images from
one of the gallery folders in Pulse. The embed code does not have enough information in it
to specify any additional information. This is where tag variables come into play. With tag
variables your embed code can be written as:
{{rand:gallery3}}
Pulse will read the tag and automatically convert the 'gallery3' portion of the tag and put it
into a variable called '$tag_var1'. Now your script can look for '$tag_var1" on load so it
knows where to pull the images from.
Each Pulse Tag can include up to 6 variables. If your script uses all three the syntax would
look like this:
{{rand:gallery3:med:10}}
This would set:
$tag_var1 = 'gallery3';$tag_var2 = 'med';$tag_var3 = '10';
See more notes and examples in the public repo: https://github.com/yuzoolcode/
pulsecms-plugins
Dedicated Loop Tag
{{block_loop:"block folder name":"width of block including units
or %"}}
Eg. {{block_loop:"contact":"30%"}}This will show the blocks in the content/blocks/contact and each block will be 30% of the
container width. This is ideal to loop all the Blocks in a page.
Pulse Commerce
{{unishop:"test@this.that":"USD":"$":"US":"0":"/paypal_ok":"/
paypal_cancel"}}
The arguments are: PayPal email, currency, currency symbol, locale, no_shipping, return
url and the cancel url.
For the Currency codes see the PayPal reference. The “no_shipping” value can be either
“0” or “1” depending on whether you want to collect a shipping address. And the return
and cancel URL should be full URLs.
Stripe Tag
{{stripe:publishable-key:sku:success-url:cancel-url:text}}
Eg
{{stripe:pk_live123456789:sku_123456789:site.com/success:site.com/
cancel:Buy Now}}
As opposed to a full on shop, the Stripe Tag will add Stripe Checkout buttons for quick buy
now items on any page or block or blog post. The URLs need to be https:// and that part is
already in the tag so just add your domain and the pages such as "domain.com/success"
and so on.
There's more on how to setup your Stripe account, get the key and sku below.
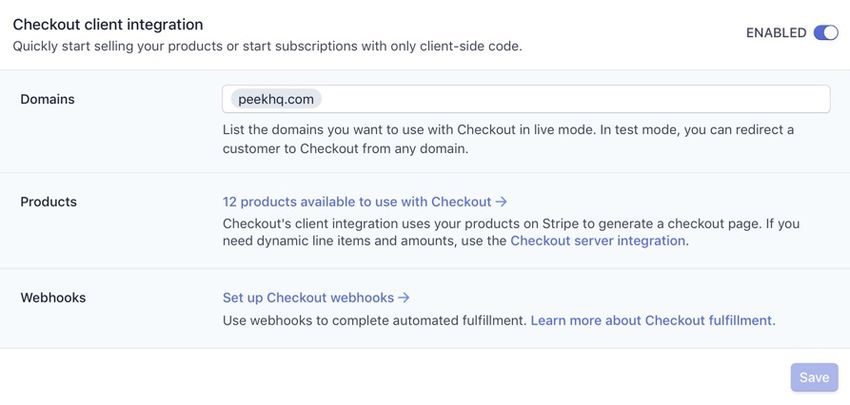
To get started with Stripe, log into your Stripe Dashboard and navigate to the Checkout
settings. From here you can enable the client integration and customize the look and feel
of your checkout page. List the domains in here. This is important otherwise your
checkout will fail. For demo test products this is fine to leave empty, but real sites need
this activated.You can also read