How to Build a DIY Bio-Filter - An alternative "Skippy-style" perspective on
←
→
Page content transcription
If your browser does not render page correctly, please read the page content below
How to Build a DIY Bio-Filter & Venturi for your Pond by J.Prior

               An alternative “Skippy-style” perspective on

                 How to Build a DIY Bio-Filter
                                                  and
                                             Venturi
                                    for your Pond

                                                     by
                                                  Jim Prior

Copyright © J.Prior 2006

The following work and research is an amalgamation of information from various different sources. Credit
has been given to its source where applicable. If you find it useful, please feel free to re-distribute as you
wish. Copying of the content or use of the photographic and schematic information in your own projects
is subject to approval, please contact me for permission first leisure@prior-it.co.uk

This document was created from the web site: http://leisure.prior-it.co.uk/pond.shtml

     Version 1.6 24/9/2006                                                                   Page 1 of 80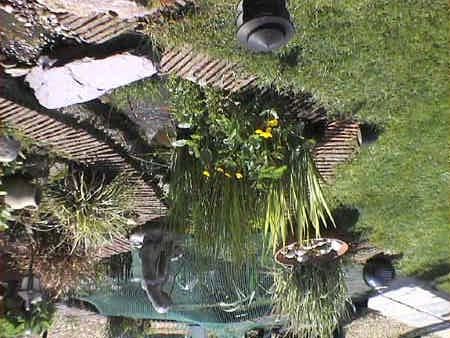
How to Build a DIY Bio-Filter & Venturi for your Pond by J.Prior

GARDEN FISH POND BIO FILTER
Introduction
Please bear in mind when reading this document that it was generated from the content on my web site,
and even though I do update this document occasionally when I make changes to the web site, the
pages of my web site are likely to be the more up to date. Also this book does not include all pages from
my web site, since it is a continually evolving project. So for the latest information please refer to my web
site.

What you get: In this project I give some background into my pond, and the common "green pea soup" algae problem, my personal
opinion of pumps and filters on the market and some modifications. I cover construction of a DIY BIO-filter with a simple venturi system and
vortex chamber, and identify key issues in preventing algae, and also provide some useful resources and forums for research.

Disclaimer: I am not a professional, and my small pond is not specifically for Koi fish, this project is purely suggestions from my own
experience and research. Some aspects involve modifications to equipment that could invalidate your warranty. I just enjoy trying things out,
and judging by the number of people looking for similar information in fish pond forums, as one of them you might be interested in my ideas.

Safety: Please be careful! If you have a young family, do remember that kids are fascinated by water.
You really should think twice about building a pond if you are unable to supervise youngsters at all times.
Tiny tots are fearless and don't understand the dangers of water, and it only takes a minute for a little
person to drown, even in very shallow water. Having said that, our grand-children visit regularly, and with
constant reminders they learn to be careful. But we never let the youngest ones near the pond without
an adult right by their side.

                                             Our pond, complete with lighting, and fake heron!

When we moved to a new house in 2001 we built a fish pond. My wife didn't want anything too big, while
I on the other hand, had bigger ideas! Our garden pond was to be a home for a few goldfish (not a large
koi-pond project), although as time has passed and the fish have grown, it has started taking on some
aspects of the koi-keeper's concerns.

When we were planning the layout we started by using bricks on the lawn to mark out the shape and
size. For about a month we had fun battling out against each other the actual size of the pond, which
grew (me), then shrunk (wife), every other day, until we agreed to differ.

This is the fruit of our labours after 3 years. At first we just thought it would be mildly interesting, but in
this time we have grown to love our fish, and we get many hours enjoyment maintaining and improving it,
even more so as our little fish have grown into quite size-able whoppers!

We would even venture to say that from daily observation, and getting to know them, that our fish
actually have different "characters". Maybe, as keen Scuba Divers who have seen many wonderful and
beautiful forms of sea life, we have formed a respect and affinity with our aquarian friends in their own
little garden haven.

       Version 1.6 24/9/2006                                                                                            Page 2 of 80
How to Build a DIY Bio-Filter & Venturi for your Pond by J.Prior

For great fish-keeping communities visit my favourite forums at:-

    •     The American Water Gardening Society
    •     Koiphen Forums

They are very friendly and knowledgeable groups of people who will make you feel very welcome.

Fantastic fish ponds is an excellent guide on how to build and maintain your own fish pond. Learn The
Secrets Of The Pros To Have a Fish Pond Water Garden That Will Amaze Your Friends!

In a Nutshell
The original plan was always to have a "terracotta water urn" spouting water into the top of a small
stepped waterfall, leading into a stream and "bog" area, then into the main pond.

We didn't want a prefabricated waterfall. Many of the fibre-glass or plastic waterfalls available were either
not interesting enough, the wrong shape for the layout we wanted, or looked un-natural.

Most items used for our pond were bits and bobs that we found in various places, and the millstone style
edging was a £50 batch lot picked up from the junk section of a local stone merchants.

We used high-grade pond liner to line the pond dug into clay (hard work by hand!), edged with
substantial wooden battens to prevent cave-ins, and hold the weight of the millstone edging, and levelled
using the old "water in a hose-pipe with two funnels" trick.

        Version 1.6 24/9/2006                                                               Page 3 of 80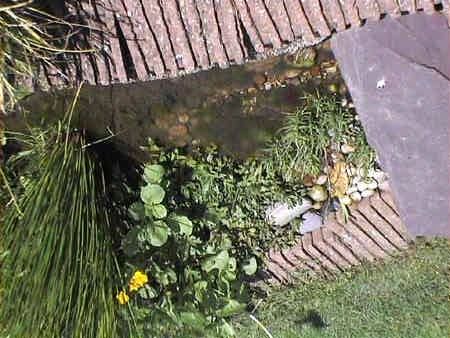
How to Build a DIY Bio-Filter & Venturi for your Pond by J.Prior

View of the "urn" at the top of the rockery, spouting into the waterfall, down the stream, through the bog-area, and into the pond.

There are 3 levels:-

     •     Deepest at 3ft. has a Hozelock Cyprio 240v 4000litres/hour fountain pump (modified by me to
           pass solids) sat on a couple of bricks, which powers a "water-globe" nozzle fountain (which
           doesn't foul up as quickly/easily as a fine water-jet fountain), and also pumps water up to the top
           of the waterfall via a Hozelock Bio-Force UVC Filter (although the UV bulb is no longer
           connected) and my home-made "Skippy" style BIO-filter (the construction of which is
           described in this project).
     •     Middle at 2ft to give some depth below the streams entry into the pond, so the fish can swim
           happily underneath, and the shelf can hold mid-depth aquatic plants, plus the shelf can be used
           to move the pump to a higher level in winter to allow warmer water to stay at the bottom.
     •     Shallow shelf at about 9-12 inches around the pond-perimeter for marginal aquatic plants
           (although we have discovered to our distress that herons love this sort of depth to stand and fish
           in!). We now have fine netting over the pond.

Building a Small Stream leading into the Pond
One of things that really makes a difference to our pond is the waterfall, little stream and bog area. When
we built the stream we wanted something of our own, not a prefabricated fibre-glass or plastic unit. We
used liner for ours, although some people fashion a waterfall out of concrete.

We wanted it to flow out of the urn, down 3 or 4 steps turning as it went, and then level out before it led,
at a slower pace, into a bog area.

On this page I will tell you how to build a small stream for your pond, and the problems we came up
against as we built ours. Although you will likely have some ideas of your own for your water features you
will still need to consider several things.

Unfortunately I didn't take any photos at the construction stage - sorry - so I'll just have to describe it as
best I can.

         Version 1.6 24/9/2006                                                                                            Page 4 of 80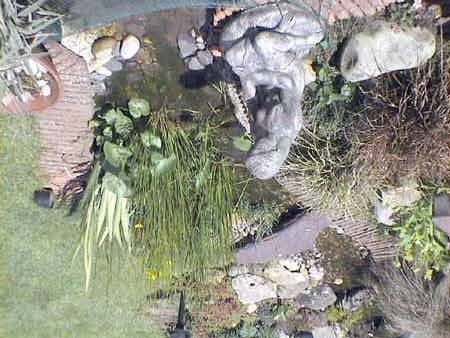
How to Build a DIY Bio-Filter & Venturi for your Pond by J.Prior

     Version 1.6 24/9/2006                                         Page 5 of 80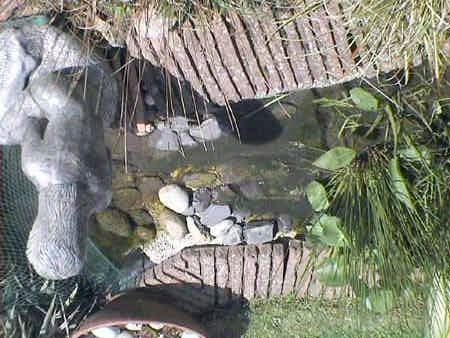
How to Build a DIY Bio-Filter & Venturi for your Pond by J.Prior

Waterfall
When we built the pond we ended up with a
few tons of clay soil from digging the main
hole for the pond. We used this to form the
rockery and waterfall.

I dug the ground and built it up to form the
steps for the waterfall area, and smoothed out
the bottom (ours is fairly solid clayish soil
which meant it stayed in the form I made it).

One of the key things with the waterfall, was
to make sure the pond liner had plenty of
overlap with each consecutive section. If you
can, try to do it in one piece. See notes on this
later on. Be sure you measure and then add
plenty extra when you are buying your liner. If
you don't allow enough you will have wasted
your money!

We found it impractical to use one piece,
because of the turn in the waterfall, and
pushing the liner into the shape of the steps.
Whatever you do, don't cut the PVC pond liner
until you've got it positioned nicely and have
done some testing by filling with water to see
how it flows. And always leave plenty of
overlap for making adjustments as it ages, in
case you find certain areas settle and form    Water flows out of the Urn into the Waterfall
overflows and leaks.

Make sure you exagerrate your levels to give
plenty of depth to each step and plenty of
height at the sides. If you don't you will end up
with it being too shallow by the time you have
put stones and gravel into each step.

Also angle each step backward, so that it becomes deeper at the back compared to the front. This will
help create a nice pooling effect on each step, and prevents gravel from being washed down the
waterfall.

Similarly make the vertical part of each step reach out further at the top than at the bottom to try and
encourage the water to "fall" rather than just flowing downhill.

This is probably the most difficult thing to achieve with a "liner" waterfall, particularly if you don't have
much force of water flowing. One made out of concrete can be fashioned to create very sharp steps, and
therefore a more convincing water "fall". Fibre-glass waterfall units can be obtained readily from aquatic
stores and combined with pond liner to create a stream if you prefer.

If you can, it is best to use EPDM Pond Liner, which is a very durable rubber liner.
EPDM is AQUATIC SAFE, it is a highly stable material that is formulated for safety when exposed to fish
and plant life in a decorative pond.
EPDM is HIGHLY FLEXIBLE, it stays flexible in temperatures from -40° Fahrenheit to 175° Fahrenheit
making it easy to install year round. Unlike other pond liner materials, it does not contain plasticizers that
could make it become brittle with age and cause cracks or splits in the material, threatening aquatic life.
EPDM has DESIGN VERSATILITY, its flexibility provides more versatility in the pond design. Unlike
preformed liners, it can be easily shaped to fit the unique contours of the pond dimensions, allowing a

      Version 1.6 24/9/2006                                                                   Page 6 of 80
How to Build a DIY Bio-Filter & Venturi for your Pond by J.Prior

more creative design.
EPDM is WEATHER RESISTANT, it has remarkable resistance to the harmful effects of ultraviolet
radiation (UV), ozone and other environmental conditions.
EPDM has HIGH ELONGATION, it has high expansion and contraction characteristics that enable it to
conform to objects in the sub grade. Should earth movement occur, rocks and tree roots could be
dislodged beneath the liner, but EPDM's high elongation will enable it to stretch over such objects.
MINIMAL MAINTENANCE, it requires little or no regular maintenance once installed. However, if repair
becomes necessary, it is easy to do without removing the liner from the pond with the EPDM repair
patch.

You will probably want to put some heavy stones into the steps, because the liner has a tendency to
unfold itself after you push it into the shape of each step.

Pebbles work better on a waterfall than small gravel which tends to get washed away.

Note the use of "gravel liner" to hide the black liner underneath. I think this gravel liner is quite important
because you just can't put pebbles on the slopes and vertical surfaces of black liner to hide it.

Another consideration as you construct your waterfall is to strategically place a few large decorative
"stepping stones" at the sides. Bed them in very securely. As well as looking nice, these are for you to
stand on whenever you are maintaining the waterfall area, e.g. planting, clearing blanket-weed, working
on the top pool, etc.

                                                                                   Top Pool
                                                                                   In the very top where the
                                                                                   earthernware urn spills
                                                                                   water out, there is a
                                                                                   seperate piece of PVC
                                                                                   pond liner which forms a
                                                                                   small pool that holds some
                                                                                   nice big pebbles.

                                                                                   With this pool, the water is
                                                                                   able to splash out into it
                                                                                   and creates a nice sound
                                                                                   (makes you want to go to
                                                                                   the toilet, LOL).

                                                                                   Plenty of nice large rocks
                                                                                   help hide the black liner,
                                                                                   and hold it down at the
                                                                                   edges. Again - Leave
                                                                                   plenty of overlap!
The Urn sits atop pebbles in the upper pool

Learning the Hard Way!
The first year was one of continuously ironing out the wrinkles:- adjusting the liner for the stream,
searching for small (and sometimes large) leaks, and generally getting everything working nicely. The
stream was initially done in 4 sections of liner from the waterfall to the pond. One thing we overlooked
with this method was capillary action which caused water to backtrack into open ground in the
stream section because I hadn't allowed enough overlap. Its amazing how such a minor thing can
lose water so quickly, and when your water is metered by the local council, constantly filling up the pond
with 50 or 100 gallons every couple of weeks can soon mount up the water-bill !

      Version 1.6 24/9/2006                                                                    Page 7 of 80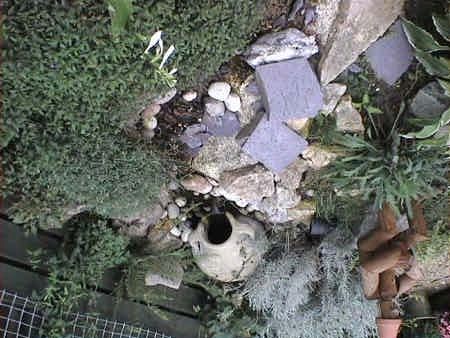
How to Build a DIY Bio-Filter & Venturi for your Pond by J.Prior

Large stones with pitted holes allow places for moss and plants to grow.
In spring birds love to steal the moss for their nests.

Eventually we ended up pulling out the entire stream and re-laying a single piece of pond liner. That did
the trick. I would strongly recommend if you are considering building a stream that you make sure to
have a single piece of pond liner, with plenty of overlap at the sides (its easy to hide too much extra
under stones or plants, but you sure can't add it back on once you've cut if off!).

Although there are vinyl bonding adhesives which are supposed to be able to glue pond liner together, I
would not trust them. Maybe its ok in the pond itself where there is little movement, but a stream is a
living moving thing which settles, gets trodden on, expands, contracts and weathers in the sun, rain,
snow and ice.

Keep the Water Flowing - Maintaining your Stream
Bear in mind that over time the stream will settle and the extra overlap at the edges will naturally get
pulled inward and downward. For example in one or two places the millstone edging has settled (usually
because people stand on it) and required lifting and building up again by shovelling some additional
gravel or sand under the edge of the liner to raise the level again.

Also make sure you've got sufficient depth to your stream;

a) your kids will probably paddle and play in it
b) pets will like to drink from it (therefore step in it)
c) during the summer it will undoubtedly get blanket-weed build up in it

All these things will result in the stones or any channel that you have formed becoming levelled out or
clogged up, which in turn will raise the level of water possibly sufficient enough to find grooves in your
liner at the edges which then overflow into the surrounding ground. As mentioned above, even the
smallest leak, over hours and days will result in substantial loss of water from your pond.

       Version 1.6 24/9/2006                                                                 Page 8 of 80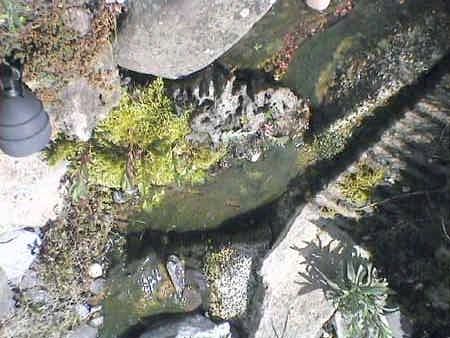
How to Build a DIY Bio-Filter & Venturi for your Pond by J.Prior

Evaporation in the summer does not account for a drop of 2 inches over 3 or 4 days - it means you've got
a leak!

                                    The stream bubbles under the slate bridge

Once finished and bedded in, every couple of weeks examine your stream for little pebble dams that
might be causing a raise in water-level, clean out too much blanket-weed (I think some blanket weed is
nice, and helps achieve a natural look as it sways slowly in the current), and push the pebbles towards
the sides again to create more depth for the water to flow in the middle of the channel.

     Version 1.6 24/9/2006                                                               Page 9 of 80
How to Build a DIY Bio-Filter & Venturi for your Pond by J.Prior

Sunlight shimmers like gold in the moving water

Pampering Your Bottom
Another important thing with a stream when you are building it is to give it plenty of padding underneath
the liner, with lots of sand and/or old blankets. Most people recommend sand, but I think some material
such as blanket will stay in place (sand might get washed out by rain), and also I think it might help deter
creatures such as voles or moles from tunnelling into your stream.

Never put sharp stones or objects in the stream. The temptation for kids and pets to mess about in the
stream is too great.

You're not concerned about the kids or pets!

What I'm talking about is their weight will push any sharp objects through the liner, puncturing it, and you
will never find where the leak is! You would have to re-lay a new stream liner again.

Also explain to your children that pond liner does not like sharp sticks, football boots, toys, etc!

You Gotta Do A Bridge

Another thing that I added was a bridge. Here it is in the form of a large chunk of slate laid across the
stream. I've also seen some very nice miniature wooden bridges which I've been tempted with, but they
can be quite expensive, and wifey thought that the size of our stream didn't warrant a large wooden
structure, so we went for the slate instead.

       Version 1.6 24/9/2006                                                                 Page 10 of 80
How to Build a DIY Bio-Filter & Venturi for your Pond by J.Prior
Marsh buttercups, cress and reeds thrive in the bog area and help
create a natural veggy filter to keep your water clean and clear.
For some reason kids just love to cross the stream, so I prefer them to step on the bridge rather than in
the stream where they might puncture the liner. It also helps us adults take a short cut when we are
gardening the surrounding rockery and plant beds.
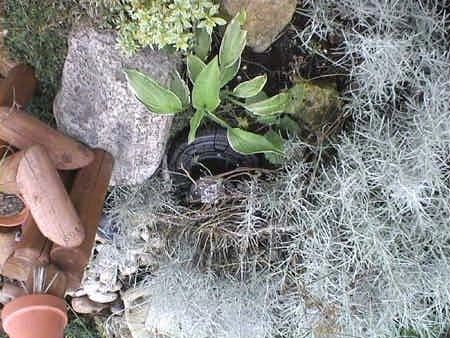
A very early photo of the bog area before it was established
Two Layers Are Better Than One
One thing that helps in this area is to consider two layers and types of garden pond liner;
1) a good thick strong black pond liner at the bottom (preferably EPDM Pond Liner), this gives the main
waterproof membrane,
Version 1.6 24/9/2006 Page 11 of 80How to Build a DIY Bio-Filter & Venturi for your Pond by J.Prior
2) gravel liner
I'm not sure what the proper name is for it, but basically its a very thick butyl or PVC plastic (black on the
back, grayish/white on the front). It has very small gravel glued/melted into the plastic. Being
stone/gravel, it gives a more natural look at the edge of the stream.
It can be quite expensive though, so rather than laying it the complete width of the stream, I cut it into
strips about 18 inches wide and laid it just at the edges of the stream. The black liner bottom will become
covered with smooth pebbles and gravel.
Tip: When cutting the gravel liner, cut it from the back side with an old knife that you don't mind getting
blunted by the little stones.
Close-up of the sides where the black liner is covered by the (expensive) gravel coated plastic.
Now you have double-protection to a certain degree from the bottom layer getting punctured. Finally, put
a layer of fine gravel on the black bottom liner then also lay rounded pebbles in the bottom, or large flat
stones, slate and anything else that helps achieve a natural look.
Let Nature Do Her Work
The main thing to remember that is to enjoy it and not rush the job. It takes a good year or two to get a
rockery established and the stream looking good with plants growing over the edges, etc. As long as you
get the basic shape and size right to start with, you will continually be making little adjustments forever
after, moving a rock here or there, selecting the right plants, and so forth. This is where my wife's gift of
green fingers makes it look lovely. It is definitely a passion that we now both enjoy and it gives us
something fun to do together.
Version 1.6 24/9/2006 Page 12 of 80How to Build a DIY Bio-Filter & Venturi for your Pond by J.Prior
A year later and the bog area looks great.
Various baubles and low-voltage garden lights complete the setting.
It looks wonderful at night too with its underwater lights.
More About Overlapping
Where the bog area runs into the pond, the normal level of the pond water would be a couple of inches
below the lip of the bog area. The PVC liner of the main pond and the liner of the stream are seperate
pieces, but there is plenty of overlap.
The liner of the main pond extends up and out to form the whole bog area as well, and then up the
stream a little way (to prevent capillary action), while the middle pond liner section forming the waterfall
and stream also goes right down through the whole bog area, and overlaps into the pond. I'm talking of
about 5 or 6 feet of overlap, so that both pieces of liner form the bog area! This is shown in the following
illustration. Likewise the top pool liner overlaps the first step of the waterfall section.
Its double-protection. You have to be sure that this area is able to contain its water with no leaks.
Again if you can actually do the complete pond and stream in one piece of liner that will guarantee no
leaks. It depends on the length you want your stream to be, and also whether you have already built your
pond as to whether you can do it with one piece.
All I'm saying is you absolutely MUST get this right at the start of your project, because you don't want to
be messing about with it later on.
Version 1.6 24/9/2006 Page 13 of 80How to Build a DIY Bio-Filter & Venturi for your Pond by J.Prior
Making the Bog
Also when fashioning the bog area I dug it deeper than the step which actually leads into the pond. This
was so that we could lay a sufficient depth of pond-soil for the bog plants to grow in, without the soil
being washed into the pond by the flow of water. Do NOT use ordinary soil. Get proper pond soil which is
a lot more loamier and heavy and sinks to the bottom and stays there.
The River Flows Into The Sea
At the threshold of the stream going into the pond I also have a large flat piece of slate sat atop of the
liner, which the water flows over before entering the pond. This looks nicer than the black liner, its also
more attractive than the gravel liner, and more importantly it helps to prevent soil being washed into the
pond and the water picks up a little bit more speed as it flows over the slate before it enters the pond.
One problem we encountered at first and which requires a bit of messing about with is that the water
prefers to flow under the slate, rather than over it! Putting gravel and soil at the bottom edge of the slate
helps to block it, and over time it silts up with muck and seals naturally.
Another ponding friend suggested that I could have used a can of plastic foam (like the kind used to fill
cavity walls) to create a barrier underneath before bedding the stone and this would have helped prevent
this problem. If I ever have to uproot and re-lay this step, then I will most likely do as she suggested.
The large flat piece of slate creates a kind of dam, to prevent soil and silt being washed into the pond from the bog. Pebbles at the
sides help narrow the entrance into the pond creating a slightly faster flow. The fish like to push their heads out of the water facing
up the stream to see what morsels of food might be washed out of the marsh to them!
Plenty of Piping
To feed the water from the pump in the pond, up to the bio-filter and then the top pool, I use 25mm
flexible hosing which runs beneath the millstone edging of the stream. This means the pipework is
protected, yet it is simply a matter of lifting the edging if ever I need to replace it.
When you cut the pipe to fit your equipment at the top of the stream, for example to go into flow control
valves or the pre-filter, make sure you leave plenty of extra.
When I initially was using the Hozelock Bio-Force UVC filter (before I got fed up with it blocking and
requiring cleaning all the time and replaced it with my own homemade bio-filter), cleaning it required
unclipping and removing the top, but of course because the flexible pipe was attached to it, this meant
Version 1.6 24/9/2006 Page 14 of 80How to Build a DIY Bio-Filter & Venturi for your Pond by J.Prior
the plastic pipe was constantly being bent back and stressed.
Now you might think "Isn't that what flexible piping is supposed to do?". Well yes - but in the winter when
the plastic is cold, and in time due to the constant bending, one day the piping cracks and you're
suddenly pouring gallons of water all over the place. To fix it you have to cut the pipe back to a good
point, but you can't do that if you've cut it too short in the first place!
So please bear this in mind if you are thinking of using a filter unit that involves the pipework constantly
being flexed.
Conclusion
Well that's the stream! We hope this gives you a few ideas, and would love to hear from you about your
project, or if you have any questions. email Leisure
Lights placed strategically light up the waterfall at night.
It's well worth the effort. A stream and bog area attracts so much wildlife; we get frogs, dragonflies,
water-boatmen. Also its a delight to see wagtails and blackbirds come to wash in the stream. On some
occasions when heavy rain has raised the water level in the pond to overflowing, the smaller fish will
swim up the stream to explore the bog !
Version 1.6 24/9/2006 Page 15 of 80How to Build a DIY Bio-Filter & Venturi for your Pond by J.Prior
Night-time in the pond. Jaws can be seen enjoying the heat from the lamps.
Version 1.6 24/9/2006 Page 16 of 80How to Build a DIY Bio-Filter & Venturi for your Pond by J.Prior
Green Pea-soup
During the second year our fish had babies, and the adults were growing at an amazing pace. We started
with 12 fish, a mix of goldfish, shebunkins, and ghost-koi, all of which were about 3 inches or smaller.
Now the ghost-koi look fantastic and the biggest is about 12 inches long and looks very stocky and
chunky. I'm sure he'd make a good dinner (only joking).
For the first year the water was lovely and clear, even in the summer, and we had good cover to provide
shade from the marginals, like lilies, water hyacinth, and "Fairy Moss" - that red-leafed surface cover
weed that can take over the pond and you end up scooping out handfuls of the stuff. Also in the boggy
area of our stream we had a good variety of bog-plants; Marsh Marigold, Horsetail Rush, Water Musk.
The main pond, now covered with netting since we lost 2 beautiful carp to a heron.
But, in the second year (Summer 2004) things suddenly started going wrong.
Three things seem to be the culprit:-
1. The fish were much bigger, and eating more, were therefore excreting more.
2. Even though we put more of the Fairy Moss in the pond to get more cover to keep out the sun, it
didn't survive, we think the fish were eating it(?).
3. The yellow-flowered Water Musk had pretty much taken over the entire bog-area, and so we had
a mad fit and removed ALL of it!
Ooops! Within about 2 weeks the water went a pea-green, taken over by fine water-born algae. We
couldn't see below about 4 inches, any deeper and the fish could only be made out as dark shapes
passing below.
In hindsight we now realise that the plants in the bog-area, with their massive root network, were
acting as a wonderful natural "veggy-filter" to eat up nitrates in the water, hold back any crap
being pumped out of the pond coming back down the stream, and provide a home for bacteria
that was helping the whole "balance" process.
When we designed our pond, waterfall, stream and bog-area, we didn't really appreciate what a clever
design we had given "nature" to work with.
And we had just messed up by removing the most vital part of the cycle. A natural vegetable
biological filter.
Initially we didn't figure out why it had happened. At about the same time the fish had been traumatised
by the heron eating two of the larger fish, and we thought the water was cloudy because they were
stirring up the bottom silt to "hide themselves".
I was also starting to get very fed up with cleaning my Bio-Force filter literally every 2 to 3 days,
and having to remove the Cascade water pump from the pond every week because that too was
getting clogged up, mostly by blanket weed.
Version 1.6 24/9/2006 Page 17 of 80How to Build a DIY Bio-Filter & Venturi for your Pond by J.Prior
I knew that sunlight was going to be a major cause of the algal-bloom, but I was starting to get concerned
about the state of the water and the health of the fish, the water at times was almost looking "black", and
so I started my quest to learn more about what was going wrong and how to resolve the problem.
Introducing "Skippy"
Everywhere I looked there seemed to be plenty of remedies in the form of expensive solutions and
additives which promised to eradicate the blanket weed algae that was fast overcoming the pond, and
other remedies to remove the water-born algal bloom. However I was already trying these to no avail.
It seemed like a threshold had been passed where the algae was winning hands-down.
I had been toying with the idea of buying a new bigger better pump, and getting a better filter (although at
this point had no idea what kind), but all this seemed yet more expense given that I had already
upgraded from a Hozelock Cyprio 24v Low-Voltage 2000litre/hour pump to the 240v 4000litre/hour model
earlier in the year, and also purchased the Bio-Force UVC (Ultra-Violet Clarifier) 2200 Filter, which now I
didn't think was man enough for the job (even though the performance ratings suggested it should be
sufficient).
I also felt that the Ultra-Violet clarifier was just a gimmick because it didn't appear to be having any effect
on removing the algal bloom, even though my pond at about 400 gallons is by no means large as
compared to some peoples. [In fact 2 months after finishing my bio-filter I have clear water and the UVC
bulb is not even connected!]
So before making any impulse purchases I felt it would be wise to do some research into the best
solution. I started doing some surfing around all kinds of pond-related web sites, most of them obviously
trying to sell their stuff, and many of which didn't appear to give the answers I was looking for.
Now before going any further into my project I would like to show you a web site which I thought was
a breath of fresh air amongst all the technological gobbledy-gook being pushed at me by the myriad of
web sites whose sole purpose appears to be providing "good advice" with the ultimate aim being that you
buy one of the multitude of different makes of pumps, filters and other accessories.
Skippy's is the site that gave me the inspiration to have a go at building my own BIO-filter. And the
most wonderful thing is it explains all about "freakin magic"!! You NEED to know about Freakin Magic in
order to understand ponds (you'll see what I mean if you don't already know), in fact you'll learn about
Nature and LIFE! In fact even for experienced pond keepers, it makes a great read - the emphasis is on
helping you understand how to work with Nature to create balance, not against her.
Skippy's then tell you how to build your own DIY vortex/settlement-chamber based BIO-filter. Its a great
site but for one thing. I don't think they make it clear enough that you need to PRE-filter the water going
into the BIO-filter (maybe I missed something!). For a novice like me I got the impression their bio-filter
was able to do everything. It wasn't until after I had built my basic bio-filter based upon their ideas, and
then later read in their associated forum about other newbies who similarly misunderstood the need for
PRE-filtering, that I made some changes. (I also emailed them about it and they confirmed I was right).
Anyway, this project is my own take on the Skippy Bio-Filter. Once you've read their web site (and I
Version 1.6 24/9/2006 Page 18 of 80How to Build a DIY Bio-Filter & Venturi for your Pond by J.Prior
strongly recommend you do), if you are interested come back and see how I've done it (and
implemented a simple venturi too - a mechanism to mix air into the water with no moving parts), and also
where to get media for your Skippy filter if you're in the UK (Skippys is a USA site).
So here it is ...... Skippy's bio-filter - I suggest you start first by reading this page, closely followed by
this page to learn about Freakin Magic, then go to this page for their Bio-Filter construction.
Remember to come back here! :-)
Now I will show you what I have actually done, and why.
If you have any comments or suggestions about this project please contact us: email Leisure
Version 1.6 24/9/2006 Page 19 of 80How to Build a DIY Bio-Filter & Venturi for your Pond by J.Prior
DESIGN CONSIDERATIONS FOR A DIY BIO-FILTER FOR
YOUR POND
Right. In this section I get down and dirty with some mathematical calculations based upon advice given
at a number of Internet resources during my research. Don't worry. Skip to the pictures in the Build
Section if you just want to see how I built it, but you might find this design section useful to help your
understanding of the processes involved, and what is generally considered necessary in the design of a
biological filter.
This section covers the following topics:-
• Overview & Design Points
• A Quick Recap
o Biological Filtration and the Nitrification Cycle
o Ammonia
o Nitrite
o Nitrate
• Some Theory and Maths
o Essentials
o Design Considerations
o How much Surface Area? (includes a table showing various filter media Specific
Surface Area to Volume Ratios)
o Is void Important?
o What about cleaning?
o Bio-Filter Water Retention Time
o How do you calculate the retention time of your filter?
o Turnover - The quicker the better?
o How much Ammonia from that much Food?
o What is an Adequate Flow-rate?
o Filter Size
o Let the Water Flow (just time it!)
• Summing Up
o Sunshine
• My Calculations
o Feeding the Fishes (How much ammonia in a handful of food?)
o Turnover
o Retention Time
o The Real Thing
Version 1.6 24/9/2006 Page 20 of 80How to Build a DIY Bio-Filter & Venturi for your Pond by J.Prior
Overview and Design Points
If you're done at the Skippy site after reading the previous section, you now have a pretty good idea of
whats involved in building their Skippy bio-filter, and how it all works. This picture is of their basic Skippy
filter "in the raw". Hmmm. I think "functional" is the word! Well, it's not so bad after a bit of hiding!
A Skippy Bio-Filter Where did it go?
I like the whole idea behind the Skippy design. However I had some ideas of my own:-
• My pond is not massive (about 400 gallons), so I didn't think I needed a tank as large (or ugly) as
a "Rubbermaid" used for the Skippy filter. Please remember that I am not a professional Koi-
keeper! I don't need a massive filtration system, I just want to improve the water quality for my
small pond.
• Generally a Skippy filter is situated at the top of, and is effectively part of a waterfall, with its large
flange outlet (see above picture), the water literally flows out and down the waterfall (with rubber
sheeting around the flange to prevent water leaking behind any rocks which form the waterfall).
To accomodate this size of tank into my already built rockery simply was not practical, and I
wanted a design with flexible pipe to put the water where I wanted it - in the back of my terracotta
urn.
• I particularly liked their "vortex" design, where the pipework creates a swirling motion in the base
of the filter, but a "Rubbermaid" is oblong. Using a cylindrical tank would be better to maintain a
smooth swirl in the bottom.
• I wondered whether I might find something that looks nicer, and could "blend" into the garden
better.
• Rather than having a drain outlet in the side, I thought that a drain exiting vertically down out of
the base would help remove filtered solids more efficiently. A Rubbermaid tank has a small outlet
in the side, near the base, which is fine for draining just water, but not great for getting gunky
muck out of a bio-filter!
• After reading up on "venturis", I wondered whether a venturi dedicated to aerating the filter itself
would improve oxygenation of the aerobic bacteria in the bio-filter.
Version 1.6 24/9/2006 Page 21 of 80How to Build a DIY Bio-Filter & Venturi for your Pond by J.Prior
Well, here is a picture of my working bio-filter in position (before the venturi was fitted). I find this is
sufficient for my 400 gallon pond.
I suppose a serious koi-keeper might laugh his socks off! Thats fair enough, and I admit I am a bit
eccentric but I like to try out my own ideas. In time I might paint the pipework a terracotta colour so its not
so garish, and grow some more plants both inside it (to help filtration), and around it.
I might also add at this point that by building this filter myself I did not save money! I think I must have
spent around £100 by the time I had finished experimenting and getting all the parts together. If I had
known exactly all the parts I needed right from the start it would have been cheaper, more like £70.
I could have bought an off-the-shelf prefabricated product of similar size for £50, but I don't think I would
have enjoyed the challenge as much as doing it myself!
A Quick Recap
Before we continue lets recap on what we're trying to achieve;
Biological Filtration and the Nitrification Cycle
A biological filter is quite simply the heart of a koi pond. It is not essential in small fish ponds, but the
more fish you stock, the larger they get and the more they eat, so the need for a bio-filter becomes
greater. The pond gets to a point where it needs a "sewage farm". It's purpose is to convert the waste
matter produced by the koi from harmful ammonia into less toxic waste.
It is less important to remove solids particles from water than it is to process nitrogen, so if there
is to be a compromise between mechanical and biological, err on the side of biological.
In other words, it is much better to allow particles below a certain size to escape back into the pond,
while converting a great deal of ammonia to nitrate, than it is to catch every little thing down to a micron
or less which in the process would slow the water down to the point where the bacteria have a hard time
living (because they're not getting enough oxygen).
The bacteria that convert ammonia to nitrate for us are among a class of bacteria that you may have
heard of before. They are the so-called, “nitrogen fixing” bacteria. This means that they take nitrogen that
is unavailable to plants in its ammoniacal form, and make it available to plants in an oxidized form.
These are the same bacteria that live among the roots of leguminous plants. Without these beneficial
bacteria, life as we know it would cease. So be kind to your bacteria. What they need to survive is a large
surface area, chemically inert medium and a ready supply of fresh water. They depend upon dissolved
oxygen in the water to live and to do their job. As soon as the water flow is stopped, the oxygen in the
filter becomes finite, and eventually gets used up. The ultimate result is that the bacteria die, and you
have to start over.
Version 1.6 24/9/2006 Page 22 of 80How to Build a DIY Bio-Filter & Venturi for your Pond by J.Prior
Some people use both mechanical and biological filtration, and some of the new commercially
manufactured filters available do this. In the first instance, many people are tempted to install a canister
filter (pre-filter) ahead of the biological filter, thinking that they will extend the life of the media used in the
bio-filter by catching all of the particles that would eventually clog it up. They are correct, of course, but
they wind up being slaves to the canister filters in an effort not to destroy their pumps, which have to
work too hard to push water through the pre-filter canister.
It is better to merely use the bio-filter and to maintain it well.
Putting the canister after the bio-filter is a good idea, but the same problem arises, just less often.
Several types of bacteria are currently available to you, each with its own specialty. It is important to start
out with a good supply of beneficial bacteria so that you minimize the green water stage of pond
establishment.
There are 2 types of bacterial species that colonise the biological filter media. Nitrosomonas sp.
bacteria which oxidize ammonia to nitrite, and Nitrobacter bacteria convert nitrite to nitrate.
Ammonia
Ammonia (NH3) is produced by fish (and particularly koi because they are fat greedy chaps!), as part of
their normal metabolic function and is excreted from the gills. The amount of ammonia produced is
directly related to the amount of food they eat. Approximately 3-4% of normal 30-40% protein level koi
food will be excreted as ammonia, i.e. for every 100grams of food 3-4grams (3000-4000mg) of ammonia
is produced.
Koi exposed to unacceptable levels of ammonia risk damage to gills, eyes, fins and skin which can result
in them being susceptible to secondary bacterial infection.
Using standard drop type tests kits any ammonia reading is considered unacceptable and remedial
action should be taken.
Nitrite
Ammonia is oxidized by the Nitrosomonas sp. bacteria in the filter to produce nitrite (NO2). Whilst it is not
considered as dangerous as ammonia it can still do serious damage to your fish. High levels of nitrite are
likely to stress your koi leaving them susceptible to secondary infection. As with ammonia, target levels
should be that nitrite is undetectable.
Before the fish pond filter can efficiently remove ammonia and nitrite from the fish pond water, it must first
become fully colonized with nitrifying bacteria. This can take some time and is a process known as fish
pond filter "maturation". Each time a fish is put in the fish pond it will add to the total amount of ammonia
being produced. The ammonia level in the fish pond will therefore increase slightly. Because there is
more ammonia for the bacteria to utilize, they start to multiply until there are enough to use all of the
ammonia being produced inside the fish pond. The ammonia level in your fish pond will then fall back to
zero.
Nitrate
As the ammonia level falls, the amount of nitrite produced by the bacteria in the fish pond filter will start to
increase. Therefore, the level of nitrite in the fish pond will rise. The increasing nitrite level means that the
bacteria that break it down can start to multiply in the fish pond filter until, as with the ammonia, there are
enough to use up all the nitrite that is being produced. The nitrite level within the fish pond can then fall to
zero. As this occurs, the nitrate level increases.
Conversion of nitrite to nitrate (NO3) is the final stage of the nitrification process. There is debate as to
the possible problems that elevated levels of nitrate may cause. Indeed some koi keepers have high
Version 1.6 24/9/2006 Page 23 of 80How to Build a DIY Bio-Filter & Venturi for your Pond by J.Prior
Nitrate and it causes no problem at all. High nitrate may also attribute to green water
(phytoplankton) and blanketweed growth however the two do not always go hand in hand. The green
water problem can get worst when you clean the biofilter and make water change outs, due to the
reduction in bacteria.
The bacteria also produces a certain phytoplankton-killing enzyme. As algae starts to grow in the bio-
filter, or on the walls of the pond, the bacteria loves to feed on this algae, and as it does so it releases the
enzyme into the water.
Green water is a pain for many reasons. Ultra Violet Clarifier lights will kill single cell phytoplankton algae
that cause green water, and when dead they clump together and can be removed by the filter. However
there is sometimes a concern expressed that passing water through the UVC also kills beneficial
bacteria. Note that a UVC does not get rid of blanketweed.
The Skippy site teaches us that we should try to achieve "balance" in the pond - don't fight mother
nature. By use of the bio-filter and other larger plant forms you starve the water of Nitrate, so that the
algae has no food, and is therefore unable to grow, while at the same time the bacteria create the
enzyme which kills the phytoplankton. Its a double-edged sword in this battle.
Some Theory and Maths
During my research I came across a very complete and excellent resource by Terry Cusick,Third
Alternate AFKAPS Rep and Certified AKCA Koi Health Advisor at FishDoc.co.uk to whom I extend my
thanks, and from which a number of extracts have been used to compile this section of my project. I
strongly recommend reading the complete article since the site provides a very thorough explanation of
the considerations when designing filtration systems for ponds to ensure healthy fish.
Essentials
Humans convert ammonia into urine, whereas fish simply excrete it continuously from their gills into the
surrounding water. Normally in a river or the sea it is diluted by thousands of gallons of water to render it
harmless. But nobody told Mother Nature about koi-keepers and their ponds, where ammonia can build
up to a dangerous level due to the large number of fish in a small volume of water.
A koi pond has to deal with two types of pollution; solids waste and dissolved waste from solids.
Therefore it is essential to remove the solid wastes from the water before they have a chance to dissolve.
If we can do this we gain; better water quality, fewer dissolved pollutants and ultimately less fish health
problems.
Once the solid wastes have been collected, it is important that they are flushed out of the system
regularly, before they get the chance to decompose. In summertime this could be as often as twice a
day. This means that any settlement chamber incorporated into the filter design will need to have a drain
to allow easy flushing to waste.
• It doesn't matter whether the solids decompose in the pond or the filter - the result is the same -
polluted water!
• To maintain good water quality it is essential that solids are removed from the pond and filter
before they have time to pollute the water
• Any trapped solids must be removed from the system on a regular basis, otherwise they will
simply decompose and pollute the pond. They will also encourage high levels of opportunistic
bacteria.
For good filtration and water quality very little solid waste should be allowed to enter the 'biological'
section of the filter. To restate the point made previously; the more effective the settlement area of the
filter at removing solid waste, the lighter the load on the following biological section - provided, of course,
that trapped waste is removed before it decomposes.
This entails:-
Version 1.6 24/9/2006 Page 24 of 80How to Build a DIY Bio-Filter & Venturi for your Pond by J.Prior
• Regular maintenance to keep the biological area clean and free of mulm,
• Reducing the level of dissolved organic compounds by effective settlement/entrapment, together
with regular cleaning of the settlement area.
• If we can remove solids from the system before they decompose and at the same time keep the
biological section of the filter fairly clean we will;
o Encourage a vigorous growth of nitrifying bacteria
o Reduce the load on the biological section
Do you see a repeated theme here? Cleanliness is the order of the day!
Design Considerations
When building a filter it is suggested that either;
• the filter surface area should be approximately one tenth that of the pond; or,
• that there should be a pond turnover rate of once every 2 to 3 hours.
How much surface area?
Nearly all types of filtration system rely on "attached-growth" Media SA to V Ratio
processes in which a bacterial slime layer or biofilm -
comprising of bacteria, algae and often-larger invertebrates, Flocor 200:1
such as worms and snails - forms on the media. Micro-
organisms present in the biofilm 'feed' from the water as it Stone(2cm) 70:1
flows past. So, as a first approximation, the amount of Kaldnes K1 800:1
biological activity will be determined by the amount of
available surface area for bacterial colonization. However, in Bio Block 700:1
practice this available specific surface area (SSA), as it's
called, is rarely a limiting factor since most filtration systems Bio Balls 550:1
are large. Bio bale 800:1
Bacteria will thrive on almost any surface and the particular Hozelock Cyprio Media 180:1
choice of medium has very little influence on their growth.
Scouring Pads 300:1
Obviously, if you had just a square piece of material Siporax 10,000:1
measuring say 1m x 1m this would give a total area of 2
square meters (because both sides are available for bacterial Ceramic 1,000:1
colonization assuming almost zero thickness). Even this small
area could support millions of micro-organisms, attached in a Fine Foam 1,000:1
slimy biofilm. But typical filter media have a far greater SSA. Coarse Foam 200:1
For instance, gravel has an available surface area of about Medium Foam 600:1
100 to 200 square meters per cubic meter (100-200 m2/m3).
This area is also often expressed as the Surface Area to Trickle Media 200:1
Volume Ratio, for example 200:1. Bio rings (5/8in.) 340:1
And other, more specialist media can have significantly more Bio rings (1in.) 210:1
surface area as indicated in the table to the right.
Bio rings (1.5in.) 130:1
So you can see that even a small amount of filter medium Compac 3 280:1
provides a potentially vast SSA for bacterial colonization.
Hair Rollers 150:1
Each square meter of biologically active surface can
metabolize nearly one gram of ammonia per day,
dependent on temperature, and given that most ponds will
usually be producing fewer than 60g of ammonia per day, the
amount of SSA required is really small - and "not a lot of
people know that", as Michael Caine might say!
Version 1.6 24/9/2006 Page 25 of 80How to Build a DIY Bio-Filter & Venturi for your Pond by J.Prior
If we based filter sizing on the basis of SSA alone, filters could
be incredibly small -perhaps only the size of a shoe box!
However, there are other factors to consider....
Is void Important?
The void size or empty space within a filter medium is important in determining the right filter size and
efficiency. Void size is a measure of how much of the medium consists of empty space. If we consider
sand, for instance, each particle has a large surface area in relation to its volume and the total SSA per
cubic meter of sand works out at thousands of square meters. Despite this enormous SSA, sand would
make a poor filter medium because the small particle size would soon lead to blockages and subsequent
'tracking' as water found the 'easy routes' round the medium. And, of course, because of the dense
packing, any flow through the sand would be very slow. So, despite its massive surface area, once
compacted and blocked the amount of surface area exposed and the volume of water that could be
treated per hour would actually be quite small.
There is another important disadvantage of a medium like sand - retention time, or the amount of time
the water spends in contact with the biofilm. It is obvious that if we wish to avoid blockages and tracking,
some void space in the filter medium or media is desirable. If we consider a medium such as gravel,
although its larger size yields less SSA it is less prone to tracking and blocking. And specialist media
such as filter matting, plastic or sintered glass have both a large SSA and a generous void space. In fact,
many of them are more than 90% void or empty space! This makes tracking and blockage almost
impossible.
What about cleaning?
Another important consideration - which becomes more important the longer you keep koi! - Is ease of
cleaning. In the early days of the hobby, part of the novelty lies in spending weekends cleaning and
vacuuming. But after a while, strangely, it seems that there are more pleasurable ways to spend a sunny
Sunday. And with gravel and other granular media, it really isn't much fun trying to clean several tons of
the stuff! Compared to gravel, cleaning lightweight media is a delight. Obviously, regular maintenance is
somewhat easier if each filter chamber has its own bottom drain but, even so, ease of maintenance has
to be a major consideration in the choice of filter medium.
The three major factors affecting our choice of filter media are:
• Specific surface area
• Void space
• Cleanability
Bio-Filter Water Retention Time
Broadly speaking, the effectiveness of biological filtration is improved the longer the 'polluted' water is
held in the filter - i.e. the longer the retention time. The most time-consuming process in filtration is the
breakdown of dissolved organic carbon compounds into simple inorganic compounds. These compounds
are ultimately incorporated back into living organisms. This complex chain of processes is not
instantaneous and will, even under ideal circumstances, take some time. If insufficient filtration time is
available, intermediate products will be pumped out of the filter back into the pond. This is clearly
undesirable and rather defeats the object of having a filtration system. Indeed, this may well be the
reason why excessive alga growth occurs in some ponds, with the filter merely producing an endless
supply of plant nutrients!
So for how long should water be retained in the biological section?
This depends on how polluted the water is in the first place. Certainly, industrial water treatment plants -
which handle much higher levels of pollution from sewage etc. - would retain water in the plant for many
hours before it was deemed sufficiently clean to return to the nearest water-course.
Version 1.6 24/9/2006 Page 26 of 80How to Build a DIY Bio-Filter & Venturi for your Pond by J.Prior
Given that pond water is likely to be only mildly polluted, a retention time of 10 minutes, possibly longer,
will usually suffice.
The more polluted the water is, the longer it needs to be retained in the filter. Most koi ponds will require
a retention time of at least a few minutes.
How do you calculate the retention time of your filter?
Doing the Maths
This is determined by the flow rate and the volume of water in the filter. If water output from the filter is
2,000 gallons/hour and the filter contains 500 gallons (when full of media) of water then:
filter retention time = filter size / pump rate
so, in our example:
retention time = 500 (gallons) / 2000 (gallons per hour flow rate) = 0.25 hours (which is 15
minutes).
So a given sample of water will take 15 minutes to pass through the filter and back to the pond.
In the above, the filter capacity represents the amount of water in the filter - not the physical size of the
filter, which will be greater.
The retention time and the size of the filter will depend to a very large extent on the type of filtration
medium used.
A solid medium with low void space such as gravel will occupy much more filter space than large-pored,
lightly packed media and therefore leads to a lower retention time.
More calculations!
Using our same example of a 500-gallon filter. If we now nearly fill it with gravel, the volume of water it
will hold will be reduced substantially - maybe to as little as 150 to 200 gallons. Using the above
example, the retention time of such a filter would now become;
200/2000 = 0.1 hours (6 minutes) or less
In comparison, if the same filter was filled instead with matting or plastic, there would be hardly any
displacement and the filter will probably still hold in excess of 450 gallons, giving a retention time over
double that of gravel. So a filter with a dense, low-void medium, such as gravel, will need to be
substantially larger than one based on light-weight media, in order to achieve the same retention time,
which explains why koi filters were traditionally so large.
Turnover - The quicker the better?
Just when everything starts to make sense, along comes a complication. While a longer filter retention
time will produce better water quality we also have to consider pond turnover times. Why? Because
polluted water is produced in the pond and, if there was a slow turnover at the filter, it would take longer
for pond water to get processed by the filter.
To make sense of pond turnover rates it is helpful to return to the original analogy of koi being sewage-
making machines: expensive food in one end and sewage out the other. Our seemingly impossible aim
should be to remove this pollution as fast as it is produced. If we can manage that then we would have
perfect water conditions most of the time.
When we are considering pollution the primary concern is not so much the volume of water, but rather
Version 1.6 24/9/2006 Page 27 of 80How to Build a DIY Bio-Filter & Venturi for your Pond by J.Prior
the number of fish and the amount of food we feed to them - because this is what determines both the
amount of metabolic ammonia and the quantity and quality of solid waste. There are several ways to
calculate ammonia production in a koi pond. A rough and ready estimate can be made based on the
amount of food fed each day.
How much Ammonia from that much Food?
Each kilogram (2.2 pounds) of fish food will result, on average, in 37 grams of ammonia being
produced, together with copious feces. And there is other organic waste, such as that from
decomposing algae and microorganisms. The important point is that as the stocking, and thereby feeding
level, is increased the water will have to be treated at an ever quicker rate if water quality is to be
maintained.
If, for instance, we had a pond of 4,500 gallons and the fish were fed 200 grams (7 ounces) of food per
day, this would produce approximately 7.5 grams (7,500mg) of ammonia per day, an average of say 300
mg per hour. (In reality the ammonia level would fluctuate throughout the day, being highest shortly after
feeding).
1kg food = 37g ammonia
1000g / 200g fed = 5
37 / 5 = 7.4g = 7400mg / 24hrs = 308mg per hour.
At this feeding rate, if no ammonia was removed, at the end of a day the ammonia content of the water
would be 24hrs x 300 mg ammonia = 7,200 mg in 4,500 gallons of pond water, giving an ammonia
concentration of 1.6 mg/gallon or 0.37 mg/litre, which is too high.
Conversely, if it was possible to remove the ammonia at the same rate as it is produced - namely, 300
mg per hour - the steady state ammonia level would be zero. Assuming we have a perfectly sized filter,
then to remove ammonia this quickly we would have to pass the entire contents of the pond through the
filter every hour, giving a flow-rate of 4,500 gallons/hour, otherwise there will always be some residual
ammonia present.
Deep breath!
If, instead of a flow-rate of 4,500 gallons/hour, we had a flow rate of the pond volume every two hours -
or half the pond volume every hour (same thing), an oversimplified calculation would give:
300 mg ammonia / 4,500 gallons (pond volume) x 2,250 (flow rate gallons/hour) = 150 mg ammonia
removed per hour, leaving 150mg in the pond, or a steady state of >0.01 mg / litre. (This makes the
simplifying assumption that there is no nitrification occurring in the pond.)
What is an Adequate Flow-rate?
So what is an adequate flowrate? As explained, it depends on the feeding rate.
The most commonly quoted advice is: turn over the volume of the pond between 8 and 12 times a
day. Otherwise expressed as between one-third and one-half every hour.
Filter Size
Taking retention times and flow rates into consideration, when it comes to choosing the right filter size,
there are two important but conflicting factors:
• the right filter retention time, which ensures all the required biological activity occurs,
• brisk water flow to prevent a high pond ammonia level.
If we decide that a flow-rate of say 2,250 gallons per hour and a filter retention time of 10 minutes are
required then the volume of water in contact with the filter media at any time will need to be;
Version 1.6 24/9/2006 Page 28 of 80You can also read