Installation instructions - www.akrapovic.com - Cycle Gear
←
→
Page content transcription
If your browser does not render page correctly, please read the page content below
Installation instructions

  Akrapovič Exhaust System:
  Racing
  for the
  Yamaha MT-09

    *503944*

                              www.akrapovic.com
www.akrapovic.com

     Congratulations on purchasing an Akrapovič exhaust system. Please read the entire installation manual
     prior to undertaking any activities related to installation of your new Akrapovič exhaust system. In case
     you do not fully understand the manual or any of its parts, please contact your authorized dealer!

     This product should be installed by someone with sufficient knowledge of exhaust systems and their
     installation, and appropriate hand or power tools. If you are not qualified for this work, please utilize a
     certified mechanic for installation. By installing Your Akrapovič exhaust system, you indicate that you
     have read the installation manual in its entirety and you agree with the terms stated herein.

     It is your responsibility to follow all installation instruction guidelines supplied with the Akrapovič exhaust
     system and undertake all necessary safety precautions. Akrapovič d.d. assumes no responsibility for
     damages occurring from misuse, abuse, improper installation, improper operation, lack of responsible
     care, or all previously stated reasons resulting from incompatibility with other manufacturer’s products
     and/or systems.

     IMPORTANT INFORMATION

     Exclusion of Certain Liability
     1. The manufacturer, importer or dealer shall not be liable for any incidental damage including personal injury
        or any other damages caused by improper installation or operation of the Akrapovič exhaust system. When
        installing the Akrapovič exhaust system be careful that the exhaust system does not touch other parts
        sensitive to high temperature.
     2. Akrapovič makes no representation or warranties with regard to damage caused by the improper installation,
        use and maintenance of the Akrapovič exhaust system. The warranty is limited to defects recognized by
        our technical department and due to normal use, and excludes items subject to normal wear (gaskets and
        damping wool). The guarantee is void in case of accident, modification, improper or competition use.
     3. Do not attempt to install the Akrapovič exhaust system on a vehicle model for which it was not made or
        tested by Akrapovič.
     4. When the exhaust system gets very hot during operation, be careful not to burn yourself on the exhaust
        system or parts which are in direct contact with it, even when the engine is not running. Also protect other
        people, especially children, from the injuries mentioned above.
     5. In some cases Akrapovič exhaust system kits contain chemical products (ceramic anti-seizing grease; bolt
        sealant). Handle with care, do not inhale or swallow. Avoid excessive contact with skin, eyes or mucous
        membranes. Keep out of reach of children.
     6. Technical specifications of Akrapovič exhaust systems and related products are subject to change without
        notice.
     7. Before removing the original exhaust system from your vehicle, please compare the parts you received
        with the list of materials provided in the installation manual in order to assure that you have all the parts
        necessary for the installation of your new Akrapovič exhaust system.
     8. Although this manual consists of instructions for installation in written form, as well as photographs and
        pictures representing individual steps of the installation, please note that the photographs and pictures
        are symbolic and are intended for representation of general overview only. The photographs and pictures
        contained herein should serve as a guideline only and actual installation of the exhaust system may not
        correspond with the photographs and pictures entirely.
     9. The process of uninstalling the original exhaust system may vary depending on the existing exhaust system.
        Please follow the original exhaust system manufacturer’s instructions for uninstalling the original exhaust
        system.

     Trademarks
       The Akrapovič Exhaust System Technology logo is a registered trademark of Akrapovič d.d.

     Akrapovič website
       Information about Akrapovič exhaust systems and related products is available on the Akrapovič website at:
       http://www.akrapovic.com/

     Copyright
       No part of the Akrapovič exhaust system or its documentation may be reproduced or distributed in any form or
       by any means without the prior written authorization of the Akrapovič company.

         © Akrapovič, d.d. All rights reserved.

                                                                                                                        2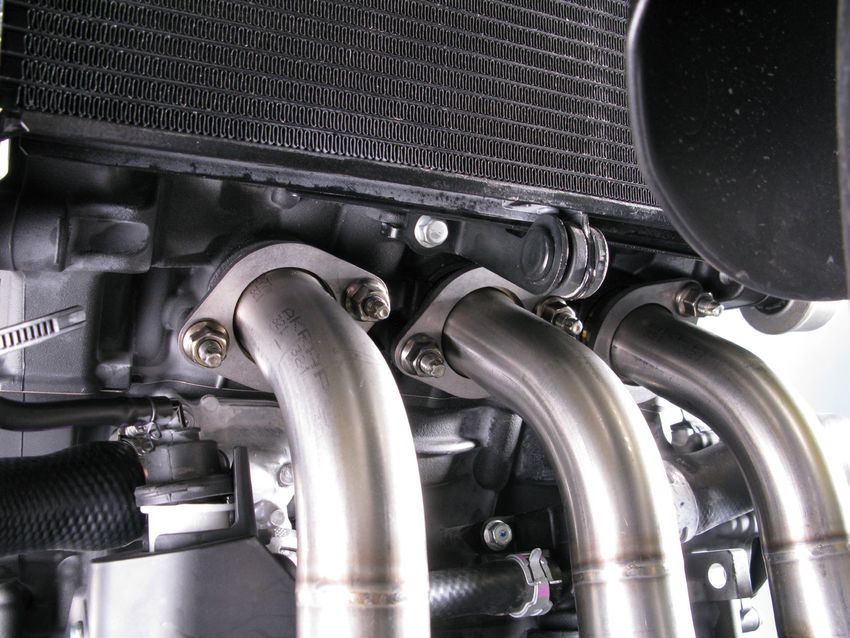
Symbols
      The following symbols are used throughout these installation instructions:

                           TOOLS REQUIRED                             TIGHTENING TORQUE

                           INSTALLATION TIP                           CAUTION OR WARNING

             USE BOLT SEALANT; Apply 3 to 4 small drops of bolt sealant onto the cleaned and degreased threads
             before tightening the bolts. WARNING! Avoid contact with skin, eyes and mucous membranes.
             Do not inhale fumes. Keep out of reach of children.

             USE ANTI-SEIZE LEAD-FREE COPPER PASTE (black tube); Provides trouble-free and long-lasting
             protection against seizing, corrosion and rusting of bolts, threaded ends, nuts, joints, etc. Also protects
             against vibration, wear and impact. WARNING! Avoid eye contact. Avoid excessive skin contact.
             Keep out of reach of children.

             USE ANTI-SEIZING GREASE (white tube); Prevents seizing, corrosion and excessive wear between
             the titanium components of your exhaust system. WARNING! Avoid eye contact. Avoid excessive
             skin contact. Keep out of reach of children.

                                              Combination 22 mm wrench
                                              T-handle 5 mm three hexagon wrench
                                              T-handle 6 mm three hexagon wrench
                                              T- handle swivelling 12 mm hexagon wrench
                                              T- handle 12 mm wrench
                                              Spring puller

             BEFORE INSTALLING, CHECK THE PARTS LIST AND SCHEMATIC DRAWING OF THE EXHAUST
             SYSTEM! THE LATEST VERSION OF THE PARTS LIST AND SCHEMATIC DRAWINGS OF THE
             PRODUCTS ARE AVAILABLE ON OUR WEB PAGE.

             IF ANY ITEMS IN THE AKRAPOVIČ EXHAUST SYSTEM PACKAGE ARE MISSING, PLEASE
             CONTACT YOUR AUTHORIZED DEALER. KEEP THE SCHEMATIC FOR FUTURE REFERENCE.

             THESE INSTALLATION INSTRUCTIONS MUST BE READ CAREFULLY IN ORDER TO ENSURE
             PROPER INSTALLATION AND OPERATION OF THE AKRAPOVIČ EXHAUST SYSTEM.

             THE EXHAUST SYSTEM CAN BE EXTREMELY HOT. ALLOW THE EXHAUST AND ENGINE TO
             COOL DOWN BEFORE BEGINNING INSTALLATION.

             WE ADVISE YOU TO LEAVE INSTALLATION TO A QUALIFIED SERVICEMAN. IMPROPER
             INSTALLATION MAY RESULT IN A SHORTER LIFETIME OF THE EXHAUST SYSTEM AND/OR
             DAMAGE TO THE VEHICLE.

             THIS MANUAL IS SPECIFIC TO THE YAMAHA MT-09 M.Y. 2014. THERE MAY BE SOME
             DIFFERENCES IN INSTALLATION PROCEDURES FOR OTHER MT-09 MODELS.

             AKRAPOVIČ MAKES EVERY EFFORT TO PROVIDE IMPROVED CORNERING CLEARANCE
             FOR EXHAUST SYSTEMS. HOWEVER, DUE TO DESIGN AND SPACE LIMITATIONS ON SOME
             MOTORCYCLE MODELS, GROUND AND CORNERING CLEARANCE MAY NOT IMPROVE OR
             MAY EVEN BE REDUCED. FOR ADVANCED USERS, WE RECOMMEND INCREASING THE
             SPRING PRELOAD SETTINGS TO IMPROVE GROUND CLEARANCE.

             THE AKRAPOVIČ WARRANTY DOES NOT COVER DISCOLORATION OF ANY CHROME
             PRODUCTS.

3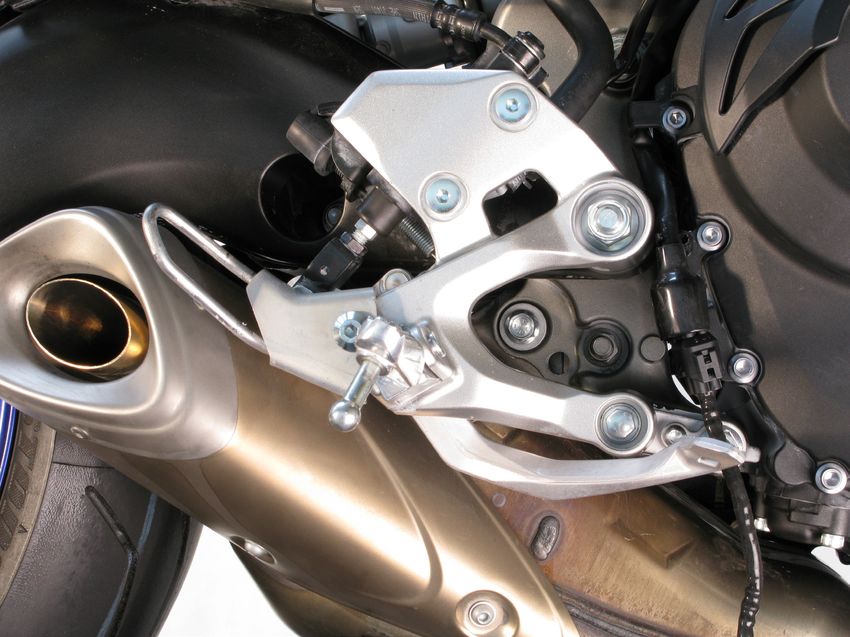
www.akrapovic.com

             REMOVAL OF STOCK EXHAUST SYSTEM:
             1.     Put the motorcycle on a side stand, we recommend a racing stand. Make sure, that surface is solid and flat.
             2.     Unscrew the marked muffler’s bolts, lambda sensor, headers’ flange nuts and carefully remove the stock exhaust
                    system off the motorcycle (Figure 1, 2, 3, 4, 5).
                    CAUTION: be careful not to damage any part of the motorcycle during this process!

                                                                                                                         Figure 1

                                                                                                                         Figure 2

                                                                                                                                     4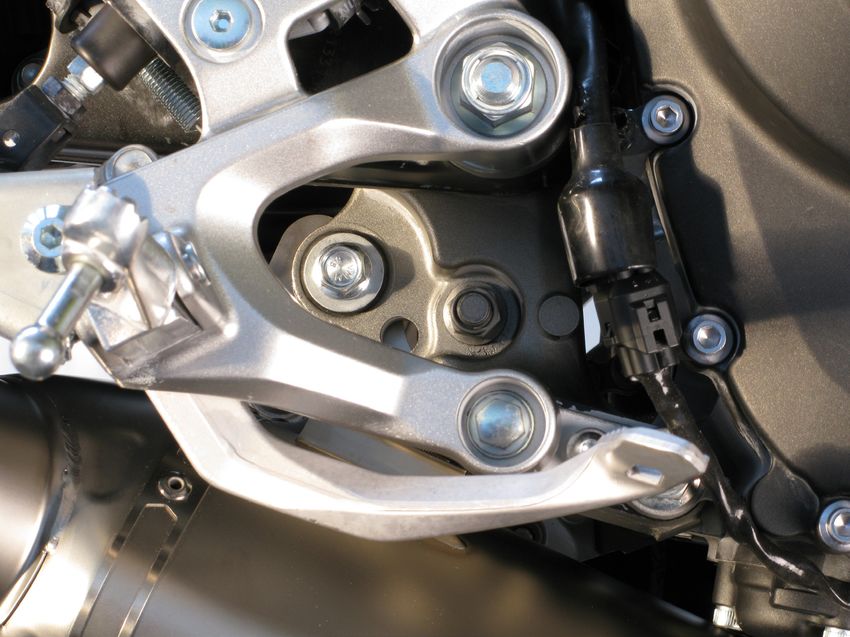
6x

    Figure 3

    Figure 4

5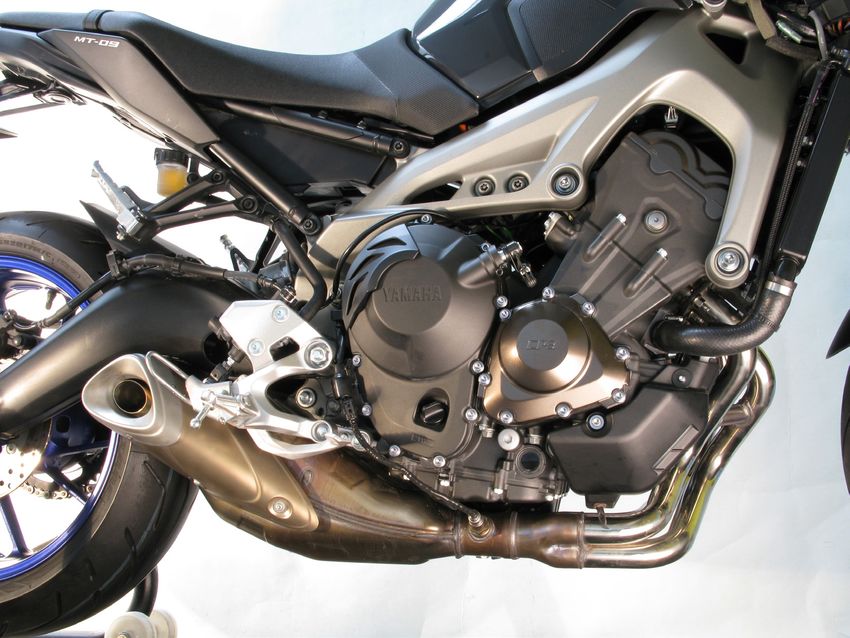
www.akrapovic.com
Figure 5
INSTALLATION OF THE AKRAPOVIČ EXHAUST SYSTEM:
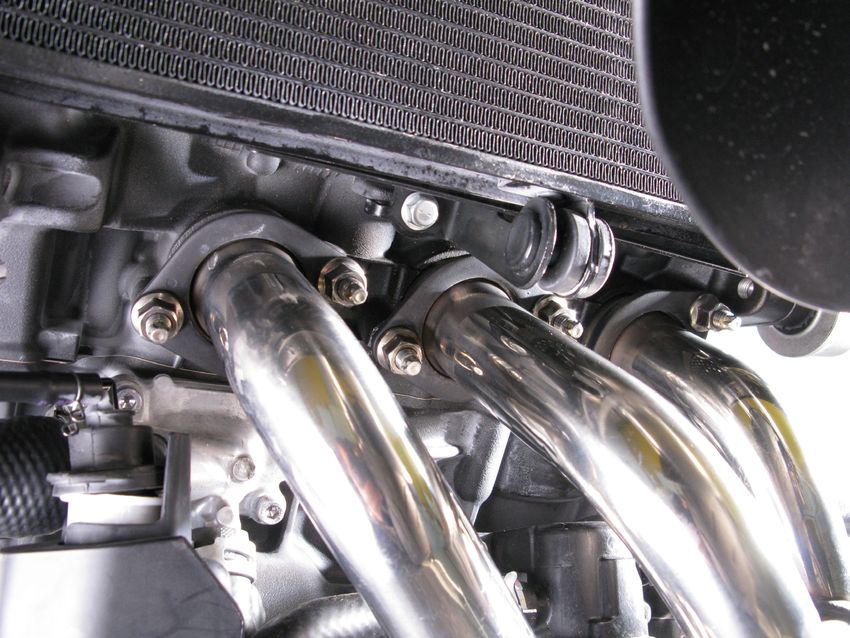
1. Install the Akrapovič headers and hand tighten the flanges onto the cylinder head (using stock nuts) and tighten the
lambda sensor into the collector (Figure 6, 7, 8).
WARNING: do not fully tighten the flanges yet!
INSTALLATION TIP: use new stock exhaust port gaskets.
Figure 6
6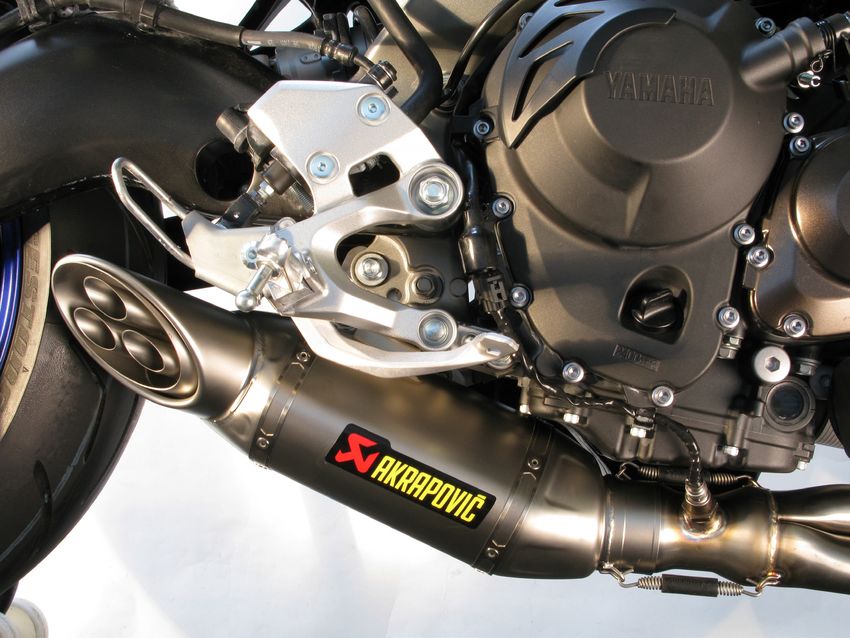
6x

    Figure 7

    WARNING: make sure not to damage the lambda sensor’s electrical lead during this process (Figure 8)!
    WARNING: use anti-seize copper paste only on the lambda sensor threads!

                                                                       39Nm
                                                                       29ftlb

    Figure 8

7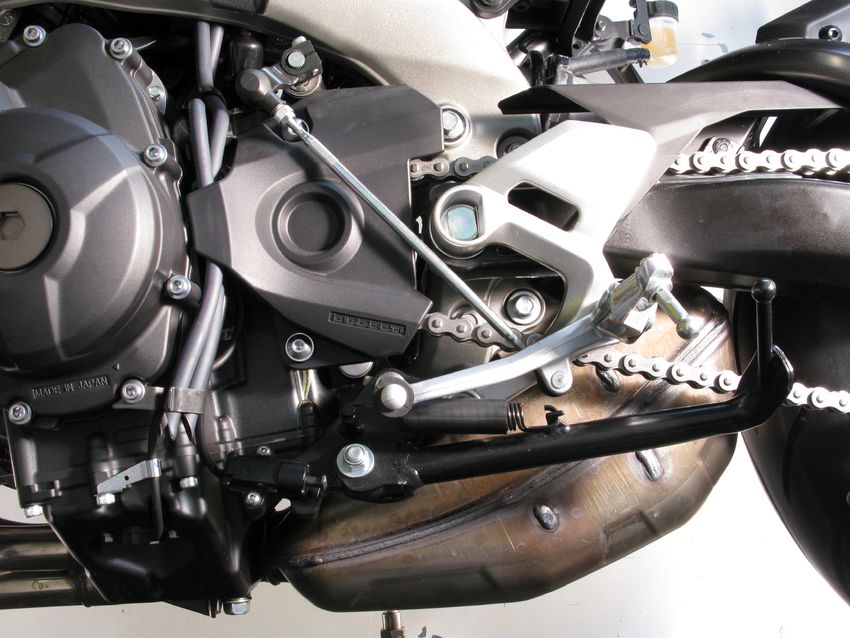
www.akrapovic.com

             2.     Assemble the muffler’s bracket onto the muffler, using bolts from Akrapovič installation kit (Figure 9).
                    WARNING: use bolt sealant on all four bolt threads!

                                                                                       22Nm
                                                                           4x          16ftlb

                                                                                                                                Figure 9

             3.     Insert the Akrapovič catalytic converter into the muffler’s inlet, as shown (Figure 10).
                    WARNING: make sure that you put the shorter part of the catalyst into the inlet!
                    WARNING: EC TYPE APPROVAL IS VALID ONLY IF OPTIONAL CATALYTIC CONVERTER IS INSTALLED!

                                                                                                                               Figure 10

                                                                                                                                           8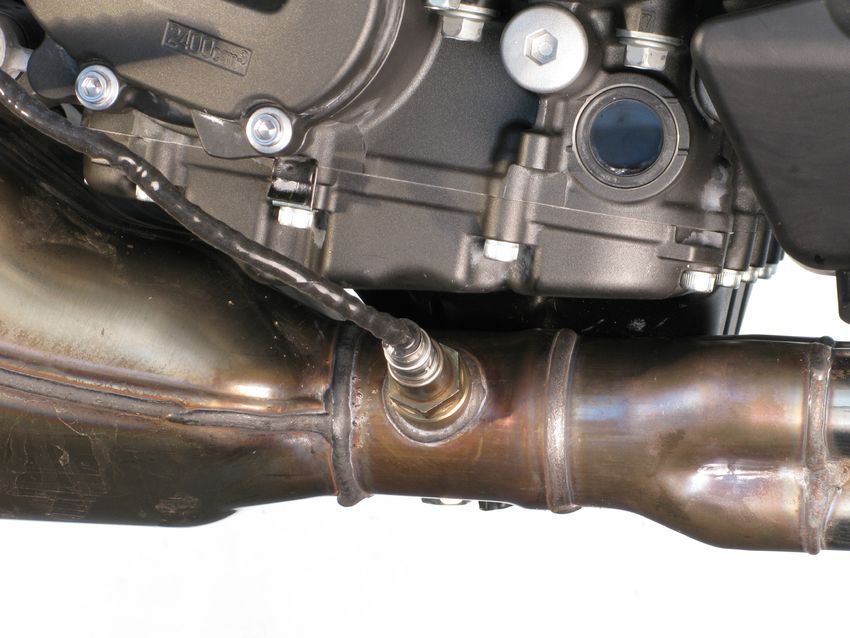
4.   Position the muffler correctly and slide it onto the outlet side of the collector. Attach the springs (Figure 11).
         WARNING: make sure, that springs pull the muffler all the way onto the collector – use rubber mallet if
         necessary to tap the connection into place!
         CAUTION: be careful not to damage the muffler or any part of the motorcycle during this process!

         Figure 11

    5.   Align the muffler in respect to the motorcycle and tighten the muffler’s bracket onto the frame, using stock bolts and
         washers (Figure 12, 13).
         CAUTION: be careful not to damage any part of the motorcycle during this process!

                                                                                   22Nm
                                                                                   16ftlb

         Figure 12

9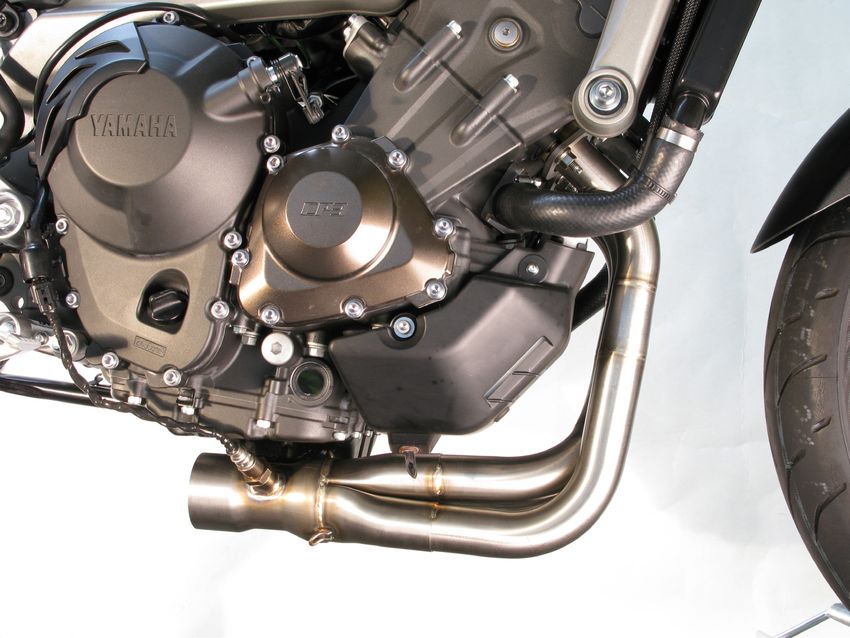
www.akrapovic.com

                                                                22Nm
                                                                16ftlb

                                                                                                                  Figure 13

             6.     Tighten the header’s flanges to specified torque (Figure 14).
                    WARNING: be careful not to damage the radiator or any other part of the motorcycle during this process!

                                                                                    22Nm
                                                                         6x         16ftlb

                                                                                                                  Figure 14

                                                                                                                              10
Final installation:
Clean grease spots:
a. Muffler – titanium outer sleeve: use a soft cloth sprayed with a multi-purpose spray lubricant
(WD-40 or equivalent).
b. Muffler – carbon-fiber outer sleeve: use a soft dry cloth.
c. Muffler – carbon-fiber outlet cap: use a soft dry cloth.
d. Stainless steel pipes: use a soft cloth sprayed with a contact cleaner, then wipe with a
soft dry cloth.
e. Titanium pipes: use a soft cloth sprayed with a multi-purpose spray lubricant
(WD-40 or equivalent).
Cleaning will prevent spots from burning onto the surface. Do not use aggressive chemical cleaners,
because they can damage the sticker.
WARNING: make sure all the bolts are sufficiently tightened. In case the exhaust system touches
the cowling or other parts repeat the adjustment of the exhaust system or contact your authorized
dealer.
WARNING: after running engine for 30 minutes, retighten the bolts of the Akrapovic carbon-fiber
heat shield!
IT IS NORMAL IF WHITE SMOKE COMES OUT OF THE MUFFLER ON FIRST OPERATION.
DO NOT STAND BEHIND THE MUFFLER ON FIRST OPERATION.
DO NOT USE AUTOMOTIVE WHEEL CLEANERS OR ANY CLEANING PRODUCTS WHICH
CONTAIN ACIDIC ADDITIVES TO CLEAN AKRAPOVIČ EXHAUST SYSTEMS.
MAINTENANCE OF THE AKRAPOVIČ EXHAUST SYSTEM:
1. Clean the titanium exhaust components with a multi-purpose spray lubricant (WD-40 or equivalent),
carbon fiber exhaust components with soft and dry cloth and stainless steel components with soft cloth
sprayed with contact cleaner, then wipe with soft and dry cloth. A change in the color of the exhaust
system is normal due to the high temperatures.
2. Periodically make sure all the bolts and springs are sufficiently tight.
WARNING:
Please note that certain aftermarket exhaust systems may not comply with applicable California laws and
regulations, and may therefore be prohibited for use on California highways or roads, or on roads or vehicles
otherwise subject to emissions control requirements.
Akrapovič exhaust systems for automobiles and motorcycles mounted downstream of the catalytic converter (also
known as “cat-back systems”) are considered “replacement parts” in California by the California Air Resources
Board (CARB), and do not require an exemption or executive order from CARB to be sold in California. However,
California prohibits the use of any aftermarket exhaust system that modifies, removes or replaces original
equipment catalysts, unless CARB has issued an Executive Order as to such part or system.
Further, Akrapovič parts or exhaust systems used or intended for use on “racing vehicles” (i.e. a competition
vehicle used exclusively for competition on closed-course circuits) do not require an exemption or Executive
Order from CARB to be sold in California. However, such parts are prohibited from use on California public
highways or roads, even if occasionally used “off-road.”
11www.akrapovic.com
REPARATION OF THE AKRAPOVIČ MUFFLERS:
1. Drill all sleeve rivets on muffler’s inlet cap, using 4.9 mm drill bit (Figure 15).
WARNING: make sure, that you don’t injure yourself or damage the outer sleeve, end cap or any other part
of the muffler during this process! Use personal protection equipment!
7x
Figure 15
2. Remove all used damping material out of the muffler. Tuck the small chunks of new damping material into the muf-
fler and inlet cap one by one, using large screwdriver or equivalent (Figure 16).
WARNING: use personal protection equipment during this process!
CAUTION: be careful not to damage any part of the mufflers during this process!
CAUTION: you should use all of the damping material supplied in Akrapovič reparation kit!
Figure 16
123. Position the outlet caps precisely into the mufflers’ outer sleeves and carefully tap them into the final position. Apply the
rivet tape and insert the rivets supplied in the Akrapovič reparation kit into the mufflers, as shown (Figure 17).
WARNING: make sure, that you don’t injure yourself or damage the outer sleeve or outlet cap during this
process! Use personal protection equipment!
Figure 17
4. Rivet the rivets one by one (Figure 18).
WARNING: make sure, that you don’t injure yourself or damage any part of the mufflers during this process!
Use personal protection equipment!
Figure 18
13www.akrapovic.com
You can also read