Lemur Documentation Release 0.8.0 - Netflix Security - Read the Docs
←
→
Page content transcription
If your browser does not render page correctly, please read the page content below
Lemur Documentation
           Release 0.8.0

         Netflix Security

                Jan 13, 2021
CONTENTS
1 Installation 3
1.1 Quickstart . . . . . . . . . . . . . . . . . . . . . . . . . . . . . . . . . . . . . . . . . . . . . . . . 3
1.2 Production . . . . . . . . . . . . . . . . . . . . . . . . . . . . . . . . . . . . . . . . . . . . . . . . 9
2 User Guide 23
2.1 User Guide . . . . . . . . . . . . . . . . . . . . . . . . . . . . . . . . . . . . . . . . . . . . . . . . 23
3 Administration 33
3.1 Configuration . . . . . . . . . . . . . . . . . . . . . . . . . . . . . . . . . . . . . . . . . . . . . . . 33
3.2 Command Line Interface . . . . . . . . . . . . . . . . . . . . . . . . . . . . . . . . . . . . . . . . . 51
3.3 Upgrading Lemur . . . . . . . . . . . . . . . . . . . . . . . . . . . . . . . . . . . . . . . . . . . . 53
3.4 Plugins . . . . . . . . . . . . . . . . . . . . . . . . . . . . . . . . . . . . . . . . . . . . . . . . . . 53
3.5 3rd Party Plugins . . . . . . . . . . . . . . . . . . . . . . . . . . . . . . . . . . . . . . . . . . . . . 56
3.6 Identity and Access Management . . . . . . . . . . . . . . . . . . . . . . . . . . . . . . . . . . . . 57
4 Developers 59
4.1 Contributing . . . . . . . . . . . . . . . . . . . . . . . . . . . . . . . . . . . . . . . . . . . . . . . 59
4.2 Writing a Plugin . . . . . . . . . . . . . . . . . . . . . . . . . . . . . . . . . . . . . . . . . . . . . 63
4.3 REST API . . . . . . . . . . . . . . . . . . . . . . . . . . . . . . . . . . . . . . . . . . . . . . . . 70
4.4 Internals . . . . . . . . . . . . . . . . . . . . . . . . . . . . . . . . . . . . . . . . . . . . . . . . . 70
5 Security 75
5.1 Security . . . . . . . . . . . . . . . . . . . . . . . . . . . . . . . . . . . . . . . . . . . . . . . . . . 75
6 Doing a Release 77
6.1 Doing a release . . . . . . . . . . . . . . . . . . . . . . . . . . . . . . . . . . . . . . . . . . . . . . 77
7 FAQ 79
7.1 Frequently Asked Questions . . . . . . . . . . . . . . . . . . . . . . . . . . . . . . . . . . . . . . . 79
8 Reference 81
8.1 Changelog . . . . . . . . . . . . . . . . . . . . . . . . . . . . . . . . . . . . . . . . . . . . . . . . 81
8.2 License . . . . . . . . . . . . . . . . . . . . . . . . . . . . . . . . . . . . . . . . . . . . . . . . . . 87
Index 91
iii
Lemur Documentation, Release 0.8.0

Lemur is a TLS management service. It attempts to help track and create certificates. By removing common issues
with CSR creation it gives normal developers ‘sane’ TLS defaults and helps security teams push TLS usage throughout
an organization.

CONTENTS                                                                                                         1
Lemur Documentation, Release 0.8.0

2                                    CONTENTS
CHAPTER

                                                                                                                ONE

                                                                                             INSTALLATION

1.1 Quickstart

This guide will step you through setting up a Python-based virtualenv, installing the required packages, and configuring
the basic web service. This guide assumes a clean Ubuntu 14.04 instance, commands may differ based on the OS and
configuration being used.
For a quicker alternative, see the Lemur docker file on Github.

1.1.1 Dependencies

Some basic prerequisites which you’ll need in order to run Lemur:
    • A UNIX-based operating system (we test on Ubuntu, develop on OS X)
    • Python 3.7 or greater
    • PostgreSQL 9.4 or greater
    • Nginx

Note: Lemur was built with AWS in mind. This means that things such as databases (RDS), mail (SES), and TLS
(ELB), are largely handled for us. Lemur does not require AWS to function. Our guides and documentation try to be
as generic as possible and are not intended to document every step of launching Lemur into a given environment.

1.1.2 Installing Build Dependencies

If installing Lemur on a bare Ubuntu OS you will need to grab the following packages so that Lemur can correctly
build its dependencies:

sudo apt-get update
sudo apt-get install nodejs nodejs-legacy python-pip python-dev python3-dev libpq-dev
 ˓→build-essential libssl-dev libffi-dev libsasl2-dev libldap2-dev nginx git

 ˓→supervisor npm postgresql

Note: PostgreSQL is only required if your database is going to be on the same host as the webserver. npm is needed
if you’re installing Lemur from the source (e.g., from git).

                                                                                                                      3
Lemur Documentation, Release 0.8.0 Note: Installing node from a package manager may create the nodejs bin at /usr/bin/nodejs instead of /usr/bin/node If that is the case run the following sudo ln -s /user/bin/nodejs /usr/bin/node Now, install Python virtualenv package: sudo pip install -U virtualenv 1.1.3 Setting up an Environment In this guide, Lemur will be installed in /www, so you need to create that structure first: sudo mkdir /www cd /www Clone Lemur inside the just created directory and give yourself write permission (we assume lemur is the user): sudo useradd lemur sudo passwd lemur sudo mkdir /home/lemur sudo chown lemur:lemur /home/lemur sudo git clone https://github.com/Netflix/lemur sudo chown -R lemur lemur/ Create the virtual environment, activate it and enter the Lemur’s directory: su lemur virtualenv -p python3 lemur source /www/lemur/bin/activate cd lemur Note: Activating the environment adjusts your PATH, so that things like pip now install into the virtualenv by default. Installing from Source Once your system is prepared, ensure that you are in the virtualenv: which python And then run: make release Note: This command will install npm dependencies as well as compile static assets. You may also run with the urlContextPath variable set. If this is set it will add the desired context path for subsequent calls back to lemur. This will only edit the front end code for calls back to the server, you will have to make sure the server knows about these routes. 4 Chapter 1. Installation
Lemur Documentation, Release 0.8.0

Example:
  urlContextPath=lemur
  /api/1/auth/providers -> /lemur/api/1/auth/providers

make release urlContextPath={desired context path}

1.1.4 Creating a configuration

Before we run Lemur, we must create a valid configuration file for it. The Lemur command line interface comes with
a simple command to get you up and running quickly.
Simply run:

lemur create_config

Note: This command will create a default configuration under ~/.lemur/lemur.conf.py you can specify this
location by passing the config_path parameter to the create_config command.

You can specify -c or --config to any Lemur command to specify the current environment you are working
in. Lemur will also look under the environmental variable LEMUR_CONF should that be easier to set up in your
environment.

1.1.5 Update your configuration

Once created, you will need to update the configuration file with information about your environment, such as which
database to talk to, where keys are stored etc.

vi ~/.lemur/lemur.conf.py

Note: If you are unfamiliar with the SQLALCHEMY_DATABASE_URI string it can be broken up like so:
postgresql://username:password@:/

Before Lemur will run you need to fill in a few required variables in the configuration file:

LEMUR_SECURITY_TEAM_EMAIL
#/the e-mail address needs to be enclosed in quotes
LEMUR_DEFAULT_COUNTRY
LEMUR_DEFAULT_STATE
LEMUR_DEFAULT_LOCATION
LEMUR_DEFAULT_ORGANIZATION
LEMUR_DEFAULT_ORGANIZATIONAL_UNIT

1.1. Quickstart                                                                                                  5
Lemur Documentation, Release 0.8.0 1.1.6 Set Up Postgres For production, a dedicated database is recommended, for this guide we will assume postgres has been installed and is on the same machine that Lemur is installed on. First, set a password for the postgres user. For this guide, we will use lemur as an example but you should use the database password generated by Lemur: sudo -u postgres -i psql postgres=# CREATE USER lemur WITH PASSWORD 'lemur'; Once successful, type CTRL-D to exit the Postgres shell. Next, we will create our new database: sudo -u postgres createdb lemur Note: For this guide we assume you will use the postgres user to connect to your database, when deploying to a VM or container this is often all you will need. If you have a shared database it is recommend you give Lemur its own user. Note: Postgres 9.4 or greater is required as Lemur relies advanced data columns (e.g. JSON Column type) 1.1.7 Initializing Lemur Lemur provides a helpful command that will initialize your database for you. It creates a default user (lemur) that is used by Lemur to help associate certificates that do not currently have an owner. This is most commonly the case when Lemur has discovered certificates from a third party source. This is also a default user that can be used to administer Lemur. In addition to creating a new user, Lemur also creates a few default email notifications. These notifications are based on a few configuration options such as LEMUR_SECURITY_TEAM_EMAIL. They basically guarantee that every certificate within Lemur will send one expiration notification to the security team. Your database installation requires the pg_trgm extension. If you do not have this installed already, you can allow the script to install this for you by adding the SUPERUSER permission to the lemur database user. Additional notifications can be created through the UI or API. See Creating Notifications and Command Line Interface for details. Make note of the password used as this will be used during first login to the Lemur UI. cd /www/lemur/lemur lemur init Note: If you added the SUPERUSER permission to the lemur database user above, it is recommended you revoke that permission now. Note: It is recommended that once the lemur user is created that you create individual users for every day access. There is currently no way for a user to self enroll for Lemur access, they must have an administrator create an account 6 Chapter 1. Installation
Lemur Documentation, Release 0.8.0

for them or be enrolled automatically through SSO. This can be done through the CLI or UI. See Creating Users and
Command Line Interface for details.

1.1.8 Set Up a Reverse Proxy

By default, Lemur runs on port 8000. Even if you change this, under normal conditions you won’t be able to bind to
port 80. To get around this (and to avoid running Lemur as a privileged user, which you shouldn’t), we need to set up
a simple web proxy. There are many different web servers you can use for this, we like and recommend Nginx.

Proxying with Nginx

You’ll use the builtin HttpProxyModule within Nginx to handle proxying.                   Edit the /etc/nginx/
sites-available/default file according to the lines below

location /api {
      proxy_pass http://127.0.0.1:8000;
      proxy_next_upstream error timeout invalid_header http_500 http_502 http_503 http_
 ˓→504;

      proxy_redirect off;
      proxy_buffering off;
      proxy_set_header        Host            $host;
      proxy_set_header        X-Real-IP       $remote_addr;
      proxy_set_header        X-Forwarded-For $proxy_add_x_forwarded_for;
  }

 location / {
     root /www/lemur/lemur/static/dist;
     include mime.types;
     index index.html;
 }

Note: See Production for more details on using Nginx.

After making these changes, restart Nginx service to apply them:

sudo service nginx restart

1.1.9 Starting the Web Service

Lemur provides a built-in web server (powered by gunicorn and eventlet) to get you off the ground quickly.
To start the web server, you simply use lemur start. If you opted to use an alternative configuration path you can
pass that via the --config option.

Note: You can login with the default user created during Initializing Lemur or any other user you may have created.

# Lemur's server runs on port 8000 by default. Make sure your client reflects
# the correct host and port!
lemur --config=/etc/lemur.conf.py start -b 127.0.0.1:8000

1.1. Quickstart                                                                                                    7
Lemur Documentation, Release 0.8.0 You should now be able to test the web service by visiting http://localhost:8000/. 1.1.10 Running Lemur as a Service We recommend using whatever software you are most familiar with for managing Lemur processes. One option is Supervisor. Configure supervisord Configuring Supervisor couldn’t be more simple. Just point it to the lemur executable in your virtualenv’s bin/ folder and you’re good to go. [program:lemur-web] directory=/www/lemur/ command=/www/lemur/bin/lemur start autostart=true autorestart=true redirect_stderr=true stdout_logfile=syslog stderr_logfile=syslog See Using Supervisor for more details on using Supervisor. 1.1.11 Syncing Lemur uses periodic sync tasks to make sure it is up-to-date with its environment. Things change outside of Lemur we do our best to reconcile those changes. The recommended method is to use CRON: crontab -e */15 * * * * lemur sync -s all 0 22 * * * lemur check_revoked 0 22 * * * lemur notify 1.1.12 Additional Utilities If you’re familiar with Python you’ll quickly find yourself at home, and even more so if you’ve used Flask. The lemur command is just a simple wrapper around Flask’s manage.py, which means you get all of the power and flexibility that goes with it. Some of the features which you’ll likely find useful are listed below. lock Encrypts sensitive key material - this is most useful for storing encrypted secrets in source code. 8 Chapter 1. Installation
Lemur Documentation, Release 0.8.0

unlock

Decrypts sensitive key material - used to decrypt the secrets stored in source during deployment.

Automated celery tasks

Please refer to Periodic Tasks to learn more about task scheduling in Lemur.

1.1.13 What’s Next?

Get familiar with how Lemur works by reviewing the User Guide. When you’re ready see Production for more details
on how to configure Lemur for production.
The above just gets you going, but for production there are several different security considerations to take into account.
Remember, Lemur is handling sensitive data and security is imperative.

1.2 Production

There are several steps needed to make Lemur production ready. Here we focus on making Lemur more reliable and
secure.

1.2.1 Basics

Because of the sensitivity of the information stored and maintained by Lemur it is important that you follow standard
host hardening practices:
      • Run Lemur with a limited user
      • Disabled any unneeded services
      • Enable remote logging
      • Restrict access to host

Credential Management

Lemur often contains credentials such as mutual TLS keys or API tokens that are used to communicate with third
party resources and for encrypting stored secrets. Lemur comes with the ability to automatically encrypt these keys
such that your keys not be in clear text.
The keys are located within lemur/keys and broken down by environment.
To utilize this ability use the following commands:
        lemur lock
and
        lemur unlock
If you choose to use this feature ensure that the keys are decrypted before Lemur starts as it will have trouble commu-
nicating with the database otherwise.

1.2. Production                                                                                                          9
Lemur Documentation, Release 0.8.0
Entropy
Lemur generates private keys for the certificates it creates. This means that it is vitally important that Lemur has enough
entropy to draw from. To generate private keys Lemur uses the python library Cryptography. In turn Cryptography
uses OpenSSL bindings to generate keys just like you might from the OpenSSL command line. OpenSSL draws
its initial entropy from system during startup and uses PRNGs to generate a stream of random bytes (as output by
/dev/urandom) whenever it needs to do a cryptographic operation.
What does all this mean? Well in order for the keys that Lemur generates to be strong, the system needs to interact
with the outside world. This is typically accomplished through the systems hardware (thermal, sound, video user-input,
etc.) since the physical world is much more “random” than the computer world.
If you are running Lemur on its own server with its own hardware “bare metal” then the entropy of the system is
typically “good enough” for generating keys. If however you are using a VM on shared hardware there is a potential
that your initial seed data (data that was initially fed to the PRNG) is not very good. What’s more, VMs have been
known to be unable to inject more entropy into the system once it has been started. This is because there is typically
very little interaction with the server once it has been started.
The amount of effort you wish to expend ensuring that Lemur has good entropy to draw from is up to your specific
risk tolerance and how Lemur is configured.
If you wish to generate more entropy for your system we would suggest you take a look at the following resources:
• WES-entropy-client
• haveged
The original WES-entropy-client repository by WhitewoodCrypto was removed, the link now points to a fork of it.
For additional information about OpenSSL entropy issues:
• Managing and Understanding Entropy Usage
1.2.2 TLS/SSL
Nginx
Nginx is a very popular choice to serve a Python project:
• It’s fast.
• It’s lightweight.
• Configuration files are simple.
Nginx doesn’t run any Python process, it only serves requests from outside to the Python server.
Therefore, there are two steps:
• Run the Python process.
• Run Nginx.
You will benefit from having:
• the possibility to have several projects listening to the port 80;
• your web site processes won’t run with admin rights, even if –user doesn’t work on your OS;
• the ability to manage a Python process without touching Nginx or the other processes. It’s very handy for
updates.
10 Chapter 1. InstallationLemur Documentation, Release 0.8.0
You must create a Nginx configuration file for Lemur. On GNU/Linux, they usually go into /etc/nginx/conf.d/. Name
it lemur.conf.
proxy_pass just passes the external request to the Python process. The port must match the one used by the Lemur
process of course.
You can make some adjustments to get a better user experience:
server_tokens off;
add_header X-Frame-Options DENY;
add_header X-Content-Type-Options nosniff;
add_header X-XSS-Protection "1; mode=block";
server {
listen 80;
return 301 https://$host$request_uri;
}
server {
listen 443;
access_log /var/log/nginx/log/lemur.access.log;
error_log /var/log/nginx/log/lemur.error.log;
location /api {
proxy_pass http://127.0.0.1:8000;
proxy_next_upstream error timeout invalid_header http_500 http_502 http_503
˓→http_504;
proxy_redirect off;
proxy_buffering off;
proxy_set_header Host $host;
proxy_set_header X-Real-IP $remote_addr;
proxy_set_header X-Forwarded-For $proxy_add_x_forwarded_for;
}
location / {
root /path/to/lemur/static/dist;
include mime.types;
index index.html;
}
}
This makes Nginx serve the favicon and static files which it is much better at than python.
It is highly recommended that you deploy TLS when deploying Lemur. This may be obvious given Lemur’s purpose
but the sensitive nature of Lemur and what it controls makes this essential. This is a sample config for Lemur that also
terminates TLS:
server_tokens off;
add_header X-Frame-Options DENY;
add_header X-Content-Type-Options nosniff;
add_header X-XSS-Protection "1; mode=block";
server {
listen 80;
return 301 https://$host$request_uri;
}
(continues on next page)
1.2. Production 11Lemur Documentation, Release 0.8.0
(continued from previous page)
server {
listen 443;
access_log /var/log/nginx/log/lemur.access.log;
error_log /var/log/nginx/log/lemur.error.log;
# certs sent to the client in SERVER HELLO are concatenated in ssl_certificate
ssl_certificate /path/to/signed_cert_plus_intermediates;
ssl_certificate_key /path/to/private_key;
ssl_session_timeout 1d;
ssl_session_cache shared:SSL:50m;
# Diffie-Hellman parameter for DHE ciphersuites, recommended 2048 bits
ssl_dhparam /path/to/dhparam.pem;
# modern configuration. tweak to your needs.
ssl_protocols TLSv1.1 TLSv1.2;
ssl_ciphers 'ECDHE-RSA-AES128-GCM-SHA256:ECDHE-ECDSA-AES128-GCM-SHA256:ECDHE-RSA-
˓→AES256-GCM-SHA384:ECDHE-ECDSA-AES256-GCM-SHA384:DHE-RSA-AES128-GCM-SHA256:DHE-DSS-
˓→AES128-GCM-SHA256:kEDH+AESGCM:ECDHE-RSA-AES128-SHA256:ECDHE-ECDSA-AES128-
˓→SHA256:ECDHE-RSA-AES128-SHA:ECDHE-ECDSA-AES128-SHA:ECDHE-RSA-AES256-SHA384:ECDHE-
˓→ECDSA-AES256-SHA384:ECDHE-RSA-AES256-SHA:ECDHE-ECDSA-AES256-SHA:DHE-RSA-AES128-
˓→SHA256:DHE-RSA-AES128-SHA:DHE-DSS-AES128-SHA256:DHE-RSA-AES256-SHA256:DHE-DSS-
˓→AES256-SHA:DHE-RSA-AES256-SHA:!aNULL:!eNULL:!EXPORT:!DES:!RC4:!3DES:!MD5:!PSK';
ssl_prefer_server_ciphers on;
# HSTS (ngx_http_headers_module is required) (15768000 seconds = 6 months)
add_header Strict-Transport-Security max-age=15768000;
# OCSP Stapling ---
# fetch OCSP records from URL in ssl_certificate and cache them
ssl_stapling on;
ssl_stapling_verify on;
## verify chain of trust of OCSP response using Root CA and Intermediate certs
ssl_trusted_certificate /path/to/root_CA_cert_plus_intermediates;
resolver ;
location /api {
proxy_pass http://127.0.0.1:8000;
proxy_next_upstream error timeout invalid_header http_500 http_502 http_503
˓→http_504;
proxy_redirect off;
proxy_buffering off;
proxy_set_header Host $host;
proxy_set_header X-Real-IP $remote_addr;
proxy_set_header X-Forwarded-For $proxy_add_x_forwarded_for;
}
location / {
root /path/to/lemur/static/dist;
include mime.types;
index index.html;
}
}
12 Chapter 1. InstallationLemur Documentation, Release 0.8.0
Note: Some paths will have to be adjusted based on where you have choose to install Lemur.
Apache
An example apache config:
...
SSLEngine on
SSLCertificateFile /path/to/signed_certificate
SSLCertificateChainFile /path/to/intermediate_certificate
SSLCertificateKeyFile /path/to/private/key
SSLCACertificateFile /path/to/all_ca_certs
# intermediate configuration, tweak to your needs
SSLProtocol all -SSLv2 -SSLv3
SSLCipherSuite ECDHE-RSA-AES128-GCM-SHA256:ECDHE-ECDSA-AES128-GCM-
˓→SHA256:ECDHE-RSA-AES256-GCM-SHA384:ECDHE-ECDSA-AES256-GCM-SHA384:DHE-RSA-AES128-GCM-
˓→SHA256:DHE-DSS-AES128-GCM-SHA256:kEDH+AESGCM:ECDHE-RSA-AES128-SHA256:ECDHE-ECDSA-
˓→AES128-SHA256:ECDHE-RSA-AES128-SHA:ECDHE-ECDSA-AES128-SHA:ECDHE-RSA-AES256-
˓→SHA384:ECDHE-ECDSA-AES256-SHA384:ECDHE-RSA-AES256-SHA:ECDHE-ECDSA-AES256-SHA:DHE-
˓→RSA-AES128-SHA256:DHE-RSA-AES128-SHA:DHE-DSS-AES128-SHA256:DHE-RSA-AES256-
˓→SHA256:DHE-DSS-AES256-SHA:DHE-RSA-AES256-SHA:AES128-GCM-SHA256:AES256-GCM-
˓→SHA384:AES128-SHA256:AES256-SHA256:AES128-SHA:AES256-SHA:AES:CAMELLIA:DES-CBC3-SHA:!
˓→aNULL:!eNULL:!EXPORT:!DES:!RC4:!MD5:!PSK:!aECDH:!EDH-DSS-DES-CBC3-SHA:!EDH-RSA-DES-
˓→CBC3-SHA:!KRB5-DES-CBC3-SHA
SSLHonorCipherOrder on
# HSTS (mod_headers is required) (15768000 seconds = 6 months)
Header always set Strict-Transport-Security "max-age=15768000"
...
# Set the lemur DocumentRoot to static/dist
DocumentRoot /www/lemur/lemur/static/dist
# Uncomment to force http 1.0 connections to proxy
# SetEnv force-proxy-request-1.0 1
#Don't keep proxy connections alive
SetEnv proxy-nokeepalive 1
# Only need to do reverse proxy
ProxyRequests Off
# Proxy requests to the api to the lemur service (and sanitize redirects from it)
ProxyPass "/api" "http://127.0.0.1:8000/api"
ProxyPassReverse "/api" "http://127.0.0.1:8000/api"
Also included in the configurations above are several best practices when it comes to deploying TLS. Things like
enabling HSTS, disabling vulnerable ciphers are all good ideas when it comes to deploying Lemur into a production
environment.
Note: This is a rather incomplete apache config for running Lemur (needs mod_wsgi etc.), if you have a working
1.2. Production 13Lemur Documentation, Release 0.8.0 apache config please let us know! See also: Mozilla SSL Configuration Generator 1.2.3 Supervisor Supervisor is a very nice way to manage you Python processes. We won’t cover the setup (which is just apt-get install supervisor or pip install supervisor most of the time), but here is a quick overview on how to use it. Create a configuration file named supervisor.ini: [unix_http_server] file=/tmp/supervisor.sock [supervisorctl] serverurl=unix:///tmp/supervisor.sock [rpcinterface:supervisor] supervisor.rpcinterface_factory=supervisor.rpcinterface:make_main_rpcinterface [supervisord] logfile=/tmp/lemur.log logfile_maxbytes=50MB logfile_backups=2 loglevel=trace pidfile=/tmp/supervisord.pid nodaemon=false minfds=1024 minprocs=200 [program:lemur] command=python /path/to/lemur/manage.py manage.py start directory=/path/to/lemur/ environment=PYTHONPATH='/path/to/lemur/',LEMUR_CONF='/home/lemur/.lemur/lemur.conf.py' user=lemur autostart=true autorestart=true The 4 first entries are just boiler plate to get you started, you can copy them verbatim. The last one defines one (you can have many) process supervisor should manage. It means it will run the command: python manage.py start In the directory, with the environment and the user you defined. This command will be ran as a daemon, in the background. autostart and autorestart just make it fire and forget: the site will always be running, even it crashes temporarily or if you restart the machine. The first time you run supervisor, pass it the configuration file: 14 Chapter 1. Installation
Lemur Documentation, Release 0.8.0

supervisord -c /path/to/supervisor.ini

Then you can manage the process by running:

supervisorctl -c /path/to/supervisor.ini

It will start a shell from which you can start/stop/restart the service.
You can read all errors that might occur from /tmp/lemur.log.

1.2.4 Periodic Tasks

Lemur contains a few tasks that are run and scheduled basis, currently the recommend way to run these tasks is to
create celery tasks or cron jobs that run these commands.
The following commands that could/should be run on a periodic basis:
    • notify expirations notify authority_expirations, and notify security_expiration_summary (see Notification Op-
      tions for configuration info)
    • check_revoked
    • sync
If you are using LetsEncrypt, you must also run the following:
    • fetch_all_pending_acme_certs
    • remove_old_acme_certs
How often you run these commands is largely up to the user. notify should be run once a day (more often will result
in duplicate notifications). check_revoked is typically run at least once a day. sync is typically run every 15 minutes.
fetch_all_pending_acme_certs should be ran frequently (Every minute is fine). remove_old_acme_certs can be ran
more rarely, such as once every week.
Example cron entries:

0 22 * * * lemuruser export LEMUR_CONF=/Users/me/.lemur/lemur.conf.py; /www/lemur/bin/
 ˓→lemur notify expirations

0 22 * * * lemuruser export LEMUR_CONF=/Users/me/.lemur/lemur.conf.py; /www/lemur/bin/
 ˓→lemur notify authority_expirations

0 22 * * * lemuruser export LEMUR_CONF=/Users/me/.lemur/lemur.conf.py; /www/lemur/bin/
 ˓→lemur notify security_expiration_summary

*/15 * * * * lemuruser export LEMUR_CONF=/Users/me/.lemur/lemur.conf.py; /www/lemur/
 ˓→bin/lemur source sync -s all

0 22 * * * lemuruser export LEMUR_CONF=/Users/me/.lemur/lemur.conf.py; /www/lemur/bin/
 ˓→lemur certificate check_revoked

Example Celery configuration (To be placed in your configuration file):

CELERYBEAT_SCHEDULE = {
    'fetch_all_pending_acme_certs': {
        'task': 'lemur.common.celery.fetch_all_pending_acme_certs',
        'options': {
            'expires': 180
        },
        'schedule': crontab(minute="*"),
    },
    'remove_old_acme_certs': {
                                                                                                   (continues on next page)

1.2. Production                                                                                                        15
Lemur Documentation, Release 0.8.0
(continued from previous page)
'task': 'lemur.common.celery.remove_old_acme_certs',
'options': {
'expires': 180
},
'schedule': crontab(hour=7, minute=30, day_of_week=1),
},
'clean_all_sources': {
'task': 'lemur.common.celery.clean_all_sources',
'options': {
'expires': 180
},
'schedule': crontab(hour=1, minute=0, day_of_week=1),
},
'sync_all_sources': {
'task': 'lemur.common.celery.sync_all_sources',
'options': {
'expires': 180
},
'schedule': crontab(hour="*/3", minute=5),
},
'sync_source_destination': {
'task': 'lemur.common.celery.sync_source_destination',
'options': {
'expires': 180
},
'schedule': crontab(hour="*"),
},
'notify_expirations': {
'task': 'lemur.common.celery.notify_expirations',
'options': {
'expires': 180
},
'schedule': crontab(hour=22, minute=0),
},
'notify_authority_expirations': {
'task': 'lemur.common.celery.notify_authority_expirations',
'options': {
'expires': 180
},
'schedule': crontab(hour=22, minute=0),
},
'send_security_expiration_summary': {
'task': 'lemur.common.celery.send_security_expiration_summary',
'options': {
'expires': 180
},
'schedule': crontab(hour=22, minute=0),
}
}
To enable celery support, you must also have configuration values that tell Celery which broker and backend to use.
Here are the Celery configuration variables that should be set:
CELERY_RESULT_BACKEND = 'redis://your_redis_url:6379'
CELERY_BROKER_URL = 'redis://your_redis_url:6379/0'
CELERY_IMPORTS = ('lemur.common.celery')
(continues on next page)
16 Chapter 1. InstallationLemur Documentation, Release 0.8.0
(continued from previous page)
CELERY_TIMEZONE = 'UTC'
REDIS_HOST="your_redis_url"
REDIS_PORT=6379
REDIS_DB=0
Out of the box, every Redis instance supports 16 databases. The default database (REDIS_DB) is set to 0, however,
you can use any of the databases from 0-15. Via redis.conf more databases can be supported. In the redis:// url, the
database number can be added with a slash after the port. (defaults to 0, if omitted)
Do not forget to import crontab module in your configuration file:
from celery.task.schedules import crontab
You must start a single Celery scheduler instance and one or more worker instances in order to handle incoming tasks.
The scheduler can be started with:
LEMUR_CONF='/location/to/conf.py' /location/to/lemur/bin/celery -A lemur.common.
˓→celery beat
And the worker can be started with desired options such as the following:
LEMUR_CONF='/location/to/conf.py' /location/to/lemur/bin/celery -A lemur.common.
˓→celery worker --concurrency 10 -E -n lemurworker1@%%h
supervisor or systemd configurations should be created for these in production environments as appropriate.
1.2.5 Add support for LetsEncrypt/ACME
LetsEncrypt is a free, limited-feature certificate authority that offers publicly trusted certificates that are valid for
90 days. LetsEncrypt does not use organizational validation (OV), and instead relies on domain validation (DV).
LetsEncrypt requires that we prove ownership of a domain before we’re able to issue a certificate for that domain,
each time we want a certificate.
The most common methods to prove ownership are HTTP validation and DNS validation. Lemur supports DNS
validation through the creation of DNS TXT records as well as HTTP validation, reusing the destination concept.
ACME DNS Challenge
In a nutshell, when we send a certificate request to LetsEncrypt, they generate a random token and ask us to put
that token in a DNS text record to prove ownership of a domain. If a certificate request has multiple domains, we
must prove ownership of all of these domains through this method. The token is typically written to a TXT record at
-acme_challenge.domain.com. Once we create the appropriate TXT record(s), Lemur will try to validate propagation
before requesting that LetsEncrypt finalize the certificate request and send us the certificate.
To start issuing certificates through LetsEncrypt, you must enable Celery support within Lemur first. After doing so,
you need to create a LetsEncrypt authority. To do this, visit Authorities -> Create. Set the applicable attributes and
click “More Options”.
You will need to set “Certificate” to LetsEncrypt’s active chain of trust for the authority you want to use. To find the
active chain of trust at the time of writing, please visit LetsEncrypt.
Under Acme_url, enter in the appropriate endpoint URL. Lemur supports LetsEncrypt’s V2 API, and we recom-
mend you to use this. At the time of writing, the staging and production URLs for LetsEncrypt V2 are https:
//acme-staging-v02.api.letsencrypt.org/directory and https://acme-v02.api.letsencrypt.org/directory.
1.2. Production 17Lemur Documentation, Release 0.8.0 18 Chapter 1. Installation
Lemur Documentation, Release 0.8.0

1.2. Production                                  19
Lemur Documentation, Release 0.8.0

After creating the authorities, we will need to create a DNS provider. Visit Admin -> DNS Providers and click Create.
Lemur comes with a few provider plugins built in, with different options. Create a DNS provider with the appropriate
choices.

By default, users will need to select the DNS provider that is authoritative over their domain in order for the LetsEn-
crypt flow to function. However, Lemur will attempt to automatically determine the appropriate provider if possible.
To enable this functionality, periodically (or through Cron/Celery) run lemur dns_providers get_all_zones. This com-
mand will traverse all DNS providers, determine which zones they control, and upload this list of zones to Lemur’s
database (in the dns_providers table). Alternatively, you can manually input this data.

ACME HTTP Challenge

The flow for requesting a certificate using the HTTP challenge is not that different from the one described for the DNS
challenge. The only difference is, that instead of creating a DNS TXT record, a file is uploaded to a Webserver which
serves the file at http:///.well-known/acme-challenge/
Currently the HTTP challenge also works without Celery, since it’s done while creating the certificate, and doesn’t
rely on celery to create the DNS record. This will change when we implement mix & match of acme challenge types.
To create a HTTP compatible Authority, you first need to create a new destination that will be used to deploy the
challenge token. Visit Admin -> Destination and click Create. The path you provide for the destination needs to be the
exact path that is called when the ACME providers calls ``http:///.well-known/acme-challenge/`. The token
part will be added dynamically by the acme_upload. Currently only the SFTP and S3 Bucket destination support the
ACME HTTP challenge.
Afterwards you can create a new certificate authority as described in the DNS challenge, but need to choose Acme
HTTP-01 as the plugin type, and then the destination you created beforehand.

20                                                                                         Chapter 1. Installation
Lemur Documentation, Release 0.8.0

LetsEncrypt: pinning to cross-signed ICA

Let’s Encrypt has been using a cross-signed intermediate CA by DST Root CA X3, which is included in many older
devices’ TrustStore.
Let’s Encrypt is transitioning to use the intermediate CA issued by their own root (ISRG X1) starting from September
29th 2020. This is in preparation of concluding the initial bootstrapping of their CA, by having it cross-signed by an
older CA.
Lemur can temporarily pin to the cross-signed intermediate CA (same public/private key pair as the ICA signed by
ISRG X1). This will prolong support for incompatible devices.
The following must be added to the config file to activate the pinning (the pinning will be removed by September
2021):

# remove or update after Mar 17 16:40:46 2021 GMT
IDENTRUST_CROSS_SIGNED_LE_ICA_EXPIRATION_DATE = "17/03/21"
IDENTRUST_CROSS_SIGNED_LE_ICA = """
-----BEGIN CERTIFICATE-----
MIIEkjCCA3qgAwIBAgIQCgFBQgAAAVOFc2oLheynCDANBgkqhkiG9w0BAQsFADA/
MSQwIgYDVQQKExtEaWdpdGFsIFNpZ25hdHVyZSBUcnVzdCBDby4xFzAVBgNVBAMT
DkRTVCBSb290IENBIFgzMB4XDTE2MDMxNzE2NDA0NloXDTIxMDMxNzE2NDA0Nlow
SjELMAkGA1UEBhMCVVMxFjAUBgNVBAoTDUxldCdzIEVuY3J5cHQxIzAhBgNVBAMT
GkxldCdzIEVuY3J5cHQgQXV0aG9yaXR5IFgzMIIBIjANBgkqhkiG9w0BAQEFAAOC
AQ8AMIIBCgKCAQEAnNMM8FrlLke3cl03g7NoYzDq1zUmGSXhvb418XCSL7e4S0EF
q6meNQhY7LEqxGiHC6PjdeTm86dicbp5gWAf15Gan/PQeGdxyGkOlZHP/uaZ6WA8
SMx+yk13EiSdRxta67nsHjcAHJyse6cF6s5K671B5TaYucv9bTyWaN8jKkKQDIZ0
Z8h/pZq4UmEUEz9l6YKHy9v6Dlb2honzhT+Xhq+w3Brvaw2VFn3EK6BlspkENnWA
a6xK8xuQSXgvopZPKiAlKQTGdMDQMc2PMTiVFrqoM7hD8bEfwzB/onkxEz0tNvjj
/PIzark5McWvxI0NHWQWM6r6hCm21AvA2H3DkwIDAQABo4IBfTCCAXkwEgYDVR0T
AQH/BAgwBgEB/wIBADAOBgNVHQ8BAf8EBAMCAYYwfwYIKwYBBQUHAQEEczBxMDIG
CCsGAQUFBzABhiZodHRwOi8vaXNyZy50cnVzdGlkLm9jc3AuaWRlbnRydXN0LmNv
bTA7BggrBgEFBQcwAoYvaHR0cDovL2FwcHMuaWRlbnRydXN0LmNvbS9yb290cy9k
c3Ryb290Y2F4My5wN2MwHwYDVR0jBBgwFoAUxKexpHsscfrb4UuQdf/EFWCFiRAw
VAYDVR0gBE0wSzAIBgZngQwBAgEwPwYLKwYBBAGC3xMBAQEwMDAuBggrBgEFBQcC
ARYiaHR0cDovL2Nwcy5yb290LXgxLmxldHNlbmNyeXB0Lm9yZzA8BgNVHR8ENTAz
MDGgL6AthitodHRwOi8vY3JsLmlkZW50cnVzdC5jb20vRFNUUk9PVENBWDNDUkwu
Y3JsMB0GA1UdDgQWBBSoSmpjBH3duubRObemRWXv86jsoTANBgkqhkiG9w0BAQsF
AAOCAQEA3TPXEfNjWDjdGBX7CVW+dla5cEilaUcne8IkCJLxWh9KEik3JHRRHGJo
uM2VcGfl96S8TihRzZvoroed6ti6WqEBmtzw3Wodatg+VyOeph4EYpr/1wXKtx8/
wApIvJSwtmVi4MFU5aMqrSDE6ea73Mj2tcMyo5jMd6jmeWUHK8so/joWUoHOUgwu
X4Po1QYz+3dszkDqMp4fklxBwXRsW10KXzPMTZ+sOPAveyxindmjkW8lGy+QsRlG
PfZ+G6Z6h7mjem0Y+iWlkYcV4PIWL1iwBi8saCbGS5jN2p8M+X+Q7UNKEkROb3N6
KOqkqm57TH2H3eDJAkSnh6/DNFu0Qg==
-----END CERTIFICATE-----
"""

LetsEncrypt: Using a pre-existing ACME account

Let’s Encrypt allows reusing an existing ACME account, to create and especially revoke certificates. The current
implementation in the acme plugin, only allows for a single account for all ACME authorities, which might be an
issue, when you try to use Let’s Encrypt together with another certificate authority that uses the ACME protocol.
To use an existing account, you need to configure the ACME_PRIVATE_KEY and ACME_REGR variables in the lemur
configuration.
ACME_PRIVATE_KEY needs to be in the JWK format:

1.2. Production                                                                                                    21
Lemur Documentation, Release 0.8.0

{
     "kty": "RSA",
     "n": "yr1qBwHizA7ME_iV32bY10ILp.....",
     "e": "AQAB",
     "d": "llBlYhil3I.....",
     "p": "-5LW2Lewogo.........",
     "q": "zk6dHqHfHksd.........",
     "dp": "qfe9fFIu3mu.......",
     "dq": "cXFO-loeOyU.......",
     "qi": "AfK1sh0_8sLTb..........."
}

Using python-jwt converting an existing private key in PEM format is quite easy:

import python_jwt as jwt, jwcrypto.jwk as jwk

priv_key = jwk.JWK.from_pem(b"""-----BEGIN RSA PRIVATE KEY-----
...
-----END RSA PRIVATE KEY-----""")

print(priv_key.export())

ACME_REGR needs to be a valid JSON with a body and a uri attribute, similar to this:

{"body": {}, "uri": "https://acme-staging-v02.api.letsencrypt.org/acme/acct/"}

The URI can be retrieved from the ACME create account endpoint when creating a new account, using the existing
key.

22                                                                                     Chapter 1. Installation
CHAPTER
TWO
USER GUIDE
2.1 User Guide
These guides are quick tutorials on how to perform basic tasks in Lemur.
2.1.1 Create a New Authority
Before Lemur can issue certificates you must configure the authority you wish use. Lemur itself does not issue
certificates, it relies on external CAs and the plugins associated with those CAs to create the certificate that Lemur can
then manage.
Fig. 1: In the authority table select “Create”
2.1.2 Create a New Certificate
2.1.3 Import an Existing Certificate
2.1.4 Create a New User
2.1.5 Create a New Role
23Lemur Documentation, Release 0.8.0 Fig. 2: Enter an authority name and short description about the authority. Enter an owner, and certificate common name. Depending on the authority and the authority/issuer plugin these values may or may not be used. 24 Chapter 2. User Guide
Lemur Documentation, Release 0.8.0

Fig. 3: Again how many of these values get used largely depends on the underlying plugin. It is important to make
sure you select the right plugin that you wish to use.

                                  Fig. 4: In the certificate table select “Create”

2.1. User Guide                                                                                               25
Lemur Documentation, Release 0.8.0
Fig. 5: Enter an owner, common name, short description and certificate authority you wish to issue this certificate.
Depending upon the selected CA, the UI displays default validity of the certificate. You can select different validity
by entering a custom date, if supported by the CA.
You can also add Subject Alternate Names or SAN for certificates that need to include more than one domains, The first domain is
the Common Name and all other domains are added here as DNSName entries.
You can add notification options and upload the created certificate to a destination, both of these are editable features and can be
changed after the certificate has been created.
26 Chapter 2. User GuideLemur Documentation, Release 0.8.0 Fig. 6: These options are typically for advanced users. Lemur creates ECC based certificate (ECCPRIME256V1 in particular) by default. One can change the key type using the dropdown option listed here. 2.1. User Guide 27
Lemur Documentation, Release 0.8.0

Fig. 7: Enter an owner, short description and public certificate. If there are intermediates and private keys Lemur will
track them just as it does if the certificate were created through Lemur. Lemur generates a certificate name but you
can override that by passing a value to the Custom Certificate Name field.
 You can add notification options and upload the created certificate to a destination, both of these are editable features and can be
                                          changed after the certificate has been created.

28                                                                                                     Chapter 2. User Guide
Lemur Documentation, Release 0.8.0
Fig. 8: From the settings dropdown select “Users”
Fig. 9: In the user table select “Create”
2.1. User Guide 29Lemur Documentation, Release 0.8.0
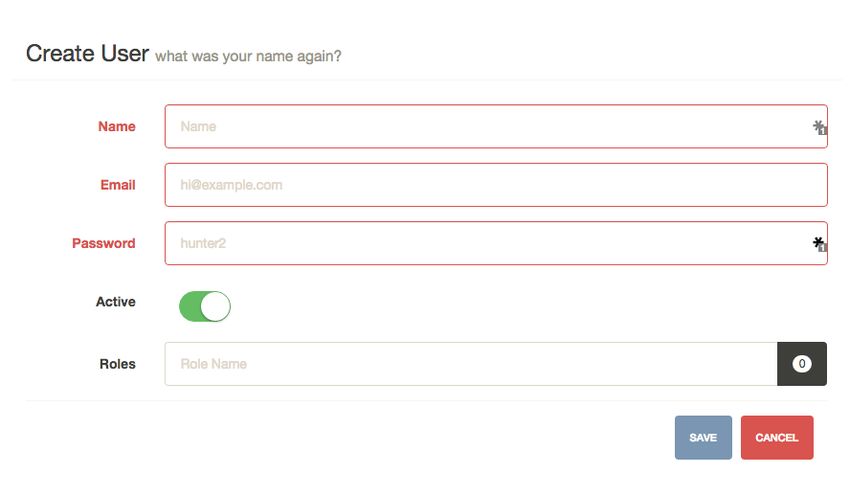
Fig. 10: Enter the username, email and password for the user. You can also assign any roles that the user will need
when they login. While there is no deletion (we want to track creators forever) you can mark a user as ‘Inactive’ that
will not allow them to login to Lemur.
Fig. 11: From the settings dropdown select “Roles”
30 Chapter 2. User GuideLemur Documentation, Release 0.8.0
Fig. 12: In the role table select “Create”
Fig. 13: Enter a role name and short description about the role. You can optionally store a user/password on the role.
This is useful if your authority require specific roles. You can then accurately map those roles onto Lemur users. Also
optional you can assign users to your new role.
2.1. User Guide 31Lemur Documentation, Release 0.8.0 32 Chapter 2. User Guide
CHAPTER

                                                                                                      THREE

                                                                                    ADMINISTRATION

3.1 Configuration

 Warning: There are many secrets that Lemur uses that must be protected. All of these options are set via the
 Lemur configuration file. It is highly advised that you do not store your secrets in this file! Lemur provides
 functions that allow you to encrypt files at rest and decrypt them when it’s time for deployment. See Credential
 Management for more information.

Note: All configuration values are python strings unless otherwise noted.

3.1.1 Basic Configuration

LOG_LEVEL

      LOG_LEVEL = "DEBUG"

LOG_FILE

      LOG_FILE = "/logs/lemur/lemur-test.log"

LOG_UPGRADE_FILE

      LOG_UPGRADE_FILE = "/logs/lemur/db_upgrade.log"

DEBUG
    Sets the flask debug flag to true (if supported by the webserver)

      DEBUG = False

       Warning: This should never be used in a production environment as it exposes Lemur to remote code
       execution through the debug console.

                                                                                                                33
Lemur Documentation, Release 0.8.0
CORS
Allows for cross domain requests, this is most commonly used for development but could be use in production
if you decided to host the webUI on a different domain than the server.
Use this cautiously, if you’re not sure. Set it to False
CORS = False
SQLALCHEMY_DATABASE_URI
If you have ever used sqlalchemy before this is the standard connection string used. Lemur uses a
postgres database and the connection string would look something like:
SQLALCHEMY_DATABASE_URI = 'postgresql://:@:5432/lemur'
SQLALCHEMY_POOL_SIZE
The default connection pool size is 5 for sqlalchemy managed connections. Depending on
the number of Lemur instances, please specify per instance connection pool size. Below is
an example to set connection pool size to 10.
SQLALCHEMY_POOL_SIZE = 10
This is an optional setting but important to review and set for optimal database connection usage and for overall
database performance.
SQLALCHEMY_MAX_OVERFLOW
This setting allows to create connections in addition to specified number of connections in pool size.
By default, sqlalchemy allows 10 connections to create in addition to the pool size. This is also an
optional setting. If SQLALCHEMY_POOL_SIZE and SQLALCHEMY_MAX_OVERFLOW are not
speficied then each Lemur instance may create maximum of 15 connections.
SQLALCHECK_MAX_OVERFLOW = 0
Specifying the SQLALCHEMY_MAX_OVERFLOW to 0 will enforce limit to not create connections above specified
pool size.
LEMUR_ALLOW_WEEKEND_EXPIRATION
Specifies whether to allow certificates created by Lemur to expire on weekends. Default is True.
LEMUR_ALLOWED_DOMAINS
List of regular expressions for domain restrictions; if the list is not empty, normal users can only issue
certificates for domain names matching at least one pattern on this list. Administrators are exempt
from this restriction.
Cerificate common name is matched against these rules if it does not contain a space. SubjectAlt-
Name DNS names are always matched against these rules.
Take care to write patterns in such way to not allow the * wildcard character inadvertently. To match
a . character, it must be escaped (as .).
LEMUR_OWNER_EMAIL_IN_SUBJECT
By default, Lemur will add the certificate owner’s email address to certificate subject (for CAs that
allow it). Set this to False to disable this.
LEMUR_TOKEN_SECRET
The TOKEN_SECRET is the secret used to create JWT tokens that are given out to users. This
should be securely generated and kept private.
34 Chapter 3. AdministrationLemur Documentation, Release 0.8.0
LEMUR_TOKEN_SECRET = 'supersecret'
An example of how you might generate a random string:
>>> import random
>>> secret_key = ''.join(random.choice(string.ascii_uppercase) for x in range(6))
>>> secret_key = secret_key + ''.join(random.choice("~!@#$%^&*()_+") for x in
˓→range(6))
>>> secret_key = secret_key + ''.join(random.choice(string.ascii_lowercase) for x
˓→in range(6))
>>> secret_key = secret_key + ''.join(random.choice(string.digits) for x in
˓→range(6))
LEMUR_ENCRYPTION_KEYS
The LEMUR_ENCRYPTION_KEYS is used to encrypt data at rest within Lemur’s database. With-
out a key Lemur will refuse to start. Multiple keys can be provided to facilitate key rotation. The first
key in the list is used for encryption and all keys are tried for decryption until one works. Each key
must be 32 URL safe base-64 encoded bytes.
Only fields of type Vault will be encrypted. At present, only the following fields are encrypted:
• certificates.private_key
• pending_certificates.private_key
• dns_providers.credentials
• roles.password
For implementation details, see Vault in utils.py.
Running lemur create_config will securely generate a key for your configuration file. If you would
like to generate your own, we recommend the following method:
>>> import os
>>> import base64
>>> base64.urlsafe_b64encode(os.urandom(32))
LEMUR_ENCRYPTION_KEYS = ['1YeftooSbxCiX2zo8m1lXtpvQjy27smZcUUaGmffhMY=',
˓→'LAfQt6yrkLqOK5lwpvQcT4jf2zdeTQJV1uYeh9coT5s=']
DEBUG_DUMP
Dump all imported or generated CSR and certificate details to stdout using OpenSSL. (default: False)
ALLOW_CERT_DELETION
When set to True, certificates can be marked as deleted via the API and deleted certificates will not
be displayed in the UI. When set to False (the default), the certificate delete API will always return
“405 method not allowed” and deleted certificates will always be visible in the UI. (default: False)
3.1. Configuration 35Lemur Documentation, Release 0.8.0
3.1.2 Certificate Default Options
Lemur allows you to fine tune your certificates to your organization. The following defaults are presented in the UI
and are used when Lemur creates the CSR for your certificates.
LEMUR_DEFAULT_COUNTRY
LEMUR_DEFAULT_COUNTRY = "US"
LEMUR_DEFAULT_STATE
LEMUR_DEFAULT_STATE = "California"
LEMUR_DEFAULT_LOCATION
LEMUR_DEFAULT_LOCATION = "Los Gatos"
LEMUR_DEFAULT_ORGANIZATION
LEMUR_DEFAULT_ORGANIZATION = "Netflix"
LEMUR_DEFAULT_ORGANIZATIONAL_UNIT
LEMUR_DEFAULT_ORGANIZATIONAL_UNIT = ""
LEMUR_DEFAULT_ISSUER_PLUGIN
LEMUR_DEFAULT_ISSUER_PLUGIN = "verisign-issuer"
LEMUR_DEFAULT_AUTHORITY
LEMUR_DEFAULT_AUTHORITY = "verisign"
3.1.3 Notification Options
Lemur supports a small variety of notification types through a set of notification plugins. By default, Lemur configures
a standard set of email notifications for all certificates.
Plugin-capable notifications
These notifications can be configured to use all available notification plugins.
Supported types:
• Certificate expiration
Email-only notifications
These notifications can only be sent via email and cannot use other notification plugins.
Supported types:
36 Chapter 3. AdministrationLemur Documentation, Release 0.8.0
• CA certificate expiration
• Pending ACME certificate failure
• Certificate rotation
• Security certificate expiration summary
Default notifications
When a certificate is created, the following email notifications are created for it if they do not exist. If these notifications
already exist, they will be associated with the new certificate.
• DEFAULT__X_DAY, where X is the set of values specified in
LEMUR_DEFAULT_EXPIRATION_NOTIFICATION_INTERVALS and defaults to 30, 15, and 2 if not
specified. The owner’s username will replace .
• DEFAULT_SECURITY_X_DAY, where X is the set of values speci-
fied in LEMUR_SECURITY_TEAM_EMAIL_INTERVALS and defaults to
LEMUR_DEFAULT_EXPIRATION_NOTIFICATION_INTERVALS if not specified (which also defaults to
30, 15, and 2 if not specified).
These notifications can be disabled if desired. They can also be unassociated with a specific certificate.
Disabling notifications
Notifications can be disabled either for an individual certificate (which disables all notifications for that certificate)
or for an individual notification object (which disables that notification for all associated certificates). At present,
disabling a notification object will only disable certificate expiration notifications, and not other types, since other
notification types don’t use notification objects.
Certificate expiration
Certificate expiration notifications are sent when the scheduled task to send certificate expiration notifications runs (see
Periodic Tasks). Specific patterns of certificate names may be excluded using --exclude (when using cron; you may
specify this multiple times for multiple patterns) or via the config option EXCLUDE_CN_FROM_NOTIFICATION
(when using celery; this is a list configuration option, meaning you specify multiple values, such as ['exclude',
'also exclude']). The specified exclude pattern will match if found anywhere in the certificate name.
When the periodic task runs, Lemur checks for certificates meeting the following conditions:
• Certificate has notifications enabled
• Certificate is not expired
• Certificate is not revoked
• Certificate name does not match the exclude parameter
• Certificate has at least one associated notification object
• That notification is active
• That notification’s configured interval and unit match the certificate’s remaining lifespan
All eligible certificates are then grouped by owner and applicable notification. For each notification and certifi-
cate group, Lemur will send the expiration notification using whichever plugin was configured for that notifica-
tion object. In addition, Lemur will send an email to the certificate owner and security team (as specified by the
LEMUR_SECURITY_TEAM_EMAIL configuration parameter).
CA certificate expiration
Certificate authority certificate expiration notifications are sent when the scheduled task to send authority certificate
expiration notifications runs (see Periodic Tasks). Notifications are sent via the intervals configured in the configuration
parameter LEMUR_AUTHORITY_CERT_EXPIRATION_EMAIL_INTERVALS, with a default of 365 and 180 days.
3.1. Configuration 37Lemur Documentation, Release 0.8.0
When the periodic task runs, Lemur checks for certificates meeting the following conditions:
• Certificate has notifications enabled
• Certificate is not expired
• Certificate is not revoked
• Certificate is associated with a CA
• Certificate’s remaining lifespan matches one of the configured intervals
All eligible certificates are then grouped by owner and expiration interval. For each interval and certificate group,
Lemur will send the CA certificate expiration notification via email to the certificate owner and security team (as
specified by the LEMUR_SECURITY_TEAM_EMAIL configuration parameter).
Pending ACME certificate failure
Whenever a pending ACME certificate fails to be issued, Lemur will send a notification via email to the certificate
owner and security team (as specified by the LEMUR_SECURITY_TEAM_EMAIL configuration parameter). This
email is not sent if the pending certificate had notifications disabled.
Certificate rotation
Whenever a cert is rotated, Lemur will send a notification via email to the certificate owner. This notification is
disabled by default; to enable it, you must set the option --notify (when using cron) or the configuration parameter
ENABLE_ROTATION_NOTIFICATION (when using celery).
Security certificate expiration summary
If you enable the Celery or cron task to send this notification type, Lemur will send a summary of
all certificates with upcoming expiration date that occurs within the number of days specified by the
LEMUR_EXPIRATION_SUMMARY_EMAIL_THRESHOLD_DAYS configuration parameter (with a fallback of 14
days). Note that certificates will be included in this summary even if they do not have any associated notifications.
This notification type also supports the same --exclude and EXCLUDE_CN_FROM_NOTIFICATION options as
expiration emails.
NOTE: At present, this summary email essentially duplicates the certificate expiration notifications, since all certificate
expiration notifications are also sent to the security team. This issue will be fixed in the future.
Email notifications
Templates for emails are located under lemur/plugins/lemur_email/templates and can be modified for your needs.
The following configuration options are supported:
LEMUR_EMAIL_SENDER
Specifies which service will be delivering notification emails. Valid values are SMTP or SES
Note: If using SMTP as your provider you will need to define additional configuration options as specified by
Flask-Mail. See: Flask-Mail
If you are using SES the email specified by the LEMUR_MAIL configuration will need to be verified by AWS
before you can send any mail. See: Verifying Email Address in Amazon SES
LEMUR_SES_SOURCE_ARN
Specifies an ARN to use as the SourceArn when sending emails via SES.
Note: This parameter is only required if you’re using a sending authorization with SES. See: Using sending
authorization with Amazon SES
38 Chapter 3. AdministrationLemur Documentation, Release 0.8.0
LEMUR_SES_REGION
Specifies a region for sending emails via SES.
Note: This parameter defaults to us-east-1 and is only required if you wish to use a different region.
LEMUR_EMAIL
Lemur sender’s email
LEMUR_EMAIL = 'lemur@example.com'
LEMUR_SECURITY_TEAM_EMAIL
This is an email or list of emails that should be notified when a certificate is expiring. It is also the
contact email address for any discovered certificate.
LEMUR_SECURITY_TEAM_EMAIL = ['security@example.com']
LEMUR_DEFAULT_EXPIRATION_NOTIFICATION_INTERVALS
Lemur notification intervals. If unspecified, the value [30, 15, 2] is used.
LEMUR_DEFAULT_EXPIRATION_NOTIFICATION_INTERVALS = [30, 15, 2]
LEMUR_SECURITY_TEAM_EMAIL_INTERVALS
Alternate notification interval set for security team notifications. Use this if you would like the default
security team notification interval for new certificates to differ from the global default as specified
in LEMUR_DEFAULT_EXPIRATION_NOTIFICATION_INTERVALS. If unspecified, the value of
LEMUR_DEFAULT_EXPIRATION_NOTIFICATION_INTERVALS is used. Security team default
notifications for new certificates can effectively be disabled by setting this value to an empty array.
LEMUR_SECURITY_TEAM_EMAIL_INTERVALS = [15, 2]
LEMUR_AUTHORITY_CERT_EXPIRATION_EMAIL_INTERVALS
Notification interval set for CA certificate expiration notifications. If unspecified, the value [365,
180] is used (roughly one year and 6 months).
LEMUR_AUTHORITY_CERT_EXPIRATION_EMAIL_INTERVALS = [365, 180]
3.1.4 Celery Options
To make use of automated tasks within lemur (e.g. syncing source/destinations, or reissuing ACME certificates), you
need to configure celery. See Periodic Tasks for more in depth documentation.
CELERY_RESULT_BACKEND
The url to your redis backend (needs to be in the format redis://:/)
CELERY_BROKER_URL
The url to your redis broker (needs to be in the format redis://:/)
CELERY_IMPORTS
The module that celery needs to import, in our case thats lemur.common.celery
CELERY_TIMEZONE
3.1. Configuration 39You can also read