MY BERNINA - BERNINA Q-MATIC WORKBOOK For use with the BERNINA Q 20 and Q 24 on the Frame
←
→
Page content transcription
If your browser does not render page correctly, please read the page content below
MY
  BERNINA

                                                                                                                                       MASTERY
                                                                                                                                         BOOK
                                                                                                                                        SERIES

BERNINA Q-MATIC WORKBOOK
For u se wit h the B E R N I N A Q 20 and Q 2 4
on t he Frame

 ©2020 BERNINA of America. Permission granted to copy and distribute in original form only. Content may not be altered or used in any other form or under any other branding.
 05152020
My BERNINA                                                                     BERNINA Q-MATIC WORKBOOK

TABLE OF CONTENTS
INTRODUCTION..............................................3                 REVERSE SEW............................................14
Q-MATIC STARTUP PROCEDURE..................4                                TRIM...........................................................14
Q-MATIC SHUTDOWN PROCEDURE............4                                     SEW OPTIONS...........................................15
BEFORE BEGINNING A PROJECT...................5                           MASK TOOL EXERCISE.................................16
MAINTAINING THE Q-MATIC SYSTEM.........5                                 SETTING THE SAFE AREA............................18
Q-MATIC SCREEN INTRODUCTION...............6                              REALIGNING THE SAFE AREA.....................19
Q-MATIC ICON QUICK REFERENCE GUIDE.7                                     EASYGLIDE....................................................20
THE DESIGN CENTER......................................8                 MICROMOVE.................................................20
THE TOOL CENTER.........................................9                BLOCK PLACEMENT TOOLS........................21
   SELECT..........................................................9        GRAB & DROP...........................................21
   QUILT SIZE...................................................9           BOUNDARY...............................................21
   COPY/DELETE..............................................9               MARKERS..................................................21
   ALIGN...........................................................9     GRAB & DROP EXERCISE.............................22
   RESIZE........................................................10      BOUNDARY EXERCISE.................................23
   MASK.........................................................11       MARKERS EXERCISE.....................................24
   ROTATE......................................................11        THREAD BREAK RECOVERY........................25
   FLIP.............................................................12   EDGE TO EDGE QUILT LAYOUT..................26
   MIRROR.....................................................12         CUSTOM QUILT LAYOUT.............................29
   UNDO/REDO..............................................12             STRAIGHT LINE QUILT LAYOUT..................34
   ZOOM: CENTER ZOOM............................12                       WORKING WITH THE LIBRARY...................36
   ZOOM: ACTUAL SIZE (1:1) FULL VIEW..12                                 WORKING WITH TAGS.................................41
   ZOOM: ZOOM IN/ZOOM OUT...............12                               ART & STITCH EDIT VIA THE SHORTCUT...44
   E2E+/E2E-...................................................13        CONVERTING DESIGNS WITH
   MULTIPLY...................................................13         ART & STITCH................................................48
   CONNECT/UNCONNECT...........................13                        USING ART & STITCH DESIGNS...................50

                                                                                                                                            2
My BERNINA                                                        BERNINA Q-MATIC WORKBOOK

INTRODUCTION
Welcome! Learning to use your new BERNINA Longarm
Quilting Automation System to its fullest capabilities will let
you enjoy your machine for many years. Understanding your
Q-matic’s features and learning its navigation will maximize
your creativity. While you will be learning some basics,
you’ll also be learning some creative techniques, and we
hope both will be inspirational.

Along with your machine's manual, this workbook is
designed to take you on a step by step journey into the
Q-matic program's capabilities. Once completed, the
workbook can serve as a technique reference guide.

You will find additional resource materials in the back of
this workbook

While this may be the beginning of your educational
journey, there are other opportunities to grow creatively.
BERNINA of America strives to provide quality sewing,
quilting and embroidery machines while offering the best
educational experience possible. Along with providing
My BERNINA Classes, your local BERNINA dealer stocks
BERNINA reference books, such as the Big Book of Feet.                Click here for video:
                                                                      What has been added to the frame
                                                                      for Q-matic
Instructional video tutorials are available on bernina.com
and the BERNINA YouTube channel. You will also find
inspiring sewing projects on BERNINA's blog WeAllSew.com.
Visit the BERNINA website at bernina.com for information
on your machine and the Q-matic software.

                     www.bernina.com
                     www.weallsew.com

                                                                                                         3
My BERNINA                                                                      BERNINA Q-MATIC WORKBOOK

Q-MATIC STARTUP PROCEDURE
TURNING ON THE SYSTEM:
•   The machine should be plugged into the Control Cabinet and the machine power switch should be turned on.
•   Use the switch on the back of the white Control Cabinet to turn the system on.
•   Press the GREEN button on top of the Control Cabinet until you hear a “thump”.
•   Ensure both Clutch Belt Clamps are engaged on the belts – turn the lever to engage and ensure the peg goes in between
    the teeth on the belt.
•   Once the machine is on, it is safe to power up the computer and open Q-matic.
•   Open Q-matic with a double-tap on the desktop icon. (If using a mouse, right click, and then select Open from the drop-
    down menu.)
•   You will be prompted to set the Safe Area. Set the Safe Area now if desired, or close the window and set the Safe Area
    later. However, the Safe Area must be set in order to stitch.

Q-MATIC SHUTDOWN PROCEDURE
TURNING OFF THE SYSTEM
•   Close the program using the red X.
•   You will be prompted to save the file if you have not already done so. Save your project if desired.
•   Turn off the computer with the normal Windows shut-down procedure.
•   Use the switch to turn off the Control Cabinet.

                                                 Click here for video:
                                                 Turning on and off the Q-matic System

                                                                                                                         4
My BERNINA                                                              BERNINA Q-MATIC WORKBOOK

BEFORE BEGINNING A PROJECT
•   Clean and oil your machine. Remove the stitch plate, brush out lint and oil the hook.
•   Insert a new needle. The T6 screw driver will loosen/tighten the needle screw.
•   Check the bobbin tension using the bobbin tension gauge.
•   Test the stitching by sewing in an unused area of the quilt.

MAINTAINING THE Q-MATIC SYSTEM
Check key areas of the system to ensure movement is not obstructed, and tighten areas that may become loose over time.
•   Remove the covers from the wheels and clean them from time to time. They can collect a sticky residue which can be easily
    removed with a soft cloth.
•   Remove dust, threads and project debris from the belts of the system to keep it running smoothly.
•   Clean the table surface with a dry, soft cloth.
•   Check the screws in the frame and ratchets. Over time, they could become loose. Use the included allen wrenches to snug
    screws in the frame. Check screws in the ratchet; tighten if necessary so the rails don’t move side to side.
•   Clean the computer screen and Sewhead Screen with a damp microfiber cloth when both are off.
•   Refer to the built-in maintenance tutorial on the machine. Select Home>Tutorials>Maintenance.

                                             Click here for video:
                                             Maintaining the Q-matic System

                                             Click here for video:
                                             Cleaning and Oiling Your Longarm

                                                                                                                           5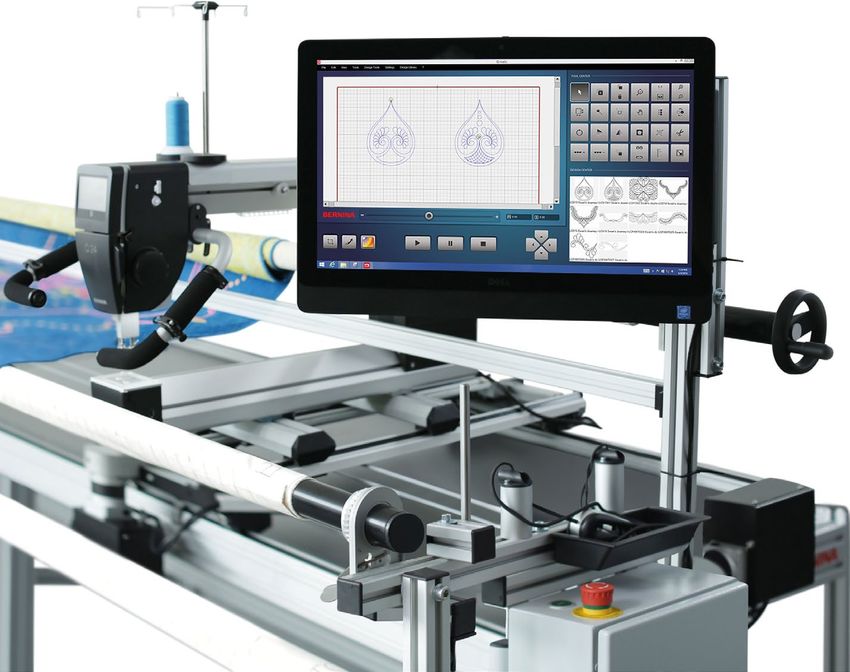
My BERNINA                                                                BERNINA Q-MATIC WORKBOOK

Q-MATIC SCREEN INTRODUCTION

                              QUILT AREA                                                       TOOL CENTER

                                                                                             DESIGN CENTER

                                CONTROL TOOLS

Each dark gray box in the Quilt Area is equal to 4 inches.

Accessing icons
Icons can be accessed in one of two ways:
•   By using the touch screen on the computer
•   By using a mouse (optional accessory) to access icons on the screen
In this workbook, you will be given instructions for accessing and making selections using the touch screen. If you are using a
mouse, refer to the chart below for equivalents.

                                     Touch Screen                         Mouse Equivalent
                         Touch (or tap)                              Click
                         Tap (or touch) and hold                     Right click
                         Double-tap                                  Double-click

                                                           Click here for video:
                                                           Screen Introduction
                                                                                                                             6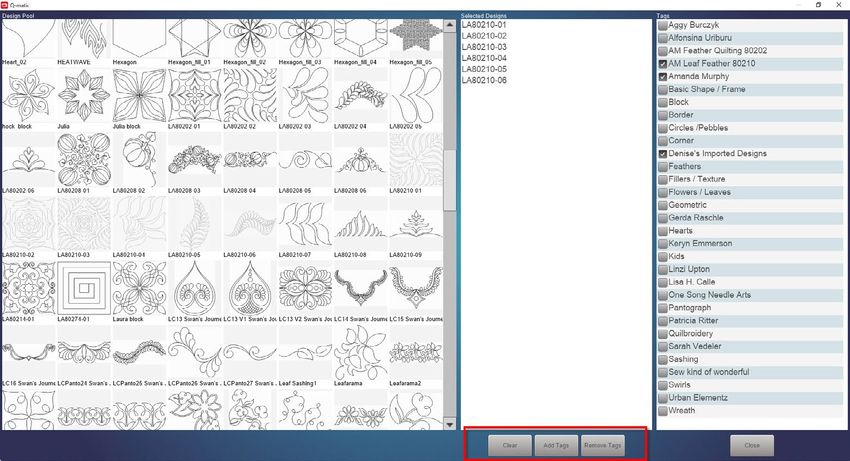
My BERNINA                                            BERNINA Q-MATIC WORKBOOK

Q-MATIC ICON QUICK REFERENCE GUIDE

     Select       Add Design         Copy      Center Zoom     Zoom In    Zoom In

                                    Delete                    Full View   Zoom Out

   Quilt Size      Markers        Realign Safe Grab & Drop Sew Options Reverse Sew
                                     Area

     Rotate           Flip          Mirror           Mask     Boundary      Trim

      Undo           E2E+          Multiply         Connect     Align      Resize

      Redo           E2E-                       Unconnect

                                    Speed Control

Set Safe                                                                   Nudge
 Area         MicroMove               Start         Pause     Stop

      EasyGlide    Art & Stitch

                                                                                     7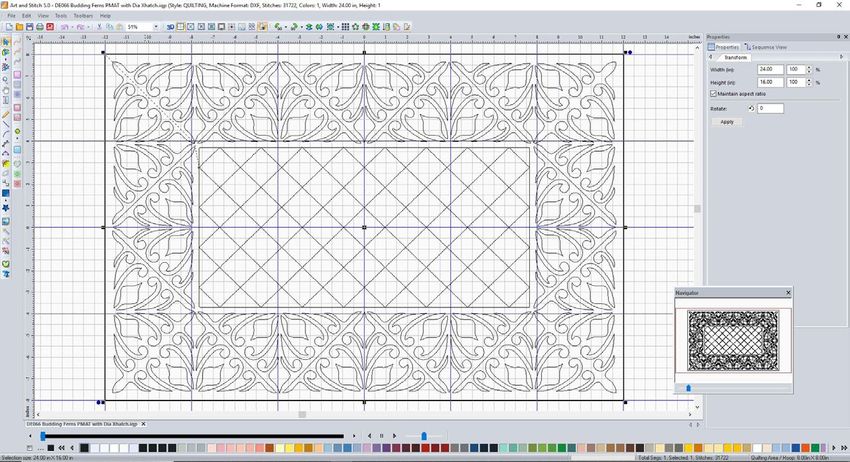
My BERNINA                                                           BERNINA Q-MATIC WORKBOOK

THE DESIGN CENTER
More than 230 quilt designs are available in the Design Pool for you to choose from. For a better overview, copy designs
chosen for a particular project into the Design Center where they are easily available during the creative process.

 1.   Select the Add Design icon in the Tool Center.
      • Three columns appear: Tags, Design Pool,
        Design Center.
 2.   Select Clear All at the bottom of the Design
      Center column to remove existing designs
      from the Design Center. NOTE: This does not
      remove the designs from the Design Pool.

 3.   Designs that can be selected are in the Design
      Pool (middle column). This is the Library.
      Designs can easily be sorted by using Find
      Design, or by creating a Search by title, type,
      designers, tags, etc.

 4.   To place a design in the Design Center to use
      on a project, scroll through the Design Pool
      and double-tap to select the chosen design.
      Designs are listed alphabetically.

 5.   To remove a design selected in error, double-
      tap on the design to return it to the Design
      Pool.

 6.   When all designs have been selected for a
      project, select Close.

 7.   The selected designs now appear in the
      Design Center and can be used in Quilt
      Layout.

Add these six designs to the Design Center by scrolling and double-tapping each one:

 1.   Heart_01
 2.   Lilli
 3.   PebblesShells_Panto
 4.   Petal
 5.   SwirlsPaisley_Corner
 6.   SwirlsPaisley_Square 1

Select Close to exit and return to the Q-matic Screen.

                                                           Click here for video:
                                                           Design Center
                                                                                                                      8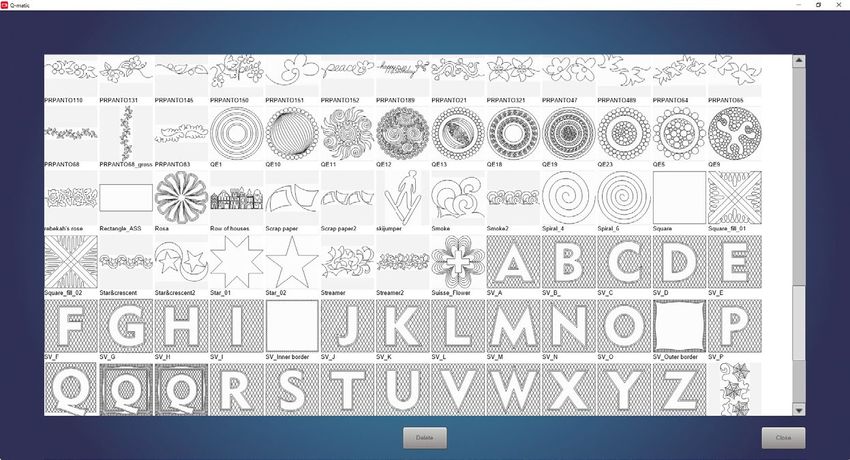
My BERNINA BERNINA Q-MATIC WORKBOOK
THE TOOL CENTER
The Tool Center contains the tools necessary for quilt layout and working with quilt designs, and finally placing the designs for
stitching onto the loaded quilt.
Click here for video:
Select, Copy/Delete, Align, Resize, Nudge and Mask Tools
SELECT
Select activates a quilt pattern in quilt layout.
QUILT SIZE
Select Quilt Size.
• A small secondary window opens to enter quilt width and height.
• Enter the quilt width, then quilt height using the keypad.
• Select Confirm.
COPY/DELETE
• Duplicate a selected design or connected designs by touching the upper portion of the icon.
• Delete a selected design or connected designs by touching the lower portion of the icon.
ALIGN
Align designs using the Screen Control or the Sewhead.
• Select Control: Screen.
Select the alignment orientation (top, bottom, centered horizontally, left, right, centered vertically).
Select Place Line and touch the screen to place the aligning line.
To change the placement of the line, touch the screen again.
Choose Select Design to select the designs, rows or groups to align.
Select Clear to undo.
• Select Control: Sewhead.
Select the alignment orientation.
Select Place Line and move the Sewhead to place the aligning line by selecting Set on the Sewhead or any toggle on
the handles.
To change the placement of the line, move Sewhead and choose Set again or any toggle on the handles.
Choose Select Design to select the designs, rows or groups to align.
Select Clear to undo.
• Select Confirm or Cancel to close the window.
9
My BERNINA BERNINA Q-MATIC WORKBOOK
THE TOOL CENTER, CONT.
RESIZE
• Select Control: Screen.
Fingertip press and hold the desired drag point. Drag point will turn green.
Choose to Maintain the Ratio of the design.
Drag to the desired size.
• Select Control: Sewhead.
Touch and hold the desired drag point. Drag point will turn green.
Choose to Maintain the Ratio of the design.
Move the Sewhead to the starting point (diagonally opposite of the green drag point).
Select Set on the Sewhead.
Move the Sewhead to the end point.
Select Set on the Sewhead.
Select Clear to undo.
• Select Control: Keypad.
Select the Enter Width window to enter the width of the design using the pop-up number keypad.
Select Enter Height window to enter the height of the design using the pop-up keypad.
Only one measurement is necessary when Maintain Ratio is selected.
Select Apply to see a preview and set the desired change.
Select Clear to undo.
• Select Confirm or Cancel to close the window.
Tip: The Maintain Ratio button is selected by default. Deselect to resize the designs without maintaining the ratio. This is
applicable with any of the resizing methods.
10My BERNINA BERNINA Q-MATIC WORKBOOK
THE TOOL CENTER, CONT.
MASK
Select masking method: Selected Design or Create Region.
• Select Design (only on screen).
A background design and a masking design have to be selected from the Design Center. Place the
masking design on top of the background design. Before opening the mask feature, the background
design has to be selected.
Select the masking design (it will turn black).
Choose to remove the region inside or outside.
Choose to sew the mask outline if you want to create a stitching line.
Select Preview to check the settings; select Clear to undo.
• Create Region (on screen).
A background design has to be selected from the Design Center; the masking region will be created on screen.
Select Screen.
Create the desired masking boundary on top of the background design by touching the screen to create the path. The
last point needs to be on top of the first point to auto close the shape.
Choose to remove the region inside or outside.
Choose to sew the mask outline if you want to create a stitching line.
Select Preview to check the settings; select Clear to undo.
• Create Region (with Sewhead).
A background design has to be selected from the design center; the masking region will be created with the Sewhead.
Select Sewhead.
Move the Sewhead and create the desired masking boundary. Confirm each corner point by selecting Set on Sewhead
or activate any toggle switch. The last point needs to be on top of the first point to auto close the shape.
Choose to remove the region inside or outside.
If you want to create a stitching line, choose to sew the mask outline.
Select Preview to check the settings; select Clear to undo.
• Select Confirm or Cancel to close window.
ROTATE
Selected design can be rotated around one of nine points of rotation or around the design's Start Point. The
default is center.
• Tap and hold to select a rotation point other than default.
• Select Method to rotate around first stitch.
• Rotate by entering desired degree or by preset degrees.
Click here for video:
• Select Confirm or Cancel to close window. Rotate, Flip, Mirror, Undo/Redo Tools
11My BERNINA BERNINA Q-MATIC WORKBOOK
THE TOOL CENTER, CONT.
FLIP
• Flip selected design top to bottom.
MIRROR
• Mirror selected design left to right.
UNDO/REDO
• To undo the last actions step by step, touch Undo (upper portion of icon). The last 9 steps can be undone.
• To restore the last actions step by step, touch Redo (lower portion of icon). The last 9 steps can be redone.
Click here for video:
ZOOM: CENTER ZOOM Zoom Tools
• Touch a point on the screen and it will zoom to that point and move that point to the center of the screen.
ZOOM: ACTUAL SIZE (1:1) FULL VIEW
• Actual size (upper portion of icon) shows the design in real size.
• Full view (lower portion of icon) shows a full view of the whole quilt layout.
ZOOM: ZOOM IN/ZOOM OUT
• Zoom In (upper portion of icon) enlarges the view of the design.
• Zoom Out (lower portion of icon) reduces the view of the design.
12My BERNINA BERNINA Q-MATIC WORKBOOK
THE TOOL CENTER, CONT.
E2E+/E2E- Click here for video:
E2E+E2E-, Multiply, Connect/Unconnect, Reverse Sew, Trim Tools
• Select the E2E+ (upper portion of icon) to add a copy of the selected design.
• Select the E2E- (lower portion of icon) to take away a copy of the selected design.
• The selected design should be a Panto design, for example, Pebbles_Shell_Panto.
• Each time the E2E+ is selected, it will attach the first stitch of the copy to the last stitch of the previous
design.
MULTIPLY
• Multiply a design by entering the number of desired repeats across and the number of rows down.
• To enter the number of repeats and rows, select the + or – to change the default number. You may also
select the number window and use the number pad.
• If desired, choose how and which row or column you would like to flip.
• The horizontal or vertical space between the designs or design rows can be altered by selecting the corresponding arrow,
or select the number window and use the number keypad to enter a new value. The default value is 0.25. To change the
default offset value, select the number window and use the number keypad to enter a new value.
• Additionally, the rows can be offset by selecting the corresponding arrow, or select on the number window and use the
number keypad to enter a new value. The default value is 0.25. To change the default offset value, select the number
window and use the number keypad to enter a new value.
• Select Confirm or Cancel to close the window.
CONNECT/UNCONNECT
CONNECT (upper portion of icon)
• Group:
Select Group.
Select the designs you would like to group. Grouped designs can be modified together. They will
remain in their positions but will be stitched out as a group.
• Attach:
Select Attach.
Select the designs you would like to attach. The start point of next design will snap to the end point of the previous
design. Both designs become one design.
• Link:
Select Link.
Select the designs to link. The design will remain in its position, but the end point of the selected design will be linked
with a direct stitching line to the start point of the next design selected.
• Select Confirm or Cancel to close the window.
UNCONNECT (lower portion of icon)
• You can unconnect any Grouped, Attached or Linked designs by selecting the Unconnect icon.
13My BERNINA BERNINA Q-MATIC WORKBOOK
THE TOOL CENTER, CONT.
REVERSE SEW
• Changes the position of start stitch and the end stitch of the selected design or connected designs.
TRIM
Choose to trim a selected design or the entire quilt to remove quilting that is not needed, such as when the
quilting extends beyond the edges of the actual quilt.
• Select Control: Screen
Select the trim line orientation (horizontal, vertical or angle).
Touch the screen to place the trim line.
To change the placement of the trim line, touch again.
For an angled line, first place the pivot point by touching the screen; then place another point to set the angle. Touch
again to change the angle.
The area of the design that is black will be trimmed away.
Options:
• Invert: Select to reverse the area that is to be trimmed away.
• Jump Stitch: Choose to have a jump stitch between non-connected design parts. (Default: the ending and beginning
of non-connected design parts are linked with a straight stitching line.)
Select Preview to check the settings. Select Clear to undo.
• Select Control: Sewhead
Select the trim line orientation (horizontal, vertical or angle).
Move the Sewhead to the desired trim line position.
Select Set on the Sewhead or any toggle switch on the handles.
To change the placement of the line, move the Sewhead to the new position and select Set on the Sewhead or any
toggle switch on the handles.
For an angled line, move the Sewhead first to the pivot point, select Set on the Sewhead or any toggle switch on the
handles. Move the Sewhead to place the angle, select Set on the Sewhead or any toggle on the handles.
To change the angle of the trim line, move the Sewhead to the new position and select Set on Sewhead again or any
toggle on the handles.
The area of the design that is black will be trimmed away.
Options:
• Invert: Select to reverse the area that is to be trimmed away.
• Jump Stitch: Choose to have a jump stitch between non-connected design parts. (Default: the ending and beginning
of non-connected design parts are linked with a straight stitching line.)
Select Preview to check the settings. Select Clear to undo.
• Select Confirm or Cancel to close the window.
14My BERNINA BERNINA Q-MATIC WORKBOOK
THE TOOL CENTER, CONT.
SEW OPTIONS
• Set Sewing Sequence
Choose Select.
Select the designs in the order you would like them to be quilted.
• Queue & Dequeue Designs
Queue: Select the designs in the Safe Area you would like to quilt.
Queue All: Select to queue all designs on the screen.
Dequeue: Select the designs in the Safe Area you would not like to be quilted.
Dequeue All: Select to dequeue all designs on screen .
• Securing Stitches
Choose to Tie On and /or Tie Off.
Select the distance (length) of the securing stitches (1/16, 1/8, 1/4, 1/2).
Select the density of the stitches (SPI 16-24) by selecting the + or -, or by entering the SPI in the number window using
the key pad.
• Note: The distance 1/16 will give the opportunity to secure the stitches at the beginning of the sewing process just
enough so that the tail will not have to be held when starting the stitch out. However, the stitches will come undone
when clipped. Leave a sufficient thread tail to bury in the quilt sandwich for truly invisible starts and ends of a
quilting design.
• Select Confirm or Cancel to close window.
TIP: What do the colors of the design indicate?
• Red: Selected; tools may be used
• Blue: Queued to stitch
• Green: Stitching process
15My BERNINA BERNINA Q-MATIC WORKBOOK
MASK TOOL EXERCISE
The Mask tool in the Tool Center can remove part of the stitching in a design. It can remove stitching from
the inside or the outside. When using Create Region with the Sewhead you can Mask away stitching to avoid
stitching on top of an appliqué or embroidery design.
To Create a Mask Quilt Design using 2 blocks:
1. Add SwirlsPaisley_Square1 to the Quilt Area.
2. Add the design Heart_01 to the Quilt Area.
3. Place the heart in the center of the block design, SwirlsPaisley_Square_1.
4. Select the block design for the background. With the design selected,
select Mask.
5. Set:
• Control: Screen
• Method: Selected Design
• Region to Remove: Outside
• Sew Mask Outline
6. Select the heart design and it turns black.
7. Select Preview before selecting Confirm or select Clear to undo.
16My BERNINA BERNINA Q-MATIC WORKBOOK
MASK TOOL EXERCISE, CONT.
To Mask around an area, for example, to remove quilting from a block that would stitch over embroidery:
1. Add SwirlsPaisley_Square1 to the Quilt Area.
2. Select the block design for the background. With the design selected,
select Mask.
3. Set:
Control: Sewhead
Method: Create Region
Region to Remove: Inside
Do not select Sew Mask Outline
4. Move the Sewhead and create the desired masking area. Confirm each
point by selecting Set on the Sewhead screen or activate and toggle
switch. The last point should be on top of the first point to auto close
the shape.
5. Select Preview before selecting Confirm to retain, or select Clear to
undo.
6. When stitching, the Sewhead will stop where the line of stitching was masked and will allow the opportunity to pull the
bobbin thread for a neater backing.
17My BERNINA BERNINA Q-MATIC WORKBOOK
SETTING THE SAFE AREA
The Safe Area defines the maximum quilt area that can be quilted in one pass. The Safe Area can be set at
anytime but MUST be set in order to stitch. Some tools only work after the Safe Area has been set. When a
design is placed on the Quilt Area without the Safe Area defined, the design will go to the center of the grid.
Setting the Safe Area:
1. Both Clutch Belt Clamps must be engaged in order to set the Safe Area.
2. Select the Set Safe Area icon on the lower left corner of the computer screen.
3. Both the computer screen and the Sewhead screen will prompt you to move the Sewhead to the upper left corner of the
frame where your quilt top is loaded.
4. When you have the Sewhead as far to the left and as close to the back as you need, touch Set on the Sewhead.
5. Move the Sewhead at a steady pace across the frame to the right and as far to the front as possible.
6. On the computer screen, the Safe Area will be created as a red box while the Sewhead is moved.
7. Touch Set on the Sewhead.
8. There will be a red box on the computer screen that shows the Safe Area.
Click here for video:
Setting the Safe Area
18My BERNINA BERNINA Q-MATIC WORKBOOK
REALIGNING THE SAFE AREA
After advancing the quilt, the Safe Area needs to be re-aligned with a previously stitched portion of the
design to ensure consistent spacing throughout the quilt.
Realigning the Safe Area:
1. Advance the quilt; baste the sides if desired.
2. Select the Realign the Safe Area tool. There are two ways to realign the Safe Area:
• Select Reposition on Screen.
• Drag the Safe Area outline to a new position.
• Select Snap to Point.
• After advancing the quilt, touch the main screen on a reference point
of the design to place a reposition dot. Move the Sewhead to the
corresponding location on the design on actual quilt top. Use a design
that has already been stitched.
3. Select Confirm to set the new Safe Area, or select Cancel to close the window without setting the new Sare Area.
19My BERNINA BERNINA Q-MATIC WORKBOOK
EASYGLIDE
EasyGlide makes it easy to move the Sewhead with the belts engaged or latched. Access Settings to adjust
the assistance level.
Click here for video:
• Select Settings and EasyGlide EasyGlide
• Set the desired assist level. The levels are from 1 to 20, with 20 giving the most assistance while moving the Sewhead on
the carriage.
NOTE: EasyGlide is mostly automatic. If EasyGlide is not active, then it is best not to move the Sewhead.
MICROMOVE
MicroMove moves the machine in very tiny steps when the belts are engaged. MicroMove is active when the
icon is dark grey. MicroMove will override EasyGlide, so you can only move the machine with MicroMove
when activated. Deactivate the MicroMove function and EasyGlide is active.
• To use the active function, use either the toggles or the Sewhead screen.
• From the Sewhead screen, select the movement step size for the Sewhead (small, medium or large steps) to position the
machine accurately.
• This MicroMove display appears when activated from the Q-matic screen. Use toggles, or simply touch the screen.
Click here for video:
MicroMove
• When using a function that requires a point to be set using the Sewhead, such as Boundary, Markers, Trim, Mask, Align,
Resize or Grab & Drop, the Set screen will appear with MicroMove on the Sewhead for exact placement. Choose the move
steps desired and use the toggles to move the Sewhead to the position needed.
• The needle point laser will show the exact position of the needle for exact block placement. Removing the foot will offer
more visibility.
20My BERNINA BERNINA Q-MATIC WORKBOOK
BLOCK PLACEMENT TOOLS
There several options of Block Placement Tools available for placing the selected designs onto the loaded quilt. The area
where the design is to be placed often suggests which of the Block Placement Tools to select.
GRAB & DROP
• Default when design is added to Quilt Area and there is a Safe Area set.
• Attaches (Grab) design to needle at first stitch of the design.
• While activated, the design moves with machine needle.
• Can be activated for any selected design.
• To deactivate, touch the icon in the Tool Center, touch Set on the Sewhead, or select and move the design on the
computer screen.
BOUNDARY
Select Control: Screen
• Select clockwise or counter-clockwise on four points on the computer screen to create boundary.
• Select Preview; the selected design will morph into the boundary.
• Select Clear to undo.
Select Control: Sewhead
• Move the Sewhead clockwise or counter-clockwise to set four points: confirm each corner point with Set on the Sewhead
screen or use toggle switch on the handles.
• Select Preview; the selected design will morph into the boundary.
• Select Clear to undo.
Optional: Set a margin
• Select the white rectangle and a number keypad will open.
• Enter a border margin.
Optional:
• Choose to Maintain Ratio or Morph to Fit.
Select Confirm or Cancel to close the window.
MARKERS
• Move the Sewhead to the desired marker position.
• Select Set on Sewhead screen or toggles on handle to confirm.
• Move the Sewhead to the next position and set additional markers until all desired makers are placed.
• Optional: To connect markers, select Connect in the second layer screen; then select each marker you would like to
connect.
• Select Center to show the center point of the connected markers.
• Select Clear to delete all markers.
Select Confirm or Cancel to close the window. 21My BERNINA BERNINA Q-MATIC WORKBOOK
GRAB & DROP EXERCISE
Grab & Drop is a quick and easy way to place a design and start stitching. The Safe Area must be set to use
Grab & Drop. Grab & Drop does not change the size or shape of the design.
1. Set the Safe Area.
2. Select the design Lilli from the Design Center and place it on the Quilting Area by double-tapping it in the Design Center.
3. The design is now attached to the needle at its first stitch. The first stitch in any design is indicated by the little circle
with a green line. The green line indicates the direction it is going to start stitching. The design moves as the Sewhead
is moved.
4. This design starts in the center, so you will mark the center on the block on the frame (mark an "x" from corner to
corner to find the center of the block.
5. Move the Sewhead to the marked center of the block, select Set on the Sewhead and the design is ready to stitch.
Click here for video:
Grab & Drop
22My BERNINA BERNINA Q-MATIC WORKBOOK
BOUNDARY EXERCISE
Boundary is another Placement Tool available for placing a design on the quilt top. Four points are placed to
create the area for the design to fit into.
1. Set the Safe Area.
Click here for video:
2. Place the design called PebblesShell_Square on the Quilting Area. Boundary
3. Select the design and open Boundary.
4. Boundary is one of the ways you can place a design on your quilt top. When using Boundary you need four points to set
the design. The design will change to fit into the area created with the four points.
5. If you have Morph to Fit selected, it will change in both size and shape.
6. If you have Maintain Ratio selected, the design will resize in the same height to width ratio.
7. You will set the four boundary points on screen OR you can also set the four points with the Sewhead.
8. After you have the four points set, select Preview to view position.
9. Confirm to stitch.
23My BERNINA BERNINA Q-MATIC WORKBOOK
MARKERS EXERCISE
Placing Markers is another Placement Tool available for placing a design on the quilt top. Markers gives you the
flexibility to place as many markers as needed around a desired shape. The markers can be connected and a
connected line stitched if desired.
Click here for video:
1. Set the Safe Area. Markers
2. Double-tap the Petal design in the Design Center to place on the Quilt Area.
3. Select the design and then select Markers.
4. Move the Sewhead around the shape you want to mark.
• You can put as many markers around the shape as needed.
• The markers can be connected to each other in any order.
• The connected lines can also be stitched.
5. Draw a pentagon shape on the quilt top to place the Petal design.
6. Move the Sewhead to each corner and touch Set on the Sewhead.
7. In the Marker window, select Connect Markers and Center.
8. Touch the first marker on the computer screen; then the second one, third one, fourth one, fifth one and then the first
one again.
9. When confirmed, the lines become the stitching line.
10. When the Markers are no longer needed, they can be cleared from the Marker screen by touching CLR.
24My BERNINA BERNINA Q-MATIC WORKBOOK
THREAD BREAK RECOVERY
1. When the thread breaks or you run out of bobbin, an
error screen will appear.
9. On Resume screen, select “At Closest Point on
Design”. This is a good choice because we don’t
2. Clear screen on machine using the X in the red
rectangle in the upper right corner of the screen.
3. Select OK on computer screen.
know exactly how many stitches the machine took
after the thread broke.
10. Tie On/Off Screen will show on both the Sewhead
and the computer screen.
11. Pull bobbin thread.
4. Pull up the bobbin thread, if possible.
5. Move machine to one end of frame and correct what
is wrong.
• Rethread.
12. Select check mark in green box to confirm.
• Wind and reload bobbin.
• Clear any thread that might be causing the error. 13. The stitching will start.
6. Move machine back to the point you want to If the thread breaks at the end of the completed block,
continue sewing. requeue the design and place the Sewhead at the position
of the closest point.
7. Select Start.
8. Press check mark in green rectangle to confirm you Click here for video:
Thread Break Recovery
want to continue sewing.
25My BERNINA BERNINA Q-MATIC WORKBOOK
EDGE TO EDGE QUILT LAYOUT
Create Layout
Use Add Design to place designs in the Design Cen-
ter for the project, such as SwirlsPaisley_Panto.
Set the Quilt Size. In this example 48.5” x 48.5” is
used.
Double-tap the design in Design Center to place on
Quilt Area.
Resize the design, if desired. In this example, the
design was resized to 7.19" x 9.50".
Move the design to upper left corner of grid.
Edge to Edge Quilting is a continuous line design that
is stitched from one edge of the quilt to the other and
repeated from top to bottom on the quilt. Edge to Edge Use E2E+ to add designs across the top of the quilt.
Quilting is a quick and easy way to machine quilt your tops. Enough designs should be added to extend beyond
the sides at both ends.
Load the Frame
1. Attach quilt top to Leader on Top Rail and attach the
quilt backing to Leader on Backing Rail and then to
the Take-up Rail.
2. Lay batting on top of the quilt back. The batting will
be placed between the Top and Backing Rails. The
bottom of the batting will be hanging free if there is
not a Batting Bar.
Select and move to center over top of grid.
3. Baste a straight line across the top of backing and
Open Multiply; select the + under Down to have 2
batting so the quilt top can be placed straight. Use rows.
this basting line as a guide. Baste only the quilt top
and sides that are in the Safe Area. Adjust vertical spacing using the arrows that point
together.
4. Place clamps on the sides of quilt. Clean, oil and
Add rows to fill the Quilting Area grid. In this exam-
place a new needle in the Sewhead before stitching ple, seven were needed.
is started.
Click here for video:
Edge to Edge Quilting
26My BERNINA BERNINA Q-MATIC WORKBOOK
EDGE TO EDGE QUILTING, CONTINUED
Adjust the layout so that it fits over the grid.
Quilt First Row/Rows
Open Sew Options; then select Dequeue All.
Select Unconnect one time to make the rows sepa-
rate.
Select row 2 and select Reverse Sew. Select Queue. Select the the first 2 rows and
they turn blue. Only Queued designs (blue) can
be stitched and must be within the Safe Area.
Do the same for rows 4 and 6. This can be done for
Confirm.
every other row.
Select the Start button and then select At Start Point
when prompted. The machine will move to the first
Select row 1 and open Connect. Select Link and link
stitch in the row. Using the icon on the Sewhead,
row one to row two by selecting row 2.
hold the thread tail and select the icon to pull up
Rows can only be linked if they are in the Safe Area. the bobbin thread. Holding both the top thread and
the bobbin thread, Confirm you are ready to start by
Trim the excess stitching. With the first row selected selecting the check mark in the green box. Select the
(red), open Trim and select Sewhead. Move the Sew- Pause icon on the Sewhead screen to stop the stitch-
head to the top left corner of the quilt and select Set. ing and cut thread tail. Confirm with check mark in
The black area indicated on-screen will be trimmed green box to continue stitching.
when confirmed. Repeat for the left side. For the
right side, select invert before confirming. When stitching is complete, select OK on the com-
puter screen.
Advancing the Quilt
Advance the quilt on the Takeup Rail. Firm up the
quilt layers, baste down the sides of the quilt and
replace the clamps on the sides.
Locate a point in the already-stitched design that you
would like to realign to. Place the machine on that
point.
Zoom in using Center Zoom on the point on comput-
er screen that is the same as the point on the actual
quilted top. Zoom in close.
27My BERNINA BERNINA Q-MATIC WORKBOOK
EDGE TO EDGE QUILTING, CONTINUED
Open Realign Safe Area and select Snap to Point.
Press Start as the trimmed row/rows have already
been queued to stitch and select At Start point. Pull
Select the same reference point on the computer bobbin thread after Sewhead moves and confirm to
screen that the Sewhead is aligned to. This will place start stitching, pausing to cut thread tails
a red reposition dot on the screen. Confirm with the Repeat advancing, realigning, trimming and stitching
check mark in the green box and the Safe Area is until you get to the last row. If the last row is longer
now aligned to start your next rows. The crosshairs than your quilt top you can now trim it at the bot-
of the needle are now seen on the computer screen tom using the Sewhead.
where the dot was.
Open Sew Options and Dequeue all and Queue your
next row/rows. If you can stitch more than that one
row, you may want to Link them.
Select the row/rows in the Safe Area. Open Trim and
select Sewhead. Move Sewhead to left side and trim.
Confirm. Move Sewhead to right side of quilt top;
open Trim and select Sewhead. Make sure Invert is
checked. Trim right side. After the rows inside the
Safe Area are trimmed, they will now be queued to
stitch.
28My BERNINA BERNINA Q-MATIC WORKBOOK
CUSTOM QUILT LAYOUT
4. Place clamps on the sides of quilt. Clean, oil and
place a new needle in the Sewhead before stitching
is started.
5. Baste (BSR3, Stitch length=4) a straight line across the
top of the backing and batting to create a straight
guideline. Align the top edge of the quilt top to the
stitched guideline.
Create the Layout
Add designs to the Design Center. In this example
these designs are used:
• SwirlsPaisley_Triangle
• SwirlsPaisley_Square 1
• SwirlsPaisley_Square 2
• SwirlsPaisley_Wreath
Set the Quilt Size to the size of the quilt top. In this
example, 38.5” x 38.5” is used.
In this lesson, you will learn how to create a custom lay-
out. If you choose to sew along with the exercise, you Create and Place Block 1
will need a quilt top, batting and backing. A block can be created using a triangle. Place
SwirlsPaisley_Triangle on the Quilt Area by double-
tapping it in the Design Center.
Create the Quilt Top Select the design and copy the design to make four
triangles. Copy is the top half of this icon.
1. The quilt top is made up of 16 blocks.
2. Cut the blocks 10” x 10” from a variety of fabrics.
Select Rotate.
3. Piece the top in a 4 x 4 configuration with the finished
blocks measuring 9.5" square. Select each triangle and rotate each design by 45
4. The finished top should measure 38.5” x 38.5”. degrees until each is rotated with the long side on
top, bottom, left and right to form a block.
Load the Frame
1. Attach quilt top to Leader on Top Rail and attach the
quilt backing to Leader on Backing Rail and then to
the Take-up Rail.
2. Lay batting on top of the quilt back. The batting will Select one of the triangles and open Connect.
be placed between the Top and Backing Rails. The
bottom of the batting will be hanging free if there is
Select Attach. The start point of the design is shown
not a Batting Bar.
by a green circle with a line coming out of it which
3. Baste a straight line across the top of backing and shows which way it will sew.
batting so the quilt top can be placed straight. Use
Click here for video:
this basting line as a guide. Baste only the quilt top Custom Quilt Layout & Stitchout
and sides that are in the Safe Area. 29My BERNINA BERNINA Q-MATIC WORKBOOK
CUSTOM QUILT LAYOUT, CONT.
To attach, select the next design, and the start point With the design selected, open Resize. Change
of the second design will attach to the end point of size to 9.5” x 9.5”. Remove the check mark in
the first selected design. They are now one. Contin- Maintain Ratio to change both width and height
ue around all four are connected to make a block. independently.
Select the block.
Select Resize.
• Select Key Pad and enter the block size of 9.5".
• Select Apply. Select the design and copy to have four patterns.
Place on layout on the blue blocks.
Select the block and copy to make 4 blocks.
Use the diagram below to place the blocks on the
Block 3
quilt layout in the gold squares.
Double-tap Swirls Paisley_Square1 in the Design
Center to place on the Quilt Area.
With the design selected, select Resize. Change the
size to 9.5” x 9.5” using either the handle or the
keypad.
Copy to have four patterns. Place on the quilt layout
in the green blocks.
Block 2
Place the SwirlsPaisley_Wreath on the Quilt Area by Block 4
double-tapping it in the Design Center. Double-tap on SwirlsPaisley_Square2 in the Design
Select and rotate by 5 degrees, and then in .1 de- Center to place on the Quilt Area.
gree increments until the flatter part of the wreath With the design selected, resize the design to 9.5”
is at the top and bottom. To make rotating easier, x 9.5”.
Zoom in and use the lines of the grid to align to the
straight edge of the design.
Copy to have 4 patterns. Place on the quilt layout in
the white blocks.
30My BERNINA BERNINA Q-MATIC WORKBOOK
CUSTOM QUILT LAYOUT, CONT.
Align the Blocks Aligning the blocks presents a visual of the quilting,
but the quilt top may not be perfect and things may
The blocks will be aligned to the sides, top, bottom
shift as it is quilted. Therefore, each quilt pattern will
and in the center using the different alignment
be placed individually within the sewn block using
orientation options.
Markers and Boundary placement tools.
Select a design. Open Align. The Control will be the
Screen.
Block Placement with Boundary
Set the Safe Area.
Select the first block in the top row and open
Boundary.
Select Sewhead and leave Morph to Fit selected.
The Sewhead shows the Set Screen.
Select the align to top horizontal icon. Place the needle over one corner of the block and
press Set. To fine-tune placement, use MicroMove,
Touch the top of the quilt on screen. A bolder red
also displayed on the Set screen. To use MicroMove,
line appears as the alignment line. If the placement
select MicroMove, the step size and use the toggles
is not satisfactory, tap a second time for a new line.
on the handles to position the needle. The Needle
Select each design in the top row to align.
Point laser will make this easier to see.
Use the align to bottom horizontal button and
repeat to align the bottom blocks.
Deactivate MicroMove before trying to move the
Align the sides using left and right vertical alignment
Sewhead to the next Boundary position.
options.
Boundary requires four points. Go around the block
Align the center blocks using the center horizontal
clockwise or counterclockwise to set four points.
to line up the designs that are in the middle of the
layout. Repeat for the center vertical alignment.
Select each design to move it to the alignment line.
Select Preview on the computer screen and Confirm.
Click here for video:
Custom Quilt Layout & Stitchout Part 2 31My BERNINA BERNINA Q-MATIC WORKBOOK
CUSTOM QUILT LAYOUT, CONT.
With the design placed, Queue only this design to Each marker is a little red box. Unlike Boundary, as
stitch. many markers as needed can be used. In this case,
• Open Sew Options and select Dequeue All. (All four markers are enough. Work your way around
designs will turn gray.) the block.
• Select Queue and tap only this design on screen.
• The Queued design is blue. This should be the
only blue design on screen.
Select Start and then At Start Point.
Pull bobbin thread using the Pull Bobbin icon on the
Sewhead.
Select Connect Markers and Center in the Marker
Confirm to start stitching. Press Pause on the Sew- window.
head to trim thread tails.
Select the first marker, the second marker, third,
When sewing is complete, use the toggle with the fourth and the first marker again.
Securing function to pull up bobbin thread and • This is now a stitching line and there will be a +
move Sewhead over and trim thread tails. in the middle of the area you created to show
When the Securing toggle is pressed once, it raises the center mark.
the needle and foot. Select OK on computer screen
for Sewing Complete.
Block Placement with Markers
The Wreath design will be placed using Markers.
Select the second design in the first row, the Wreath Confirm.
design. Move the Wreath design into place by dragging it or
Open Markers. When Markers is selected, the Sew- by using the nudge arrows.
head displays the Set icon. Queue only this design to stitch. With the design
selected, open Sew options, Dequeue All and Queue
only this design by touching it.
Press Start, and select At Start Point.
Pull bobbin thread using the Sewhead screen icon.
Pause to trim thread tails.
When sewing is complete use the Securing function
on the handle to pull up bobbin thread and move
Markers can only be set with the Sewhead and with
Sewhead over and trim thread tails.
a Safe Area defined.
Repeat the steps for Boundary placement for the
Place the needle over one corner of the block. Use
other two design in the first row.
MicroMove to fine-tune the position if needed, and
select Set. A Marker will appear on the computer
screen.
Deactivate MicroMove before going to the next
position to mark.
32My BERNINA BERNINA Q-MATIC WORKBOOK
CUSTOM QUILT LAYOUT, CONT.
Advancing the Quilt Confirm with the check mark. The Safe Area is now
aligned to start the next row.
Advance the quilt to the Takeup Rail. Firm up layers
of the quilt and baste down sides. Replace clamps
on the sides.
Locate a point in the already stitched design that
you would like to realign to. Place the Sewhead
needle on that point.
Continue Quilting
Quilt the remaining rows using the same process.
Place one design and stitch. Use Markers for the
Wreath, and Boundary for all other blocks.
Locate the same point on the computer screen. Advance the quilt and realign the Safe Area after
Use Center Zoom to zoom to that point. Zoom in each row is sewn.
enough so that you can select that point easily. Before stitching the final row, baste the bottom of
the quilt from center out.
Unload and bind the quilt.
Open Realign Safe Area and select Snap to Point.
Tap on the computer screen to align on the stitched
design point. A red dot will appear. If the red dot is
not on the point, touch the screen again to reset the
red dot.
Click here for video:
Custom Quilt Layout & Stitchout Part 3
Advancing the Quilt
33My BERNINA BERNINA Q-MATIC WORKBOOK
STRAIGHT LINE QUILT LAYOUT
If resizing is needed, it should be done now. Select
the design and open Resize. Resize to 2.00” x 4.00”
using the Keypad option. Select Apply. Resizing this
design to this size will give half inch wide lines.
Load the Frame
1. Attach the quilt top to Leader of Top rail.
Select the design the using E2E+ and add enough
2. Attach the quilt backing to the Leader of the quilt designs to make it 12 inches wide. You can see the
Back Rail and then to the Take-up Rail. size of the design when selected on the lower right
of the Quilt Area in the height and width boxes.
3. Lay batting on top of the quilt back and then bring
quilt top up and over the batting.
4. On the frame, the batting will be placed between the
Top and Backing Rails. The bottom of the batting will
hang free if there is no Batting Bar.
5. Baste (BSR3, Stitch length=4) a straight line across the
top of the backing and batting to create a straight
guideline so the quilt top can be placed straight. Align
the top edge of the quilt top to the stitched guideline.
6. Baste only the quilt top and sides that are in the Safe Rotate the selected design 45 degrees 2 times
Area. clockwise. This will make the design lines horizontal
on the screen and the start point will be at the upper
7. Place clamps on the sides of quilt.
left.
8. Clean, oil and place a new needle in the Sewhead
before stitching is started.
Create Layout
Add design to Design Center to be used. In this
example we used Basics_06.
Set quilt size. In this example we used 35” x 35”.
Double-tap the design in Design Center to place
design on Quilt Area.
Click here for video:
Straight Line Quilting
34My BERNINA BERNINA Q-MATIC WORKBOOK
STRAIGHT LINE QUILT LAYOUT, CONT
With the design selected, open Resize. Uncheck Zoom in using Center Zoom on that point on the
Maintain Ratio. Now tap and hold on the black han- computer screen. Zoom in close.
dle in the middle on the right side of the design. This
will change the handle to green. Pull on that handle Open Realign Safe Area and select Snap to Point. Tap
until the design stretches all the way across the grid the computer screen at the point where the corner is
and hangs over just a little on both sides. to align to. A red dot will appear on the screen. Con-
firm with the check mark in the green box and your
Safe Area is now realigned to start your next rows.
Queue row 2 to stitch. Repeat with row 3.
If the last row has any of the design extending below
the bottom edge, it can be trimmed. With the row
selected, open Trim and place line at the bottom of
quilt top to trim. (Invert will need to be selected.)
With design selected, open Multiply. Leave it at one
row across and then add rows down until the grid is
filled. In this example 3 rows were needed. If needed,
adjust the Vertical Spacing with arrows. Confirm to
close window.
Select the layout and unconnect the rows using the
Unconnect in the Tool Center.
Quilting
Open Sew Options and Dequeue All. Select only
the top row to stitch. Confirm and press start. Then
select At Start Point when prompted.
When stitching is complete, advance the quilt to the
Takeup Rail. Firm up layers of the quilt and replace
clamps on the sides. Baste down both sides in Safe
Area using the basting stitch on the Sewhead.
Locate a point in the already-stitched design that you
would like to realign to. On a straight line design the
easiest place to realign to may be the corner where
the design turns. Place the Sewhead on that point.
35My BERNINA BERNINA Q-MATIC WORKBOOK
WORKING WITH THE LIBRARY
Importing .bqm Designs Click here for video:
Importing .bqm Designs
The native file format for Q-matic is .bqm. This file format can be easily imported into the Design Library. Save the .bqm file in
a location where it can easily be found.
• Open Design Library; then select Import Design.
• The secondary screen will open and there will be four columns.
On the far left is Explorer. This is where the design to be imported is found.
The next column is Files. This is the column that the file will be selected from. If a file cannot be imported it will say this
next to the file.
The next column is for a preview of the file being imported.
Just below the Preview there is a short column that has the file name in it that is being imported.
The last column is for Tags. Tags are a way to organize the design so that they can be searched.
• Navigate to the folder where the design was saved and select it. Select that file in the Explorer column.
36My BERNINA BERNINA Q-MATIC WORKBOOK
WORKING WITH THE LIBRARY, CONT.
• Next select the file name in the Files column.
• Touch the file name once to see the Preview and double-tap quickly to see the file name in the Importing column.
• Check any Tags needed for this design. One tag or many tags can be given to a design.
37My BERNINA BERNINA Q-MATIC WORKBOOK
WORKING WITH THE LIBRARY, CONT.
• Select Import at the bottom of the third column.
• In the Files column, it will now say that this file has been imported.
• To check that the design is in the library, open Add Design.
38My BERNINA BERNINA Q-MATIC WORKBOOK
WORKING WITH THE LIBRARY, CONT.
• Scroll down until the name of the file (Heatwave) is seen. Double-tap to place in Design Center.
• All designs found in the Q-matic Library are in alphabetic order. Search for designs by tags or by name.
Click here for video:
Deleting Library Designs Deleting Library Designs
• Any design file can be deleted out of the library. From the menu at the top of the screen, select File and a drop-down
menu will open. Select Delete; then select Delete Design File.
• A secondary window will open and in this window are all of the designs in the Q-matic Library. Select the design that
needs to be deleted. It will have a pink highlighted box over it. Select Delete at the bottom of the screen. When Delete is
selected, a small dialog box will open in the center of the screen asking if the selected design is to be deleted. Select Yes
to delete.
39My BERNINA BERNINA Q-MATIC WORKBOOK
WORKING WITH THE LIBRARY, CONT.
• The design is now gone from the Library.
• Select Close at the bottom of the page to close this window.
40My BERNINA BERNINA Q-MATIC WORKBOOK
WORKING WITH TAGS
Designs in the Q-matic Library have tags to sort and search for them in the Design Pool. The Tags can be
added, modified and deleted. Designs can have more than one tag or no tags at all.
• To add a tag, select Design Library and then Manage Tags in the drop-down menu.
Click here for video:
ManageTags
• A secondary window will open. Select Add and a dialog box will open. Enter the new tag text in the dialog box. Once the
name is complete, select the check mark in the green box.
• The new tag can now be seen.
41My BERNINA BERNINA Q-MATIC WORKBOOK
WORKING WITH TAGS
• To modify a tag, the name will need to be selected. Select Modify. A dialog box will open and the name can be changed
in the dialog box. When completed, select the check mark in the green box.
• The modified name can now be seen.
• Tags can also be deleted from the list. Select the tag to delete. Then select the Delete icon.
• The tag is now deleted and no longer seen.
42My BERNINA BERNINA Q-MATIC WORKBOOK
WORKING WITH TAGS
• The tags on a design or a set of designs can be changed at any time under Design Library>Design Tags.
Select the designs and then select the tags to be Added or Removed.
43My BERNINA BERNINA Q-MATIC WORKBOOK
ART & STITCH EDIT VIA THE SHORTCUT
Edit Via the Shortcut Click here for video:
Edit via the Shortcut
• Any design that is in the Q-matic Library can be edited in Art & Stitch. One of the easiest ways to do this is to use the Art
& Stitch shortcut on the Q-matic screen.
• Design file PR0125 has a little gap in the stitching. This gap can be edited in Art & Stitch. With the design on the Q-matic
Quilt Area and selected, open Art & Stitch using the shortcut at the bottom of the screen.
• Note: With the design selected, it will open in the Art & Stitch screen. (If the design had not been selected, there would be
no design on the Art & Stitch screen when it opens.)
• When Art & Stitch opens, you will see the Simplify and Smoothen box open. Close this screen by selecting Cancel.
44My BERNINA BERNINA Q-MATIC WORKBOOK
ART & STITCH EDIT VIA THE SHORTCUT
With the design selected, select the Reshape tool in the far left tool bar that goes down the side of the screen. When it is
activated, there will be a lot of nodes on the design. The nodes are the little blue squares. The gap should easily be seen now.,
but if not, Zoom in.
• Touch and hold the red square. When the drop-down menu opens, select Close Line.
45My BERNINA BERNINA Q-MATIC WORKBOOK
ART & STITCH EDIT VIA THE SHORTCUT
The line has now been closed.
At the bottom of the screen there is a Sew Simulator. At this time the design has no stitches. When a design is taken from
the Q-matic screen via the shortcut, the stitches are removed for easy editing. The stitches will have to be added before it can
go back to Q-matic.
• No Stitches:
• When the design is selected, it will have a black box around it. Touch the first icon in the second tool bar on the left called
“Line sew type: Running stitch” and the stitches will be added to the design.
• Design with stitches: The black line is filled in. The color can be changed by selecting on one of the color chips.
• With the stitches added, select the Q-matic shortcut at the top of the screen.
46My BERNINA BERNINA Q-MATIC WORKBOOK
ART & STITCH EDIT VIA THE SHORTCUT
• A dialog box will open to save the design as an .ans file (in Files of Type) before going forward.
• When this is completed, the edited design will open on the Quilt Area of the Q-matic screen. The one in blue is the edited
one and the one that is red is the original. Delete the red one.
• Note: The edited design would need to be imported if it is to be in the Q-matic Library.
47You can also read