NEEVIA Document Converter - Professional Edition user's guide version 7.1 Title
←
→
Page content transcription
If your browser does not render page correctly, please read the page content below
Title

             NEEVIA
        Document Converter
           Professional Edition

                   user’s guide
                   version 7.1

           Neevia Document Converter Pro v7.1 user’s guide
            © Copyright © 2000-2020, Neevia Technology.
                           Page 1 of 76
Table of Contents
Title ................................................................................................................................................................. 1
Table of Contents ........................................................................................................................................... 2
License ............................................................................................................................................................ 4
Introduction .................................................................................................................................................... 8
System Requirements ................................................................................................................................. 8
Installing and Uninstalling Document Converter Pro ................................................................................... 9
Unattended installation .............................................................................................................................. 9
Unattended uninstall................................................................................................................................. 10
Registering Neevia Document Converter Pro ........................................................................................... 10
Native Applications Supported .................................................................................................................... 11
Neevia Document Converter User Interface ............................................................................................... 12
Main screen ............................................................................................................................................... 12
Input/Output Folders ................................................................................................................................ 13
General Settings tab .............................................................................................................................. 14
Scripting tab ........................................................................................................................................... 15
Advanced Settings tab ........................................................................................................................... 15
Watermark/Stationery .............................................................................................................................. 16
Text stamp ............................................................................................................................................. 17
TextBox stamp ....................................................................................................................................... 17
Image stamp .......................................................................................................................................... 17
PDF Overlay ........................................................................................................................................... 18
Scheduler ................................................................................................................................................... 19
PDF Output Format ................................................................................................................................... 20
General tab ............................................................................................................................................ 21
PDF Security ....................................................................................................................................... 22
Page Size............................................................................................................................................. 23
Compression Tab ................................................................................................................................... 24
Fonts Tab ............................................................................................................................................... 26
Color Tab................................................................................................................................................ 27
PDF Open Options tab ........................................................................................................................... 29
PDF Info (metadata) tab ........................................................................................................................ 30
PDF/A Output Format ............................................................................................................................... 31
JPEG Output Format .................................................................................................................................. 32
General Settings Tab .............................................................................................................................. 32
Advanced Settings Tab........................................................................................................................... 32
TIFF Output Format ................................................................................................................................... 34
TIFF General Settings Tab ...................................................................................................................... 34
Advanced Settings Tab........................................................................................................................... 34
TIFF Fax Optimized Output Format ........................................................................................................... 36
PNG/BMP/PCX/PSD Output Formats ........................................................................................................ 37
General Settings Tab .............................................................................................................................. 37
Advanced Settings Tab........................................................................................................................... 37
PRINTER Output Format ............................................................................................................................ 38
SEND VIA FAX as Output Format ............................................................................................................... 39
Document Parsers ..................................................................................................................................... 40
WORD Document Parser ....................................................................................................................... 42
Neevia Document Converter Pro v7.1 user’s guide
© Copyright © 2000-2020, Neevia Technology.
Page 2 of 76General Settings tab ........................................................................................................................... 43
Links tab ............................................................................................................................................. 43
Bookmarks tab ................................................................................................................................... 44
Form Fields tab................................................................................................................................... 45
Advanced Settings tab........................................................................................................................ 46
EXCEL Document Parser ........................................................................................................................ 47
General Settings tab ........................................................................................................................... 47
Links tab ............................................................................................................................................. 48
Bookmarks tab ................................................................................................................................... 49
Advanced settings tab ........................................................................................................................ 49
POWERPOINT Document Parser............................................................................................................ 51
Links tab ............................................................................................................................................. 52
HTML Document Parser......................................................................................................................... 53
Header-Footer tab.............................................................................................................................. 53
Conversion Settings tab ..................................................................................................................... 54
HTML Rendering Engine tab............................................................................................................... 55
EMAIL Parser.......................................................................................................................................... 56
IMAGE Parser ......................................................................................................................................... 57
OPENOFFICE Parser ............................................................................................................................... 59
DESIGN REVIEW Parser .......................................................................................................................... 61
File Associations ........................................................................................................................................ 62
Email Watcher ........................................................................................................................................... 63
General Settings tab .............................................................................................................................. 64
Advanced Settings tab ........................................................................................................................... 64
SMTP Settings ........................................................................................................................................ 65
Advanced Settings Interface...................................................................................................................... 66
Clustering ...................................................................................................................................................... 68
Scripting ........................................................................................................................................................ 70
Launching Document Converter as a Windows Service.............................................................................. 71
Supported File Formats ............................................................................................................................... 72
Appendix A: Variables supported by Text / TextBox stamps ..................................................................... 76
Neevia Document Converter Pro v7.1 user’s guide
© Copyright © 2000-2020, Neevia Technology.
Page 3 of 76License
NEEVIA TECHNOLOGY
ELECTRONIC END USER LICENSE AGREEMENT
For One (1) Computer/Server/Virtual Server
This is an End User License Agreement. This is a contract. If you install this software, you must abide by the
terms of this agreement. This license is applicable to all software products sold by Neevia Technology
(Neevia). The term software includes upgrades, modified versions or updates. This software is licensed and
not sold. Only a personal, non-transferable and nonexclusive right to use the Neevia products is granted to
the end user.
The following are definitions that should be noted by the user:
a. SERVER
This is a single computer owned, rented or leased by a single individual or entity on which one or
more applications load and execute software in the memory space of that computer. Software is
installed on a server for one or more users. All servers must be licensed to utilize Neevia software.
b. VIRTUAL SERVER
This is a single computer or a virtual machine (a software implementation of a machine that
executes programs like a physical machine) that is owned, rented or leased by an individual or
entity that turns around and rents or leases access to others. The virtual server may have one or
more applications on it for the end users to use. The purpose of the virtual server is to give multiple
users access to many software programs. All servers must be licensed to utilize Neevia software.
c. DEVELOPMENT
This means that you are programming a specific application or tool that will interact with the
software you are licensing from Neevia Technology.
THIS IS A CONTRACT BETWEEN YOU AND NEEVIA TECHNOLOGY. YOU SHOULD CAREFULLY READ THIS
LICENSING AGREEMENT AND MUST ACCEPT ALL THE TERMS AND CONDITIONS BEFORE INSTALLING THIS
NEEVIA SOFTWARE. BY INSTALLING THE SOFTWARE, YOU ARE AGREEING TO BE BOUND BY THE TERMS AND
CONDITIONS OF THIS LICENSE. IF YOU DO NOT AGREE TO THE TERMS OF THIS LICENSE, DO NOT INSTALL
THE SOFTWARE, AND DO NOT USE THE SOFTWARE. IF YOU VIOLATE THIS AGREEMENT, YOU WILL BE
SUBJECT TO LEGAL ACTION BY NEEVIA TECHNOLOGY.
Subject to the payment of applicable license fees, Neevia Technology grants you a nonexclusive right to use
its accompanying Neevia software product and related documents (the Software) in the terms and
conditions provided as follow:
Neevia Document Converter Pro v7.1 user’s guide
© Copyright © 2000-2020, Neevia Technology.
Page 4 of 76LICENSE
Until such time as Neevia Technology has issued a valid serial number to you, you may only use this
software for a 90-day trial period. You agree to remove any copies of the software after the expiration of
the trial period. No license is issued to you until you are issued a valid serial number.
(a) Home Use:
The primary user of each computer on which the Software is installed or used may also install the
Software on one home or portable computer. However another person may not use the Software on
a secondary computer at the same time the Software on the primary computer is being used.
(b) Server or Network Use:
You may install or store one (1) copy of the SOFTWARE on a network server or a storage device, such
as for backup and archival purposes only. A license for the SOFTWARE may not be shared or used
concurrently on different computers.
(c) Operating system or Language versions:
If you receive two or more copies of the Software with different operating systems or language
versions, the total aggregate number of computers on which all versions of the Software are used may
not exceed the Permitted Number of Computers. You may not rent, lease, sublicense, lend or transfer
versions or copies of the Software you do not use, or Software contained on any unused media.
(d) Archiving:
You may make one copy of the Software solely for archival purposes. If the Software is an upgrade, you
may use the Software only in conjunction with upgraded product. If you receive your first copy of the
Software electronically, and a second copy on media afterward, the second copy can be used for
archival purposes only.
You agree to surrender your license(s) if you violate this agreement. If you violate this agreement, you will
not receive a refund upon termination of this license. You agree not to utilize our software to violate the
copyright of any third parties. If you do violate the copyright of a third party utilizing our software, you
agree to hold Neevia Technology harmless and will indemnify Neevia Technology for any such activity even
if the violation is unintentional.
Neevia Document Converter Pro v7.1 user’s guide
© Copyright © 2000-2020, Neevia Technology.
Page 5 of 76COPYRIGHT
The Software is owned by Neevia Technology and/or its suppliers, and is protected by the copyright and
trademark laws of the United States and related applicable laws. You may not copy the Software except as
set forth in the "License" section. Any copies that you are permitted to make pursuant to this Agreement
must contain the same copyright and other proprietary notices that appear on or in the Software.
You may not rent, lease, sub-license, transfer, or sell the Software. You may not modify, translate, reverse
engineer, decompile, disassemble, or create derivative works based on the Software, except to the extent
applicable law expressly prohibits such foregoing restriction. You may use the trademarks to identify the
Software owner's name, or to identify printed output produced by the Software. Such use of any trademark
does not give you any rights of ownership in that trademark.
NO WARRANTY LICENSED SOFTWARE (S) - "AS IS"
The Software is provided AS IS. NEEVIA TECHNOLOGY AND ITS SUPPLIERS MAKE NO WARRANTIES, EXPRESS
OR IMPLIED, AS TO THE MERCHANTABILITY, QUALITY, NONINFRINGEMENT OF THIRD PARTY RIGHTS,
FITNESS FOR A PARTICULAR PURPOSE, AND THOSE ARISING BY STATUTE OR OTHERWISE IN LAW OR FROM
A COURSE OF DEALING OR USAGE OF TRADE. THE ENTIRE RISK AS TO THE QUALITY, RESULTS BY USING THE
SOFTWARE, AND PERFORMANCE OF THE SOFTWARE IS WITH THE END USER. Some states or jurisdictions
do not allow the exclusion or limitation of incidental, consequential or special damages, or the exclusion of
implied warranties or limitations on how long an implied warranty may last, so the above limitations may
not apply to your or your company.
LIMITATION OF REMEDIES AND LIABILITY
NEEVIA TECHNOLOGY OR ITS SUPPLIERS OR RESELLERS SHALL NOT UNDER ANY CIRCUMSTANCE BE LIABLE
TO YOU FOR ANY DAMAGES, INCLUDING BUT NOT LIMITED TO SPECIAL, INDIRECT, OR CONSEQUENTIAL
DAMAGES, LOST PROFITS OR LOST SAVINGS, OR FOR ANY CLAIM BY A THIRD PARTY, ARISING OUT OF THE
USE OR INABILITY TO USE THE SOFTWARE, EVEN IF NEEVIA TECHNOLOLGY SHALL HAVE BEEN INFORMED
OF THE POSSIBILITY OF SUCH DAMAGES, OR FOR ANY CLAIM BY ANY OTHER PARTY.
GENERAL
This Agreement shall be construed, interpreted, and governed by the laws of the State of Florida, excluding
the application of its conflicts of law rules. The United Nations Convention on Contracts of the International
Sale of Goods, will not govern this Agreement. If any part of this Agreement is found void and
unenforceable, it will not affect the validity of the rest of the Agreement, which shall remain valid and
enforceable according to its terms.
If you need to redistribute this product with your own software products, you need to contact Neevia and
negotiate a separate licensing and royalty agreement.
You may not ship, transfer, or export the Software into any country or used in any manner prohibited by
any export laws, restrictions or regulations.
Neevia Document Converter Pro v7.1 user’s guide
© Copyright © 2000-2020, Neevia Technology.
Page 6 of 76UPGRADES
You must be properly licensed to install upgrades to Neevia Software products. Neevia upgrades replace
and or supplement the previous product that formed the basis for your eligibility to for the upgrade. You
may use the upgrade only in accordance with the terms of this Agreement. Upgrades may not be separated
and used on separate computers.
GOVERNEMENT USERS
For United States government users, the Software and associated Documentation are deemed to be
“commercial computer software” and “commercial computer documentation”, respectively pursuant to
DFAR 227.7202 and FAR 12.212(b) as applicable.
ENTIRE AGREEMENT
You acknowledge that you have read this Agreement, understand it and agree to be bounded by its terms
and conditions. It is the complete and exclusive statement of the Agreement between us, which supersedes
any proposal or prior agreement, oral or written, and other communication between us relating to the
subject matter of this Agreement.
Neevia Document Converter Pro v7.1 user’s guide
© Copyright © 2000-2020, Neevia Technology.
Page 7 of 76Introduction
In today’s business environment there is a tremendous need for companies to convert business content to
PDF, PDF/A and/or image formats like TIFF, PNG or JPEG. This is apparent by the many requests
programmers and IT professionals receive from managers in industries that range from the legal field to
the financial and insurance fields. We realized this more than a decade ago and that is when we began to
work on the suite of software products that are offered by Neevia Technology. We understand that we live
in a PDF world and we set out to create an application that would change the way people view share and
work with e-documents.
Neevia Document Converter is a software product that dynamically converts HTML, Microsoft Office XP,
2003, 2007, 2010, 2013, 2016, WordPerfect, PostScript and many other document types into PostScript,
PDF, PDF/A, JPEG, TIFF, PNG, PCX, EPS and BMP. It operates in both a batch mode via directory or email
scanning and in direct mode via a COM component.
Document Converter Pro is easy to install and is used by companies in the legal, pharmaceutical, insurance,
banking and many other areas that generate large volumes of documents. The goal of Document Converter
Pro is to help your company create one PDF/Image standard that can be integrated into your workflow with
ease and affordability.
System Requirements
• Windows 2003, Vista, 7, 2008, 2012, 8, 10, 2016, 2019 – 32 and 64bit.
• At least 50 MBytes of free disk space;
• Memory requirement: min 512MB - heavily dependent on the nature of the job being converted.
Neevia Document Converter Pro v7.1 user’s guide
© Copyright © 2000-2020, Neevia Technology.
Page 8 of 76Installing and Uninstalling Document Converter Pro
Before installing and/or using this product, please make sure you carefully read the copyright notice and
agree to all of its terms. If you have any questions about the licensing agreement, please feel free to call or
email sales@neevia.com in our sales department.
To install Document Converter Pro:
download and save the https://neevia.com/prods/dcpro.exe file to your hard disk. After downloading the
file, double-click it and follow the instructions. The installation procedure automatically detects your
operating system, copies the needed files to your system directory and installs Document Converter Pro in
your system.
NOTE: You must be logged in with an account that has local administrator rights to install Document
Converter Pro.
Unattended installation
To perform an unattended (silent) installation launch Document Converter Pro installer with /sp /verysilent
/norestart command line switches. Here is the full list of supported switches:
/SP
Disables the "This will install... Do you wish to continue?" prompt at the beginning of Setup.
/SILENT, /VERYSILENT
Instructs Setup to be silent or very silent. When Setup is silent the wizard and the background
window are not displayed but the installation progress window is. When a setup is very silent this
installation progress window is not displayed. Everything else is normal so for example error
messages during installation are displayed and the startup prompt is (if you haven't disabled it with
'/SP-' command line option explained above). If a restart is necessary and the '/NORESTART'
command isn't used (see below) and Setup is silent, it will display a “Reboot now?” dialog. If it's very
silent it will reboot without asking.
/NOCANCEL
Prevents the user from canceling during the installation process, by disabling the Cancel button and
ignoring clicks on the close button. Useful along with /SILENT.
/NORESTART
Instructs Setup not to reboot even if it's necessary.
/DIR="x:\dirname"
Overrides the default directory name displayed on the Select Destination Directory wizard page. A
fully qualified pathname must be specified.
/GROUP="folder name"
Overrides the default folder name displayed on the Select Start Menu Folder wizard page.
/user="username", /company="company name", /serial="serial number"
Use these switches to pass the registration info (username, company name and serial number) to the
installer.
Neevia Document Converter Pro v7.1 user’s guide
© Copyright © 2000-2020, Neevia Technology.
Page 9 of 76To remove Neevia Document Converter Pro from your system:
1. Select Settings -> Control Panel from the Start menu.
2. In the Control Panel click Add/Remove Programs and select Document Converter Pro from the list.
3. Click the Add/Remove button to remove the program.
4. A confirmation prompt is displayed.
NOTE: In some circumstances the uninstaller may be unable to remove the Neevia Converter printer from
the Windows printing system. If this happens, you should reboot your computer and uninstall again.
Unattended uninstall
To perform an unattended (silent) uninstall, launch unins000.exe from the folder where Document
Converter Pro has been installed with /verysilent /norestart command line switches. Here is the full list of
supported switches:
/SILENT, /VERYSILENT
When specified, the uninstaller will not ask the user for startup confirmation or display a message
stating that uninstall is complete. Shared files that are no longer in use are deleted automatically
without prompting. Any critical error messages will still be shown on the screen. When '/VERYSILENT'
is specified, the uninstallation progress window is not displayed. If a restart is necessary and the
'/NORESTART' command isn't used (see below) and '/VERYSILENT' is specified, the uninstaller will
reboot without asking.
/NORESTART
Instructs the uninstaller not to reboot even if it's necessary.
Registering Neevia Document Converter Pro
To register Neevia Document Converter Pro, launch it, then in the main Document Converter window click
Help -> About -> Register. Enter the user name, company name and registration key that have been emailed
to you after purchase and press the OK button.
NOTE: Make sure you enter the licensing info exactly as shown in the registration email message –
registration key is case sensitive and user name / company name dependent. In some cases you may need
to right click on dconverter.exe and select Run as administrator then register.
Neevia Document Converter Pro v7.1 user’s guide
© Copyright © 2000-2020, Neevia Technology.
Page 10 of 76Native Applications Supported
In order for the Neevia Document Converter to do its job properly, you will need to install the prerequisite
applications (e.g. Microsoft Word) to process the documents. Neevia Document Converter software does
not have any formatting or document reading capabilities.
• Microsoft® OfficeTM XP (Word, Excel, PowerPoint)
• Microsoft® OfficeTM 2003 (Word, Excel, PowerPoint)
• Microsoft® OfficeTM 2007 (Word, Excel, PowerPoint)
• Microsoft® OfficeTM 2010 (Word, Excel, PowerPoint)
• Microsoft® OfficeTM 2013 (Word, Excel, PowerPoint)
• Microsoft® OfficeTM 2016 (Word, Excel, PowerPoint)
• Microsoft® OfficeTM 2019 (Word, Excel, PowerPoint)
• Microsoft® PublisherTM XP, 2003, 2007, 2010, 2013, 2016, 2019
• Microsoft® VisioTM 2003, 2007, 2010, 2013, 2016, 2019
• Microsoft® ProjectTM 2003, 2007, 2010, 2013, 2016, 2019
• Microsoft® SnapshotTM Viewer
• Microsoft® Internet Explorer 5.x, 6.x, 7.x, 8.x, 9.x, 10.x, 11.x
• Adobe® IllustratorTM 10, 11, CSx
• Adobe® InDesignTM 1.x, 2.x, 3.x (CSx)
• Lotus® WordProTM 97 and higher
• Lotus® 1-2-3TM
• Corel® WordPerfectTM v10, 11, 12 and higher
• Corel® DrawTM v9, 10, 11 and higher
• Autodesk® Design ReviewTM v2013, True ReviewTM v2013
• Autodesk® AutoCADTM V14 and higher
• SolidworksTM
• OpenOffice 2.x, 3.x, 4.x
Neevia Document Converter Pro v7.1 user’s guide
© Copyright © 2000-2020, Neevia Technology.
Page 11 of 76Neevia Document Converter User Interface
To access the Document Converter program, in Windows go Start->Programs->Neevia Document
Converter->Document Converter Pro.
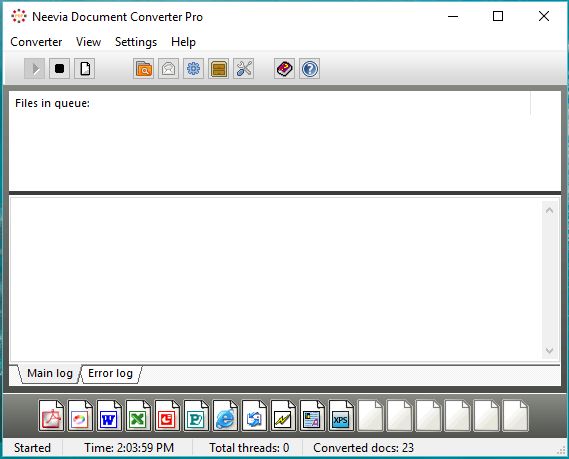
Main screen
There are 4 menu items:
Converter → Start - start Document Converter Pro;
→ Stop - stop Document Converter Pro;
→ Clear Logs - clear Document Converter Pro log window;
→ Clear Converted Docs Count - reset converted files count to zero;
→ Exit - close Document Converter Pro;
View → Toolbar - display/hide main menu;
→ Parsers bar - display/hide parser bar;
Settings → Folders … - add/edit/delete input folders;
→ eMail Watcher - edit eMail Watcher settings;
→ Advanced … - edit Document Converter advanced settings;
Help → User’s manual;
→ About;
Neevia Document Converter Pro v7.1 user’s guide
© Copyright © 2000-2020, Neevia Technology.
Page 12 of 76NOTE: Document Converter Pro 7.x supports folder specific configurations which means that you can set
different conversion parameters for each input folder DC Pro watches. To modify parsers when this feature
is enabled click Settings -> Folders -> double click on Folder to Scan -> Document Parsers tab -> select your
parser. Folder specific configuration is enabled by default.
To disable it, in the main DC Pro interface click Settings -> Advanced and uncheck Folder-specific
configuration.
Input/Output Folders
An input folder is a folder watched by the converter. When a file is copied into it, Document Converter picks
it up, converts it to the specified output format then moves it to the output folder.
To define additional input/output folders in the main Document Converter screen menu select: Settings-
>Folders … The following screen will be displayed:
In the screen above you have a list of all input folders currently defined. On the bottom of the screen
there are 5 buttons:
Add Folder - use this to add a new input folder to Document Converter;
Edit Settings - use this to edit the configuration of an existing input folder;
Delete Folder - use this to delete an input folder from Document Converter;
Pause/Resume Folder - pause/resume input folder processing;
Scheduler - use this for scheduling input folder processing;
Neevia Document Converter Pro v7.1 user’s guide
© Copyright © 2000-2020, Neevia Technology.
Page 13 of 76When you select Add Folder or Edit Folder the following screen is displayed:
General Settings tab
Folder to scan - This is the path to the folder that Document Converter will scan for documents. You
cannot change this folder once it has been entered. If you need to do that, you will need to add a new
folder and delete the old one. Network paths (UNC names) are fully supported.
The Process Subfolders checkbox allows the user to have Document Converter process files in all the
subfolders that may exist in Folder to scan. In case you do not want subfolders to remain in the input
folder after processing check Delete empty subfolders.
If you’d like the converter to process all files in the input folder (unsupported formats will be
automatically moved to the Error folder) you need to check Process all files in the input folder.
Destination folder – this is the folder where converted files should be placed.
Destination folder cannot be the same as Folder to scan. If the "Copy Folder to scan" checkbox is
selected, Document Converter will recreate the Folder to scan subfolder structure in the Destination
folder and will place the processed files in the corresponding subfolder. Should you like to keep the
original file extension please check Keep original file extension in the output file name. The
converted filename for, let’s say, an Excel document will be in this case filename.xls.pdf.
Neevia Document Converter Pro v7.1 user’s guide
© Copyright © 2000-2020, Neevia Technology.
Page 14 of 76Error folder - the folder where documents that cannot be converted should be placed.
This folder cannot be the same name as Folder to scan. If you do not specify a path, the documents
that cannot be converted will be deleted.
Folder for original files - the folder where original documents should be placed.
This cannot be the same name as Folder to scan. If you don’t specify a path, original documents will
be deleted.
Output Format - use this to select the output format. It can be PostScript, PDF, PDF/A, JPEG, TIFF, TIFF
fax optimized, PNG, PCX, PCL-XL, BMP, EPS, Printer or Send via Fax.
neeviaPDF addins - when clicked it allows you to enable the PDFcompress and/or PDFsign addins.
These products must be installed on the same machine with Document Converter otherwise you will
not be able to configure them. You can use them to compress and/or apply an electronic signature
after the PDF conversion process is done.
Scripting tab
Scripting Language - select the language you want to use for your scriptlet - VBS/JS.
Script timeout - the timeout for script execution in milliseconds.
Script to execute - enter the full path to the VBScript or JScript scriptlet you want to have executed
before/after conversion.
Allow script to interact with desktop - check this option to allow your script to interact with desktop
(display MessageBoxes etc).
Note: Please read the section entitled Scripting for more information.
Advanced Settings tab
Here you can specify the file processing order. By default Document Converter will process files the way
they are listed by the operating system. In case you want to change that please select by creation date or
in alphabetical order. For multiple input folders you can specify the number of files that Document
Converter should process from each input folder at a time. The default number is 5.
Neevia Document Converter Pro v7.1 user’s guide
© Copyright © 2000-2020, Neevia Technology.
Page 15 of 76Watermark/Stationery
By using this feature you will be able to configure Document Converter Pro to place a stamp (watermark)
on all converting files. To define new stamps press the Create Stamp button. The interface below will be
displayed:
Stamp name - use this to set a name for the new stamp profile you want to create.
Stamp type:
Text stamp - only one line of text can be stamped;
TextBox stamp - multiple lines of text can be stamped;
Image stamp - allows you to specify an image that can be used as stamp;
PDF Overlay - allows you to specify an existing PDF file to be used as overlay.
Neevia Document Converter Pro v7.1 user’s guide
© Copyright © 2000-2020, Neevia Technology.
Page 16 of 76Text stamp
To specify characteristics for Text stamp you have the following options that you can enable by clicking the
buttons below:
a. Insert Variable - selects a variable from the list - see Appendix A for the entire list;
b. Select Font - defines both font name and size. In this window you also have the option to embed the font
with or without subset;
c. Text Color - defines both text color and color space (Gray, RGB, CMYK);
d. Text Rendering Mode - click the down arrow to select:
- Fill text, no stroke
- Stroke text, no fill
- Fill then stroke text
- Invisible text
Example:
Fill text, no stroke Stroke text, no fill Fill then stroke text
TextBox stamp
To specify characteristics for TextBox stamp you have the following options that you can enable by clicking
the buttons below:
a. Insert Variable - to select a variable from the list - see Appendix A for the entire list;
b. Select Font - to define both font name and size. In this window you also have the option to embed the font
with or without subset.
c. Text Color - to define both text color and color space (Gray, RGB, CMYK).
d. Text Alignment - ( left, center or right ). Check Word Wrap to automatically adjust lines of text to fit within
the defined margins
e. TextBox Width, Height - enter values in points, inches, centimeters or milimeters. You can also use text for
both as a value which creates a rectangle that contains the exact data you want to
stamp.
f. Text Rendering Mode - click the down arrow to select:
- Fill text, no stroke
- Stroke text, no fill
- Fill then stroke text
- Invisible text
Example:
Fill text, no stroke Stroke text, no fill Fill then stroke text
Image stamp
Allows you to specify an image that can be used as a stamp.
Click Browse to select the image you would like as stamp.
Supported image types are: JPEG, GIF, BMP, PNG and TIFF.
Image Width - enter value in pixels.
Image Height - enter value in pixels.
Image Scale - allows you to scale the image stamp. A scale of 50% makes the image stamp half of the original
image size, while a scale of 200% makes the image stamp double in size.
Neevia Document Converter Pro v7.1 user’s guide
© Copyright © 2000-2020, Neevia Technology.
Page 17 of 76PDF Overlay
You can use this option to specify an existing PDF file to be used as overlay (stationery).
Click Browse to select the PDF file you would like to use as overlay. If multiple pages exist you can specify which
page to be imported.
Scale - allows you to scale the PDF overlay. A scale of 50% makes the PDF overlay half of the original PDF size,
while a scale of 200% makes it double in size.
After you finished with the above settings you can select:
Position - defines the measurement Units (Points, Inches, Centimeters or Millimeters), Rotation angle, Stamp
placement (as stamp: over the page content or watermark: under the page content) and the X, Y
coordinates. For the X coordinate you can use as values, not only numbers but center, left and right -
this will position the watermark in the center of the page, on the left or right side. For Y you have
center, top and bottom which will place the watermark in the center of the page on top or in the
bottom. To position your watermark on the right lower corner use X=right and Y=bottom.
Place On - specifies the pages to stamp. Check "All pages" to place the stamp on all pages in the PDF file or "Pages"
to specify the page numbers.
Opacity - specifies how transparent the stamp should be. A value of 100 means that the stamp is completely
opaque, while a value of 0 means that the stamp is invisible.
PDF Actions - specifies how the stamp should behave: as hyperlink or as link to a page.
Miscellaneous - specifies the page CropBox to position the stamp and/or use the page rotation parameter. The
latter specifies the number of degrees by which the page should be rotated clockwise when
displayed or printed.
In order to see the stamp position, click the Refresh Preview button on the right-hand side. This is also valid
when you edit an existing stamp which can be done by clicking Edit stamp in the Stamps window.
Once you finished defining a stamp you can save it into a file that contains all the settings you selected. To
do that in the Stamps graphic interface click Save Stamps and select your destination folder. To load a
previously saved file containing stamp settings in the same interface click Load Stamps.
Neevia Document Converter Pro v7.1 user’s guide
© Copyright © 2000-2020, Neevia Technology.
Page 18 of 76Scheduler
You can schedule Document Converter to process the selected input folder once a day for a specified
duration of time. If the Scheduler is not enabled, Document Converter will process input folders continually.
You must set the Start Time and Duration for each day enabled. Please note that a 24-Hour clock is used.
You can enter the hour and minutes or use the up and down arrows to set the time.
Neevia Document Converter Pro v7.1 user’s guide
© Copyright © 2000-2020, Neevia Technology.
Page 19 of 76PDF Output Format
If you select PDF as output format and press the Advanced Settings button the following screen will be
displayed:
There are 6 tabs displayed:
General tab - use this to specify job options, document resolution, security options, optimization and
other general settings;
Compression tab - choose appropriate compression options to reduce the size of PDF document;
Fonts tab - select the font embedding options;
Color tab - select the color profiles: RGB, GRAY, CMYK. If you want to preserve the color profile in the
original file use Leave unchanged.
PDF Open options - select the PDF Open options;
PDF Info (metadata) - set the PDF metadata: Title, Author, Subject, Keywords;
Neevia Document Converter Pro v7.1 user’s guide
© Copyright © 2000-2020, Neevia Technology.
Page 20 of 76General tab
Job Options:
For your convenience there are several sets of predefined settings for creating PDF files. These settings
are designed to balance file size with quality, depending on how the PDF file is to be used:
• Default job option - is intended to be useful across a wide variety of uses, possibly at the expense of a
larger output file. All color and grayscale images are downsampled at 72 dpi, monochrome images at 300
dpi; subsets of all fonts used in the file are embedded; and all information is compressed. PDF files created
using the Default job option are compatible with Acrobat 4.0 (and later).
• Screen job option - intended for PDF files that will be displayed on the World Wide Web or an intranet,
or that will be distributed through an e-mail system for on-screen viewing. This set of options uses
compression, downsampling, and a relatively low resolution; converts all colors to RGB; maintains
compatibility with Acrobat 3.0; to create a PDF file that is as small as possible. It also optimizes files for byte
serving (fast web view).
• Printer job option – to be used for PDF files that are intended for desktop printers, digital copiers,
publishing on a CD-ROM, or to send to a client as a publishing proof. In this set of options, file size is still
important, but it is not the only objective. This set of options uses compression and downsampling to keep
the file size down, but it also embeds subsets of all fonts used in the file, tags everything for color
management, and prints to a medium resolution to create a reasonably accurate rendition of the original
document.
• Prepress job option - intended for PDF files that will be printed as a high-quality final output to an
imagesetter or, for example, a platesetter. In this case, file size is not a consideration. The objective is to
maintain all the information in a PDF file that a commercial printer or service bureau will need to print the
document correctly. This set of options downsamples color and grayscale images at 300 dpi, monochrome
images at 1200 dpi, embeds subsets of all fonts used in the file, prints to a higher resolution, and uses other
settings to preserve the maximum amount of information about the original document.
Compatibility
Select the PDF document compatibility level (a.k.a. PDF version).
Auto-Rotate Pages
Auto-Rotate Pages automatically rotates pages based on the orientation of the text. For example, some
pages (such as those containing tables) in a document may require the document to be turned sideways
so it can be read. Choose "None" to disable the Auto-Rotate Pages option. Choose "All" to rotate all
pages in a document based on the orientation of the majority of text. Choose "PageByPage" to rotate
each page based on the direction of text on that page.
Resolution
Here you can define the output document resolution. Usually, a higher resolution setting will result in
a larger but higher quality PDF document, while a lower setting will result in a smaller but lower quality
PDF document. You can enter a value from 72 to 2400.
NOTE: Low resolution is ideal for screen viewing. However, if high-quality paper print or the accurate
control of character position is required, you should choose a resolution of at least 600dpi.
Neevia Document Converter Pro v7.1 user’s guide
© Copyright © 2000-2020, Neevia Technology.
Page 21 of 76PDF Security
NOTE: All Neevia products enforce the restrictions set by PDF Security (encryption). However, not all third
party products fully support these settings. Recipients using such third party products may be able to bypass
some of the restrictions you have set.
If you press the PDF Security button the following screen will be displayed:
Selecting the Use Security checkbox will turn on the security options and apply them to the resulting PDF
file.
Compatibility drop-down box. There are 5 options:
a. Acrobat 5.0 and later (PDF 1.4) enables 128 bit RC4 encryption;
b. Acrobat 6.0 and later (PDF 1.5) enables 128 bit RC4 encryption;
c. Acrobat 7.0 and later (PDF 1.6) enables 128 bit AES encryption;
d. Acrobat 9.0 and later (PDF 1.7) enables 256 bit AES encryption.
e. Acrobat X and later (PDF 1.7 ext 3) enables 256 bit AES R6 encryption
Encrypt All Document Contents
When you select this option both the document and document metadata will be encrypted. Search engines will
not be able to access the document metadata when this option is used.
Encrypt All Document Contents except Metadata
Valid for Acrobat 6 and later. Only the content of a PDF document will be encrypted. Metadata remains fully
accesible for search engines.
Neevia Document Converter Pro v7.1 user’s guide
© Copyright © 2000-2020, Neevia Technology.
Page 22 of 76Require a Password to Open the Document
This allows you to set a password for opening the encrypted PDF.
Change Permissions Password
This password prevents users from changing the permission settings. The user can view the file in Acrobat Reader
but must enter the specified Permissions password in order to change the file’s Security and Permissions settings.
Permissions:
Printing Allowed - Specifies the level of printing that users are allowed for the PDF document. Possible values:
None - disables printing.
Low Resolution (150 dpi) - Users can print but the resolution will not be higher than 150-dpi. Each page is
printed as a bitmap image which may cause files to print at a slower speed. To make this option
available set the Compatibility option to Acrobat 5 (PDF 1.4) or later.
High Resolution - Allow users to print at any resolution. PostScript and other printers that come with high-
quality printing features can be used.
Changes Allowed - Enables the editing actions that are allowed in the PDF document. Possible values:
None - when selected none of the changes listed in Changes Allowed drop down box, such as filling in form
fields and adding comments are permitted.
Inserting, Deleting, And Rotating Pages - allows users to insert, delete, and rotate pages. Also bookmarks and
thumbnails creation are permitted. This option works only for high (128-bit RC4, AES or AES256)
encryption.
Filling in Form Fields and Signing Existing Signature Fields - when selected users can fill in forms and add
digital signatures. Adding comments or creating form fields is not permitted. This option works only
for high (128-bit RC4, AES or AES256) encryption.
Commenting, Filling In Form Fields and Signing Existing Signature Fields - users are allowed to add comments,
digital signatures and fill in forms. Moving page objects or create form fields is not permitted.
Page Layout, Filling in Form Fields and Signing - users can insert, rotate or delete pages and create bookmarks
or thumbnail images, fill out forms, and add digital signatures. Creating form fields is not permitted.
This option works only for low (40-bit RC4) encryption.
Any Except Extracting Pages - allows users to edit the document, create and fill in form fields, add comments
and digital signatures.
Enable Copying of Text, Images, and Other Content - allows users to select and copy the contents of a PDF.
Enable Text Access For Screen Reader Devices For The Visually Impaired - when selected visually impaired users
can read the document with screen readers. It doesn’t allow users to copy or extract the document’s contents.
This option works only for high (128-bit RC4, AES or AES256) encryption.
NOTE: there are programs available to crack the password. The longer the password, the harder it is to
crack. Please consider this when selecting a password.
Page Size
This allows you to select the page size and orientation for the converting documents. In case you would like
to define your own pagesize check Custom Page Size and enter your values for height and width specifying
also the measurement units. Check Scale to scale the page content. Make sure that Constrain proportions
when scaling is checked in case you would like to maintain the original proportions between the new page
dimensions and content.
NOTE: you should keep Page Size on Default if you want to preserve the original document page size
during the PDF conversion process.
Neevia Document Converter Pro v7.1 user’s guide
© Copyright © 2000-2020, Neevia Technology.
Page 23 of 76Compression Tab
Document Converter Pro allows the compression of images (bitmaps), text, and graphics (line art).
ReSampling also provides a further reduction of very large or high-resolution images.
Since the effectiveness of compression is highly data dependent, for the best result, you might want to try
different compression settings for different kinds of data sources.
For color or grayscale images, choose ZIP to apply the compression that works well on images with large
areas of single colors or repeating patterns, such as screen shots, simple images created with paint
programs, and black-and-white images that contain repeating patterns. Choose JPEG, quality minimum to
maximum, to apply the compression that is suitable for grayscale or color images, such as continuous-tone
photographs that contain more detail than can be reproduced on-screen or in print. Choose Automatic to
determine automatically the best quality for color and grayscale images.
NOTE: For monochrome images, choose CCITT or ZIP compression. Make sure that monochrome images are
scanned as monochrome and not as grayscale. Scanned text is sometimes saved as grayscale images by
default. Grayscale text compressed with the JPEG compression method is “muddy” at best and may be
unreadable.
Neevia Document Converter Pro v7.1 user’s guide
© Copyright © 2000-2020, Neevia Technology.
Page 24 of 76Resample
To resample color, grayscale, or monochrome images, Document Converter Pro combines pixels in a sample
area to make one larger pixel. You provide the resolution of your output device in dots per inch (dpi) and
select the resample algorithm:
Average Downsample – this algorithm averages the pixels in a sample area and replaces the entire area with
the average pixel color at the specified resolution.
Subsample – this algorithm chooses a pixel in the center of the sample area and replaces the entire area with
that pixel at the specified resolution. Subsample significantly reduces the conversion time compared with
downsampling but results in images that are less smooth and continuous.
Bicubic Downsample – this algorithm uses a weighted average to determine pixel color and usually yields
better results than the simple averaging method of downsampling. Bicubic is the slowest but most precise
method, resulting in the smoothest tonal gradations.
NOTE: Resampling monochrome images can have unexpected viewing results, such as no image
display. If this happens, turn off resampling and convert the file again. This problem is most likely to
occur with subsample and least likely with bicubic downsample.
Neevia Document Converter Pro v7.1 user’s guide
© Copyright © 2000-2020, Neevia Technology.
Page 25 of 76Fonts Tab
Under the Fonts tab you can enable or disable embedding fonts in the resulting PDF file.
Select Subset embedded font option to include only those characters of a font that are used in the PDF
document, to reduce document size. A "threshold" is specified to tell if font-subset is necessary. If the
percentage of used characters (compare with total characters of the particular font) exceeds this threshold,
the entire font is embedded.
Neevia Document Converter Pro v7.1 user’s guide
© Copyright © 2000-2020, Neevia Technology.
Page 26 of 76Color Tab
Process Color Model Device RGB
Sets the color space to use for device-dependent colors in the output document to DeviceRGB.
NOTE: this does not affect images and shadings.
Process Color Model Device CMYK
Sets the color space to use for device-dependent colors in the output document to DeviceCMYK.
NOTE: this does not affect images and shadings.
Process Color Model Device Gray
Sets the color space to use for device-dependent colors in the output document to DeviceGray.
NOTE: this does not affect images and shadings.
Leave Unchanged
Enabling this option will force Document Converter to preserve the color model in the original document.
Device-dependent Options
Choose any of these options only if you are working with documents created by high-end documentation and
graphics applications, such as Adobe Illustrator and Adobe InDesign. For more information, see the
documentation that came with the application.
"Preserve overprint settings" retains any overprint settings in files being converted to PDF. Overprinted
colors are two or more inks printed on top of each other. For example, when a cyan ink prints over a yellow
ink, the resulting overprint is a green color. Without overprinting, the underlying yellow would not be printed,
resulting in a cyan color.
Transfer functions are used for artistic effect and to correct for the characteristics of a specific output device.
For example, a file that is intended for output on a particular imagesetter may contain transfer functions that
compensate for the dot gain inherent with that printer.
"Preserve under color removal and black generation" retains these settings if they exist in the PostScript
file. Black generation calculates the amount of black to be used when trying to reproduce a particular color.
Undercolor removal (UCR) reduces the amount of cyan, magenta, and yellow components to compensate for
the amount of black that was added by the black generation. Because it uses less ink, UCR is generally used
for newsprint and uncoated stock.
Neevia Document Converter Pro v7.1 user’s guide
© Copyright © 2000-2020, Neevia Technology.
Page 27 of 76"Preserve Transfer Functions" retains the transfer functions traditionally used to compensate for dot gain or
dot loss that may occur when an image is transferred to film. Dot gain occurs when the ink dots that make
up a printed image are larger (for example, due to spreading on paper) than in the halftone screen; dot loss
occurs when the dots print smaller. With this option, the transfer functions are kept as part of the file, and
are applied to the file when the file is output.
"Preserve halftone information" retains any halftone information in files. Halftone information consists of
dots that control how much ink is deposited by halftone devices at a specific location on the paper. Varying
the dot size and density creates the illusion of variations of gray or continuous color. For a CMYK image, four
halftone screens are used: one for each ink used in the printing process. In traditional print production, a
halftone is produced by placing a halftone screen between a piece of film and the image and then exposing
the film. Electronic equivalents, such as in Adobe Photoshop, let users specify the halftone screen attributes
before producing the film or paper output. Halftone information is intended for use with a particular output
device.
Neevia Document Converter Pro v7.1 user’s guide
© Copyright © 2000-2020, Neevia Technology.
Page 28 of 76You can also read