TeraByte Unlimited Las Vegas, Nevada, USA 2021-06-17
←
→
Page content transcription
If your browser does not render page correctly, please read the page content below
TeraByte Unlimited
Las Vegas, Nevada, USA
http://www.terabyteunlimited.com
                                                           Revision: 2021-06-17
Copyright © 2018-2019 TeraByte, Inc. All Rights Reserved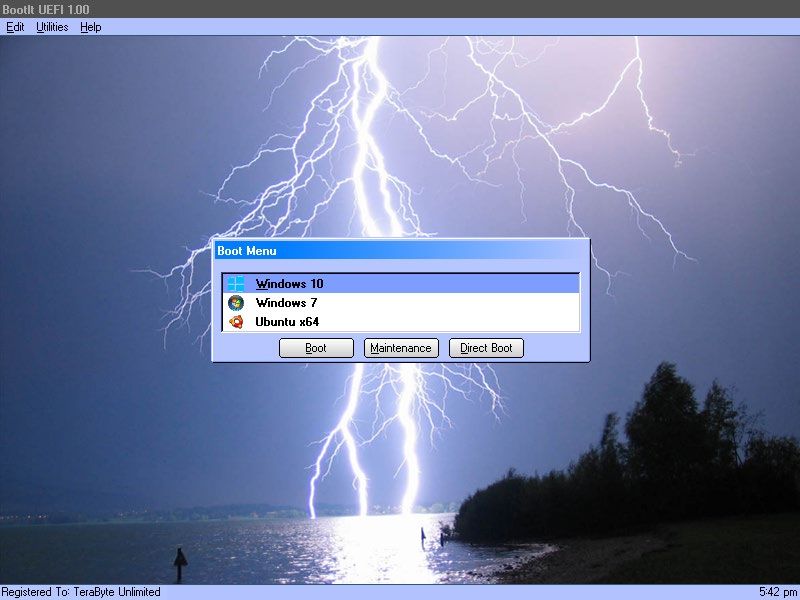
Contents
What You Can Do With BootIt UEFI ............................................................................................................. 5
Installing BootIt UEFI .................................................................................................................................... 6
   Limitations & UEFI Issues ......................................................................................................................... 6
   System Requirements ............................................................................................................................... 7
   Changes from BootIt Bare Metal ............................................................................................................... 7
   Before You Begin ...................................................................................................................................... 8
      Create a Windows 10 Recovery Drive ................................................................................................... 8
      Create a Windows 7 System Repair Disc .............................................................................................. 8
      Prepare for a BootIt UEFI setup ............................................................................................................ 9
      Review the two-step installation process ............................................................................................... 9
   Step A: Creating the Boot Media or ISO Image ........................................................................................ 9
      Boot Media and UEFI Systems.............................................................................................................. 9
      Step A: Create the boot media using the MakeDisk utility (Windows users) ...................................... 10
          Video Method ................................................................................................................................... 12
          Video Mode ...................................................................................................................................... 12
          Device Options ................................................................................................................................. 13
          Global Geometry and MBR Options................................................................................................. 13
   Step B: Installing BootIt UEFI on Your Hard Disk ................................................................................... 17
      Step B: Boot from the CD/DVD or USB flash drive ............................................................................. 17
      Install BootIt UEFI for the first time ...................................................................................................... 18
      Upgrade from an earlier version of BootIt UEFI .................................................................................. 19
      Choose the partition manually ............................................................................................................. 19
      Complete the installation ..................................................................................................................... 20
   Uninstalling BootIt UEFI .......................................................................................................................... 20
   The Installation & Recovery Boot Menu .................................................................................................. 20
Using Image for UEFI .................................................................................................................................. 22
Using BootIt UEFI ....................................................................................................................................... 23
   The Boot Menu ........................................................................................................................................ 23
      The Normal Boot Menu ........................................................................................................................ 23
      Set up the Normal Boot Menu ............................................................................................................. 24
      Add or edit a normal boot menu item................................................................................................... 25
          Boot Details ...................................................................................................................................... 25
          Password.......................................................................................................................................... 27
          MBR Details ..................................................................................................................................... 27
          GPT Details ...................................................................................................................................... 27
      The Direct Boot Menu .......................................................................................................................... 28

BootIt™ UEFI User Manual.                                                                                                                             Page 2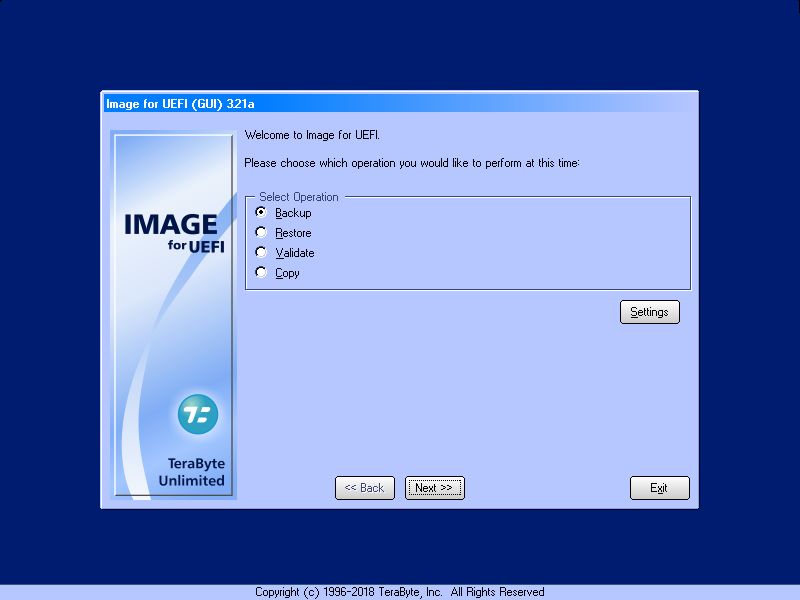
Boot an item using the Direct Boot Menu ............................................................................................ 28
         Item Menu ........................................................................................................................................ 28
         View Menu........................................................................................................................................ 29
   Working with Partitions ............................................................................................................................ 30
      Selecting a Drive .................................................................................................................................. 30
      Partition Operations ............................................................................................................................. 31
         Create a partition or volume ............................................................................................................. 31
         Delete a partition or volume ............................................................................................................. 31
         Undelete a partition or volume ......................................................................................................... 32
         Format a partition or volume ............................................................................................................ 32
         Resize a partition or volume............................................................................................................. 33
         Copy a partition or volume ............................................................................................................... 34
         Slide a partition or volume................................................................................................................ 35
         Align a FAT/FAT32 partition ............................................................................................................. 35
         View partition properties ................................................................................................................... 35
         BCD Edit........................................................................................................................................... 37
         Editing a file ...................................................................................................................................... 38
         Applying TRIM .................................................................................................................................. 39
      Drive Settings ....................................................................................................................................... 40
      Wipe Entire Drive ................................................................................................................................. 43
      Change Disk Type ............................................................................................................................... 46
      View MBR ............................................................................................................................................ 46
      Reorder GPT........................................................................................................................................ 47
   Program Settings ..................................................................................................................................... 48
      Startup ................................................................................................................................................. 49
      General ................................................................................................................................................ 50
      Device .................................................................................................................................................. 52
      Global Geometry and Alignment.......................................................................................................... 53
      Security ................................................................................................................................................ 55
      Time Zone ............................................................................................................................................ 56
      Users .................................................................................................................................................... 56
   Display Settings ....................................................................................................................................... 57
   Creating Icons and Backgrounds ............................................................................................................ 58
Installing Operating Systems ...................................................................................................................... 59
   Installing an Operating System (OS) ....................................................................................................... 59
Advanced Program Options ........................................................................................................................ 61
   INI File Options ........................................................................................................................................ 61
      Video .................................................................................................................................................... 61
      Options ................................................................................................................................................. 62

BootIt™ UEFI User Manual.                                                                                                                                Page 3
HDn ...................................................................................................................................................... 66
License ................................................................................................................................................. 67
SVGA/VGA .......................................................................................................................................... 67
Using Terabyte OSDT Pro for BootIt .......................................................................................................... 69
Obtaining Technical Support ....................................................................................................................... 70
Ordering and Licensing BootIt UEFI ........................................................................................................... 70
Trademarks ................................................................................................................................................. 70
Definition of Shareware ............................................................................................................................... 71
Ombudsman Statement .............................................................................................................................. 71
TeraByte Unlimited (Trial-Use) License Agreement ................................................................................... 72
TeraByte Unlimited (Full-Use) License Agreement..................................................................................... 75
BootIt™ UEFI User Manual. Page 4What You Can Do With BootIt UEFI
While you can read a detailed description of each BootIt UEFI (BIU) feature in Using BootIt UEFI on page
23, the following is a brief overview of just some of the many tasks you can accomplish using BootIt UEFI:
• Configure detailed boot items to fit your needs. • Edit text files on Ext2/3/4, FAT, FAT32, and
• Boot from any partition on up to sixteen hard NTFS file system partitions.
drives (OS must support being booted in UEFI • Edit the Windows BCD file.
mode from selected partition). • Convert between FAT and FAT32 without data
• Boot multiple operating systems from a single loss.
EFI System partition. • Format FAT, FAT32, and NTFS partitions.
• Partition GPT (GUID Partition Table) drives. • Set up users and passwords.
• Create over 200 primary partitions on EMBR • Create and restore compressed images of your
drives (if desired). partitions using the included CUI version of
• Create volumes (logical partitions) in extended Image for UEFI.
partitions. • … and Yes, it supports Windows Server
• Resize Ext2/3/4, FAT, FAT32, and NTFS file Operating Systems for the same price.
system partitions without data loss.
BootIt™ UEFI User Manual. Page 5Installing BootIt UEFI Before you install BootIt UEFI (BIU), take a moment to read about its limitations and system requirements. Next, complete the procedures in Before You Begin on page 8. Finally, create the boot media or ISO image as described on page 9, and then install BootIt UEFI on your hard drive as described on page 17. Limitations & UEFI Issues BootIt UEFI supports accessing the drives through the BIOS (basic input/output system) using UEFI as well as directly, which may be faster. If direct access is enabled, but unable to be used, native UEFI access will be used. When possible, using the most current BIOS version is recommended. Older UEFI versions generally have more issues, less support, and are more unstable. Some features are not available if the UEFI environment lacks support (e.g. TRIM, burning optical media). Several UEFI issues you may see are listed below: BootIt™ UEFI User Manual. Page 6
•   UEFI boot entries get changed and hidden.
    •   UEFI boot entries order changes unexpectedly.
    •   UEFI boot entries are filled with duplicates, incorrect item boots (may require clearing/disabling
        invalid boot items and resetting boot order).
    •   Renaming a directory using the UEFI file system causes the directory to be removed (chkdsk
        needed to repair).
    •   Boots to Windows or last booted item until booted into BootIt UEFI (boot order is ignored).
    •   Attempting to write to booted ISO causes EFI file system to disappear (requires restart).
    •   Boot variables lost.
    •   Environment becomes unresponsive, requiring restart.
    •   The Direct Boot feature and Use UEFI BM boot option will not work on systems that don’t support
        BootNext (such as the Surface Pro 4). In those cases the system will boot as if a reboot was
        requested.
    •   On systems where unmounted UEFI file systems are not remounted, using the Boot Menu to boot
        a menu item, switch to the Direct Boot menu, or enter maintenance mode results in an Unable to
        open BOOTIT.DAT error message. This issue is more likely to occur with UEFI implementations
        based on an older code base. If a BIOS update is not available to resolve the problem, using the
        UEFINoRemount option will allow basic usage of BootIt UEFI. If you need Image for UEFI in this
        mode you will need to switch to the CUI version. Refer to the following KB article for more details
        on enabling and using this option as well as the limitations involved:
        https://www.terabyteunlimited.com/kb/article.php?id=626
    •   We also want to note that due to the way the motherboard manufactures have implemented UEFI
        variables in NVRAM with no easy reset method, should any bugs in the system UEFI cause boot
        problems due to UEFI variables, the system BIOS would need to be flashed using their method
        that does not depend on the system being able to be booted.

System Requirements
Verify that your computer system meets the minimum requirements listed below. Note that most current
systems exceed these requirements and should support BootIt UEFI.

    •   Standard x64 PC using AMD64/EMT64 and UEFI 64-bit.
    •   UEFI BIOS x64 version 2.1 or later (more current versions usually provide more features and
        stability).
    •   CD/DVD drive or USB flash drive (needed to create the boot media).
    •   UEFI BIOS-accessible hard drive or SSD.

Changes from BootIt Bare Metal
For users of BootIt Bare Metal (BootIt BM), the following differences should be noted:

New

    •   Boots and installs on UEFI systems.

BootIt™ UEFI User Manual.                                                                             Page 7
• Boot Manager supports booting multiple operating systems on GPT drives.
• GPT partitions can be hidden.
• Secure Boot is supported.
Changed
• Image for UEFI is provided for imaging.
• TBOSDT for BootIt (UEFI version) provided for scripting support.
• Direct Boot Menu items are UEFI boot items (controlling partition states not supported).
Obsolete / Removed
• Booting on Legacy systems and booting in Legacy mode on UEFI systems.
• Boot Manager support for Legacy operating systems on MBR/EMBR drives (MBR/EMBR drives
are still supported as non-booting drives).
• Multi-OS feature.
Before You Begin
TeraByte Unlimited has taken every effort to make BootIt UEFI as safe as possible. However, it is not
possible to provide a 100-percent guarantee of safety.
If you ever choose to set a disk type as EMBR and are not using the Limit Primaries option for that drive
then it is extremely important that you do not use any partitioning software (such as Windows Disk
Management, DISKPART, or FDISK) on that drive. If you ignore this warning, you are taking a serious
risk of data corruption on that drive.
Before using BootIt UEFI on any system for the first time, back up all data on all hard drives. It’s better to
be safe than sorry.
It’s always a good idea to have a Recovery Drive, System Repair Disc, or installation media that can be
used to boot the system and perform repairs should something ever go wrong. Windows 7/8.x/10 include
repair capabilities on the installation media. You should configure the disk to give you all the functionality
you may need by adding any drivers or utilities as well as configuring the configuration files. The following
sections explain this process. (If you have Image for Windows, the TBWinRE boot media also includes
the Windows System Recovery Options utility.)
Create a Windows 10 Recovery Drive
1. Click the Start button or press the Windows key.
2. Type Recovery Drive to search for it.
3. Run the app.
4. Follow the instructions presented to create the boot media.
Create a Windows 7 System Repair Disc
5. Click the Start button.
6. Click All Programs.
BootIt™ UEFI User Manual. Page 87. Select Maintenance >> Create System Repair Disc.
8. Follow the instructions presented to create the disc.
Prepare for a BootIt UEFI setup
1. Be sure to read Before You Begin on page 8.
2. Verify that you have the latest version of and support information for BootIt UEFI by visiting:
www.terabyteunlimited.com
3. If not already done, consider creating a startup disk as described in Before You Begin.
4. Back up all the data on all of your hard drives.
5. Create the BootIt UEFI Setup CD/DVD or USB flash drive (UFD) as described on page 9.
6. Consider reviewing the example tutorials available on the TeraByte website. While these tutorials
were created using the previous versions of the program (BootIt BM, BootIt NG), the basics of the
procedures are very similar (http://www.terabyteunlimited.com/howto/index.htm).
7. Install or upgrade BootIt UEFI on your hard disk as described on page 17.
8. Read Using BootIt UEFI on page 23.
9. For an example of how to install operating systems, refer to Installing Operating Systems on page 59.
Review the two-step installation process
A. Create the installation media, bootable ISO (International Standards Organization) image, or CD/DVD
disc as described in Step A: Creating the Boot Media or ISO Image.
B. Use the installation media to install BootIt UEFI on your hard disk as described in Step B: Installing
BootIt UEFI on Your Hard Disk on page 17.
Note
• Verify that you have the latest version of and support information for BootIt UEFI by visiting:
www.terabyteunlimited.com
• Before beginning the BootIt UEFI installation, be sure to read Before You Begin on page 8.
Step A: Creating the Boot Media or ISO Image
The first of two steps in setting up BootIt UEFI from a downloaded copy of the software is to create the
installation boot media. If you are installing on multiple computers, each computer must have its own
license and you may wish to create boot media for each system (usually only necessary if a system
requires special settings for the boot media). The boot media will be either a CD/DVD disc or a USB flash
drive (UFD). Depending upon your version of Windows, you can either use Windows Explorer or File
Manager to complete the following procedure.
Boot Media and UEFI Systems
Computer systems that come from the manufacturer with Windows 8.x or Windows 10 installed include a
BIOS interface known as the Unified Extensible Firmware Interface (UEFI). This BIOS interface boots
media differently than a traditional (Legacy) BIOS. Microsoft also requires these systems to use a feature
of UEFI called Secure Boot. When Secure Boot is enabled, the system will only boot items that have a
digital signature that is included in the system firmware. The manufacturers include a digital certificate,
provided by Microsoft, to boot Windows on their systems. Secure boot can be disabled (on non-ARM
BootIt™ UEFI User Manual. Page 9systems) to allow you to boot other operating systems and environments. Boot media must be specifically
created for UEFI to allow UEFI to boot from it. However, most systems also include the ability to boot
traditional boot media though a method or mode typically called Legacy or BIOS.
BootIt UEFI boots on UEFI systems (Legacy mode is not supported). Secure Boot can be enabled or
disabled.
Step A: Create the boot media using the MakeDisk utility (Windows users)
1. Extract the contents of bootit_collection_en.zip (Full version) or bootit_collection_en_trial.zip (Trial
version) to a folder of your choice.
• In Windows you can double click the ZIP file and then use the Extract all files or Extract All link
shown in the left pane, toolbar, or ribbon of Explorer to extract the contents. Alternatively, after
opening the ZIP file, you can select all the files listed and copy them to another folder to extract
the contents. Please note that whichever foregoing method you use, the contents of the ZIP file
must be extracted to another folder before proceeding.
2. Run MakeDisk.exe from the folder of Step 1. For versions of Windows with UAC enabled, this will
trigger a UAC prompt. Select to allow the program to run.
3. The MakeDisk welcome screen is displayed. If you would like to save the selections you make as you
step through the wizard, check the “Save selections for next time” box. (Selections will only be saved
if boot media is created.) Click Next to continue.
4. Select the PC Platform (UEFI) option to create the BootIt UEFI media and then click Next.
BootIt™ UEFI User Manual. Page 105. Select the product to include in the build:
BootIt UEFI Select to include BootIt UEFI and, optionally, Image for UEFI and Scripting
Support (selected in a later step) on the boot media.
Image for UEFI Select to include only Image for UEFI on the boot media. If you select this
(GUI) option you will need to select either Simple mode or Traditional mode for
Image for UEFI in the next step. For more information on these modes
please refer to the Image for DOS manual.
6. The product license agreement screen is displayed. Read the license agreement, and, if you accept
it, select the I accept the agreement button and click Next.
7. Select the optional components.
Image for UEFI Select to include Image for UEFI. Image for UEFI will also be installed on
the system when you install BootIt UEFI using the boot media.
Scripting Support Select to include TBOSDT Pro for BootIt. Supports adding, deleting, sliding,
copying, and resizing partitions in addition to the standard features of
TBOSDT Pro.
This option is available if you are using the purchased version.
8. The MakeDisk wizard will now proceed through the option screens, each of which is detailed below.
Select the desired options on each screen and then click Next to proceed. If you are creating only the
Image for UEFI media and selected the Simple mode option some of the following option screens will
not be shown.
Note
When booting a computer using the BootIt UEFI setup media, be aware that all settings except the
BootIt™ UEFI User Manual. Page 11video mode/method come from the installed copy of BootIt UEFI if it’s installed. The video
mode/method is updated when BootIt UEFI is reinstalled/updated, but the other settings are not. For
systems on which BootIt UEFI is not installed the settings as configured here will be used when the
setup media is booted.
Video Method
Default Video Uses the GOP video standard for the display. Support is provided by the
video card’s BIOS. This is the recommended video method.
Default: Selected
Alternate Video Uses an alternate method, which is a bug workaround for video issues. It is
not recommended to select this option unless you know for certain it is
required (e.g. standard GOP doesn’t work or you’re instructed to use it by
TeraByte support).
Video Mode
For the best viewing experience, it is recommended to select 800x600 or higher with 16M colors. If
the selected resolution isn’t supported a supported resolution will be used instead.
Resolutions using The selected video resolution will be used with a color depth of 16M.
16M Colors
Resolutions using The selected video resolution will be used with an emulated color depth of
256 Colors 256.
BootIt™ UEFI User Manual. Page 12Device Options
Make any desired changes to the optional device options BootIt UEFI will use when booting the boot
media on a system that does not have BootIt UEFI installed. These options will also be used when
BootIt UEFI is installed. By default, all options are unselected.
Direct DASD IO Use direct IO to access hard drives instead of native UEFI IO. Will fall back
to native IO if unable to use direct access.
Direct Optical IO Use direct IO to access optical media instead of native UEFI IO. Will fall
back to native IO if unable to use direct access.
Disable Touch Disables UEFI touch screen support.
Support
Global Geometry and MBR Options
These options control how BootIt UEFI and Image for UEFI manage drive geometry (they will be the
default for all drives in the system that have the Use Global Settings options selected in Drive
Settings). Note that all of these options can be changed in BootIt UEFI. By default, all options are
unselected. Also, these geometry settings are only applicable to MBR/EMBR drives.
Disable Global Disables the global geometry settings. BootIt UEFI and Image for UEFI will
Geometry revert to using program defaults or drive specific overrides (equivalent to
those used by the imaging programs prior to version 2.52).
For normal use, it is not recommended to disable Global Geometry, which
provides an easy method of applying geometry settings system-wide.
Disable Align MBR The Align MBR for BIOS Auto Mode option is enabled by default to prevent
for BIOS Auto Mode problems with unaligned partitions on systems with their BIOS using Auto
Mode. Many newer systems use Auto Mode by default, and some even
don't have an option to turn it off. Select this option if you want to disable
BootIt™ UEFI User Manual. Page 13Align MBR for BIOS Auto Mode.
Align Partitions on This option provides a convenient way to enable 1MiB partition alignment
1MiB Boundaries for all drives (drives with 512 byte sectors will be aligned on 2048 sectors;
drives with 4096 byte sectors will be aligned on 256 sectors). When this
option is enabled, partition alignment will be configured using the Windows
Vista and Windows 7/8.x/10 standard. This is popular with users of SSD
type drives, which require this alignment for optimal performance.
Align Partitions on This option is used in conjunction with Align Partitions on 1MiB Boundaries
Cylinders to provide an easy way to auto determine alignment and to default a blank
drive to use either 1MiB alignment or cylinder alignment.
For more details, please see Settings | Align on Cylinder on page 53.
Assume Same Enable this option to prevent problems when a backup image of another
Target System system’s drive is restored to a drive connected to a different system and
drive will be put back into the original system.
This option uses drive geometry based on the MBR entry of the first
partition in the backup image file and applies only when restoring a backup
image.
For more details, please see Settings | Assume Same Target System on
page 54.
Use Source Host Enables the use of the drive geometry saved in the backup image that
Geometry represents the geometry from the environment (Windows, Linux, DOS, or
UEFI) used to create the backup file. The saved drive geometry is used for
the restored partition(s) instead of the geometry in use on the current
system (which may differ).
For more details, please see Settings | Use Source Host Geometry on
page 55.
Disable Validate The Validate Geometry Before Use option is used to ensure that the
Geometry Before geometry from the MBR on the original system is aligned to known
Use standards before accepting it for use. It only applies when the Assume
Same Target System option is enabled. Select this option if you want to
disable Validate Geometry Before Use.
For more details, please see Settings | Validate Geometry Before Use on
page 54.
Use Windows 9x Windows Vista and later tied the kernel loader to the MBR code such that
MBR using previous MBR code may not allow Windows Vista or later to boot on
certain machines. Leave this option unselected (the default) to use the
code base compatible with Windows Vista or later. The new MBR code will
continue to boot older OSes with the exception of some (rare)
configurations using Win9x on FAT32.
For more details, please see Settings | Use New Windows MBR on page
55.
BootIt™ UEFI User Manual. Page 149. The Additional bootit.ini Options screen is displayed. Enter any additional bootit.ini file options you
require. If unsure, just leave the fields blank (most of the options you should set to use BootIt UEFI or
Image for UEFI are set for you by default). For example, you might want to use the TimeZone
variable to identify your time zone (as shown below). Click Next to continue.
10. The BootIt UEFI Registration Screen is displayed. If you have purchased a BootIt UEFI license,
enter the registration information you were provided with in the text boxes shown on this screen.
Leaving the text boxes empty will result in BootIt UEFI operating in a limited mode. If you are using
the trial version of BootIt UEFI you won’t be prompted to enter license information. Click Next.
11. The Select Target screen is displayed. Choose the target that MakeDisk should use.
If you choose the ISO File option, you must supply an ISO file name.
If you choose the USB/SD option to create a bootable flash drive, select the USB Layout to use:
No Partition - The entire UFD is configured as one big unpartitioned device. If you were
FAT/FAT32 Volume to view a 4 GB UFD created using this option in Windows, you’d see free
space beyond the amount used by MakeDisk up to the size of the drive.
This free space is available to be used normally. If the UFD is 4GB or
smaller, it's formatted as FAT. Otherwise, it's formatted as FAT32.
Partition - MBR The entire UFD is used as a single bootable partition. The computer's
FAT/FAT32 Partition BIOS will usually detect this type of UFD as a hard drive. Any unused
BootIt™ UEFI User Manual. Page 15space on the UFD is available to be used normally. If the UFD is 4GB or
smaller, it's formatted as FAT. Otherwise, it's formatted as FAT32.
Partition - MBR This is the same as the Partition - MBR FAT/FAT32 Partition mode except
FAT/FAT32 Partition that the INT 13 Extension is used (this is required for some computers to
(Int13h Extensions) boot a UFD).
Partition – MBR The UFD is configured as an MBR drive that contains an EFI System
UEFI System Partition. This type of drive may not boot on Legacy BIOS (non-UEFI)
Partition systems. Additionally, the partition may not be accessible normally via a
drive letter.
Partition – GPT The UFD is configured as a GPT drive that contains an EFI System
UEFI System Partition. This type of drive will only boot on UEFI systems in UEFI mode.
Partition Additionally, the partition may not be accessible normally via a drive letter.
Multi-Partition – Will create a small FAT or FAT32 partition for BootIt UEFI and create an
MBR FAT/FAT32 exFAT partition in the remaining space. If this layout already exists,
(+exFAT) MakeDisk can update the BootIt UEFI partition and leave the exFAT
partition unchanged.
Multi-Partition – This is the same as the Multi-Partition – MBR FAT/FAT32 (+exFAT) mode
MBR FAT/FAT32 except the INT 13 Extension is used (this is required for some computers
(Int13h Extensions) to boot a UFD).
(+exFAT)
Multi-Partition MBR The UFD is configured as an MBR drive that contains a small EFI System
UEFI System Partition that contains BootIt UEFI. An exFAT partition is created in the
Partition (+exFAT) remaining space. This type of drive may not boot on Legacy BIOS (non-
UEFI) systems. Additionally, the partition may not be accessible normally
via a drive letter. If this layout already exists, MakeDisk can update the
BootIt UEFI partition and leave the exFAT partition unchanged.
Multi-Partition GPT The UFD is configured as a GPT drive that contains a small EFI System
UEFI System Partition that contains BootIt UEFI. An exFAT partition is created in the
Partition (+exFAT) remaining space. This type of drive will only boot on UEFI systems in UEFI
mode. Additionally, the partition may not be accessible normally via a drive
letter. If this layout already exists, MakeDisk can update the BootIt UEFI
partition and leave the exFAT partition unchanged.
The Geometry Calculation Method options control how the drive geometry is calculated for the
USB/SD device. It is recommended to try the Default option first. If the device fails to boot properly
(e.g. black screen, boot failure, device not found, etc.), the other options can be tried. Make note of
which option works properly for future use.
By default, for data safety reasons, MakeDisk does not support UFD devices that are larger than 64
GB in size. For that reason, devices larger than 64 GB will not appear in MakeDisk. You can allow
MakeDisk to support larger devices by clicking the USB+ button or by specifying the /nousblimit
parameter when it's run (e.g. makedisk /nousblimit).
More information on UFD boot media can be found in the following KB article:
http://www.terabyteunlimited.com/kb/article.php?id=317
BootIt™ UEFI User Manual. Page 1612. Click Finish, and respond to subsequent prompts as necessary. MakeDisk will then create your
bootable media or ISO image. When it is done, the success screen should appear.
Note: If you created a boot CD/DVD the disc will appear blank, but it is still bootable.
13. If you opted to create bootable media in Step 9, you are done with Step A, proceed to Step B:
Installing BootIt UEFI on Your Hard Disk. If you selected the ISO File option instead, you will first
have to use other CD/DVD authoring software, such as BurnCDCC, to create a bootable BootIt UEFI
installation disc from the ISO file. Once you have done that, proceed to Step B: Installing BootIt UEFI
on Your Hard Disk.
Step B: Installing BootIt UEFI on Your Hard Disk
In this step, you will install BootIt UEFI onto your hard drive using the installation media that you created
in Step A.
Warning to Windows 8.x and Windows 10 Users
You must disable the Windows 8.x and Windows 10 Fast startup option or you risk corruption of your
partitions and data. This option can be disabled by viewing the Windows partition’s properties in Partition
Work and clicking the Disable Fast Start button. This can be done after the installation of BootIt UEFI has
completed.
Step B: Boot from the CD/DVD or USB flash drive
1. Consider doing the following:
• From within BIOS (basic input/output system) setup, verify that your system boot up sequence
(boot order) is correct. Most newer computers display either a list of devices containing all boot
devices or separate lists for each type of device. Make sure to place the drive or device from
which you will be booting the BootIt UEFI Setup media before the internal hard drive.
• Instead of changing the boot order, you could boot the media using the BIOS Boot Menu. This
can be accessed on startup by pressing the appropriate key (e.g. F8, F12, etc.). Some systems
will display on-screen which key accesses the boot menu, which may be labeled BBS (BIOS Boot
Specifications). Select the BootIt UEFI media to boot it (select the UEFI entry for the device if
given the choice between UEFI and Legacy modes).
• Disable the Boot-Sector/MBR virus protection option (if it exists in the BIOS). If you leave the
virus protection option enabled, it may cause issues.
2. Insert the BootIt UEFI Setup media in the correct drive or, if using a USB flash drive, plug it into a
USB port.
3. Restart or reboot the computer.
• BootIt UEFI should begin loading from the CD/DVD or USB flash drive.
• If BootIt UEFI doesn’t seem to load and your system starts as it normally does, double-check that
you configured the BIOS boot order correctly.
Note
• If you are installing BootIt UEFI for the first time, refer to Install BootIt UEFI for the first time.
• If you are upgrading from an existing BootIt UEFI installation, refer to Upgrade from an earlier
version of BootIt UEFI.
• If you are upgrading an installation of the trial version of BootIt UEFI, recreate the BootIt UEFI
BootIt™ UEFI User Manual. Page 17Setup media using the full version and enter your name and key when prompted. Then refer to
Upgrade from an earlier version of BootIt UEFI.
Install BootIt UEFI for the first time
1. After you boot from the BootIt UEFI Setup media, at the Welcome to setup prompt, click OK.
2. You are then asked if you want to install the boot files to the default UEFI boot directory. Some
systems may require the boot files in the default folder.
Click Yes to install the boot files to the \EFI\Boot folder of the EFI System partition.
Click No to install the boot files to the \EFI\BootIt folder of the EFI System partition.
3. When asked how you want the partition chosen, click Yes to have Setup choose the partition for you
or click No to choose the partition manually as described on page 19.
4. You are then asked if you want BootIt to manage the directories under the EFI directory.
BootIt UEFI can manage the booting files of multiple operating systems from the same EFI directory.
When managed, folders can additionally be renamed as necessary for the boot items so the booted
OS sees its booting files as it normally would. If the directories are not managed the folders will not be
renamed, which will cause booting file conflicts if multiple versions of the same operating system are
installed.
BootIt™ UEFI User Manual. Page 18Click Yes to have BootIt UEFI manage the directories (recommended).
Click No to have BootIt UEFI not manage the directories.
5. When Setup indicates that it has all of the needed information, click OK to begin copying files to your
hard disk, and then refer to Complete the installation on page 20.
If Setup is unable to find or create the installation partition, Setup will switch to manual mode where
you can select or create an EFI System partition for installation.
Upgrade from an earlier version of BootIt UEFI
1. After you boot from the BootIt UEFI Setup media, on the Installation & Recovery Boot Menu, click
Upgrade BootIt UEFI, and then click OK.
2. At the Welcome to setup prompt, click OK.
3. When asked how you want the partition chosen, click Yes to have Setup choose the partition for you
or click No to choose the partition manually as described in Choose the partition manually.
4. When Setup indicates that it has all of the needed information, click OK to begin copying files to your
hard drive, and then refer to Complete the installation on page 20.
If Setup is unable to find the BootIt UEFI partition, a message will be displayed and you will need to
reinstall BootIt UEFI.
Choose the partition manually
When installing BootIt UEFI for the first time (page 18) or upgrading an earlier version of BootIt UEFI
(page 19), when asked how you want the partition chosen, if you click No and decide not to have Setup
choose the partition for you, then you must manually complete this procedure to prepare and choose the
partition.
1. Read the displayed message indicating that you must ensure that an EFI System partition is selected
for installation and that you need to enable the BIU Managed bit on the partition to have BootIt
manage the directories under \EFI, and then click OK.
2. In the Work with Partitions dialog box that appears, in the Actions section, you’ll see the Setup button
which only appears in this dialog box when accessed during installation.
3. Select the booting drive (usually HD0), if not already selected. If the text above the partitions does not
read GPT Partitions, the drive is not GPT. You may have the wrong drive selected or need to convert
it to GPT (BootIt UEFI can only be installed to a GPT drive). To convert to GPT, click the Change
Disk Type button and then click the GPT button. It is not recommended to convert a drive unless you
are aware of the effect the conversion will have on the drive’s contents (e.g. converting an MBR drive
with Windows installed on it will prevent Windows from booting).
4. With the appropriate hard drive selected, click the EFI system partition for installation.
If one does not exist, you can create and format it at this time. A minimum size of 400MB is
recommended to allow sufficient space for the booting files of the operating systems that will be
installed (consider a larger size if planning to install many operating systems that will share the
partition). If there is no Free Space (unpartitioned space) to create the partition, you can resize one of
the existing partitions smaller by the amount of space needed.
Ensure the desired EFI System partition is highlighted before continuing with the next step.
5. If you want BootIt UEFI to manage the \EFI directories (recommended), click the Properties button
and enable bit 55 (BIU Managed) in the Flags listbox. Click OK to save the change.
6. Click Setup to continue. Setup will notify you if something still needs to be configured.
BootIt™ UEFI User Manual. Page 19If the Setup button is grayed out and unavailable, then the partition that you highlighted is not valid for
the installation.
7. When Setup indicates that it has all of the needed information, click OK to begin copying files to your
hard disk and then refer to Complete the installation.
Complete the installation
1. Once the installation has finished you will be prompted to remove the BootIt UEFI boot media and
restart the system. Keep the boot media available to use for reactivating or upgrading BootIt UEFI.
2. Check the BIOS boot sequence and configure it to boot the BootIt UEFI item first (or after the
CD/DVD drive if it’s used for booting). Be aware that some Windows operations may change the
UEFI boot order so you may occasionally need to enter the BIOS and change BootIt UEFI back to
first position. If the system allows it, you may find it helpful to disable all the other BIOS boot entries
so only the BootIt UEFI item is enabled.
Uninstalling BootIt UEFI
1. If you do not have primaries limited on EMBR drives, then the first step to uninstalling BootIt UEFI is
to make sure that you have no more than four primary partitions per EMBR drive (this is not
necessary if the EMBR partitions will be managed manually with the BootIt UEFI or BootIt BM boot
media or with an installed BootIt BM).
Use the Work with Partitions dialog box to delete any extra primary partitions as described in Working
with Partitions on page 30.
2. On the Utilities menu, click Uninstall.
3. In the Uninstall dialog box, select the Remove BootIt UEFI checkbox.
4. Click OK.
Note
The uninstall option is option is only available when using a copy of BootIt UEFI that has been installed to
the hard drive. If your system boots the incorrect operating system or won’t boot at all after uninstalling,
you may need to enter the BIOS and update the boot order or perform some manual boot repairs.
The Installation & Recovery Boot Menu
The Installation & Recovery Boot Menu dialog box appears when you boot with the BootIt UEFI boot
media after BootIt UEFI has been installed (it is displayed if booting a CD/DVD or USB flash drive).
The following options are available:
BootIt™ UEFI User Manual. Page 20Reactivate BootIt UEFI Select to reactivate BootIt UEFI if it was deactivated after installing a
new operating system (such as Windows) or by using the Deactivate
option on the uninstall dialog.
Reinstall BootIt UEFI Select to start the BootIt UEFI setup to reinstall the existing installation.
Upgrade BootIt UEFI Select to start the BootIt UEFI setup to upgrade the existing installation.
BootIt™ UEFI User Manual. Page 21Using Image for UEFI BootIt UEFI includes TeraByte’s Image for UEFI program, supporting imaging entire drives as well as single partitions and providing full compatibility with TeraByte’s V3 imaging programs. Image for UEFI is automatically installed with BootIt UEFI if it was included on the Setup media. To run Image for UEFI, click the Disk Imaging icon on the desktop or select Disk Imaging from the Utilities menu. Image for UEFI usage is similar to Image for DOS. For details refer to the Image for DOS manual. BootIt™ UEFI User Manual. Page 22
Using BootIt UEFI
BootIt UEFI can be used with a mouse and keyboard or just a keyboard. The following shortcut keys work
with most dialog boxes in BootIt UEFI:

 Press            To
 Esc              Cancel
 F1               Help
 F10              OK, Close, or Apply
 Ins              Add, Create, or Fill
 Del              Delete or Clear
 Tab              Next control
 Shift+Tab        Previous control
 Arrow keys       Move highlight, Increment/Decrement
 Spacebar         Activate, Toggle checkbox, Open drop-down box

Several special shortcut keys are also available:

 Press            To
 Alt+0 (zero)     Turn off most computers at the Boot Menu or main desktop.
                  You cannot use this shortcut when editing a Boot Menu.
 Ctrl-Alt-Del     Reboot the computer.

Most controls can be access directly by using their shortcut key (underlined letter or number) with the Alt
key. For example, on the Boot Menu, if you press and hold the Alt key and then press the M key, you will
enter Maintenance Mode (Alt+M).

Shortcut keys specific to an area of BootIt UEFI will be listed in the appropriate section.

The Boot Menu
BootIt UEFI has the following two types of boot menus:

    •   The Normal Boot Menu displays the specific boot items configured for it as described in The
        Normal Boot Menu (below).
    •   The Direct Boot Menu displays the list of UEFI boot items (by default, those that haven’t been
        hidden or disabled) as described in The Direct Boot Menu on page 28.
You’ll use the Normal Boot Menu most frequently, especially if you have configured hiding of GPT
partitions or enabled support for more than four primary partitions on EMBR drives.

The Normal Boot Menu
The Normal Boot Menu (Boot Menu) displays the specific boot items configured for it. Click to select an
item or use the keyboard arrow keys.

BootIt™ UEFI User Manual.                                                                           Page 23
You can boot an item using this menu in the following ways:
• Double click the item.
• Select the item and then press Enter.
• Select the item and then click Boot.
• Press the associated shortcut key for the item (such as W for Windows 10).
• Select the item and then press and hold down the left Shift key while selecting Boot to perform a
simulated boot that only updates the partition settings for the boot item. You’ll hear a beep when
performing this option (if the computer’s internal speakers work). This option is useful when you
need to have the partitions in the state configured for the boot item, but booting into the OS is not
required (preparing to install an OS, for example). Note that the Shift key state doesn’t always
register correctly in EFI when used with the mouse (a normal boot would occur). You can also
hold down the left Shift and press Enter to perform a simulated boot via the keyboard.
You can position the Boot Menu window to an alternate location by dragging it with the mouse. To save
the position press F11. To return the menu to the default location (center of screen) press Shift-F11.
Set up the Normal Boot Menu
1. On the Edit menu, click Boot Menu. Alternatively, from the main desktop screen, click Boot Edit.
2. In the Boot Menu dialog box, do any of the following:
• To rearrange the order of the items, select an item, and then click Move Up or Move Dn as
appropriate.
• To delete an item, select the item that you want to delete, and then click Delete.
• To create a menu item, click Add, and then refer to the following screen capture and Add or edit a
normal boot menu item.
BootIt™ UEFI User Manual. Page 24• To edit a menu item, select the item that you want to modify, click Edit, and then refer to the
following screen capture and Add or edit a normal boot menu item.
• To save the current Boot Menu to a file, click the Save As button. The saved menu can then be
used when setting up users.
• To load a previously saved Boot Menu, click the Open button.
Add or edit a normal boot menu item
1. On the Edit menu, click Boot Menu. Alternatively, from the main desktop screen, click Boot Edit.
2. In the Boot Menu dialog box (as displayed in The Boot Menu on page 23), do one of the following:
• To add a menu item, click Add.
• To edit a menu item, select the menu item and then click Edit.
3. The Add Menu Item or Edit Menu Item dialog box will be displayed (depending on your selection in
Step 2). The options for both are the same and are detailed below.
The Menu Item dialog contains all the settings for the menu item. These settings are categorized below
by section for easy reference.
Boot Details
Identity Type the name to be displayed in the boot menu. You can type & before any
letter in the name that you want to become a shortcut key on the Boot Menu.
BootIt™ UEFI User Manual. Page 25Memo Enter descriptive text for the menu item. This text will be displayed on the
boot menu.
HD Click the up or down arrows to enter the hard drive number (starting at zero)
of the hard drive containing the partition to boot. In most cases, this should be
set to the drive containing the EFI System partition for the operating system.
Icon Select the desired icon to be displayed for this entry in the Boot Menu.
Boot Select the name of the partition to boot. In most cases, this should be set to
the EFI System partition for the operating system being booted by this menu
item.
Boot File Enter the path to the EFI booting file for the operating system being booted.
You can also use the Browse button to browse and select the file. For
example, Windows installations will use \EFI\Microsoft\Boot\bootmgfw.efi.
If you are setting up the boot item before the OS is installed you can specify
an .efi file that doesn’t exist. This allows you to configure the boot item so it
can be booted (or simulated) to set the partitions as needed for the OS install.
Script Enter the file name of the Script (.tbs or .run) to run when this item is booted
by clicking Browse and choosing the desired script. When this menu item is
selected to boot the script will run prior to the OS booting. The script can
abort booting the OS by removing the ResumeB value from the Options
section of the bootit.ini file located in the BootIt installation folder. An example
TBS script is shown below. The script runs a validation and then waits five
seconds before continuing to boot. Pressing ESC will abort the boot and
return to the menu.
sub main()
exec("C:\EFI\BOOTIT\IMAGEU.EFI /v /f:2@0x6:^"\Win10x64^"", 1)
cls()
printl("Script completed.")
printl("")
key = getkey("Press ESC within 5 seconds to return to the BootIt menu...",5)
if key=27 then
ext("set ini bootit.ini Options ResumeB")
end if
end sub
Use UEFI BM Select to boot the operating system through the BIOS instead of direct to file.
This is required if BitLocker is used and may be required for some systems to
boot properly.
Rename Directory Select to have BootIt UEFI rename the operating system’s booting files folder
back to its original name when booted. This is recommended for operating
systems that lose functionality when booting files can’t be found (such as
Windows). This option requires the EFI System partition’s BIU Managed flag
is set (bit 55).
Default Select to designate the menu item that you are adding or editing to be the
default menu item (the one that is always selected to boot on the next
reboot).
Remove MS GPT Select to reorder the partitions in the GPT partition table so there are no gaps
Gaps (partitions will be in consecutive slots). Only Microsoft specific partitions will
BootIt™ UEFI User Manual. Page 26be moved.
Password
Keyword Enter a password/keyword that will be required to boot this item. Note that a
password protected boot item cannot be booted with BootNow.
MBR Details
In this section, each entry represents an entry in the standard MBR for a given MBR/EMBR hard drive.
When this boot item is booted, the MBR of each drive will be updated to reflect the view you see here. To
edit or adjust the entries, select a partition or blank entry, and then do any of the following:
Fill Select a blank space (or a partition to be replaced) and then click Fill (or press Ins). If
the Limit Primaries setting is enabled, then all partitions are already listed.
If the partition being booted is on an MBR/EMBR drive, then, at the very least, the
boot partition for the operating system must be loaded to the MBR.
Clear Removes the selected partition from the MBR. This option is disabled if the Limit
Primaries setting is enabled or the drive is not configured as EMBR.
Hide / Unhide If the selected partition is currently unhidden (default), the partition is marked as
hidden. If the selected partition is currently hidden, the partition is set as unhidden.
The Spacebar can also be used to toggle hidden status.
Volumes To hide individual volumes (logical partitions), select an extended partition and then
click Volumes.
Move Up Moves the selected partition or volume one slot up in the partition table.
Move Dn Moves the selected partition or volume one slot down in the partition table.
Retain This setting applies to drives only. The selected drive will retain the items in the MBR
at the time of booting instead of using the items in the MBR Details section of the boot
item. This special use option is of value to those swapping in EMBR enabled drives
with Limited Primaries disabled.
Ignore This setting applies to drives only. The selected drive will be ignored by BootIt UEFI.
This is necessary when using a non-standard drive. An example would be a drive that
is fully encrypted (including the MBR) and appears to have no valid partition table. If
this option is not used, when BootIt UEFI checks the drive it may write a valid empty
partition table to the drive, corrupting the encrypted data.
GPT Details
In this section, each entry represents a partition on a GPT drive. When this boot item is booted, the
partitions of each GPT drive will be updated to reflect the settings configured here. When a partition is
selected you can press Spacebar to toggle hiding the partition or use the Properties button to open a
dialog with following settings:
BootIt™ UEFI User Manual. Page 27You can also read