Organic Modeling with T-Splines and Rhino 4 - A case study in free-form jewelry design
←
→
Page content transcription
If your browser does not render page correctly, please read the page content below

Organic Modeling with
T-Splines and Rhino® 4

A case study in free-form jewelry design

Ricardo Amaral,
Modellistica

© 2007 by T-Splines, Inc. and Modellistica

 PAGE 1
Introduction
I have been using Rhino since 1998. After first using it for 3D rendering work, since 2003 it’s been a key part of
my rapid prototyping business, which covers mostly jewelry. Rhino has been the best companion for years.

The problem
However, one area I have always struggled with in Rhino is with free-form jewelry designs. In the past,
I have rented a seat of Maya to design these projects with subdivision surfaces, make all my tweaks to
the design while still in Maya, then export a NURBS, bring it to Rhino, and work with the model as a
piece of immovable geometry.

The project
Recently, I needed to create a branch-shaped ring with hearts in place of leaves as a gift to my wife. I
had modeled a similar ring in the past using my previously described workflow, but rather than rent-
ing a seat of Maya to do the redesign, I decided to try to complete the whole project inside Rhino 4
using T-Splines.

The solution: T-Splines
I had done production work in the past using T-Splines to make free-form surfaces, and liked how
easy it was to edit them, but this was my first time using them in manufacturing. I was pleased with
the results. I was able to build a smooth and continuous surface that I could easily edit to cope with
aesthetic, design and fabrication issues. The whole modeling process took me six hours.

The process
The following tutorial walks step by step through my modeling process. In short, most of the model-
ing work was done using the T-Splines “ControlPolygonToSrf” command (to quickly generate a surface)
and the T-Splines “Insert Point” command (to add local control). Towards the end of the process, I was
able to seamlessly use some new features available in Rhino 4 to finish the production. The tight inte-
gration of T-Splines with Rhino made this workflow efficient.

 PAGE 2
                                                                                              T•Splines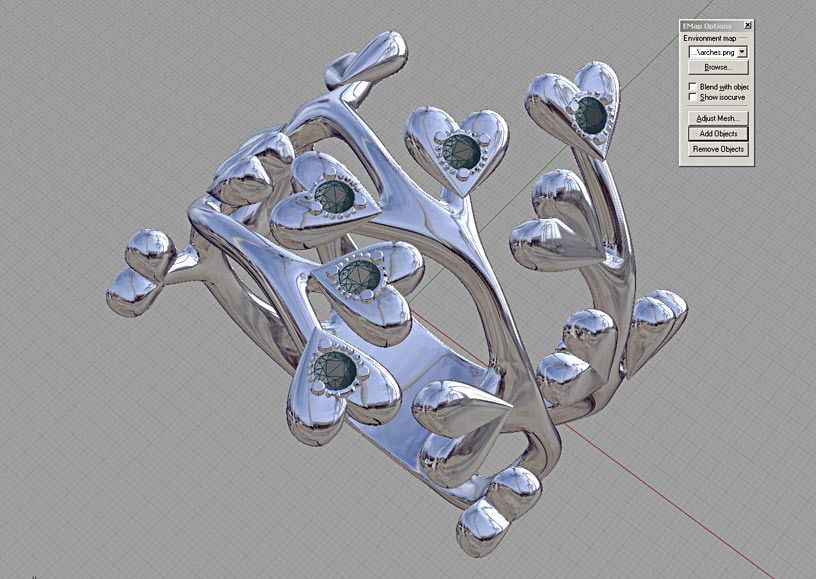
1   Sketching
    Basic form finding was done by hand sketching and 2D illustration programs, with this final concept:

    The shape was defined in developed format, to be later bent into the ring model.

2   Model planning in Rhino
    I considered two approaches:

    1. Modeling in a subdivision surface-like workflow, using T-Splines “Face extrusion”.

    T-Splines sphere                    Face selected                        After face extrusion
    2. Building the shape from polylines, using the T-Splines “ControlPolygonToSrf” command.

    Control Polygon                     Inside the command                   Final shape

    Both strategies would have delivered the desired shape, but since I had already laid out the topology,
    I went with T-Splines “ControlPolygonToSrf.” Notice that I got one control point per line intersection,
    providing for easy topology planning and easy-to-tweak geometry.

     PAGE 3
                                                                                            T•Splines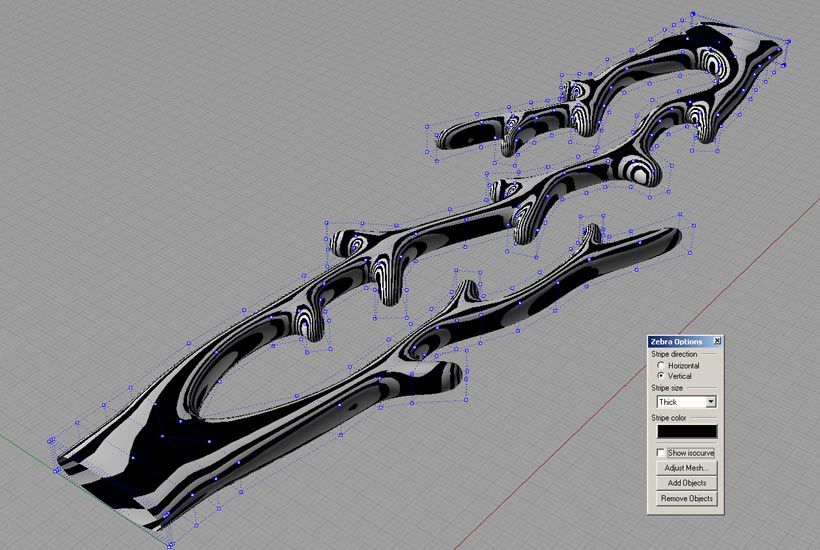
3   Building the control polygon
    The first step was simply designing a polyline
    around the desired shape.

    T-Splines “ControlPolygonToSrf” can work with
    pretty much any topology, but squares are desir-
    able, so I tried to keep the number of corners as
    even as possible.

    The final control polygon had a pair of five-sided
    areas, and everything else was squares. Next, the
    2D plan was converted into a 3D cage by copying
    the plan and adding pillars.

4   T-Splines surface generation
    At this point, I entered the T-Splines “ControlPolygonToSrf” command, which is a two-step process.

    First, the command tries to figure out the topology. Some tweaks are usually needed in the “Faces” tab.
    The tweaking process is a fun-to-play puzzle, in fact.

    Setting priority to the ground curves fixes most of it at once.

     PAGE 4
                                                                                       T•Splines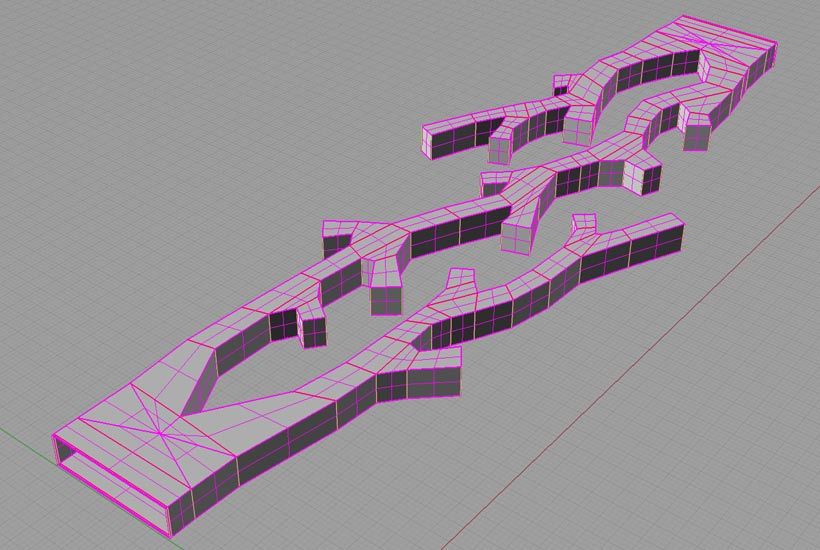
Preview surfaces are added and deleted by click-
    ing over them and in a few minutes everything
    is set up. The ends were left open so they match
    when the ring is bent.

    Click OK and presto. The final result is a single,
    smooth and editable polysurface, with 266 con-
    trol points.

5   Adding detail
    The geometry can still be refined by either inserting or removing control points. In this case I wanted a
    thicker base, so I used T-Splines “Insert Point” to insert some points to the main branch.

    The original surface                 Begin point insertion               The final shape

    I chose to use simple T-Splines point insertion, which will disregard the surface geometry and append
    directly to the control cage. It is possible to add individual control points instead of an entire row.

     PAGE 5
                                                                                         T•Splines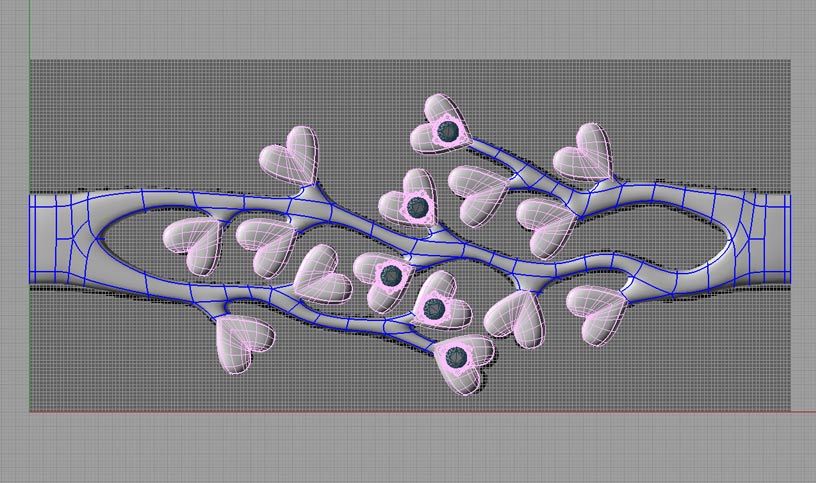
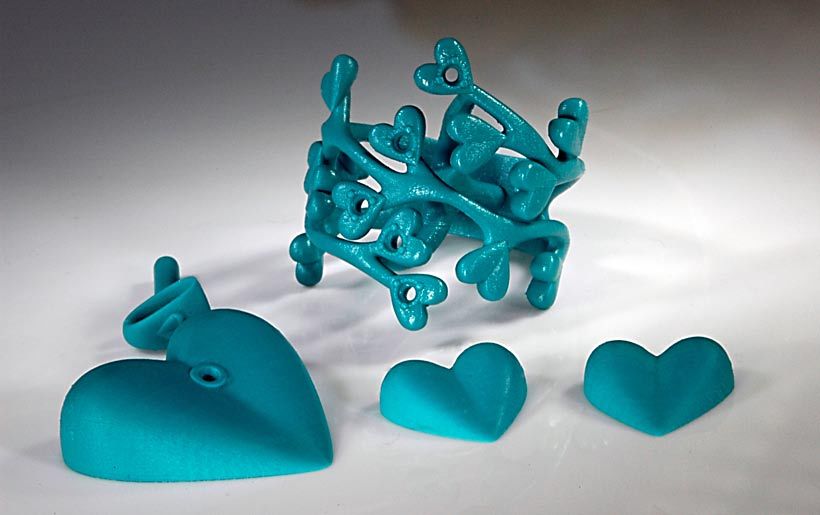
6   The heart shape
    The heart shape was designed using the same strategy: T-Splines “ControlPolygonToSrf”, and point
    editing.

    The line cage                       “ControlPolygonToSrf”               The final shape

    The collection included a pair of earrings and a necklace pendant. The pendant link was also built with
    T-Splines “ControlPolygonToSrf.”

    The heart shape then received stone setting geometry, using TechGems 4.2.

7   Parts layout
    The hearts were placed as blocks (using the Rhino
    “Block” command) on the branch network as
    shown at right.

    Now T-Splines came in really handy. This layout
    had two problems: in some areas the branches
    were too thick and covered the hearts’ tips. On
    other areas, the branches barely touched the
    hearts, which is a bad idea for rapid prototyping
    and casting. Some very quick point tweaking
    fixed this.

    Now everything was in place to turn the model
    into a ring.

                                                          Bad branch/heart          After one minute of
                                                          interface                 tweaking

     PAGE 6
                                                                                       T•Splines
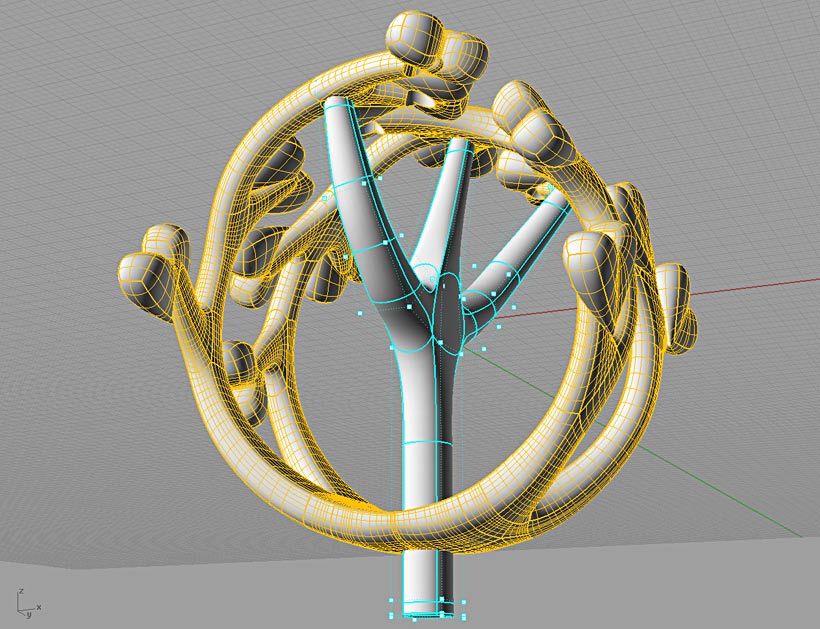
8    Making it round
     The branch shape was rounded using the Rhino
     “Flow Along Surface” command. The hearts
     (defined as blocks with the setting geometry in
     place) were transferred from the plan layout to
     the ring with the Rhino “Orient On Surface” com-
     mand. Booleans were then performed to get the
     final model.

9    Ready for rapid prototyping
     and casting
     The final step was to build sprues for investment
     casting.

     The sprue was designed out of a cube using the
     T-Spline “Extrude” technique mentioned previ-
     ously.

10   Making it from bits to atoms
     Alongside with the ring a necklace pendant and
     a pair of earrings where designed using the same
     heart shape. The parts where converted into STL
     and printed in a Solid-Scape’s T612-BT2.

     The RP waxes were then cast directly in gold,
     with stones pre-set in the wax.

      PAGE 7
                                                         T•Splines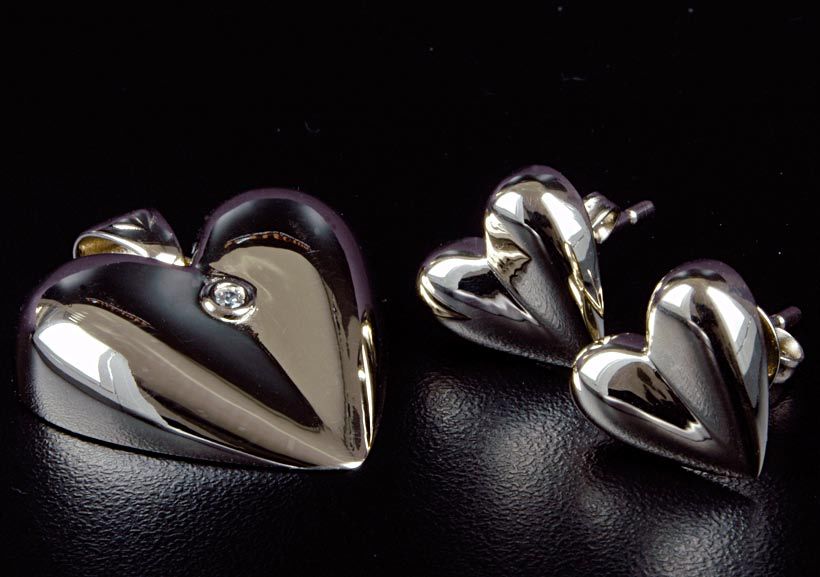
Concluding thoughts
T-Splines did an excellent job at keeping the surface as simple as possible while I was modeling my
organic ring design. By using T-Splines’ powerful set of tools, the project yielded the fewest possible
control points, keeping the geometry easy to read and edit. T-Splines fills the need for free form mod-
eling tools in Rhino.

I had previously made this ring in Maya as a SubD and converted it to NURBS Rhino. I redesigned the
ring in T-Splines since I needed to recast it. Here is a comparison between the first ring and the second
ring:

SubD model                                               T-Splines model

The Maya SubD model was converted into 348 NURBS surfaces, while the T-Splines model was con-
verted into 148.

   •   Fewer surfaces: The Maya SubD model was converted into 348 NURBS surfaces, while the T-
       Splines model was converted into 148. Most of the work, though was done in while the model
       was a single T-Spline surface (with drastically smaller number of control points than the SubD).
   •   Rhino compatible: The SubD model couldn’t be edited in Rhino, it would be a nightmare.
   •   Tight integration: I had to rent a Maya seat to do this the first time; with T-Splines I could work
       in my familiar Rhino environment.
   •   Time saved: The T-Splines ring (six hours) took less than half the time to model than the Maya
       SubD ring (two/three days).

Ricardo Amaral studied naval architecture and has done NURBS modeling since 1990. He currently runs
Modellistica, a rapid prototyping service bureau he founded in 2003.

Contact information:
  ricardo@modellistica.com.br
  http://www.modellistica.com.br

For more information about T-Splines for Rhino, go to http://www.tsplines.com/rhino/.

 PAGE 8
                                                                                       T•Splines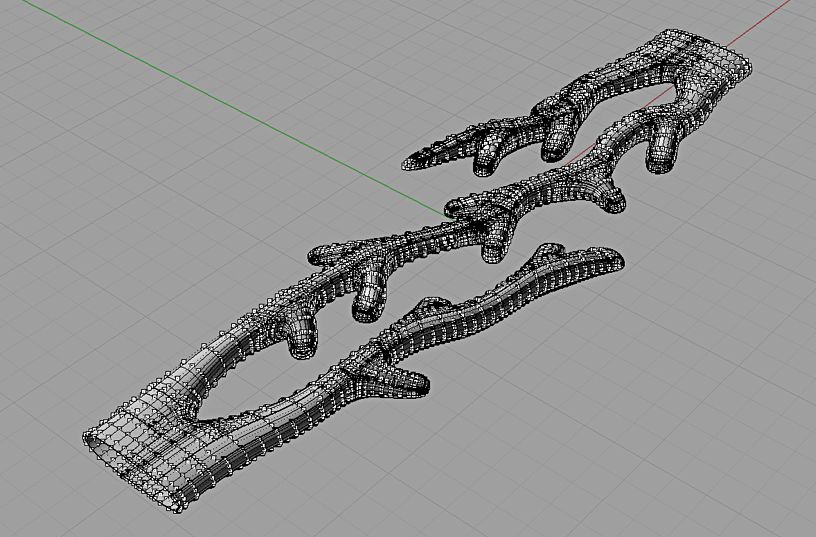
You can also read