School of Geography, Development, and - Environment Community Cookbook Summer 2020
←
→
Page content transcription
If your browser does not render page correctly, please read the page content below
School of Geography, Development, and
             Environment
         Community Cookbook

            Summer 2020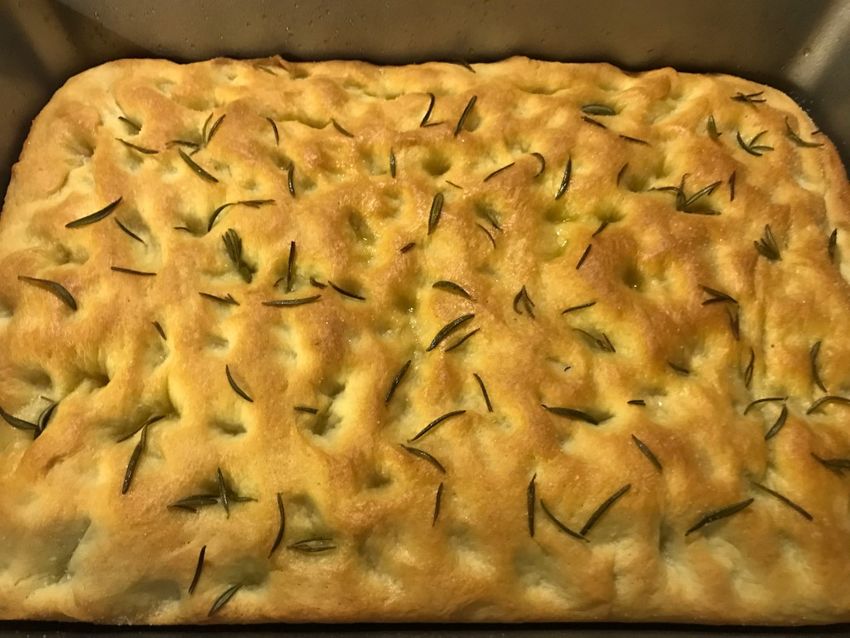
Contents

Introduction .................................................................................................................................................. 4
Soup and salad ............................................................................................................................................. 5
   Spicy Chickpea and Butternut Soup .......................................................................................................... 6
   Julie’s Gazpacho ........................................................................................................................................ 7
   Kale Tabbouleh.......................................................................................................................................... 9
Main dish salads ......................................................................................................................................... 10
   Mustard Milanese with an Arugula Fennel Salad ................................................................................... 11
   Filet Mignon with Roquefort and Red Leaf ............................................................................................. 13
Main dishes................................................................................................................................................. 14
   Okra with Green Mango and Lentils ....................................................................................................... 15
   Snobby Joes ............................................................................................................................................. 16
   Chana Dal (Split Chickpeas), New Delhi-Style ......................................................................................... 17
   Shakshuka (Traditional Tunisian Dish) .................................................................................................... 18
   Cheese potatoes (aka Funeral Potatoes) with Green Chili ..................................................................... 19
   Ramen Carbonara ................................................................................................................................... 20
   Spicy Sesame Noodles with Chicken and Peanuts .................................................................................. 22
   Pasta with Cauliflower ............................................................................................................................ 24
   Hibiscus Flower Tacos ............................................................................................................................. 26
   Sweet Potato and Black Bean Tacos ....................................................................................................... 28
Baked things ............................................................................................................................................... 29
   Focaccia Bread ........................................................................................................................................ 30
   Savory Scones.......................................................................................................................................... 32
   Best Scones Ever ..................................................................................................................................... 34
   Dried Cranberry, Walnut, and Lemon Scones ......................................................................................... 35
Desserts ...................................................................................................................................................... 36
   Tiramisu................................................................................................................................................... 37
   The Earl Girls’ English Trifle ..................................................................................................................... 40
   Date Squares ........................................................................................................................................... 42
   Oatmeal Chocolate Chip+ Cookies .......................................................................................................... 43
   No-Bake Cheesecake ............................................................................................................................... 44

                                                                                2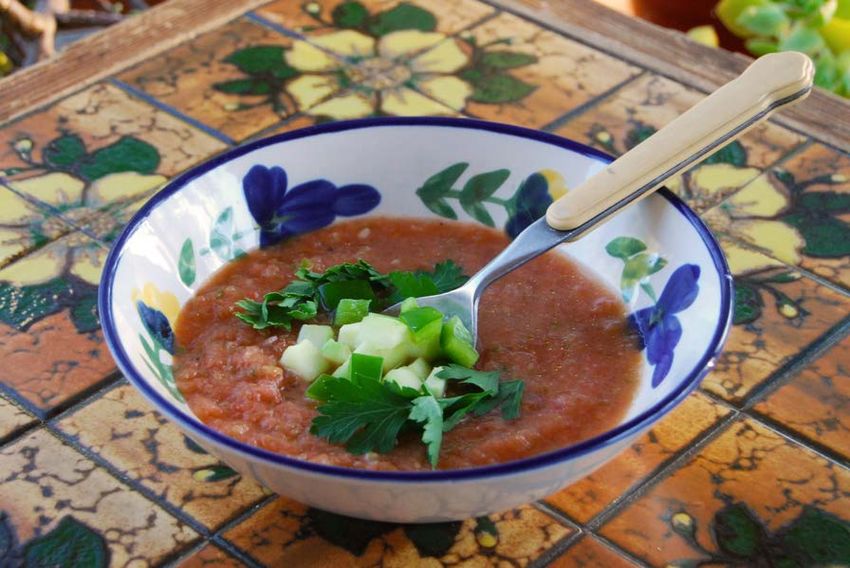
Drinks .......................................................................................................................................................... 45
   Prickly Pear Schrub.................................................................................................................................. 46
   Very Simple Wine Cooler ........................................................................................................................ 47
Other things ................................................................................................................................................ 48
   Salt Olives ................................................................................................................................................ 49
   Salt Lemons ............................................................................................................................................. 50

                                                                                 3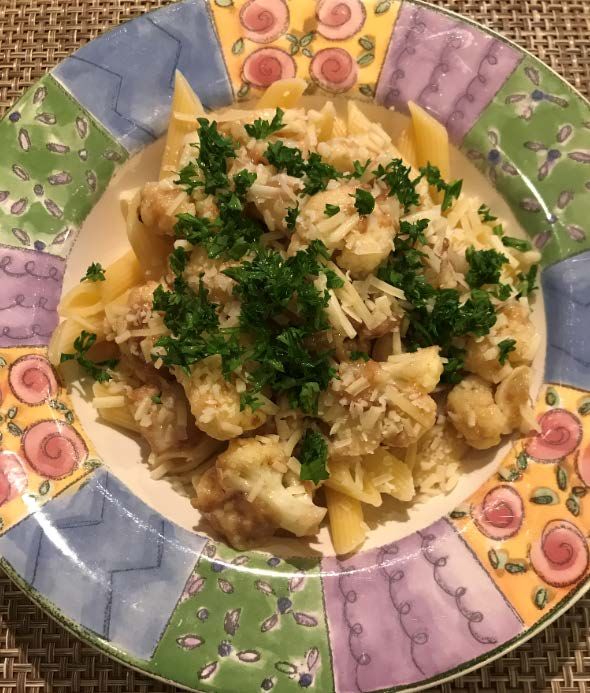
Introduction
This cookbook is the result of the recipes contributed by the people of the School of Geography,
Development, and Environment. These recipes were collected starting the spring of 2020 when
COVID-19 required everyone to stay home. We were all coping with online teaching and
learning, which was pretty stressful. Many people were spending more time in the kitchen (or
with someone who was spending more time in the kitchen). Given this new focus on food at
home, I wondered if people would be interested in sharing recipes for the foods they were
preparing to comfort and nourish themselves, their friends and family (or were being nourished
by), or perhaps recipes for dishes that brought back memories of other times. The collection
here reflects what people have chosen to share during these times, which have only intensified
with George Floyd, Black Lives Matter, Carlos Ingram-Lopez, racism, equity and social justice
issues coming to a head, the Bighorn fire, and more. The result is an assortment of dishes that
represent that tastes of SGDE and that I hope will provide nourishment and comfort during
these unsettled times.

Please also check out "Recipes for Revival" (http://www.youareheregeography.com/) in the
2019-2020 issue of You Are Here, The Journal of Creative Geography, published by graduate
students in the School of Geography, Development, and Environment at the University of
Arizona. And see graduate student Lara Tarantino’s project for the PandemiDiarios microgrant
program, “As Thin As Silk: Homemade Pasta And The Taste Of Home”
https://confluencenter.arizona.edu/funding/pandemidiarios).

                                                                         Connie Woodhouse
                                                                         July 14, 2020

                                               4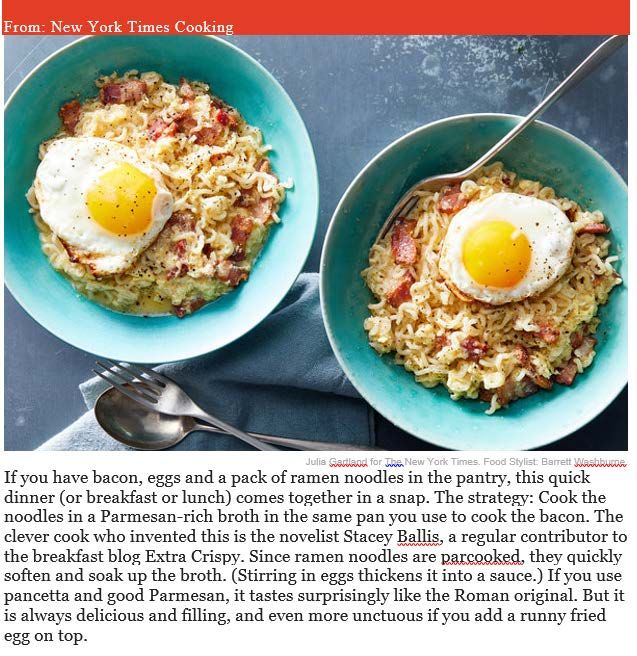
Soup & Salad

     5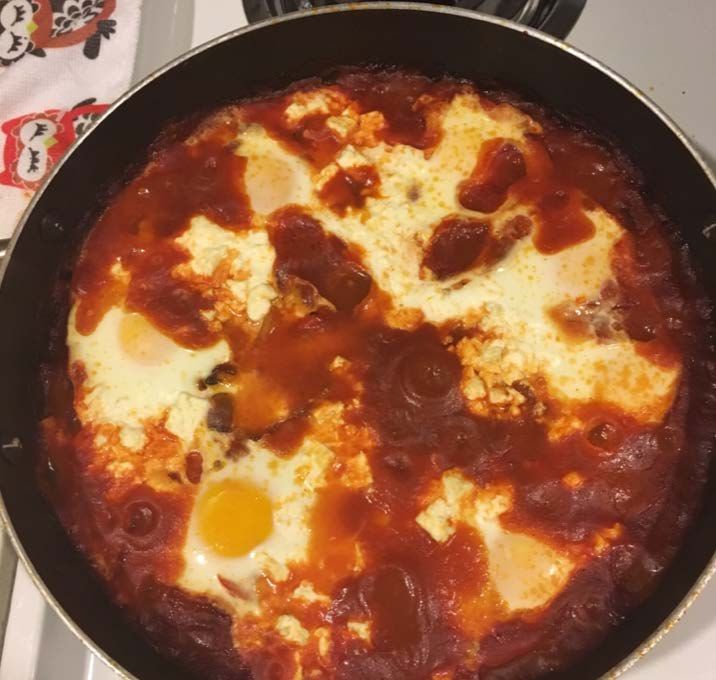
Spicy Chickpea and Butternut Soup
Aaron Krupp

Ingredients
        3 tablespoons olive oil
        1 tablespoon chopped fresh garlic
        2 cups finely chopped onions (I use much less!)
        1 cup celery (minced or diced)
        2 cups carrots, sliced
        6 cups butternut squash, peeled and cut into chunks
        2 cups canned tomatoes, diced
        4 quarts well-flavored vegetable stock
        2 cups tomato juice
        1⁄2 cup soy sauce
        1⁄4 cup fresh lime juice
        2 cups canned chick-peas
        1 tablespoon ginger
        1 tablespoon ground coriander
        1 teaspoon minced scotch bonnet pepper
        1(14 ounce) can coconut milk
        1 cup flaked coconut
        1 tablespoon fresh cilantro, chopped
        1 teaspoon coconut extract

Directions
   1. Heat olive oil and garlic in a large heavy stockpot.
   2. Sauté 1-2 minutes.
   3. Add onions, carrots and celery.
   4. Sauté 10-15 minutes.
   5. Add squash, canned tomatoes, stock, tomato juice, soy sauce, lime juice, chickpeas,
      ginger and coriander; bring to a boil.
   6. Cook until all the vegetables are tender, approx 30 minutes. Add coconut milk, flaked
      coconut, coconut extract and cilantro, warm through.

                                               6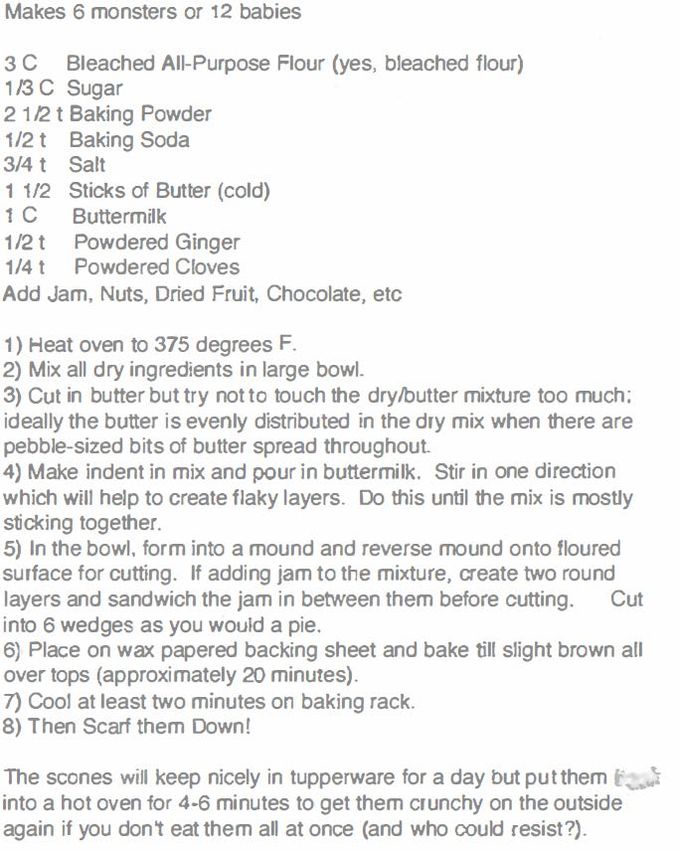
Julie’s Gazpacho
Julie Edwards

Ingredients
       about 6 Roma tomatoes
       1 medium cucumber, peeled and chopped. Leave some over for garnish
       1/2 bell pepper, any color I prefer green. Leave some over for garnish
       1 garlic clove, crushed
       1/2 cup of chopped red onion
       1 small jalapeno pepper
       1 lime, juiced
       2 tbsp olive oil
       1/2 tsp cumin
       1 tsp salt, to taste
       1/4 tsp black pepper, to taste
       1/4 tsp paprika
       1 tsp red wine vinegar
       1 tsp balsamic vinegar
       any fresh herb: basil, parsely, cilantro, dil
       day old bread/any bread

Directions
   1. Boil a pot of water with enough space left over for the tomatoes
   2. Cut an "x" into the bottom of each tomato, place into boiling water for about 15
      seconds, remove the tomatoes from the boiling water and place them into an ice bath
      until cool enough to handle.
   3. Peel, core, and seed the tomatoes. Discard the peels but place the cores and seeds into
      a strainer over a bowl so that the tomato juice is collected. Mash up some of the cores
      and seeds to release more juice.
   4. Place the tomato flesh, cucumber, bell pepper, garlic, onion, jalapeno pepper, lime juice,
      olive oil, spices, and vinegars, and the collected tomato juice (basically all the
      ingredients except the herbs and bread) in a blender and puree for 40 seconds. You can
      puree for longer and then strain the mixture if you would like a smoother consistency.
   5. Cover and chill the gazpacho for at least 2 hours before serving.
   6. Cut the bread into 1 inch cubes and cook in a drizzle of olive oil over medium high heat
      until golden brown to make croutons
   7. Serve chilled gazpacho, garnish with croutons, chopped cucumbers, chopped bell
      pepper, and fresh herb of your choosing.

                                               7
8
Kale Tabbouleh
Connie Woodhouse

Serves 4-6

Ingredients
       2/3 cup fine bulgur
       3 tablespoons lemon juice
       1 shallot, finely chopped
       2 teaspoons ground cumin (or less)
       1teaspoons salt (or less)
       ½ cup extra-virgin olive oil
       1 bunch kale, stems removed, leaves finely chopped (about 5 cups)
       2 large ripe tomatoes, diced (about 2 cups)
       ½ cup torn mint leaves
       ½ cup diced radish
       Black pepper as needed

Directions
   1. Cook bulgur according to package (I pour boiling water over the bulgur, let soak for 30
      minutes, then pour off any water that hasn’t been absorbed; ratio is 1 bulgur/2 water)
   2. In a small bowl, whisk together lemon juice, shallot, cumin, and salt. Whisk in olive oil.
   3. In a large bowl mix everything together.
   4. Season with black pepper to taste.

From the New York Times

                                                9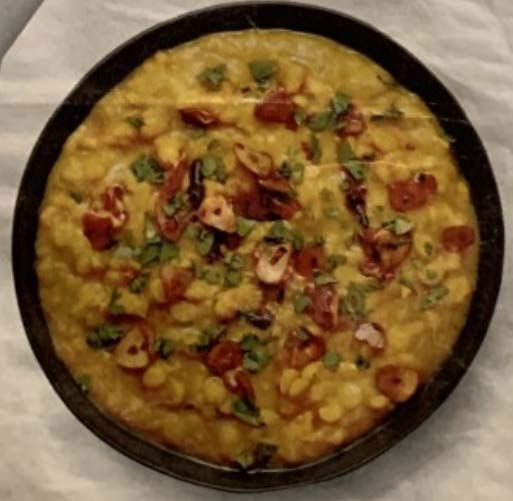
Main Dish Salads
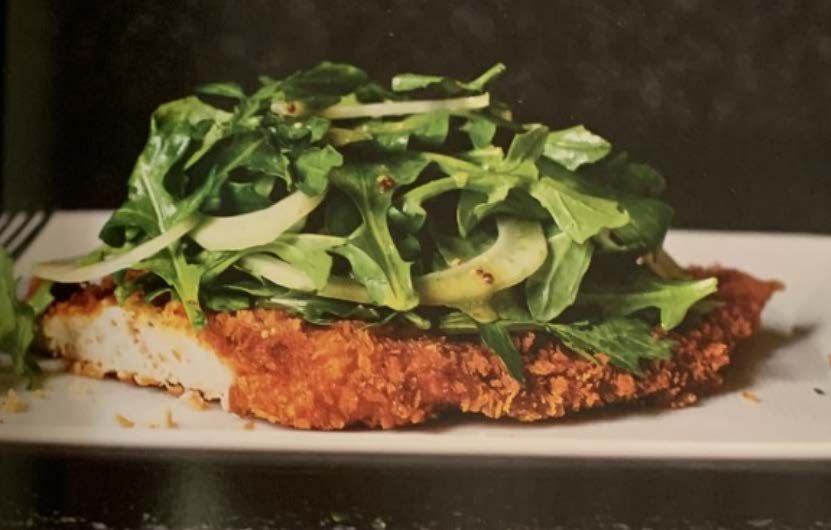
10Mustard Milanese with an Arugula Fennel Salad
Andrea Gerlak
Serves 4
Prepare chicken: Ingredients:
On a cutting board, with a very sharp knife, butterfly
your chicken breasts, and slice them all the way
through, so that you end up with 4 thin cutlets. With
a meat pounder (not a tenderizer), pound your
cutlets out between two pieces of plastic wrap to ¼”
thickness. Season the chicken on both sides with salt
and pepper.
Grab 3 big plates, and line them up on your counter.
Pour the flour into the first one. In a small dish, whisk
together the egg white, smooth Dijon, garlic,
oregano, and lemon zest. Pour half of this into the
second plate. In the 3rd plate, spread out the
breadcrumbs.
Dredge each piece of chicken lightly in flour, then
heavily in the egg white/mustard mixture, and
generously in the breadcrumbs. Repeat with the
second, then refill the rest of egg white/mustard
mixture, and repeat with the last two pieces of
chicken. Arrange pieces on a large tray, and chill in
the fridge for an hour or up to a day (covered with
plastic wrap). This helps the coating to set.
Preheat your oven to 175 degrees
Cook chicken:
Pour ½” of oil in a large pan, and heat over medium-
high heat. Test heat with a flick of water –if it hisses,
you’re good to go. Cook the chicken until golden
brown on both sides, about 3-4 minutes on the first
side, 2-3 minutes on the second. Remove the chicken
from heat, and salt and paper both sides, while
draining on paper towels. Once it’s drained, transfer
to a tray to keep warm in the oven. Do in several
batches if needed, adding more oil as needed.
11Prepare the salad: In a small bowl, whisk lemon juice and mustards together, then whisk in
olive oil in a thin stream. Pour ¾ of this into a large bowl. Add arugula to bowl. Thinly shave
your fennel bulb on a mandolin or slice it as thinly as you can with a sharp knife, and add to the
arugula.
To serve: When you’re ready to serve it, toss the salad. Arrange one piece of chicken from the
warm oven on a plate. Drizzle with a few drops of the reserved salad dressing on the chicken,
and pile the salad on top. Season with salt and pepper and eat immediately.
------------------------------------------------------------------------------------------------------------------------------
Cooking note: Can’t find panko breadcrumbs? Try this: Preheat your oven to 350 degrees. Tear
one or two slices of soft, crustless white bread into 1” pieces, and pulse them in the food
processor until coarsely ground. This makes a generous ½ cup. Transfer crumbs to a rimmed
baking sheet, and bake them until they are golden brown and dry, about 15 minutes, stirring
occasionally. Cool before using.
12Filet Mignon with Roquefort and Red Leaf
Andrea Gerlak
Serves 4
Ingredients: Method:
13Main Dishes
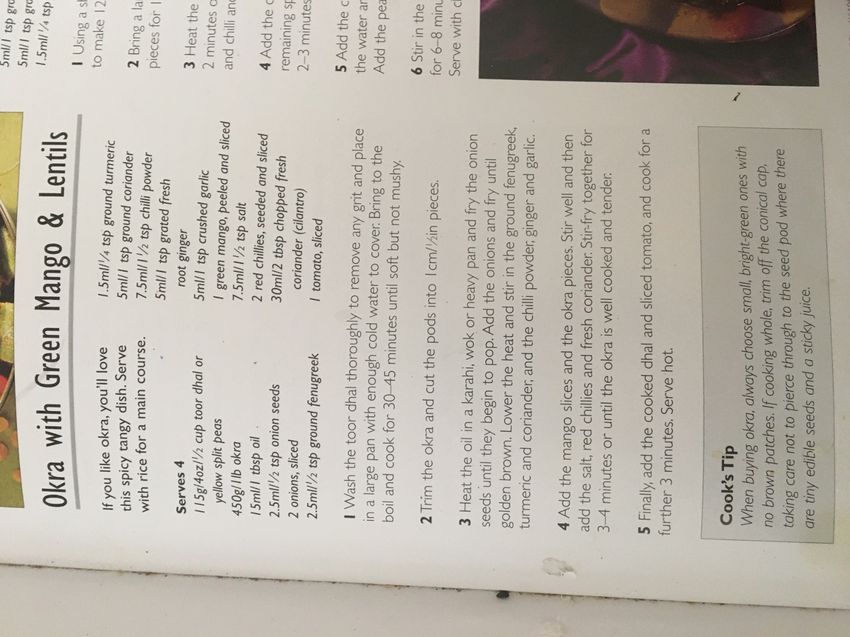
14Okra with Green Mango and Lentils
Stephanie Buechler
15Snobby Joes
Robert Hibberd
Ingredients
1 C uncooked lentils
4 C water
1 Tbsp. extra virgin olive oil
1 medium yellow onion diced small
2 garlic cloves minced
½ -1 Tbsp. chili powder
1½ tsp. dried oregano
1 tsp. sea salt
1 8 oz. can tomato sauce
¼ C tomato paste
3 Tbsp. real maple syrup
1-2 Tbsp. brown mustard
4-6 whole-grain rolls
optional: 1 green pepper diced small
Directions
1. Put the lentils in a small sauce pot and add water. Cover and bring to a boil, then reduce
heat and simmer 30 min. Drain and set aside.
2. About 10 minutes before lentils are done, sauté the onion and optional pepper in oil for
7 minutes in a medium saucepan, until softened. Add the garlic and sauté a minute
more.
3. Add the cooked lentils, the chili powder, oregano, and salt to the onion/garlic and mix.
Add the tomato sauce and tomato paste. Cook about 10 min.
4. Add the maple syrup and mustard and heat through.
5. Turn the heat off and let sit for about 10 min. Serve open faced, with a scoop of Snobby
Joes on each half a bun.
Can also be served cold or warm in romaine lettuce leaves.
16Chana Dal (Split Chickpeas), New Delhi-Style
Andrea Gerlak
~ 4 servings
Ingredients
1 cup split chickpeas (chana dal)
1 ½ tsp. turmeric
½ tsp. ground cardamom
1 bay leaf
1 tsp. salt
2 tbs. sunflower or safflower oil
6 whole cloves
4 large garlic cloves, thinly slices
1 tsp. crushed red chili flakes
(optional)
3 tbs. freshly chopped cilantro
Directions
To make the dal:
1. Combine the chana dal, turmeric, cardamom, bay leaf, salt, and 4 cups water in a large
saucepan and bring to a boil. Adjust the heat so the mixture bubbles gently, cover
partly, and cook for 40 minutes. At that point, the mixture should still be quite moist; if
it is now, add 1 cup additional water and continue cooking, covered, until the dal is
tender, about 20 minutes.
2. Turn off heat. Remove bay leaf.
3. Use an Indian mathani [or food processor] to puree the dal for about 1 minute; the dal
should be saucy but not soupy.
To make the tadka:
1. Put the oil on a small saucepan over medium-high heat. When the oil is hot, add the
cloves; let sizzle for about 30 seconds until fragrant.
2. Add the garlic and cook, stirring constantly until medium brown.
3. Stir in the chili flakes if you’re using them, and turn off the heat
To serve: Pour the tadka into the dal; stir gently to combine. Garnish with cilantro.
17Shakshuka (Traditional Tunisian Dish)
Ray Smith
Vegetarian though not vegan. Can be made with ingredients often already on hand.
Quick and easy prep:
1. Sautee an onion (maybe adding garlic and green pepper) in olive oil
2. Add in tomato sauce (into an oven-ready pan). Can be a pre-prepared pasta sauce.
3. Add in garbanzo beans to the sauce (optional)
4. Make six “wells” (indentations) into the sauce and crack a raw egg into each well
5. Sprinkle feta into the remaining sauce (optional)
6. Bake for about 15-20 minutes at 375 degrees, until eggs are firm
A salad, couscous, or bread make good side dishes to shakshuka. You can easily give it a
Southwestern twist: add chili, hot sauce, cilantro, etc., before or after baking
18Cheese potatoes (aka Funeral Potatoes) with Green
Chili
Natalia Cachora
Prep time: 30 minutes
Cook time: 45 minutes
Ingredients
6 medium Potatoes boiled peeled (if you are in a hurry you can use frozen simply potato
hash browns)
½ medium size yellow onion minced
1 cup of unsalted butter
16 oz sour cream
16 oz grated sharp cheddar (reserve 8 zo for later)
1 large can of Cream of Potato soup concentrate
1 7oz can of green chili drained
Pepper to taste
Directions
1. Preheat oven to 350
2. Boil your potatoes so they are soft. When a fork can easily go into the skin and center of
the potato, peel and set aside to cool. If the potatoes are over cooked the potato will be
mushy and hard to shred.
3. In a medium saucepan melt the butter
4. While butter is melting add onions. cook until onions are clear
5. Add Sour cream, cream of chicken soup and 8oz cheese to mixture thoroughly stir
6. Shred potatoes add to the sour cream mixture
7. In a 9 x13 cake pan pour in mixture.
8. Add green chili to top
9. Add rest of cheese on top evenly
10. Cook uncovered until cheese is golden brown about 45 minutes or until HOT
11. Serve hot as a main dish or as a side
Variations to this can be made by adding ham, bacon or make without the green chili
***This recipe is made without addition salt because of the cheese and condensed soup which
has a high salt content.
19Ramen Carbonara
Sallie Marston
Serves 2
Ingredients
6 to 8 slices bacon or pancetta, cut crosswise into 1/2-inch strips or lardons (4 to 6
ounces) (or dried mushrooms: see note below)
2 cups boiling water
3 tablespoons butter, plus more for frying eggs
1 cup grated Parmesan or pecorino, or a combination (about 4 ounces)
2 (3-ounce) packages ramen noodles (noodle blocks only; discard the seasoning packs)
2 eggs, whisked together until smooth
Kosher salt and black pepper
Directions
1. In a large skillet (preferably nonstick), cook bacon over medium heat until fat is
rendered and meat is cooked through. Adjust the heat as needed to prevent scorching.
When bacon is cooked, use a slotted spoon to transfer it to a paper-towel-lined plate.
Set aside.
2. Pour off the extra bacon fat in the pan, leaving behind any browned bits stuck on the
bottom. Return pan to medium-high heat and add boiling water, butter and half the
cheese. Stir, scraping up bacon bits, and bring to a boil. Add noodle blocks and boil,
gently separating the strands as they soften, until noodles are almost cooked through,
about 3 minutes. The noodles will absorb some of the liquid, and there will be a thick
broth in the pan. Keep the heat high; you want most of the liquid to evaporate.
3. Reduce heat to low. Add whisked eggs, stir into noodles very well, and cook, stirring
constantly and scraping the bottom of the pan, about 1 minute. The sauce should
remain quite runny; the eggs will continue to cook after you remove them from the
heat. Mix in cooked bacon, remaining cheese and plenty of black pepper and
immediately remove from the heat.
4. Scrape mixture into 2 large serving bowls. If not making fried eggs, serve immediately,
grinding pepper over the top of each bowl.
5. If making fried eggs, cover the noodle bowls to keep them warm. Return empty pan to
medium heat, add a lump of butter, and swirl until melted and foaming. Crack the eggs
into the pan and fry until yolks are just set and edges are brown, about 3 minutes.
Transfer to noodle bowls, grind on more pepper, and serve immediately.
20Notes from Sallie
I love this recipe as a mostly vegetarian (I occasionally eat fish) who also occasionally eats
bacon/pancetta, maybe once or twice a year. Ordinarily, I make this recipe with dried
mushrooms such as porcinis or chanterelles, or fresh ones like Portobellos, instead of the
bacon. I first hydrate the dry mushrooms and then sauté either dry or fresh with olive oil and
some garlic for enhanced flavor. I’d say one or two large Portobellos and maybe a couple of
handfuls of the dried mushrooms will more or less take the place of one pound of chicken.
Finally, I always have some packets of Forbidden Ramen at the ready but fresh ramen noodles
are even better. Whole (Paycheck) Foods and Sprouts have Forbidden products or you can
make the noodles yourself, which to me defeats the objective of making this a quick meal. I
don’t use the Top Ramen Noodles ever as they stay in my stomach too long:
https://www.youtube.com/watch?v=fvvYMzDvFfw
This is the ultimate comfort food as far as I am concerned! The cheese and the eggs really make
it substantial.
21Spicy Sesame Noodles with Chicken and Peanuts
Sallie Marston
4 servings
Ingredients
1 ½ tablespoons low-sodium soy sauce
1 ½ teaspoons toasted sesame oil, plus more as needed
Kosher salt and black pepper
½ cup plus 1 tablespoon neutral oil, like grapeseed or vegetable
6 tablespoons roasted, salted peanuts, coarsely chopped
Rind of 1/2 orange, peeled into 2- to 3-inch strips
1 pound ground chicken
10 to 12 ounces ramen or udon noodles, preferably fresh
3 tablespoons finely chopped chives
Directions
1. In a medium heatproof bowl, stir together the red-pepper flakes, soy sauce and sesame
oil. Set next to the stovetop.
2. Bring a large pot of salted water to boil. Meanwhile, in a large (12-inch) skillet over
medium heat, cook the 1/2 cup oil, peanuts and orange rind, shaking the pan
occasionally, until the peanuts are golden and bubbling, 3 to 5 minutes. Immediately
pour the contents of the skillet over the red-pepper mixture (be careful of splattering!)
and set aside. (Once cool, the chile oil will keep in the refrigerator for 2 weeks in an
airtight container.)
3. Meanwhile, in the same skillet, heat the remaining tablespoon oil over medium-high.
Add the chicken and press it down with a wooden spoon into a thin layer. Season with
salt and a generous amount of black pepper and cook, without stirring, occasionally
pressing the layer of chicken down, until the bottom is browned, 5 to 7 minutes. Break
the chicken up into small pieces and cook, stirring occasionally, until cooked through, 1
to 2 minutes more.
4. While the chicken cooks, cook the noodles according to package directions, until chewy
but not soft. Drain and toss with a bit of sesame oil.
5. Remove and discard the orange rind from the chile oil. Off the heat, add the chile oil to
the chicken and stir to coat, scraping up any browned bits from the pan. Add the
noodles and toss to coat. Top with chives and serve at once.
Notes from Sallie
As a person who does not eat any kind of meat (I do eat bacon once or twice a year but I
consider that fat, not meat), I adapt lots of recipes always looking for flavor as my main goal.
22This recipe is really scrumptious whether or not you go with chicken or the alternative I have
substituted: eggplant. I chop two medium or one large eggplant into bit sized chunks, toss
them in olive oil (maybe a quarter of a cup) and roast them in the oven at 400 degrees, turning
them after 10 minutes and browning them when they are thoroughly cooked—which means
when they are fully soft and slumping. Just follow the recipe and when it says in Step 5 to add
the chicken to the chile oil, add the eggplant instead. Also, I like the orange rind so I leave it in
the dish. I could eat this every night. It’s really spicy and satisfying.
23Pasta with Cauliflower
Andrew Comrie
Time: 25 minutes
Makes: 3 to 4 main-course servings
When I first read the original version of this recipe in The Minimalist Cooks Dinner, one of Mark
Bittman’s earlier cookbooks, I thought the dish would taste almost as bland as it sounds, but it
is amazingly delicious and satisfying. The original uses the same water to cook the cauliflower
and then the pasta, but I’ve adapted it to shorten the preparation time (and keep the
cauliflower and pasta separate for the picky eater we had back then).
The mix of extra virgin olive oil and garlic along with the umami of the anchovies and parmesan
is irresistible. Because the anchovies are sautéed and broken up, their fishy taste disliked by
some people mostly disappears. Still, if you have a fundamental objection to anchovies, try
something else intensely salty such as chopped kalamata olives or spicy sausage. Cauliflower is
best in this dish, but you can also substitute broccoli.
Ingredients
1 head cauliflower (about 1 pound)
¼ cup extra virgin olive oil
3 cloves crushed or finely chopped garlic (or 1 tablespoon minced garlic)
3 or 4 canned anchovy fillets with their oil
1 cup coarse bread crumbs
1 pound penne, ziti, or other cut pasta
Salt and freshly ground black pepper
Grated parmesan cheese for topping
Directions
1. Start a large pot of water to boil for the pasta.
2. Trim the cauliflower and divide it into bite-size florets. Add the cauliflower to a bowl
with a little water. Cover and cook it on high in the microwave for several minutes until
tender but not mushy.
3. Combine the oil, garlic and anchovies in a large, deep skillet over medium-low heat and
cook, stirring occasionally, until the garlic is golden (not brown) and the anchovies break
up, no more than 5 minutes. Meanwhile, add the pasta to the now-boiling water.
4. Drain the cauliflower, add it plus the bread crumbs to the skillet, and turn the heat to
medium-high. Cook, stirring once or twice to coat the cauliflower, but resist the urge to
stir any more to allow parts of the mixture to brown.
5. When the pasta is just about done, take a cup of the cooking water and pour it over the
skillet so that the cauliflower mixture becomes gooey but not liquid. If it is a little too
24liquid, just cook on high for a little longer to boil off the excess. Add salt and pepper to
taste and serve over the pasta, topped with lots of grated parmesan.
Garnish with chopped parsley or basil. If it seems dry, drizzle a little extra olive oil before
garnishing.
25Hibiscus Flower Tacos
Dugan Meyer
Source: Calvo L and Rueda Esquibel C (2015) Decolonize Your Diet: Plant-Based Mexican-
American Recipes for Health and Healing (p. 133). Vancouver: Arsenal Pulp Press.
Yield: 8 tacos
Ingredients
½ cup (125 mL) dried hibiscus flowers [see note below]
2 tsp raw local honey
1 tbsp extra virgin coconut oil [another oil works fine]
½ white onion, diced
2 large red potatoes, scrubbed and diced
2 garlic cloves, minced
1 tbsp minced chipotles en adobo [canned is fine]
¾ tsp sea salt
1/8 tsp white pepper [black pepper is fine]
½ tsp lime juice
8 corn tortillas
chipotle salsa
1 large avocado, peeled, seeded, and cubed
8 cilantro sprigs
4 oz (115g) crumbled queso fresco (optional but recommended)
Directions
In a small saucepan on medium-high heat, place flowers, honey, and 2 cups (500mL) water and
simmer for 25 minutes. Meanwhile, in a frying pan on medium, melt coconut oil. Sauté onions
in coconut oil until translucent, about 5 minutes. Strain flowers, reserving liquid for another use
(see below). Chop flowers coarsely and add to onions. Stir in potatoes and garlic and sauté
mixture for about 5 minutes, stirring often. Add minced chipotle, salt, pepper and ½ cup (125
mL) water. Cover and cook for 15 minutes, or until potatoes are cooked through. Remove from
heat, stir in lime juice, and adjust seasonings.
Heat a griddle on high for 5 minutes. Reduce heat to medium, and heat tortillas 1-2 minutes on
each side. Divide potato mixture between 8 tortillas. Garnish each taco with a spoonful of salsa,
several cubes of avocado, a spring of cilantro, and a smattering of queso fresco.
26After soaking flowers in water, save bright red water. Taste and add more sugar, honey, or stevia to taste. It should be tangy. Drink hot or cold. This beverage, also called jamaica, has been used medicinally to treat high cholesterol and hypertension. 27
Sweet Potato and Black Bean Tacos
Lise Nelson

 Ingredients
        4 small or two large sweet potatoes
        1 yellow onion
        Cilantro (half bunch / ¼ oz)
        4 cloves garlic
        1 can black beans (15 oz)
        2 limes
        1 oz honey
        2 tsp cumin
        2 avocados
        8 TBSP sour cream
        Flour tortillas

Directions
   1. Preheat oven to 400 .ͦ Peel sweet potatoes and cut into ½ inch cubes. Toss with 2 TBSP
      olive oil and salt. Spread onto baking sheet. Roast about 20 minutes (tossing halfway
      through) until tender and lightly browned.
   2. Meanwhile: dice onion, separate cilantro from stems, mince or grate garlic. Drain beans
      and rinse. Zest 1 tsp zest from limes, cut them into halves.
   3. In large pan over medium heat, heat 2 TBSP olive oil. Add onion and cook 5-6 minutes
      until softened. Season with salt and pepper. Add garlic and beans to pan, cook 3-4 more
      minutes until fragrant.
   4. Add to pan with beans the sweet potatoes, honey, cumin and juice from one lime. Cook
      2-3 minutes until most liquid has evaporated, season with salt and pepper. Remove
      from heat.
   5. Make avocado crema: take one avocado and scoop out into small bowl, adding sour
      cream, lime zest, and juice from 2nd lime. Mash with fork until smooth, adding salt and
      pepper to taste. Take 2nd avocado and peel and slice as side garnish.
   6. Warm tortillas. On each warm tortilla spread avocado crema as the first layer, scoop on
      filling and garnish with cilantro and avocado slices.

This is one of our go-to recipes that significantly jazzes up what might have been regular old
tacos. The avocado crema is a super yummy addition.
                                        –from Lise & Andy

                                               28
Baked things
29Focaccia Bread
Lara Tarantini
Ingredients
500 g flour (I use all purpose) [2 2/3 cups]
7 g instant yeast [1 0.25 ounce package]
10 g sugar [< 1 T]
1 heaping tsp salt
4 tbsp olive oil
275 – 300 ml lukewarm water (37 – 40 degree Celsius)
--------------------
2 tbsp oil (or more)
2 tbsp kosher salt (or to taste)
Optional: rosemary; dried tomatoes; green or black olives; anchovies; bacon bits
Directions
In a big bowl, mix flour and yeast. Make a well at the center and add sugar, salt and oil.
Start mixing and adding water little by little. Mix and then knead for 10 minutes. The resulting
dough may be a little sticky and soft. Fold it a couple of times, then place it in a bowl brushed
with olive oil and cover with plastic wrap. Let the dough rise for about 2 hours (or at least until
it doubles its volume). Make sure that the temperature is warm enough and constant (I put my
dough in the oven, barely heated if necessary).
Brush a baking tray with olive oil and, with your hands covered in oil, too, place the dough in
the tray and spread the dough, covering the whole tray. At this point, the dough is (or should
be) pretty elastic, so it may take a couple of minutes to do it. Cover the tray with plastic wrap
and let the dough proof for 1 hour.
Preheat the oven at 392F (200C)
Once the dough is ready, with your hands covered in oil, dip your fingers in the dough and
create the typical dimples. Pour the 2 tbsp of oil on the surface (you'll likely need more as the
surface needs to be very oily at the end) and the kosher salt.
You can also add rosemary or any of the optional ingredients.
Bake for 25 minutes (it could be more or less, depending on the oven).
Focaccia bread lasts for about a week, covered in plastic wrap (can be kept in the fridge, too).
30Serving suggestion:
Heat your focaccia, slice it in half and add some Swiss cheese, lettuce (or any greens of your
choice), pan-fried bacon, mayo (optional). Best sandwich ever!
31Savory Scones
Lauren Fritzsche
Makes 8 scones
My mom and her husband ask me to make these scones every time I see them and I always end
up baking them more to take home or before I leave. Which is to say, they’re addictive!
“Lauren’s scones are very tasty! Anytime she leaves town and I’m left alone, she makes me
these scones to ensure that I have decent food intake while she’s away. Good substitute for
breakfast, lunch, dinner, or any other meal.” - Eden
Ingredients
Dough Other ingredients
2 cups all-purpose flour 1 c cheese (medium-hard cheeses work well)*
1/2 tsp salt 1/3 c chives or scallions
1 tbsp baking powder 1/2 lb bacon (optional)
2 tsp sugar
4 tbsp cold butter 1 c heavy cream (sometimes more!)
*I’ve used cheddar or gruyere or a mix of cheeses; sometimes fun funky cheeses I find on sale at
Rincon Market end up in these scones
Directions
1. Heat oven to 425 F. Grease or line baking sheet with parchment paper.
2. Cook bacon if using. Finely chop the scallions/chives and coarsely shred the cheese. Set
aside.
3. Mix dry ingredients together in a medium sized bowl.
4. Chop butter into small cubes and work into the dry ingredient mixture (I use my fingers
or a fork) until its unevenly crumbly. Having some butter remaining in chunks is fine!
5. Add the cheese, chives, bacon in with the dough ingredients and mix well.
6. Slowly add in the cream, stopping to mix the batter every so often to ensure even
distribution. If crumbs remain in the bottom of the bowl, work in more cream (or milk)
until dough comes together in a shaggy mound. Transfer the dough to a well-floured
surface to shape.
7. Shape the dough into a 7in wide disk. It should be about ¾-1 inch thick.
8. Transfer to the baking sheet.
9. Cut the disk into 8 pieces (you may have to remold some of the pieces, that's ok).
Spread them out a bit on the baking sheet so that there’s about 1 inch between the
scones since they’ll puff up while cooking.
3210. Bake for 16-20 minutes (occasionally a few minutes more depending on your oven).
Check on them! They should be golden.
11. Let them cool on the baking sheet.
12. ENJOY THEM! (especially on picnics or bring them with you when you go camping)
33Best Scones Ever
(salvia officinalis furiousa)
Sallie Marston
34Dried Cranberry, Walnut, and Lemon Scones
Aaron Krupp
Makes 12
Ingredients
2 tablespoons plus 1 cup sugar
2 tablespoons fresh lemon juice, divided
3 cups all purpose flour
1 tablespoon baking powder
1 tablespoon finely grated lemon peel
1 teaspoon salt
3/4 cup (1 1/2 sticks) chilled unsalted butter,
diced
1 cup dried sweetened cranberries
1/2 cup coarsely chopped walnuts
1/2 cup (or more) chilled half and half,
divided
Directions
1. Position rack in top third of oven; preheat to 375°F. Line baking sheet with parchment
paper.
2. Whisk 2 tablespoons sugar and 1 tablespoon lemon juice in bowl for glaze.
3. Whisk flour, baking powder, lemon peel, salt, and 1 cup sugar in large bowl. Add chilled
butter; using fingertips, rub in until coarse meal forms. Mix in cranberries and walnuts.
Add 1/2 cup half and half and 1 tablespoon lemon juice. Toss with fork until dough
comes together in moist clumps, adding more half and half if dough is dry.
4. Gather dough into ball; divide in half. Press out each half on floured surface to 6-inch-
diameter (1-inch-high) round. Cut each round into 6 wedges. Transfer to baking sheet;
brush with glaze.
5. Bake scones until golden and tester comes out clean, about 18 minutes. Serve warm or
at room temperature.
35Desserts 36
Tiramisu
Lara Tarantini

Ingredienti (Ingredients)
       3 eggs (at room temperature)
       3 heaping tablespoons of sugar
       300 grams/10 ounces of mascarpone cheese (at room temperature)
       2 packs of Savoiardi biscotti (if you struggle to find them, Babylon market and other
       Middle Easter groceries usually sell them)
       4 or 5 cups coffee (preferably 5 espressos watered down with cold water, but drip
       coffee is OK)
       1 tbsp rum (optional, but highly recommended)
       Cacao powder

Appliances: handheld mixer (or a whisk); a brownie pan

Preparazione (Directions)
Mascarpone
  1. Separate the yolks from the whites and keep the whites aside.
  2. Put the yolks in a bowl and add the sugar. Whip yolks and sugar with a whisk until you
      have a thick cream (my mother says “until you can write with it” which means that it has
      to be thick enough to leave streaks...makes sense?). You can also use a handheld mixer,
      which makes the process a lot faster.
  3. Add mascarpone cheese. Keep whipping until the mascarpone is smoothly mixed with
      the yolk-sugar cream.
  4. Add the tablespoon of rum. This step is optional. Also, if you don’t have rum, you can
      substitute with other liquors of your choice (I’ve tried whiskey and it works well, too).
      Mix well. It is possible to add a little bit more of rum, but be careful as it can make the
      mix curdle.
  5. The mascarpone cream is now ready, but it is possible to add an optional extra step.
  6. At this point it is possible to add the egg whites: using a handheld mixer, beat them until
      stiff and then carefully add them to the mascarpone cream. This will actually make more
      mascarpone cream and avoid the waste of the egg whites it you don’t know how to use
      them for other preparations. I usually don’t do it, I like the mascarpone cream without
      whipped egg whites, but you can try both combinations and decided which one works
      best for you.
  7. The final cream should be thick and smooth, but it might be a little bit on the liquid side,
      which is fine as well, as long as it tastes good.

                                               37
Coffee
I usually use watered down espresso, but drip coffee is ok. It is possible to add sugar to the
coffee (when still hot), but I usually keep the coffee a little bit on the bitter side since the
mascarpone cream is already sweet. The strength of the coffee really depends on your taste. 5
cups should be plenty, but if you realize that the coffee is not enough, you can still make more.
Just make sure that the coffee is not hot (lukewarm/cold is the perfect temperature).
Assemblaggio (Assembly)
Now that you have all the ingredients ready, you can proceed with the assembly.
1. Start with dipping the Savoiardi in coffee. Because Savoiardi absorb liquids faster than a
sponge, roll them very quickly in the coffee (even if they look stiff, do not worry, they’ll
keep absorbing the liquid and get softer). This is a very important step: the Savoiardi
should not be completely soaked in coffee, for this would make the tiramisu soggy (and
likely make them fall apart before you can even place them in the pan).
2. Place the dipped-in-coffee Savoiardi in the brownie pan, parallel to each other at first,
then perpendicular, until you have covered the bottom of the pan with a layer of coffee-
dipped Savoiardi.
3. Add a layer of mascarpone cream, enough to cover the Savoiardi. Now proceed this way
until you’ve finished up the ingredients (or until you have reached the top of the pan),
making sure that the top layer is mascarpone cream.
4. Dust some cocoa powder on the top (if you fancy a more cocoa flavor, you can dust it on
every layer of mascarpone cream, this depends on taste).
Place the pan in the fridge for at least 3 hours and then enjoy!
Please note:
1. Since you’re using raw eggs, they need to be uber fresh and the tiramisu needs to be
eaten within a couple of days (ok, probably this won’t be an issue)
2. Tiramisu can also be frozen, but again, unless you make A LOT, you’ll probably finish it
within 2 days.
3. There are many variations of tiramisu out there, though the usual proportion is 1 yolk : 1
heaping tbsp sugar : 100gr mascarpone. The usual package of mascarpone cheese here
in the States is about 250 grams, so, in case you don’t want to buy more mascarpone
than you would use, it is possible to use less cheese for 3 yolks. In case you have more
cheese, you can also exceed the proportion (just don’t overdo it).
4. This is the recipe I learned as kid (the fun of an Italian upbringing). I usually eyeball the
ingredients, so I really don’t know how many persons this recipe serves.
5. When you buy the Savoiardi, buy at least two packages, as it really is a drag when you
start making tiramisu and you discover that you don’t have enough biscotti. The good
thing is that Savoiardi keep very well, and if you don’t use them all for the first batch of
38tiramisu, you can always use them for the next one - or you can simply eat them the way
they are or dip them in coffee.
39The Earl Girls’ English Trifle
Diana Liverman
Here is my Trifle recipe - my mother and her sisters excelled at this essentially British dessert
Ingredients for 8 people
Trifle bottom:
Ingredients
4 cups of a selection of/from raspberries, sliced peaches, sliced strawberries, mandarin
oranges (fresh or frozen)
1 packet of lady finger biscuits or 1 lemon or vanilla sponge/pound cake sliced into
‘fingers’
Sweet sherry or marsala (1/2 cup)
raspberry jello (optional)
Directions
1. Line glass bowl with biscuits or slices of sponge
2. Spoon in fruit and pour over sherry
3. Make raspberry jello and pour to set
Custard:
Ingredients
Either made from Bird’s custard mix (make at least 3 cups) or home made from:
2 cups whole milk
1 cup whipping cream
2 tsp vanilla
6 eggs
3 tbs sugar
1 tbs cornflour [corn starch]
Directions
1. Put the milk and cream into a thick-bottomed pan with the vanilla on a gentle heat.
Stir, then bring it to just below a simmer; do not allow it to boil.
2. Beat the egg yolks, sugar and cornflour together in a large bowl.
3. Pour the milk on to the yolk and sugar mixture, stirring all the time.
4. Turn the heat down to medium-low, and pour the custard back into the pan.
5. Stirring slowly and continuously, cook until it coats the back of a wooden spoon –
the longer you cook it, the thicker it will be. If it doesn't appear to be thickening
after 10 minutes, you may have the heat slightly too low, but don't turn it up
40dramatically or you'll spoil all your hard work. (Alternatively, if you're not feeling
terribly brave, suspend a heatproof bowl over a pan of simmering water, pour the
yolk and milk mixture into that, and proceed as above.)
6. Decant into a jug to cool.
7. Pour over bottom layer of trifle.
Topping:
Whip 1-2 cups of whipping cream and pipe onto top of trifle. Decorate with toasted almonds,
flowers, mint, grated chocolate and/ or pomegranate seeds.
Refrigerate until serving.
This can also be composed in individual goblets.
41Date Squares
Meg Mills-Novoa
Ingredients
1 lb. dates
3/4 cup hot water
Pinch of salt
1 tsp. vanilla
1.5 cups flour
1/2 tsp baking soda
1.5 cups rolled oats
1.5 cups brown sugar
1 cup butter
Directions
1. Combine dates, hot water, and salt in a saucepan. Cook over medium heat until dates
are soft and water is absorbed. Add vanilla and let cool.
2. Stir flour and baking soda together. Add oats and brown sugar and mix well. Work in
butter with a fork until the mixture is crumbly
3. Spread half the mixture in the bottom of a 9inch square pan and pat down. Cover with
date filling and pat remaining mixture on top
4. Bake at 350 degrees F for 20-25 minutes
Enjoy!
42Oatmeal Chocolate Chip+ Cookies
Talia Anderson
A favorite cookie recipe of my Grandma Hazel.
Ingredients
1 cup butter
1/2 cup white sugar
1 cup brown sugar
2 eggs
2 cups flour
1 tsp baking soda
1 tsp baking powder
1 tsp salt
2.5 cups rolled oats
1.5 tsp vanilla
1 package chocolate chips (semi-sweet or dark)
1 cup chopped and toasted pecans
1 cup coconut flakes
Directions
1. Cream butter, white, and brown sugar.
2. Add eggs and beat.
3. Sift together dry ingredients.
4. Add to sugar/butter mixture.
5. Add vanilla, oats, chocolate chips, and nuts.
6. Drop by spoonfuls on a cookie sheet, press lightly.
7. Bake at 350 until light brown (10-12 minutes).
43No-Bake Cheesecake
Connie Woodhouse
This is a recipe from the New York Times by Mark Bittman. This is a great recipe for Tucson
summers, since you don’t need to turn on the oven and can take advantage of fresh summer
fruits!
Mark Bittman notes: There are those who may not find
this sweet enough, and if that’s the case I recommend
adding a quarter cup or so of sugar instead of increasing
the honey, because you don’t want the honey flavor to
become overpowering. Other flavor possibilities to add
with the blueberries: any citrus you like; a teaspoon or
so of very finely ground coffee or cocoa; or chopped
raisins or, I suppose, chocolate chips. I prefer the
straight honey-lemon combination, unadulterated.
8-12 servings
Ingredients
16 graham cracker squares (8 whole crackers), crushed
¼ cup ground pecans or walnuts, optional
3 tablespoons melted butter
1 8-ounce package cream cheese, at room temperature
1 cup ricotta cheese (drain if watery)
2 tablespoons honey, or to taste
Rind of a lemon, freshly grated
Pinch salt
About 1 1/2 cups blueberries
Directions
1. Combine crushed graham crackers, nuts if using, and melted butter. Press evenly
into bottom of an 8- or 9-inch square pan (glass is good) to form a crust about 1/4-
inch thick. Put in refrigerator until ready to use.
2. Using a standing or hand mixer, or a whisk, combine cream cheese, ricotta, honey,
lemon rind and salt, and blend until smooth.
3. Spread cheese mixture carefully and evenly over crust, using a spatula or butter
knife to smooth top. Cover with fresh blueberries and chill for at least an hour, or
until set. Cut into squares or bars and serve.
CW notes: This is less firm than regular cheesecake. You can use other fresh ripe fruits
besides blueberries (strawberries, raspberries, kiwis, thinly sliced ripe peaches, pitted and
halved cherries, or a mix).
44Drinks 45
Prickly Pear Schrub
Lauren Fritzsche
I started making this shrub when Eden and I first
arrived in Tucson in 115 degree weather. The fruit has
lots of nutrients, vitamins, and electrolytes – which
makes this shrub a super refreshing (and pretty!)
beverage to enjoy during the hot summer months.
Ingredients
1 lb. Tucson-fresh prickly pear*
¾ c. organic sugar
¾ c. organic apple cider vinegar
Directions
1. Wash the prickly pear fruit. Using tongs and a knife**, cut a slit down the length of the
fruit. Scoop out the prickly pear flesh (grapefruit spoons work super well here). Discard
the skins and place the fruit in a large bowl.
2. Mix the sugar and prickly pear together in the bowl. Cover and place in fridge for 24
hours.
3. After 24 hours, add in the vinegar and mix. Cover again and place in the fridge for a few
days. Taste the mixture every day until the desired flavor is reached.
4. Strain the fruit-sugar-vinegar mixture using a mesh strainer.
5. Store the strained liquid in a jar in the fridge.
Enjoy with bubbly water or mix into cocktails
Mix around 1 tbsp of shrub with bubbly water, but it depends on the strength and sweetness of
your shrub.
*Harvest (carefully!) when pink/purple/red in color in August/September. Be sure to leave 1-2
fruits per prickly pear pad.
**No matter how careful I am, I always end up with some cactus thorns in my fingers so I keep
some scotch tape and/or tweezer nearby to pull them out!
46Very Simple Wine Cooler
Connie Woodhouse
This a super-easy, thirst-quenching cooler that can be thrown together in a couple of
minutes, max.
Per person:
1. Fill a large glass (a pint beer glass works well) about half full with ice cubes.
2. Cut a slice each of orange, lemon, and lime, and squeeze each into the glass (add the
fruit, if you want or discard).
3. Add seltzer or other sparking water (I usually fill the glass to about an inch from the
top).
4. Top with white wine.
5. Gently stir to mix, and enjoy!
Notes: This is not a set recipe so proportions are approximate and to taste.
Pre-freezing the glass works well, and if you happen to have a foam beer cozy, these two
measures will keep the cooler nice and cold, which is especially important if you’re outside.
For wine, I use inexpensive chardonnay (e.g., Yellowtail or Smoking Loon unoaked). I’ve also
used red wine in a pinch, but I think white works best. Others would be fine, too, I’m sure!
https://cuesa.org/article/sunshine-winter-farmers-market-guide-citrus
47Other things
48Salt Olives
Chris Scott
1. Use ripe black olives from the tree, starting once they’ve fully ripened in fall (typically
November in Tucson) through winter until Spring (March, from the tree, but when mine
are falling all over the ground — note, the birds love the late-season olives because they
have better oil content and taste)
2. Discard any with broken skin
3. Rinse in mild salt water to get off the dust and grime, prick each one with a sharp knife
once or twice (the juice will stain)
4. Use well-cleaned large jars (food grade plastic or glass ok)
5. Pour in each half an inch of kosher or sea salt, layer on top an inch of olives, another half
inch salt, etc. until the jar is about three-quarters full (allowing room for mixing later)
6. Put the lids on (not too tightly) and leave in a cool location for a week (10 days for early-
season olives)
7. When liquid begins to collect at the bottom of the jar, shake the jar thoroughly to
redistribute the salt and olives — add salt only if needed to cover the olives fully
8. Repeat the shaking every week or so until the dark juice is more of a liquid brine at the
bottom half of the jar — make sure olives remain covered in salt
9. After min. 3-4 weeks but before the olives start getting too dry and wrinkled, remove an
olive, rinse and taste. The flesh should come off cleanly, leaving a black or dark-crimson
pit
10. Rinse the olives thoroughly (even soak in fresh water for an hour if you like less of the
salty taste), air dry for an hour on an old but clean cloth (will get stained)
11. In each quart-size jar, fill all but an inch with olives, drizzle 2 tbsp. olive oil over them
and shake to distribute the oil (necessary so they don’t dry out further and get hard)
12. No further curing necessary - enjoy!
49Salt Lemons with cardamom, bay leaf or rosemary
Chris Scott
1. Harvest your lemons (or forage from the neighborhood) when they’re still firm, rinse
thoroughly
2. Squeeze the juice and remove the pips (pulp ok) from two thirds of the lemons,
selecting any blemished ones
3. Wash the remaining ones thoroughly to get off the dust and grime
4. Quarter these, but not all the way to the stem, pack each with 1 tbsp of kosher or sea
salt
5. Use only clean (rinsed with boiling water) glass jars, the wider the better
6. Pour in each jar half an inch of kosher or sea salt, pack in a layer of lemons using a stiff
wooden spoon to bruise some juice from the lemons
7. For each layer, add cardamom pods (slightly opened beforehand) or your spice of choice
(I’ve made them with bay leaf, rosemary, black pepper, chili, ginger…)
8. For a dozen or so lemons in a quart jar, you should use a quarter-cup of salt or more
9. Leaving an inch at the top of each jar, pour in the lemon juice to fully cover the packed
lemons
10. Put the lids on tightly and place in a sunny window (on a plate in case you filled too
much juice and/or the lids leak)
11. Turn each jar daily to get different sun exposure for a week to 10 days
12. Refrigerate for 3-4 weeks before enjoying!
50You can also read