Shabby Heart Wall Art Instructions - Copyright 2011 Jubilee Creative Studio, LLC For Personal Use Only. This pattern may not be copied or ...
←
→
Page content transcription
If your browser does not render page correctly, please read the page content below
Shabby Heart Wall Art Instructions

Copyright 2011 ‐ Jubilee Creative Studio, LLC
For Personal Use Only. This pattern may not be copied or redistributed without permission.
About Homespun Fabric

Homespun fabric is highly recommended for this and most rag stitching projects. Other cottons simply will not fray as
well. Flannel will fray decently but it has a tendency to pill when washed.

Homespun is a yarn dyed fabric meaning that the design comes from the colors of the thread. It is not a printed fabric
so it has no front or back side. Both sides are the same. The threads are often somewhat coarser than traditional
cottons and the weave is sometimes looser. These are the characteristics that make homespun so perfect for rag style
projects.

Although most homespuns are manufactured internationally now, this type of fabric is called homespun because the
technique is very similar to the way that pioneer women used to create their own fabrics. The threads will occasionally
have nubs and imperfections in them which is the nature of the fabric.

After the first wash, homespun fabric will shrink about 10% and become very soft and supple and the loose weave will
tighten up. About ¼ cup of table salt in the first wash will help set the color in any 100% cotton fabric and prevent color
bleeding. A liquid fabric softener will also help loosen the strings for rag projects.

Some online sources of homespun fabric are:
www.JubileeFabric.com
www.hugsandstitches.com

Copyright 2011 ‐ Jubilee Creative Studio, LLC
For Personal Use Only. This pattern may not be copied or redistributed without permission.
About Ragged Style Stitching
Rag stitching can be totally addictive! Once you get the hang of it, you will realize that it’s fast, fun and simple.
Even the most basic sewing project can become totally cute and unique when it is done in rag style.
One of the most popular features of rag style stitching is its forgiving nature. In other words, it’s really hard to
mess this up! Most seams and stitch lines are covered over with the “fray” when your project is finished so no
one will ever see the crooked stitch lines or the uneven intersections. This makes rag projects great for
beginners who will be very encouraged to create such a great looking product so easily. It also makes rag
projects great for experienced crafters who don’t have much time and want to make something quick and
easy.
Here’s some tips based on our years of experience sewing rag style with homespun fabric:
Wear an apron. Those strings get everywhere and an apron will help when you need to clean yourself
up fast.
Keep plenty of lint rollers handy. These will not only help clean the strings off your projects when you
are finished but they’ll clean the strings off of you that the apron left behind. Also use these to clean
your cutting table and even the floor under your chair when you’re done. They are a great time saver.
Don’t try to do too much clipping at one time. Your hand will get really tired. Space it out if you have a
big project.
Use spring loaded scissors if possible. It’s not necessary but does help with hand fatigue on the big
projects like quilts and tablecloths.
Put the kids to work! Clipping seams on big projects is not hard. Just teach them to not cut too close
to the stitch line.
If you do cut into a stitch line, restitch the area immediately and put just a touch of a liquid fray
preventer on the area to secure it.
Don’t stress over getting everything lined up just perfectly. As you can see from our tutorial pictures,
we believe that when you are rag stitching, “Close enough is good enough”.
Copyright 2011 ‐ Jubilee Creative Studio, LLC
For Personal Use Only. This pattern may not be copied or redistributed without permission.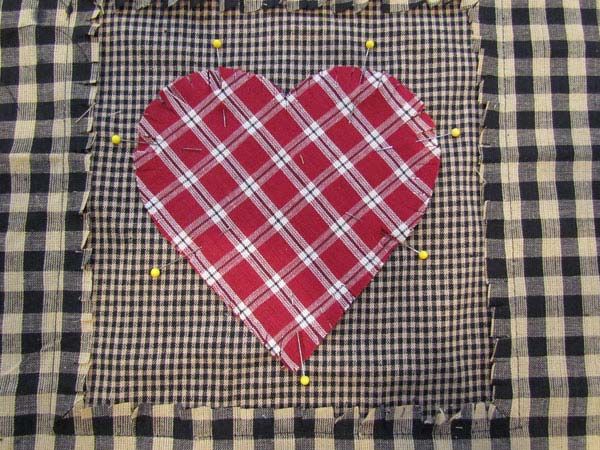
Materials List:
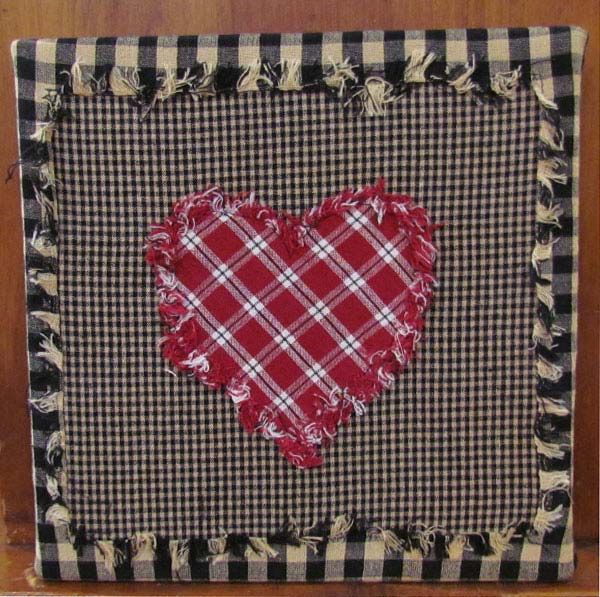
Shabby Heart Wall Art
1 fat quarter “background” homespun fabric
1 fat quarter “border” homespun fabric
2 precut 6” homespun hearts
Thread
10” x 10” artist canvas
Office stapler that will open up to staple a flat surface
NOTE: A fat quarter is approximately 18” x 22”
Assembly Instructions for Shabby Heart Wall Art:
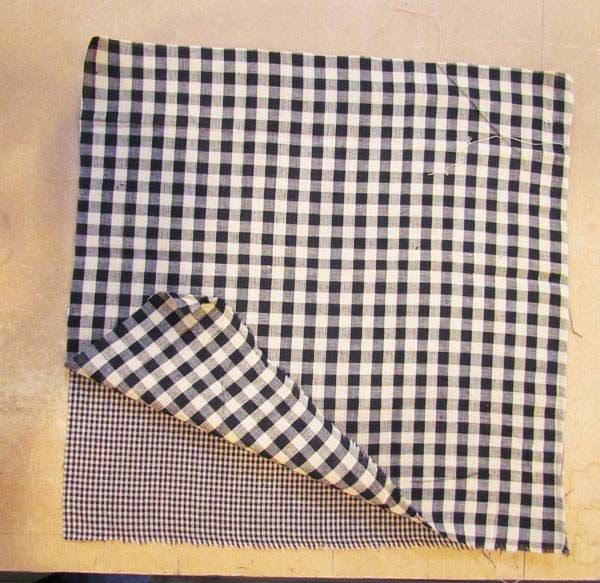
1. Cut a 16” x 16” square out of each of the homespun fat quarters. Layer one on top of the other and lay them on
a flat surface.
Copyright 2011 ‐ Jubilee Creative Studio, LLC
For Personal Use Only. This pattern may not be copied or redistributed without permission.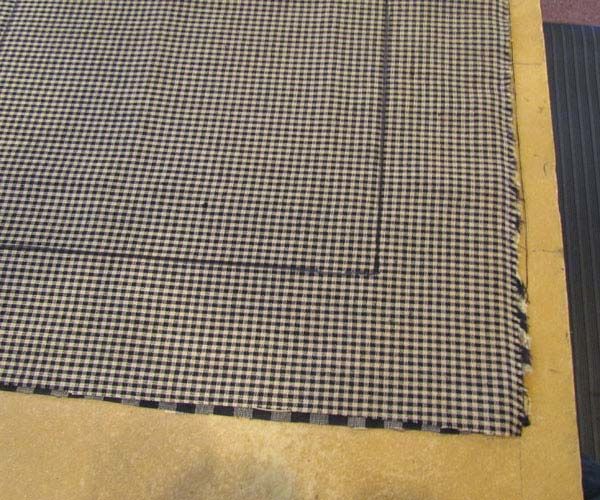
2. Place the fabric that you want to use for the “background” of the wall art on the top and the “border” fabric on
      the bottom. Center your 10” x 10” art canvas in the middle of the fabrics and trace the square outline with a
      pen or sharpie.

Copyright 2011 ‐ Jubilee Creative Studio, LLC
For Personal Use Only. This pattern may not be copied or redistributed without permission.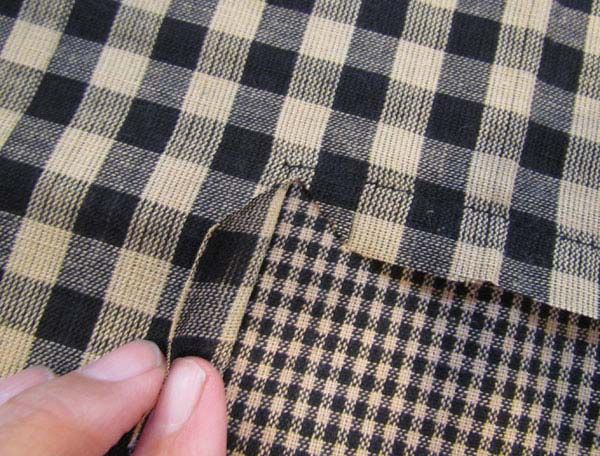
3. Stitch around the inside of the drawn square about ¾ inch from the line. Stitch through both layers of fabrics.
   4. Now flip the two pieces of fabric over so that the “border” fabric is on top. Trim out the inside part of the border
      fabric by cutting away the fabric ½ inch from the inside of the stitch line.
   5. Make a diagonal clip into each of the four corners.

Copyright 2011 ‐ Jubilee Creative Studio, LLC
For Personal Use Only. This pattern may not be copied or redistributed without permission.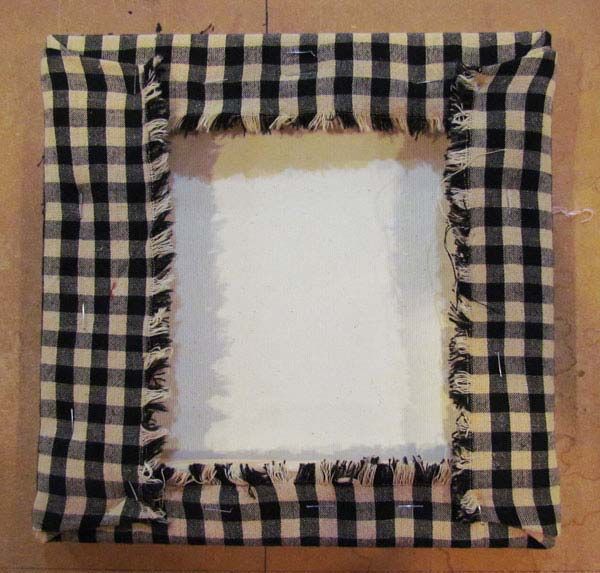
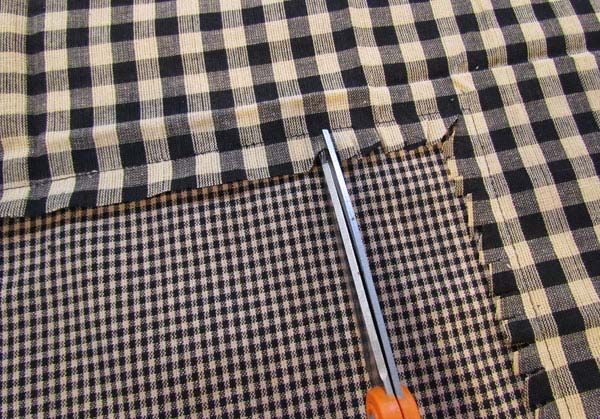
6. Now clip the exposed edge of the “border” fabric where you just trimmed. These clips should be about ½ inch
      apart and should go almost to the seam but be sure that you don’t clip into the stitching of the seam. This
      clipped edge is what will make the beautiful shabby “fray” when the fabric is washed.

   7. Place the two hearts, one lined up on top of the other, onto the front side of the fabric. Center the hearts in the
      center of the “background” fabric. Pin into place. Stitch around the perimeter of the heart with a seam that is
      5/8 inch from the raw edge. Be sure that you don’t catch any of the precut “clips” into the stitching. Stitch
      through all layers. (You may use just one heart layer if you wish but using two will make your heart applique
      extra fluff with lots of fray)

Copyright 2011 ‐ Jubilee Creative Studio, LLC
For Personal Use Only. This pattern may not be copied or redistributed without permission.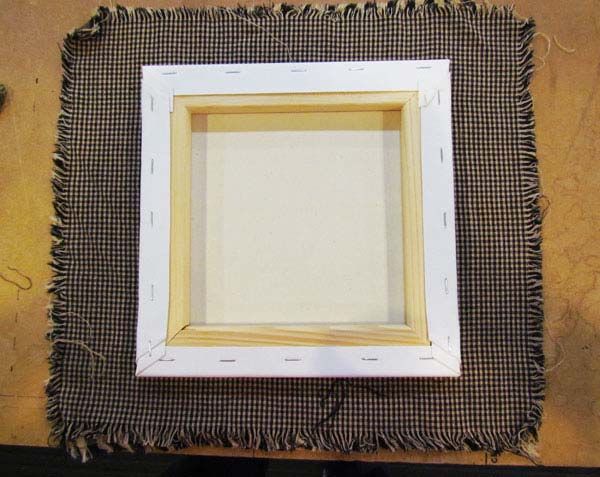
8. Wash the fabric in a washing machine. Tumble dry. Be sure to check the lint trap for excess threads and lint that
      will build up during the dry cycle.

   9. Remove from the dryer and press lightly from the BACK side with an iron until the wrinkles are all removed and
      the fabric is lying flat and smooth with the front side down.

   10. Place the art canvas in the center of the fabric. Center the canvas evenly in the center using the stitched square
       as a guide. If the canvas is centered on top of this square, the “border” will be evenly spaced from the front.

   11. Fold the bottom edge up over the canvas and staple in place. Try to keep the edge even with the plaid.

Copyright 2011 ‐ Jubilee Creative Studio, LLC
For Personal Use Only. This pattern may not be copied or redistributed without permission.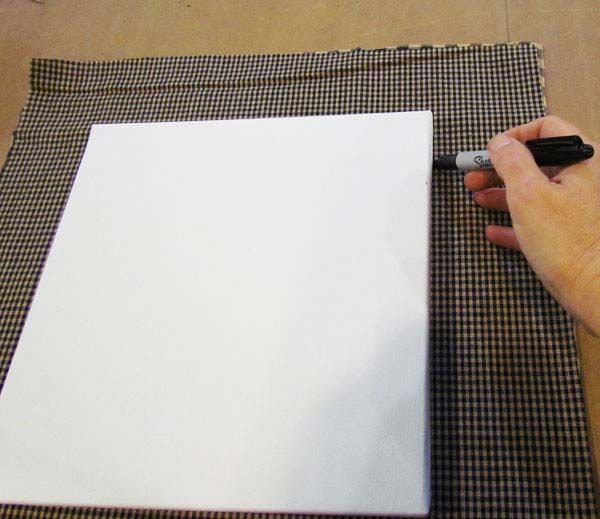
12. Fold the corners in about half way and staple the corners.

   13. Repeat the same process on the top side.

   14. Now fold both remaining sides in and staple in place.

   15. That’s it! You are done. Your Shabby Heart Wall Art will look great hanging on the wall or sit it on a shelf with
       other shabby home décor items. This pattern can also be adapted to make a pillow by deleting the art canvas
       and adding two more fat quarters to use as the back of the pillow.

       Happy Sewing!

Copyright 2011 ‐ Jubilee Creative Studio, LLC
For Personal Use Only. This pattern may not be copied or redistributed without permission.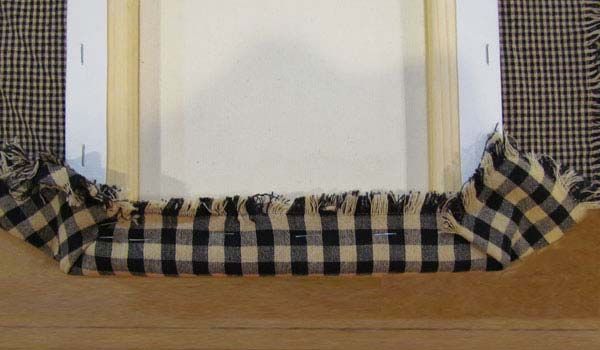
Copyright 2011 ‐ Jubilee Creative Studio, LLC
For Personal Use Only. This pattern may not be copied or redistributed without permission.
You can also read