Shopify - Beginner - 2H Media
←
→
Page content transcription
If your browser does not render page correctly, please read the page content below

Shopify - Beginner

About Us

      Ecommerce · Branding · Web Development
What you’ll learn

1.   Why use Shopify?      5.   Adding a collection

2.   Apps & Themes         6.   Managing shipping

3.   Modifying a product   7.   Updating the homepage

4.   Adding a product      8.   Q&A

Why use Shopify?

Shopify
It’s a Canadian eCommerce company
headquartered in Ottawa, and with offices
in Waterloo.
Shopify provides an eCommerce platform
that lets you control your own website,
backed by local reliable support.

Apps & Themes

Shopify Apps
“That’s an app-based solution”
Can’t seem to set up the exact
shipping method you want?
Do you feel like you’re missing out
on product bundles?
Do wish lists seem like a good
idea?
There’s probably an app for that.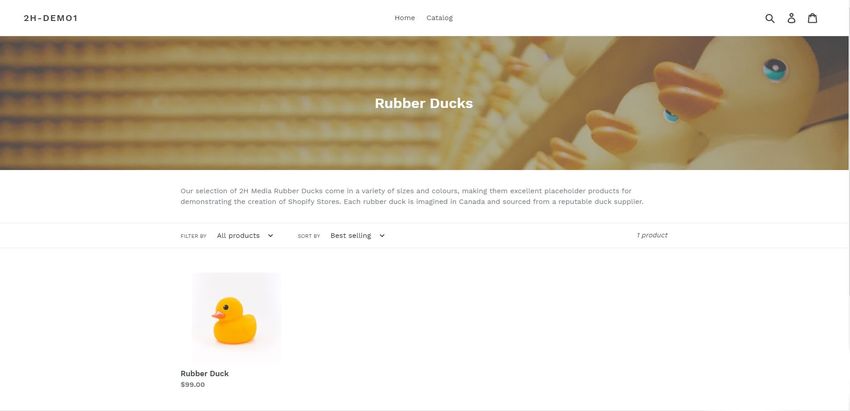
Shopify Themes
Each theme is different
Free themes have their limitations.
Your homepage & product pages
might look quite different than ours.
Most importantly, your theme does
not change the back-end of Shopify.
The design is separate from the data.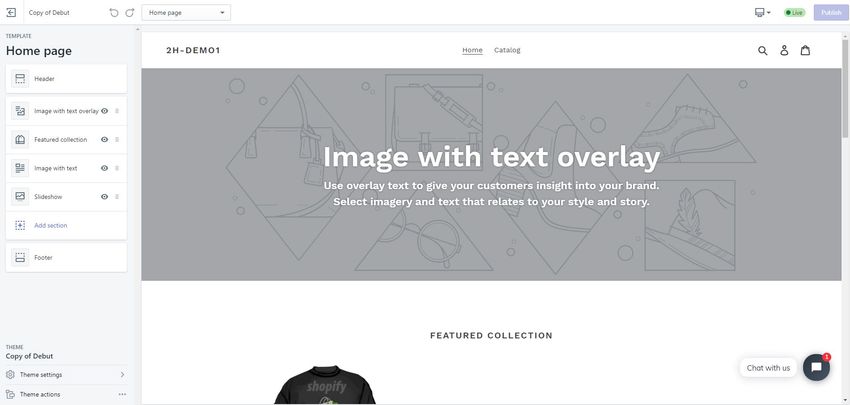
Modifying a Product
Start on the dashboard

Click “Products” in the menu on the left
Select a product to edit

Search or filter if you are looking for a
          specific product.
Title & Description
At the top of the product page is a very
basic set of fields for title and
description.
Use a short descriptive title. What
would your customer call the
product?
The Description box has some basic
text editing capabilities.
For SEO, try to describe your product as if
you had to explain it to someone who is
vision impaired.
Use Bold text for headers.
Use bullets to display key information.Uploading Images
Below the description is a section for
“ Media” in which you can upload product
photography.
The optimal image size is 2048x2048
pixels at 72 pixels per inch.
To upload in image you can drag and
drop an image from your computer to
the “ Add media” box or click the box to
open a browser window.
After uploading your image, click on the
image to open an overlay. From the
overlay, click “ Add alt text” to enter
descriptive alt text and improve SEO.Modifying Prices
Mid-way down the page, you should see
either a section for “ Pricing” or for
“ Variants” .
The pricing box is for simple
products.
The “ Variants” box is for more
complex products that have multiple
size or colour options.
In either case, the price field can be seen
in the box. To change the price, simply
type in a new number in your store
currency.Product Availability To the right of the title, field is a section for “ Product availability” . Click “ Manage” and a pop-up will appear. From here, you can untick “ Online Store” to make your product unavailable without deleting it. You may see one or more other channels. You can ignore them for now.
Save your updated product

Click “Save” in the top-right corner.
Adding a Product
Start on the Products page
                             Return to the products
                             page, and click the
                             “ Add product” button
                             in the top-right corner
                             of the screen.
Fill in the product details
Just like updating a product
Enter a short, descriptive title
Enter a 1 paragraph description with
additional bullet points for key points
Upload at least 1 product image and
add alt tags. Add up to 6 product
images if possible.Fill in the product details All set? Your product should look something like this so far.
Pricing & Inventory
Pricing
Price: Enter the price you are selling the product for.
Compare at price: leave this blank.
Cost per item: Enter your cost for the product to
unlock additional analytics.
Inventory
Enter the product’s SKU and bar code (if possible)
If you do not plan to use Shopify to manage your
inventory, uncheck “ Track quantity”
Otherwise, enter the stock you have on-hand into the
“ Available” field.Shipping
If your product is digital or you are selling
a service, uncheck “ This is a physical
product”
Otherwise, enter a weight for your product.
Use the selector to choose a unit of
measurement.
If you are only shipping within Canada, you
can leave the Customs Information blank.
Otherwise, select the country where your
product was manufactured and enter the
Harmonized System (HS) code.Variants*
Adding Variants
Under “ Option 1” enter a title for the variant option
(ie. Size, colour)
In the box to the right, enter all available variants
separated by commas.
To add additional variants, click the “ Add another
option” button. Then repeat the first 2 steps for each
new variant.
Enter additional pricing and SKUs for each variant in
the new fields below.
*If your product does not require variants, you can
skip this step.Availability, Type,
and Tags
Scroll back to the top of the page.
On the right hand side, Product availability is
automatically turned on.
Under organization, enter a Product type
(what is the product in the simplest terms?)
And enter a Vendor (who manufactured the
product?)
Leave COLLECTIONS blank.
Under TAGS, enter any number of tags to
help create collections later on. These do not
impact SEO.
*Product types and tags are case sensitive.View your new product
Save your product and middle-click “View
on your online store”Adding a Collection
Start on the Products page
                             Return to the products
                             page, and click the
                             “ Collections” button in
                             the left-hand menu
                             under “ Products” .
The Collections Page
To create your first collection, click the
“Create collection” button in the top-right
corner.The “Create collection” page You Should Recognize: Title Description Collection availability Fill out the Title and Description just like you would for a product. Collections are automatically available on the online store.
Collection Type
Save time with Automated
collections
Check “ all conditions” or “ any condition”
Add a product tag
Add additional conditions as needed.
To include only rubber ducks, select “ all
conditions” and add “ Product tag is equal
to duck” and “ Product tag is equal to
rubber”
Selecting “any condition” would include all duck
products and all rubber products.
Removing “ Product tag is equal to rubber” would
include all duck products.Collection Image
Add a collection image:
Drag an image from your computer into
the “ Collection image” section, or click to
open a browser window. Your collection
image should:
Be 1920x1080 72px/inch
Represent all of the products in the
collectionGive your image alt text:
Under “ Collection image” click “ Edit”
Click “ edit image alt text”
In the pop-up, enter a description of the
image and press the “ Save” button.Save and view your collection
After saving your collection, middle click
“View on your online store”Adding a collection to the menu Access the Navigation settings Click “ Online Store” in the menu bar Then click “ Navigation”
Select a menu
In most cases, you will want to select
“ Main menu”
This page also allows you to modify
your footer menu or even add new
menus (advanced content)Add your collection
Click “ Add menu item”
In the pop-up, click the “ Link” selector
and search for your collection
The “ Name” field will fill automatically
When you are done, click AddOrganize your menu
Click and drag the 6 dots next to your
new menu item to change its position
in the menu
Dragging down and a little to the right
from another menu item will create a
dropdown.Questions?
How do I get the slides?
Subscribe to our newsletter
at www.2h.media
How do we connect?
Follow 2H Media on LinkedIn
Specific Questions?
Give us a call
P: 519-835-3009
E: hello@2h.mediaIntermission
Managing Shipping
Access the Shipping
Settings
Click “ Settings” in the menu bar
Click “ Shipping and delivery” on the
Settings page.Shipping and Delivery
From the Shipping and Delivery page,
click “ Manage rates” under the
shipping section.
Shipping can be very complicated. To
keep things simple, we’re not covering
Local delivery or Local pickup.Shipping Zones and Rates
Typically you want your shipping rates to
look something like this.
What you’re looking for is “ Canada Post
(Discounted rates from Shopify
Shipping).Deleting a Shipping Rate
To delete a shipping rate, simply click
the three dots next to the rate you want
to delete and click “ delete” .Adding a Shipping Rate Click the “ Add rate” button
Add a Carrier Rate
Select “ Use carrier or app to calculate
rates”
Select all applicable services
In most cases, you should select
“ Automatically show new shipping
services to customers when they
become available”
Add a handling fee if desired
Click the “ Done” buttonAdd a Custom Rate
Select “ Set up your own rates”
Enter a price or leave blank for free
shipping
For free or flat rate shipping, select
“ Add conditions”
Select Based on order price
Enter a minimum price
Click the “ Done” buttonAdding a Shipping Zone
From “ Shipping Zones and Rates”
click “ Create shipping zone” Enter a name for the shipping zone Search for the desired country Select the desired country Click the “ Done” button
To use your new shipping zone, you
will need to add one or more rates
This process is identical to adding a
rate within CanadaExcluding a Province or State
From “ Shipping Zones and Rates” click the
three dots next to the desired zone.
Click “ Edit zone” In the pop-up, scroll down until you
see the desired country.
Click the dropdown next to the
country. In Canada this is labelled “ 13
of 13 provinces”
Uncheck the province(s) you wish to
exclude
Click the “ Done” buttonSave your changes
Updating the homepage
Access the customizer

Click “Online Store” in the menu sidebar.
   Then, click the “Customize” button.
The Customizer
The Customizer Sidebar
A simple panel with a lot of power
From the sidebar in the customizer, you can adjust almost
every aspect of your homepage. To keep things simple, we’re
just going to focus on a few of the “ sections” that are
commonly seen on Shopify. – Since we are editing the front-
end, this is where you will see the most differences depending
on your theme.
Header Sections Footer
Add a logo Add image sliders Add a menu
Select a menu Feature collections Describe
and products your
Add an business
announcement Add images with text
Newsletter
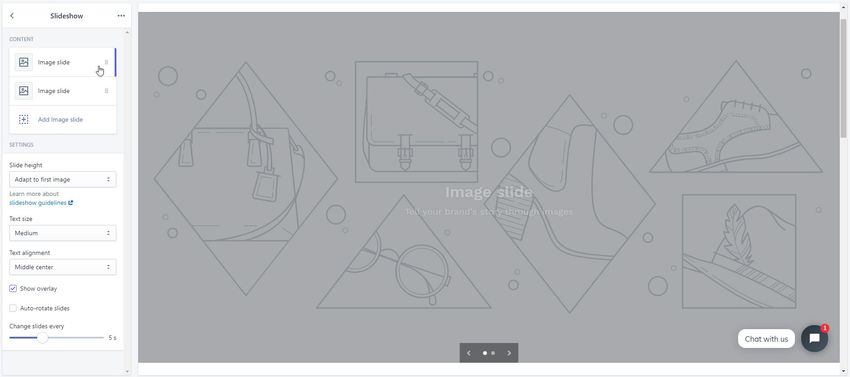
bar Many more options sign-upSlideshow/Image Slider
Typically used as the “ hero section” of
your homepage
May potentially be used further down
the page as well
To edit an existing slide, click the
desired slide under the “ CONTENT”
header.
Or click “ Add image slide” to add a new
slideEditing an Image Slide
The options that appear in the sidebar will depend on
your chosen theme
You will have the option to upload an image
You may be able to adjust the image or text position
Each slide will likely include 1-3 text fields, and an
optional button
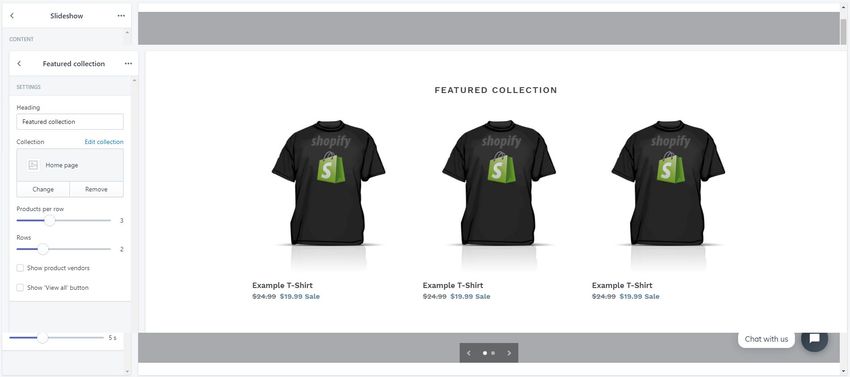
Any field can be left blankFeatured Collection
Often the first element below the hero
section
Any collection on the website can be
selected as the featured section
We recommend creating a best sellers
collection to display here
Typically, some minor display
adjustments can be made including
adjusting the products per row, number
of rows, and hiding some informationImage With Text
Very commonly used to display
information about the company
You will have the option to upload an
image
You can typically place the image to
the left or right of the text
We recommend alternating between left
and right of this section is used multiple
times on the homepage
Typically this section will include a
heading field and a text field
An optional button field is often
included
Any field can be left blankQuestions?
How do I get the slides?
Subscribe to our newsletter
at www.2h.media
How do we connect?
Follow 2H Media on LinkedIn
Specific Questions?
Give us a call
P: 519-835-3009
E: hello@2h.mediaYou can also read