Understanding PIC WEB boards and how to use Microchip's TCP-IP Stack - Copyright(c) 2008, OLIMEX Ltd, All rights reserved
←
→
Page content transcription
If your browser does not render page correctly, please read the page content below
Understanding PIC WEB boards and how to use
          Microchip's TCP-IP Stack

                       Rev.A, April 2008

     Copyright(c) 2008, OLIMEX Ltd, All rights reserved
INTRODUCTION:
The PIC-WEB family of boards are development boards based on Microchip
open source TCP-IP stack. At the moment this paper is written the family
includes these boards:
PIC-MICRO-WEB
With PIC18F67J60 microcontroller with integrated Ethernet, 42 MHz
operation, 128Kbytes Flash, 3.8Kbytes Ram, AT45DB011 data flash for
storage 128Kbytes space.
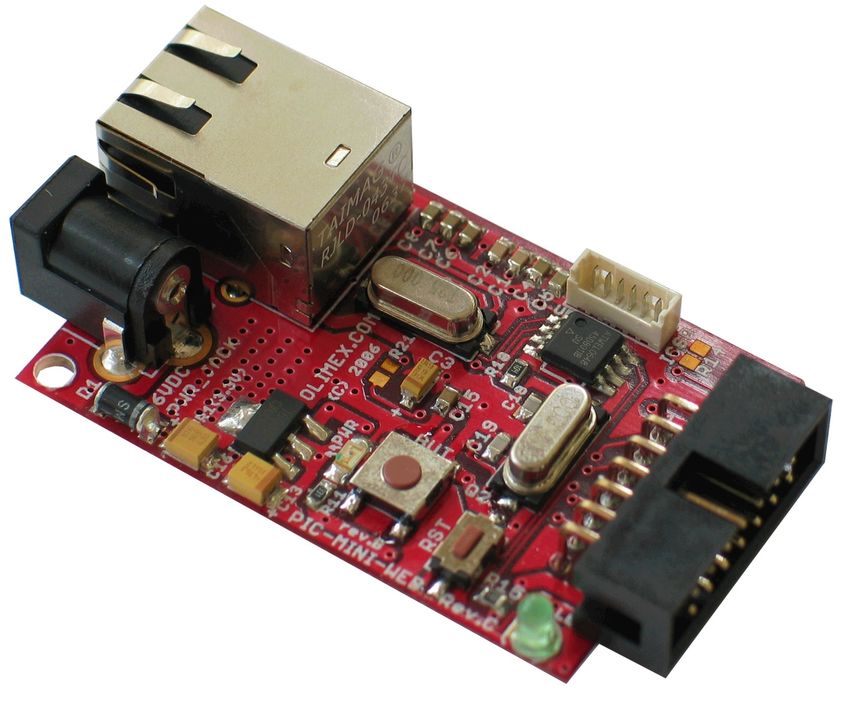
PIC-MINI-WEB
With PIC18F25J10 microcontroller and ENC28J60 Ethernet controller, 40
MHz operation, 32Kbytes Flash, 1 KByte Ram, AT45DB011 dataflash for
storage – 128KBytes space.
PIC-WEB
With PIC18F252 microcontroller and ENC28J60 Ethernet controller, 40
MHz operation, 32Kbytes Flash, 1.5 KB Ram, AT45DB011 dataflash for
storage – 128KBytes space.
PIC-MAXI-WEB
With PIC18F97J60 with integrated Ethernet controller, 42 MHz operation,
128Kbytes Flash, 3.8 KByte Ram, AT45DB011 dataflash for storage –
128KBytes space.
PIC-P67J60
With PIC18F67J60 with integrated Ethernet controller, 42 MHz operation,
128Kbytes Flash, 3.8 KByte Ram, AT45DB011 dataflash for storage –
128KBytes space.
PIC-GSM
With PIC18F97J60 with integrated Ethernet controller, 42 MHz operation,
128Kbytes Flash, 3.8 KByte Ram, internal flash used for storageSOFTWARE RUNNING ON THESE BOARDS:
All the boards use a modified version of the current Microchip TCP/IP
stack (ver. 4.18 as of the moment of writing) which is available for
download from the web pages of the boards at http://www.olimex.com/dev
The only exception are the PIC-WEB and PIC-MINI-WEB which use an
older rev. 3.76 based software, again available for download from link on
their web pages.
To compile the sources and program the boards you will need:
● MPLAB IDE – available for free download from
http://www.microchip.com
● Microchip MCC for PIC18 – an evaluation version is also
available
● MPLAB-compatilble programmer/debugger – for example PIC-
ICD2, PIC-ICD2-POCKET or compatible.
To may use the boards you will also need:
● An unused connection to your LAN
● A suitable power supply
● A serial cable (for PIC-WEB, PIC-MAXI-WEB, PIC-P67J60 and
PIC-GSM)
● A terminal program configured at 19200 bps, 8N1 and no flow
controlDEFAUL BOARDS CONFIGURATION
PIC-MAXI-WEB:
IP Address: 192.168.0.95 – DHCP ENABLED by default; the actual address
used will be displayed on the LCD and on the serial port
MAC address: 00:04:a3:00:00:05
ftp username: „ftp“
password: „olimex“
PIC-MICRO-WEB:
IP Address: 192.168.0.98 – DHC DISABLED by default
MAC address: 00:04:a3:00:00:0a
ftp username: „ftp“
password: „olimex“
PIC-P67J60:
IP Address: 192.168.0.101 – DHCP ENABLED by default; the actual
address used will be displayed on the serial port
MAC address: 00:04:a3:00:00:0b
ftp username: „ftp“
password: „olimex“
PIC-GSM:
IP Address: 192.168.0.105 – DHCP DISABLED by default.
MAC address: 00:04:a3:00:00:0c
ftp username: NA
password: NA
PIC-WEB, PIC-MINI-WEB:
IP Address: 192.168.0.30 – DHCP DISABLED by default.
MAC address: 00:04:a3:00:00:00
ftp username: „ftp“
password: „microchip“Programming the precompiled hex-files to the board
If you wish to restore the factory default software, the respective .hex files
are supplied in the „precompiled“ directory in the source archive. To
program them to the board:
● Start MPLAB and select the appropriate processor type from
„Configure->Select Device“
● Import the respective .hex file („File->Import“)
● Connect the board to your programmer and apply power
● Select the correct programmer in MPLAB („Programmer->Select
Tool“)
● Program the device („Programmer->Program“)Invoking the menu on the serial port
The boards that have a serial port can display a configuration menu that
can be used to change the various configuration options of the board. By
default this menu is not displayed and the user must follow a special
procedure described below:
1.Connect the board to a serial port on your computer and start a
terminal program at that port, configured for 19200bps, 8N1 data
format
2.Press and hold the Button on the board (Button 1 on the PIC-MAXI-
WEB).
3.Press and release the Reset button
4.Release the Button. If you continue to hold it for 4 seconds after you
have released the reset button, the contents of the on-board dataflash
will be completely erased and you will have to restore them.
If you have followed the procedure correctly, a menu should be displayed
on the serial port.Changing the board settings (IP & MAC addresses, etc.)
Almost every setting of the boards can be changed. There are various ways
to do that:
● On the PIC-WEB, PIC-MAXI-WEB and PIC-P67J60 you can enter
the new settings through the menu on the serial port (see above)
● On the PIC-MAXI-WEB, PIC-MICRO-WEB and PIC-P67J60 you can
use the „Configuration“ webpage and change the settings from the
available web interface
● On the PIC-MINI-WEB and the PIC-GSM you need to recompile the
source code and reprogram the boards. This is needed because the
PIC-GSM does not have an external memory and the settings are
stored directly in the program memory, which cannot be changed
by itself. On the PIC-MINI-WEB a serial port is not available and
there are no enough resources available to implement a web-based
configuration interface.Uploading web pages to the board.
The html pages that are displayed to the user are independent from the
rest of the program and are stored in the dataflash memory on the board
in all cases except on the PIC-GSM board, where they are embedded in the
rest of the program. So in most cases the user also needs to upload a new
webpage image. This image is generated by the MPFS2.exe utility available
in the „Microchip\TCPIP Stack\Utilities“ directory. The user should supply
an input directory containing the pages (e.g. „TCPIP Demo
App\WebPagesOlimexMaxi“ for PIC-MAXI-WEB) and set the options – the
output file format and the MPFS type. For the different boards these
settings are as follows:
PIC-WEB, PIC-MINI-WEB: Output: Bin Image; Advanced->Output Format:
MPFS Classic
PIC-MICRO-WEB, PIC-MAXI-WEB, PIC-P67J60: Output: Bin Image;
Advanced->Output Format: MPFS 2
PIC-GSM: Output: C18Array; Advanced->Output Format: MPFSClassic
If you are using the PIC-GSM board, copy the resulting .c file to your
project directory, overwriting the old one and compile the project (see
below for details about compiling from sources). If you are using any of the
other boards, you just need to upload the resulting .bin file to the board.
There is one or more method available depending on the board type you
use.
If you are using PIC-WEB or PIC-MAXI-WEB you can upload a new image
through the serial port. Enter the menu on the serial port and choose
„Download MPFS image“, then use your terminal program's send function
with a Xmodem protocol - if you are using HyperTerminal on Windows,
this is available at the „Transfer->Send File“ menu.
If you are using a PIC-MICRO-WEB, PIC-MAXI-WEB or PIC-P67J60 you
can upload the .bin file directly from your web browser. Go to the page
http://board_ip_address/mpfsupload and use the web form.
NB! Internet Explorer is broken and sometimes the upload fails. Please use
another browser.
If you have a PIC-WEB or PIC-MINI-WEB you can use an ftp client to
upload the file to the board. One such client available on every Windows
Installation is the command-line FTP.EXE. To use it, start a command
prompt (Start menu->Run->Cmd.exe) and change to the directory where
your file is located e.g. if it is located in „c:\tests\pic_web\“ type:
c:\> cd tests\pic_web
Then start the terminal client to your board and, after a successfull login,
send the file:
c:\tests\pic_web> ftp board_ip_address (e.g. 192.168.0.232)
Connected to 192.168.0.232.
220 Ready
User (192.168.0.232:(none)): ftp
331 Password required
Password:
230 Logged in
ftp> put web.binCOMPILING THE SOURCES
After you have fulfilled the requirements, download the sources from the
addresses given above and extract them. Then start up MPLAB and load
the appropriate project, e.g. OLIMEX_MAXIWEB.mcw,
OLIMEX_P67J60.mcw, etc. After you have compiled the project, you
should be able to program the board. Note that if you program the board
using the „Debugger“ menu, it will work when ran from the MPLAB but the
board will NOT work later in standalone mode – you should use the
„Programmer“ menu instead.
Modifying the stack to support additional features
The software stack that runs on these boards can easily be modified to
accommodate for different user's needs. A quick run-down of the different
features available is given below
Overview
There are two different http servers available in the stack – HTTP and
HTTP_2. Depending on the version used, the interaction dynamic
interaction between the stack and the web pages displayed is handled in a
different way
HTTP – the old server
This server is used in the PIC-WEB, PIC-MINI-WEB and PIC-GSM boards.
Dynamic variables
The dynamic variables and command handlers commands are given an
unique number which must be defined(and logically matched) in both the
web pages and the source. An example, taken from an older revision of
PIC-MAXI-WEB is given below:
The dynamic variables are defined in the web pages as a 2-byte
hexadecimal value prefixed with a “%”, e.g. “%2a”. When the web server
encounters such a variable in a .cgi page that is to be sent to the user it
executes the function
WORD HTTPGetVar(BYTE var, WORD ref, BYTE* val)
where the “var” is the variable encountered, “ref” is a callback counter
used when this function needs to write multiple bytes to the client and *val
is a pointer where the function should write the output. For example to
return the state of the button 1 the relevant code is:
in index.cgi
Button1: %04
in maindemo_maxiweb.c
#define VAR_DIGIN0 (0x04) // Momentary push button
inputs
inside HTTPGetVar()
case VAR_DIGIN0:*val = BUTTON0_IO ? '1':'0';
break;
Note that if the data that needs to be returned requires extensive(and time
consuming) processing, this is best done asynchronously in the
ProcessIO() function and the only thing done in HTTPGetVar() should be
the actual outputting of the data. An example of this is the temperature
measurement:
inside ProcessIO()
tmp = *((WORD*)(&ADRESL));
if(Temperature>512)
{
tmp = tmp – 512;
tmp/=9;
Temperature = 20 + tmp;
}
else
{
tmp = 512 – tmp;
tmp/=9;
Temperature = 20 – tmp;
}
// Convert 10-bit value into ASCII string
itoa(Temperature, TEMPString);relays is:
in index.cgi
ActionsToggle RELAYs:
in maindemo_maxiweb.c
#define CGI_CMD_DIGOUT (0)
#define CMD_RELAY1 (0x0)
#define CMD_RELAY2 (0x1)
inside HTTPExecCmd()
command = argv[0][0] – '0';string that needs to be displayed to the user. So the actual function will
look like:
void HTTPPrint_version(void)
{
TCPPutROMArray(sktHTTP,(ROM void*)VERSION,
strlenpgm((ROM char*)VERSION));
}
where the VERISON constant is defined as
#define VERSION "v4.18"
Form Processing
Form processing in the HTTP2 version of the stack is also very different.
Both the “GET” and “POST” methods are supported and are handled
differently.
HTTP “GET” handling
When the client generates a HTTP “GET” request, it is dispatched to the
HTTPExecuteGet() function in the relevant *_HTTPApp.c file (e.g.
Maxiweb_HTTPApp.c). Inside that function the first operation is to extract
the filename of the form that caused the call. After that, the user can parse
the rest of the parameters (using HTTPGetArg() family of functions), and
at the end return either a success or that the operation cannot be
completed at this moment ( HTTP_IO_DONE or HTTP_IO_WAITING
respectively). An example of the function that handles the setting of two
LEDs through a GET request is given below:
HTTP_IO_RESULT HTTPExecuteGet(void)
{
BYTE *ptr;
BYTE filename[20];
MPFSGetFilename(curHTTP.file, filename, 20);
if(!memcmppgm2ram(filename, "leds.cgi", 8))
{
ptr = HTTPGetROMArg(curHTTP.data, (ROM BYTE *)"led");
switch(*ptr)
{
case '1':
LED1_IO ^= 1;
break;
case '2':
LED2_IO ^= 1;
break;
}
}
return HTTP_IO_DONE;
}HTTP “POST” handling
The other form processing method available is “POST”. This method does
not require all the data to be available at the start of the processing, so the
length of the parameters is virtually unlimited. The handling is done in the
HTTPExecutePost() function that is just a dispatcher that calls the
various HTTPPost*() functions based on the name of the file that caused
the “POST” request. These functions are basically the same as the
HTTPExecuteGet() function with the exception that if more data is
required that is not yet received it could return a HTTP_IO_NEED_DATA
and be called again when that additional data is available. An example is
the HTTPPostLCD() function that is used to display a text to the LCD on
the PIC-MAXI-WEB
static HTTP_IO_RESULT HTTPPostLCD(void)
{
BYTE *ptr; WORD len;
// Look for the lcd string
len = TCPFindROMArray(sktHTTP, (ROM BYTE *)"lcd=", 4, 0, FALSE);
// If not found, then throw away almost all the data we have and ask for more
if(len == 0xffff)
{
curHTTP.byteCount -= TCPGetArray(sktHTTP, NULL,
TCPIsGetReady(sktHTTP) - 4);
return HTTP_IO_NEED_DATA;
}
// Throw away all data preceeding the lcd string
curHTTP.byteCount -= TCPGetArray(sktHTTP, NULL, len);
// Look for end of LCD string
len = TCPFind(sktHTTP, '&', 0, FALSE);
if(len == 0xffff)
len = curHTTP.byteCount;
// If not found, ask for more data
if(curHTTP.byteCount > TCPIsGetReady(sktHTTP))
return HTTP_IO_NEED_DATA;
// Prevent buffer overflows
if(len > HTTP_MAX_DATA_LEN - 2)
len = HTTP_MAX_DATA_LEN - 2;
// Read entire LCD update string into buffer and parse it
len = TCPGetArray(sktHTTP, curHTTP.data, len);
curHTTP.byteCount -= len;
curHTTP.data[len] = '\0';
ptr = HTTPURLDecode(curHTTP.data);
ptr = HTTPGetROMArg(curHTTP.data, (ROM BYTE *)"lcd");// Copy up to 32 characters to the LCD
if(strlen((char*)curHTTP.data) < 32u)
{
memset(LCDText, ' ', 32);
strcpy((char*)LCDText, (char*)ptr);
} else { memcpy(LCDText, (void *)ptr, 32); }
LCDUpdate();
strcpypgm2ram((char*)curHTTP.data, (ROM void*)"forms.htm");
curHTTP.httpStatus = HTTP_REDIRECT;
return HTTP_IO_DONE;
}Revision history:
REV.A - create April 2008
Disclaimer:
© 2008 Olimex Ltd. All rights reserved. Olimex®, logo and combinations thereof, are registered trademarks of
Olimex Ltd. Other terms and product names may be trademarks of others.
The information in this document is provided in connection with Olimex products. No license, express or implied
or otherwise, to any intellectual property right is granted by this document or in connection with the sale of Olimex
products.
Neither the whole nor any part of the information contained in or the product described in this document may be
adapted or reproduced in any material from except with the prior written permission of the copyright holder.
The product described in this document is subject to continuous development and improvements. All particulars of
the product and its use contained in this document are given by OLIMEX in good faith. However all warranties
implied or expressed including but not limited to implied warranties of merchantability or fitness for purpose are
excluded.
This document is intended only to assist the reader in the use of the product. OLIMEX Ltd. shall not be
liable for any loss or damage arising from the use of any information in this document or any error or omission in
such information or any incorrect use of the product.You can also read