Using Smartboard Notebook Software

         Tabs and Objects
←
→
Page content transcription
If your browser does not render page correctly, please read the page content below
Using Smartboard Notebook Software
Tabs and Objects
Tab Navigation

                                             Page Sorter Tab

                        Page thumbnail

               Page drop-down menu

Increase the width of the tab display area

                                              Move tabs to the
                                              other side of the
                                              work area

                                               Previous page

                                               Next page

                                               Add a page

                       Auto-hide check box
                                                Undo last action
Tabs and their Functions:

        Page Sorter Tab

               Gallery Tab

        Attachments tab

          Properties Tab
Page Sorter Tab
    The active page is indicated by a second border around the thumbnail
    image and a drop-down menu. Clicking another page in the Page Sorter
    tab area makes that page active, and its contents are displayed in the
    work area. To change the page order, drag and drop the thumbnail of
    the page into its is new location.

                                                 Clicking the drop-down
                                                 menu on the active page
                                                 presents you with eight
 The second border indicates the active page     options.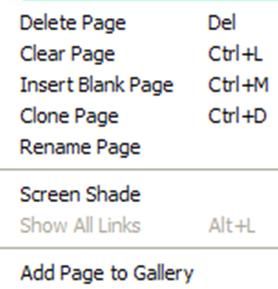
Page Sorter Tab Options
           - deletes the selected page

           - removes all objects and drawings from the page
          - adds page below the selected page
          - Clone Page – a duplicate page is created below the
          selected page
          - Rename page – pages can be named (useful in linking
          pages)
          - Screen Shade – Shade is automatically added to page
          and will stay on the page until manually removed.

          - Add page to gallery – stores page in my content
          (Notebook files and pages) under the gallery. Page can
          be accessed easily.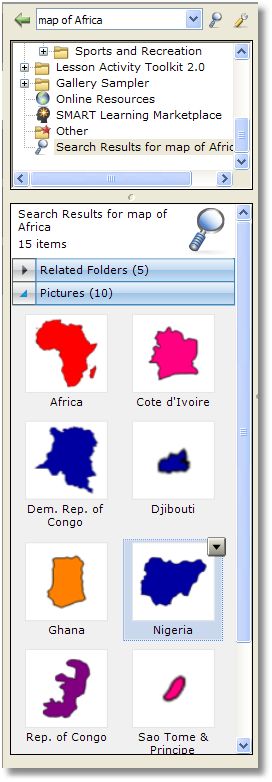
Attachments

            The attachment tab allows you to link to supporting documents
            software and web pages. The Attachment tab allows you to store
            documents or web sites in your SMART Notebook software
            presentation that you might want to use in your lesson.

To insert a Copy of file or Short cut to File

           1. Click the Insert button at the bottom of the Attachments
             tab, select Insert Copy of file or select Insert Shortcut to
             File

           2. Browse to the file location

           3. Click on the file and click Open.

NOTE: You can open a different software application such as Excel, Inspiration, etc. while remaining in
Notebook. You can insert a shortcut. These files will end in .exe . This works best with an actual
Smartboard.
Attachments

To insert a Hyperlink

1. Click the Insert button at the bottom of the
   Attachments tab, select Insert Hyperlink
                                                  http://www.brainpop.com/

2. The Hyperlink dialog box will appear. Type
                                                  Brain Pop
   the Internet address. Type the name to
   display on the Smart Notebook

3. Click ok.

                Example of link box:

                                   Shortcut

                                        File

                                  Hyperlink
Attachments
 When you have an attachment associated with
 your presentation, the appearance of the
 Attachments tab sometime changes to remind
 you the attachment is there. The tab will revert
 back to the paper clip when file is reopened.

 To bring the attachment onto the page…click on
 the attachment. Then drag the link into the
 Notebook work area. It becomes an object with a
 paper clip icon in the bottom-left corner.

        Chapter 1 Quiz is dragged onto the Notebook page. To
        activate the link, click on the icon attached to the link.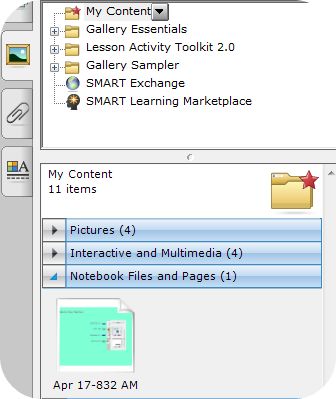
Properties
 Properties can also be accessed from the tool bar. To change the characteristics of
 an object, first click on the object and then click the Properties tab. The properties
 shown depend upon on the type of object you are working with at the time.

Changing Fill Effects             -      Changing Line Style- You                Applying Object
many options exist to fill color of an   can also change the color, thickness    Animation- the type, direction,
object, including pattern or picture.    and style of a line. There are also     speed, occurrence and repeats are
You can also change the                  choices for the start and ending of a   all options in applying animation to
transparency of an object.               line                                    objects
Properties – Page Recording

          To page record click on
                    1. Properties
                    2. Click on Page Recording
                    3. Click on Start
                    4. When finished, click on finish
                    5. To play back, click on play.

                              Rewind            Start or
                                        Pause   Restart    Stop
Gallery The Gallery helps you quickly develop and deliver lessons in rich graphic detail. Thousands of images, pages, videos, Flash files and entire Smart Notebook files are organized into searchable collections that will allow you to create attractive, reusable lessons. My Content – allows you to customize the Gallery. Move frequently used Gallery content as well as imported media files to your “My Content” folder. You can export “ My Content” folders on servers for use with other computers. Gallery Essentials – Extra supportive graphic multimedia elements arranged by subject Lesson Activity Toolkit provides interactive template, pages and tools to create interactive lessons. Lesson Activity Toolkit has its own lesson. Gallery Sampler – examples of interactive multimedia Smart Exchange – provides lesson activites and digital content to use in the lessons. Also provides connection with other teachers Smart Learning Marketplace - offers a world- class collection of over a million learning resources that can help you add variety and interactivity to any lesson. The searchable online library offers quick access to learning resources from some of the world’s most respected education publishers and content providers.
Finding Gallery Content

There are two ways to find content in the Gallery. The search field at the top of the Gallery
tab allows you to search by keyword. You can then browse the Gallery collections by
selecting a folder.

To search for objects in the Galley

1. Click inside the search field

2. Type a keyword related to the type of object(s)
   you are looking for...search singular rather than
   plural terms for better search results

3. Click the search button to display your results.

    Search results will be displayed in categories.
    Click on the categories and items will be
    displayed below the category name.
Finding Gallery Content
Browse Through individual collections if you were looking for all
the objects related to a general topic, such as History
To search for objects in the Galley
1. Click on Gallery Essential, or other
folder
2. Click on Specific folder. ex: History
(Each folder contains many supportive
graphics and multimedia for the
subject of your choice)
3. When you pick a subject, you get a
subsequent drop down area for each
item in the subject.
4. Click on folders to browse through
contentAdding Gallery Content to a Notebook page
Select the object and drag it
onto the notebook page.
Cote d'Ivoire
Additional gallery actions
Click to view other gallery actions.Objects in the Gallery
Objects are organized in the bottom area of the
Gallery by Pictures and Backgrounds, Interactive and
Multimedia Files, Pages and Related Folders
cow
Audio Clip
Picture
Background
Notebook Page
Flash Object Video ClipResources
In the Gallery, click on Smart Exchange
Resources for teachers to create or view
other Smartboard presentations are
available.
Click on Standards- Correlated Lessons
You will be connected to Smart Exchanged and asked to choose State for Standards,
Garde and Subject. Notebook files created from chosen criteria will be available for
downloadsOther Resources
To obtain other resources,
1. Go to WCPS web site
2. Click on Staff
3. Click on Technology
4. Click on WCPS SmartBoard Page
5. or do a Google search for Smartboard notebook presentations.
Some of the resources from that page are listed below.
http://www.bristolvaschools.org/mwarren/SBActivities.htm
http://community.teqsmart.org/download.php
http://teacherwebs.org/smart_board.htm
http://www.juliethompson.com/SMART.html
http://its.leesummit.k12.mo.us/smartboard.htmObjects
All text, images, audio, video and multimedia are considered
objects in Smart Notebook software. The properties of these
objects can be changed to make the presentation more
effective.
Anything placed inside the work area is considered an object.
Objects can be added by
-Typing text
- Drawing or writing with the pen tool
- Creating shapes
- Inserting content from the Gallery, Internet or computer.
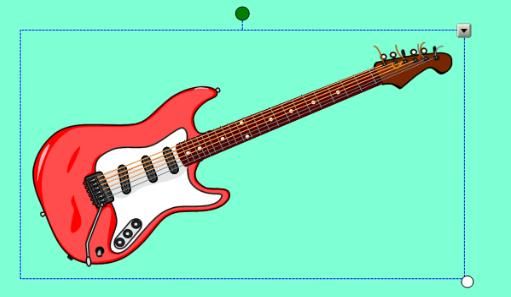
click on green dot to rotate
click on object to select
dotted line will appear
click on white dot to resizeModifying Objects
Image and Text Right Click Window
When you right click on an object (or click on Clone creates an exact copy of the object (s)
the arrow at the top right of an image) you get next to the original object
a window with 13 options.
Cut – Removes the selected object from the
Smart Notebook page and places it on the
clipboard.
Copy – Creates an identical copy of the selected
object.
Paste – Places the object from the clipboard
onto the SMART Notebook page
Delete – Deletes the selected object
Picture Transparency - removes the background
of a picture.
Locking – Protects an object or an entire group
of objects from editing. Choose from Lock in
Place, Allow Move, and Allow Move and Rotate
Flip – object can be turn left/right or up/down
Order – Object can be sent backwards, to the
back, bring to the front or bring forward.
Grouping – Group two or more objects to act as
one object. Select, change, move, delete, and
resize a group as a single unit. To edit or resize
the objects individually, ungroup them.Infinite Cloner
Make unlimited copies of an object on a SMART Notebook page. Select and
drag the object to create as many clones as required
When you right click on an object set to clone infinitely, the infinity symbol
appears in the top – right corner, and a text box with Infinite Cloner checked
appears over the object
Infinity cloner
The Infinite Cloner option in the object drop-down menu
allows you to reproduce an object an unlimited number of
times, without having to click Clone repeatedly from the
drop-down menu.Adding Links to Object
You can link an object to a website, another Smart Notebook page, a file
on your computer or a file residing in the Attachments tab.
Click link from an object’s drop-down menu, and choose the type of link
you would like to add to your object from the Insert Link dialog box.
You can choose to launch your link by clicking an icon at the side of the
object or by clicking on the object itselt.Alignment
The Alignment Guides allow you to control the placement of objects on your page so objects
can be placed exactly where you want them to be.
Click format > alignment from the menu bar to use the alignment guide or click on view >
alignment from the menu bar
Alignment lines
Click the Guide color box to change the
color of the guide lines.You can also read