2010 Camaro installation instructions Super Street Model
←
→
Page content transcription
If your browser does not render page correctly, please read the page content below
2010 Camaro
          installation instructions
            Super Street Model

Tools needed:

1. 10mm socket wrench
2. Flathead screwdriver
4. Pliers
5. Torx (T15) or a 8mm driver socket

NOTE; Read the instructions completely through before beginning this installation, if you feel
uncomfortable with any aspect of the installation please allow a qualified service technician to
perform the installation for you.
(Call us with any questions at 713-477-8100 or Tech 713-899-6456)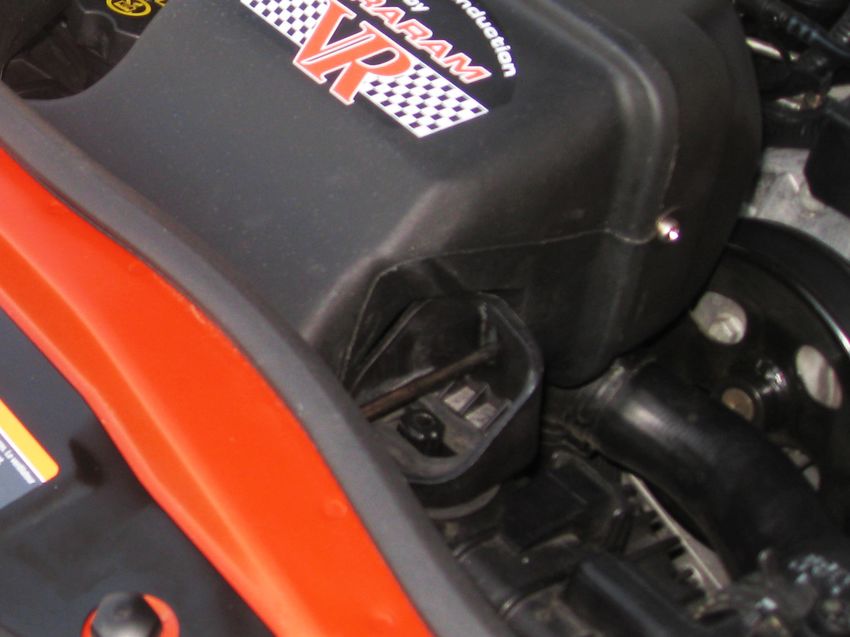
Section 1 A Removing factory engine cover.
Twist and remove the oil fill cap as shown. Pull up and pull towards the front of the car.
This will release the cover.
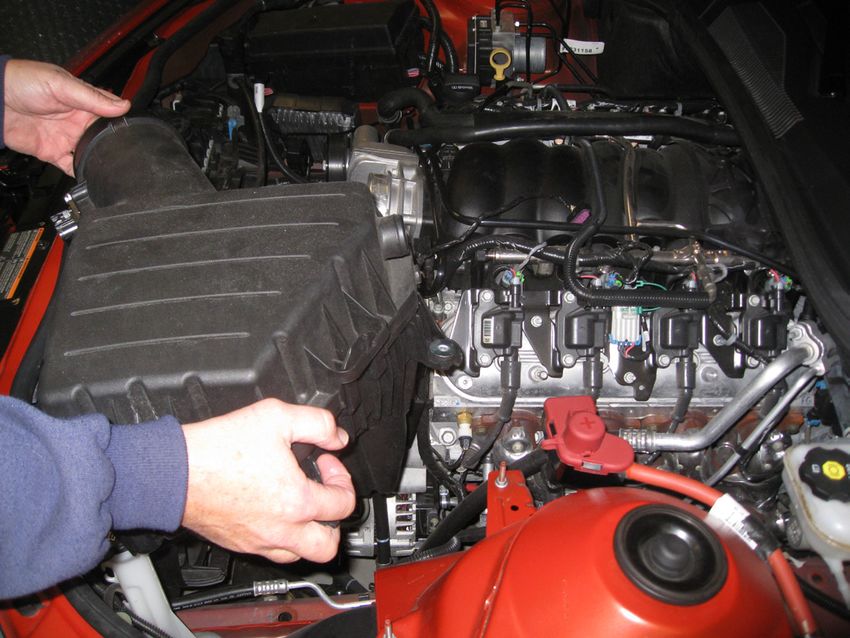
Section 1B - Removing the factory air box
1. Remove factory bolts (10mm X2)
2. Unplug air meter wiring harness by squeezing and pulling on the harness plug.
3. Loosen hose clamps (3 clamps, 6mm driver or flathead screwdriver)
and remove factory intake air tube.
4. Lift air box straight out by pulling up, it will release with a pop!
(there is a grommet under the box)
1 2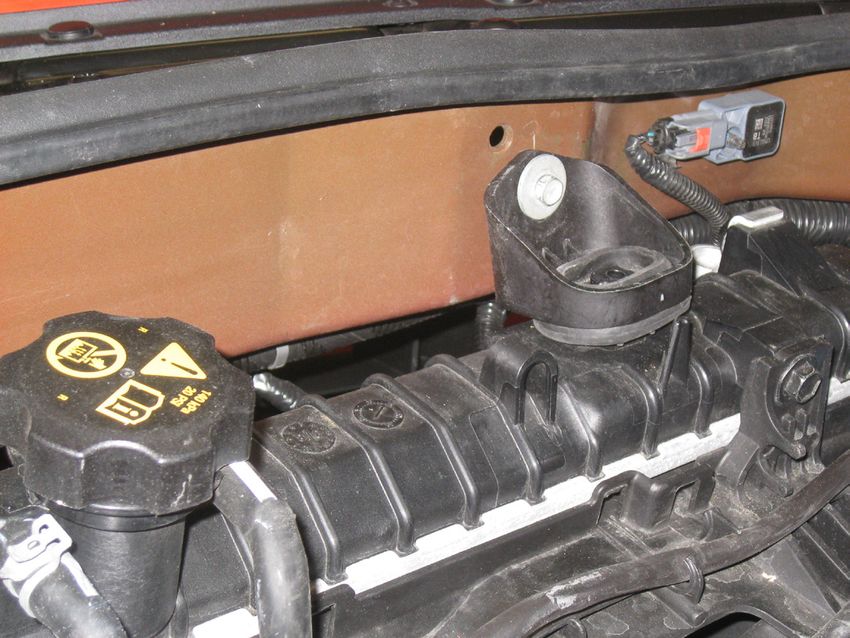
3                                                           4

    Section 2 Removing The air meter from the stock airbox

    1. Simply unscrew this with the Torx, 15T
    2. Make sure you keep the factory O-ring (its rectangular in shape) you will reuse
       this on the VR unit.

1                                                           2

                                                              Factory gasket ring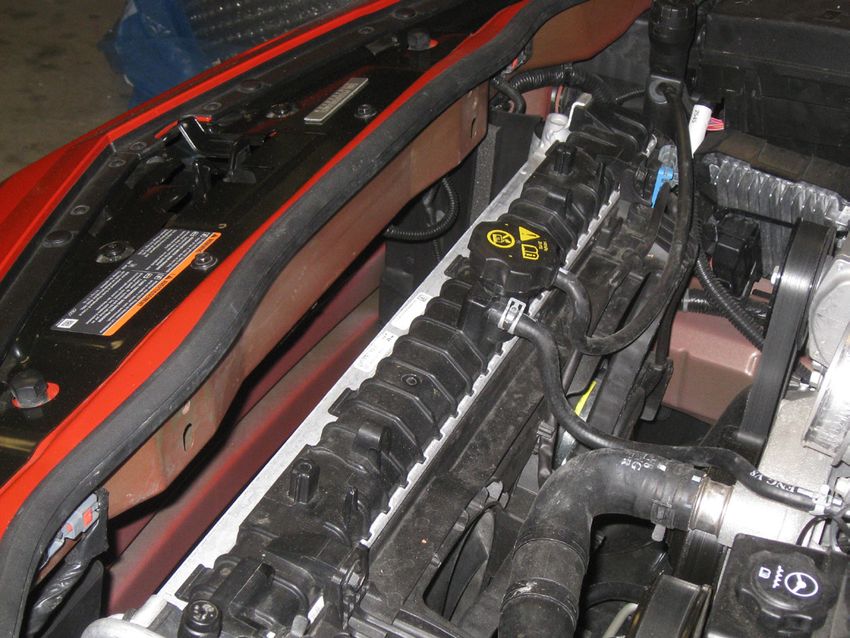
Section 3. leaning the Radiator back.

     1. Remove factory supports (10mm socket) There are 2 of these located at the top of the radiator.
     2. Lean radiator back with minimal effort, No real force is required here.
     3. Remove rubber sealing strip from atop the A/C Condenser. (not shown)

1a                                                        1b

2                                                                3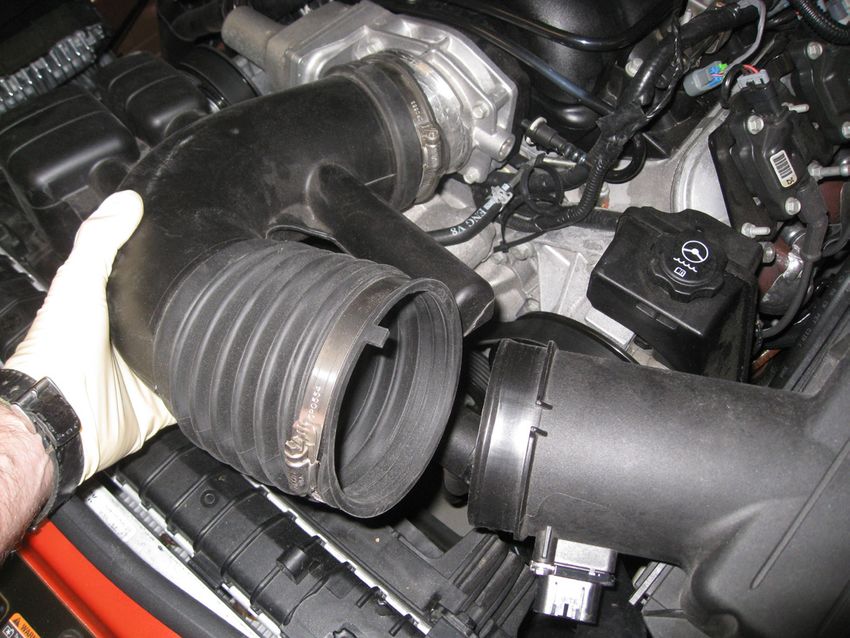
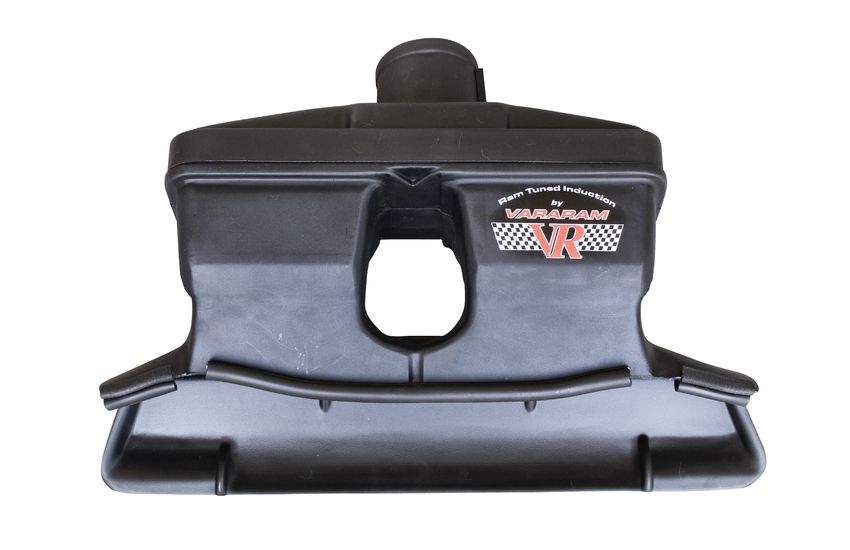
Now its time to prep the VR system for installation
      This VR system is ready to run out of the box (the filter is already pre-oiled)

     Section 3B. Re-installing the air meter into the VR air meter housing
     (this is in the tail of the VR system)

     1. Use the screws and lock washers provided in the VR bolt kit. Use 1 washer per screw, placing
        the washer between the air meter and the head of the screw. This will keep you from
        overthreading the screw to deeply into the MAF housing. The screws need only be tightened
        with a screwdriver (DO NOT OVERTIGHTEN)

1a                                                      1b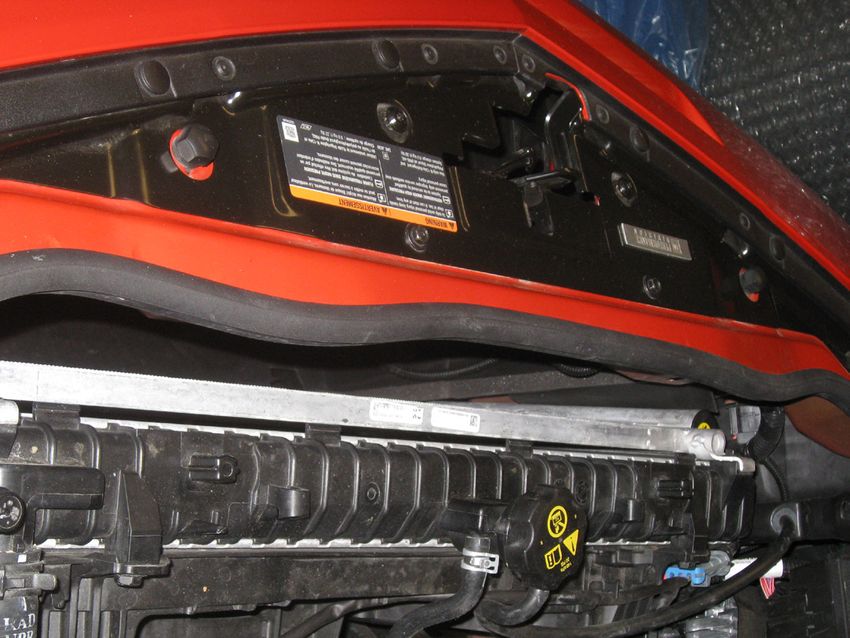
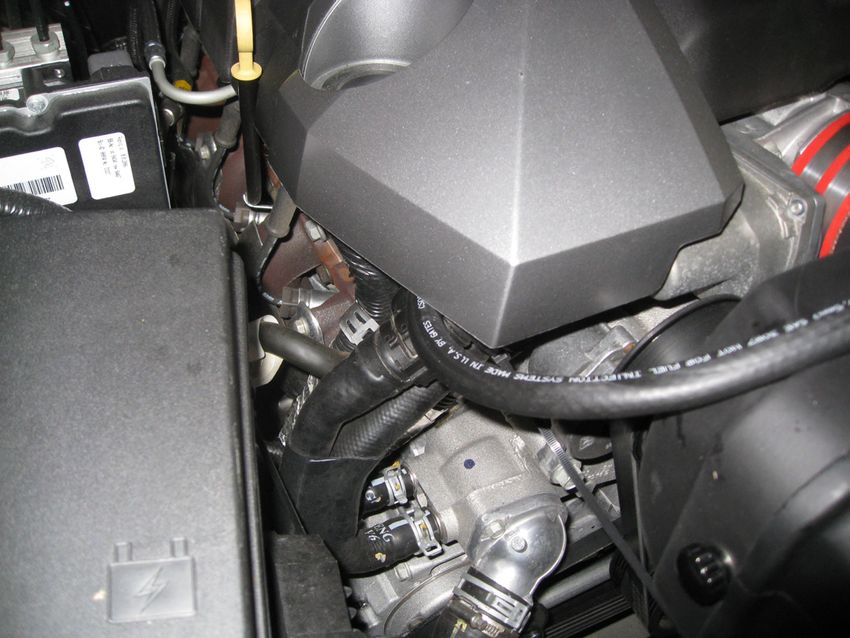
Section 4. Installing the VR system

    1. Place heat pad on the top of the radiator as shown. Using the 2 hose clamps supplied, place red
       hose on to the throttle body with both hose clamps very loose. (do not tighten either clamp yet)
    2. Place the VR system into the car, scoop 1st pointing down at about a 45-65deg angle until
       the lower scoop touches the top of the A/C condenser as shown. Now simply lay the back
       side down. The grommets will catch under the system for a snug fit.
    VR neck to hose coupling
    3. Push the neck down through the tip of the hose. Using a flathead screwdriver pry the hose up
       around the outer lip until the hose is completely on the VR system..
    4. Slide hose evenly between the VR and throttle body. Tighten both clamps completely.
       Plug MAF meter back in. You can route the harness as shown to take up some slack.

1                                                           2

3                                                           4
Section 5. The PCV line

    1. Remove the factory hose by rotating it 180 deg counter clockwise to locate its release clamp.
       Simply pry back and pull, this will release the hose.
    2. Install VR supplied hose, be sure to route this hose to keep it away from belts etc.. as shown.
       Refit the engine cover to verify fit. Remove the cover and cut any access hose length.
       Refit engine cover. The engine cover is sharp everywhere so you may want to sand it to
       remove its sharp edge. This will keep it from chafing the hose later down the road.

1                                                         2a

    Installing Long Bolts

    We have provided special long bolts and washers for mounting the VR system using the OEM
    brackets.
    1. To use this configuration, simply reverse the factory OEM bracket as shown.
       (The VR is already clearanced for use with these components.)
    2. Install the bolts from the rear, screwing them into the OEM mounting location in the core
       support.
    3. You may need to remove the central plastic and rubber out of the factory grommet, some cars
       are tighter than others.
    This will provide a rigid mount for extreme use.

                             1

                                                                          2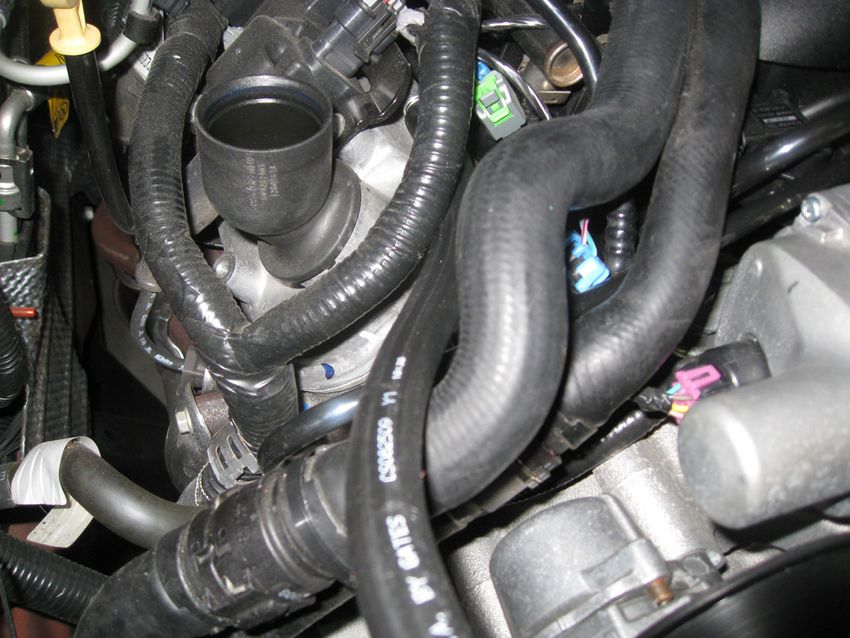
You have now completed the VR Installation.
Computer learn time. (MUST READ)

Fire up the car - The Idle may be rough at first, but will clean out (DO NOT BLIP The throttle!)
Let the computer learn its new cold start airflow. This can take about 10 min.
Driving- Drive normally allowing the computer to learn stoplight to stoplight driving and some
freeway cruise. Allow the system 100 miles before dynoing or operating at Wide open throttle. The E38
computer will take a initial set within 30-40 miles at which point you can do some spirited driving. Full
dail in will take 100 miles of variable driving, i.e.: city, highway etc..
We drove 37 miles on the Dyno at which point the AFR dialed in by 5% but after 100 miles it had
dialed in by 7-8% and the timing was also advancing properly.

Trouble shooting
1. Erratic idle - “DO NOT PANIC”- just give us a call 713-899-6456, you will get an engine
development Engineer, not a sales rep, they will be able to help you with any situation,
2. Car bucks at 1200 RPM in 5th gear at 35 mph - Car is rich, car needs more learn time.
3 Car throws a check engine light - Double check PCV and all connections for leaks.
Remove the negative end of the battery for 30 minutes at the min, this will reset the fuel trims and turn
off the light.

Custom tuning - based on a stock car with a no tune model
Cold start, this should be in Parameter
Cruise - also in parameter
Wide open throttle operation (timing)       Fuel
600-2000RPM + 4 deg			                      -5%
2000-4000RPM + 4 deg			                     -5%
4500-5000RPM + 4 deg			                     -5%
5100-5500RPM + 4 deg			                     -5%
5600-5800RPM + 3-4 deg			                   -5%
This is a conservative combination and does not include removal of Torque management. If you have a
catback etc...

Cleaning the air filter
Remove the filter housing.
Remove the electronic air meter.
Using a dustbuster or home vacuum cleaner fitted with a thin wide mouth, vacuum the filter from
the air side.
Now run warm water from the backside through the neck assembly towards the front. Repeat process
several times until clean. Dry the filter completely, you can use a hair dryer or just let it sit overnight
until dry.
Using GREEN High Performance filter oil, re-oil the filter, using a light coat of oil.
(Green filter oil is air sensor safe)
Reinstall airmeter and reinstall airbox assembly
You are ready to go.
You can also read