CLEVER COGS CHALLENGE - Girlguiding North West England
←
→
Page content transcription
If your browser does not render page correctly, please read the page content below
CLEVER COGS CHALLENGE
Contents
      Introduction...........................................................................................................3
      FAQs..........................................................................................................................4
      Chocolate bridges..........................................................................................5-7
      Build-a-Boat....................................................................................................8-9
      Bottle Cap Cogs..........................................................................................10-12
      Snowy Science............................................................................................13-15
      Taking Flight................................................................................................16-19
      Constellations.............................................................................................20-22
      Fuel-Free Car...............................................................................................23-24
      Rainbow Fuel..............................................................................................25-26
      Appendix A...................................................................................................27-30
      Appendix B..........................................................................................................31
      Appendix C..........................................................................................................32
      Appendix D..................................................................................................33-34
      Appendix E.........................................................................................................35

                                                                                                                                   2
© 2019 Girlguiding North West England
Introduction
      About this Challenge
      This challenge is an extension of the popular Clever Cogs Engineering Challenge, and is themed around
      Transportation Engineering. Each activity will give you a taste of a different kind of engineering that you
      might find with the field of Transportation Engineering. Clever Cogs - Going Places has been designed to
      complement the ‘Have Adventures’ theme of the new programme. Each activity is based on a different
      method of transport, and you’ll read about some incredible female explorers who have been somewhere
      amazing using these modes of transport along the way! As you complete the activities, think about how
      engineering has made these adventures possible, and what kind of adventures you could go on using
      these transport methods!

      What is Transportation Engineering?
      Transportation Engineering covers so many different things. It is when science is applied to the design,
      development, analysis, operation, and management of transportation systems for many different modes
      of transport e.g. roads, buses, air, rail, and marine. Transportation Engineering provides the capability
      for people and goods to move around the world safely.
      Transportation Engineering is a sub-discipline of Civil Engineering; it focusses on a similar theme
      of designing and implementing infrastructure. It looks into forecasting future demand for travel,
      engineering traffic to make sure it provides the more effective solution, and ensuring roads are designed
      and laid out appropriately. It also includes designing airports and bridges – things that facilitate
      transportation.
      Transportation Engineers solve complex problems by analysing data and using innovative solutions. Most
      Transportation Engineers would work in an office, but there’s also some field work involved to visit
      construction sites and assess progress.

      Women in Engineering
      According to a survey done by the Women’s Engineering Society (WES) in 2017, the percentage of female
      engineers within the UK has increased in recent years, and is currently 11.8%.
      Despite this gender gap, women have achieved some of the greatest engineering feats of all time.
      Throughout this challenge, you will be able to find out much more about some really inspiring engineers,
      and also some adventurers!

      Produced in conjuction with:                                              BAE Systems is committed
                                                                                to promoting diversity in
                                                                                engineering and proud to
                                                                                sponsor the engineering
                                                                                challenge badge.

                                                                                                                  3
© 2019 Girlguiding North West England
FAQs
      How to Complete this Challenge
      The Clever Cogs – Going Places challenge is suitable for all sections to take part in. You can choose to
      complete activities as a Six, Patrol, Unit… or another grouping of your choice!
      We recommend you spend a minimum of two meetings working on the challenge. Rainbows and Brownies
      should aim to complete 3-4 activities; Guides and Rangers 5-6.

      Leaders:
      At the end of each activity there is a ‘Guidance for leaders’ section, giving extra information on how
      to support delivery of the activity, as well as details of how you can adapt it to make it easier or more
      challenging, as appropriate to the section you’re supporting with the challenge.

      Remember:
      You, our young members should decide which activities you would like to do. Why not get everyone
      together for a Rainbow Chat, Brownie Pow Wow, Patrol Meeting, Rangers’ planning meeting or just a
      simple discussion.
      This is a fun badge, not a qualification, and a flexible approach is required. As long as you have taken a
      full and active part in the challenge, then you should receive the badge.

      How to Order your Badges:
      Badges are £1 each and can be ordered from the Girlguiding North West England shop. They can be
      purchased in store or online.
      Why not try some of our top tips to make this challenge printer friendly:
      •• Print multiple pages to one sheet – make sure you can still read it though!
      •• Set your printer to double-sided, for optimum paper economy
      •• Only print the pages and sections you need
      •• Print the challenge in black and white, to save on ink

                                                                                                                   4
© 2019 Girlguiding North West England
Chocolate Bridges
      Equipment:
      ••   13 x chocolate bars of your choice (preferably long and thin)
      ••   Chopping board
      ••   2L empty milk carton
      ••   Kettle
      ••   Coins
      ••   Weighing scales
      ••   Cup (preferably paper)
      ••   Funnel (Optional)
      ••   Fridge

      Estimated Time:                60 Minutes

      Method:
           Caution: This activity includes pouring hot water from a kettle into an empty milk carton. For
            Rainbows and Brownies, this should be done by a leader. For Guides and Rangers, help and
                                       supervision should be given, as required.

      To make your chocolate bridge you’ll need to make 3 boxed structures; two of the boxed structures will
      form your supports and the third will form the main structure of the bridge.
       1. To start making the first of your boxes, first boil the kettle and open up four of the chocolate bars.
       2. Once the water is boiled, leave it for 5 minutes to cool. Then, carefully pour the water into the
          empty, 2L milk carton and screw the lid back on. Make sure the water has cooled slightly otherwise it
          may deform the milk carton.
       3. Take two of your chocolate bars and hold the edges against the milk carton until the edges start to
          melt a little. Once they’ve melted, hold the two chocolate bars together at the right angle to form
          an L shape. The melted chocolate will act as the cement for the structure and will hold the sides of
          the chocolate together – you could also think of this process as welding with chocolate!
       4. Repeat this process by melting the sides of the other two chocolate bars together to form another L
          shape.
       5. As before, hold the free edges of both of the L-shaped structures onto the milk carton, until the
          edges begin to melt a little, and then hold them together to create the boxed structure. Try to line
          up the pieces of chocolate perfectly and ensure that the chocolate is welded along each side with no
          gaps – this will help to make your structure stronger.
       6. Place the structure onto the chopping board and place it in the fridge to harden.
       7. Repeat this process twice more until you have 3 boxed structures in the fridge.
       8. Leave the boxes in the fridge for about 20 minutes.
       9. Once the time is up, take the boxes out of the fridge. Place two of the boxes upright on the
          chopping board and now place a single bar of chocolate across the tops of the two upright
          structures.
       10. You can test the strength of this structure by placing the paper cup on the middle of the bar crossing
           the two boxed structures and gradually adding coins into the cup. You will notice that the bar will
           break quite easily.

                                                                                                                   5
© 2019 Girlguiding North West England
11. Next, replace the single bar with the third boxed structure and repeat the process; placing your cup
           in the centre of the third boxed structure and gradually adding coins into the cup. You will notice
           that the bar is much stronger and takes longer to break.
       12. When the bridge collapses, where does it break? Does it break along the joints? Discuss why you
           think this bridge can take more weight than the single bar?
       13. Have a read of the ‘How this relates to Engineering’ section to understand how this works.

       14. Finally, enjoy eating it!

             Melt

                                                             L Shape

                                                                                           Box

       Guides and Rangers
       Once your bridge collapses, you can weigh the coins using the scales which will give you the mass. To
       calculate the weight, you can times the mass by 9.81 (value for the acceleration due to gravity). This
       weight of the coins gives you the maximum force acting on the bridge when it collapses. If you took part
       in the activity in groups, you can compare the value with the other groups to see which team built the
       strongest bridge.
       Why not take it further and try to make bridges out of different types of chocolate, to see which type of
       chocolate can support the greatest force.

      How this relates to Engineering:
      Bridges are made out of different types of materials and often the simplest ones are beams that span the
      distance of the bridge. Some bridges are made using a boxed structure, where the beam is a box shape
      instead of a single beam; this helps to make the beam much stiffer and hold more weight.
      Welding is a way of heating pieces of metal using electricity or heat so that they melt and stick together.
      This makes the structures much stronger and is often used on bridges to weld together large pieces of
      metal to form the strongest bridge. In this challenge, the process of melting the edges of the chocolate
      bars and sticking them together is effectively welding with chocolate.
      So, why is the box shaped beam stronger than the single bar beam? This is due to the box shaped beam
      being stiffer than the single beam, so the boxed beam deflects (bends) less under a force being placed
      upon it. This is like a ruler; it is much easier to bend the longer side of the ruler than it is the short one.
      The upright parts of the box structure are like bending the ruler on its side, making the whole structure
      stronger. If a beam deflects too much then it can break quite easily, and a single beam is not as strong so
      it can break under a smaller amount of force.
      The strength of the bridge can also depend on the material used as some materials can be ductile and
      some can be brittle. Brittle beams will suddenly snap and you’ll notice this will probably happen if you
      use milk or white chocolate. Some softer chocolates will cause the beam to deform slowly and in a
      ductile manner, so the collapse of the bridge will be much slower.

                                                                                                                  6
© 2019 Girlguiding North West England
Guidance For Leaders:
      This activity involves the pouring of boiling water which, for our Rainbows and Brownies, should only
      be done by a leader. In addition, before any of the girls (particularly Rainbows and Brownies) press the
      chocolate against the side of the milk carton. Please ensure that the water has cooled sufficiently so
      as to not cause burns.

          Inspiring Female Engineer:
          Sarah Guppy
      •
           bridge in 1811.
      •    Sarah was also an inventor and patented a new method of constructing and erecting bridges and
           railroads without arches; a method using piling for the construction of a suspension bridge.
      •    Thomas Telford used Sarah’s designs for his suspension bridges, including Conwy Suspension Bridge
           and the Menai Suspension Bridge. The Menai Suspension Bridge was the world’s longest bridge at the
           time. Sarah offered Thomas the design from the license as she believed in knowledge sharing and
           open innovation.
      •    Sarah and her family held 10 patents and one of her last patents was for a device that improved the
           process of caulking ships (sealing the joints on the ships). Through this patent, she earned a contract
           with the Royal Navy which was worth £40,000 for the invention.
      •    Sarah went onto inventing a system for exercising whilst still in bed, as well as a breakfast machine
           that made tea, cooked eggs and kept the plates warm.

                                                                                                                   7
© 2019 Girlguiding North West England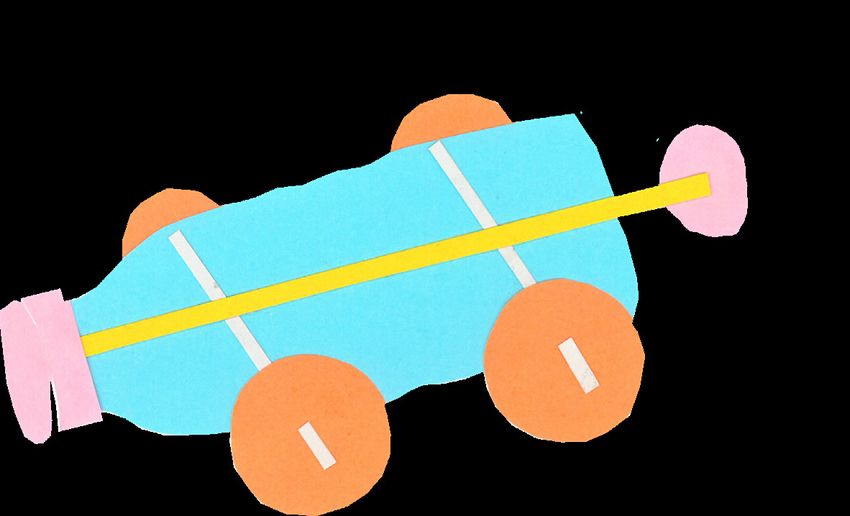
Build-a-Boat
      Equipment:
      •   A large paddling pool or pond, for the boat race
      •   A selection of materials, depending on which boats you choose to build (See Appendix A)

      Estimated Time:              60 Minutes

      Method:
      In small groups, build a boat using one of the techniques found in
      building your boats, get together to hold a boat race!
      •   Which boat travelled furthest?
      •   Which boat travelled fastest?
      •   Which boat stayed true (i.e. didn’t swerve or change direction)?

      How this relates to Engineering:
      Each of the boats in Appendix A uses different engineering principles to propel them through the water:
      Paddle Boat: This uses energy known as ‘elastic potential energy’, which is stored in the elastic band
      when it is stretched and twisted. When the band is released, this energy changes to ‘kinetic energy’ -
      movement energy! This causes the band to twist; turning the paddles and propelling the boat.
      Bicarbonate of Soda and Vinegar Boat: This boat is powered by the chemical reaction between the two
      ingredients. Bicarbonate of soda contains sodium bicarbonate, and vinegar is an acid. When sodium
      bicarbonate is mixed with an acid, carbon dioxide gas (the same gas we breathe out!) is released from
      the sodium bicarbonate. The gas shoots out of the straw and propels the boat.
      Balloon-Powered Boat: This boat uses a physics rule known as Newton’s 3rd Law, which states that ‘every
      action has an equal and opposite reaction’. When you release the balloon, it forces air through the
      straw and out into the water – this creates a force. In turn, the water produces an ‘equal and opposite
      reaction’ – the water pushes back on the boat causing it to move.
      Straw-Powered Boat: When you blow through the straw onto the sail, the air from your straw exerts a
      force on the sail, pushing the boat forwards.

      Guidance For Leaders:
      If you would like to make this activity more challenging, why not introduce new criteria for the competi-
      tion, such as: ‘which boat can hold the most weight?’. Use small weights, such as toy building bricks, to

      amount of weight added to each boat. How does this affect the movement of the boats?

                                                                                                              8
© 2019 Girlguiding North West England
Inspiring Female Explorer:
          Dame Ellen McArthur
      •    In 2005, Dame Ellen McArthur broke the World Record, previously held by a man, for the fastest,
           single-handed circumnavigation of the globe.
      •    Dame Ellen completed the journey of over 50,600km in 71 days, 14 hours, 18 minutes and 33
           seconds.
      •    Dame Ellen has since set up two charities, including the Ellen MacArthur Cancer Trust.

                                                                                                             9
© 2019 Girlguiding North West England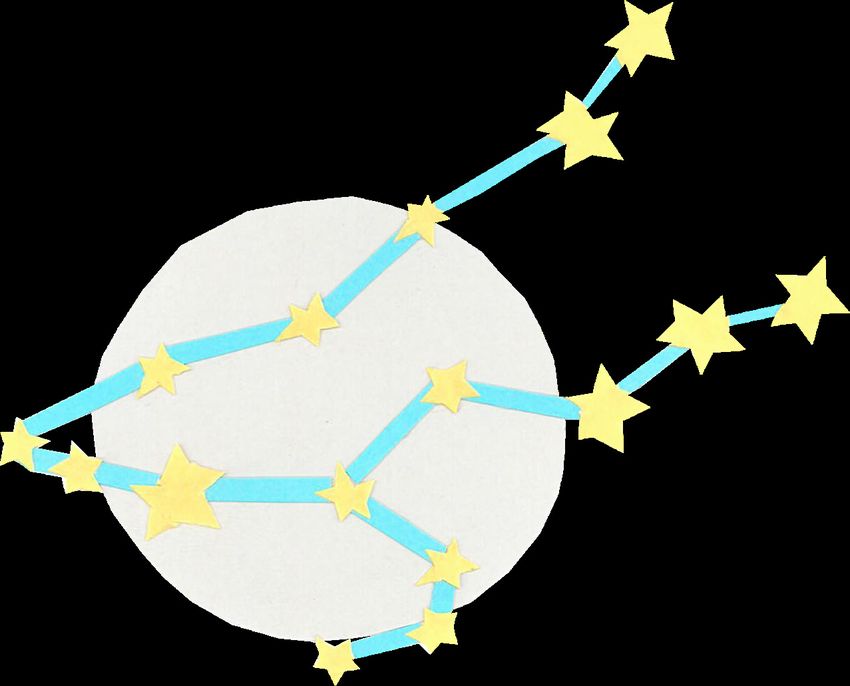
Bottle Cap Cogs
      Gears are basically just wheels that have teeth. These teeth are able to slot together with the teeth of
      another gear. When you turn one gear, the gear next to it will turn as well. If you have different sizes
      of gears, you can generate more force when you turn them. A small gear will turn quickly, but with less
      force, and a large gear will turn slowly, but with lots of force. Therefore, you can link different size of
      gears together to turn small gears quickly and create lots of force by connecting with a large gear. Gears
      are used in bikes to allow you to pedal up hills more easily, and to go faster when on flat ground.
      By the way!
      When an object moves (or stops moving) in a circle due to a force being applied to it, this is called
      torque.

                                                                Slower rotation, more force

                                                                              Faster rotation, less force
                                      Teeth Lock Together

      Equipment:            (per gearbox)

      ••   1 x cardboard box
      ••   Assortment of sizes of plastic bottle lids
      ••   Lollipop sticks, cut in half
      ••   Scissors
      ••   Low-temperature glue gun or sticky tape

      Estimated Time:                 45 minutes

       Method:
       In your group, build a series of three gears using the materials you’ve been given.
       1. Use the glue gun to glue the flat end of the lollipop sticks around the edges of three of the largest
          bottle caps. You should glue 8 lollipop sticks all around the outside of the bottle caps, as in the
          diagram shown below. Rainbows and Brownies, make sure that you ask for leader for help if using a
          glue gun, as it could get hot.
       2. Cut the top half of the cardboard box off, so that you can easily reach the bottom of the box.
          Rainbows and Brownies, be sure to ask your leader for help with this.

                                                                                                              10
© 2019 Girlguiding North West England
3. Place the three bottle cap gears that you have made into the box and position them so that the
lollipop stick spokes overlap with each other about halfway down.
4. Now, mark on the box where you have placed your gears and then remove them. Then, glue smaller
bottle caps (ones that your gears can comfortably fit over), onto the positions you’ve marked on the
cardboard box.
5. Next, place your gears on top of the bottle caps that are glued onto the box. They should now be
able to spin freely without leaving their positions.
6. Can you think of where gears like this might be used?
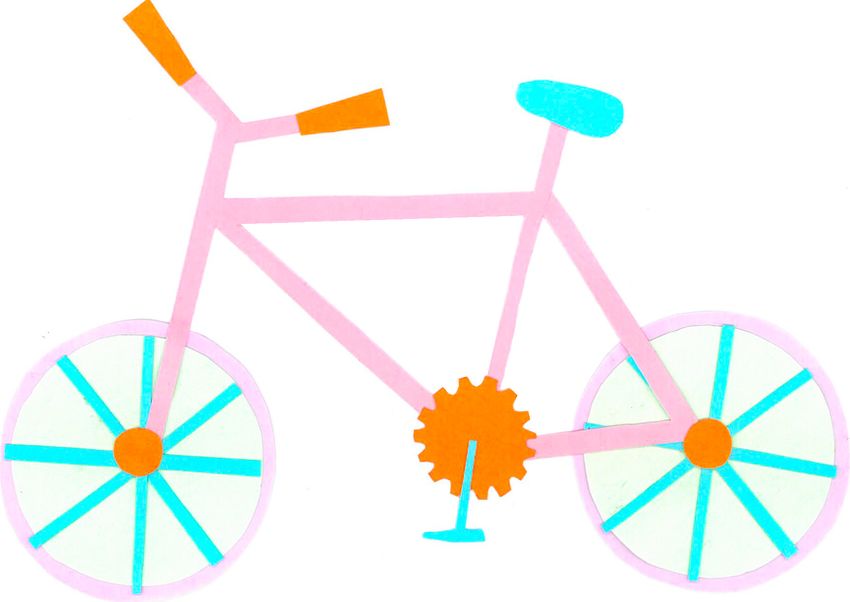
7. Finally, see if you can fill in the blanks to label the parts of a bike (Appendix B).
How this relates to Engineering:
Gears are used in so many things that you will come across in your day-to-day life. They are in cars,
bikes, boats, clocks and scales, to name a few!
When gears work together, they are called a transmission, or a gearbox. Transmission mechanics form
a part of mechanical engineering, where engineers design and test gears to make things like bikes and
cars.
Did you know that Big Ben has huge gears inside of it to make it tick? In a clock, the gears are usually
called ‘cogs’. Each clock hand is attached to its own cog, so that when one cog turns, it pushes the one
next to it to move too. Due to the different sizes of the cogs, the clock hands turn at different speeds.
What a Clever Cog!
Guidance For Leaders:
If the girls are finding making the gears too easy, see if they can mount one of the gears onto the inside
wall of the box and position it to interact with the gears on the base of the box. They could also cut the
‘teeth’ (lollipop sticks) to different sizes and see how this affects the way the gears turn and how easy
or hard it is to turn them. They could change the number of teeth to see how that affects the way the
gears turn too.
11
© 2019 Girlguiding North West EnglandInspiring Female Explorer:
Annie Londonderry
•• Annie was born in Latvia, and later married in the US to become Annie Kopchovsky. As a mother of
three, athlete, entrepreneur, and explorer, she decided to change her name to Annie Londonderry.
Annie was the first woman ever to circle the globe on a bicycle.
•• Annie was actually completing a bet when she did this. The bet was that she couldn’t circumnavigate
the world in under 15 months, while earning $5000 along the way (this was a lot of money in those
days – worth around $150,000 today!). What seemed like a silly bet became a way for Annie to
challenge the concept of female propriety, as well as a chance for her to show everyone that a
woman can get on in the world by herself.
•• Annie departed from her husband and children on 25th June 1894 and set off from the Massachusetts
State House in Boston with more than 500 people watching. On her route, she sold promotional
photos of herself and was paid to make appearances. She also leased out advertising space on the
clothing she was wearing, and on her bicycle. She completed the ride around the world, and The New
York World said her adventure was “the most extraordinary journey ever undertaken by a woman”.
12
© 2019 Girlguiding North West EnglandSnowy Science
Part One: Friction
Skiing is made possible because of something called friction. In this activity you’ll learn all about
friction and how it makes skis slide.
Equipment: (per experiment)
•• Rice (enough to fill an empty plastic bottle)
•• Pencil
•• Funnel
•• Empty, dry plastic bottle
•• Scoop/spoon
•• Cooking bowl
Estimated Time: 15 Minutes
Method:
Do you think you can lift a bottle of rice with a pencil?
1. First, pour the rice into the cooking bowl, so it is half-full.
2. Dip your pencil into the rice and lift it back up. Does anything happen?
3. Place the funnel in the top of the plastic bottle and scoop the rice from the cooking bowl into the
funnel. Once the bottle is full, remove the funnel from the bottle.
4. Next, put your pencil into the plastic bottle and wiggle it slowly down into the rice until it is all the
way in.
5. Grab the pencil and lift it up. You should be able to lift the whole bottle of rice without the pencil
coming out!
6. Why do you think this happens? (See ‘How this Relates to Engineering’).
Guidance For Leaders:
Make sure that the bottle is completely packed full of rice, and that the pencil is fully inserted into the
bottle, if you find that it doesn’t lift when tested. You could ask the girls why sometimes the pencil lifts
up the bottle and sometimes it doesn’t (this will be because the rice isn’t settled well enough around the
pencil). You could try other materials instead of rice, such as sand or stones. You could also try switching
the plastic bottle for something different. Note the differences you see and see if the girls can figure out
why some worked and some didn’t (see the ‘How this Relates to Engineering’ section to understand how
friction plays a part!).
13
© 2019 Girlguiding North West EnglandPart 2: Ice Cream in a Bag
Ice cream starts off as a liquid (milk), and transforms into a solid when it is cooled. This is an example of
physics, where things can change from one form to another by adding or removing heat.
Equipment: (per bag)
• Lots of ice – either cubes or crushed
• 6 tablespoons of rock salt
• 125ml milk
• ¼ teaspoon of vanilla essence
• 1 tablespoon of sugar
• Large (4 litre) ziplock bag
• Small (500ml) ziplock bag
• Bowl
• Spoon
• Various toppings
Estimated Time: 30 Minutes
Method:
1. Fill the large ziplock bag half full with ice and add the rock salt to the ice.
2. Put the milk, sugar, and vanilla into the small ziplock bag and seal it shut. Make sure it is properly
sealed and won’t leak!
3. Now, place the small ziplock bag inside the large ziplock bag, together with the ice and seal it shut.
Again, make sure it is properly sealed.
4. Shake the large ziplock bag until the mixture inside the small bag freezes and becomes ice cream.
This will take about 5 minutes so keep shaking it!
5. Carefully open the large bag (take care not to spill the ice), and then remove the small bag.
6. Open the small bag and pour the ice cream into a bowl.
7. Add some toppings and enjoy!
How this relates to Engineering:
Friction is a force that we can’t see. Friction is the resistance of one object rubbing against another
object. When you rub your hands together when you’re cold, this creates friction, which creates warmth.
In the rice activity, when we pushed the pencil into the plastic bottle, the grains of rice moved closer to
each other. Normally, air between objects prevents friction and allows objects to slide past one another.
However, because the pencil pushed all of the air out of the way, friction caused the grains of rice to
push against each other and against the pencil, which made it stay in place.
When a ski puts pressure onto snow, the snow directly underneath the ski melts. This makes a very thin
layer of water underneath the ski, which reduces friction between the ski and the snow, and therefore
lets the ski slide across the snow very easily.
14
© 2019 Girlguiding North West EnglandInspiring Female Explorer:
The Ice Maiden Team
The Ice Maidens are a team of six women from the British Army who are the largest all-female group to
ski coast-to-coast across Antarctica. The expedition took place in October 2018 and was 1056 miles long.
It was predicted that the team would take between 75 and 90 days to complete the expedition, but the
team managed to complete it in just 62 days! Each of the women had to pull an 80kg sledge behind them
all of the way, so they all had to train very hard before they left. They faced 60mph winds and temper-
atures as low as -40˚C, and all they had were skis and their own strength to pull the sledges all of the
way. The six Ice Maidens were selected out of more than 250 female soldiers who applied to complete
the expedition. They trained for almost two years to prepare, and had to do some really gruelling tasks
to get ready for the challenge.
15
© 2019 Girlguiding North West EnglandTaking Flight
Part One: Aeroplane/Helicopter Making
Rainbows & Brownies
Equipment: (per helicopter)
• Paper helicopter template (Appendix C), printed on paper and cut out
• Scissors
• Paper clips
• Sticky tape
• Fans (not essential but makes it more fun!)
Estimated Time: 20 minutes
Method:
1. Cut along the solid lines of your template (the lines between section D and E, and the top of section
A and B). Ask your leader for help with this, if you are unsure.
2. Now, fold along the dotted lines. Fold section A and B inward and fold section C upward. Secure this
fold with a paper clip to add weight to the bottom.
3. -
tions
4. Now, stand on a balcony (or a chair with your leaders’ supervision), and drop your helicopter from a
height.
6. Why do you think it is behaving like that?
7. Discuss this with your leaders.
16
© 2019 Girlguiding North West EnglandGuides & Rangers
Equipment: (per plane)
•• 1 x wooden clothes peg
•• 2 x mini lollipop sticks
•• 2 x large lollipop sticks
•• Scissors
•• 1 x craft bead
•• Low-temperature glue gun
•• Acrylic paint
•• Paintbrushes
Estimated Time: 30 Minutes
Method:
In your groups, make a small wooden aeroplane that can fly when you throw it, using the materials listed
above.
1. First, remove the spring from the clothes peg and leave it to one side (don’t throw it away!). Ask
your leader to help if you need to.
2. Paint the peg, the lollipop sticks and the craft bead in whatever colours you like.
3. Tip: A wooden skewer is great for holding these still while you paint them!
4. When everything has dried properly, put the spring back into your clothes peg.
5. Use the glue gun to glue the large lollipop sticks to the top and bottom sides of the clothes peg (see
the diagram above for help). Younger Guides, be sure to ask your leader for help with this, as the
glue gun could get hot.
6. Glue one mini lollipop stick to the top of the peg at the opposite end to the large sticks.
7. Then, glue the other mini lollipop stick to the front of the peg, to act as the propeller.
8. Finally, glue the craft bead in the centre of the mini lollipop stick that you just glued to the front of
the peg, to act as the propeller (refer to the diagram for help, if you are unsure).
9. Once the glue has dried properly, try testing your new aeroplane by throwing it (if possible, throw it
over a grassy area so that it doesn’t break when it lands!).
17
© 2019 Girlguiding North West EnglandPart Two: Balloon Propeller
Equipment: (per propeller)
• Round balloon
• Sticky tape
• Straw (preferably paper)
• Pin
• Pencil with rubber on the end
Estimated Time: 20 Minutes
Method:
1. Stretch the balloon by blowing it up and then letting the air out.
2. Place the end of the straw inside the balloon and tape the balloon around it (if using plastic straws,
use the opposite end to the bendy part). The seal needs to be air-tight, so ask a leader to help make
sure, if you need to.
3. Once the balloon is taped onto the straw, you need to find the balance point. To do this, put the
straw on your fingers and move it side-to-side until you find the position where it balances. When
you’ve found the balance point, poke a pin all of the way through that section of the straw (both
sides). Rainbows and Brownies, be sure to ask a leader for help with this.
4. Whilst the pin is still through the straw, poke it into the top of the pencil’s rubber (as in the diagram
above), to attach the straw to the end of the pencil. Again, our younger sections should ask a leader
for help with this.
5. Spin the straw around a few times to stretch out the pin-hole you’ve made in the straw.
6. Now, blow up the balloon (be careful not to pull the pin out!) and keep hold of the end of the balloon
once it has been blown up, so that the air doesn’t escape.
7. Finally, let go on the balloon and watch it spin around like a propeller.
8. Can you think of where a propeller might be used in real life? Can you think of what purpose it serves?
Guidance For Leaders:
For the aeroplane, you could get the girls to test their planes by throwing them as far as they can, and
then asking them what they could do to make them go even further (this could include things like a
powered engine, more streamlined wings or a lighter body). You could even try creating them out of
different materials to see the difference.
The girls will most likely need some assistance with the paper helicopters, in particular where to fold
to add more weight (paperclips) and test them out, or try using bigger templates to see how that affects
makes.
18
© 2019 Girlguiding North West EnglandHow this relates to Engineering:
Aerodynamics is the term used to describe how air interacts with solid objects, like aeroplane wings
or helicopter rotors. Aerodynamics is part of physics, and applies to anything that flies – even birds!
Aeroplanes can fly because of two main reasons; 'push' and 'lift'. 'Push' is generated by the aeroplane
engines, which propel them forwards through the air. 'Lift' is generated by the movement of air over the
aeroplane’s wings and is what keeps the aeroplane up in the air. In physics, 'push' is called thrust.
For birds, both thrust and lift is generated from the flapping motion of their wings. Because aeroplanes
can’t flap (this would be very difficult to engineer!), aeroplanes have to have engines to create thrust.
Gravity is the force that pulls things to the ground (like the helicopters you have made!). When the
helicopter is dropped, air pushes upwards against the wings, which makes them spin around. When they
spin around, they create lift which is what helps the helicopter stay in the air for longer.
A propeller has wings too, but these wings move in a circle instead. A propeller creates thrust by rotating
and pushing against air or water very quickly.
Isaac Newton was a famous scientist who created some rules in physics. Newton’s 3rd Law of Motion is a
famous physics law which states that “for every action, there is an equal and opposite reaction”. This
means that, when the propellers apply a force on the air/water (the action), the propellers are pushed
forward by the air/water (reaction).
Inspiring Female Explorer:
Bessie Coleman
•• Bessie Coleman was the first ever black female pilot in the world.
•• After being banned from flying schools in America, Bessie fought against racism and gender
discrimination to do what she loved. Since she was banned in America, Bessie taught herself French
and then travelled to France to earn her pilot’s licence, which she completed in 1921.
•• After that, Bessie flew all over America, performing flying tricks and also teaching, to raise money to
build an African-American flying school so that others like her could learn to be a pilot in America.
19
© 2019 Girlguiding North West EnglandConstellations
Pipe-Cleaner Constellation
Rainbows and Brownies
Equipment: (per constellation)
•• 1 x pipe cleaner
•• Beads (ideally star shaped, but any will work!)
•• Scissors
•• Constellation cards, printed out (Appendix D)
•• Constellation finder (Appendix E)
Estimated Time: 30 Minutes
Method:
1. Take one of the constellation cards that have been printed out from Appendix D.
2. Then, take a pipe cleaner and a few beads - the pipe cleaner will form the ‘lines’ of the
constellation, and the beads will form the stars.
3. Count how many stars are in the constellation that you are planning to make, and thread that
number of beads on to your pipe cleaner.
4. Twist the ends of your pipe cleaner to stop the beads falling off!
5. Using the constellation cards as a template, bend the pipe cleaner until it forms the shape of the
constellation.
6. If you need to, slide your beads along your pipe cleaner until they are in the right position to form
the stars of the constellation.
Once everyone has created a constellation, using the constellation finder sheet (Appendix E), look at
all of the other pipe cleaner constellations that have been created and see if you can identify what
constellation they have created.
20
© 2019 Girlguiding North West EnglandConstellation Jars
Guides and Rangers
Equipment: (per jar)
• 1 x empty jam jar or similar
• 1 x Tea light
• Long matches
• Black card
• Small hole punch
• Ruler
• Scissors
• Sticky tape
• Star constellations, printed out (Appendix E)
Estimated Time: 30 Minutes
Method:
1. Cut the black card to size so that it will wrap around the outside of your jam jar.
2.
copying them from your print out.
3. Where you have marked a star, use the hole punch to punch a small hole in the paper.
4. Where you have marked a constellation (a line joining two stars), use the scissors to cut a line
through the paper – be careful not to make this too big.
5. After you have cut all of your constellations into the black paper, wrap it around the outside of the
jar and secure it in place with sticky tape.
6. Place the tea-light inside your jar and carefully light it. Turn out the lights and you should be able
to see your constellations light up! Place the jar close to a wall and you will be able to see your
constellations projected on to the wall.
21
© 2019 Girlguiding North West EnglandGuidance For Leaders:
After this activity, you could challenge the girls to go away and see if they can spot any constellations
in the night sky!
How this relates to Engineering:
Space is an incredibly challenging environment, and in order to explore it, Space Engineers have to think
of new methods to overcome these challenges. At the moment, the furthest that a human has travelled
in space is the far side of the moon – approximately 250,000 miles from the Earth. To put this into
perspective, the nearest star (the sun) is 93 million miles away from the Earth. The closest star besides
the sun is known as ‘Alpha Centuri’.
There is huge potential for exploration in space, and many scientists believe that there is life elsewhere
in the universe. Each of the stars which you have looked at in your constellation could be like our sun,
and have planets orbiting it – some of those planets might even be like Earth! However, before we can
explore space further, we need engineers and scientists to develop new technology.
Inspiring Female Engineer:
Mae Jemison
• Mae Jemison is an engineer and physician who worked for NASA as an astronaut. In 1992, Mae became
the first black woman to travel to space. Mae took part in the STS-47 space mission, and conducted
experiments on the effects of weightlessness on crew members. In 1993, Mae resigned from NASA and
set up her own technology company.
• Mae Jemison is also on the advisory committee for a project known as ‘Project Breakthrough
Starshot’, which is attempting to use nano-technology to send a probe to the Alpha Centuri. The idea
of the project is to create tiny ‘nano-crafts’, which are miniature space probes powered by light,
which can travel at speeds of up to 100 million miles per hour. Even at that speed, it is estimated that
it would take 20 years for the ‘nano-craft’ to reach the Alpha Centuri.
22
© 2019 Girlguiding North West EnglandFuel-Free Car
Equipment: (per car)
• 1 x plastic bottle
• 4 x bottle caps
• 2 x wooden skewers
• Blu Tack
• 1 x elastic band
• Scissors
• Plasticine
• Pen
Optional Equipment:
•• Materials for a ramp (e.g. books and cardboard box)
•• Stopwatch
•• Brightly coloured tape
•• Tape measure
Estimated Time: 45 Minutes
Method:
1. Remove the lid from the plastic bottle and lay the bottle on its side.
2. Use the scissors to pierce a small hole in the side of the bottle, then cut that hole in to a large
rectangle; this will be the top of your car. Our younger sections should ask a leader for help with this.
3. Pierce another small hole, using the scissors, on the top side, just under the rim of the bottle.
4. Pierce the bottle using the skewers through the under-side (the skewers should sit low down to allow
the bottle to sit off the ground once the bottle tops are attached), one skewer should go through
towards the neck, and the other near the base. These will form the 'axles' of your car. Initially, you
may wish to use something sharper to puncture the holes, after which you can easily push the
skewers through.
5. Make a small hole, using the pen in the centre of each bottle top and slide one bottle top to each
end of the skewers. Use the Blu Tack to secure the tops in place and place some on the end of the
skewers, to round the points; making sure
the bottle tops are evenly spaced.
6. Take the elastic band and cut the loop
to make a single string. Tie one end of
the elastic band through the hole at the
rim and around the rim itself. Feed the
elastic band through the bottle to the
back axle and tie it around the axle,
making sure that it is tight.
7. Trim the excess elastic band.
8. The car is now complete. When the car
is pulled back, the elastic band will wrap
around the rear axle and be propelled (Birds eye view)
forward when the car is let go. Pierce hole here
and insert skewer
23
© 2019 Girlguiding North West EnglandGuides and Rangers
Why not try using ramps at different angles and think about why it is more, or less, difficult to do so. Or,
try using elastic bands of different lengths to see which ones are more powerful. Why do you think this
is?
You could also use the tape to mark out a start and a finish line at a set distance apart and use the
equation 'speed = distance / time' (calculating the time taken to get from one line to the other on the
stopwatch), to find out which one of your designs is the fastest.
How Does This Work?
Elastic bands store energy, known as 'Elastic Potential Energy'. As you pull the car back, and wind the
band up, you are converting the 'Kinetic' (Movement) Energy of your hand to the elastic band, where it
is stored. When you let go, the elastic band releases its potential energy and converts it back in to
Kinetic Energy.
Guidance For Leaders:
Some of the girls may require some help for this activity as it involves using scissors to pierce holes in the
plastic bottle caps and the water bottles themselves. Once the girls have completed the activity, they
may want to try out the method suggested above for Guides and Rangers, testing their cars on ramps to
calculate the speed of their cars at different angles.
How this relates to Engineering:
Transferring energy from one state to another is used in nearly all aspects of engineering. Car engines,
much like the elastic band car, keep energy stored; although this is as Chemical Energy (in the fuel),
rather than potential energy. This energy is then released in the engine to turn the axles.
Inspiring Female Engineer:
Dr. Justyna Zander
•• Justyna Zander is a Senior Automotive Product Manager at NVIDIA in the USA, one of the main
companies building the technology for self-driving cars.
•• Justyna has been working on self-driving cars for more than a decade and is an expert in artificial
intelligence and machine learning.
•• She holds a PhD, MSc, and two BSc degrees in Computer Science and Electrical Engineering.
•• Justyna spent three years as a Postdoctoral Research Scientist at Harvard University and seven years
as a Senior Scientist at the Fraunhofer Institute in Germany, where she worked on self-driving cars and
their safety features. In 2016, she worked as a Software Architect and Technology Lead in autonomous
driving at Intel.
•• Justyna also holds 7 patents and 12 patent applications at USPTO, has co-authored over 40
publications, including 3 books, and has won multiple awards. In 2018, she was listed in Business
Insider’s annual list of the Most Powerful Women Engineers.
24
© 2019 Girlguiding North West EnglandRainbow Fuel
Equipment: (per group)
•• Food colouring (4 different colours)
•• Sugar
•• Warm water
•• 4 x cups for mixing
•• 1 x jam jar, or similar
•• Spoon for mixing
•• Plastic syringe
Estimated Time: 45 Minutes
Cup Amount of sugar
Cup One No Sugar
Cup Two Two teaspoons
Cup Three Three teaspoons
Cup Four Five teaspoons
Method:
1. Add 100ml of warm water to each cup, and then add one or two drops of food colouring so that each
cup of water is a different colour.
2. Add sugar to the cups according to the table above.
3. Stir the water in the cups well, until all of the sugar has dissolved into the liquid.
4. Use the syringe to draw up some of the liquid from cup four, and empty this into the bottom of the
jam jar. Repeat this until you have a layer approximately 2cm in height (you might need to do this
two or three times, depending on the size of your syringe and your jam jar).
5. Next, use the syringe to draw up some of the liquid from cup three and gently syringe this onto the
top of the liquid in the jar, being careful not to disturb the layer too much. Again, do this until you
have another layer of approximately 2cm in height.
6. Repeat this process with the liquid from cup two, and then cup one, until you have four layers in your
cup.
7. Now try repeating the experiment, but don’t add any sugar to any of the cups of water. What hap-
pens? How does this look different to the jar that contained water with sugar in?
25
© 2019 Girlguiding North West EnglandGuidance For Leaders:
If you are doing this activity with Rainbows, it might be easier to make a large batch of each mixture, and
then split the girls into small groups and allow one girl from each group at a time to come and use their
syringe to draw up some of the coloured liquid.
The girls should find that, in the sugary-water jar, the coloured layers stay separate, and there isn’t much
mixing of the colours. This is because liquids separate according to their density – liquids with more sugar
are denser, and therefore sink to the bottom of the jar. In the jar with water, but no sugar, all of the
coloured waters are the same density, therefore they don’t separate.
How this relates to Engineering:
Most people know that lots of vehicles use petrol or diesel to power them, but did you know that petrol
and diesel actually come from a substance known as petroleum, which is found deep beneath the sea?
Petroleum is formed over millions of years, and is removed from under the sea by drilling very long holes
down into the earth, and then extracting the petroleum with a pump. Since petroleum takes so long to
form, it is a non-renewable energy source, and will eventually run out. Approximately 95 million barrels
of petroleum are used around the World every day.
Once petroleum has been removed from under the sea, it goes through a refinement process, to extract
useful substances such as petrol and diesel. This takes place through a process known as fractional
distillation. The petroleum is placed in a long tower, and heated up. The different substances within
the petroleum rise to different heights in the tower depending on their density and their boiling point,
hence separating the petroleum into useful materials. This is similar to the way that your coloured water
separated into different layers!
Engineers are involved in fractional distillation – in particular chemical engineers, which you might
know a little about from the exploding volcanoes activity in the original Clever Cogs challenge pack!
Engineers are also exploring ways that we can become less reliant on non-renewable energy sources such
as petroleum, and instead develop renewable energy sources like wind turbines, solar energy, and tidal
energy!
Inspiring Female Engineer:
Jennifer Pluckhahn
•• Jennifer Plϋckhahn is a Formula 1 Fuels Co-
ordinator for Shell, working to research, analyse
and test the fuel which is used in the Ferrari
racing cars.
•• Jennifer started working for Shell as an
Apprentice in 2010, and now works both on
the track- side at Formula One races, and at
the Shell Technology Center in Hamburg. Her
job involves sampling and testing fuel which
has come directly from the engines of Formula
One racers to check that the cars are operating
correctly.
26
© 2019 Girlguiding North West EnglandAppendix A
Boat Building Instructions
Bicarbonate of Soda and Vinegar-Powered Boat
Cut hole here
Bottle cap
Bottle
Equipment: (per boat)
•• Bicarbonate of Soda
•• Vinegar
•• Tissue or kitchen roll
•• 1 x plastic bottle and cap
•• Duct tape
•• Scissors
•• 1 x straw (preferably paper)
•• Plasticine
Method:
1. Use the scissors to cut a small hole in the bottom of the bottle (see diagram above). Push the straw
into this hole, until about 4cm of the straw is inside the bottle.
2. Use the duct tape and the plasticine to secure the straw in place and block any holes around the
edge of the straw, so that no air can escape.
3. Lay two sheets of kitchen roll on top of one another, flat on the table, and put two tablespoons of
bicarbonate of soda onto the kitchen roll.
4. Remove the bottle lid, scrunch the kitchen roll up (being careful not to spill out the bicarbonate of
soda) and push it into the bottle.
5. When you are ready for your boat race, pour approximately 50ml of vinegar into the bottle. Hold the
bottle with the hole facing upwards, so the vinegar doesn’t pour out the straw! Screw the cap on
tightly and give the bottle a shake.
6. Quickly place your boat in the water, ensuring the straw is submerged. Let go of the boat and watch
it sail!
27
© 2019 Girlguiding North West EnglandPaddle Boat
Guides & Rangers
Equipment: (per boat)
•• 1 x household sponge or scourer
•• 2 x wooden chopsticks
•• Duct tape
•• Scissors
•• Large elastic band
•• Scrap piece of easily cut plastic e.g. milk carton
•• Tool to cut plastic
Method:
1. Place the sponge on a flat surface and lay the two wooden chopsticks on either side of the sponge.
Use the duct tape to secure the two chopsticks to either side of the sponge.
2. Cut two rectangular pieces of plastic, approximately 8cm by 10cm in size.
3. Cut a slit in the middle of each of the rectangular pieces, stopping halfway (see diagram below)
4. Slot these pieces together to form the ‘paddle’ (shape shown in the diagram below).
5. Stretch the elastic band around the two chopsticks. The elastic band should be quite tight – if it is
loose, you should either swap it for a smaller elastic band or loop it around the chopsticks twice.
6. Loop two of edges of the paddle through the elastic band, so that the middle of your paddle is held
in place by the elastic band.
7. Wind the paddle up so that the elastic band is twisted. Keep going until the elastic band is twisted as
tight as possible – but be careful not to snap it!
8. Place your boat in the water and release the paddle, allowing it to turn in the water. The paddle
should propel your boat forwards.
slide
(Birds eye view of paddle)
(cut halfway)
slide
Paddle Boat
28
© 2019 Girlguiding North West EnglandBalloon-Powered Boat
Rainbows and Brownies
Equipment: (per boat)
•• 1 x household sponge or scourer
•• 1 x balloon
•• 1 x straw (preferably paper)
•• Duct tape
•• Scissors
Method:
1. Use the scissors to cut a small hole from the top of the sponge to the bottom of the sponge. Try to
cut this hole on an angle so that your straw will poke out behind the boat (see diagram below). Be
sure to ask your leader for help with this.
2. Poke the straw through the hole so that about 5cm pokes out of the bottom of the sponge. Use the
duct tape to secure the straw in place.
3. Blow up the balloon and then carefully push the straw through the opening in the balloon, being
careful not to release any air from the balloon.
4. Use duct tape to secure the opening of the balloon around the straw, still being careful not to release
any air from the balloon.
5. Once you’re ready for the race, place your boat in the water with the balloon side on top, making
sure that the straw is fully submerged in the water. When you’re ready to race, release the balloon
and let the air shoot out of the straw!
29
© 2019 Girlguiding North West EnglandStraw-Powered Sailing Boat
Rainbows and Brownies
Equipment: (per boat)
•• Straws (preferably paper)
•• A selection of scrap materials to build your boat (e.g. margarine tubs, household sponges/scourers,
milk cartons, plastic bottles, empty juice cartons)
•• A selection of scrap materials to build the sail (e.g. paper straws, cocktail sticks, plasticine, paper,
card, tissue paper, felt)
•• Scissors
•• Tape
Method:
1. Select an item to act as the body of your boat e.g. a margarine tub or plastic bottle.
2. Attach a mast to your boat – this could be a straw, cocktail stick or something else! You could use
tape or plasticine to secure it in place.
3. Build a sail and attach it to the mast. This can be any size or shape you would like it to be –
experiment!
4. Decorate your boat with anything you choose – could you create a person out of plasticine and see if
they fit on your boat?
5. When it’s time to race your boats, place them in the water and use a straw to blow into the sail!
30
© 2019 Girlguiding North West EnglandAppendix B
© 2019 Girlguiding North West England
Saddle, Seat post, Top Tube, tyre, Cassette, Stem, Headset,
Rear Derailleur, Cables, Brake Calliper, Chain, Crankset, Fork,
Front Derailleur, Rim, Crank, Spoke, Hub, Pedal
31Appendix C
B
E
C
D
A
B
E
C
D
A
B
E
C
A
D
32
© 2019 Girlguiding North West EnglandAppendix D
Perseus
Cygnus
Draco
33
© 2019 Girlguiding North West EnglandHercules
Cassiopeia
Andromeda
34
© 2019 Girlguiding North West Englandhercules
cygnus
bootes
© 2019 Girlguiding North West England
Appendix E
little dipper
cepheus pegasus
big dipper
leo cassiopeia
gemini
cancer
aries
canis minor
taurus
orion
canis major
35We hope you enjoyed this challenge pack.
Badges will be available from Monday 5 August 2019. Please visit our online shop to
purchase:
https://shop.girlguidingnwe.org.uk/.
Or alternatively, visit our store:
Girlguiding NWE, Guiding Road, Preston, PR2 5PD.
We value your feedback so that we can continue to improve our challenge packs.
Please spare a few minutes to complete the short survey upon completing the
challenge.
https://www.surveymonkey.co.uk/r/ccgoingplaces
© 2019 Girlguiding North West EnglandYou can also read