Creating PDF Forms for Intuit QuickBooks
←
→
Page content transcription
If your browser does not render page correctly, please read the page content below
Creating PDF Forms
for Intuit QuickBooks
Introduction
CONTENTS Beginning with version 9, Adobe® Acrobat® supports the integration
of PDF forms with Intuit’s QuickBooks® financial management
Introduction 1 software. It enables companies ranging from single proprietorships to
large enterprises to create and distribute intelligent electronic PDF
Getting Started 2
forms that:
Overview of QuickBooks Forms • Embed customer, product, and service data for fast and accurate
Workflow 3 data entry
Customizing QuickBooks Forms • Contain custom business logic or calculations
5 • Validate data at the point of origin
Resources 21
• Eliminate manual data transfer or rekeying
• Can be filled-out using the free Adobe Reader
Appendix: Sample Template
• Can be tracked using Acrobat Tracker
Descriptions 22
The completed forms can be easily distributed, and users can
complete the forms using Adobe Reader for Macintosh, Windows,
Linux®, Solaris®, AIX®, or HP-UX®.
Acrobat 9 provides a set of sample templates for the most frequently-
used QuickBook forms. The sample templates come complete with
the data connection and QuickBooks schema specified, and with all
needed calculations, validations, and scripting.
If you only need to customize the appearance of a sample form, such
as to add company contact information and logo, and to change
colors and fonts, then you do not need this document. You can use
Adobe LiveCycle Designer (included with Acrobat 9 for Windows®),
and then use Acrobat Help which describes how to prepare the form
for distribution.
This document describes procedures to use when you need to
change what data is transmitted to and from QuickBooks. For
example, if you need to add an additional field, reduce the amount of
data displayed in prepopulated drop-down lists, or create a new form
not based on the samples, then you will need the procedures
presented in this document.
This document has four main sections:
Getting Started, page 2 — Explains where to start based on use of
the sample templates and whether modifications affect only the
appearance of the form, or affect the data transmitted to and
from QuickBooks.
2 4 J u l y 2 0 08Overview of QuickBooks Forms Workflow, page 3 — Gives an overview of the
workflows for the creation of forms, user completion and submission of the
forms, and the uploading of the resulting data to QuickBooks.
Customizing QuickBooks Forms, page 5 — Procedures to change sample form
templates for cases where modifications affect the data transmitted.
Appendix: Sample Template Descriptions, page 22 — Describes features of
individual sample forms as well as general features of all samples.
N OTE : References to Adobe Acrobat 9 also refer to Acrobat Pro and
Acrobat Extended. Also, for Acrobat 9, the sample templates are
currently only available in English.
Audience
While simple modifications affecting only the appearance of the sample templates
(contact information, logo, colors, fonts, etc.) can be handled by users without
technical knowledge, this document is intended for the forms designer who has
experience with JavaScript scripting, an understanding of XML, and experience
with Adobe LiveCycle Designer.
System Requirements:
The following products and version numbers are required:
• Adobe Acrobat Professional 9 or Adobe Acrobat Professional 9 Extended
• Adobe LiveCycle Designer 9 (included only with Acrobat for Windows)
• Windows XP or Windows VIsta
• Intuit QuickBooks application
• Intuit QuickBooks SDK
Template development must be done using LiveCycle Designer, which is only
available for Windows. Also, Acrobat 9 for Windows must be used for distribution,
tracking, and data transmission.
Getting Started
You should first determine if one or more of the sample templates included with
Acrobat 9 will be a good starting point for the forms you need. The sample forms
can be customized for both appearance and content (see below), but if you need a
significantly different form, you will need to use LiveCycle Designer to create a new
template.
The sample form templates are included Acrobat 9 installation, and are located at:
\Program Files\Adobe\Acrobat 9.0\Acrobat\QuickBooksTemplates\ENU
For a description of the sample templates, see “Appendix: Sample Template
Descriptions” on page 22.
When you have determined whether you can use one or more of the samples, and
the extent of customization needed, choose one of the options below.
2If you need to:
• Modify the appearance of the sample PDF templates — if you only need to
change the appearance of one of the sample forms, such as adding company
contact information and logo, changing colors and fonts, or moving and
resizing form fields and buttons, you do not need this document.
Where to begin: Use LiveCycle Designer to make modifications to the form
appearance, and then use Acrobat to prepare the form for
distribution.
• Customize what data is transmitted to (prepopulation), or received from,
the form — If you need to add a new data field, customize the prepopulation
of data displayed in drop-down menus, or change what is submitted to
QuickBooks, you need to use the procedures in this document.
Where to begin: Use this document for procedures to add and customize
form fields, using LiveCycle Designer. Also use LiveCycle
Designer to customize the form’s appearance, using the
Help procedures for guidance. Use Acrobat to prepare the
form for distribution.
• Create a new form — If the provided sample templates are not what you
need, you will need to develop the form using Adobe LiveCycle Designer.
Doing so will require experience with LiveCycle Designer, JavaScript scripting,
and XML.
Where to begin: Develop the form using LiveCycle Designer; then see
sections in this document about creating a data
connection, preparing drop-down lists for prepopulation,
and, if needed, tieing selection states and creating editable
combo boxes.
Overview of QuickBooks Forms Workflow
The following is an overview of the basic steps for:
• Creating a Form Template
• Form Completion and Submission by User
• Data Migration to QuickBooks
Creating a Form Template
1. The form designer installs Adobe Acrobat Pro 9; the Intuit QuickBooks
application, and the QuickBooks SDK. If needed, a Company File is created
using QuickBooks.
32. The form designer creates a form, or modifies an existing template.
3. Data connection and XML schema are specified using the QuickBooks SDK.
4. New QuickBooks fields can be added to the form:
– Drag and drop desired form fields
– Customize fields as needed
– Specify data type and validation pattern
– If drop-down lists need to be prepopluated, use the procedure “Preparing
Drop-down Lists for Pre-Population” on page 14
– Tie field selection choices together, if needed
– Specify custom calculations and validations, if needed
5. The form is prepared for distribution using Acrobat 9
– Drop-down lists are prepopulated using Acrobat and the QuickBooks
database
Form Completion and Submission by User
1. User opens the form using Adobe Reader
2. User enters data into form fields
– Data is validated as it is entered
– Taxes, subtotals and totals are calculated and recalculated as new items are
added.
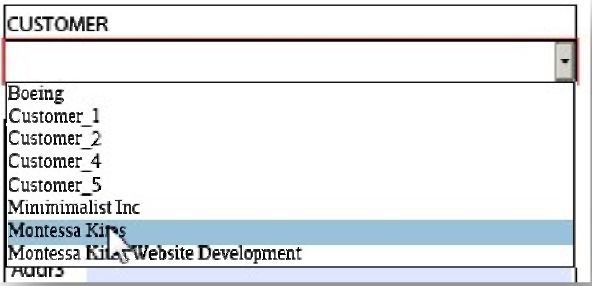
– User can edit drop-down lists, such as for a list of customers
3. User clicks the submit button
– Reader checks required fields to make sure data was entered
– Data is transmitted back to the office (where the QuickBooks application is
installed)
Data Migration to QuickBooks
1. At the corporate office, forms can be tracked and managed using Acrobat
Tracker.
2. Acrobat can be used to collect the data submitted by users; each returned
form appears as a component file in a PDF portfolio. Response files can be
added to, or deleted from, the portfolio.
3. Person managing the form chooses “Transmit to Quickbooks” in Acrobat 9 to
export data to QuickBooks (without any rekeying of data). Data can also be
exported to an existing data file, spreadsheet, or XML file.
4Form Creation and Modification Workflow
Figure 1 shows the steps required to create QuickBooks forms, using either the
sample templates included with Acrobat, or for creating a new form using Adobe
LiveCycle Designer.
FIGURE 1 Forms Creation and Modification Workflow
Create new
Use Acrobat form using
sample template LiveCycle Designer
Make minor Create new form
modfications Save as
as needed Adobe Dynamic
XML Form
No Are additional Create
fields needed? Data Connection
including schema
Yes and data binding
* Create new field(s)
* Bind new data
elements
If needed:
* Prepare dropdown
field(s)
* Tie selections in
related fields
* Set auto-calculations
and validation
Prepare for
Distribution
(using Acrobat)
Customizing QuickBooks Forms
The following procedures describe how to customize the sample templates for
desired changes that affect the data sent to, or retrieved from, a QuickBook PDF
form. For example, you might want to add a new field, or customize what data is
displayed in a drop-down menu.
The procedures would also be needed if you are developing a new form that is not
based on the sample templates. You would first create the basic form in LiveCycle
Designer, and then define the data connection and do any other customization
that is required.
Customization of the data is done using JavaScript scripting in LiveCycle Designer.
It is important to note that while previous JavaScript knowledge is transferable, to
effectively use JavaScript on your form design you must understand how to
construct LiveCycle Designer ES reference syntax, and you must be able to
5correctly use the XML Form Object Model reference syntax to access objects on
your form design.
This section contains the following procedures to help you customize the form:
Creating a Data Connection 6
Adding QuickBooks Fields to the Form 8
Customizing Form Fields 9
Preparing Drop-down Lists for Pre-Population 14
Customizing a Drop-down List 17
Tieing Selection States 19
Editable Combo Boxes 20
Initial Setup
To get started, do the following:
1. Download and install the QuickBooks SDK:
http://developer.intuit.com/
2. Open the QuickBooks application.
3. Open Adobe LiveCycle Designer and use it to open the template you want to
customize.
Creating a Data Connection
Use the following steps to create a form template QuickBooks-capable template:
1. Choose File > New Data Connection.
N OTE : The sample templates supplied with Acrobat already have their data
connection defined.
FIGURE 2 Adding a Data Connection
62. Select “XML Schema” and “Next”
FIGURE 3 Selecting the Data Connection Type
3. Select the XML Schema file “QBSDK6.0\tools\validator\qbxml60.xsd” in
the QuickBooks SDK.
FIGURE 4 Selecting the QuickBooks XML Schema
4. Select the desired XML Data Root Element Name. In cases where the form will
be populated by the end user, the Root Element Name should have an “Add”
suffix like “InvoiceAdd” in the figure below:
7FIGURE 5 Selecting the Root Element
5. Select “Embed XML Schema”
6. Select “Finish”
Adding QuickBooks Fields to the Form
This section describes how to add additional fields to one of the sample form
templates included with Acrobat 9.
1. Drag and drop the desired form fields from the Data View onto the form.
For items having a name which ends in “Ref” and two child items named ListID
and FullName, select the ListID field only. The ListID is a unique identifier
assigned by QuickBooks; using it ensures that the data entered on the form is
correctly associated when it is transferred back to QuickBooks. (See “Preparing
Drop-down Lists for Pre-Population” on page 14)
FIGURE 6 Selecting Form Fields from Data View
2. If a field must be filled out, and is not optional, use Designer to set its type to
“Required” at Window > Object > Value > Type.
83. Customize your fields accordingly. See “Customizing Form Fields” on page 9.
4. Save the file.
Customizing Form Fields
When you add new fields to your form, you must specify the data type so it
corresponds to the data types expected by QuickBooks, and the data pattern so
the data entry can be validated.
Table 1, “QBXML Type to Designer Field Type Mapping,” provides guidelines for
customizing the fields you have added to your form. It contains the data types
used in the provided Acrobat PDF form templates.
The first two shaded columns in the table show a selection of some of the most-
used data types supported by the QBXML schema, and the unshaded columns
show the corresponding data patterns supported by LiveCycle Designer.
The table shows, for example, that the QuickBooks’ DATETYPE data type, as defined
in the QBXML schema, maps to the LiveCycle Designer Date/Time field. The
LIveCycle Data Pattern is the one used by QuickBooks, while the other
patterns—Display, Edit, and Validation, are only used for the UI.
TABLE 1 QBXML Type to Designer Field Type Mapping
QBXML Schema LiveCycle Designer
Element Data Data
Type Pattern Display Pattern Edit Pattern Validation Pattern Pattern
Decimal Field
PERCENTTYPE 7.5 null{}|num{z,zzz,zzz.999} zzzzzzz.zzz Null{}|mum{zzzzzz9.999} zzzzzz9.999
QUANTYPE 7.5 null{}|num{zzz,zzz,zz9.zzzzz} zzzzzzz.zzzzz null{}|num{zzzzzz9.99999} zzzzzz9.99999
PRICETYPE 8.5 null{}|num{$zz,zzz,zz9.99} zzzzzzzz.zz null{}|num{zzzzzzz9.99} zzzzzzz9.99
AMTTYPE 8.2 null{}|num{$zzz,zzz,zzz,zzz,zz9.99} N/A N/A (Calculated) zzzzzzz9.99
Date/Time Field
CCCC-
DATETYPE MM/DD/YYYY MM/DD/YYYY MM/DD/YYYY YYYY-MM-DD
MM-DD
In order to determine the respective types and formatting for a field, cross-
reference the selected field with the QuickBooks SDK Onscreen Reference using
the following procedure:
1. Open the QuickBooks SDK Onscreen Reference (located at, for example:
\Program Files\Intuit\QBSDK6.0\newOSR\OnscreenRef.html
9FIGURE 7 Launching the QuickBooks SDK Onscreen Reference
2. Select “New OSR”
3. If the root node element in your template is, for example, “InvoiceAdd,” select
that message from the “Select message…” drop-down in the OSR.
FIGURE 8 Selecting the QBXML Message
The “Request” structure should be displayed (as below). If the “Response”
structure is displayed, click on “Request” next to “Show:”
10FIGURE 9 Displaying the Request Structure
4. The field that was dragged from the Data View in Designer will be bound
(Binding Tab in Designer) to the element listed under Tag (the example below
shows “TxnDate”). The QuickBooks Type is listed in the “Type” column.
FIGURE 10 Determining the Element Type
5. Cross-reference this information to determine the formatting and the
Designer type using the table “QBXML Type to Designer Field Type Mapping”
on page 9.
In this example, the selected element is “TxnDate” which has a QBXML data
type of “DateType”. Referencing the table above, the DateType is mapped to
the Designer “Date/Time Field”.
11N OTE : If the Object window is not visible, select Window > Object, and
select the Field tab. From the Type drop-down list, select
“Date/Time Field” as shown below.
Enter the text you want displayed in the error message if the user’s data is not
in the correct format.
FIGURE 11 Setting the Designer Type
6. Read the “Validation” entry from Table 1, “QBXML Type to Designer Field Type
Mapping, above for the selected Designer Type (for this example, it is
MM/DD/YYYY.
7. Select the Value tab: Window > Object > Value
8. Enter the Validation Pattern in Designer: select Window > Object > Value (tab)
and click the “Validation Pattern...” button.
9. For each tab in the “Patterns - Date Field” window (for example, Validation,
Display, Edit, and Data), in the “Select Type:” menu pane, click on the date
sample with the desired format (for example, “04/01/2008” corresponds to the
MM/DD/YYYY), and continue until the pattern is entered for all tabs.
12FIGURE 12 Setting the Display Pattern in Designer
10. If you wish to change any properties for the field, return to the Field tab and
set those properties.
FIGURE 13 Setting Field Properties
Set Field Binding Properties
The Binding tab (see Figure 13) shows the binding of the value for the field, to the
corresponding QuickBooks variable (in this example, $.TxnDate). Check to make
sure it is correct.
13FIGURE 14 Setting Field Binding Properties
Preparing Drop-down Lists for Pre-Population
N OTE : The actual prepopulation of a drop-down list is done by Acrobat
as part of the Prepare for Distribution step. The following
procedure prepares the drop-down list in advance. It is not
necessary to use this procedure for the existing drop-down lists in
the Acrobat template samples.
In order to populate a drop-down list from data in QuickBooks, the form field must
be bound to the ListID member of a Reference Type within the QBXML Schema. In
the figure below, the InvoiceAdd Element contains a CustomerRef element with
two children, ListID and FullName.
FIGURE 15 CustomerRef in QBXML
To populate a drop-down list with Customer names, bind the drop-down list to
CustomerRef.ListID by dragging the child field ListID to the form.
When the form is prepared for distribution, Acrobat 9 needs to know what
information will be displayed in the drop-down list and what value will be returned
to QuickBooks when the data is submitted. The sample forms supplied with
14Acrobat are set to do this, but customized drop-down list fields must be bound as
above.
Acrobat 9 looks for a specific Script Object when the user selects to “Prepare
QuickBooks Template for Distribution…”
To create the script object:
• Right-click on the topmost node in Designer’s Hierarchy Tab (InvoiceAdd in our
example) and select “Insert Script Object”.
• Rename the Script Object “QuickBooks”
FIGURE 16 Creating the QuickBooks Script Object
For each drop-down List that will be prepopulated from QuickBooks, you must
make two entries in the QuickBooks Script Object:
1. The first entry is a listing in an array that the QuickBooks interface uses to relate
a specific drop-down List in the form to a QuickBooks QBXML Schema element
and a JavaScript routine that pulls the data from QuickBooks for consumption
by the drop-down List.
The array listing has the following configuration:
- - InvoiceAdd.#variables[0].QuickBooks - (JavaScript, client)
var Filters= [ // Field Binding, QBXML Type, Filter Function Name
[ "$record.CustomerRef.ListID", "Customer", "FilterCustomer" ],
[ "BillAddress.Addr1", "Customer", "FilterBillAddress" ],
[ "ermsRef.ListID", "Terms", "FilterTerms" ],
[ "ItemRef.Desc", "Item", "FilterItem" ],
[ "CompanyRef.CompanyName", "Company", "FilterAddressBlock" ],
[ "ItemSalesTaxRef.ListID", "Item", "FilterSalesTax" ],
[ "ItemSalesTaxRef.TaxRate", "Item", "FilterSalesTaxRateList" ],
];
152. The next step is to provide the JavaScript routine referenced in the Filters array
listing. The routine is passed a reference to a collection of nodes that contain
an “Item List” from QuickBooks. By searching for the specific name of a QBXML
Type, the routine creates a filtered two-dimensional array with the Item ListID
(unique identifier in QuickBooks) as the first element, and whatever other
properties are required in the second element. In the following example, the
customer list is filtered and the array is populated with the customers’ ListID
and FullName.
FIGURE 17 Filtering the Customer List
function FilterCustomer(oNodes)
{
var res = new Array();
for (var i=0; iCustomizing a Drop-down List
You can add drop-down lists to your form and use them as is, but you can also filter
out data which you may not want to display for security reasons. You can do that
by providing a JavaScript script to filter the data provided by QuickBooks. For
example, you can create drop-down lists which populate with data pairs other
than (Name,ID) and (FullName,ID), or you can populate the sales receipt form’s
description field with (Desc,ID) pairs.
A drop-down list populated with (Value,ID) pairs will export the ID to QuickBooks,
not the Value. This will break data validation and the QBXML export layers
unless you make the following simple patch. Just modify the drop-down
field’s “exit script” to make sure that the current selection is always a value and
never an ID by adding:
if (this.selectedIndex != -1)
this.rawValue= this.getDisplayItem(this.selectedIndex);
Then add Filter functions to the QuickBooks global script object as follows:
1. In LiveCycle Designer, select “Window > Hierarchy”.
2. If there is no “QuickBooks” global script in the Variable node at the bottom of
the pane, create one, right-click the root node and select Insert Script Object.
Then click on the “(untitled Script Object)” at the bottom of the pane and
rename it “QuickBooks”.
3. If there is no “Filters” declaration in the QuickBooks global script, add one
using the following format:
var Filters= [ // Binding, Type, Filter Function Name ];
(sample code shown below)
4. Get the binding for your drop-down list from the “Default Binding” edit box in
LiveCycle Designer’s Value tab (Window > Object > Value).
5. Find the type of QuickBooks data you need to request by reading the
QuickBooks SDK Documentation. For example, the Description and Rate fields
in a Sales Receipt line item are obtained using the “Item” Query.
6. Add a line item for your field to the Filters Variable. Each line item is an array of
three strings, the Binding, Type, and Filter Function Name. the Filter Function
Name is the Name of a Custom JavaScript Function you will define later. You
can choose any valid JavaScript function name. Each function in the
QuickBooks global script must have a unique name. Here is the Filters
declaration after adding four filter line items:
var Filters= [ // Binding, Type, Filter Function Name
[ "CustomerRef.ListID", "Customer", "FilterCustomer" ],
[ "SalesReceiptLineAdd[*].ItemRef.ListID", "Item",
"FilterItem" ],
[ "$.SalesReceiptLineAdd[*].Desc", "Item", "FilterDesc" ],
[ "$.SalesReceiptLineAdd[*].Rate", "Item", "FilterRate" ],
];
177. Add a filter function to the QuickBooks global script. Below are the four filter
functions for the above Filters declaration:
function FilterCustomer(oNodes)
{
var res= new Array();
for (var i=0; iitm2.SalesOrPurchase.Desc.value));
}
}
}
return res;
}
function FilterRate(oNodes)
{
var res= new Array();
for (var i=0; iQuery” response see the QuickBooks QBXML documentation.
5. The items returned from the custom filter function replace any items already in
the drop-down.
Tieing Selection States
It is also possible to tie lists together so that they update automatically based on
selections made in other fields. For example, selecting an Item in a Sales Receipt
should automatically select the corresponding item in the Description field.
19For example, the following JavaScript could be added to the “Item” field as an
“exit” script, to tie the item and description ields together:
var rawValue= this.rawValue;
var ctls= ["Desc","Rate"];
for (var j=0; jPrepare for Distribution
To prepare a form for distribution, open the PDF template file in Acrobat, and use
Acrobat Help for guidance:
1. Open QuickBooks Company file
2. Open the template in Acrobat
3. Select: Forms > QuickBooks > Prepare QuickBooks Template for
Distribution…” from the menu.
– the “Prepare QuickBooks Template for Distribution” dialog opens.
4. Select “Use the currently open QuickBooks Template” radio button.
5. Click Next
6. Click Next
7. Click Next
8. Click the Distribute Later radio button.
9. Click Done
– Observe “Save As” dialog
10. Append “auto” to the end of the File name.
11. Click Save
12. Observe document name update in the Acrobat Title bar
Resources
Acrobat Help (from the Help menu)
Adobe Developer Connection for LiveCycle Forms:
http://www.adobe.com/devnet/livecycle/designing_forms.html
Copyright 2008 Adobe Systems, Incorporated. All rights reserved.
Adobe Systems Incorporated
345 Park Avenue, San Jose, CA 95110-2704 USA
http://www.adobe.com
Adobe, the Adobe logo, Acrobat, Adobe LiveCycle, and Reader are either registered trademarks or
trademarks of Adobe Systems Incorporated in the United States and/or other countries. Mac OS is a
trademark of Apple Computer, Inc., registered in the United States and other countries. Linux is a
registered trademark of Linus Torvalds. Microsoft, Windows, Windows Vista, and Word are either
registered trademarks or trademarks of Microsoft Corporation in the United States and/or other
countries. All other trademarks are the property of their respective owners.
24 July 2008
21Appendix: Sample Template
Descriptions
The form templates provided by Acrobat cover a variety of the most-used
QuickBooks forms. The following descriptions of the forms should give you an idea
of whether any of the samples might be appropriate for your needs.
N OTE : Samples are located at:
\Program Files\Adobe\Acrobat 9.0\Acrobat\QuickBooksTemplates\ENU
The samples are of two general types:
Internal— designed to be filled out by employees. Some fields and
drop-down lists can be prepopulated from the QuickBooks
database, such as from a known list of vendors or customers.
External— designed to be filled out by customers. Some information
should not be exposed to customers, so fields tend to be editable
by the customer, rather than prepopulating names of existing
customers. The filled-in names and addresses will be added to
QuickBooks when the form is submitted.
Sample Template Form Descriptions
Invoice — Product (Internal)
File name: Product Invoice.pdf
Target form filler is Internal Employee (e.g. Sales), therefore “Bill To” field is
selectable from drop-down list. Posts to QuickBooks as “Pending Invoice” (although
user can edit this in Designer). Works in QuickBooks Pro, Premier, and Enterprise.
Invoice — Product (External)
File name: Purchase Order for Product Sales Order.pdf
Target form filler is External User (e.g. Customer), therefore “Bill To” field can be
filled by user (rather than prepopolated from the list of known customers). Posts to
QuickBooks as “Pending Invoice”. Works in QuickBooks Pro, Premier, and Enterprise.
Invoice — Service (Internal)
File name: Service Invoice.pdf
Target form filler is Internal Employee (e.g. Sales), therefore “Bill To” field is
selectable from drop-down list. Posts to QuickBooks as “Pending Invoice”. Works in
QuickBooks Pro, Premier, and Enterprise.
22Invoice — Service (External)
File name: Purchase Order for Service Invoice.pdf
Target form filler is External User (e.g. Customer) - therefore “Bill To” field should be
fill-able. Posts to QuickBooks as “Pending Invoice” (although user can edit this in
Designer). Works in QuickBooks Pro, Premier, and Enterprise.
Sales Order — Product (External)
File name: Purchase Order for Product Invoice.pdf
Target form filler is External User (e.g. Customer) - therefore “Bill To” field should be
fill-able. Posts to QuickBooks as “Order”. Works only in QuickBooks Premier and
Enterprise (Pro does not have Order posting).
Sales Order — Service (External)
File name: Purchase Order for Service Sales Order.pdf
Target form filler is External User (e.g. Customer) - therefore “Bill To” field can be
filled in by the customer. Posts to QuickBooks as “Order”. Works only in QuickBooks
Premier and Enterprise (Pro does not have Order posting).
Estimate — Retail (Internal)
File name: Internal Estimate.pdf
Target form filler is Internal Employee (e.g. Sales) - therefore “Bill To” field is selectable
from drop-down list. Posts to QuickBooks as “Estimate”. Works in QuickBooks Pro,
Premier, and Enterprise.
Description of Features Common to all Sample Forms:
The Form Page
• All templates are one page, but because they are dynamic forms, additional
rows can be added by the user.
• The user can click a button to “add row” and “delete row”
• If the form fields overflow the page (8.5 x 11 inches) — a new page is spawned
• If new pages are spawned, the column Headers (Quantity, Item Code,
Rate/Price, Description, and Amount) are repeated at the top of spawned
page, and new pages are labelled “page X of Y”.
• All templates have an “Additional Notes” text field so internal or external user
can add supporting information. The Notes field are not be synchronized back
to QuickBooks.
23Calculations
• All sample templates calculate subtotals and totals, adding in the sales tax
where appropriate. If items are added to the form fields so that the form flows
to an additional page or pages, the total moves to last page.
• Subtotals are calculated
Prepopuation
• In all templates, the Description and Rate/Price values are prepopulated given
the Item Code chosen. However, the user can overwrite the Description and
Rate/Price fields.
Calculate Sales Tax
• Form preparer can select the sales tax item (Tax Jurisdiction and Tax Rate)
when form is prepared for distribution
Validation
• The Quantity/Ordered, Price/Rate/Cost fields are validated when the user
clicks Submit.
• Invalid Quantity/Ordered, Price/Rate/Cost values cannot be submitted to
QuickBooks using the “%%Send to QuickBooks” menu item.
• Form-level validation of the numeric values outside the specified limits cause
the submission to be cancelled.
• Date (pop-up)
24You can also read